Good morning, friends, and welcome to the October Papertrey Ink Countdown! This morning, I have the pleasure of introducing you to
Kimberly Crawford's
Sending Joy stamp set and my
Folded Pocket Tag Die.
The
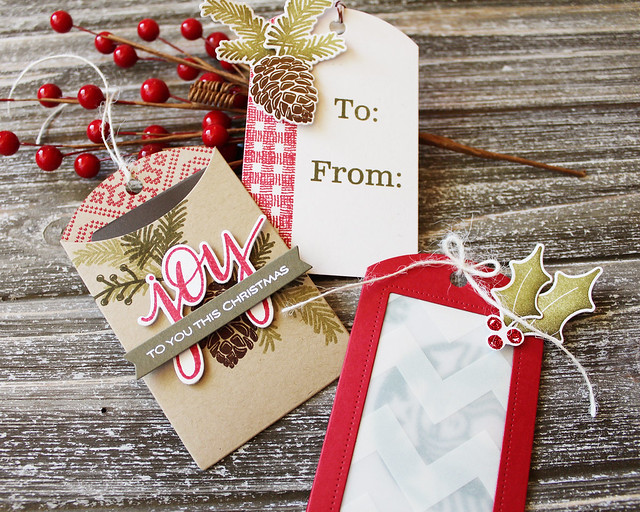
Folded Pocket Tag die can be used in so many different ways and I've created three variations for you today. Let's take a closer look!
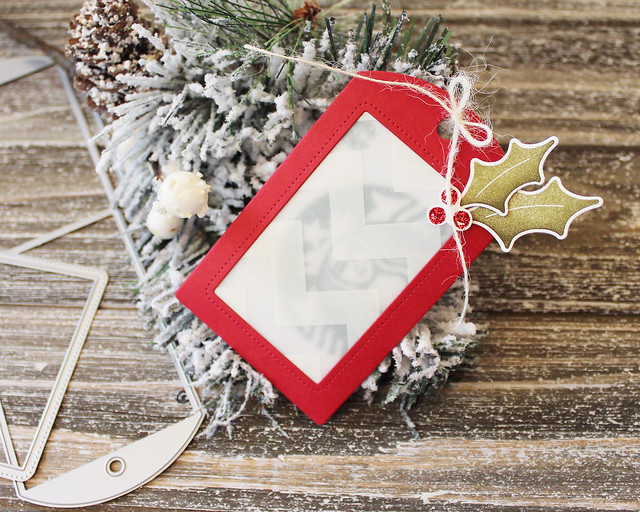
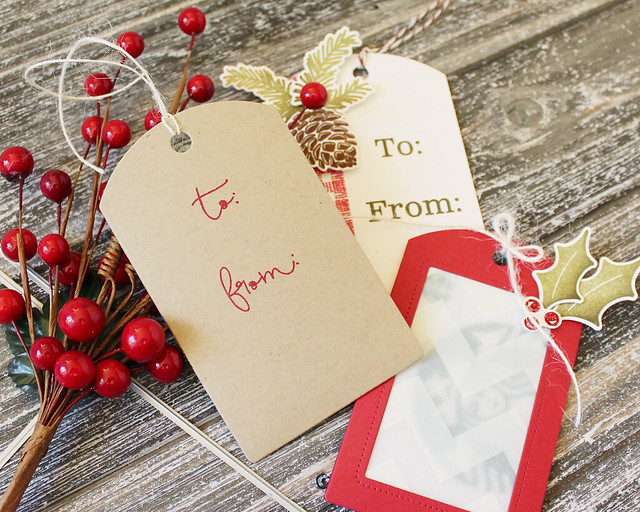
First up, let's take a closer look at the holly tag. This one is a closed pocket tag with a patterned vellum window.
I cut the tag shape from Pure Poppy cardstock and used the rectangular window to cut an opening in the front of the tag. I used
Sheer Basics Chevron Vellum to back the window and somewhat conceal the gift card inside. The vellum gives a peek without the gift card stealing the show. I assembled the tag (simply use strong adhesive on the tabs and fold them to the inside before folding up the back flap) and tied it closed with Rustic Cream button twine. Tying the pocket closed makes the gift card nice and secure. I used the holly leaves and berries from Kimberly's set to give the front of the tag a bit of holiday cheer.
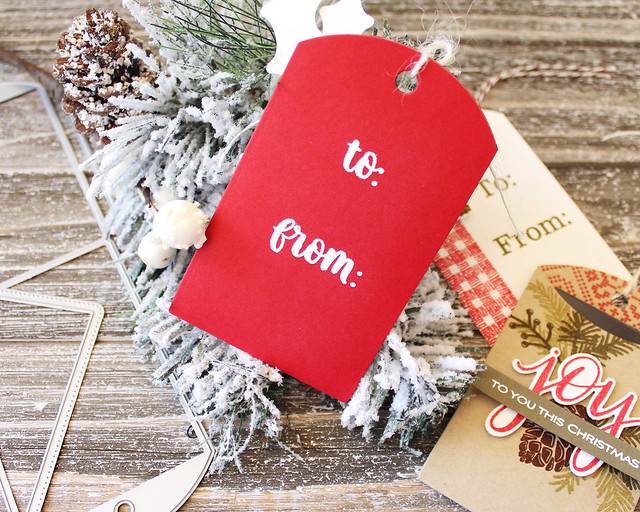
On the back of the tag, I heat embossed the "To:" and "From:" using the
Keep It Simple: To & From greeting (I use that set
a ton this time of year).
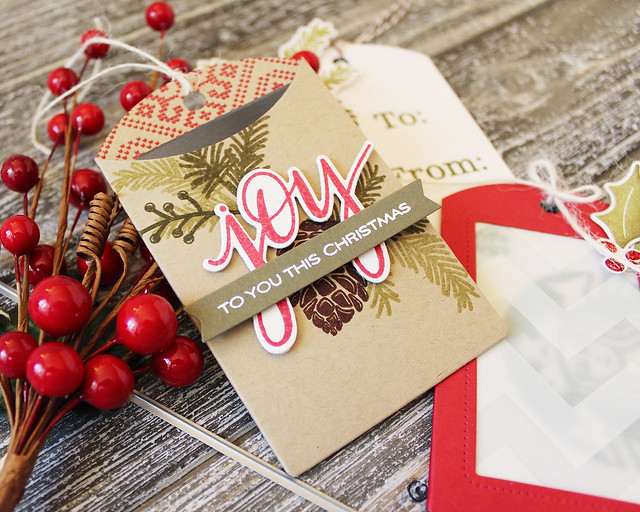
Next up, I have an open pocket tag to share. You simply rotate and cut your tag a second time to get a nice, clean edge using the same die. Here's a PDF in case you'd like visual instructions:
Open Pocket Tag Cutting Instructions.
I cut the tag from Classic Kraft cardstock and die cut using the instructions I've shared above. I stamped the inside of the back flap with the
Fair Isle Borders stamp set before assembly to give the inside a bit of interest. I also stamped the Sending Joy botanicals onto the front of the tag using Prairie Grass and Olive Twist inks. Then, I stamped and die cut the "Joy" and adhered it to the front of the tag with foam adhesive. I heat embossed the companion sentiment onto a
Wine Bottle Tag #2 banner that I cut to suit and adhered to the tag.
On the back of the tag, I once again stamped the "To:" and "From:" using the
Keep It Simple: To & From greetings.
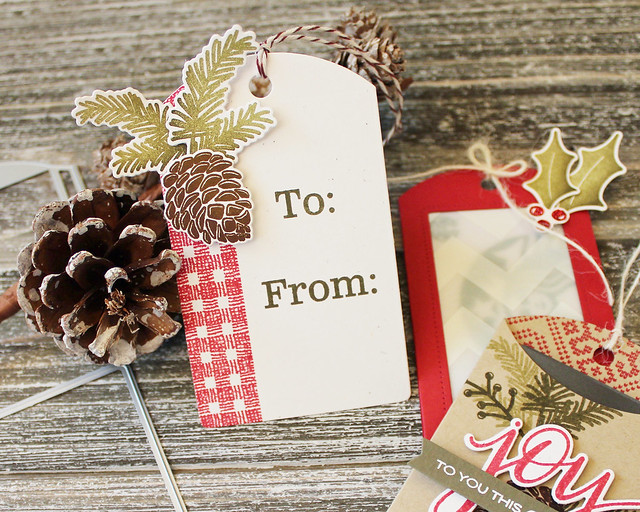
For my last tag today, I trimmed the pocket tag in half and just used the half without flaps to create a simpler design.
I began by die cutting the tag shape from Rustic White cardstock. I stamped the gingham pattern from Sending Joy down the side of the tag and then followed up with the "To:" and "From:" using the
Keep It Simple: To & From mini set. Then, I stamped and die cut the pine boughs and pinecone from Sending Joy and attached them to the front of the card using flat and foam adhesives. I finished off the tag with a bit of Dark Chocolate twine.
That's just three ways you can use the pocket tag. I'll show you another style tomorrow, so be sure to stop back.
Thank you so much for joining me today! Make sure to pop in on
Amy,
Betsy,
Dawn,
Heather,
Laurie,
Melissa B,
Melissa P,
Michelle,
Stephanie, and
Kimberly to see even more inspiration. Have a wonderful day and I'll see you tomorrow!
Supplies:
Folded Pocket Tag Trio


5 comments:
Hi Lizzie! What a wonderful post! I downloaded the PDF, thank you for that. What I love about this pocket die is the versatility! So many ways to make tags, for presents and gift cards. How great is that! You did a wonderful job designing it! And your tags are so festive and PRETTY. Thank you Lizzie & I look forward to tma! :)
WOW, these three are fabulous! And thank you for that PDF, that's definitely going to come in handy. I love this new tag -- it's so versatile with the window and the flip! I can see this getting a lot of use in my craft room during the year! Congrats on a fabulous design!
Great die set! Love the pierced windows and thanks for the open pocket option with PDF.
Fabulous die set - great tags!
Oh Lizzie, I really love the variety of this release. Your designs here are beautiful. Thanks for the inspiration and fun.
Post a Comment