Good morning, everyone, and welcome back for Day 2 of the October
Papertrey Ink countdown! The new release will be available on the Papertrey Ink website at 10pm ET on October 15th. In the meantime, I have the pleasure of introducing Heather's
Warm & Fuzzy stamp set and Betsy's
Shape Shifters: Square 3 die. I've fallen in love with these sweet stockings and mittens! And Betsy's dies never disappoint. There are so many wonderful ways to use them! Let's take a closer look.
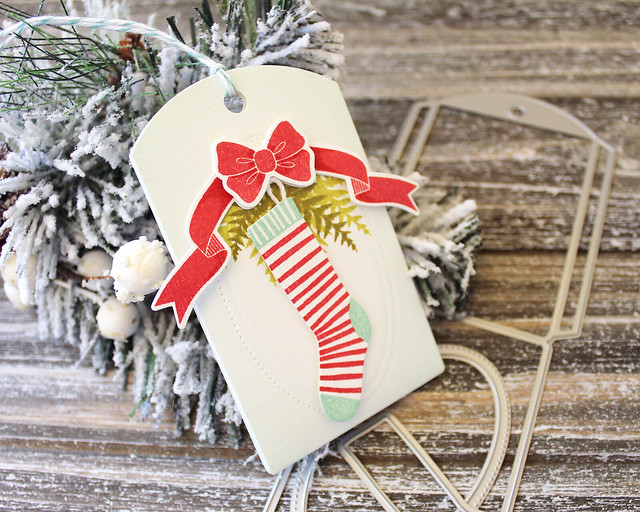
My first project pairs Heather's
Warm & Fuzzy with my new
Corner Adorner mini and
Folded Pocket Tag.
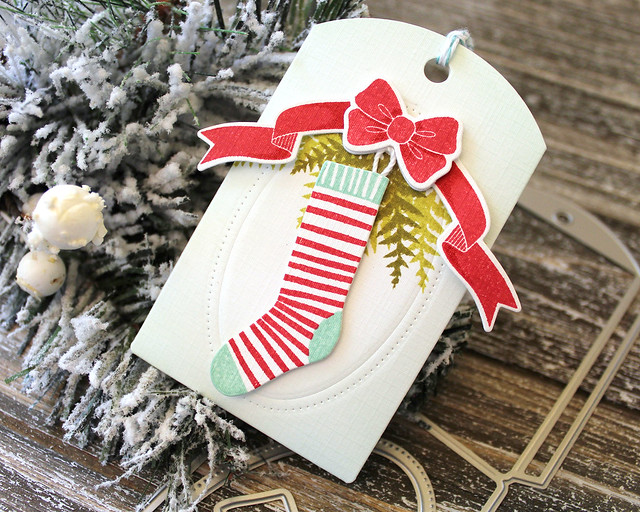
I began by sponging a piece of Fresh Snow Linen cardstock with Aqua Mist ink to give it just a hint of color. Then, I die cut the pocket tag and stamped the front with the cedar greenery from this month's
Corner Adorner. I also stamped and die cut The Corner Adorner bow and used a colored pencil to add a touch of shading.
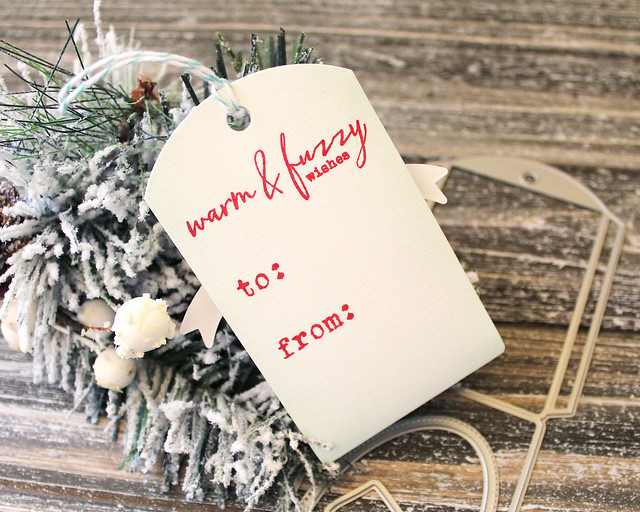
On the back of the tag, I stamped a greeting from
Warm & Fuzzy and the "To:/From:" from
Keep It Simple: To & From. Then, I used the impression plate sandwich to add the debossed oval to the front of my tag. I assembled the tag using nice, strong adhesive on the tabs.
Finally, I stamped and die cut the striped stocking from
Warm & Fuzzy. I added a crochet thread loop "hanger" (by the way, it's size 3 crochet thread - I checked it a while ago, but I think I forgot to report back) and adhered the stocking to the front of the tag. I also added the bow with foam tape and then finished the tag off with baker's twine.
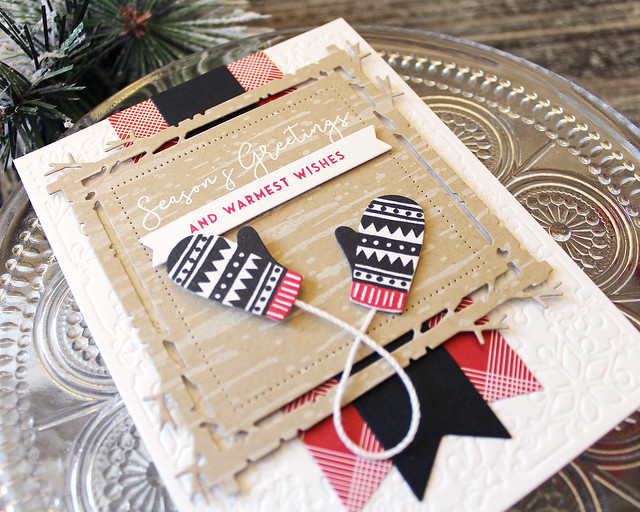
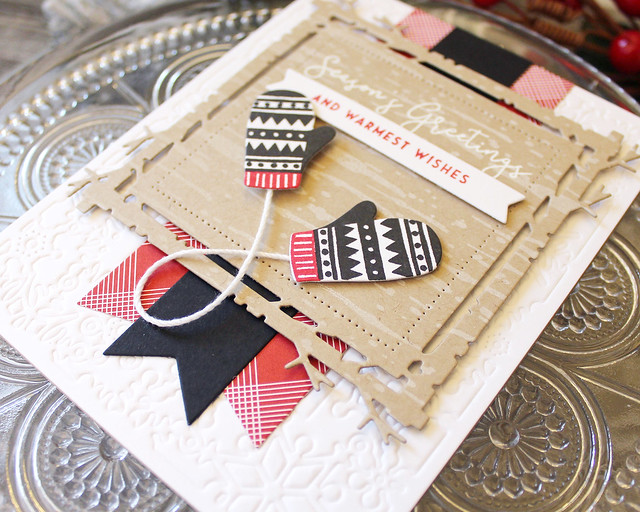
Next up, I have a Scandinavian-inspired card pairing the super-cute mittens from Heather's set with the woodland style mat in Betsy's newest
Shape Shifters die.
I began by die cutting the
Shape Shifters: Square 3 panel from Classic Kraft cardstock. I stamped it with the
Background Basics: Birch pattern using Fresh Snow ink before heat embossing my
Sentiment Staples: Season's Greetings using white powder. Then, I stamped the companion sentiment onto a
Wine Bottle Tag #2 banner and adhered it to the birch panel with foam adhesive.
Next, I stamped and die cut the mittens (isn't this pattern fantastic?!) and connected them with a piece of crochet thread. I used foam adhesive to attach the mittens to the panel and set it aside for a moment. Then, I used an impression plate sandwich and the
Bold Borders: Flurries die to add texture to a white panel.
I cut a decorative banners using the
Tag Sale #5 die (just cut it in half and hide the ends to get the length you need) and the
Get A Handle On It die and layered those on the card front. Then, I mounted the birch panel to the front of the card using foam adhesive. I'm loving the unconventional color palette!
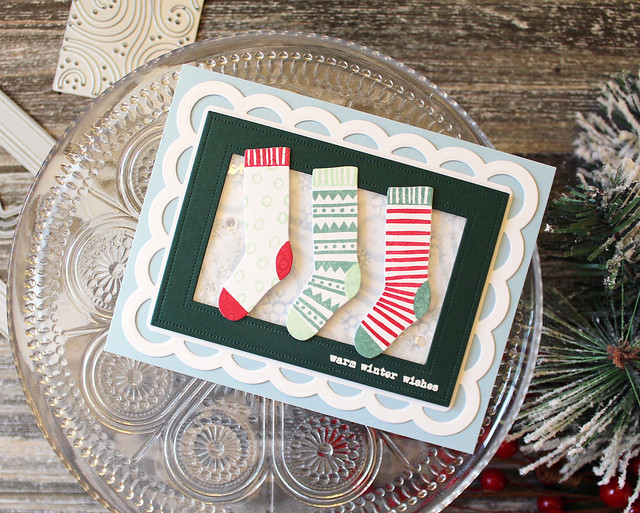
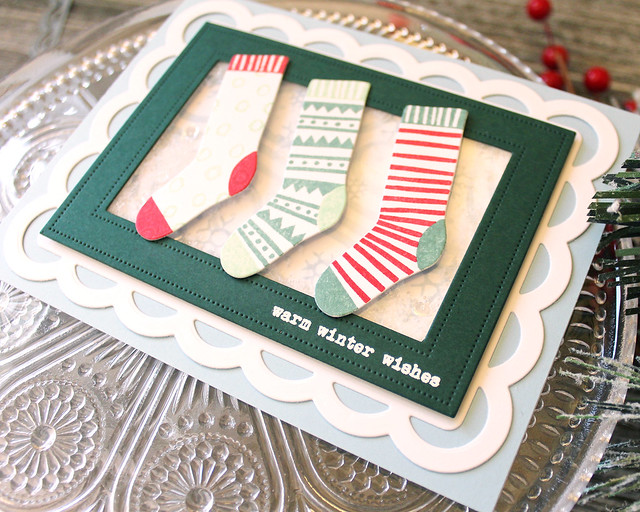
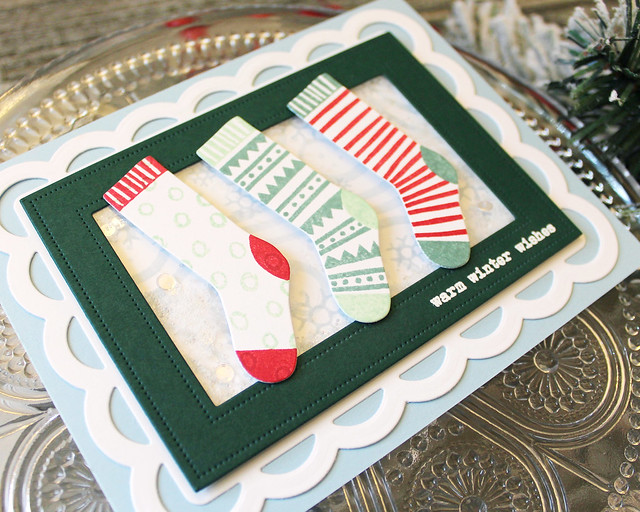
My third card today is a shaker-style card full of festive style.
I began by creating a stencil for my background using the decorative window in the
Shape Shifters die. I sponged Spring Rain ink through the openings onto a
Scallop Stackers: Medium panel. Then, I stamped a sprinkling of snowflakes from
Warm & Fuzzy using the same ink. I adhered that panel to a Spring Rain card base and set it aside.
Next, I stamped three stockings, mixing and matching the colors and designs to make them coordinate but not perfectly match. I also die cut a
Pierced Feature Frames shape and heat embossed it with the sentiment from
Warm & Fuzzy.
I backed the sentiment frame with clear cardstock and then used that to create a shaker box on the front of the card. I filled it with a mix of buffalo snow, microbeads, and a few of the sequin thingies from Betsy's Fairy Tale Christmas trimmings kit. I adhered the stockings to the front of the card with foam adhesive for a bit of dimension.
Both of these great new products are sure to be favorites of yours in no time! I'll be back tomorrow with more inspiration to share. Until then,
Betsy,
Dawn,
Heather,
Laurie,
Melissa B,
Melissa P,
Michelle, and
Stephanie have projects to share with you today. Have a wonderful day and I'll see you tomorrow!
Supplies:
Warm & Fuzzy Wishes Tag
 Season's Greetings Card
 Warm Winter Wishes Card


5 comments:
Hi Lizzie! Are you ready for a whole lot of thank you's?! I love, love your newest corner adorner! I have them all! The bow can be used year round, and I LOVE that! Thank you! And Thank you for posting the crochet thread, I was so excited to see that this morning! I'm ordering it today! And thanks for a beautiful post! SO many different designs, all so festive and PRETTY! Thank you Lizzie, you are truly a talented inspiration! Oh- and thank you again! Haha. Have a great day! :)
Adore your tag!!! Love the little details and that stocking hanger is so darn cute! And the new corner adorner is fabulous!
LOVE these project So! I want to knit a pair of mittens to match those 😂.
Ahhh. so sweet. This has been a fun release. Your cards are adorable.
Such adorable creations Lizzie~thank you for the inspiration!
Post a Comment