Wednesday, June 15, 2016

Release In Review

Good morning, friends! Welcome back for this month's Papertrey Ink countdown wrap-up. I have a few more projects to share with you featuring the June new releases, so let's get to it!

First up, I have a card showcasing Betsy's What The Doodle: Sun set.

Sending Sunshine Card

I began by sponging Harvest Gold ink through a vellum template onto a white card base. I stamped the detailed sun image using Summer Sunrise and Orange Zest inks in the resulting space. Then I used the die cut vellum shape to mask off the sun while I sponged on a bit of Aqua Mist. I just held it in place while I sponged. Next, I xyroned a piece of white cardstock and die cut that and some regular cardstock with the cloud dies in the set. I stamped the outline shapes and sandwiched them with the solid shapes, sticky side up. I sprinkled white Fun Flock over the sticky areas to give them a fuzzy appearance.

Sending Sunshine Close Up

Then, I heat embossed the sentiment onto an Aqua Mist panel I had cut with the Tipped Tops die. I trimmed the card base and the Aqua Mist panel down about 3/8" to allow for some cloud overhang and assembled my card using coaster, foam tape, and flat adhesives. As a final touch, I used a Clear Spica pen to add just a touch of glitter to the sun.

Next up, I have a set of tags that I made with the Paper Clippings: Birthday and Keep It Simple: To & From sets.

Birthday Cake Tags

I began by stamping the cakes onto pieces of white cardstock. I sponged the inks to give them dimension. The frosting is Pale Peony and Berry Sorbet. The cake layers are Harvest Gold and Summer Sunrise. The candles are Aqua Mist and Hawaiian Shores. And the flames are Harvest Gold and Summer Sunrise again.

Single Birthday Cake Tag

After the cakes were finished, I die cut the tag shapes. Then, I masked off the bottom cake layer and added a ground with the oval from Bowl Of Sunshine using Hawaiian Shores ink. I also stamped the "To:" and "From:" in True Black. I added a bit of baker's twine and embellished the frosting with a Clear Spica glitter pen to finish them off. I can't wait to add these to a few special birthday packages!

My last project this month features Betsy's Inspired: Grace set.

Saved By Grace Card

I began by sponging and splattering Spring Rain ink onto a white card base. I attached a Garden Garland (my dies from last month finally arrived!) frame that I'd cut from Ocean Tides and sponged with the coordinating ink for a bit of depth. I die cut a second frame from bitty dot vellum and placed that, slightly askew, over the first frame.

Saved By Grace Close Up

Next, I die cut the banner shape using the new Paper Clippings: Birthday Details die and stamped it with the first part of my sentiment using Stormy Sea ink. I adhered that into place on the card front using foam tape. Then, I sponged a piece of Pale Peony cardstock with Berry Sorbet ink and die cut it with the Inspired: Grace die. I attached the die to the banner shape with foam tape and embellished the card front with sequins from last month's Sunshine & Rainbows kit.

Well, that's all for me this month, folks! I'll see you again soon. In the meantime, make sure to visit Amy, Ashley, Betsy, Danielle, DawnHeather, Kay, Laurie, and Melissa to see their projects featuring this month's new release. Enjoy the rest of your week, everybody!

Recipes:
Sending Sunshine Card
Stamps: What The Doodle: Sun - Papertrey Ink
Cardstock: Aqua Mist - Papertrey Ink; white
Ink: Aqua Mist, Harvest Gold, Summer Sunrise, Orange Zest - Papertrey Ink; VersaMark - Tsukineko
Other: What The Doodle: Sun Die, Coaster - Papertrey Ink; White Fun Flock - Stampendous; Clear Spica Pen - Zig; Foam Tape - Scotch

Birthday Cake Tags
Stamps: Paper Clippings: Birthday, Keep It Simple: To & From, Bowl Of Sunshine - Papertrey Ink
Cardstock: white
Ink: Harvest Gold, Summer Sunrise, Pale Peony, Berry Sorbet, Aqua Mist, Hawaiian Shores, True Black - Papertrey Ink
Other: Tag Sale #10 - Papertrey Ink; Clear Spica Pen - Zig; Teal Baker’s Twine - Divine Twine

Saved By Grace Card
Stamps: Inspired: Grace - Papertrey Ink
Cardstock: Ocean Tides, Pale Peony, Sheer Basics Bitty Dot Vellum - Papertrey Ink; white
Ink: Berry Sorbet, Spring Rain, Stormy Sea - Papertrey Ink

Other: Inspired: Grace Die, Paper Clippings: Birthday Details Die; Sunshine & Rainbows Sequins - Papertrey Ink; Foam Tape - Scotch

Tuesday, June 14, 2016

Forget Me Not Notes

Good morning, friends! Welcome back to Day 5 of the Papertrey Ink June countdown. Today we're introducing Betsy's new Forget Me Nots stamp set and the Noted and Double-Ups dies. So much good stuff coming your way!

Forget Me Not Cards

This new set is so lovely it even makes creating for somber reasons a little bit easier. Not only that, but Betsy included thoughtful sentiments that you can use for those occasional, everyday memory lapses, too. And you're going to love the vintage style font paired with the clusters of petite flowers! Let's get on to the project details, shall we?

Sympathy cards tend to be some of the most challenging to make. The Forget Me Nots set truly makes a difficult task a little bit easier. It's full of simple, thoughtful sentiments that convey a heartfelt message without getting too flowery.

Never Forgotten Card


I began by sponging a Rustic White card base with Aqua Mist ink starting at the top left and ending at the bottom right. I stamped the clusters of flowers along that same line using Lovely Lady, Autumn Rose, Scarlet Jewel, and Ripe Avocado inks. Then I went back with a small stipple brush and added Aqua Mist speckles around the flowers. I found the reinker the best way to do this. You don't get quite enough ink by just pouncing the brush against the ink pad.

Never Forgotten Close Up

Next, I die cut the Noted: Scalloped Square die from vellum and trimmed it at the score line. I heat embossed the sentiment with white detail powder and adhered the vellum to the card base with vellum tape. I like keeping my sympathy cards on the simple side. There's no need for bells and whistles when you're consoling someone after a loss.

My next card uses the belated birthday sentiment from Forget Me Nots. I'm sure I'm not alone when I say I've been known to miss a birthday on occasion. Now I can make up for those lapses in style!

Belated Birthday Card


I began with the frame. I die cut a piece of white cardstock using the straight edge rectangles included in the Noted: Scalloped A2 die collection. I used Lemon Tart and Harvest Gold inks to sponge on color and then stamped the plaid using Background Basics: Super Stripes and Harvest Gold ink.

Belated Birthday Close Up

Next, I die cut the card base using that same die and sponged the edges lightly with Spring Rain ink. I stamped my sentiment onto the card base using Spring Rain and sponged Blueberry Sky before adhering the frame into place. Here's a tip: when I want dimension but not bulk, I use strips of coaster board instead of foam tape. That's what I did here with the frame.

Forget Me Nots Close Up

I tied a white crochet thread bow around the card base before adding die cut flower clusters from the set with foam tape. Another tip: when I want a color, but I don't want it to be quite as intense I sponge on the color rather than ink an image directly from the ink pad. That's what I did with the Blueberry Sky flower centers and they turned out great. I finished the card off by embellishing the flower centers with just a touch of crystal glitter. It's subtle, but I love that tiny bit of sparkle.

Well, that's all for me today! I'll see you back here tomorrow for the monthly wrap-up. In the meantime, Nichole, AmyAshley, Betsy, Danielle, Dawn, HeatherKay, Laurie, and Melissa to see more of these fabulous new products. Maile are also sharing another peek, so make sure to visit her, too! See you tomorrow!

Recipes:
Never Forgotten Card
Stamps: Forget Me Nots - Papertrey Ink
Cardstock: Rustic White, Vellum - Papertrey Ink
Ink: Lovely Lady, Autumn Rose, Scarlet Jewel, Ripe Avocado, Aqua Mist - Papertrey Ink; VersaMark - Tsukineko
Other: Noted: Scalloped Square Die - Papertrey Ink; White Embossing Powder - Filigree; Vellum Tape - Scotch

Belated Birthday Card
Stamps: Forget Me Nots, Background Basics: Super Stripes - Papertrey Ink
Cardstock: white
Ink: Lemon Tart, Harvest Gold, Spring Rain, Blueberry Sky, Green Parakeet - Papertrey Ink
Other: Noted: Scalloped A2 Die Collection, Forget Me Nots Die, Coaster - Papertrey Ink; Foam Tape - Scotch; Crystal Glitter - Martha Stewart Crafts; Crochet Thread

Monday, June 13, 2016

Woodblock Prints

Good morning, friends! It's Day 4 of the Papertrey Ink countdown and today we're sharing Nichole's Woodblock Prints collection. I am absolutely smitten with the patterns in this collection. Nichole has truly outdone herself! With stamps, stencils, and gorgeous linen papers you can add the feel of exotic, faraway places to all of your projects with ease. Enough chit chat - on to the projects!

Woodblock Prints Cards

I love how different these patterns can feel depending on your color selections and cardmaking style. The three cards I've created today run the gamut from graphic and modern to bold and luxe. Let's start with the card that features the patterned paper.

Woodblock Sending Hugs Card

I began by trimming the patterned paper into strips that I used to cover a white card base. Next, I die cut one of the new Double Ups Ovals from vellum stock and used it as a base for my focal point. I die cut a banner using the First Place dies and stamped it with a sentiment from The Skinny. I also die cut one of the sentiments from the Graceful Greetings II set and stamped it with Royal Velvet ink.

Woodblock Sending Hugs Close Up

I assembled those pieces with foam and flat adhesives before tucking in a few leafy bits cut with the Branching Out die. As a final touch, I added a trio of flowers (also from Graceful Greetings II) that I'd inked with Winter Wisteria and sponged with Royal Velvet.

Next up I have a card featuring the stencil collection. I've grown very fond of stencils in recent months and this set is no exception. I was particularly fond of the two that layered together, so I've used those today.

Thanks For Being Here Card

I began by sponging the solid images onto a piece of Pale Peony using Berry Sorbet ink. For the second layer, I sponged VersaMark through the stencil and then heat embossed with gold powder. I die cut one of the Double Ups Rectangles from the center of the panel to create a frame. I ran the cardstock and die through my machine a second time (this time with an embossing mat) to get that embossed scallop detail and then mounted the frame to a white card base with foam tape.

Thanks For Being There Close Up

Next, I die cut the "Thanks" from the Big Basics Die Collection from Berry Sorbet cardstock three times and layered them together. I adhered that to the front of the card, spanning the frame opening. The companion sentiment, from Thanks All Ways, was gold heat embossed onto a strip of white cardstock and adhered to the card front. I love how rich that pattern feels with the addition of the gold embossing.

My last card of the day uses the Woodblock Prints stamp set in a more modern style. And who doesn't love a rainbow?

Thanks For Everything Card

I began by stamping the square-shaped block in rainbow-colored rows down a white cardstock panel. Once that was finished, I die cut the "thanks" sentiment using the Wet Paint Cuts die collection. I then stamped the companion sentiment, from Wet Paint, underneath in Smokey Shadow ink.

Thanks For Everything Close Up

I set that aside while I stamped a Smokey Shadow card base with the dotty strip using True Black ink. I mounted the rainbow panel to the card front with foam tape and embellished with a sprinkling of Sunshine & Rainbows sequins.

So there you have it. Three very different looks using the same product line-up. Make sure to check in with  Nichole, Amy,Ashley, Betsy, Danielle, Dawn, Heather, Kay, Laurie, and Melissa to see more of these gorgeous new products. Erin and Maile are also sharing a few more peeks, so make sure to visit them, too! See you tomorrow!

Recipes:
Sending Hugs Card
Stamps: Graceful Greetings II, The Skinny - Papertrey Ink
Cardstock: Simply Chartreuse, Woodblock Prints Patterned Paper, Vellum - Papertrey Ink; white
Ink: Winter Wisteria, Royal Velvet, True Black - Papertrey Ink
Other: Double Ups Oval Die, Graceful Greetings II Die, Branching Out Die, First Place Die - Papertrey Ink; Foam Tape - Scotch

Thanks For Being There Card
Stamps: Thanks All Ways - Papertrey Ink
Cardstock: Pale Peony, Berry Sorbet - Papertrey Ink; white
Ink: Berry Sorbet - Papertrey Ink; VersaMark - Tsukineko
Other: Woodblock Prints Stencil Collection, Double Ups Rectangle Die, Big Basics Die Collection - Papertrey Ink; Gold Embossing Powder - Filigree; Foam Tape - Scotch - Papertrey Ink

Thanks For Everything Card
Stamps: Woodblock Prints, Wet Paint - Papertrey Ink
Cardstock: Smokey Shadow - Papertrey Ink; white
Ink: Pure Poppy, Summer Sunrise, Harvest Gold, Green Parakeet, Aqua Mist, Winter Wisteria, True Black, Smokey Shadow - Papertrey Ink
Other: Wet Paint Cuts Die Collection, Sunshine & Rainbows Sequins - Papertrey Ink; Foam Tape - Scotch

Sunday, June 12, 2016

A Need For Speed

Good morning, friends! Today is the first group post in the June Papertrey Ink countdown and, boy, are you in for a treat! I don't know about you, but it seems like the fellas in my life all have a soft spot for anything with a V8. The products we're featuring today from Erin and Nichole are sure to rev their engines! I've even created projects for both little guys and more mature gentlemen with these wonderful stamps and dies! Let's take a peek.

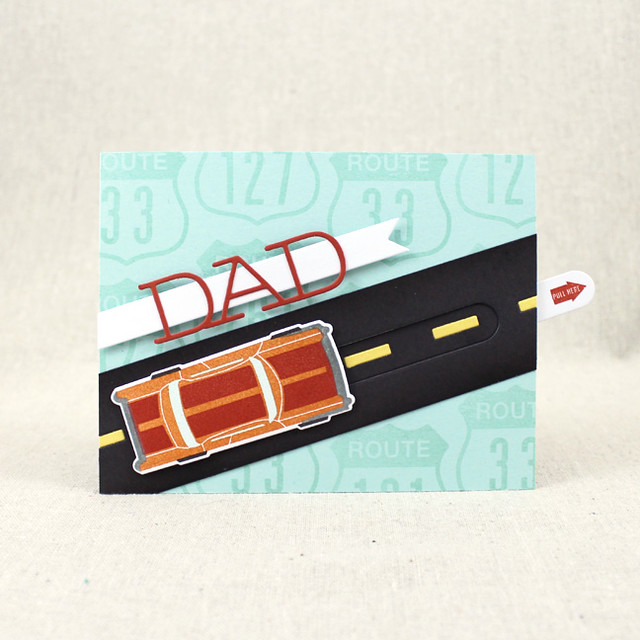
My first project is a Father's Day card for my papa-in-law. This is a man who appreciates a fine automobile (he drives a canary yellow Corvette), so I knew these stamps would be right up his alley (no pun intended).

Classic Dad Card

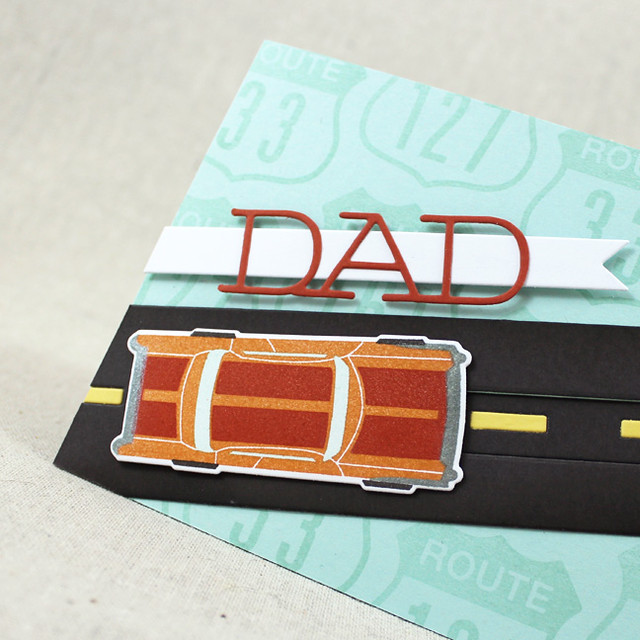
I began by stamping and die cutting the sports car from Need For Speed. I used Terra Cotta Tile and Canyon Clay for the body. I used second generation Aqua Mist for the windows. It gives them a nice, pale blue tint that isn't too overwhelming. The bumpers are stamped in Stormy Sea and then stamped a second time with VersaMark so I could add a Perfect Pearl finish to make them more chrome-y. The tires are Smokey Shadow. I set that aside while I built the rest of the card base.

Classic Dad Sentiment

I began by repeatedly stamping the Route sign from 
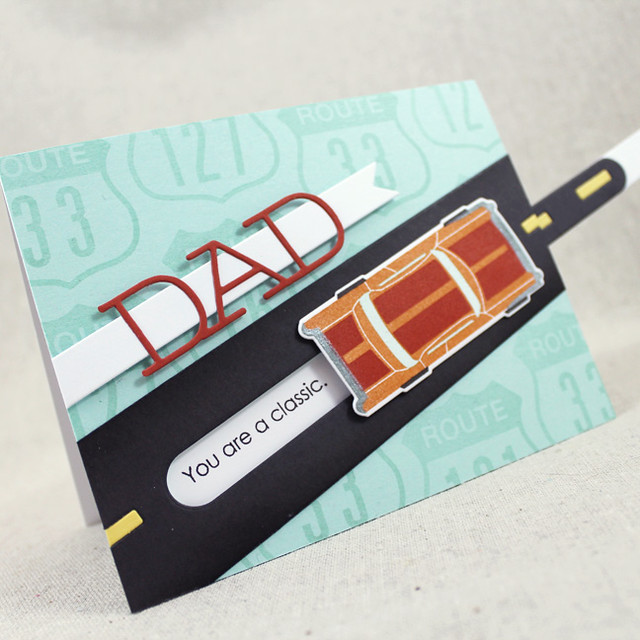
Road Signed onto a piece of Aqua Mist cardstock using the coordinating ink. I went back and added the route numbers with Road Signed Numbers. I chose state routes that have family significance to give the background a personalized feel. Next, I used the Movers & Shakers: Spinners die collection to cut a channel in the patterned panel. I also die cut a roadbed strip from Smokey Shadow cardstock using the new On The Road Die. I sponged the edges with the coordinating ink to give a bit of depth and die cut another channel with the Spinners die collection, reserving the die cut piece. I adhered the roadbed to the patterned strip and then adhered the whole piece to a white card base with foam tape.

Classic Dad Pull Tab Close Up

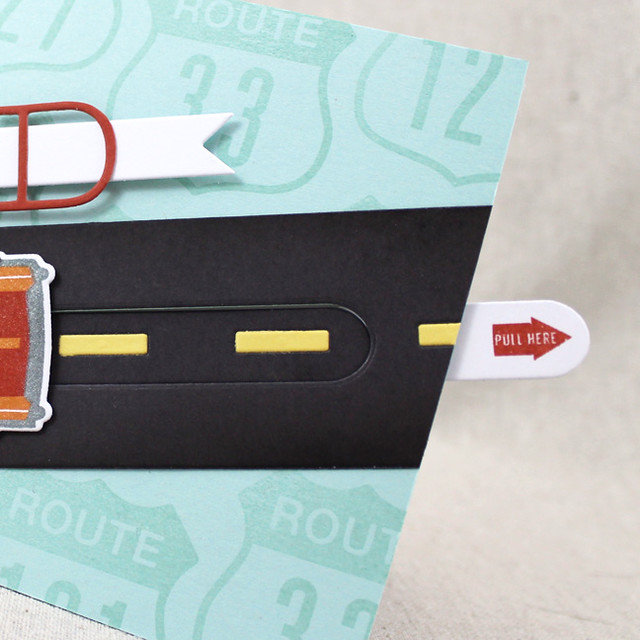
Next, I stamped the sentiment from Need For Speed directly onto the white card base through the channel in the patterned piece. I then created a slider for the car to "ride" on using the reserved roadbed piece and an extra piece cut from white cardstock. I stamped the "pull here" arrow from Movers & Shakers Sentiments onto the white piece using Terra Cotta Tile ink. I adhered all of the slider bits together and tucked them into the channel, adding the car on top with foam tape.

Classic Dad Car Close Up

Then, I die cut a Sketched Shapes banner and a Text Block: Dad shape. I trimmed the "Dad" from the Text Block and adhered it to the banner. Finally, I added the banner to the card with foam tape and called it a day. I think he's going to love it!

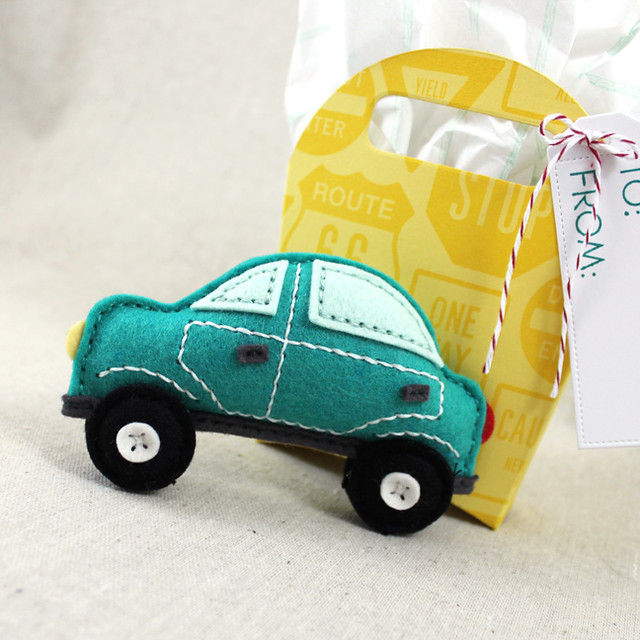
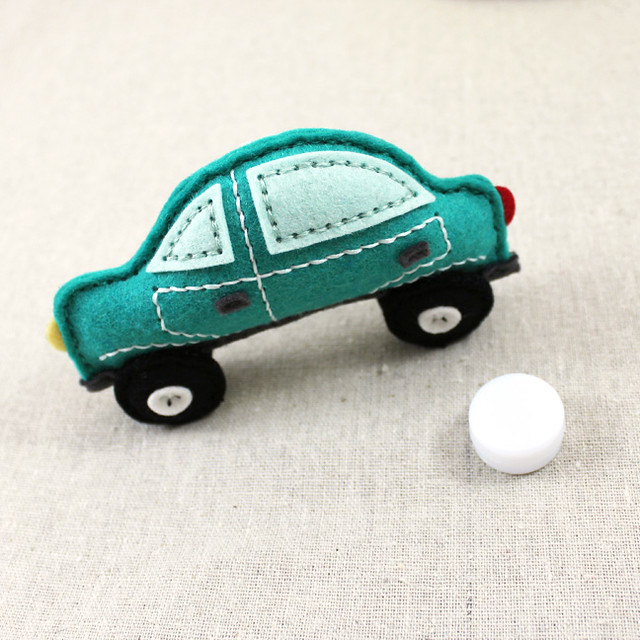
Next up, I'm sharing a baby rattle I made with Erin's new Stitched Car Die.

Felt Car Rattle

Every little boy I've ever known has loved cars and I thought this new shape would make a fabulous toy for a small fella. My trainer at the gym, Rachael, has a six month old son and this will make a nice gift for him. I cut the car parts from Tropical Teal, Aqua Mist, Smokey Shadow, True Black, Harvest Gold, Vintage Cream, and Pure Poppy felts.

Felt Car Rattle With Rattle Insert

I stitched it together using the video Erin put together, but instead of just using polyfil, I also tucked in two of these rattle inserts (I found them online - just google "rattle insert" for tons of options). I made sure to protect them with plenty of stuffing, so the rattle is still plenty soft enough and safe for kiddos. They're also great for pet toys. Gus has been trying to steal the rattle for three days.

Road Signs Gift Tote

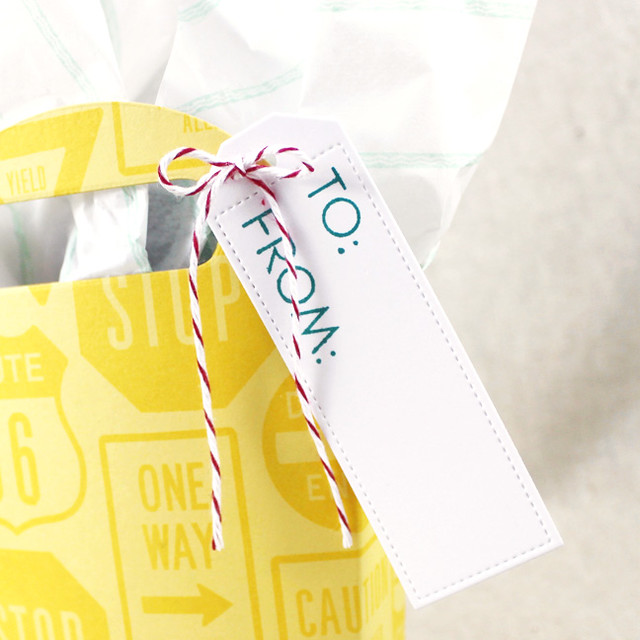
I wanted to dress up my gift a smidge, so I created this coordinating gift tote to go along with it. I began by stamping several of the images from the Road Signed set repeatedly onto Harvest Gold cardstock using Bright Buttercup ink. Next, I die cut that patterned cardstock using the Fry Box die. I cut mini handles using the small rectangle in the Summer Camp die collection and assembled the box as normal. I filled the tote with custom tissue paper that I stamped with the tread image from Need For Speed.

Gift Tote Tag Close Up

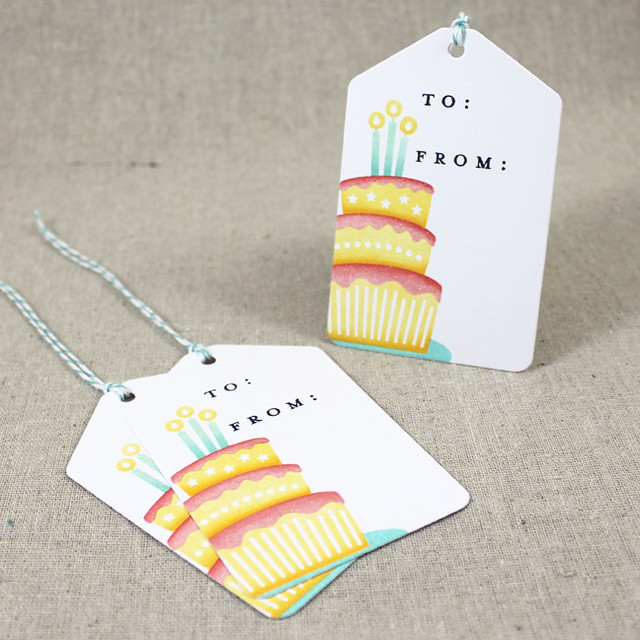
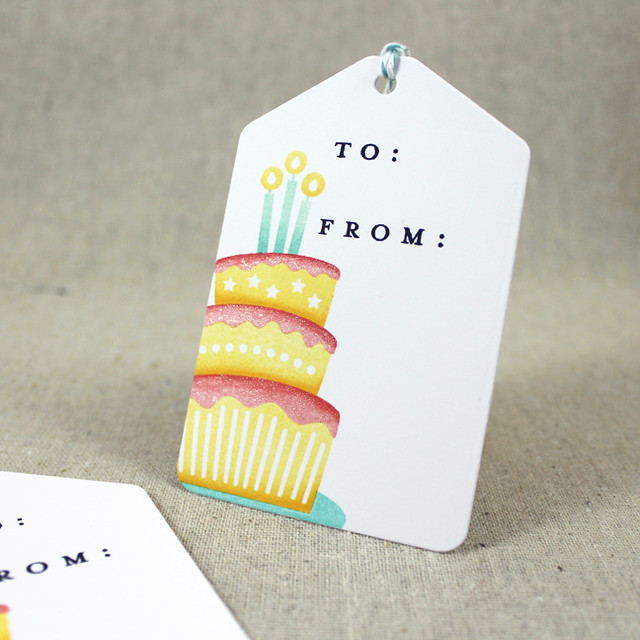
I also tied on a Keep It Simple Frames tag that I stamped with a sentiment from the new Keep It Simple: To:/From: set. I love that there are several fonts in the set, so you can choose the perfect option for any style of tag.

Well, that's all for me today, friends. I'll see you back here again tomorrow for another group post. In the meantime, make sure to check in with Nichole, Amy, Ashley, Betsy, Danielle, Dawn, Heather, Kay, Laurie, and Melissa for more inspiration. Erin and Maile are also sharing more of their new designs, so make sure to visit them, too! Have fun hopping around!

Recipes:
Classic Dad Card
Stamps: Need For Speed, Road Signed, Road Signed Numbers, Movers & Shakers Sentiments - Papertrey Ink
Cardstock: Aqua Mist, Smokey Shadow, Terra Cotta Tile, Harvest Gold - Papertrey Ink; white
Ink: Terra Cotta Tile, Canyon Clay, Aqua Mist, Stormy Sea, Smokey Shadow - Papertrey Ink; VersaMark - Tsukineko
Other: On The Road Die, Need For Speed Die, Sketched Shapes Die, Text Block: Dad Die, Movers & Shakers: Spinner Die - Papertrey Ink; Foam Tape - Scotch; Pearl Perfect Pearls - Ranger

Felt Car Rattle
Felt: Tropical Teal, Aqua Mist, Smokey Shadow, True Black, Harvest Gold, Pure Poppy, Vintage Cream - Papertrey Ink
Dies: Stitched Car Die Collection - Papertrey Ink
Other: Embroidery Floss - DMC; Polyfil; Rattle Inserts

Road Signs Gift Tote
Stamps: Road Signed, Road Signed Numbers, Need For Speed, Keep It Simple: To:/From: - Papertrey Ink
Cardstock: Harvest Gold - Papertrey Ink; white
Ink: Bright Buttercup, Aqua Mist, Tropical Teal - Papertrey Ink
Other: Fry Box Die, Keep It Simple Frames Die - Papertrey Ink; Cherry Baker's Twine - Divine Twine; Tissue Paper

Friday, June 10, 2016

Introducing Splits: Way To Go

Good morning, Papertrey Ink fans! Today is the kickoff for the June countdown and I have the great pleasure of featuring Maile's new Splits: Way To Go set (just a note: all of the new products you see over the next few days will be available on the Papertrey Ink site at 10pm on the 15th)! I love this fabulous little mini set. The geometric design is so versatile, chic, and modern. I'm sure I'll be pulling it out again and again. Let's get to some projects!

Today's first card also includes a sneak peek of Dawn's new set, The Skinny.

So Proud Of You Card

I began by sponging a panel of Fresh Snow linen stock with Spring Rain ink. I stamped the large geometric image from the set onto that same panel using Stormy Sea ink. Then I filled in the open spaces with the smaller, solid images in the set using Winter Wisteria, Spring Moss, Aqua Mist and a new color you'll be hearing more about soon. I adhered that panel to a Spring Rain card base before embellishing the colorful bits with glitter.

So Proud Of You Close Up

Next, I trimmed a Fresh Snow linen strip and stamped the sentiment from Splits: Way To Go in Spring Rain before adding the sentiment from The Skinny in Stormy Sea. I added the sentiment strip with foam tape to give it a little dimension and sprinkled on a few sequins from the Sunshine & Rainbows kit. Wouldn't this card be great for a teenage girl?

Next up is a card with a very different feel. The moment I saw this set the first things that popped into my head were black & white, the 1980s, and neon.

Neon Way To Go Card

I started by stamping and die cutting the large frame shape in black ink on white cardstock. I used the solid images to fill in the geometric frame and set that piece aside. Next, I heat embossed the geometric frame onto vellum and cut that out.

Neon Way To Go Close Up

I layered the cardstock and vellum pieces with foam tape and adhered them to a white card base with scoring details. Then, I white embossed the sentiment onto a First Place banner and attached it atop the Splits image. This design would be great for young dudes. Simply substitute the pink for a color scheme more befitting a fella.

For my last project today, I used the frame images to depict modern mountains. I paired them with a sentiment from These United States to create a graduation card.

Wherever You Go Card

I began by masking off a rectangle on the front of a white card base. I sponged that area with "sunrise colors" and then flicked on some clean water to add texture. Next, I die cut and stamped the frame from Monthly Moments: Travel Plans and mounted it to the front of my card. Then, I stamped and die cut the "mountains" and adhered them in the frame opening.

Wherever You Go Close Up

Next, I sponged a piece of white cardstock with Aqua Mist ink and die cut it with the banner in the Jar Bonnet Collection (I turned it around and ran it through a second time to get the "V" on both ends). I stamped the banner with the sentiment from These United States using Tropical Teal ink. I added that to the card front with a little foam tape to finish it off.

Thanks so much for joining me today! Make sure to join Nichole, Betsy, Dawn, Heather, Erin, and Maile for more peeks at this month's release. See you again soon!

Recipes:
So Proud Of You Card
Stamps: Splits: Way To Go, The Skinny - Papertrey Ink
Cardstock: Fresh Snow Linen - Papertrey Ink
Ink: Stormy Sea, Winter Wisteria, Spring Moss, Aqua Mist, Spring Rain, Pale Peony - Papertrey Ink
Other: Sunshine & Rainbows Sequins - Papertrey Ink; Sugar Cube Glitter - Martha Stewart Crafts; Foam Tape - Scotch

Way To Go Card
Stamps: Splits: Way To Go - Papertrey Ink
Cardstock: True Black, Vellum - Papertrey Ink; white
Ink: Neon Blue, Neon Green, Neon Orange, Neon Pink - Hero Arts; VersaMark - Tsukineko; Onyx Black - Versafine
Other: Splits: Way To Go Die, First Place Die - Papertrey Ink; White Embossing Powder - Filigree; Foam Tape - Scotch

Wherever You Go Card
Stamps: Splits: Way To Go, These United States, Monthly Moments: Travel Plans - Papertrey Ink
Cardstock: Pale Peony, Soft Stone - Papertrey Ink; white
Ink: Hawaiian Shores, Pale Peony, Harvest Gold, Stormy Sea, Berry Sorbet, Tropical Teal, Aqua Mist - Papertrey Ink
Other: Splits: Way To Go Die, Jar Bonnet Collection Die, Simply Framed Die - Papertrey Ink; Foam Tape - Scotch