Good morning, friends! Welcome to the introduction of
The Greetery's Lily & Palm Mini Release.
All of the new products I'm showcasing today will be available tomorrow, February 14th at 10am. If you make Easter or spiritual cards (prayers/religious sympathy) this release is going to be right up your alley. The products Betsy has designed are all so elegant and lovely. Let's get to it!
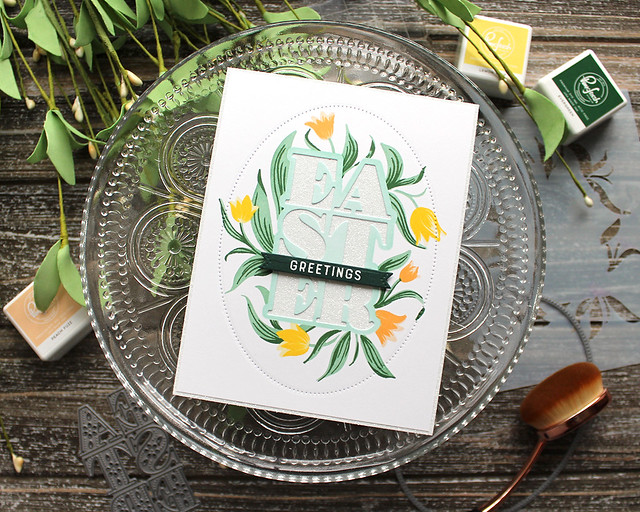
First up, I have a card featuring the new Easter Jubilee Creative Kit. This fabulous mini kit is packed with stencils, dies, and stamps that will make it a snap to make Easter cards with floral charm.
I began by using the stencil set to create the base for my design. I wanted to incorporate a couple different colors of tulips, so I used a smaller blending brush to single out the individual blooms. Then I used the coordinating stamps to add details to the leaves and flowers.
Next, I die cut the "Easter" letters out of the center area and added the pierced oval to highlight the central design. Rather than use the letter die cuts, I backed the whole panel with adhesive paper and sprinkled glitter through the negative spaces. The result is beautifully sparkly!
To finish the card, I heat embossed one of the sentiments from the set onto a mini banner and attached it to the card with foam tape. I also adhered my front panel to a contrasting, colorful card base to add a bit of interest. It's a very simple design, but all of the little details make it special.
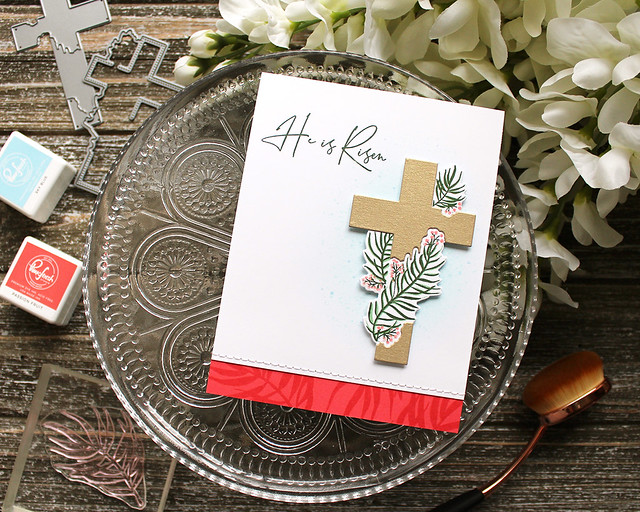
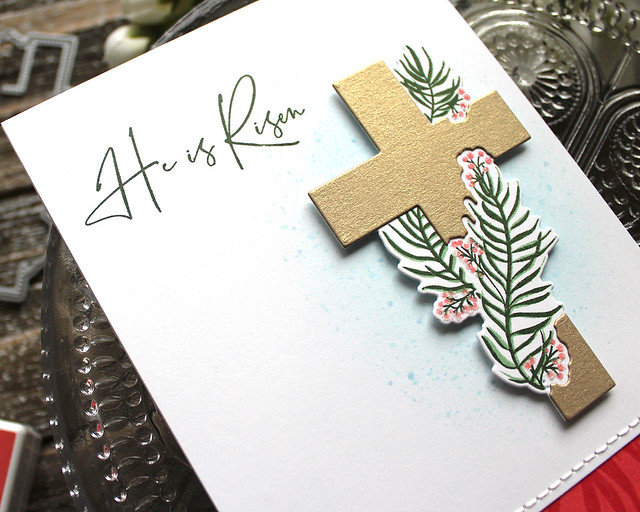
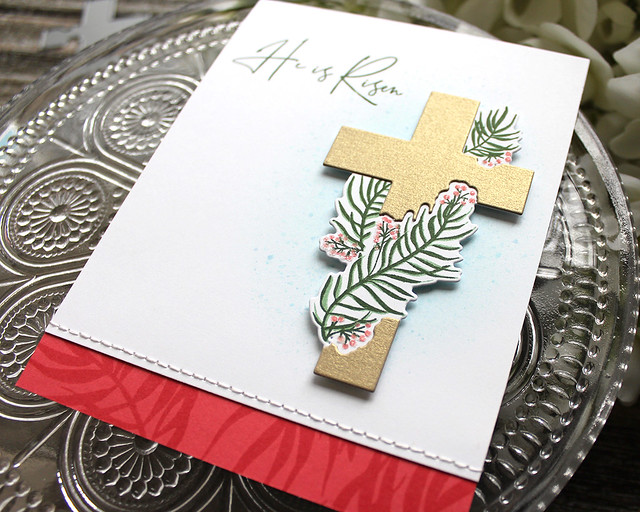
Next up, I have a card made with the new Caring Cross stamp set. I chose to make this an Easter card, but the stamp set includes several sentiments that would make it a wonderful choice for year-round crafting.
I began by stamping and die cutting the cross and palms. I used the cross pieces die to cut a second cross from champagne shimmer stock and layered those onto the first die cut, allowing the palms to peek through.
Next, I sponged a bit of pale blue ink onto a card panel and added speckles. I stamped the sentiment and then stitched a strip of cardstock (stamped with the individual palm branch) along the bottom edge of the panel. I adhered that panel to a card base and then added the cross with foam tape.
I thought the palms still needed something, so I went back with a glue pen and embellished the berries with crystal glitter. It's subtle, but the hint of shimmering glitter adds an exceptional touch without taking away from the message.
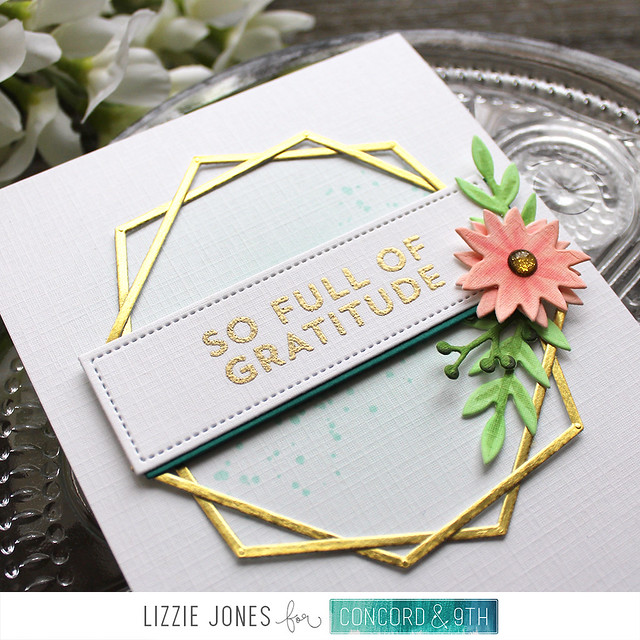
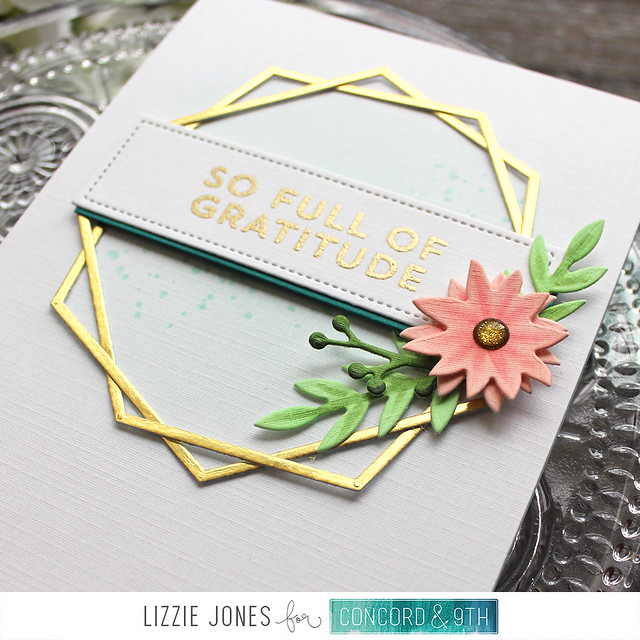
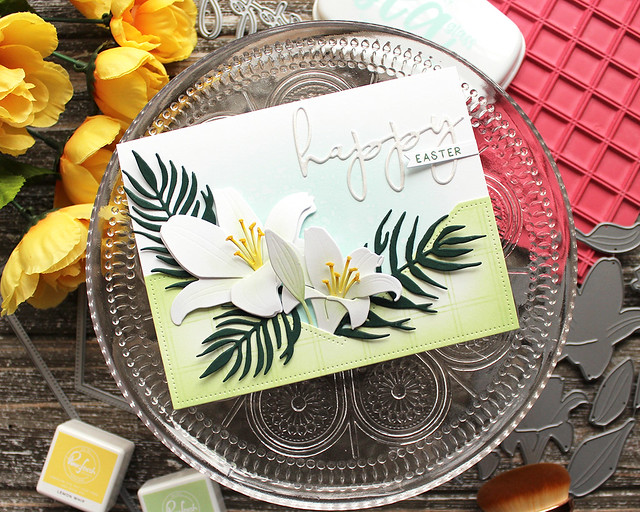
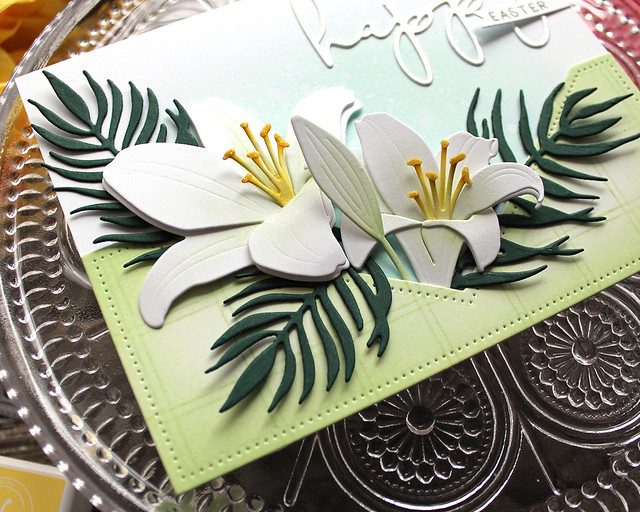
And lastly today, I have a card showcasing the new Botanicuts Lily, Botanicuts Palm, and Let's Have A Word: Happy dies. The lilies are so striking and really command attention on a card. And just think of how many different kinds of lilies you can create with these! I went with Easter lilies (because Easter), but there are daylilies, Stargazer lilies, Tiger lilies...the options are endless!
I die cut my flowers first and used a fine point blender brush to add a hint of color. I also embellished the stamens on the lilies with crystal glitter to zhoosh them a bit. Next, I die cut a Halfsies shape and sponged it with the same ink (albeit a bit more heavily). I stamped that with the recently released Windowpane Plaid Background and set all of those pieces aside.
Next, I sponged a bit of Aqua ink onto a card base and splattered it with clean water to get a subtle speckled look. Once it was dry, I attached my plaid Halfsies panel and arranged my Botanicuts Lily and Botanicuts Palm pieces.
To add a sentiment, I cut the Let's Have A Word: Happy shape from white cardstock and then smooshed the die cut into a Versamark pad. I used Perfect Pearls to give the sticky surface a shimmery finish. I attached that to the card front and added the companion sentiment on a Sentiment Suite Basics die cut. This card has so much dimension thanks to those gorgeous lilies!
Thank you so much for joining me today! Make sure to pop in on the other creative ladies on the team for even more inspiration:
Kay Miller
Laurie Willison
Dawn McVey
Heather Nichols
Keeway Tsao
Angelica Conrad
Kelly Lunceford
Norine Borys
Wanda Guess
Make sure to leave comments as you go because Betsy is giving away $25 gift certificates to two lucky commenters! Have a wonderful weekend and I'll see you again soon!
Supplies:
Easter Greetings Card
He Is Risen Card
Happy Easter Card