Friday, November 30, 2018

Festive Friday - Fairy Tale Gift Card Boxes

Festive Friday Banner

Hello, friends, and welcome to another Festive Friday! It's been a minute since I did a gift card packaging option, so I decided to pull out Betsy Veldman's Make It Market: Fairy Tale Christmas Kit (which is in stock right now in case you want to snag one!) and whip up a couple of charming gift card boxes.

LizzieJones_FestiveFriday_MakeItMarketFairyTaleChristmasKit_BookGiftBoxes

Sean's family is full of big readers, so gift cards to Barnes & Noble and Amazon always top the list. And what better way to present these gift cards than in a little box shaped like a book?

I chose to stick with the printed papers that Betsy designed for this kit today rather than stamp out my own (though there are stamps to recreate nearly every element I used). The printed papers make projects look professional without taking forever to accomplish. There's a time and a place for taking one's time, but I'm on an express train to productivity today.

LizzieJones_FestiveFriday_MakeItMarketFairyTaleChristmasKit_MerryChristmasBox2

For the Merry Christmas box, I assembled the Matchbox base which acts as the foundation of the box (though if you don't have it, the kit comes with a PDF so you can print and cut your own). I die cut the cover and adhered it into place before adding Luxe Gold corners and a Pinefeather strap with Luxe Gold clasp. I also used the mini magnets to keep the box closed. You can see Betsy's assembly video HERE if you need a visual.

LizzieJones_FestiveFriday_MakeItMarketFairyTaleChristmasKit_MerryChristmasBox

I also die cut and glittered a Silver White Winters snowflake and strategically adhered that to the box before attaching a flying Santa die cut with foam tape. Isn't it fabulously festive?!

LizzieJones_FestiveFriday_MakeItMarketFairyTaleChristmasKit_GiftForYouBox2

I decided to add a mini shaker element to the second box. I followed the same assembly steps, but this time I die cut an opening in the front cover of the book. I used a small shaker bubble filled with a flying Santa scene and beads and snow from the Trimmings kit (which I'm afraid is no longer available).

LizzieJones_FestiveFriday_MakeItMarketFairyTaleChristmasKit_GiftForYouBox

You could always use seed beads and Buffalo snow to get a similar effect. I backed the shaker with one of the pre-printed tags in the paper collection to get that pretty night sky and scalloped border. I can't wait to give these in just a few weeks. Christmas is coming, friends! It'll be here before you know it!

Have a wonderful weekend and make sure to pick up one of Betsy's kits before they're gone for good!

Supplies:
Fairy Tale Gift Card Boxes

Wednesday, November 28, 2018

Simple To Spectacular: Painted Poinsettias

Welcome to this month's Papertrey Ink Simple To Spectacular feature! This month, Melissa, Lexi, and I are showcasing Painted Poinsettias, a beautiful floral perfect for this time of year. My holiday cards might be heading out in the post soon, but I am still in need of seasonal thank you cards for after the gift-giving season.


Today's Simple To Spectacular challenge seemed like the perfect opportunity to stock up on a handful of thank you notes. I gradually increased the layers of die cuts and texture to take a simple card and amp up the pattern and interest. This was a really fun challenge!

LizzieJones_PapertreyInk_SimpleToSpectacular_PaintedPoinsettias_SimpleThankYouForTheGiftCard

My Simple card uses a die cut Nesting Frames: Pierced Rectangles die to draw the focus toward the center of the card. I stamped the smaller of the two poinsettias directly on the card base along with the leaves from the set.

LizzieJones_PapertreyInk_SimpleToSpectacular_PaintedPoinsettias_SimpleThankYouForTheGiftCard2

Then, I stamped the sentiment onto the card front. The "thank you" is from Penned Elegance and the "for the gift" is from the Painted Poinsettias set. I adhered the front panel to a Sweet Blush card base, so there's a bit of contrast between the front and inside of the card.

LizzieJones_PapertreyInk_SimpleToSpectacular_PaintedPoinsettias_SimpleThankYouForTheGiftCard3

Then, I stamped and die cut the large flower and adhered it to the front of the card with foam tape. This single bit of dimension gives the simplest design a little bit of interest while still keeping things nice and clean.

LizzieJones_PapertreyInk_SimpleToSpectacular_PaintedPoinsettias_IntermediateThankYouForTheGiftCard

On the Intermediate card, I chose a more substantial frame to draw your eye in toward the center of the card. This time, I layered two Pierced Feature Frames die cuts. Foam tape would have been too bulky, but the two layers of cardstock are just right.

LizzieJones_PapertreyInk_SimpleToSpectacular_PaintedPoinsettias_IntermediateThankYouForTheGiftCard2

I stamped my sentiment before adhering the front panel to a Sweet Blush card base and adhering the frame into place. Then, I stamped and die cut both the leaves and flowers from Painted Poinsettias set and arranged them along the frame.

LizzieJones_PapertreyInk_SimpleToSpectacular_PaintedPoinsettias_IntermediateThankYouForTheGiftCard3

I used a mix of flat and foam adhesives to add a nice variety of dimension. I love the fresh pink and green color palette against all that white!

LizzieJones_PapertreyInk_SimpleToSpectacular_PaintedPoinsettias_SpectacularThankYouForTheGiftCard

To amp things up on the Spectacular version, I layered the frames on a Scallop Stackers: Medium die cut. But before I did that, I very lightly sponged on some polka dots using Aqua Mist ink and the Stencil Basics: Dots stencil and stamped my greeting.

LizzieJones_PapertreyInk_SimpleToSpectacular_PaintedPoinsettias_SpectacularThankYouForTheGiftCard2

I adhered that whole panel to a Sweet Blush card base using foam tape. Then I used die cut flowers and leaves to embellish the frame.

LizzieJones_PapertreyInk_SimpleToSpectacular_PaintedPoinsettias_SpectacularThankYouForTheGiftCard3

This time though, I die cut the flower centers and glammed them up with a bit of clear glitter. The added sparkle is the perfect touch of holiday glitz for my seasonal thank yous.

LizzieJones_PapertreyInk_SimpleToSpectacular_PaintedPoinsettias_ThankYouForTheGiftCardTrio

Thank you so much for joining me today! I hope you've enjoyed this month's Simple To Spectacular and I'll see you again in a couple of days for Festive Friday. Have a good one!

Supplies:
Poinsettia Thank You Card Trio

Tuesday, November 27, 2018

Transformation Tuesday

Good morning, friends, and welcome to another Papertrey Ink Transformation Tuesday feature! This time of year I always seem to need one last card for someone I forgot to put on my mailing list.

TRANSTUES_LIZZIE_112720182

So for today, I've taken one of my favorite clean and simple Thanksgiving cards and switched things up a bit to create a winter holiday version that can work for anyone, regardless of how they celebrate. Not only is this design quick and simple to put together, but it's versatile enough to cover anyone we know. Now that's what I call a win!

LizzieJones_PapertreyInk_August2018_FrameItOut_SentimentStaples_HappyThanksgivingCard

You may remember the original card I created back in August. I loved how simple this design was and thought it would translate nicely to a wintery design.

LizzieJones_TransformationTuesday_SimpleSeason'sGreetingsCard

Here's my new card. I kept things very similar, using the Frame It Out: Many Blessings stamp set as a foundation, but I did switch out the stamped Forest Floor: Autumn frame for a Forest Floor: Winter version.

LizzieJones_TransformationTuesday_SimpleSeason'sGreetingsCard3

I also cooled down my color palette, opting for crisp true white and Soft Stone instead of Rustic White and Kraft. My embossing this time around was silver rather than the original gold which added to the cooler feel. And I chose another Sentiment Staples greeting, though this time I went for the Season's Greetings edition over its Thanksgiving counterpart.

LizzieJones_TransformationTuesday_SimpleSeason'sGreetingsCard2

Isn't it fantastic how easily we can make a few choice changes and end up with a completely different creation? That's one of the most fun things about this craft of ours, friends!

Thank you so much for joining me today. I'll be back tomorrow with a Simple To Spectacular feature that you'll definitely want to catch, so I'll see you then. Have a wonderful Tuesday!

Supplies:
Season's Greetings Card

Friday, November 23, 2018

Festive Friday - Plaid Treat Tags

Festive Friday Banner

Hello, friends, and welcome to another Festive Friday! I bet you thought I forgot, didn't you? I didn't. I just had family fun happening and since that's the most important thing during the holiday season I decided to give myself a break and post a little later than normal. I hope you've all enjoyed similar happy distractions in the past couple of days.

I wanted to share a quick set of tags that I made to dress up the packages of sweet treats I'm so fond of giving during the holiday season. I love to bake and everyone from my postman to my veterinarian's office gets a little box of edible joy this time of year.

LizzieJones_FestiveFriday_PlaidTags

I actually made these tags all at once. I used the Minute To Make: Holiday Tags die and with that die you get three tags wired together. I simply masked off one side of a panel of white cardstock and stamped the plaid for all three tags (I used the Plaid Builder and Background Basics: Super Stripes sets). Then, I die cut them all at once. It was super easy and fast.

LizzieJones_FestiveFriday_PlaidTags3

Next, I stamped the tags with the "To:" and "From:" using my Gift Card Cozy Sentiments set and tied on a big of teal baker's twine.

LizzieJones_FestiveFriday_PlaidTags2

Then, I stamped the greeting from Sweet Holiday Wishes onto Green Parakeet cardstock and die cut it using a Skinny Mini Banners die. I adhered those to the tags with foam tape and called it good.

I'm so looking forward to doing a few rounds of baking for this year. I go all out and it's so much fun! I think these tags will dress up the packages nicely, don't you?

Thank you so much for joining me! Have a wonderful weekend and I'll see you again very soon!

Supplies:
Plaid Treat Tags

Thursday, November 22, 2018

Throwback Thursday: Polka Dot Parade #9

Good morning, friends, and welcome to another Throwback Thursday feature with Papertrey Ink! Happy Thanksgiving to those of you in the United States and Happy Just Because to those of you joining me from elsewhere. Dawn, Laurie, and I are showcasing Polka Dot Parade #9 today. This week's challenge was a super fun one, for sure! There's something so charming and sweet about the Christmas tree from Polka Dot Parade #9. It's also a great size for both cards and tags alike, so you really can't go wrong. I paired it with some more recent products to give it a refresh and I'm just tickled at how it turned out!

The tree in this set incorporates a lot of pattern, so I went the texture route to give my frames and layers loads of interest.

LizzieJones_PapertreyInk_ThrowbackThursday_PolkaDotParade9_MerryChristmasCard

I began by stamping my tree parts. I used a blending sponge and a stamping platform to add depth to each layer using Simply Chartreuse and Ripe Avocado inks. I stamped the star in Bright Buttercup and a second generation (meaning I stamped off once before stamping on my die cut) Dark Chocolate trunk to round out the tree image.

LizzieJones_PapertreyInk_ThrowbackThursday_PolkaDotParade9_MerryChristmasCard2

Next, I created the frame I wanted to use to draw the eye in toward my tree. I began by impressing the Cover Plate: Center Stage into a piece of Pure Poppy cardstock using and impression plate sandwich and the embossing pad kit. Then, I die cut it with a Nesting Basics: Rectangle die and the oval window from my Folded Pocket Tag Die to create the frame shape. Then, I went back and cut in the pierced detail using my Nesting Frames: Pierced Rectangles Die. I layered that over a Scallop Stackers: Large die cut that I sponged with a bit of Aqua Mist ink and stamped with some Winter Window flurries. I also added an Aqua Mist grounding oval from In The Shadows that I covered with glitter for some sparkle.

LizzieJones_PapertreyInk_ThrowbackThursday_PolkaDotParade9_MerryChristmasCard3

I mounted that central piece to an Aqua Mist card front with foam tape before adhering my tree in the center of the oval. I overlapped the layers of the tree ever so slightly to give it a subtle tiered look. I glittered the star and added that to the top of the tree. Then, I stamped and die cut the Penned Elegance: Christmas greeting and adhered it above the tree. I also stamped the sentiment from Polka Dot Parade #9 and die cut it with one of the new Skinny Mini Banners Dies before adhering it in place. I'm so happy with how this turned out! That little tree is just adorable!

Thank you so much for joining me today. I hope you have a safe and happy holiday weekend. Don't go getting in any crazy Black Friday brawls and I'll see you again soon!

Supplies:
Merry Christmas Card

Friday, November 16, 2018

Festive Friday - Heather Nichols Sendoff Edition

Festive Friday Banner

Happy Friday, friends! It's Festive Friday and this week I'm going to do something a little bit special. If you're a Papertrey Ink fan, you've probably already heard the news that Heather Nichols has stepped down from the team and is moving on. This news made me just as sad as it made all of you. I started with Papertrey as a customer and Heather's rustic, printmaker style always spoke to me. When she began illustrating for the company, I was super excited and started buying her sets as soon as they debuted.

LizzieJones_FestiveFriday_RusticBranches_GiftForYouTags

That brings us to today's project. I dug into my sets and pulled out a long-time favorite that just so happens to be Heather's first set, Rustic Branches (I'm sorry for using a retired set, but this is a special occasion). I pulled out the Tag Sale #7 die and my Gift Card Cozy Sentiments set to round out these tags.

LizzieJones_FestiveFriday_RusticBranches_GiftForYouTags2

I began by die cutting three tags from Rustic White and three from Classic Kraft cardstock. Then, I stamped the Rustic Branches wreath onto the Rustic White tags using Pinefeather and Ocean Tides inks. I added the berries and the greeting from Gift Card Cozy Sentiments with Pure Poppy and then embellished the berries with Nuvo glitter drops.

LizzieJones_FestiveFriday_RusticBranches_GiftForYouTags3

I set those aside to dry while I heat embossed the "To:/From:" from Gift Card Cozy Sentiments onto the Kraft tags. Once the berries were dry, I adhered the two tags together, rough side in, and tied the top hole with a bit of Rustic Jute Button Twine. I also added button twine bows to the wreaths.

I've always loved this set and I'm having a hard time imagining not having Heather around each month. I'm going to miss her so much!

Thank you so much for joining me for this week's Festive Friday. Happy crafting, friends!

Supplies:
Rustic Branches Tags

Wednesday, November 14, 2018

Introducing Expressions Of Empathy and Corner Adorner: November

Good morning, friends, and welcome back for Day 5 of the Papertrey Ink November countdown! Today the team is featuring my new Expressions Of Empathy sentiment set and Corner Adorner: November mini.

When someone we love is battling a long-term illness or personal challenge, we need a message that goes a little deeper. Expressions Of Empathy is ideal for those unfortunate situations in which a simple "feel better soon" just won't do. I paired Expressions Of Empathy with my new Home To Roost set to create today's card.

LizzieJones_PapertreyInk_November2018_ExpressionsOfEmpathy_HomeToRoost_You'reNotAloneCard

I began by sponging a bit of Harvest Gold ink onto a white card front. I stamped the largest flare from Corner Adorner: November four times to create a round design and then added the Expressions Of Empathy greeting and branches from Floral Fantasy: Christmas. Next, I used a Nesting Frames: Rectangle to add the pierced detail to the layer and adhered the card front to an Aqua Mist card base.

LizzieJones_PapertreyInk_November2018_ExpressionsOfEmpathy_HomeToRoost_You'reNotAloneCard2

Then, I stamped and die cut the birdhouse from Home To Roost. I paper pieced the body of the birdhouse and stamped the roof and base using the coordinating images. I stamped one bird on a full birdhouse and layered it with the paper pieced version. I stamped and die cut a second bird and adhered those pieces to the front of the card.

LizzieJones_PapertreyInk_November2018_ExpressionsOfEmpathy_HomeToRoost_You'reNotAloneCard3

On the inside, I die cut a second layer of white cardstock and added the pierced frame using a Nesting Frame die. Then, I stamped the greeting from Expressions Of Empathy and birds from Home To Roost. Bringing a little bit of the outside in ties the whole card together.

Thank you so much for joining me today! Make sure to pop in on Betsy, Dawn, Heather, KellyLaurie, Melissa B, Melissa P, Michelle, and Stephanie to see even more of this month's release. Have a wonderful day!

Supplies:
You're Not Alone Card

Tuesday, November 13, 2018

Introducing Home To Roost, Shape Shifters: Circle 4, and Mix Ups Pocket Tags

Good morning, friends, and welcome back to Day 4 of the Papertrey Ink November countdown. Today the team is showcasing my new Home To Roost stamp set along with Betsy's Shape Shifters: Circle 4 and Dawn's Mix Ups Pocket Tags dies. There's so much goodness to discover, so let's get right to it!

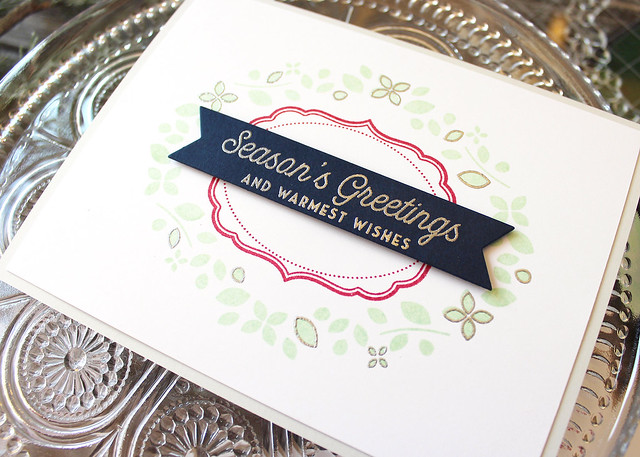
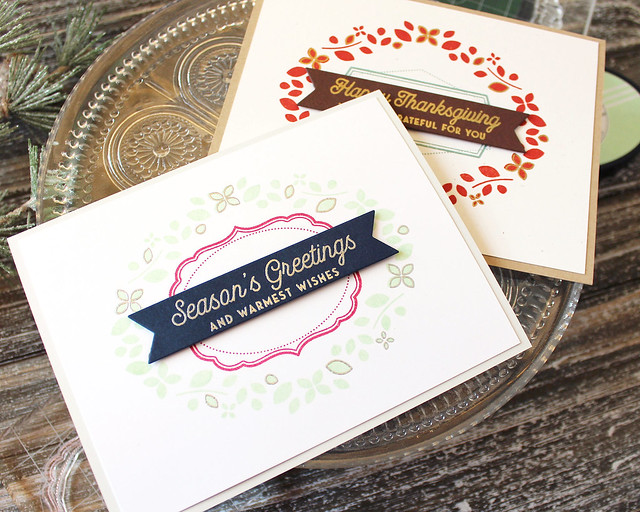
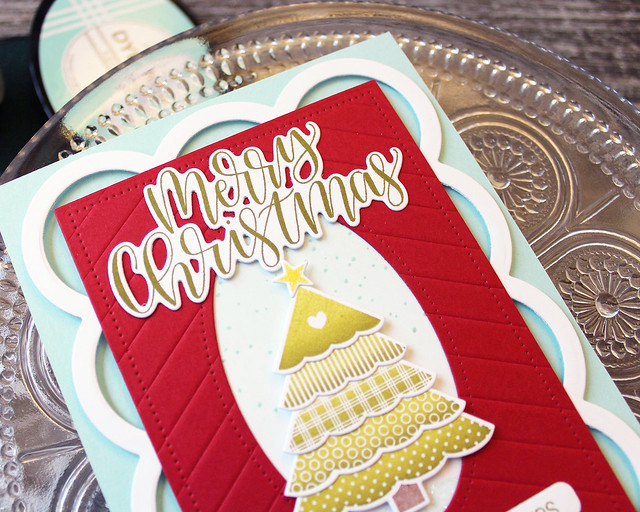
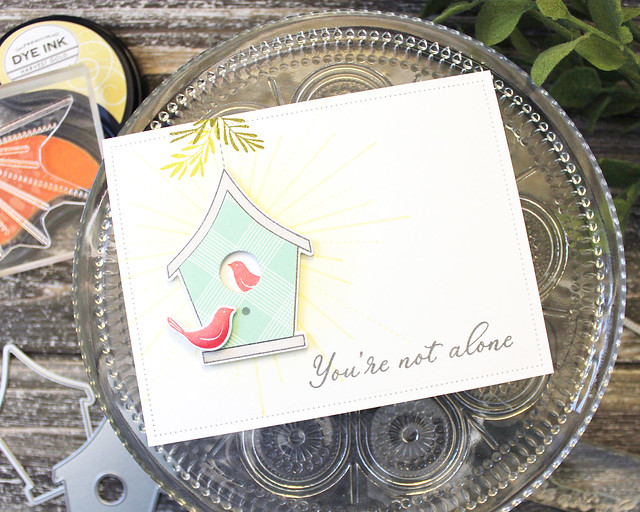
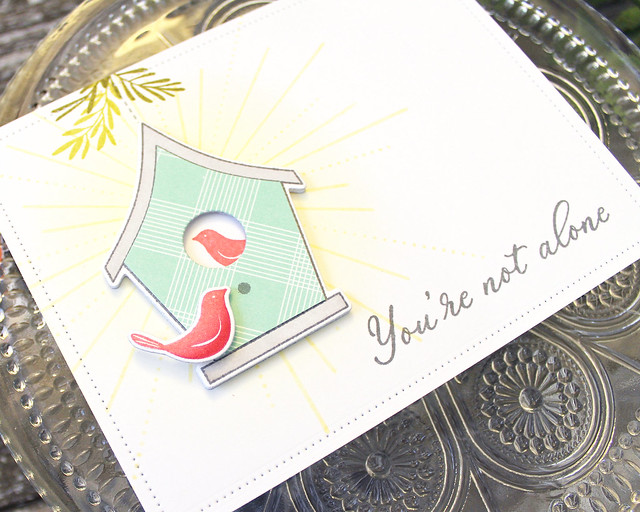
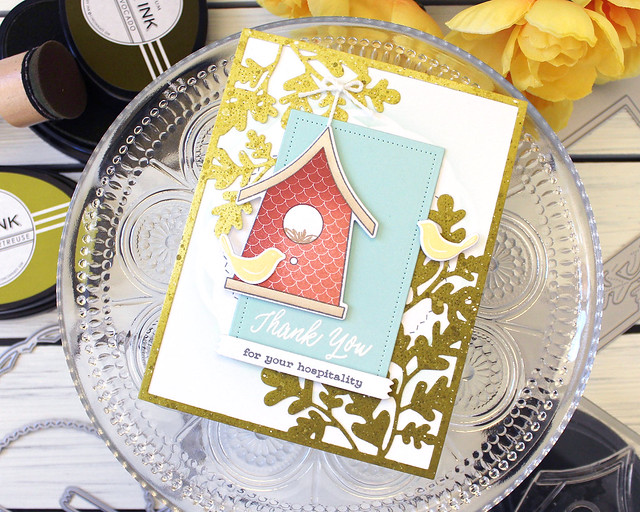
My first card today pairs Betsy's newest Shape Shifters with my Home To Roost set.

LizzieJones_PapertreyInk_November2018_HomeToRoost_ShapeShiftersCircle4_HospitalityThankYouCard

I began by sponging Spring Moss and Ripe Avocado inks onto a piece of white cardstock. I splattered with reinker and Copic opaque white pigment for texture and then die cut it with the Bold Borders: Foliage Die. Next, I cut a Shape Shifters: Circle 4 shape from vellum and sponged around the perimeter with Aqua Mist ink onto a white card front. I used the stitched border to cut a decorative circle into that panel before adhering it to an Aqua Mist card base.

LizzieJones_PapertreyInk_November2018_HomeToRoost_ShapeShiftersCircle4_HospitalityThankYouCard2

I adhered the Bold Borders: Foliage frame to the card front. Then, I die cut a central panel using my Nesting Basics: Rectangles die and added the pierced detail with a Nesting Frames: Rectangle. I embossed the sentiment before adhering that panel in the center of the Bold Borders shape.

LizzieJones_PapertreyInk_November2018_HomeToRoost_ShapeShiftersCircle4_HospitalityThankYouCard3

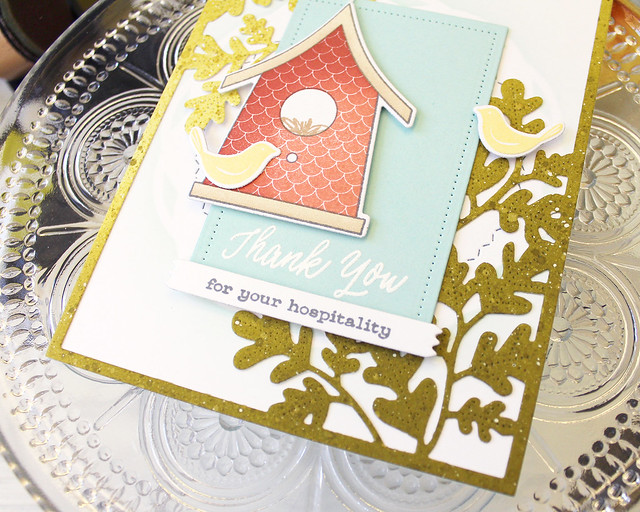
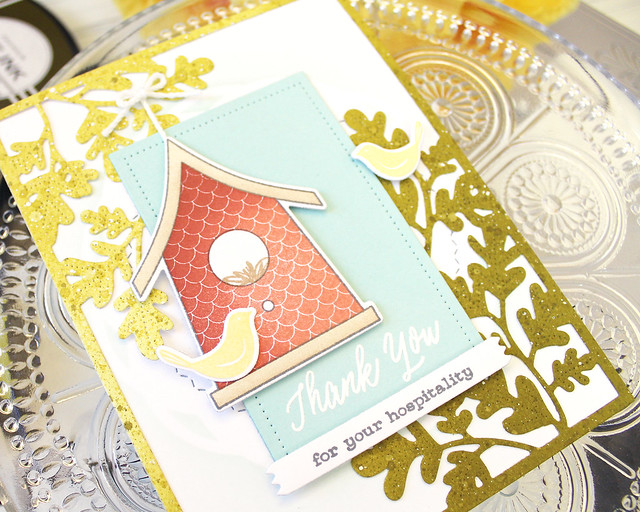
Next, I stamped and die cut the birdhouse from Home To Roost. I used Melon Berry and Americana inks on the front of the house and Fine Linen and Classic Kraft on the roof and base. Then, I stamped the smaller companion sentiment onto a Skinny Mini Banner and adhered it to the card with foam tape. I also adhered the birdhouse to the front of the card with foam tape, layering it with a bit of crochet thread. I added two Harvest Gold birds to finish it off. This set includes greetings for new home, baby, and more!

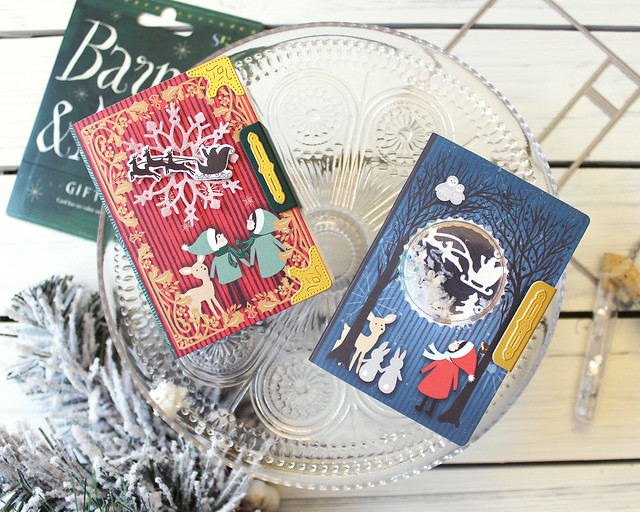
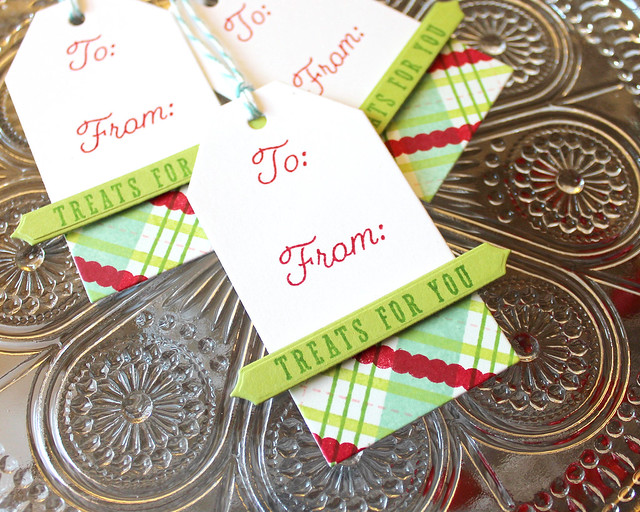
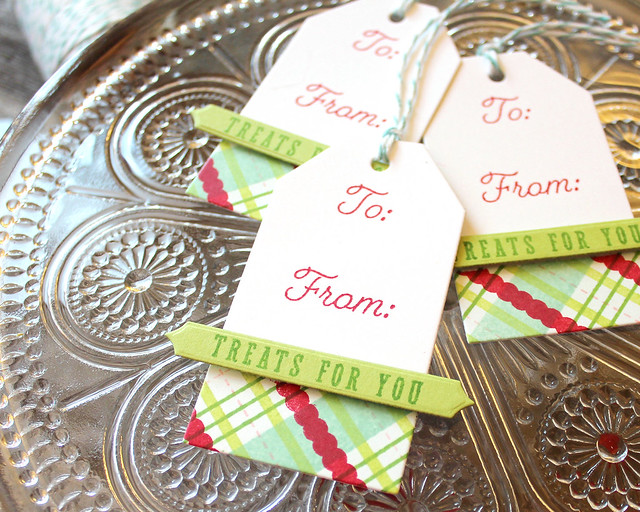
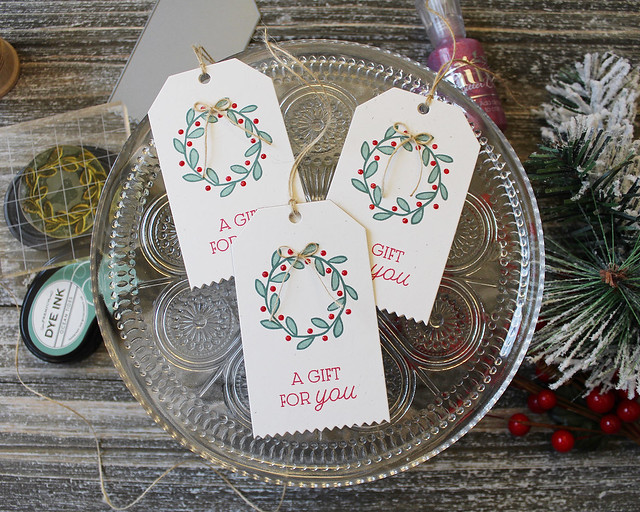
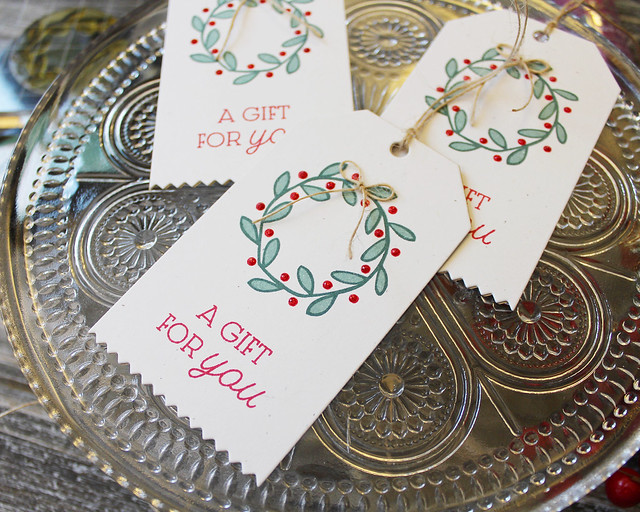
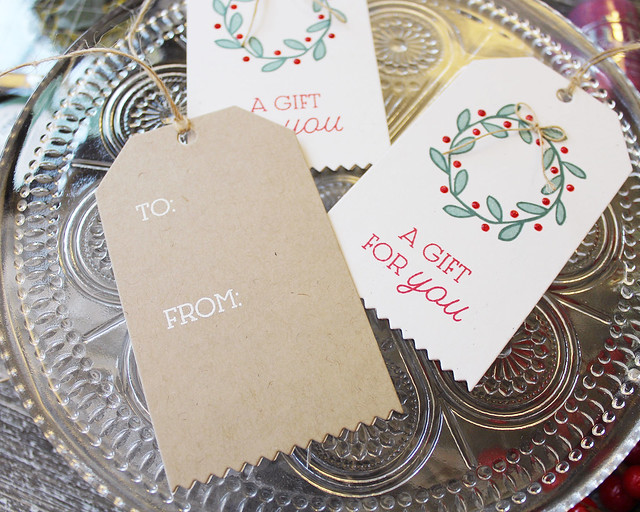
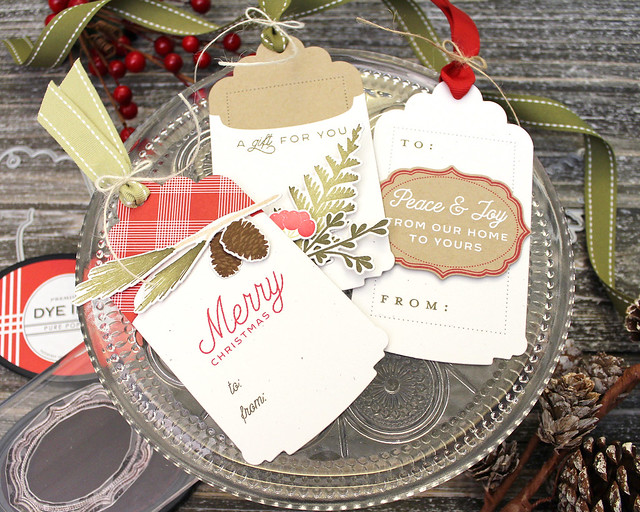
My next project for today is a set of three tags made with Dawn's new Mix Ups Pocket Tags. I love tags that give you options to get several styles from one collection of dies. This set is definitely a keeper!

LizzieJones_PapertreyInk_November2018_ForestFloorWinter_MixUpsPocketTags_ChristmasTagTrio

I wanted to create a few variations, so I made one pocket tag, one basic tag, and one tag with a patterned topper.

LizzieJones_PapertreyInk_November2018_ForestFloorWinter_MixUpsPocketTags_AGiftForYouTag

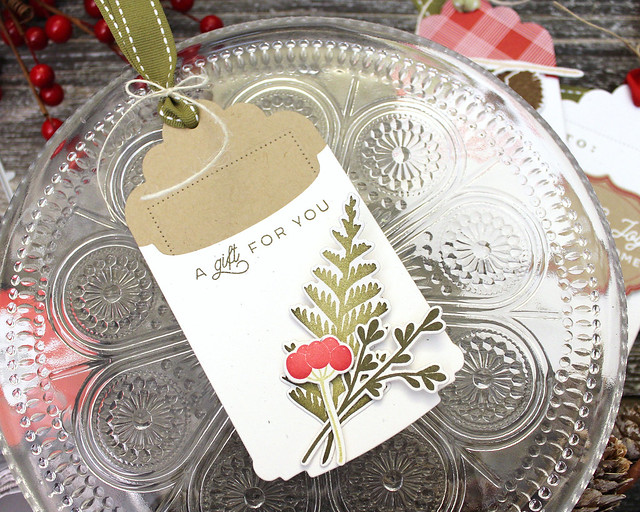
For my pocket tag, I cut one tag from Classic Kraft and one from Rustic White. I used a Nesting Frames: Rectangles shape to add the pierced detail to the Kraft tag. Then, I used one of the decorative border dies to cut the top off the Rustic White tag. I stamped a greeting from Christmas Cuts Sentiments along the edge of the pocket and adhered it into place. Then, I embellished the pocket with foliage from Forest Floor: Winter. A little Ripe Avocado saddle stitched ribbon and Rustic Cream Button Twine finished things off nicely.

LizzieJones_PapertreyInk_November2018_ForestFloorWinter_MixUpsPocketTags_MerryChristmasTag

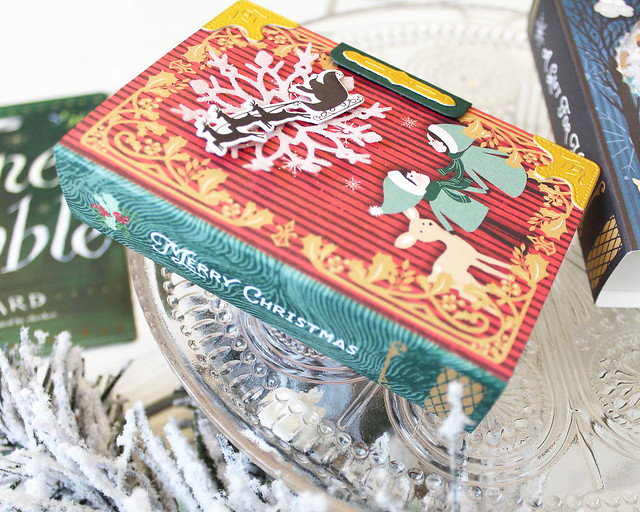
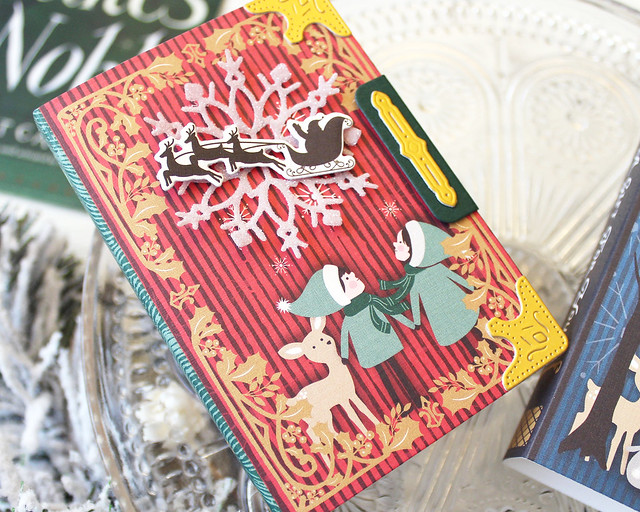
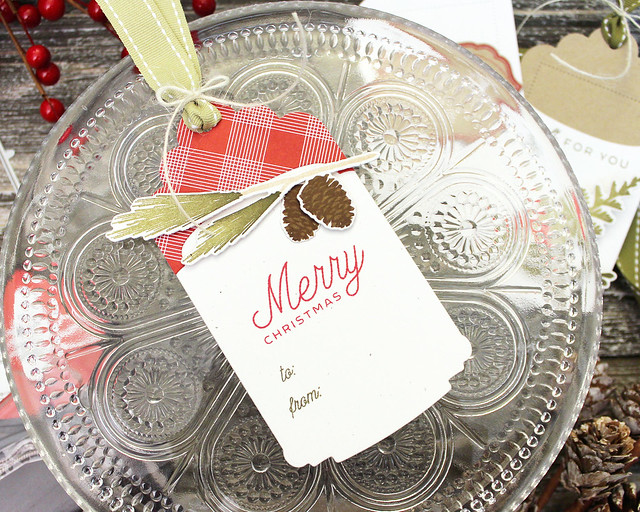
For the patterned paper topped tag, I cut a Rustic White tag and a Bitty Big: Pure Poppy tag. I stamped sentiments from Christmas Cuts Sentiments onto the Rustic White tag before using the same border die to cut the topper. I adhered the patterned topper to the tag and added a Forest Floor: Winter branch with foam tape. This time I used Spring Moss saddle stitched ribbon and the same Rustic Cream Button Twine to finish it off.

LizzieJones_PapertreyInk_November2018_ForestFloorWinter_MixUpsPocketTags_Peace&JoyTag

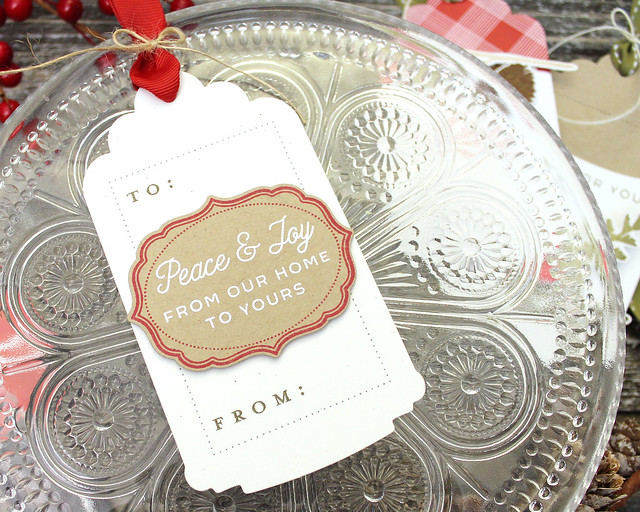
My final tag for today is the basic cut tag. I cut this one from Rustic White and used the Nesting Frames: Rectangle to add the pierced border. I stamped the "To:" and "From:" from Keep It Simple: To & From onto the tag and then added a Forest Floor: Winter frame stamped with a Christmas Cuts Sentiments greeting. A piece of Pure Poppy grosgrain ribbon tied with Rustic Jute Button Twine was the perfect finishing touch.

LizzieJones_PapertreyInk_November2018_ForestFloorWinter_MixUpsPocketTags_ChristmasTagTrio2

I love that these tags coordinate, but aren't super matchy-matchy. And this is just one of the tags in the set! There are two other tags and two other border dies! That's, like, dozens of possibilities!

Thank you so much for joining me today! I'll be back tomorrow with a couple of additional projects, but in the meantime make sure to pop in on BetsyDawnHeatherLaurieMelissa BMelissa PMichelle, and Stephanie. I'll see you in the morning!
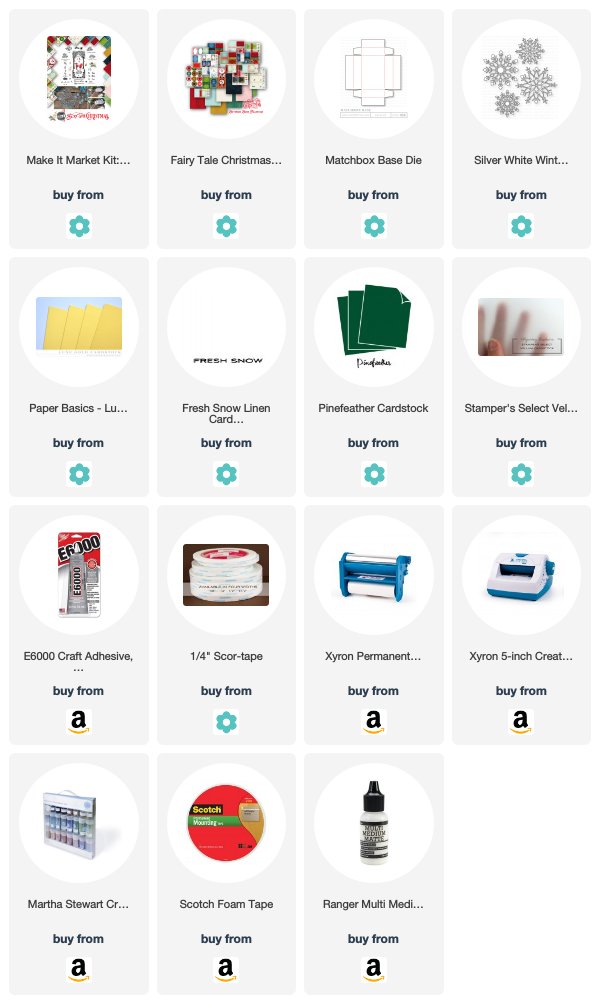
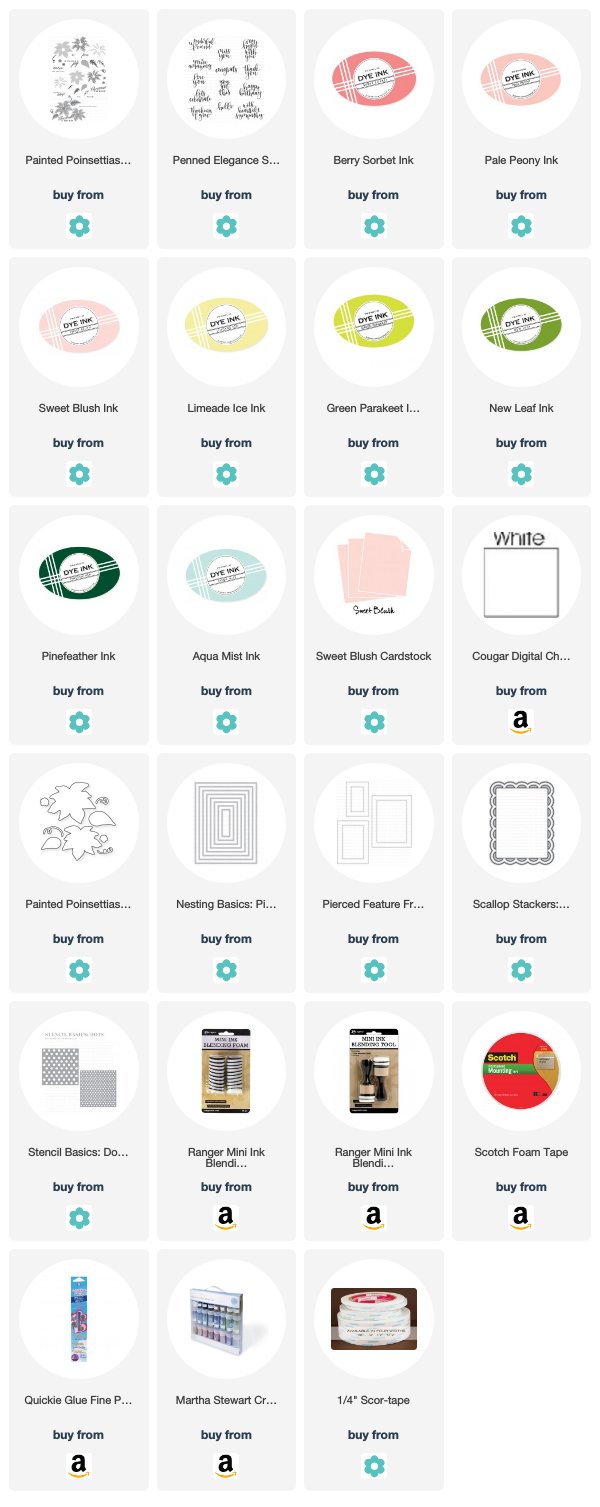
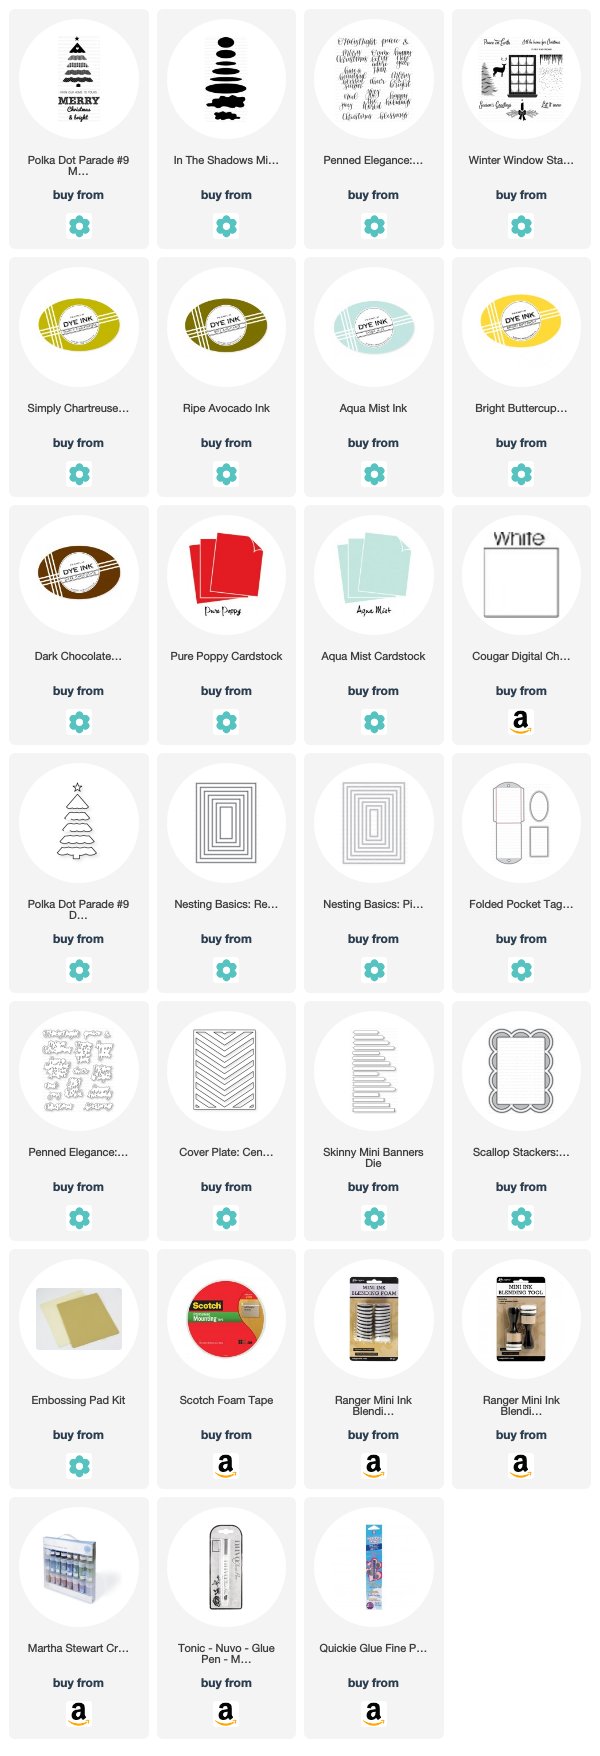
Supplies:
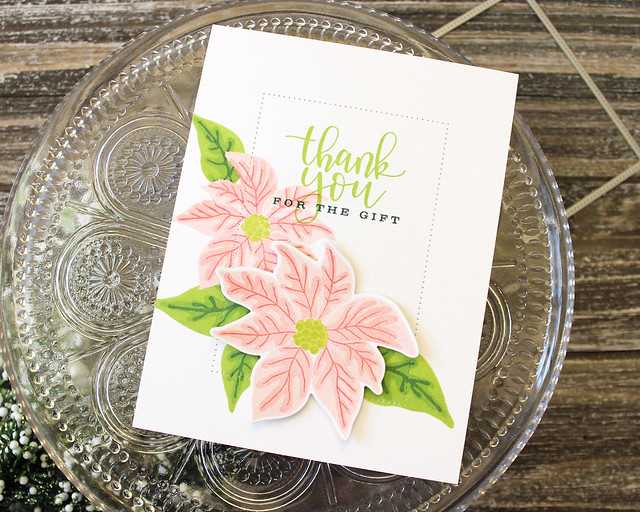
Hospitality Thank You Card


Christmas Tag Trio