Monday, March 16, 2015

My Very First Make It Monday!

Good morning, all! Are you all tired of me yet? I sure hope not, because I'm sharing my very first Make It Monday for Papertrey Ink this week! The technique is called Confetti Cluster Stamping and it's a great way to use those tiny accessory images you often have in stamp sets.


Check out the video below for the how-to and supply info and then head over to Nichole Heady's blog to link up your own project!


Remember, the participants are entered into a drawing to win a $25 Papertrey Ink gift certificate each week.


I hope you'll play along! I can't wait to see your projects!


Sunday, March 15, 2015

More Moments Inked


Good morning, friends! I'm back for one last day during this, the March Papertrey Ink new release countdown. Today the Moments Inked Team is sharing projects featuring the handful of fabulous new stamps and dies that Nichole Heady has designed to help you get the most out of your Moments Inked planner. These new products include the Divided stamps and dies, the Pocket Die, and the Listed stamps and Tabbed List die, and the Boxed dies.

I tend to collect little bits of paper, so this month's new Moments Inked products are right up my alley. I now have pretty, labeled pockets to keep all of my receipts and clippings organized in one place. It feels so good to get everything coordinated!

I chose to create pockets for receipts, coupons, and recipes because those are categories that encompass most of the little bits that I tend to find floating around my purse, car, laptop bag, etc. Having one place to corral these items will be invaluable for sure.


I have lots of business receipts that need to be managed, so this pocket is going to get its share of use. I've gotten better at keeping track of my receipts, but there is always room for improvement. Now I'll know exactly where they are when Sean, my favorite CFO, asks me to hand them over. No sweat, Honey Bunny!


I created pockets using the new Pocket Die and the full-page die from the Divided Die. I used Berry Sorbet, Orange Zest, and Aqua Mist patterned paper for the pocket pieces and Fresh Snow Linen cardstock for the page parts. I added tabs to the pockets using the Divided Die and labeled them with circles of White Adhesive Sheets that I'd stamped with headings from the Divided mini set. I put the pockets all in the front of my planner and made the tabs double-sided so I could easily find which pocket I needed no matter which side of them I was seeing at any given time. 


Here's the Coupon pocket. I decided to create a handy shopping list to go along with this pocket. I die cut it from Fresh Snow Linen cardstock and stamped it with the lines from the new Listed set. The heading was stamped on a die cut label of White Adhesive Sheet paper.

This way I can write out my list and then check my coupon file for relevant coupons. When I have a coupon for an item I can mark it with a little star so I remember to use the coupon when I'm at the store. And this way I only buy what we need. I have a tendency to go "off list" if I have the whole file with me. It feels like I'm saving money even though I'm really just buying things we don't need. This is how a person ends up with a year's worth of fabric softener. Not that I have experience with such things. Heh.


My plan is to remove the list and the clipped coupons as I get to the store, so I don't have to carry around the whole planner or the whole file while I'm shopping. Then, after I've checked out, I have a handy place to put the register coupons (because there seem to always be register coupons) for safe keeping until I get home and can put them into my file.


I'm actually really excited about the Recipe pocket. This is a great place to store recipes that I find in the newspaper or magazines. We're a family riddled with food sensitivities, allergies, and restrictions, so I'm always on the lookout for new recipes to add to our regular rotation (even I get bored with black beans and sweet potatoes after awhile). I created some custom recipe cards to use on those occasions when I find a recipe that I can't clip (not my magazine, for example).


I cut these 3 1/2" x 5 1/2" cards from the Fresh Snow Linen cardstock and stamped them with images from Listed, Posted and Journal Accessories. It turns out that the lines in the new Listed set have the same spacing as the lines in Journal Accessories, so whipping up these cards was super easy! I color coded the labels so I know at a glance what sort of recipe is on each card. Simply Chartreuse cards are entrees, Summer Sunrise cards are side dishes, and Berry Sorbet cards are Sweets & Desserts (that cake is awesome, by the way). The great thing about this system is that it's open enough to include more categories with a simple addition of colors.

ETA: Here's the link to the cake recipe. I add the vegan chocolate chips, but they're not in the original. I did it once and now they're in every time. I think they make the cake richer and a little bit fudgy. They're not even that hard to track down anymore. You can even find them at Target!


I'm can't wait to use these new systems in the real world. The coolest thing about the Moments Inked products is that they're so versatile they can offer different functions for different people, depending how you use them. I can't wait to see how you all use these new tools!

That's all for me this countdown, but I'm sure we'll see each other again soon. Make sure to check in with the Nichole for a full introduction of these new products and then check in with Ashley, Audrey, Laurie W.Stephanie, Suzanne, and Tara for more inspiration. The rest of the Papertrey Ink team is also sharing their release wrap-up post with you today, so make sure to check in with Amy, Ashley, Betsy, Danielle, Dawn, Heather, LauraLaurie, Maile, and Melissa  as they share the rest of their March release projects. Take care, everybody!

Recipes:
Receipt Pocket
Stamps: Moments Inked: Divided (available March 15th) - Papertrey Ink
Cardstock: Fresh Snow Linen, Aqua Mist, Berry Sorbet Polka Dot Paper, White Adhesive Sheet - Papertrey Ink
Ink: Orange Zest - Papertrey Ink
Other: Moments Inked: Divided Die (available March 15th), Moments Inked: Pocket Die (available March 15th) - Papertrey Ink; Scor Tape

Coupon Pocket
Stamps: Moments Inked: Divided (available March 15th), Moments Inked: Listed (available March 15th), Moments Inked: Planner Banners - Papertrey Ink
Cardstock: Fresh Snow Linen, Orange Zest Stripe Paper, Berry Sorbet, White Adhesive Sheet - Papertrey Ink
Ink: Aqua Mist, Orange Zest, Berry Sorbet, Smokey Shadow - Papertrey Ink;
Other: Moments Inked: Divided Die (available March 15th), Moments Inked: Pocket Die (available March 15th), Moments Inked: Tabbed List Die (available March 15th) - Papertrey Ink; Scor Tape

Recipes Pocket
Stamps: Moments Inked: Divided (available March 15th), Moments Inked: Listed (available March 15th), Moments Inked: Posted, Journal Accessories - Papertrey Ink
Cardstock: Fresh Snow Linen, Aqua Mist Bitty Dot Paper, Orange Zest, White Adhesive Sheet - Papertrey Ink
Ink: Simply Chartreuse, Aqua Mist, Summer Sunrise, Berry Sorbet, Smokey Shadow - Papertrey Ink
Other: Moments Inked: Divided Die (available March 15th), Moments Inked: Pocket Die (available March 15th) - Papertrey Ink; Scor Tape

Saturday, March 14, 2015

March Papertrey Ink Countdown - Day 5

Good morning, friends! Welcome back for Day 5 of the Papertrey Ink March new release countdown! I have a few final projects to share with you today featuring the Retro Style Graduation, Retro Style Birthday Sentiments, and Text Block: You Did It die. Let's get to it, shall we?

My first project today is a birthday card that highlights the year the recipient was born. This is particularly great for milestone birthdays.


I began by die cutting the sign from Aqua Mist cardstock and stamping it with Tropical Teal and white heat embossing. Then, I traced the arrow with a glue pen sprinkled on a bit of glitter. I then die cut the rectangle from white cardstock and stamped it with the pinstripe using Lemon Tart ink and the winged circle with Summer Sunrise. I stamped a 3/4" white circle with the birthday sentiment using Hibiscus Burst ink and mounted it in the center of the winged image with foam tape. The "it's your" shape was cut from Tropical Teal cardstock and heat embossed with white powder. I mounted the rectangle to the larger sign shape with foam tape and added the sentiment shape with flat adhesive.


Next, I die cut the Skyscapes sun burst shape from Hibiscus Burst cardstock and mounted it to a Xyroned white scalloped layer. I sprinkled glitter onto the exposed adhesive to make the negative space shimmer and added my sign with foam tape. I mounted that whole focal piece to a card front layered with polka dotted Summer Sunrise cardstock. It's nice and bright and cheerful. After all, you're only as old as you feel and sunshine and perky colors are sure to add a little skip to anyone's day.

This next one is a graduation card using the multi-directional arrow from Retro Style Graduation.


I began by stamping and trimming the arrows image from white cardstock. I stamped the same image onto polka dotted Aqua Mist patterned paper and mounted the arrows into place with foam tape. Then, I die cut a New Leaf hill using the In The Meadow dies and stamped it with Background Basics: Woodgrain for some grassy texture. I then heat embossed the sentiment with white detail powder and mounted the hill to the Aqua Mist piece with foam tape.


I textured a piece of white cardstock with the Sunshine impression plate and adhered it to an Aqua Mist card base. I tied waxed white twine around the base and mounted my focal point with foam tape. Simple. I like simple.

Speaking of simple...it doesn't get much simpler than this last card, but I love it!


I began by stamping a white card base with rainbow stripes using the Background Basics: Super Stripes set. Then I die cut the Text Block: You Did It shape from a piece of Luxe Gold Adhesive sheet that I'd stuck down to a piece of white cardstock (for stability).

Rainbow Hooray Close Up

I mounted the Text Block shape to the card front with foam tape. So easy, but the metallic gold against the rainbow stripes makes me very happy.

Alright, friends. That's all for me today. It's another group post day, so make sure to check in with Nichole, AmyAshleyBetsy, Danielle, Dawn, Heather, Laura, Laurie, Maile, and Melissa for even more inspiration. I'll see you again soon!

Recipes:
It's Your Birthday Card
Stamps: Retro Style Graduation (available March 15th), Retro Style Birthday Sentiments (available March 15th), Polka Dot Basics III - Papertrey Ink
Cardstock: Hibiscus Birst, Tropical Teal, Aqua Mist, Summer Sunrise - Papertrey Ink; white
Ink: Tropical Teal, Hibiscus Burst, Summer Sunrise, Lemon Tart - Papertrey Ink; VersaMark - Tsukineko
Other: Retro Style Die Collection (available March 15th), Scene It Basic Backer Die, Scene It: Skyscapes Die Collection - Papertrey Ink; Foam Tape - Scotch; White Embossing Powder - Filigree; Fine Crystal Glitter - Martha Stewart Crafts; Xyron

Wherever You Go Card
Stamps: Retro Style Graduation (available March 15th), Background Basics: Woodgrain - Papertrey Ink
Cardstock: Aqua Mist, Aqua Mist Bitty Dot Paper, New Leaf - Papertrey Ink; white
Ink: Berry Sorbet, Tropical Teal, Orange Zest, True Black, New Leaf - Papertrey Ink; VersaMark - Tsukineko
Other: Retro Style Die Collection (available March 15th), Sunshine Impression Plate, In The Meadow Die - Papertrey Ink; Foam Tape - Scotch; White Embossing Powder - Filigree; White Waxed Cord - May Arts

Rainbow Hooray Card
Stamps: Background Basics: Super Stripes - Papertrey Ink
Cardstock: Luxe Gold Adhesive Sheets - Papertrey Ink; white
Ink: Pure Poppy, Summer Sunrise, Harvest Gold, Simply Chartreuse, Blueberry Sky, Winter Wisteria - Papertrey Ink
Other: Text Block: You Did It Die (available March 15th) - Papertrey Ink; Foam Tape - Scotch

Friday, March 13, 2015

March Papertrey Ink Countdown - Day 4

Good morning, everyone! Welcome back to Day 4 of the Papertrey Ink March new release countdown. I have a few more projects for you today featuring the Retro Style stamps and dies, so let's get to it!

My first project is a graduation ensemble. Many of my projects this week have featured retro-inspired color schemes, so I went a little more "modern guy" with this one.


Do you ever get stuck on an idea and fuss with it until you can make it work? That's pretty much exactly what happened here.

I began by stamping the brick pattern using Terra Cotta Tile ink onto Canyon Clay cardstock. I trimmed that with a Tipped Tops die and textured the resulting pieces with the linen and canvas impression plate. I mounted the outer piece to a card front that I'd textured with the Sunrise Impressions 1 impression plate using foam tape. The inside piece was trimmed to fit on the front of a white pillow box.


Then, I created the signs using striped Spring Rain patterned paper and white and Enchanted Evening cardstocks. I stamped the white parts with the coordinating images using Simply Chartreuse and Harvest Gold inks. The numbers were added with Enchanted Evening ink and the sentiments were heat embossed on the Enchanted Evening bits with white detail powder.


I added a Terra Cotta Tile sentiment circle to the pillow box and assembled all of the pieces with a combination of flat and foam adhesives. I created tiny brackets with strips of Enchanted Evening cardstock and adhered the signs into place with foam tape. All-in-all I think a young fella would appreciate this ensemble...especially if there was a gift card for food, gas, or books inside that pillow box. Or, who am I kidding, cash. If you're heading off to college (or out into the real world after college) you appreciate the rare sensation of having a little mad money in your pocket. Not that I remember what that feels like or anything. Heh.

Ok! Next, I have some gift tags to share.


I started with Spring Rain striped paper cut at different angles. The color gives them continuity, but the angles keep them from feeling too similar. I mounted the patterned paper to white cardstock to give them a little heft, but that's maybe an unnecessary step. I heat embossed the poles onto the tags with white detail powder and then began building my signs.


On this one, I die cut the arrows from Limeade Ice, Winter Wisteria, and Tropical Teal cardstocks. I heat embossed the sentiments and added pattern with Bitty Background Blocks II. Next, I cut the "Happy" shape and stamped it with Royal Velvet ink. To finish, I simply attached the bits to the tag with foam tape and added a length of waxed white cord for tying. Easy!


Here, I cut the large sign shape from Winter Wisteria cardstock and stamped the neon arrow image using Royal Velvet ink. I die cut the bubble shape from Limeade Ice and stamped it with a Tropical Teal sentiment before sticking it in place with foam tape. Then, I die cut the rectangle from white cardstock and stamped it with Limeade Ice and Royal Velvet inks. I adhered it to the larger sign shape and added a the "Make" that I'd die cut from Tropical Teal and heat embossed with white powder. Instead of using all of the layers, you could stamp the outline image on the sign shape and use the bubble shapes or rectangle to add someone's name, age, year of birth...whatever you like!


Here's the last one! On this one, I die cut the large sign shape from Limeade Ice. The pinstripes were stamped in the same color and the sentiments were heat embossed with white detail powder. The arrow and rectangle were die cut from white cardstock and stamped with Tropical Teal and Winter Wisteria inks. I added the sentiment to the rectangle with Royal Velvet, but again, if you wanted to customize, this would be a great place to stamp or write someone's name. I die cut the "Happy" shape and stamped it with Royal Velvet before adhering it into place with foam tape. Such a fun way to dress up a package!

That's all I have today. Thank you for stopping in and I'll see you again tomorrow. In the meantime, there's another group post today, so  Nichole, Amy, Ashley,Betsy, Danielle, Dawn, Heather, Laura, Laurie, Maile, and Melissa all have projects to share that you won't want to miss. I'll see you soon!

Recipes:
Brick Wall Grad Ensemble
Stamps: Retro Style Graduation, Home Made - Papertrey Ink
Cardstock: Canyon Clay, Enchanted Evening, Spring Rain Stripe - Papertrey ink; white
Ink: Simply Chartreuse, Harvest Gold, Enchanted Evening, Terra Cotta Tile - Papertrey Ink; VersaMark - Tsukineko
Other: Retro Style Die Collection, Essential Pillow Box Die, Tipped Tops Die Collection, Sunrise Impressions 1 Impression Plate, Linen & Canvas Impression Plate - Papertrey Ink; 5/8" circle punch; White Embossing Powder - Filigree; Foam Tape - Scotch

Birthday Tag Trio
Stamps: Retro Style Graduation, Retro Style Birthday Sentiments, Bitty Background Blocks II, Background Basics: Super Stripe - Papertrey Ink
Cardstock: Limeade Ice, Winter Wisteria, Tropical Teal, Spring Rain Stripe - Papertrey Ink; white
Ink: Limeade Ice, Winter Wisteria, Tropical Teal, Royal Velvet - Papertrey Ink; VersaMark - Tsukineko
Other: Retro Style Die Collection, Tag Sale #10 - Papertrey Ink; White Embossing Powder - Filigree; Foam Tape - Scotch; Waxed Cord - May Arts

Thursday, March 12, 2015

March Papertrey Ink Countdown - Day 3

Good morning, everyone! Welcome back for Day 3 of the March Papertrey Ink new release countdown! I'm sharing a few additional projects featuring the Retro Style stamp sets and the Text Block: You Did It die, so let's get started!

Let's begin today with the Text Block project. This die is perfect for creating shaker cards, so that's what I did with it today.


I began by die cutting two Text Block shapes, one in Harvest Gold and one in white. I cut away the stars on the white shape and layered the two together. Then, I used a glue pen to add glitter to the Harvest Gold stars. I backed that piece with clear cardstock and foam tape to create a shaker box on a layer of vellum that I filled with sequins and chunky glitter.


I added strips of narrow Scor Tape to the back of the vellum under the shaker's frame and adhered it to a Hawaiian Shores card front. It's fairly straightforward, but it's so simple and pretty that I just love it!

My next project today is one I put together for my papa-in-law's birthday.


I started by die cutting the sign shape from Aqua Mist, the bubble layer from Lemon Tart, and the rectangle and polaroid shape from white cardstock. I stamped the bubble layer once with Harvest Gold and once with VersaMark before heat embossing with clear powder. The large sign shape was stamped with the Tropical Teal arrow and the bubble image was layered on with foam tape. Next, I stamped the winged circle onto the white rectangle with Pure Poppy ink and the lights were filled in with a yellow Copic Marker. I added the sentiment to the polaroid frame with True Black and tied that piece with a bit of yellow baker's twine. Then, I stamped a pole and clouds onto a scrap of Aqua Mist cardstock using Tropical Teal and Fresh Snow inks. I assembled all of those piece to a Pure Poppy card front that I'd stamped with the chevron pattern strip in Heather's new Noted set.


Next, I created the center of the winged circle feature. I stamped the sentiment circle onto a white 3/4" circle and added it to the sign with foam tape. Then, I created an epoxy dome using Heather's epoxy embellishments technique with a 3/4" circle of xyroned clear cardstock and a bottle of Glossy Accents. Once that embellishment was dry (12ish hours) I peeled off the adhesive backing and layered it over the sentiment circle. I love the dimension this technique gives!

Today's final project is another graduation card featuring the Retro Style stamps.


I began by heat embossing the signs and poles onto a Spring Rain card base using white detail powder. Then, I went back in and filled in the signs with watermark ink. I wanted a subtle tone-on-tone appearance that would let the central sign stand out. Then, I die cut the sign and several of the accessory shapes from white cardstock.


I stamped those shapes with the coordinating images using Harvest Gold, Hibiscus Burst, Limeade Ice, and New Leaf inks. I assembled the sign with a mix of flat and foam adhesives to give the sign dimension and embellished all of the light bulbs with a glue pen and clear glitter. This card has such a bright, preppy feel and that makes me smile!

That's all I have for you today, but it's a group post day, so Nichole, Amy, Ashley, BetsyDanielle, Dawn, Heather, Laura, Laurie, Maile, and Melissa all have projects to share that you won't want to miss. I'll see you again tomorrow!

Recipes:
Hooray Shaker Card
Cardstock: Hawaiian Shores, Harvest Gold, Sheer Basics Bitty Dot, Clear Cardstock - Papertrey Ink; white
Other: Text Block: You Did It Die (available March 15th) - Papertrey Ink; Foam Tape - Scotch; Marigold and Marshmallow Sequins - Pretty Pink Posh; Fine Crystal Glitter, Chunky Crystal Glitter - Martha Stewart Crafts; glue pen

Happy Birthday To You Card
Stamps: Retro Style Graduation (available March 15th), Retro Style Birthday Sentiments (available March 15th), Noted (available March 15th), Up, Up, & Away, Background Basics: Super Stripes - Papertrey Ink
Cardstock: Pure Poppy, Aqua Mist, Lemon Tart, Clear Cardstock - Papertrey Ink; white
Ink: Tropical Teal, Pure Poppy, Harvest Gold, Fresh Snow, True Black - Papertrey Ink; VersaMark - Tsukineko
Other: Retro Style Die Collection (available March 15th), Fabulous Frames - Papertrey Ink; Lemon Baker's Twine - Divine Twine; Foam Tape - Scotch; Glossy Accents - Ranger; Clear Embossing Powder - Filigree

To The Grad Card
Stamps: Retro Style Graduation (available March 15th), Retro Style Birthday Sentiments (available March 15th), Background Basics: Super Stripes - Papertrey Ink
Cardstock: Spring Rain - Papertrey Ink; white
Ink: Harvest Gold, Hibiscus Burst, Limeade Ice, New Leaf - Papertrey Ink; VersaMark - Tsukineko
Other: Retro Style Die Collection (available March 15th) - Papertrey Ink; White Embossing Powder - Filigree; Foam Tape - Scotch; Fine Crystal Glitter - Martha Stewart Crafts; glue pen

Wednesday, March 11, 2015

March Papertrey Ink Countdown - Day 2

Welcome back for Day 2 of the Papertrey Ink March countdown! I'm so happy to hear about your excitement about the Retro Style collection and the newest Text Block die! It's always wonderful to hear when you've designed something that fills a gap. Makes me feel like I'm doing my job well and who doesn't like that, am I right? Well, I have a few more projects to share with all of you today, so let's get to it!

This first card is a great example of how you can use Retro Style Graduation to create more general congratulations cards. Know a theater, music, or art student? This sentiment might be right up that kid's alley.


I began by die cutting the sign and rectangle layer from white cardstock. I stamped the arrow in Harvest Gold and the rectangle in Tropical Teal. Then, I trimmed out the inside of the rectangle image and layered that piece with an Aqua Mist die cut that I'd heat embossed with the "you're a" phrase. I adhered that all into place on the larger sign shape and added the word die cut. Then, I cut the bubble shape from Melon Berry, stamped it with the coordinating sentiment in Berry Sorbet, and mounted it to the sign shape with foam tape. Then, I lost my mind a little. I cut a bobbin die (but any stitching die could work here) from Harvest Gold and used the tiny circle negatives to add lights to the sign. I attached them to the rectangle using a fine-point glue pen and then embellished with clear glitter. I'd gone that far, so glitter seemed like the next logical step. Ha!


Next, I die cut the Notched Star Banner from Harvest Gold and white cardstocks. I adhered the white banner to a Tropical Teal card front and filled in the larger star negatives from the Harvest Gold shape. I added a section of a Berry Sorbet banner embellished with glitter and finished up by mounting the sign with foam tape. This sentiment works for so many big occasions, not just graduation.

This next one is for my youngest brother's 16th birthday. It's coming up here in just a couple of months and I think he'll get a kick out of the retro sign.


I began by die cutting the complete sign shape from Pure Poppy, the arrow from Aqua Mist, and the rectangular base from Luxe Silver Adhesive paper and white cardstock. I layered those last two and added seaming with a round-nosed stylus. I was going for a chrome look and I'll be darned if it didn't totally work! I stamped the sign with the pinstripe image using Scarlet Jewel and heat embossed the word "birthday" using white powder. Then, I stamped the arrow shape with it's coordinating image using Hawaiian Shores ink and adhered it to the larger sign shape. Next, I stamped the ring onto a circle shape and added the numerals and ordinals with Hawaiian Shores and Tropical Teal inks. I didn't include a circle shape in the die set, but any 3/4" or so circle shape will work. This one was cut using the Heart-2-Heart #12 die. Finally, I mounted all of the loose parts to the larger sign shape using foam tape.


Then, I went about creating a shaker box using Betsy's new You've Been Framed: Diamond die. I cut the frame from Harvest Gold striped paper and white cardstock. I adhered the striped paper to a Smokey Shadow card front and sprinkled on some Crystal chunky glitter and red and turquoise hexagonal glitters. I added the frame using foam tape (the central diamond having been backed with clear cardstock). Sorry for the in-progress snapshot, but I wanted you to be able to see the shaker before I added the sign.


Which I then did with Scor Tape directly onto the shaker front. Isn't it fun?! I hope he loves it. I mean...check out that chrome!

This last one is a window card made with the new Text Block: You Did It die.


I began by die cutting the Text Block from Spring Rain cardstock. I added flags in Limeade Ice, Enchanted Evening, and Summer Sunrise cardstocks and embellished with the mortar board from For The Graduate. Then, I cut a rectangular opening into a card base that I'd layered with striped Summer Sunrise paper. I added a Limeade Ice sentiment flag that I'd stamped with phrases from Retro Style Graduation in Enchanted Evening ink and heat embossed white.


I finished it simply by adding the Text Block with foam tape. Yesterday's card was much more feminine (what with the ruffles and total glitter coverage), so I thought I'd go a little more masculine today. I hope you like!

That's all for me today! Make sure to check in with Nichole, Betsy, Danielle, Dawn, Heather, LauraMaile, and Melissa for more inspiration with this month's sets! Have a great day!

Recipes:
You're A Star Card
Stamps: Retro Style Graduation (available March 15th) - Papertrey Ink
Cardstock: Tropical Teal, Melon Berry, Harvest Gold, Aqua Mist, Berry Sorbet - Papertrey Ink; white
Ink: Berry Sorbet, Harvest Gold, Tropical Teal - Papertrey Ink; VersaMark - Tsukineko
Other: Retro Style Die Collection (available March 15th), Notched Star Banner Die Collection, Sketched Shapes Die - Papertrey Ink; White Embossing Powder - Filigree; Fine Crystal Glitter - Martha Stewart Crafts; Foam Tape - Scotch; Glue Pen

16th Birthday Card
Stamps: Retro Style Graduation (available March 15th), Retro Style Birthday Sentiments (available March 15th) - Papertrey Ink
Cardstock: Smokey Shadow, Pure Poppy, Aqua Mist, Harvest Gold Patterned Paper, Luxe Silver Adhesive Sheets, Clear Cardstock - Papertrey Ink; white
Ink: Scarlet Jewel, Hawaiian Shores, Tropical Teal, Summer Sunrise - Papertrey Ink; VersaMark - Tsukineko
Other: Retro Style Die Collection (available March 15th), You've Been Framed: Diamond Die (available March 15th), Heart-2-Heart #12 Die - Papertrey Ink; White Embossing Powder - Filigree; Chunky Crystal Glitter, Garnet Hexagonal Glitter, Turquoise Hexagonal Glitter - Martha Stewart Crafts; Foam Tape - Scotch

You Did It Window Card
Stamps: Retro Style Graduation (available March 15th), For The Graduate - Papertrey Ink
Cardstock: Limeade Ice, Enchanted Evening, Summer Sunrise, Spring Rain, Summer Sunrise Striped Paper - Papertrey Ink; white
Ink: Enchanted Evening - Papertrey Ink; VersaMark - Tsukineko
Other: Text Block: You Did It Die (available March 15th), For The Graduate Die, Tag Sale #5 - Papertrey Ink; Foam Tape - Scotch; White Embossing Powder - Filigree

Tuesday, March 10, 2015

Introducing Retro Style Graduation, Retro Style Birthday Sentiments, And The Text Block: You Did It Die

Good morning, everybody! I am so excited to see you here for Day 1 of the Papertrey Ink March Countdown! Can you believe we're here already? This one sneaks up on us a bit, what with February being a smidge short, but boy! do we have some great stuff to share this month! I have the great pleasure of making a handful of introductions. Today, we're saying hello to Retro Style Graduation, Retro Style Birthday Sentiments, and the 
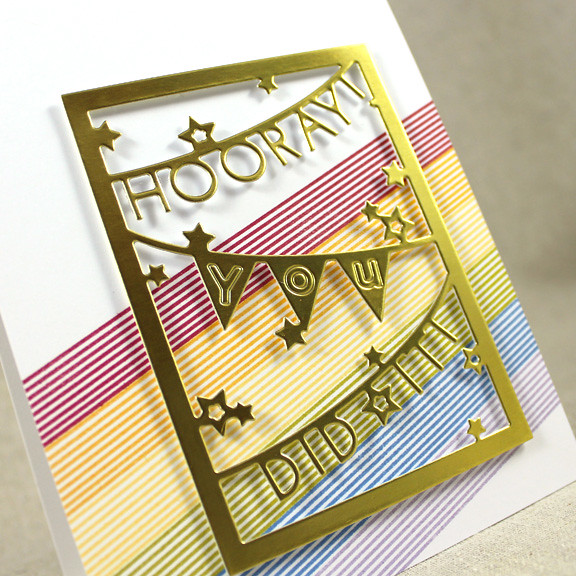
Text Block: You Did It Die. These products will be available beginning March 15th at 10pm over on the Papertrey Ink website, but I have plenty of inspiration to share with you between now and then. Let's get to it!

My first card today features one of my favorite sentiments from Retro Style Graduation (not to mention, the more I play with these signs, the more I love them).


I began by die cutting the sign shape from white cardstock. I stamped the outline with True Black and filled in the interior bits with Hawaiian Shores, Harvest Gold, Terra Cotta Tile, and a touch more black. Then, I die cut the sunburst from Harvest Gold cardstock and embellished it with glittered Lemon Tart rays. Next, I die cut clouds from white cardstock and textured them with the Rustic Burlap impression plate.


I adhered a piece of Aqua Mist to a white card base and layered on some Sheer Basics bitty dot vellum to soften the color. Then, I adhered the sun burst and clouds. I used an 1/8" strip of Smokey Shadow cardstock to act as the sign pole and adhered my sign with foam tape. This card is so much fun!

This next graduation card would be perfect for a young guy. I even made myself step away from the glitter shaker on this one!


I began by die cutting the sign shape and stamping the outline with True Black ink. I filled in with coordinating images in Pure Poppy, Lemon Tart, True Black and Simply Chartreuse inks. Then, I die cut a white panel with the cloud Scene It: Skyscapes Die and stamped a sign pole using one of the stripes from Background Basics: Super Stripes and True Black ink. I adhered that to a Spring Rain card base and set it aside.


Next, I colored in some of the "lightbulbs" using a Copic marker. Then, I went over all of the bulbs with a fine-point glue pen. I sprinkled clear embossing powder onto the exposed adhesive and set it using my heat tool. The result is glossy and really looks like tiny lightbulbs! I finished up by adhering my sign into place with some foam tape.

This next card pairs Retro Style Graduation with the coordinating Birthday Sentiments set.


I began by stamping the dotted image using Lemon Tart ink with Harvest Gold rolled around the edges. Then, I stamped the grounding oval (Spring Rain stamped off once to soften the color). The Sign came next in True Black ink.


Next, I die cut each arrow from white cardstock and stamped them using Orange Zest, Limeade Ice, and Blueberry Sky inks. I adhered the arrows with foam tape over the corresponding shapes on the sign post. Quick and easy. This is a heading-out-the-door-to-the-party sort of card. These sets make those types of cards a snap!

My last card today features the new Text Block: You Did It Die. This die was just begging for an ombre treatment, so that's where I went (side note: I've had the phrase "I made ombre my hombre" stuck in my head all day long. Now you all know just how much of a dork I really am).


This card came together pretty easily. I ran pieces of Aqua Mist, Hawaiian Shores, Tropical Teal, and Pinefeather through the Xyron and then cut them sticky side up using the new die. I also die cut a piece of white cardstock and assembled all of the pieces on a piece of White Adhesive Sheet. Then, I removed the protective adhesive backing and sprinkled the exposed adhesive with glitter. I mounted the glittered block to a Harvest Gold striped card front that I'd tied with ruffled ribbon and baker's twine. The great thing about the sentiment on this die is that it can be used for all sorts of accomplishments - you're not limited to graduation. I'm always on the lookout for ways to make my new stamps and dies as versatile as possible. This one is no exception.

Well, that's all for me today. Nichole and Betsy are sharing more of Retro Style Graduation and the Retro Style Birthday Sentiments stamps. Heather also has more with the Text Block: You Did It Die. Make sure to check in with them and with Dawn, Erin, and Maile for more of this month's release. See you back here again tomorrow! Have a great day!

Recipes:
Bright Future Card
Stamps: Retro Style Graduation (available March 15th) - Papertrey Ink
Cardstock: Aqua Mist, Harvest Gold, Lemon Tart, Smokey Shadow, Sheer Basics Bitty Dot - Papertrey Ink; white
Ink: Terra Cotta Tile, Harvest Gold, Hawaiian Shores, True Black - Papertrey Ink
Other: Retro Style Die Collection (available March 15th), Blue Skies Rays Die, Blue Skies Die, Rustic Burlap Impression Plate - Papertrey Ink; Fine Crystal Glitter - Martha Stewart Crafts; Foam Tape - Scotch; Xyron

Class Of 2015 Card
Stamps: Retro Style Graduation (available March 15th), Background Basics: Super Stripes - Papertrey Ink
Cardstock: Spring Rain - Papertrey Ink; white
Ink: Pure Poppy, Lemon Tart, Simply Chartreuse, True Black - Papertrey Ink
Other: Retro Style Die Collection (available March 15th), Scene It: Skyscapes Die Collection - Papertrey Ink; Clear Embossing Powder - Filigree; Copic Marker; Glue Pen; Foam Tape - Scotch

Which Way To Cake Card
Stamps: Retro Style Graduation (available March 15th), Retro Style Birthday Sentiments (available March 15th), Dot Spot, Bowl Of Sunshine - Papertrey Ink
Cardstock: white
Ink: Orange Zest, Limeade Ice, Blueberry Sky, Lemon Tart, Harvest Gold, Spring Rain, True Black - Papertrey Ink
Other: Retro Style Die Collection (available March 15th) - Papertrey Ink; Foam Tape - Scotch

Glittered Ombre Card
Cardstock: Aqua Mist, Hawaiian Shores, Tropical Teal, Pinefeather, Harvest Gold Stripe Paper, White Adhesive Sheets - Papertrey Ink; white
Other: Text Block: You Did It (available March 15th) - Papertrey Ink; Ribbon - May Arts; Twine - Divine Twine; Foam Tape - Scotch; Fine Crystal Glitter - Martha Stewart Crafts; Xyron

Friday, March 6, 2015

March Sneak Peeks

Good morning! I just wanted to pop in quickly to share a couple of sneak peeks at two sets I have coming your way this month:


These two sets are inspired by the vintage marquees you'd find outside of diners, bowling alleys, hotels and such. I'm very excited to share them with you...just a few more days. See you then!

Sunday, March 1, 2015

March Color Play

Good morning, friends! Welcome to this month's Papertrey Ink Color Play feature. This month I'm playing with this color combination, inspired by a wedding cake photo from the Martha Stewart Weddings website.


I don't know about you, but lately I've been daydreaming of sunshine and flowers and warmer days. This photo brings all of that together into one very sweet package. I thought these colors would be perfect for temporarily escaping the winter blues.

How about a thank you card today?


I started by texturing a Sweet Blush panel with the Wrought Iron Impression Plate. I adhered that to a white card base and set it aside. Then I die cut the Layered Banner shape from white cardstock and Lemon Tart patterned paper. I stamped the white banner with the sentiment from the coordinating set using Canyon Clay ink and adhered the two layers together.


Then I die cut several of the flower arrangements from Bitty Bouquets and stamped them with the colors in this month's palette. I mounted the banner to the card front, overhanging just a bit, using foam tape. Then, I tucked the flowers underneath, fluffing the flowers a little to give the card a touch more dimension.

That's all for me today. Thank you all so much for joining me today. I'll see you again soon!

Recipe:
Stamps: Layered Banner Banter, Bitty Bouquets - Papertrey Ink
Cardstock: Sweet Blush, Lemon Tart Patterned Paper - Papertrey Ink; white
Ink: Lemon Tart, Canyon Clay, Sweet Blush, Berry Sorbet, Simply Chartreuse - Papertrey Ink
Other: Layered Banner Die, Bitty Bouquets Die, Wrought Iron Impression Plate - Papertrey Ink; Foam Tape - Scotch