Friday, October 25, 2019

Festive Friday - Shaped Tree Tags

Festive Friday Banner

Good morning, friends! Thank you for joining me for another Festive Friday! If you've spent any time around here you may have noticed that I love a shaped tag. So today, I thought I would pair a new set I picked up from Altenew called Festive Foliage with the Speed Tagging Christmas Sentiments from The Greetery to create a fun trio of cheerful Christmas trees.

LizzieJones_FestiveFriday_FestiveFoliageShapedTreeTags

I used Spruce and Seafoam inks to stamp the tree foliage. I love that you can opt for a two step version or a single step version with this set from Altenew! I wanted the heart to have a presence, but I didn't want it to be too strong (and potentially obscure my sentiment) so I chose to very lightly sponge It's A Girl ink around the edge of the solid heart image before stamping it into place. The result is a really lovely, barely-there halo that I'm totally digging.

LizzieJones_FestiveFriday_FestiveFoliageShapedTreeTags2

Then, I stamped the sentiment from The Greetery's set atop the heart and added a die cut bow (also from the Speed Tagging Christmas Sentiments set). I embellished each bow with a tiny red rhinestone and then glittered a few of the dots in the foliage with silver glitter. I just did the dots randomly and I like that it doesn't look too planned out, but it adds a nice touch of sparkle.

LizzieJones_FestiveFriday_FestiveFoliageShapedTreeTags3

You could simply stamp the "To:" and "From:" on the back, but I chose to make these folded tags. All you have to do is prefold your cardstock and die cut with about 3/4" of the top of the die hanging over the edge. Easy! I stamped the insides with the "To:" and "From:" from The Greetery's set and then adhered them to the fronts. A little white crochet thread finished things off nicely.

Thank you so much for joining me today! I hope you're enjoying this little series of mine. Have a wonderful weekend and I'll see you again soon!

Supplies:
Shaped Tree Tags

Friday, October 18, 2019

Festive Friday - Christmas Stripe Tags

Festive Friday Banner

Good morning, friends, and welcome back for this week's Festive Friday post! I'm really enjoying getting in the holiday spirit before the panic of seasonal preparation sets in. Every year I try to pack in just a little more than I probably should, so getting my tags made well ahead of time makes me feel like I'm really on the ball. I may only have two gifts purchased, but gosh darn it, I have tags!

FestiveFriday_LizzieJones_ChristmasStripeTags

I decided today to make a big(ish) batch of tags, but I kept them nice and simple to make the process streamlined. If you have a stamp platform, things go even more quickly and smoothly. I was able to whip up this set of six tags with very little fuss.

FestiveFriday_LizzieJones_ChristmasStripeTags2

I bought the Tag'd stamp set and die from The Stamp Market several months ago, but this is the first time I've actually used it for tags (I've used some of the sentiments for cards though). I also pulled out some of their new inks and cardstock for a nicely coordinated set of tags.

FestiveFriday_LizzieJones_ChristmasStripeTags3

The baker's twine is a great way to pull those festive colors in once more, but simple crochet thread would be a great option if you didn't have quite the right colors on hand. I like to try and keep the scale of the package in mind when I'm wrapping a gift, and I think these tags are a great size for bigger boxes. They'll also be perfect for adding a pop of color to more neutral wrapping papers!

Thank you so much for joining me today! I've received some very fun packages in the past week or two, so I hope to make some cards to share around here very soon. Getting to tuck into those boxes is my reward for wrapping up a few home projects lately and I can't wait! Have a great weekend and I'll see you soon!

Supplies:
Christmas Stripe Tags

Friday, October 11, 2019

Festive Friday - Stocking Pocket Tags

Festive Friday Banner

Good morning, friends! Do you realize there are only ten and a half weeks until Christmas?! Ten and a half weeks! I'd love to get ahead this year, so it's time to get cracking!

LizzieJones_FestiveFriday_StockingPocketTags

Today, I have a trio of pocket tags made with Concord & 9th's Stocking Stuffers set. I couldn't wait to get my hands on this set when I saw it during their release countdown. It's totally cute and the stocking is such a great size. I decided to treat myself to a new set and I'm so glad I did!

LizzieJones_FestiveFriday_StockingPocketTags2

I began by stamping and coloring the stockings and fillers with Copic markers. I die cut those pieces along with the cuffs and toe and heel details and an extra stocking for each tag. I also cut the inside slider pieces and stamped those with the "To:" and "From:" greetings from the Christmas Care-A-Van set from The Greetery.

LizzieJones_FestiveFriday_StockingPocketTags3

I sandwiched two stocking pieces (one colorful, one blank) with foam tape, tucking the "To:/From:" piece inside. I adhered one stocking filler on the top of each sliding piece and embellished each with a touch of glitter to make them sparkle. I finished up by using the heel, toe, and cuff details to dress up each stocking. Then, I adhered the stocking hangers to the back to use to tie on a bit of crochet thread. The end result is adorable and I can't wait to attach them to my packages this year!

Thank you so much for joining me today! I hope to see you back here again for Festive Friday next week. Have a wonderful, crafty weekend!

Supplies:
Stocking Pocket Tags

Friday, October 4, 2019

Festive Friday - Sweet Treats & Christmas Cheer

Festive Friday Banner

Good morning, friends, and welcome to this year's inaugural Festive Friday! I had so much fun with this series last year that I decided to go ahead and do it again. Plus, by the time the holidays rolled around I had more than enough tags on hand to decorate my packages. I hope you'll join me every week from now until Christmas. You could even play along if you're so moved!

This week, I thought it might be fun to create a couple of treat boxes with the new Candy Pops Rectangle die from The Greetery (it releases today at 10am on The Greetery's website, so be sure to swing over there to pick up one of your own).

LizzieJones_FestiveFriday_TheGreetery_CandyPopsTreatBoxes

I also paired it with the Tear Away Rectangle Die and Candy Pops Peppermint Addition Die for a super festive package that is perfect for tucking into stockings. In fact, I think I'll probably make more of these so everyone on our list can get a sweet surprise to enjoy while they open presents!

LizzieJones_FestiveFriday_TheGreetery_CandyPopsTreatBoxes2

On the front, I stamped a sentiment from the Candy Pops Sentiments stamp set. On the back piece, I embossed the "To:" and "From:" from the Speed Tagging Christmas Sentiments set on the tear-away panel. I used the deep rectangle clear bubbles and filled them with Crunchy Mint M&Ms. I'll be honest, I bought these specifically for color, but after trying them I'm a fan. They're like a Thin Mint/M&M hybrid! If you like Thin Mints, I highly recommend them!

LizzieJones_FestiveFriday_TheGreetery_CandyPopsTreatBoxes3

I embellished my packaging with a bit of glitter (but only on the outside, so the candy itself is free and clear) along with bits of cherry baker's twine. These truly are so fun and they hold just enough candy to give a little treat without making your sister want to string you up by your toes because you fed her children a boat-load of sugar. Not that I would ever do such a thing (I actually probably wouldn't - that's Grandma's territory).

Thank you so much for joining me today! I hope you've enjoyed today's Festive Friday kick-off! I'll see you back here next week (if not before). Have a wonderful weekend!

Supplies:
Sweet Treats & Christmas Cheer Treat Boxes


Thursday, October 3, 2019

Speed Tagging & Sweet As Sugar Treats With The Greetery

Good morning, friends! Welcome back for Day 4 of The Greetery's holiday countdown (all of the new products will be available at 10am on Friday, October 4th on The Greetery's website)! Today is all about packaging and dressing up your seasonal parcels. I love, love, love packaging and tags and all things gifty, so today's introductions are right up my alley! Let's get to it!

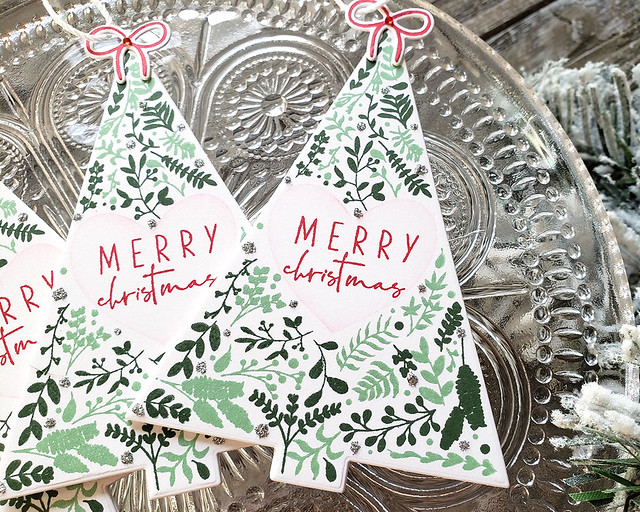
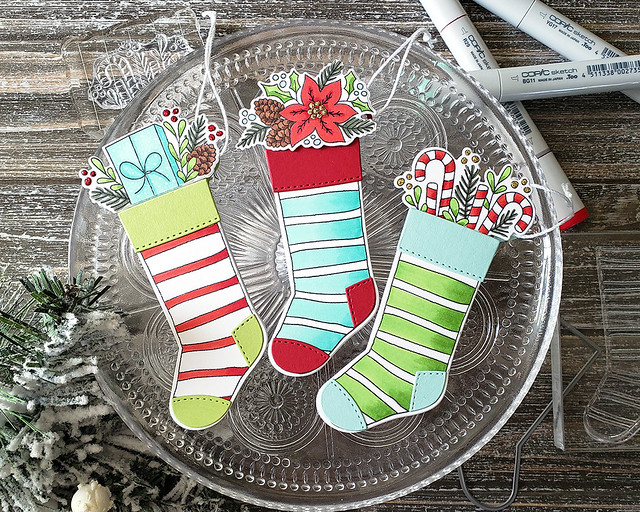
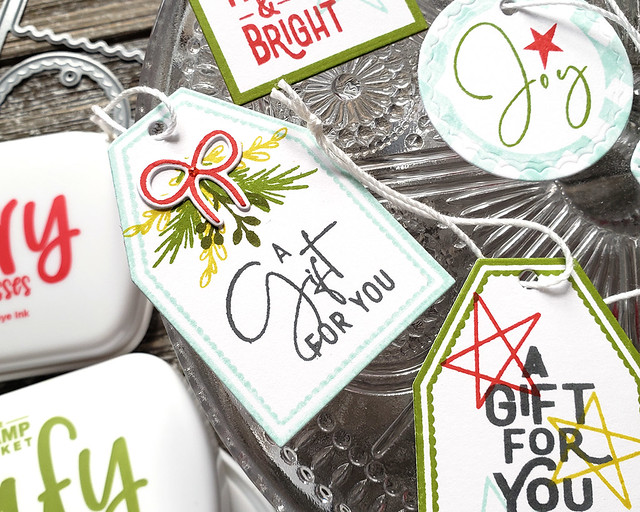
First up, I have a collection of tags to share with you. These tags were a snap to create, thanks to the ingenious design behind the Speed Tagging collection.

LizzieJones_October2019_TheGreetery_SpeedTaggingChristmas_SpeedTaggingTags

Betsy designed this collection to be a one stamp, one die cut, seven tags solution to making your holiday gift tags a snap. You seriously just stamp the rubber, cling mounted image once, line up the die with the dots on the pattern, and then die cut for a total of seven tags at a time.

LizzieJones_October2019_TheGreetery_SpeedTaggingChristmas_SpeedTaggingTags2

I chose to stamp my tags in a few colors and make each tag double sided to give them a more polished overall look, but that was totally optional.

LizzieJones_October2019_TheGreetery_SpeedTaggingChristmas_SpeedTaggingTags4

All of the tags are symmetrical which made making them double sided a breeze. I just stuck the "bad" sides together before tying each tag with crochet thread. I use fabric ribbon to wrap my gifts, so the crochet thread is a nice neutral that blends in fairly well when I'm tying my bows.

LizzieJones_October2019_TheGreetery_SpeedTaggingChristmas_SpeedTaggingTags5

I used the new Speed Tagging Christmas Sentiments stamp set and die to give each tag a touch of holiday flair. I particularly love the foliage and bow, but the stars and some of the more generic greetings (like "A gift for you") would make perfect birthday options, too!

LizzieJones_October2019_TheGreetery_SpeedTaggingChristmas_SpeedTaggingTags6

I love the variety of shapes and sizes you get with a single impression and die cut. And several of the tags also have embossed or pierced details that would make them interesting even if you chose not to stamp the patterns.

LizzieJones_October2019_TheGreetery_SpeedTaggingChristmas_SpeedTaggingTags3

If you love gift packaging and tags as much as I do, this collection is an absolute must have!

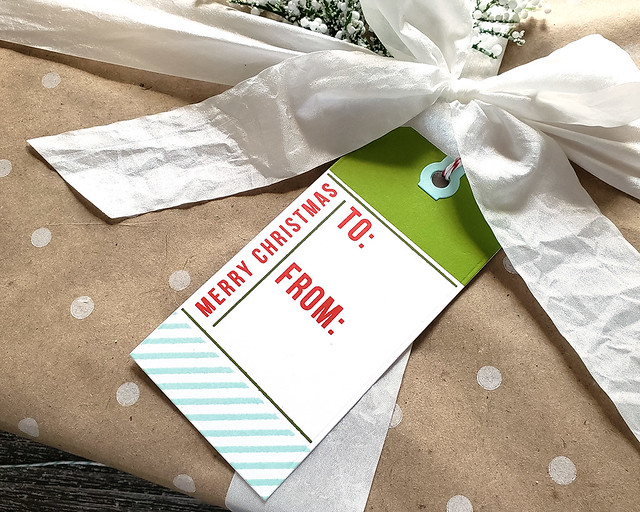
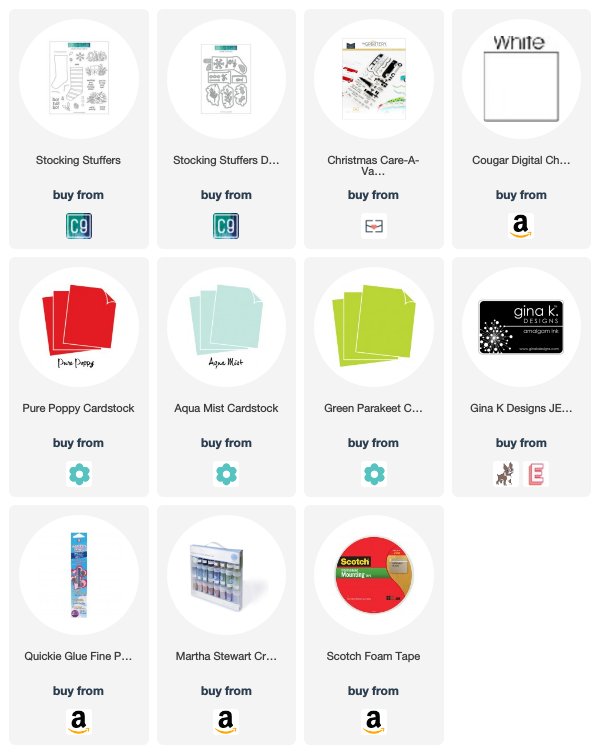
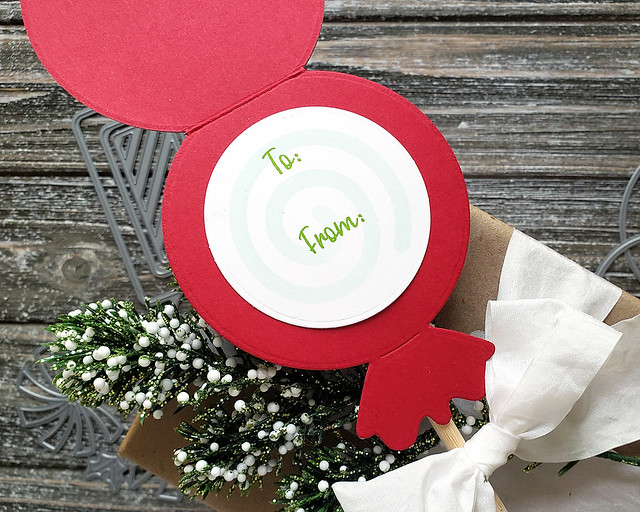
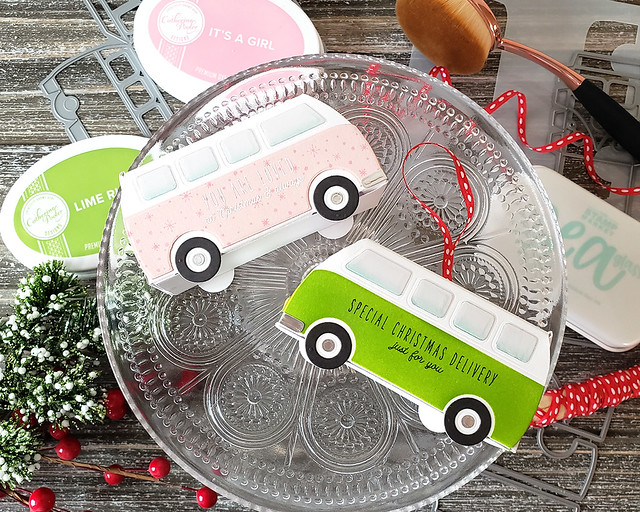
My final project today is a charming gift topper I created with the new Candy Pops Circle Die. I couldn't help but see a giant lollipop when I looked at that die and I thought it would make an adorable gift topper/tag!

LizzieJones_October2019_TheGreetery_CandyPopsCircle_CandyPopsSentiments_LollipopGiftTopper

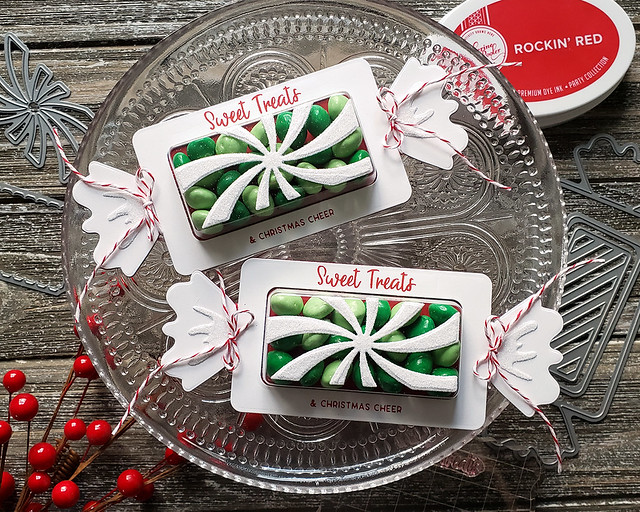
I used the Candy Pops die to cut a folded shape (simply die cut with the fold below the blade on your intended top edge) first. On the inside, I adhered a circle that I'd stenciled with the swirl (just die cut from a scrap and gently blend through the negative) and stamped with the "To:" and "From:" included in the Candy Pops Sentiments stamp set.

LizzieJones_October2019_TheGreetery_CandyPopsCircle_CandyPopsSentiments_LollipopGiftTopper3

For the outside, I die cut the overall candy shape from white cardstock and trimmed off the top wrapper bit. I cut the circle from the inside and created a shaker filled with glitter and buffalo snow. The lollipop swirl on the inside of the shaker is also glittered for extra, seasonal sparkle.

LizzieJones_October2019_TheGreetery_CandyPopsCircle_CandyPopsSentiments_LollipopGiftTopper2

I stamped the outer frame with a greeting from Candy Pops Sentiments before securing the shaker bits all together. Then, I embellished with a bright green bow and hot glued the whole tag/topper to a bamboo dowel to give it a realistic stick. I had a blast with this and I foresee several more lollipop toppers in my future!

Thank you so much for joining me today! I hope today's introductions have you daydreaming about your holiday packages. Make sure to pop in on these lovely ladies to see what other inspiration they have in store for you:

I also wanted to mention super quickly that I'm picking up my Festive Fridays series again starting tomorrow. If you joined me last year, you'll see even more seasonal packaging and tag ideas every week. If you didn't catch the series last year, I hope you'll pop in to see what creative packaging ideas I can come up with this time around. See you tomorrow!
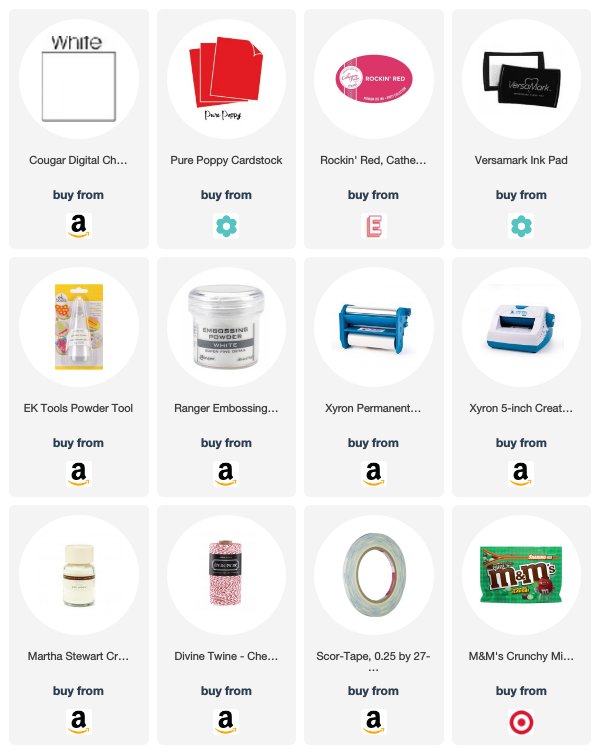
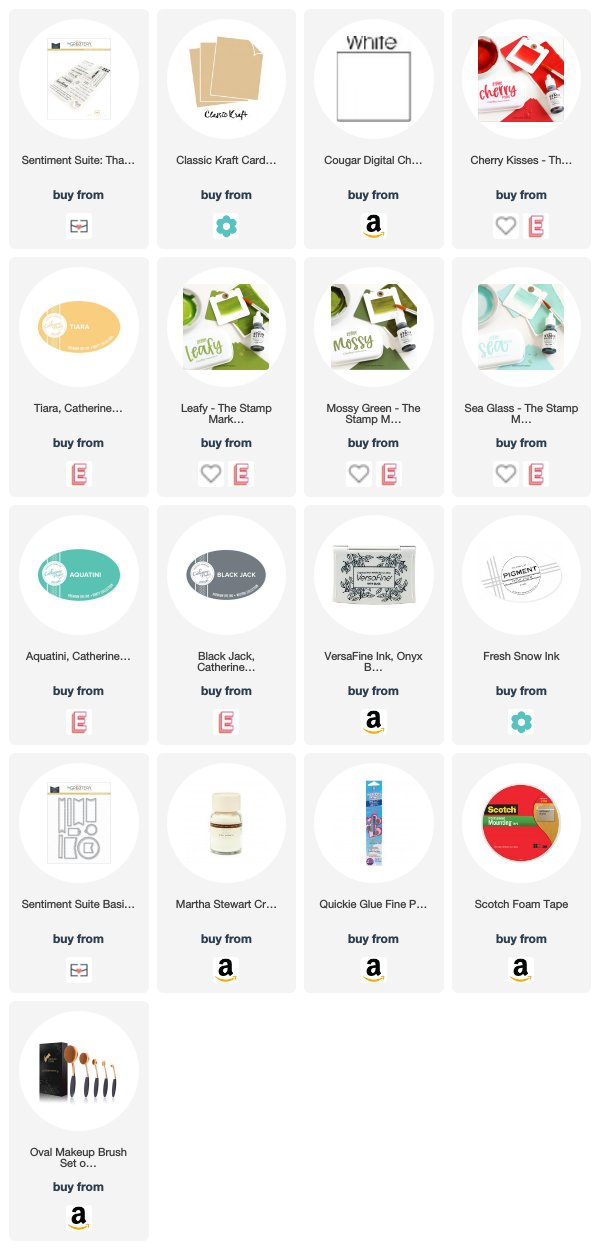
Supplies:
Speed Tagging Christmas Tags Collection


Lollipop Gift Topper

Tuesday, October 1, 2019

A Care-A-Van Of Holiday Cuteness from The Greetery

Good morning, friends! We're jumping right back in with Day 2 of The Greetery's holiday countdown (all of the new products will be available on Friday, October 4th at 10am on The Greetery's website)! This release has a little something for everyone, from elegant and sophisticated to charming and cheerful. Today's intros land somewhere toward the "joyful squeal" end of the spectrum.

When I first saw the Christmas Care-A-Van set, I couldn't stop thinking about how fun it would be to use on a slider card. So that's exactly what I did!

LizzieJones_TheGreetery_October2019_ChristmasCareAVan_DriftingDie_Fir&Foliage2_SendingMyThanksSliderCard

I stuck with holiday colors on this card, but the sentiment would also be perfect for a birthday thank you, too, with a quick color swap. I used the bumper from the Happy Hippie Van die (that you'll see in just a minute) to create the slider. Pro tip: You have to cut a couple of times to make the bumper fit all the way across the card, but if you start cutting at the left, all of the seams are hidden under the van!

LizzieJones_TheGreetery_October2019_ChristmasCareAVan_DriftingDie_Fir&Foliage2_SendingMyThanksSliderCard3

I created the background with the Fir & Foliage 2 set and the new Frosty Flakes Stencil. And, surprise, surprise...the Drifting Die has made another appearance. I truly cannot stress how much I love this die. It's a wonderful grounding element for this time of year! And, you know, a little glitter embellishment on the wispy swirls never hurt anybody.

LizzieJones_TheGreetery_October2019_ChristmasCareAVan_DriftingDie_Fir&Foliage2_SendingMyThanksSliderCard2

The sentiment for today's card comes from the Sentiment Suite: Thank You stamp set that debuted last release. I love that you reveal the rest of the sentiment by simply pulling the tab and moving that adorable van across the card. Oh my word...it's a delight!

Next up, I have a couple of sweet mini vans to share. One is a gift box and the other doubles as a holiday ornament. How fun is that?!

LizzieJones_TheGreetery_October2019_ChristmasCareAVan_HappyHippieVans1

Now, I think it's important to mention that not only is Betsy a design genius, but she's also thoughtful as well. She understands that budgets only stretch so far, so she designed the Happy Hippie Vans with two different options for embellishment.

LizzieJones_TheGreetery_October2019_ChristmasCareAVan_HappyHippieVans2

One is an additional die that will cut the decorative panels on the sides of the van. The other is a more affordable stencil that gives you the option to blend on the panels instead. I did one of each today so you could see the difference.

LizzieJones_TheGreetery_October2019_ChristmasCareAVan_HappyHippieVans3

I die cut the main van shapes from white cardstock. The pink van uses the die cut decorative panels while the green van uses the stencils. All of the other elements (tires, windows, etc.) are part of the main die. I used silver adhesive paper and clear cardstock to create realistic chrome and glass details on both vans.

LizzieJones_TheGreetery_October2019_ChristmasCareAVan_HappyHippieVans4

These vans are a great size for small gift items or candies. Jewelry and lip balm would be perfect for a feminine option. Shock the heck out of your teenager by giving them keys to their "new enough" car. Or I'm sure cash rolled into a tube and tied with ribbon for gas money would be much appreciated. I wasn't able to get a gift card to fit with the back closed, but a paper gift certificate could be rolled or folded to fit. So many options!

LizzieJones_TheGreetery_October2019_ChristmasCareAVan_HangingHappyHippieVanOrnament

I used sentiments and images from Christmas Care-A-Van to decorate the sides of both vans. Then, I set an eyelet in the top of the green van and threaded ribbon through to make it an ornament. How cute would this be hanging from your tree?!

I hope you've seen something today that put you in a festive holiday mood. I sure am! I'll be back in a couple of days to share more from this release, but in the meantime there are some lovely ladies ready to wow you with their creations:

I'll see you back here on Thursday with a few more projects that I think you'll love! Until then!

Supplies:
Sending My Thanks Slider Card


Christmas Happy Hippie Vans