Good morning, friends! Today is the second introduction day for the new products coming your way from The Greetery. Day 2 is just as exciting as Day 1, so hold on to your hats!
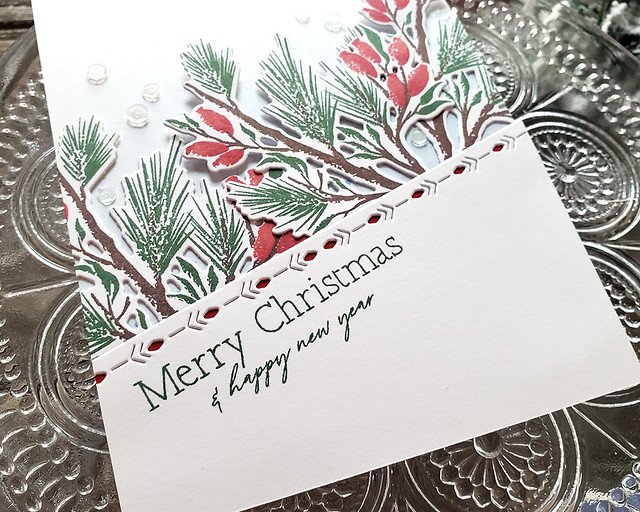
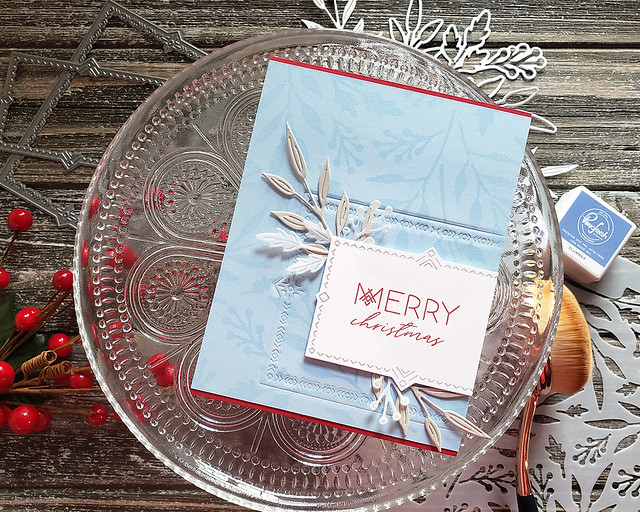
If you were a fan of the previously released seasonal Sketches sets, the Winter Sketches set is sure to be a joy! These pine boughs are totally gorgeous and they make for quite a striking focal point.
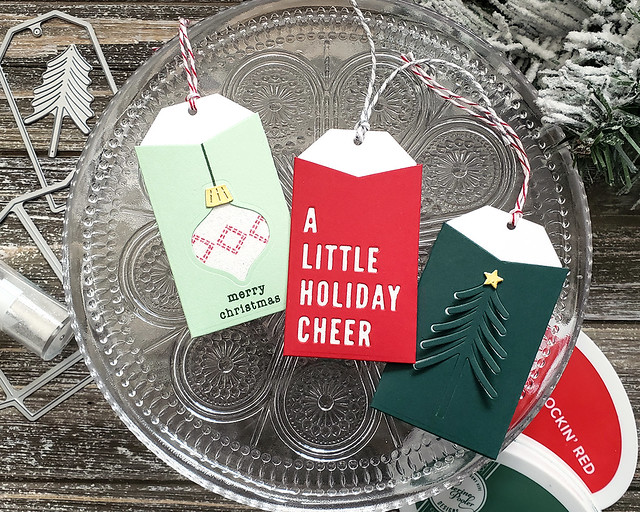
I began by die cutting a Nordic Frames shape and trimming it at an angle to create a decorative panel. I stamped the sentiment from last month's Tree Trimmings stamp set. Then, I backed the panel with red cardstock to add a little contrast behind the die cut openings.
Next, I sponged a white card base with Slumber ink to give a little atmosphere and attached the decorative sentiment panel with foam tape. Then, I tucked three of the Winter Sketches branches below the sentiment panel, giving a nice, full appearance.
A few clear sequins were the perfect embellishment for adding a little shimmer and texture without introducing another color. The result is a frosty holiday card pulled right from nature.
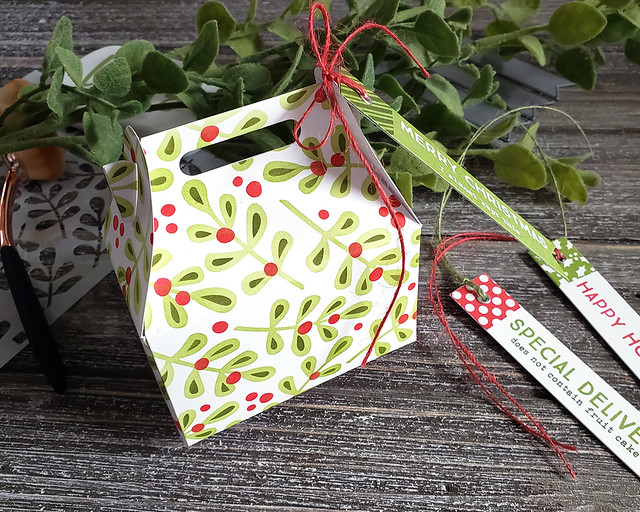
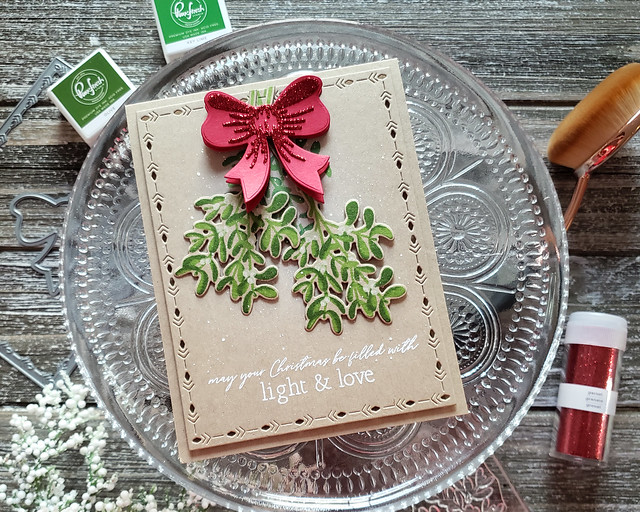
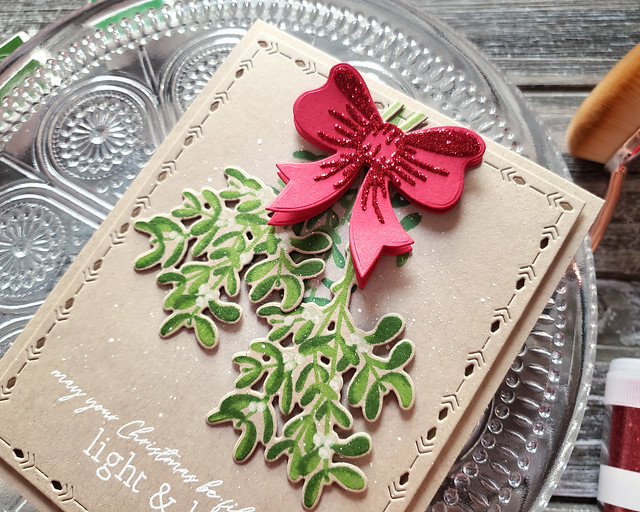
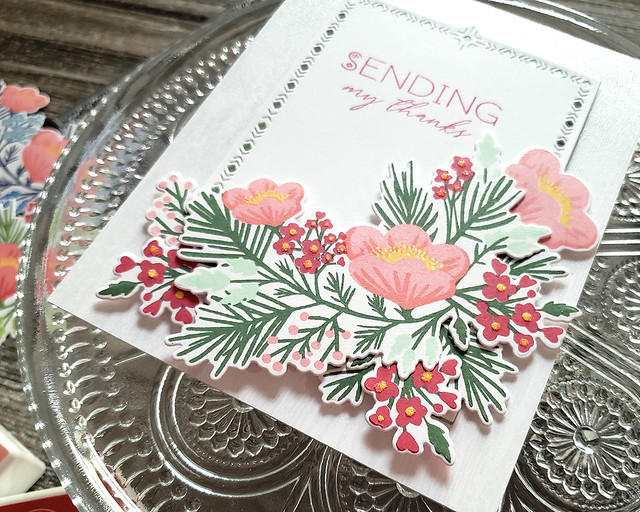
Next up, I have a card made pairing the new Budding Beauties stamp set with the new Fit To Be Tied die.
I wanted to use the mistletoe image to create a "kissing ball" on my card. Since the mistletoe berries are white in real life, I decided to stamp on Kraft cardstock. But quite honestly, these images would look lovely with a little creative license applied so go forth and create pink, red, yellow, whatever-color-your-heart-desires berries instead.
I sponged and sprinkled a bit of white ink onto a Nordic Frames shape and then heat embossed my sentiment before stamping one of the mistletoe images. I stamped and die cut two additional mistletoe sprigs and attached them to the panel before adhering that whole piece to a Kraft card base with foam tape.
No kissing ball is complete without a bright red bow, so I used the new Fit To Be Tied die to finish things off in festive fashion. I layered two of the solid bows with foam tape and topped things off with a glittered bow detail. I couldn't be more tickled! Maybe I'll just hang this card in a doorway instead of getting the real thing!
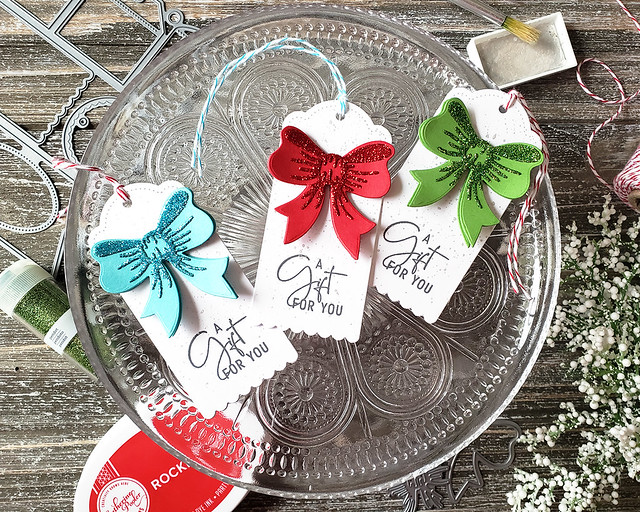
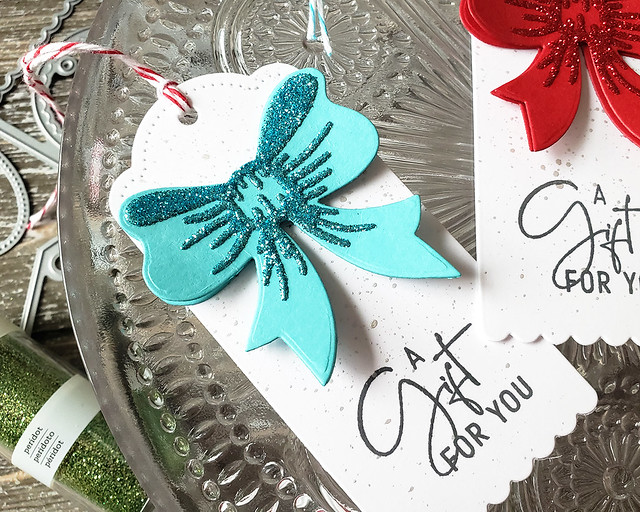
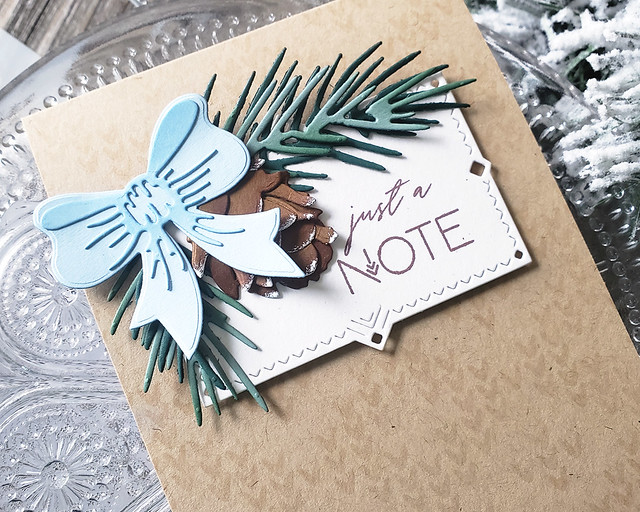
Last up, I have a winter card pairing that same Fit To Be Tied bow with the Botanicuts Pine Bough. I wanted to use the same bow to show how it can be used through the seasons for more than just holiday projects.
I began by die cutting the Botanicuts pieces and sponging them with Spruce and Gathered Twigs inks for a bit of depth. I used the Copic Opaque White Pigment on the pinecone pieces to give them a slightly snowy appearance and assembled the pinecone.
I stamped the sentiment from Pine Blossom onto a Nordic Frames shape and attached it to a Kraft card base that I had stenciled with the Knit Wits pattern. Then, I attached the pine boughs and pinecone.
Next, I die cut the bow. This time, I just used one solid bow along with the detail die. And instead of glitter, I used sponging to give the detail die contrast. Those simple changes take the bow from an over-the-top-sparkling-holiday embellishment to everyday adornment. Don't you love a die that can do double duty?!
Well, that's it for my projects for the mini release from The Greetery. Thank you so much for joining me! Make sure to pop in on these lovely ladies to see more of what this month's release has to offer:
Now, a few quick thoughts about the Pinkfresh inks. In short, I really like them. They stamped crisply and cleanly, gave great coverage, and the inks in each color family work really well together. Not all of the inks cleaned off of my stamps easily, but that's something I expect from most inks these days regardless of brand (especially the reds and pinks). Using a stamp cleaner solution (like Ultra Clean) helps minimize staining. One thing I wasn't hugely fond of is the ease of use of the cubes, but that's not specific to the Pinkfresh inks. Some lids were really tight and I had a hard time getting a handful of them open. Inevitably, I lost my grip on a couple of them and they went flying. Luckily, no projects were harmed. Again, this is not a Pinkfresh issue. I'm sure there are some colors that I will gravitate to more often and I will probably order those colors in full pad sizes at some point. I would have no hesitation suggesting trying out these inks if you have a gap in your collection that you haven't been able to fill. It may seem crazy considering they just released 48 colors, but I, for one, would really love to see a family of more yellow-y greens. These inks are going to make layering stamps even easier and more fun to use.
Thanks again for joining me for The Greetery's mini release.
All of the new products will be available on The Greetery's website at 10am ET tomorrow, November 22nd. I'll be back tomorrow with a Festive Friday post, so I hope to see you again soon! Take care!
Supplies:
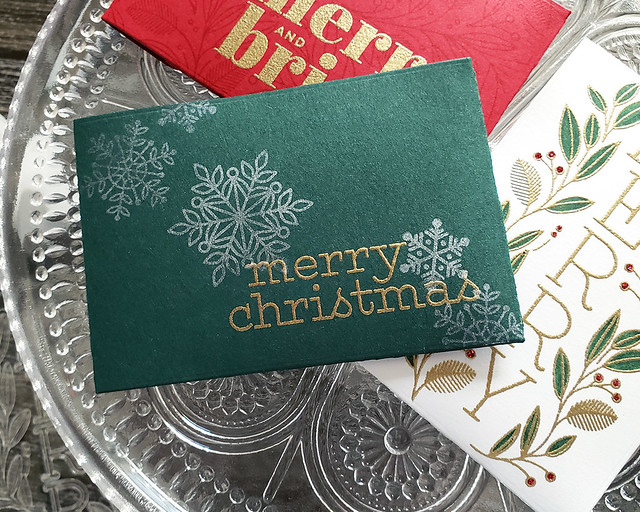
Merry Christmas Card
 Light & Love Card
 Just A Note Card