Thursday, December 31, 2015

One Big Happy - Papertrey Ink December Freebie

Good morning, Friends! I have a quick little ditty to share today featuring the One Big Happy December freebie set from Papertrey Ink.


Today is the last day to snap one up with your qualifying $100 purchase on Papertrey Ink's website, so if you've been hemming and hawing don't hesitate (orders have to be in by 11:59pm EST) . It's a wonderful little stamp set and it even comes with coordinating dies! Let's take a peek at what this mini powerhouse can do!

Happy For You Card

I began by die cutting the word "happy" from a panel of Berry Sorbet cardstock and then heat embossed the "for you" in white below. I mounted that to a white card base using foam tape and set it aside for a moment. Next, I die cut the flowers and the leafy vines from Turning A New Leaf. I stamped the leaves onto the Simply Chartreuse die cuts with Ripe Avocado ink.

Happy For You Close Up

The flowers were rock 'n rolled using a mix of Harvest Gold, Summer Sunrise, Canyon Clay, Berry Sorbet, and Pure Poppy inks. I added the flower centers with Harvest Gold, Summer Sunrise, and Canyon Clay inks before giving them a quick coating of clear Wink Of Stella to make them shimmer. I attached the leaves to the card front with flat adhesive and then added the flowers with a mix of flat and foam adhesives. I then added Glossy Accents to the flower centers to seal in the glitter and give them an extra pop of dimension. I love how easily this card came together thanks to that cute floral mini. Definitely a great staple to have on hand!

Thank you so much for joining me today! Have a wonderful New Year's Eve and I'll see you again tomorrow morning with a brand new Color Play project. Ta ta!

Recipe:
Stamps: One Big Happy, Turning A New Leaf - Papertrey Ink
Cardstock: Berry Sorbet, Simply Chartreuse - Papertrey Ink; white
Ink: Harvest Gold, Summer Sunrise, Canyon Clay, Berry Sorbet, Pure Poppy, Ripe Avocado - Papertrey Ink; VersaMark - Tsukineko
Other: One Big Happy Die - Papertrey Ink; Wink Of Stella - Zig; Foam Tape - Scotch; White Embossing Powder - Filigree; Glossy Accents - Ranger

Wednesday, December 30, 2015

Moments Inked 2016 Planner Review


Believe it or not, it's nearly January once again and that means it's time to start a fresh planner. While I'm a little stunned that we've gotten to the end of this year, I can't wait to kick off 2016 with my new Moments Inked planner! Not only do I love the changes that were made in this year's edition, but I'm thrilled that the same quality materials and beautiful colors have been used yet again. Let's take a closer look, shall we?

Both Planners Together


I've gone ahead and done a video wherein I go over the details fairly thoroughly. I'm no great master of film, but it may be nice to see the different formats in someone's hands. Ashley did a truly amazing video the other day that's also definitely worth a watch, by the way.


If you don't have time (or don't want to hear me babble...I don't blame you) here's a quicker, photo-centric run-down of this year's planners:

Just like with the video, I'll start with the spiral-bound version. Many of the basics are the same. The planner pages still measure 5" x 7" and are made with that lovely linen paper. One big difference is that the daily pages have been removed from the overall design which makes for a much slimmer planner.

Spiral Bound Front Cover

There are, once again, an assortment of laminated covers for sale that you can use to dress up the front of your planner. They can be easily swapped out if you get twitchy for a new style, but they're nice and secure once inserted so you don't have to worry about your planner cover falling off with daily use. They also pop into a silver, metal coil which feels a bit sturdier and more substantial than the plastic version from last year.

Spiral Planner Covers


The weekly spread has changed a little, too. Instead of having each day separated into three sections (morning, afternoon, and evening), there is now a simple, lined column. I'm very happy with this change. I'm not a big mover and shaker, but often we'd have one part of the day that was busier than the others making for a cramped writing situation. This way the space is much more flexible and I really like that.

How about a quick look at the binder.

Binder Embossing


For starters, it's truly attractive. I like the clean design, the stitching and metallic details, the sturdy snap closure, and the embossing on the front cover. There are four color options (white, stone gray, natural tan, and ebony) to suit just about anyone's personal style. I went with the Ebony because I think it will stand up best to my level of abuse. I'm hard on things. You should see my phone. If I had a dollar for every time I've dropped it in the bank parking lot, I'd have at least five dollars (that I can remember). I've managed to keep the screen in tact though! For now, at least.

Inside Binder Cover


Anywho...the hits don't stop on the outside. On the inside front cover you have a pocket and handy, dandy pen loop. The planner pages are identical aside from the binding edge. On the binder pages they're clean cut with drilled holes for the rings.

Back Binder Cover


The back cover has another pocket, but this one does double duty. There's a slit cut in the pocket to allow for a notepad. The notepads are made of the same beautiful linen paper as the planner pages, so everything matches nicely. And they're super affordable! I'm going to really enjoy this feature; I can already tell.

Stamped Sticky Notes

And then there are the white Post-It notes. I can't even begin to tell you how pumped I am about these. I actually did a little sing-song thing on the video that I ended up cutting out because my voice cracked and got all cray-cray on me for a second. Just know that when I tell you I love these I am being 100% serious. No more weird colors that take ink poorly!!! And two sizes (3" x 3" and 3" x 6")!? Imagine a grown woman doing the Snoopy dance and you're pretty close.

Ok, friends. There you have it. I'm truly excited about getting started on 2016 Moments Inked planner and I hope you are, too. If you're still itching for more Moments Inked planner reviews be sure to check out Amy, Ashley, Audrey, Suzanne, Lexi, and Laurie's posts. Nichole also put up a great introductory post HERE that you don't want to miss.

And don't forget, if you share photos make sure to use this little dandy, so we can all follow along!


I'll see you back here tomorrow for another little something. Have a great day and happy planning!

Tuesday, December 15, 2015

Release In Review

Good morning, everyone, and welcome back to this month's Papertrey Ink release in review. I have a handful of projects to share with you showcasing the December release, so let's get to it!

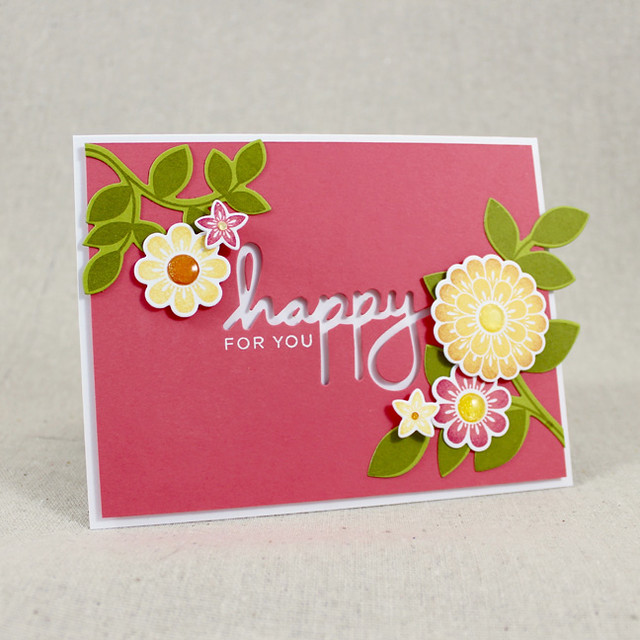
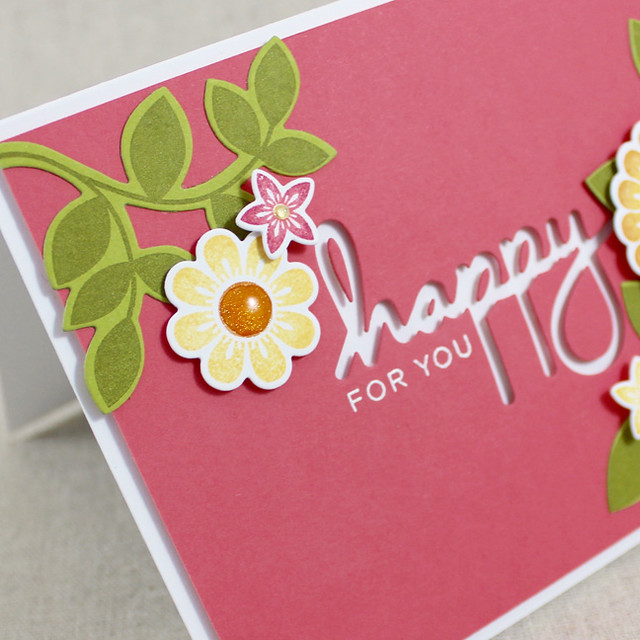
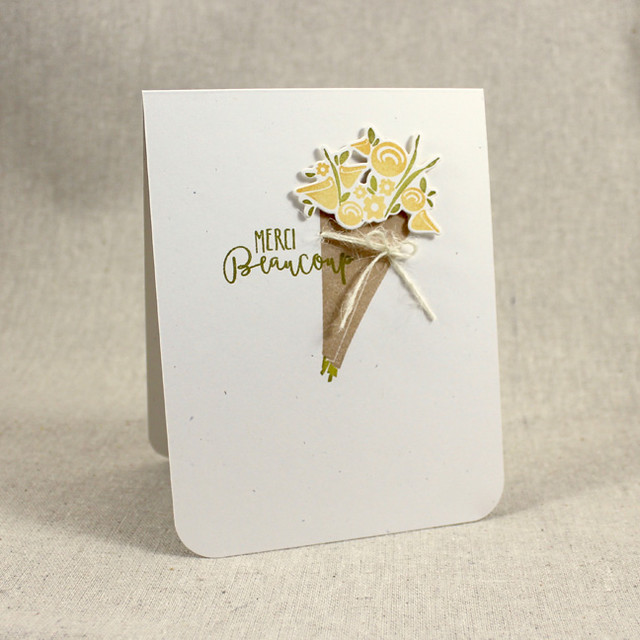
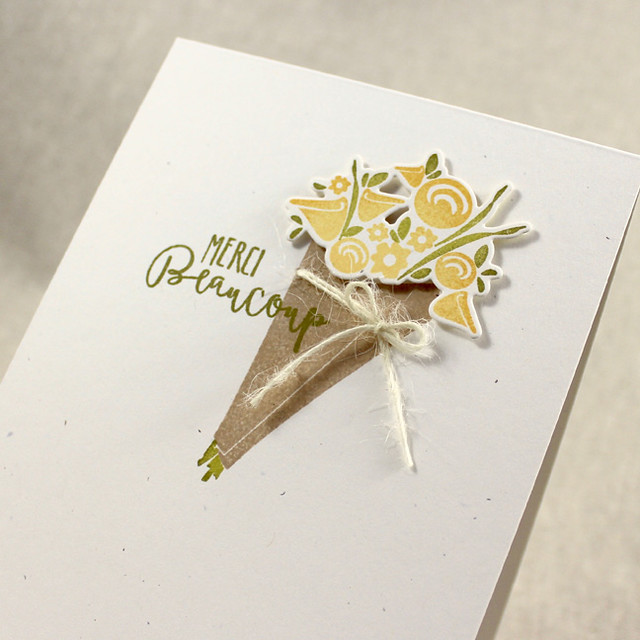
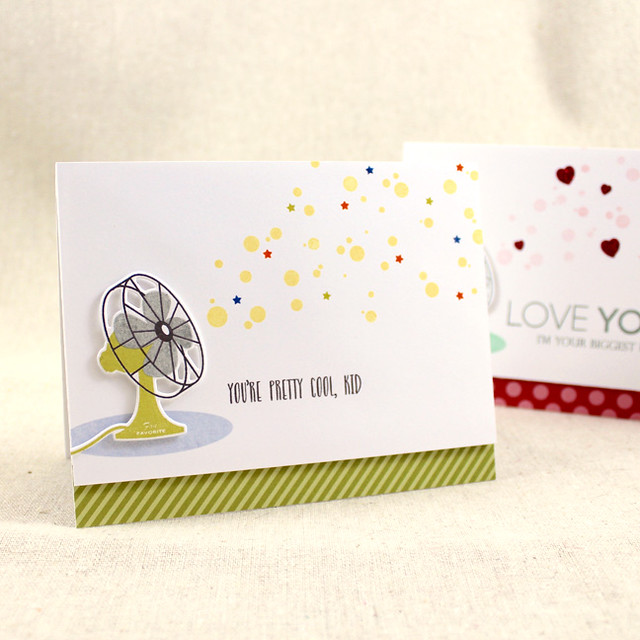
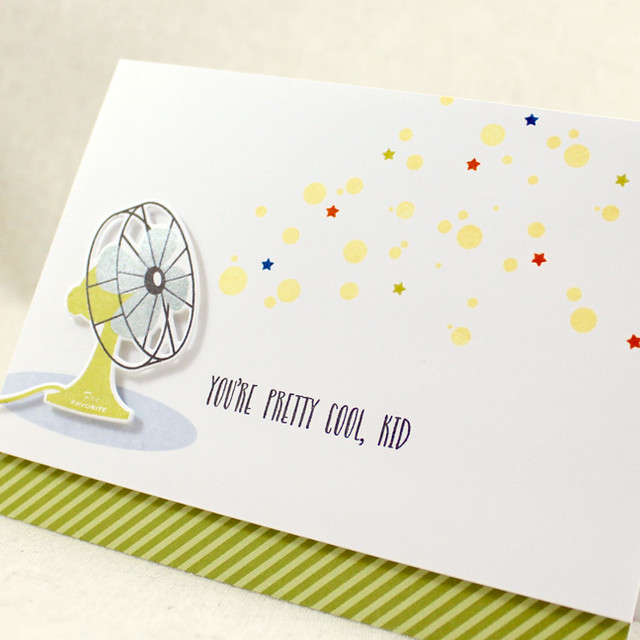
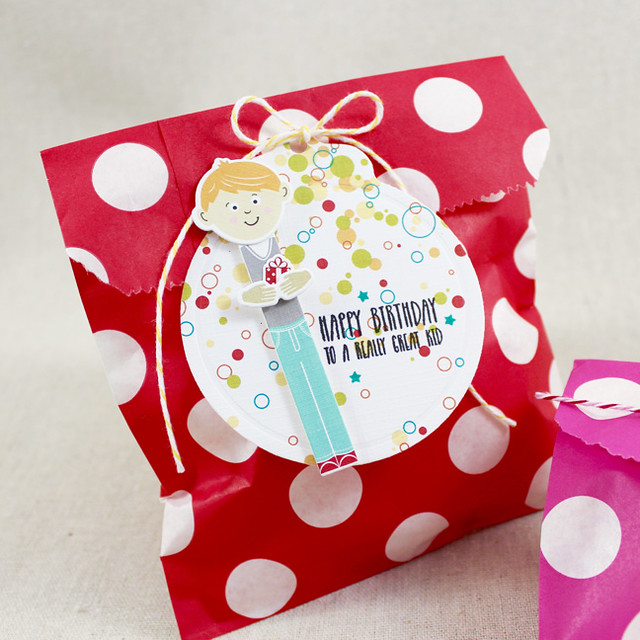
First off, let's take a peek at Maile's new Fresh Floral Wrap-Ups!

Merci Beaucoup Card

I love this set so much! It's perfect for simple cards still brimming with style. For this card, began by die cutting the flowers from Rustic White cardstock and stamping the coordinating images with Harvest Gold, Summer Sunrise, Simply Chartreuse, and Ripe Avocado inks.

Merci Beaucoup Close Up

Next, I stamped the wrap onto a Rustic White card base using Classic Kraft ink and the sentiment in Ripe Avocado, overlapping them slightly. I wanted to add a Rustic Cream twine bow, so I stitched straight through the card front and finished the twine in a bow. I added the flowers with foam tape and rounded the bottom corners as a final touch.

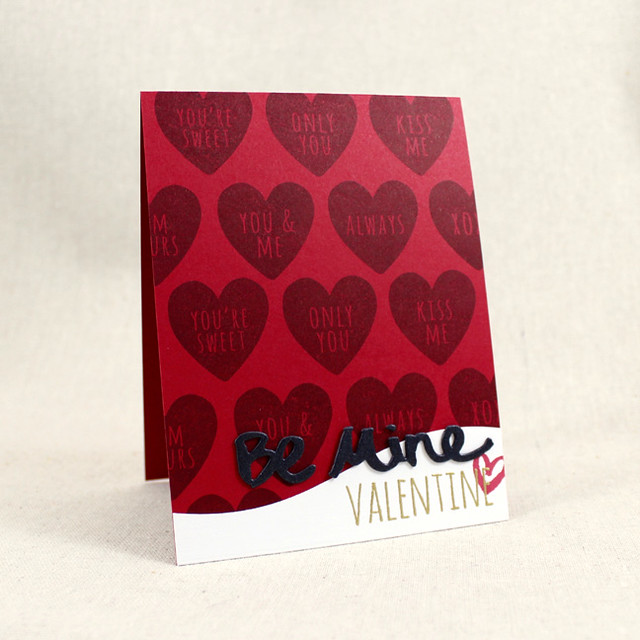
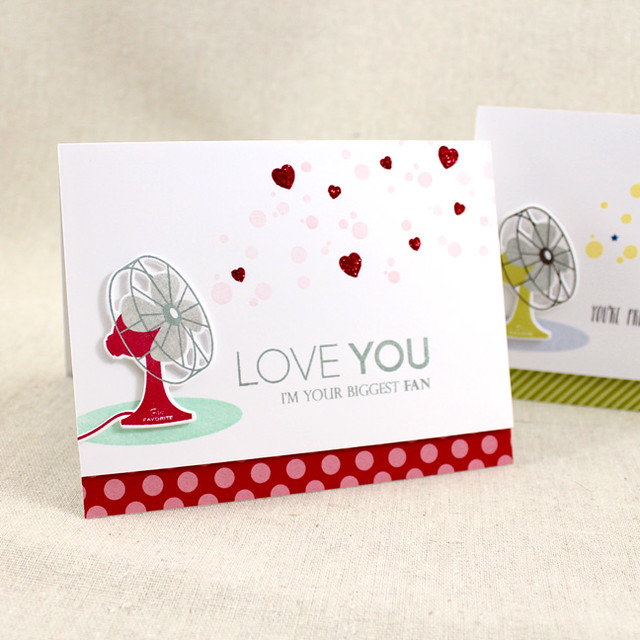
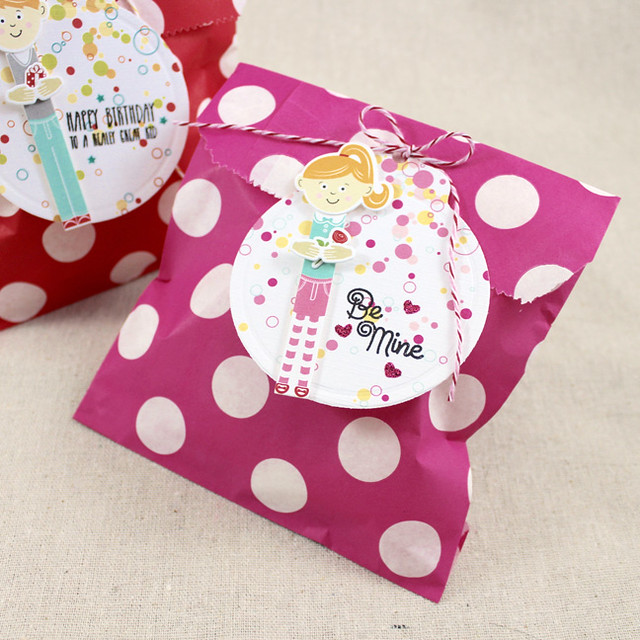
Next up is XOXO. This is one of those wonderful basics that can go from bright and colorful to sophisticated with a simple ink swap. I can't wait to play with this set more.

Be Mine Valentine Card

I began by stamping a Pure Poppy card base with a selection of the conversation hearts images in Scarlet Jewel ink. A little tip: I lined up the hearts on a large block and only had to make three impressions to finish this background. Super easy. Next, I die cut a Sentiment Splits: Vertical Curved section from Fresh Snow Linen cardstock and heat embossed the "valentine" sentiment with gold powder. I embellished that sentiment with one of the brushstroke hearts stamped in Pure Poppy ink.

Be Mine Valentine Close Up

Next, I die cut the "Be Mine" shape from Onyx Shimmer cardstock three times and layered them to give a bit of dimension. I adhered the Sentiment Splits shape to the card base and added the die cut words overtop. It's a nice simple card that's masculine enough to give my fella, but still has a little sparkle to keep me happy.

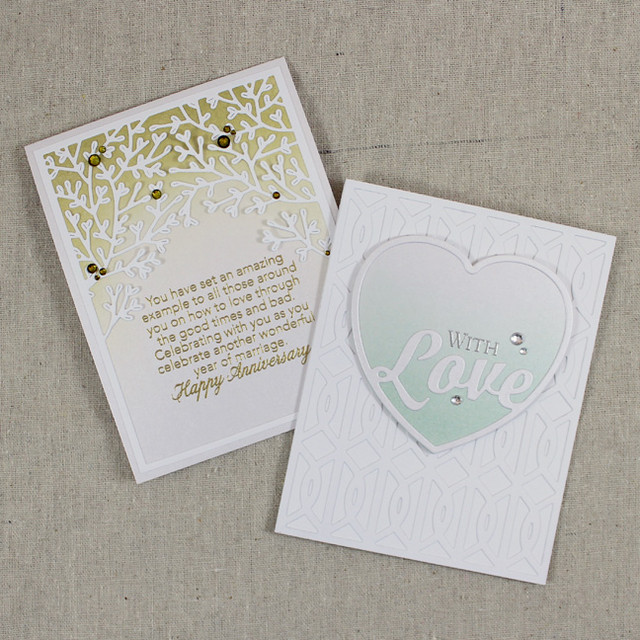
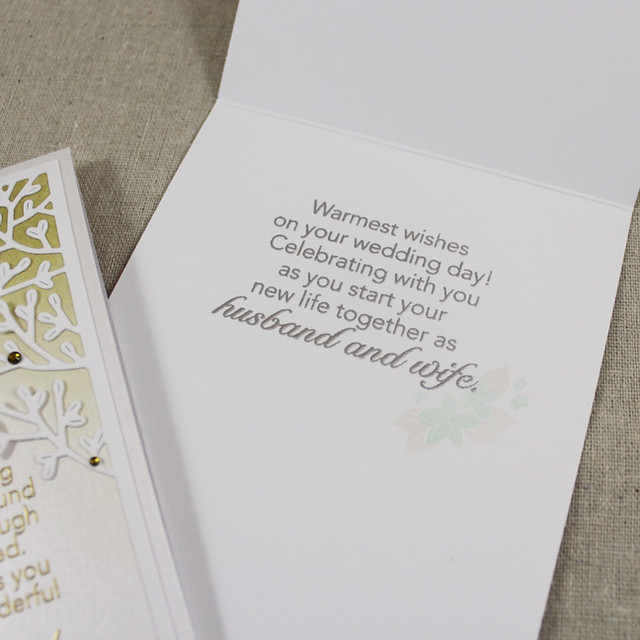
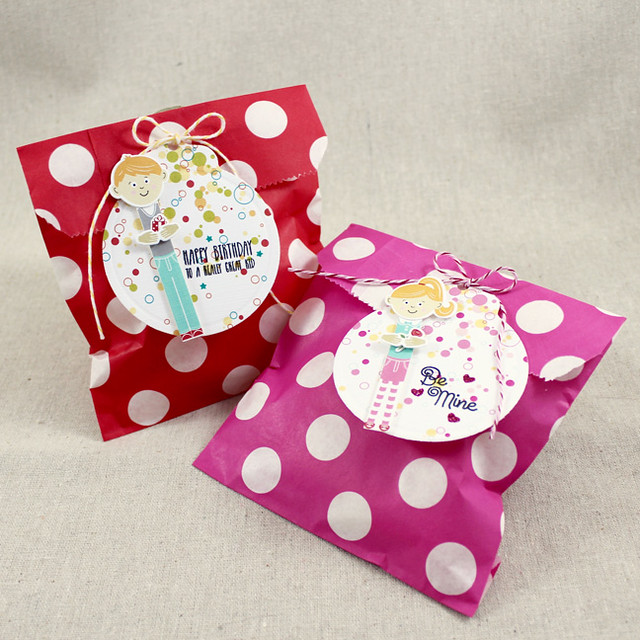
Next I have two wedding and anniversary cards that were made with a similar style in mind. These pair Dawn's Tucked In series with the new Enclosed: Heart set.

Wedding & Anniversary Cards

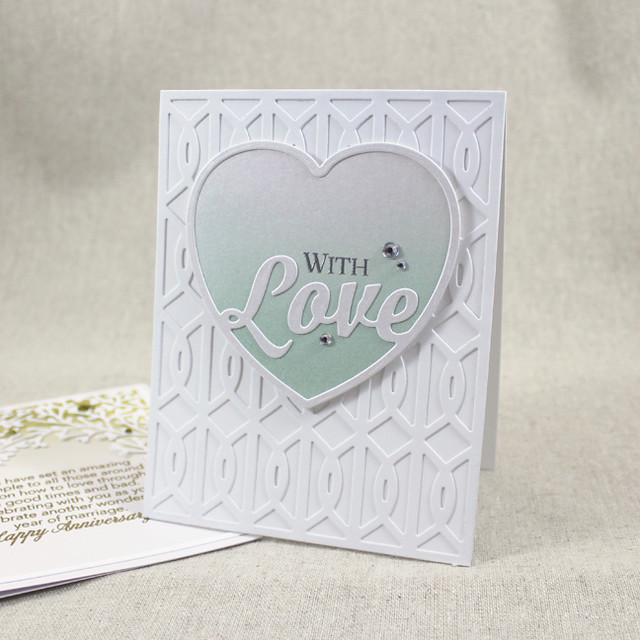
I started with the wedding card.

With Love Wedding Card

I began by die cutting the large heart from Enclosed: Heart from White Shimmer stock and blended it with Aqua Mist ink. The shimmer stock is very forgiving when it comes to the blending, but it does take awhile to dry, so keep that in mind. In the meantime I die cut the outline heart, also from shimmer stock, and a Cover Plate: Twist from white cardstock. I adhered the cover plate to a white card base to give a subtle white-on-white appearance and heat embossed the Tucked In: Wedding sentiment inside.

WIth Love Wedding Card Interior

I added the tiny floral cluster using second generation Aqua Mist flowers and Perfect Pearls leaves (got to get that shimmer inside, too). Next, I heat embossed the "with" to the blended heart and adhered the heart outline shape to the blended heart shape. I finished up by adhering the heart to the front of the card and embellishing with a few clear rhinestones.

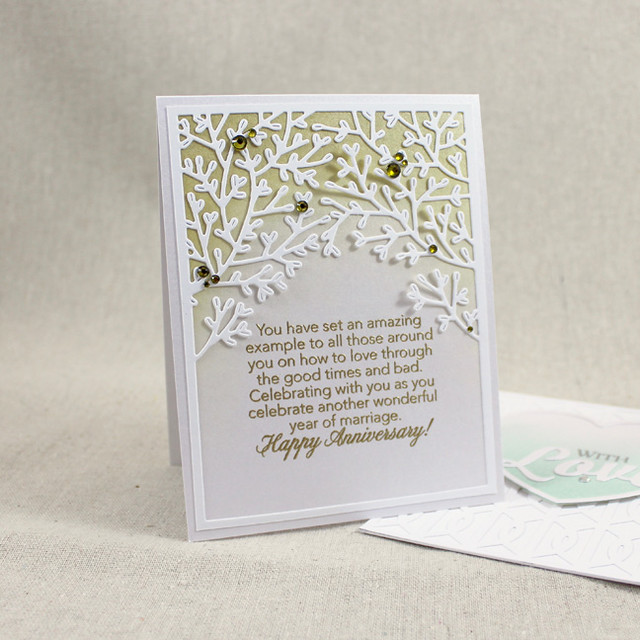
Then came the anniversary card.

Wooded Anniversary Card

This time I used a shimmer stock base and did the blending on the card front itself (using Spring Moss, Simply Chartreuse, and Ripe Avocado inks), masking off the very edges to keep them white. Then I die cut the Cover Plate: In The Woods from white cardstock and trimmed the outer frame to make it a little more delicate. Once the card base was dry, I heat embossed the sentiment with gold powder and added a sprinkling of rhinestones that I colored to match with a Copic marker.

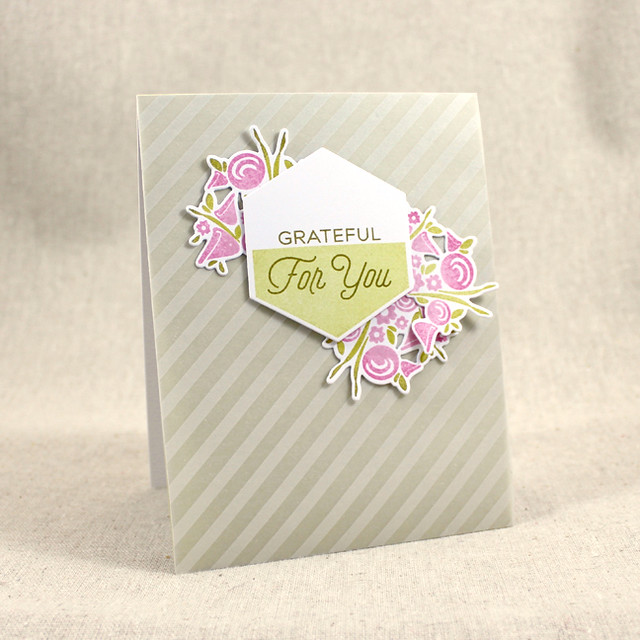
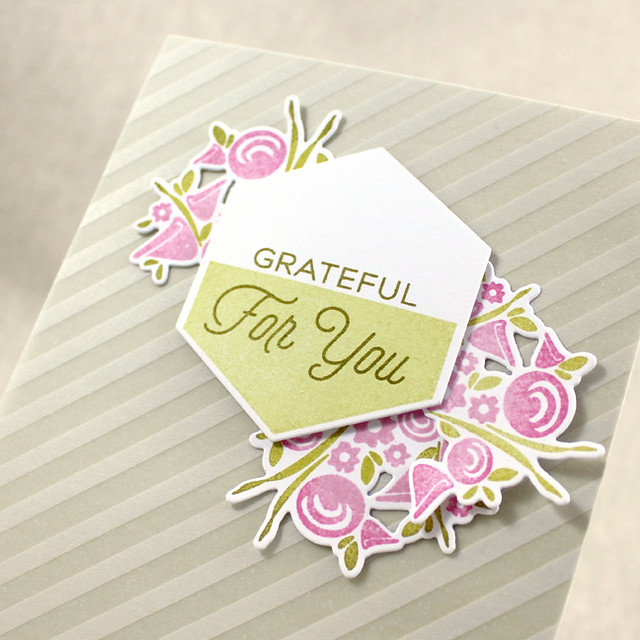
On this final card I paired Nichole's new Two Toned set with the flowers in Maile's Fresh Floral Wrap-Ups.

Grateful For You Card

I began by die cutting the hexagon shape from white cardstock and stamping it with the half-hex image in the Two Toned set using Spring Moss ink. I then added the sentiment, also from Two Toned, with Ripe Avocado ink. Then I die cut three of the floral clusters from white cardstock. I stamped the flowers in Lovely Lady and Hibiscus Burst inks and the leaves were stamped with either Simply Chartreuse and Ripe Avocado inks or Spring Moss and Simply Chartreuse inks.

Grateful For You Close Up

I adhered the sentiment hexagon to a piece of striped vellum with foam tape and tucked the flowers in around it. Then, I adhered the whole vellum layer to a Spring Moss card front, hiding the adhesive behind the sentiment panel and flowers.

Well, that's all for me today. Make sure to check in with Amy, Ashley, Betsy, DanielleDawn, Heather, Kay, Laurie, and Melissa to see their projects, too! Sean and I are in Italy right now, so if you want to follow along on our adventures keep an eye on my Instagram or Twitter feeds. See you soon!

Recipes:
Merci Beaucoup Card
Stamps: Fresh Floral Wrap-Ups - Papertrey Ink
Cardstock: Rustic White - Papertrey Ink
Ink: Harvest Gold, Summer Sunrise, Simply Chartreuse, Ripe Avocado - Papertrey Ink
Other: Fresh Floral Wrap-Ups Die, Rustic Cream Twine - Papertrey Ink; Foam Tape - Scotch

Be Mine Valentine Card
Stamps: XOXO - Papertrey Ink
Cardstock: Pure Poppy, Fresh Snow Linen, Onyx Shimmer - Papertrey Ink
Ink: Scarlet Jewel, Pure Poppy - Papertrey Ink; Delicata Gold - Tsukineko
Other: XOXO Die, Sentiment Splits: Vertical Curved Die - Papertrey Ink; Gold Embossing Powder - Filigree

With Love Wedding Card
Stamps: Enclosed: Heart, Tucked In: Wedding - Papertrey Ink
Cardstock: White Shimmer - Papertrey Ink; white
Ink: Aqua Mist - Papertrey Ink; VersaMark - Tsukineko
Other: Enclosed: Heart Die, Cover Plate: Twist Die - Papertrey Ink; Clear Rhinestones - Kaisercraft; Silver Embossing Powder - Filigree; Pearl Perfect Pearls - Ranger

Wooded Anniversary Card
Stamps: Tucked In: Anniversary - Papertrey Ink
Cardstock: White Shimmer - Papertrey Ink; white
Ink: Spring Moss, Simply Chartreuse, Ripe Avocado - Papertrey Ink; Delicata Gold - Tsukineko
Other: Cover Plate: In The Woods - Papertrey Ink; Clear Rhinestones - Kaisercraft; Tiny Rhinestones - Mark Richards; Gold Embossing Powder - Filigree; Marker - Copic

Grateful For You Card
Stamps: Two Toned, Fresh Floral Wrap-Ups - Papertrey Ink
Cardstock: Spring Moss, Striped Sheer Basics Vellum - Papertrey Ink; white
Ink: Lovely Lady, Hibiscus Burst, Simply Chartreuse, Ripe Avocado, Spring Moss - Papertrey Ink
Other: Two Toned Die, Fresh Floral Wrap-Ups Die - Papertrey Ink; Foam Tape - Scotch

Monday, December 14, 2015

Love All Ways

Good morning, everyone! It's Day 5 of the Papertrey Ink December countdown and we're celebrating love (all of the new products we're introducing today will be available on December 15th at 10pm). We have some wonderful new Valentine's Day products to share with you today. But don't be fooled! These new sets are fantastic for all times of the year. I love it when seasonal stamps can do double duty for other occasions!

Let's start with Dawn's new Be Mine, Valentine set. There are so many adorable images and sentiments in this set, but I couldn't help but fall in love with this sweet little fan. Here's my Valentine version.

Your Biggest Fan Card

I began by die cutting and stamping the fan with Pure Poppy and Stormy Sea inks (the fan blades are second generation). Then, I stamped the fan blades a second time, this time with VersaMark, and added shimmer with Pearl Perfect Pearls. Next, I stamped the grounding oval from Bowl Of Sunshine onto a white panel using Aqua Mist ink. Then it was time to add the "love bubbles."

Your Biggest Fan Close Up

I stamped the dots using my Confetti Toss set using Sweet Blush ink and then went back in and added hearts (also from Dawn's set) with Pure Poppy. I mounted that panel to a card base that I'd already embellished with a strip of Pure Poppy polka dot patterned paper. I finished the card by attaching the fan with foam tape and adding glitter to the hearts for an extra bit of sparkle.

My alternate version follows many of the same steps.

Pretty Cool Kid Card

I used Simply Chartreuse, Smokey Shadow, and Stormy Sea for the fan and Harvest Gold for the bubbles. I added stars (also from Confetti Toss) with Enchanted Evening, Orange Zest, and Simply Chartreuse inks before clear embossing them for a bit of shine. The sentiment, from Block Party, was added in Smokey Shadow.

Pretty Cool Kid Close Up

I used Simply Chartreuse striped patterned paper to embellish the card base. This will be a fun card to give to my nephew just because!

Next up is Betsy's Valentine Pin-Ups kit. The characters in this set are so very cute! And they make up the most charming treat bags.

Kiddo Treat Bags


I created the Valentine version with one of the little girl figures. I began by die cutting and assembling that sweet little lady from the pre-printed papers that come with the kit. Then, I die cut a Tag Sale #4 shape from Confetti Toss patterned paper and stamped it with one of the sentiments in the Valentine Pin-Ups stamp set.

Little Girl Valentine Treat Bag

I also stamped hearts from the set surrounding the sentiment and embellished them with glitter. I added the girl to the tag with foam tape and tied it to a pink treat bag with the Valentine twine that's included in the kit. Cute!

The birthday boy version came together by simply switching out the sentiment (also from Block Party) and giving the boy a gift box to hold (from the Holiday Pin-Ups kit). I also embellished the sentiment with a few stars stamped in Tropical Teal ink.

Little Boy Birthday Treat Bag

I tied the tag to a red treat bag with yellow twine that I happened to have on hand. He's all set and ready for Charlie's birthday!

Thank you so much for joining me today! I'll be back tomorrow with one last post for this month's release. In the meantime, NicholeAmy, Ashley, Betsy, Danielle, Dawn, Heather, Kay, Laurie, and Melissa are sharing more Valentine's Day inspiration. Erin, and Maile also have additional projects to share with you today, so be sure to visit them, too. I'll see you again soon!

Recipes:
Your Biggest Fan Card
Stamps: Be Mine, Valentine, Keep It Simple: Love, Confetti Toss, Bowl Of Sunshine - Papertrey Ink
Cardstock: Pure Poppy Polka Dot Patterned Paper - Papertrey Ink; white
Ink: Pure Poppy, Stormy Sea, Sweet Blush - Papertrey Ink; VersaMark - Tsukineko
Other: Be Mine, Valentine Die - Papertrey Ink; Garnet Glitter - Martha Stewart Crafts; Pearl Perfect Pearls - Ranger; Foam Tape - Scotch

Pretty Cool Kid Card
Stamps: Be Mine, Valentine, Block Party, Confetti Toss, Bowl Of Sunshine - Papertrey Ink
Cardstock: Simply Chartreuse Stripe Patterned Paper - Papertrey Ink; white
Ink: Simply Chartreuse, Stormy Sea, Smokey Shadow, Harvest Gold, Orange Zest, Enchanted Evening - Papertrey Ink; VersaMark - Tsukineko
Other: Be Mine Valentine Die - Papertrey Ink; Clear Embossing Powder - Filigree; Foam Tape - Scotch

Valentine Treat Bag
Stamps: Valentine Pin-Ups - Papertrey Ink
Cardstock: Confetti Toss Patterned Paper - Papertrey Ink
Ink: True Black, Raspberry Fizz - Papertrey Ink
Other: Tag Sale #4 Die, Valentine Pin-Ups kit - Papertrey Ink; Foam Tape - Scotch; Tourmaline Glitter - Martha Stewart Crafts

Birthday Treat Bag
Stamps: Block Party, Confetti Toss - Papertrey Ink
Cardstock: Confetti Toss Patterned Paper - Papertrey Ink
Ink: True Black, Tropical Teal - Papertrey Ink
Other: Tag Sale #4 Die, Valentine Pin-Ups kit, Holiday Pin-Ups kit - Papertrey Ink; Foam Tape - Scotch

Sunday, December 13, 2015

Introducing Petite Places: Barnyard

Good morning, everyone! Welcome back for today's Group Post for Papertrey Ink's December countdown (all new products being introduced today will be available on December 15th at 10pm). Today we're introducing Betsy's newest Petite Places collection. The Petite Places series is always a delight, but Betsy has completely outdone herself with this Barnyard edition. I am totally smitten with the adorable details in this set and I'm absolutely positive that you will be, too! How about a project?

Life Is Better Card

I wanted to create a sunrise scene, so I began by sponging Lemon Tart, Harvest Gold, and Aqua Mist inks onto a white card base. I stamped sun rays using the Hello Sunshine set before adding my patterned paper hills. I then stamped my sentiment and the windmill in Smokey Shadow ink.

Life Is Better Close Up

Next, I die cut the barn, sheep, fencing, and clouds. I stamped the adorable, little barn with Pure Poppy and Smokey Shadow inks to give it that classic farm look. The sheep were stamped with Smokey Shadow and then embellished with flocking to make them adequately wooly. To finish up, I simply adhered the die cut elements to the card using flat and foam adhesives.

Thank you so much for joining me today! Make sure to check in with Nichole, Amy, AshleyBetsy, Danielle, Dawn, Heather, Kay, Laurie, and Melissa for more of Petite Places: Barnyard. Erin, and Maile also have additional projects to share with you today, so be sure to visit them, too. I'll see you again soon!

Recipe:
Life Is Better Card
Stamps: Hello Sunshine, Petite Places: Barnyard, Barnyard Sentiments - Papertrey Ink
Cardstock: Simply Chartreuse Stripe Paper, Ripe Avocado Swiss Dot Paper, Classic Kraft, Sheer Basics Vellum Patterned Paper - Papertrey Ink; white
Ink: Lemon Tart, Harvest Gold, Aqua Mist, Smokey Shadow, Pure Poppy - Papertrey Ink
Other: Petite Places: Barnyard Die, Blue Skies Die, In The Meadow Die Collection, Sentiment Splits: Curve Vertical Die - Papertrey Ink; Foam Tape - Scotch; White Fun Flock - Stampendous

Saturday, December 12, 2015

Introducing Gem Inspirations

Good morning, friends, and welcome to the first group post in the Papertrey Ink December countdown (all new products being introduced today will be available on December 15th at 10pm)! Today we're introducing two stamp sets and several dies that embrace the gemstone trend.

Gemstone Cards

Gemstones have been all the rage lately and it's no wonder why. These natural works of art are so versatile! They're great for birthdays, thank you notes, even love letters! The sets we're featuring this morning are sure to get you excited about designing with gems. Let's get on to some projects!

You Are A Gem Card

How about we start with the card showcasing the new Cover Plate: Gem Stone and Betsy's You're A Gem stamp set. This is such a gorgeous cover plate. You're going to love it! I began by sponging Lovely Lady, Hibiscus Burst, and Raspberry Fizz inks onto a piece of white cardstock. I die cut that using the new cover plate die and trimmed off the outer frame, leaving just the large gemstone outline behind. Then, I colored over the gem using a clear Wink of Stella pen to give it some shimmer.

You Are A Gem Close Up

Next, I die cut another cover plate shape, this time from self-adhesive fun foam. I adhered that to the back of the cardstock gemstone and attached the whole piece to a white card base, trimming away the excess. Then, I coated the entire gem surface with Glossy Accents. The result is shiny and sparkly and oh so lovely. I finished the card by stamping one of the focal words from You're A Gem into the center of the stone and then adding the companion sentiment that I heat embossed on a Smokey Shadow die cut banner. The card is simple, but you don't need much when you're rocking a stone that size. How many carats do you think that would even be?!

My second card today pairs the outline gems from You're A Gem with the sentiments from Erin's new Charmed set. This set is such a great way to customize birthday cards for your recipient's birth month!

October Birthday Card

I began by heat embossing the gems onto watercolor paper with white powder. Next, I loosely painted the gems using a mix of watercolors and shimmer spray. That combo gave the gems a beautiful, subtle shimmer that I just love. I also added splatters in varying hues of the same pink color for some additional depth.

October Birthday Close Up

Once that panel was dry, I stamped the sentiment in Raspberry Fizz ink and mounted it to a white card base with foam tape. The card could still use a bit of luster, so I die cut the simple rectangular frame using the new Charmed Frame. I wanted to add a bit of richness, so I used Luxe Silver Adhesive paper that I'd attached to white cardstock. The metallic silver frame really pops against that pink, doesn't it?

Well, that's all for me today. Make sure to check in with Nichole, Amy, Ashley, Betsy, Danielle, Dawn, Heather, Kay, Laurie, MelissaErin, and Maile for more of this month's fabulous release. I'll see you again soon!

Recipes:
You're A Gem Card
Stamps: You're A Gem - Papertrey Ink
Cardstock: Smokey Shadow - Papertrey Ink; white
Ink: Lovely Lady, Hibiscus Burst, Raspberry Fizz - Papertrey Ink; VersaMark - Tsukineko
Other: Cover Plate: Gem Stone, Tag Sale #10 - Papertrey Ink; White Embossing Powder - Filigree; Glossy Accents - Ranger; Wink Of Stella Pen - Tsukineko; Fun Foam

October Birthday Card
Stamps: Charmed, You're A Gem - Papertrey Ink
Cardstock: Luxe Silver Adhesive Sheets - Papertrey Ink; Watercolor Paper - Ranger; white
Ink: Raspberry Fizz - Papertrey Ink; VersaMark - Tsukineko
Other: Charmed Frame - Papertrey Ink; White Embossing Powder - Filigree; Foam Tape - Scotch; Watercolors - Gansai Tambi; Pearl Shimmer Spray - Tattered Angels

Tuesday, December 1, 2015

December Color Play

Good morning, friends and welcome to this month's Papertrey Ink Color Play feature! This month we're playing along with this photo:

Source

Aren't alternative holiday color schemes a fun twist for the season? It certainly keeps things interesting. I thought these pretty little packages were so charming in their pinks and reds. And the way those aqua baubles offset those sweet pinks...swoon!

Merry Christmas Ornament Card

I've been itching to pull Dawn's Spruce & Sprigs set back out again, and I thought these colors would compliment those branches quite nicely. I began by stamping the branches onto a white cardstock panel with Aqua Mist, Stormy Sea, and Sweet Blush inks. Then, I sponged a little bit more of the Aqua Mist on the bottom half of the panel and stamped my sentiment. Next, I die cut the ornament and stamped it with Sweet Blush and Berry Sorbet inks.

Merry Christmas Ornament Close Up

I coated the Berry Sorbet portion with liquid adhesive and sprinkled on some crystal glitter. I set that aside to dry while I added an ornament string and adhered the stamped panel to a white cardstock base. I mounted the ornament into place using foam tape and then embellished with a small red bow, to mimic the bow in the inspiration photo.

And there you have it friends! Thank you for joining me today. Have a wonderful week and I'll see you again soon!

Recipe:
Stamps: Spruce & Sprigs, Vintage Ornaments, 'Tis The Season Sentiments - Papertrey Ink
Cardstock: white
Ink: Stormy Sea, Aqua Mist, Berry Sorbet, Sweet Blush - Papertrey Ink
Other: Vintage Ornaments Die, 1/4" Silk Ribbon - Papertrey Ink; R29 Marker - Copic; Crystal Glitter - Martha Stewart Crafts; Metallic Embroidery Floss - DMC; Foam Tape - Scotch