Monday, March 28, 2016

Moments Inked: Fitness Journaling


Good morning, friends! It's my turn to share what I have going on in my planner these days, so I thought I would share my fitness journaling with you. Fitness and physical activity have become increasingly important to me over the past few years. As a result I've been taking more and more classes and spending extra time at the gym. I noticed that those classes were taking up a little too much space in my regular daily planner. I was running out of room for anything else! Add to that the new Moments Inked: Active Symbols set and I knew just what I wanted to do. I created a fitness journal with an extra spiral planner I had on hand (I use the binder for my daily planner) and I'm absolutely loving it. Let's take a peek!

March Goals Dashboard

To start with, I've decided to create monthly dashboards where I can write down goals. There's plenty of space for both monthly and weekly goals.

March Goals Dashboard Close Up

I cut the Fresh Snow Linen full size page using the Moments Inked: Divided die and added a decorative Aqua Mist stripe that I'd die cut with the Monthly Moments: Year Round 1 Die. I added the "goals" from the Moments Inked: Listed set in Smokey Shadow ink.

Goals Dashboard Close Up

I used the Moments Inked: Remembered set and it works perfectly. I stamped the large "1, 2, 3" images in Hibiscus Burst and the smaller "month" and "week" images in Scarlet Jewel.

Schedule Pocket

I added a pocket to the back of that dashboard using the Moments Inked: Pocket Page Die and a piece of Hibiscus Burst patterned paper. I had to cut it so that the raw edge faced out, but using a fresh (or nearly fresh) cutting plate gives a clean enough cut that it's not terribly noticeable. The pocket is ideal for corralling the printed seasonal class schedules from the gym.

Here's what a full week looks like.

Weekly Workout Spread 3.20-26

Rather than fill it all in ahead of time (because schedules change, things come up, and sometimes you get to the middle of the week and just need a rest day gosh darn it) I fill things in as I go. That's why you're seeing my schedule for last week. My first class this week isn't until 9am this morning. And I have at least one chocolate bunny to burn off, so you'd better believe I'm going.

Weekly Workout Spread 3.20-26 Page 1

Anyway, I've been stamping the Moments Inked: Active Symbols images in a color that coordinates (this month that happens to be Aqua Mist) and then following up with additional information in Smokey Shadow.

Weekly Workout Spread 3.20-26 Page 2

Things like class times, distances, and durations are highlighted in Hibiscus Burst. I'm also adding instructor names under each class so I can keep track of who I've worked out with before. Sometimes the instructor changes and it's nice to be able to reference names if they differ from what's on the schedule. I'm still learning the different instructors' names and these notes are helpful.

Workout Notes Close Up

One of the handiest things about using the weekly spreads like this is that there's a built-in notes section. This way I can include pertinent details regarding each day's workout. I've been dealing with a little tendonitis in my left elbow and I can tell by looking at last week's notes that one set of dumbbells gave me more trouble than another. Now I know which weights to stick with until I get the elbow situation under control.

So there you have it! I like that I now have a dedicated place to track my fitness goals. And I also like that I have a little more breathing room in my daily planner. Thank you so much for joining me today! Happy planning!

Tuesday, March 15, 2016

Release In Review

Good morning, friends! Here we are, the final day in this month's Papertrey Ink countdown. This has been such a fun month for me. I hope you've enjoyed it, too. But the fun isn't over yet! I have a handful of additional cards to share with you today, so let's get to it!

First up is Maile's new Splits: Celebrate set. I love the luxe feel of black and gold embossing, so that's how I started this card.

Mint & Gold Celebrate Card

I began by gold heat embossing the ribbony frame onto a piece of Fresh Snow Linen cardstock. I trimmed out the center strip area and colored the ribbon with a minty fresh colored pencil. Next, I heat embossed the sentiment onto a piece of True Black cardstock.

Mint & Gold Celebrate Close Up
I trimmed a piece of Mint Julep + White patterned paper and adhered that to a Mint Julep card base. I adhered the True Black panel and a super narrow strip of gold cardstock to the card base as well. Finally, I mounted the ribbony bits to the card front using foam tape. The end result is simple, but has an elegance thanks to the gold touches.

Next up, I have a card featuring Betsy's new Bloomin' Cute set.

Thanks So Much Bouquet Card

I began by partially die cutting the word "thanks" from a Fresh Snow Linen panel of cardstock. I trimmed away the parts I didn't want and set that panel aside. Next, I stamped a basic plaid pattern onto an Enchanted Evening card front using the Background Basics: Super Stripes set.

Thanks So Much Bouquet Close Up 2

I heat embossed the companion sentiment from the set onto a strip of Berry Sorbet Bitty Dot paper and trimmed the end into a "v" before adhering it to the sentiment panel.

Thanks So Much Bouquet Close Up

I die cut several of the Bloomin' Cute flowers and leaves and stamped them with their coordinating stamps. I used some rock 'n roll inking to get a bit of variation and shading on the images. I arranged the flora on the sentiment panel and adhered the pieces with a mix of flat and foam adhesives. As a final touch, I rounded the bottom corners to soften things a bit. Isn't that cheerful? This is absolutely a fun new floral that I'm sure to be reaching for again and again.

Like on this next card! This time I paired the Bloomin' Cute set with Betsy's Inspired: Lord set.

Thanks To The Lord Card

I began by lightly tracing a circle on a white card base. I used that circle as a guide for stamping my leaves (in Limeade Ice, Green Parakeet, and New Leaf inks). Once the base of my wreath was finished, I stamped the sentiment from Inspired: Lord in the center. I followed up with a few small splatters from Script Swirls: Birthday stamped in Aqua Mist.

Thanks To The Lord Close Up

Next, I sponged Aqua Mist ink onto a piece of white cardstock and die cut it with the Inspired: Lord die. I also die cut a few of the flowers from Bloomin' Cute and stamped them with their coordinating images. The "Lord" shape and the flowers were attached to the card front with both flat and foam adhesives to give dimension.

On to a card I made pairing What The Doodle: Feather with Keep It Simple: Encouragement.

Hang In There Card

I began by stamping the Southwestern Style background pattern onto a Smokey Shadow card base using True Black ink. Next, I stamped the feathers on a Fresh Snow Linen panel using Summer Sunrise, Harvest Gold, and Aqua Mist inks. Then I added the sentiment in True Black.

Hang In There Close Up

I trimmed around the feathers so part of the card base would show once the panel was attached. I mounted that piece to the card front with foam tape and embellished with a few black rhinestones in order to draw attention to the sentiment.

My last card for this release features Nichole's Script Swirls: Birthday set.

Confetti Birthday Card

I began by stamping the swirl sentiment onto a piece of Confetti Toss patterned paper using True Black ink. Next, I added a trio of stars, also from the set, in Raspberry Fizz. I embellished the stars with fine crystal glitter and adhered that panel to an Aqua Mist card base.

Confetti Birthday Close Up

Next, I heat embossed the Keep It Simple: Birthday II sentiment onto a strip of True Black cardstock using white powder. I also trimmed out a strip of Aqua Mist Stripe patterned paper. I layered the two on the card front, attaching the sentiment piece with foam tape. I love how carefree these elements all feel when paired together.

Ok, everbody, that's all for me today. Thank you so much for joining me this week! Make sure to check in with Nichole, Amy, Ashley, BetsyDanielle, Dawn, Heather, Kay, Laurie, and Melissa to see more projects and details about tonight's release. Happy shopping and I'll see you again soon!

Recipes:
Mint & Gold Celebrate Card
Stamps: Splits: Celebrate - Papertrey Ink
Cardstock: Fresh Snow Linen, Mint Julep, Mint Julep + White Patterned Paper, True Black - Papertrey Ink; metallic gold
Ink: VersaMark - Tsukineko
Other: Gold Embossing Powder - Filigree; Colored Pencils - Prismacolor; Foam Tape - Scotch

Thanks So Much Card
Stamps: Bloomin’ Cute, Background Basics: Super Stripes - Papertrey Ink
Cardstock: Enchanted Evening, Fresh Snow Linen, Berry Sorbet Bitty Dot Patterned Paper - Papertrey Ink
Ink: Lemon Tart, Harvest Gold, Summer Sunrise, Orange Zest, Berry Sorbet, Green Parakeet, New Leaf, Enchanted Evening - Papertrey Ink
Other: Bloomin’ Cute Die, Bloomin’ Cute Sentiments Die - Papertrey Ink; White Embossing Powder - Filigree; Foam Tape - Scotch

Thanks To The Lord Card
Stamps: Inspired: Lord, Bloomin’ Cute, Script Swirls: Birthday - Papertrey Ink
Cardstock: white
Ink: Green Parakeet, New Leaf, Limeade Ice, Hibiscus Burst, Raspberry Fizz, Aqua Mist, Stormy Sea, Lemon Tart, Harvest Gold, Summer Sunrise - Papertrey Ink
Other: Inspired: Lord Die, Bloomin’ Cute Die - Papertrey Ink; Foam Tape - Scotch

Hang In There Card
Stamps: What The Doodle: Feather, Keep It Simple - Encouragement, Southwestern Style - Papertrey Ink
Cardstock: Smokey Shadow, Fresh Snow Linen - Papertrey Ink
Ink: Summer Sunrise, Harvest Gold, Aqua Mist, True Black - Papertrey Ink
Other: Foam Tape - Scotch; Rhinestones - Kaisercraft

Confetti Swirl Birthday Card
Stamps: Script Swirls: Birthday, Keep It Simple: Birthday II - Papertrey Ink
Cardstock: Aqua Mist, True Black, Aqua Mist Striped Patterned Paper, Confetti Toss Patterned Paper - Papertrey Ink
Ink: True Black, Raspberry Fizz - Papertrey Ink; VersaMark - Tsukineko
Other: Foam Tape - Scotch; Fine Crystal Glitter - Martha Stewart Crafts

Monday, March 14, 2016

Introducing Stitched Trays & More

Good morning and welcome back for Day 5 of the Papertrey Ink March countdown. Today the whole team is getting together to showcase the newest additions to Erin Lincoln's stitching dies series. I absolutely love stitching projects and the new Stitched Tray Dies have me delighted to be reaching for my needle and thread. These petite trays are so adorable! Not only are they sweet, but super functional too. How about we get on to the projects, eh?

I created this adorable monogrammed catch-all to sit on my dresser. I often have small things in my pockets at the end of the day and now they'll all be corralled rather than just rolling around the top of (and usually off of) my dresser.

Felt Tray Embroidery Detail

I began by die cutting three tray shapes, one from Berry Sorbet felt, one from Spring Moss felt, and the third from White Tag Stock. I used the new Stitched Monogram Frame: Square to add the detail holes to the Spring Moss layer. I also die cut an "L" and some scalloped borders from Vintage Cream felt.

Felt Monogram Tray Down

I stitched the monogram and scroll designs on the Spring Moss layer. Usually I use three strands of floss, but I wanted the stitching patterns to be nice and bold here, so I used all six strands of floss. Next, I stitched the buttons to the Berry Sorbet layer and trimmed the scalloped borders to fit the sides of the tray. I cut the Tag Stock tray into sections that I could sew into the bottom and sides of the tray. This isn't an absolutely necessary step, but it does add a nice level of stability to the finished product.

Filled Felt Tray

I began stitching the tray parts together (this was done with the typical three strands of floss). I started by sewing the bottom of the tray, sandwiching the Tag Stock between the felt layers. Next came the sides. The scalloped borders didn't have stitching holes, so I just held them in place while I stitched. The holes in the tray were easy enough to follow to keep my stitches neat and tidy.

Felt Tray Button Detail

To connect the corners, I simply wrapped crochet thread in a figure eight around the buttons on opposing sides. It's so cute! I can't wait to make another one.

The whole time I was stitching together my tray, I couldn't help but think of how great it would be for a little treat tray. So that's what I created next. It's perfect for a cupcake.

Cupcake Tray

I began by die cutting the tray from Sparkle & Shine patterned paper. I scored the bottom along the holes and snipped the bottom of each "V" so things would fold more easily. I folded up the sides and tied each corner together with a piece of white crochet thread. The holes just end up looking like a charming eyelet detail.

Cupcake Tray Close Up

I wanted to include a tag with my treat tray, so I die cut a Tag Sale #4 shape from Hawaiian Shores patterned paper to use as my base. Next, I die cut three Shaped Sayings: Birthday shapes and adhered them together for stability.

Cupcake Tray Tag

I attached those to the tag base and attached a strip of Hibiscus Burst cardstock that I'd heat embossed with a sentiment from Just Desserts. I then glittered the Shaped Sayings: Birthday shape with fine Crystal glitter for sparkle.

Cupcake Tray Down

I scrunched up some crepe paper and nested it around a cupcake inside the tray. Then, I placed the whole thing in a clear cello treat bag and tied it closed with some Simply Chartreuse Saddle-Stitched ribbon. I tied on my tag with white crochet thread and it was ready to deliver.

Last, but not least I have one more Just Desserts project to share with you today. This time I paired it with Erin's new Fancy Pants Sentiments set. I love these sets together!

Strawberry Birthday Cake Card

I began by die cutting the Tag Sale: Quilted shape from white cardstock. I masked off the scalloped edges and sponged the center with Aqua Mist ink. Next, I die cut the cake, strawberries, and candles from white cardstock. I stamped the layers of the cake with Lemon Tart and Harvest Gold inks. The crumbs were added using a kissing technique and Fine Linen ink. I stamped the frosting in third generation Berry Sorbet for a nice soft pink color.

Strawberry Cake Close Up

Next, I stamped the berries. The strawberries were inked with Berry Sorbet and Pure Poppy ink. I added the hulls with Green Parakeet ink and the blueberries with Enchanted Evening ink. I added the berries to the cake with foam tape before adding the Harvest Gold candles with flat adhesive.

Strawberry Birthday Cake Card Close Up

Then, I stamped the Fancy Pants sentiment on the tag shape using Enchanted Evening and Green Parakeet inks. I tied baker's twine to the tag before adhering it to a Berry Sorbet card front that I'd textured with the By The Numbers Impression Plate. I mounted the cake with foam tape and then added a bit of Wink Of Stella to the candles and blueberries to make them shimmer.

That's it for me today. I'll see you back here tomorrow for this month's wrap up. In the meantime, make sure to check in with Nichole, Amy, Ashley, Betsy, Danielle, Dawn, Heather, Kay, Laurie, and Melissa to see more of the new stitching dies. Erin and Maile also have more to share with you, so be sure to pop over and check them out too. See you tomorrow!

Recipes:
Felt Monogram Tray
Felt: Berry Sorbet, Spring Moss, Vintage Cream - Papertrey Ink
Dies: Stitched Tray: Square Dies, Stitched Monogram: Square Die, Sew Stylish Alphabet 1 Die, Small Scallop Border Die - Papertrey Ink
Other: Sweet Blush Buttons, White Tag Stock - Papertrey Ink; Embroidery Floss - DMC; White Crochet Thread

Cupcake Treat Tray & Tag
Stamps: Just Desserts - Papertrey Ink
Cardstock: Fresh Snow Linen, Hawaiian Shores Patterned Paper, Hibiscus Burst, Sparkle & Shine Patterned Paper - Papertrey Ink
Ink: VersaMark - Tsukineko
Other: Shaped Sayings: Birthday Die, Tag Sale #4 Die, Stitched Tray: Square Dies, Simply Chartreuse Saddle-Stitched Ribbon - Papertrey Ink; Fine Crystal Glitter - Martha Stewart Crafts; White Detail Embossing Powder - Filigree; Foam Tape - Scotch; White Crochet Thread; Crepe Paper

Happy Birthday Card
Stamps: Just Desserts, Fancy Pants Sentiments - Papertrey Ink
Cardstock: Berry Sorbet - Papertrey Ink; white
Ink: Aqua Mist, Berry Sorbet, Pure Poppy, Green Parakeet, Enchanted Evening, Lemon Tart, Harvest Gold, Fine Linen - Papertrey Ink
Other: Just Desserts Die, Tag Sale: Quilted Die, By The Numbers Impression Plate - Papertrey Ink; Foam Tape - Scotch; Baker's Twine - Divine Twine; Clear Wink Of Stella - Zig

Sunday, March 13, 2016

Super Heroes & Stars

Good morning and welcome back for Day 4 of the Papertrey Ink countdown! In this morning's group post we're featuring two of Betsy's new sets, Paper Clippings: Congratulations and Dress Up Dolls: Super Heroes.

Congratulations Cards

I'm always looking for fabulous ways to send my congratulations, so the products we're featuring today are a welcome new addition. And the best part? They're great for a wide range of ages, so I can create something to suit just about anyone on my list! Let's get on to some projects!

How about we start with the shaker card.

Congratulations Shaker Card

I started by stamping Hibiscus Burst and Harvest Gold lines onto Mint Julep + White patterned paper. I love how easy it is to customize that line of papers! I trimmed a rectangle from the center and added a Hibiscus Burst mat to the inside. I backed that with Clear Cardstock and added a thin border of foam tape all along the outside edge.

Congratulations Shaker Top

Next, I die cut and stamped a handful of the stars from the set. I added those, some sequins, and some chunky Crystal glitter together to form my shaker filling. I assembled the shaker box and mounted a Paper Clippings die cut shape to the front with bits of foam tape.

Congratulations Shaker Close Up

I wanted to make the shaker the star of the show, so I left the die cut simple and unadorned.

Next up is the Super Hero card.

Congratulations Super Hero Card

I love how versatile this Paper Clippings set is. Who would have imagined that you could get such completely different styles from the same set? I began by die cutting, stamping, and coloring the little boy.

Super Hero Close Up

Next, I stamped a ray and star image on a panel of white cardstock using Lemon Tart and Harvest Gold inks. I sponged a little extra Lemon Tart ink to warm it up a bit, too. I stamped the large "congratulations" over that with Pure Poppy Ink and added the companion sentiment in True Black.

Congratulations Close Up

I added a strip of Pure Poppy cardstock that I'd stamped with polka dots and mounted that whole piece to a Spring Rain card base. My little super hero was added to the card front with foam tape. As a finishing touch, I gave him a glittered lightning bolt to hang on to. This card will be perfect for my nephew the next time he has an accomplishment to celebrate.

And lastly today, I have a quick card I created with a sentiment from Just Desserts and the new Best Birthday Dies.

Celebrating With Streamers & Balloons Card

I began by die cutting the balloons from the Best Birthday die into a piece of Hooray patterned paper. Next, I heat embossed my sentiment using white detail powder.

Celebrating With Streamers & Balloons Close Up 1

I die cut a second balloon shape from Fresh Snow Linen cardstock and reassembled the card front on a piece of polka dot vellum. Then, I added a Hibiscus Burst card base, but I made the front much shorter so it acts more like a hinge than anything else. That way, the vellum balloons maintain their transparent quality.

Celebrating With Streamers & Balloons Close Up 2

I finished the card off with a sprinkling of clear rhinestones. Nice and simple; just the way I like it.

Well, that's all for me today, folks. I hope you've enjoyed today's post! Make sure to check in with Nichole, Amy, Ashley, Betsy, Danielle, Dawn, Heather, Kay, Laurie, andMelissa to see more of these fun new products. Erin and Maile also have more to share with you, so be sure to pop over and check them out too. See you tomorrow!

Recipes:
Congratulations Shaker Card
Stamps: Paper Clippings: Congratulations, Plaid Builder - Papertrey Ink
Cardstock: Mint Julep + White Patterned Paper, Hibiscus Burst, Clear - Papertrey Ink; white
Ink: Hibiscus Burst, Harvest Gold - Papertrey Ink
Other: Paper Clippings: Congratulations Die - Papertrey Ink; Sequins (Marigold, Pink Peonies) - Pretty Pink Posh, Sequins (Mint Julep) - Hazel & Ruby; Foam Tape - Scotch; Chunky Crystal Glitter - Martha Stewart Crafts

Congratulations Super Hero Card
Stamps: Paper Clippings: Congratulations, Dress Up Dolls: Super Hero, Hello Sunshine, Blue Skies - Papertrey Ink
Cardstock: Spring Rain, Pure Poppy - Papertrey Ink; white
Ink: Pure Poppy, Lemon Tart, Harvest Gold, True Black - Papertrey Ink; Tuxedo Black - Memento
Other: Dress Up Dolls: Super Hero Die - Papertrey Ink; Fine Crystal Glitter - Martha Stewart Crafts; Foam Tape - Scotch; Copic Markers

Celebrating With You Card
Stamps: Just Desserts - Papertrey Ink
Cardstock: Hooray Patterned Paper, Bitty Dot Sheer Basics Vellum, Hibiscus Burst, Fresh Snow Linen - Papertrey Ink
Ink: VersaMark - Tsukineko
Other: Best Birthday Die - Papertrey Ink; Rhinestones - Kaisercraft/Mark Richards

Saturday, March 12, 2016

Sweet Inspirations

Good morning, everyone, and welcome to the first group post for this month's Papertrey Ink countdown. I love any excuse to celebrate, but birthdays are my favorite! And no birthday would be complete without cake. I'm a big cake fan (which is why I have to go to the gym five days a week), so today is right up my alley.


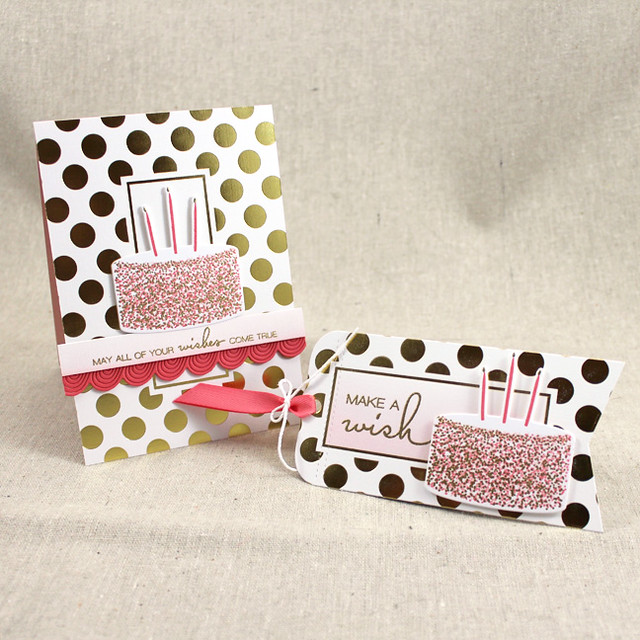
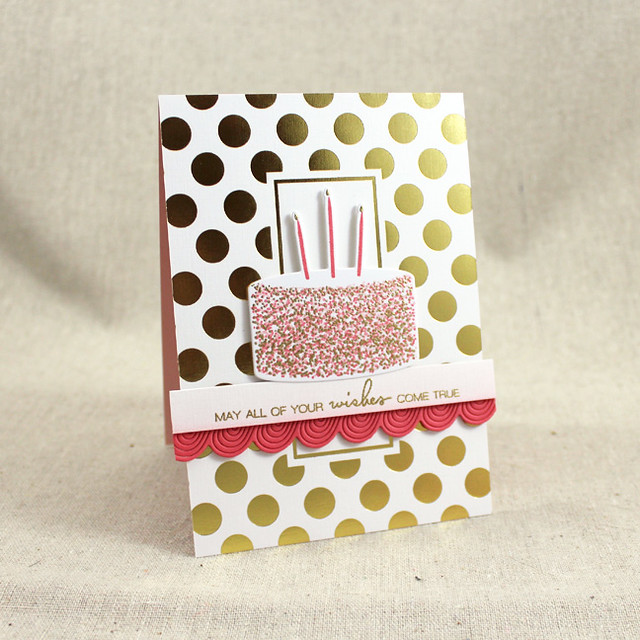
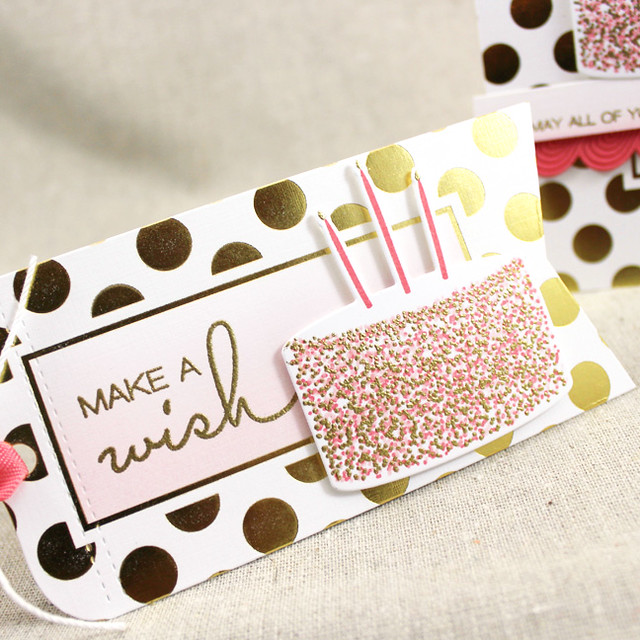
My first set of projects is another card and tag ensemble. I played around with the sprinkle cake again, but this time I gold embossed one of the sprinkle layers to give the whole package a much more luxe feel.

Pink & Gold Wishes Birthday Ensemble

Let's start with the card.

All Of Your Wishes Card

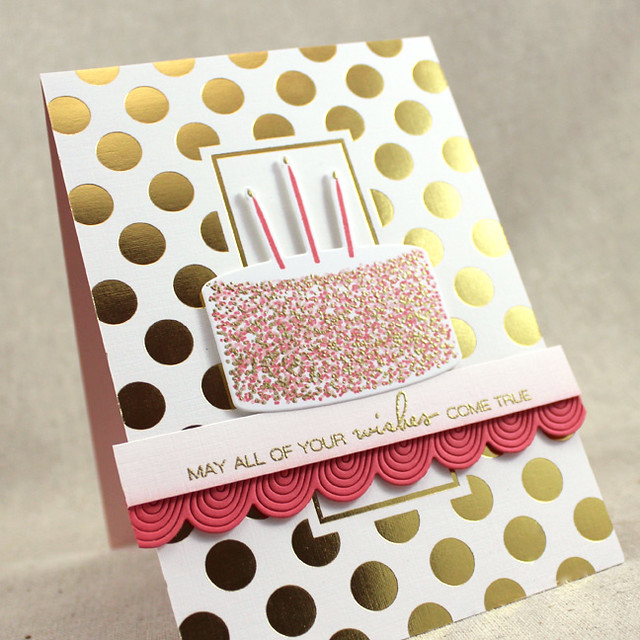
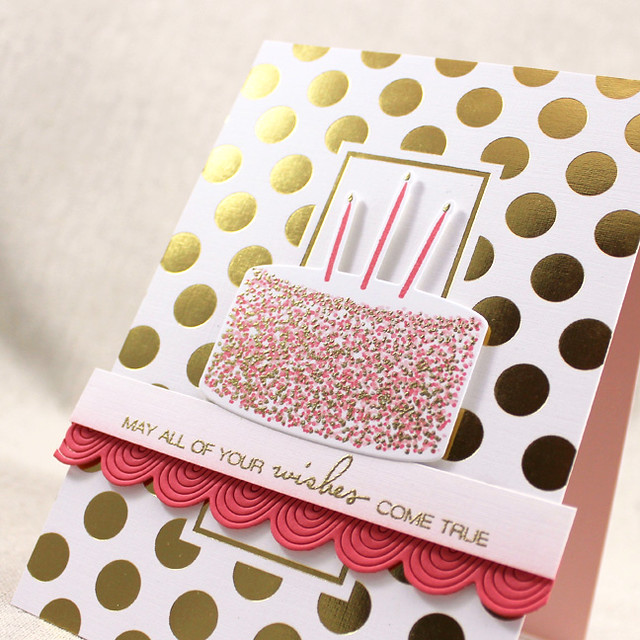
I began by die cutting the cake from white cardstock. I stamped the sprinkles in Berry Sorbet, Sweet Blush, and the gold embossing. The candles were added with Berry Sorbet before I heat embossed the flames with gold powder, too.

Wishes Come True Close Up

Next, I sponged a strip of Fresh Snow Linen cardstock with Sweet Blush ink and heat embossed that with my sentiment (this one is from Just Desserts Sentiments). I die cut one of the new Frosted Border shapes from Berry Sorbet cardstock and adhered it behind my sentiment strip.

Wishes Come True Close Up 2

I chose one of the Luxe Gold Foil papers to use as my card front. I trimmed down the sides a bit to allow my sentiment strip and piped border to hang over the edges. I adhered the gold foil layer to a Sweet Blush card base and then attached my sentiment strip. The cake came last, mounted with foam adhesive.

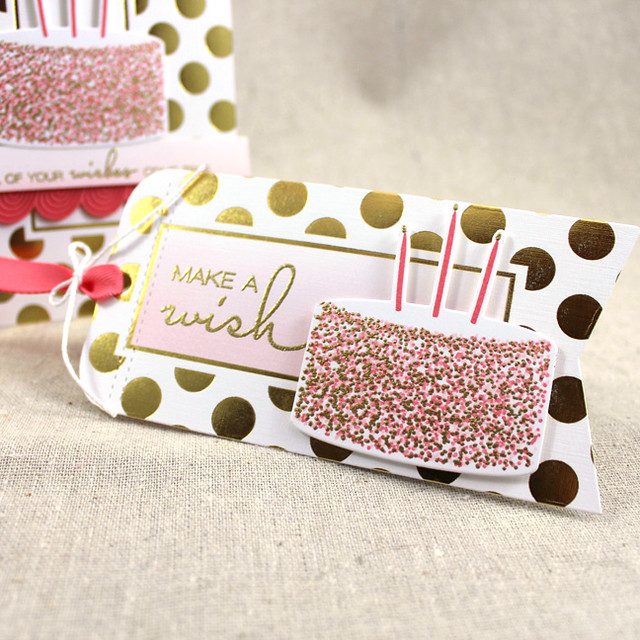
The coordinating tag was made in a similar fashion.

Make A Wish Tag

I die cut the tag base from another sheet of the same Luxe Gold Foil patterned paper using the Basic Bookmark 2 Die. I masked off the inner rectangle and sponged it with Sweet Blush ink before heat embossing my sentiment.

Make A Wish Tag Close Up

I added another cake, stamped the same way as the one on the card. A bit of Berry Sorbet Twill and some white crochet thread were the perfect finishing touch.

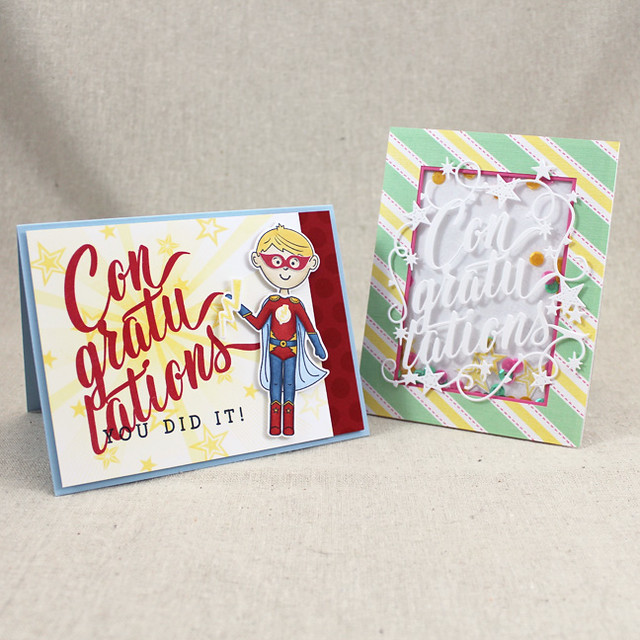
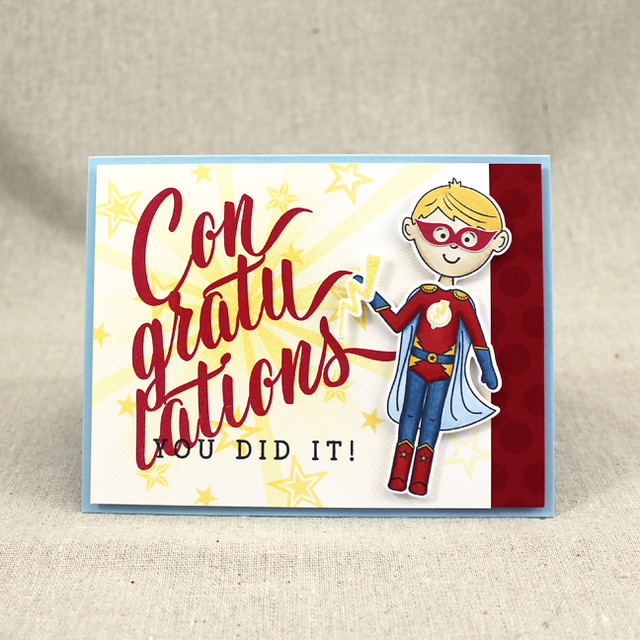
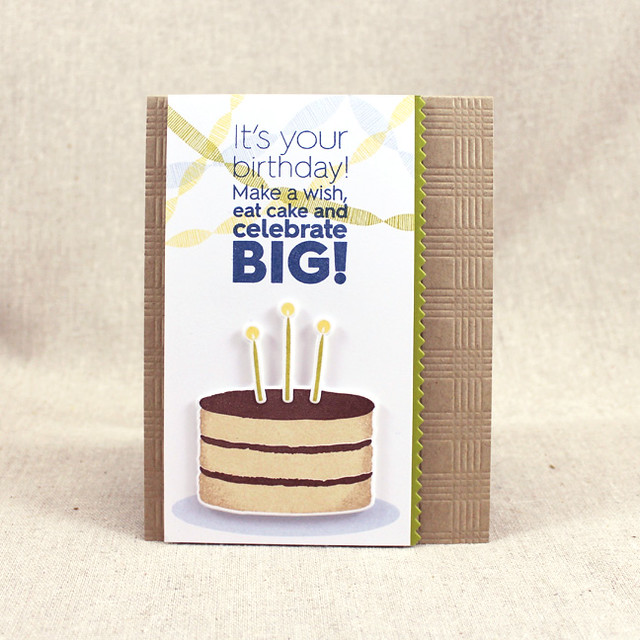
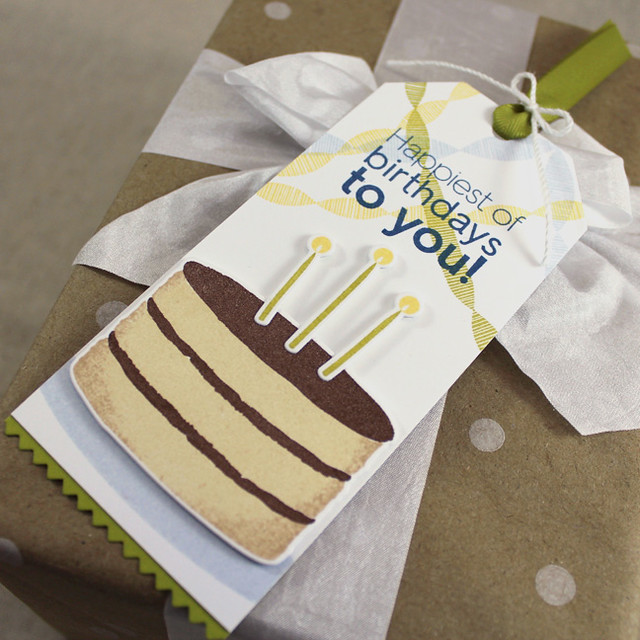
Next up is a more masculine ensemble.

Masculine Layer Cake Ensemble

Again, I began with the card. I stamped a panel of white cardstock with the streamers from Hooray in Spring Rain, Harvest Gold, and Simply Chartreuse inks. Next, I stamped the sentiment from Dawn's new Ombre Birthday Sentiments set in Enchanted Evening.

Celebrate Big Card

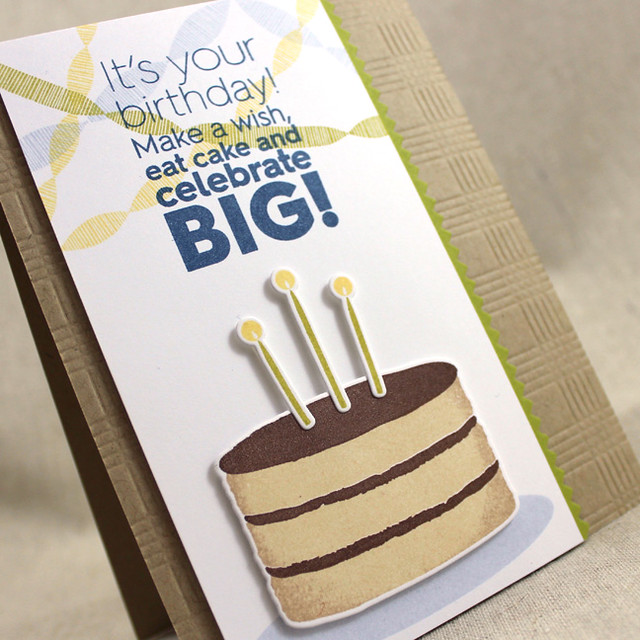
I also added a grounding oval using the putting green image from On The Links using Spring Rain ink. Then, I die cut a layer cake shape from white cardstock and stamped it with Fine Linen rolled in a bit of Classic Kraft. The frosting was then added in Dark Chocolate. I die cut the candles and stamped them with Simply Chartreuse and Harvest Gold inks. I found it easiest to stamp them by keeping them in the negative while doing my stamping. It just keeps them all nice and lined up for you.

Celebrate Big Close Up

I adhered the cake to the panel with foam tape and the candles followed in the same way. I added a pinked border of Simply Chartreuse cardstock before mounting that whole panel to a Classic Kraft card base that I'd textured with the Picnic Plaid Impression Plate. Sufficiently dudely, I think.

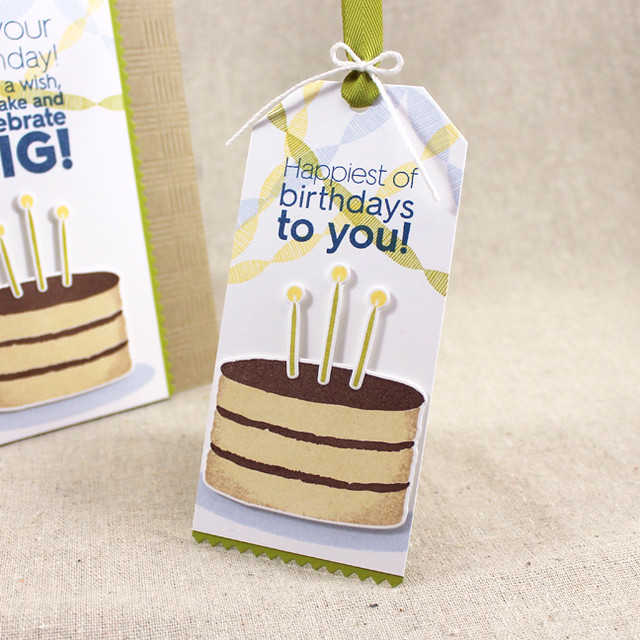
The coordinating tag is very similar.

Happiest Of Birthdays Tag

In order to get the extra-long tag I cut a strip of cardstock to the width of the Tag Sale 7 die and just used the very top edge of the die to make my cut. I stamped the same streamers, but this time went with one of the shorter sentiments from Dawn's set.

Happiest Of Birthdays Tag Close Up

The grounding oval and the cake were stamped in the same way. I added a pinked strip of Simply Chartreuse cardstock along the bottom to mimic the card. The last step was adding a bit of Simply Chartreuse Twill and a bit of crochet thread to the top of the tag.

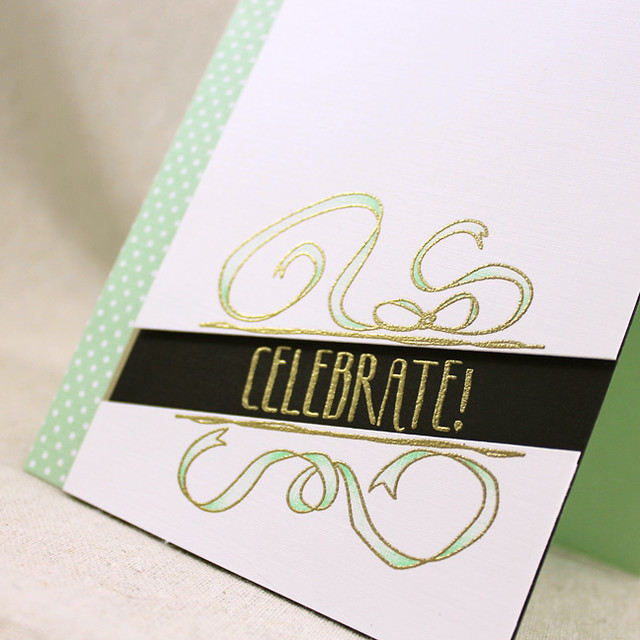
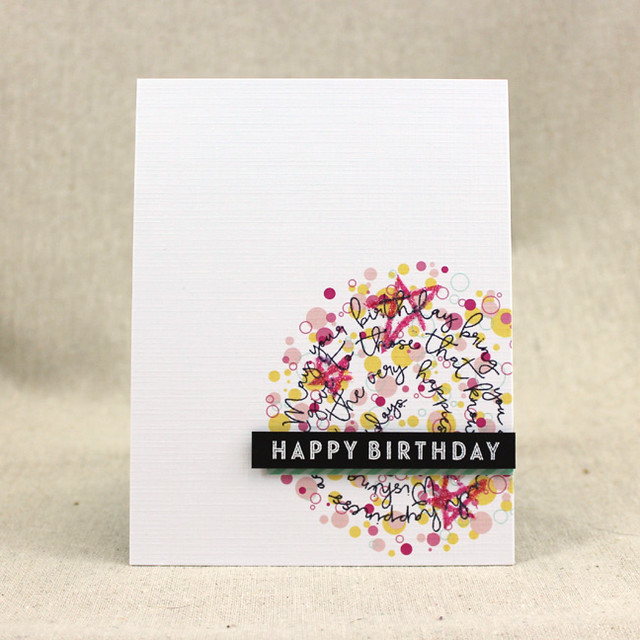
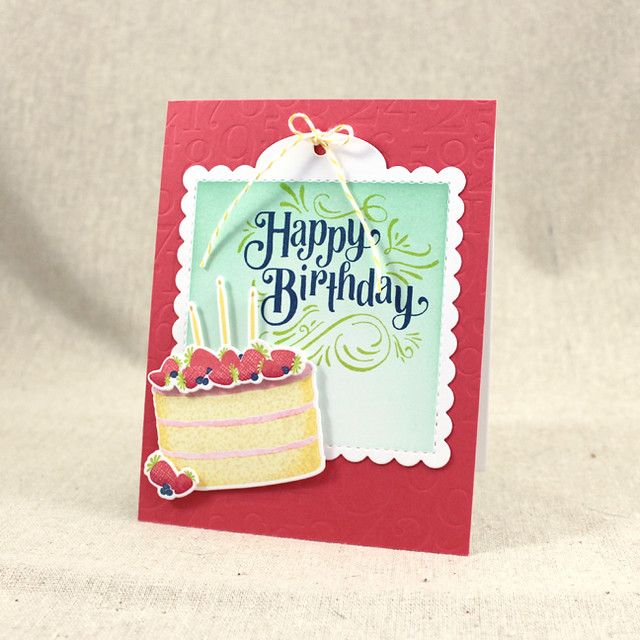
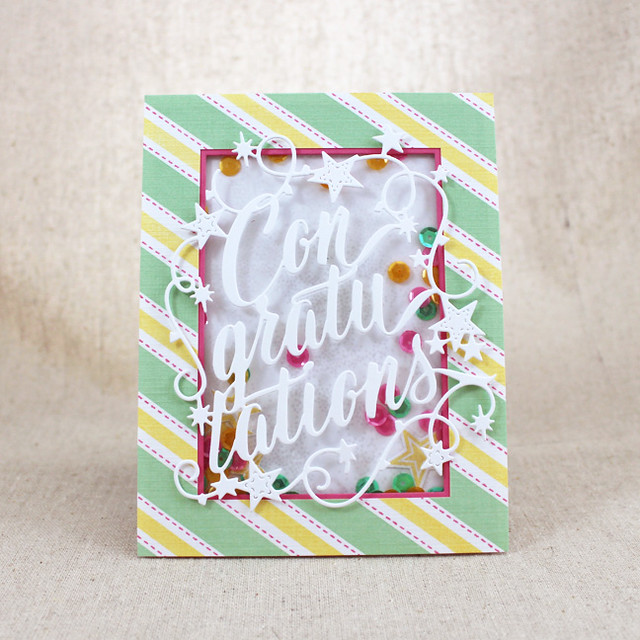
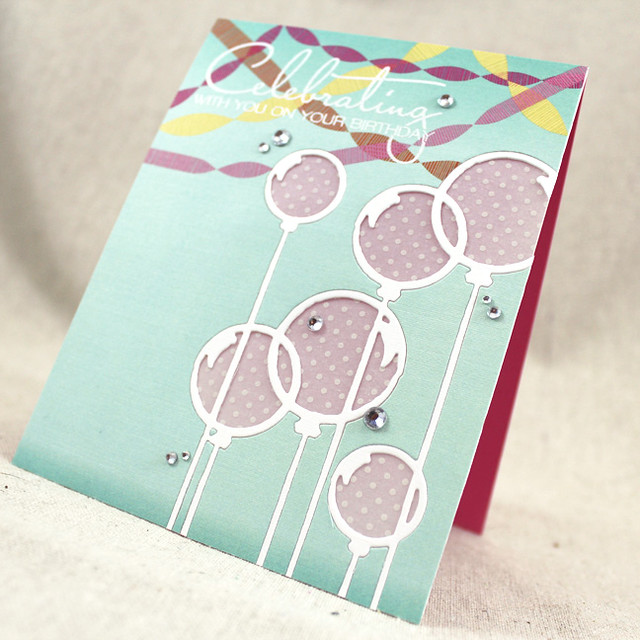
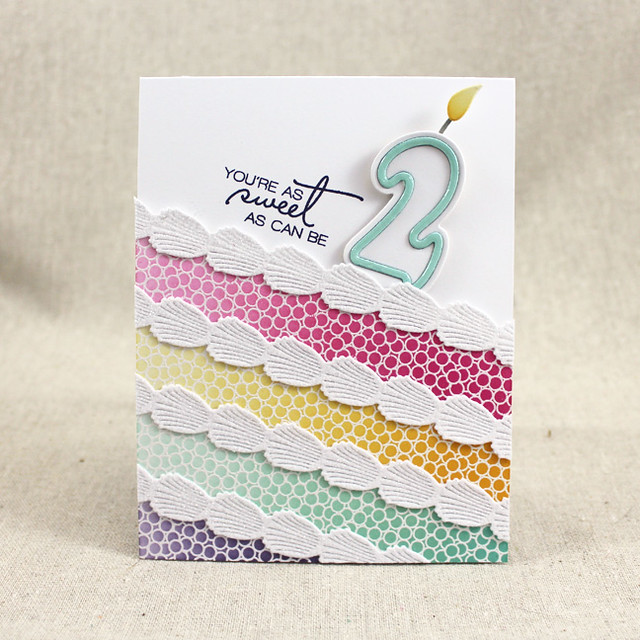
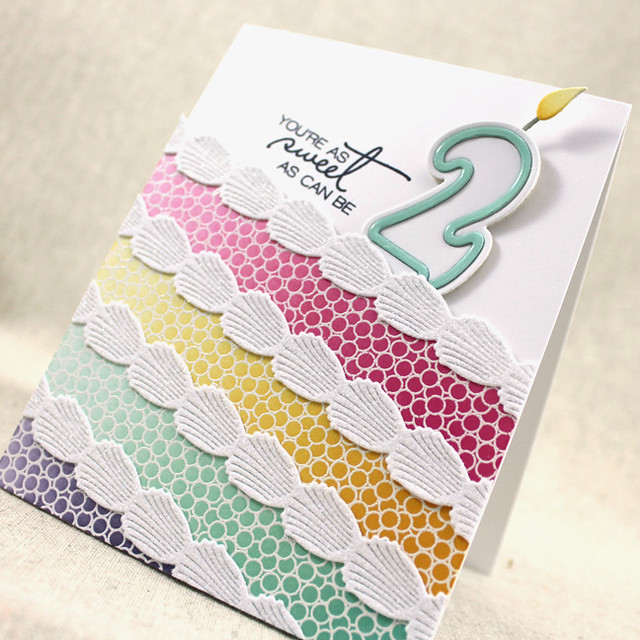
My next card features Erin Lincoln's new Sprinkles On Top set along with her Frosted Border Die and Big Birthday Candles.

Sweet As Can Be Card

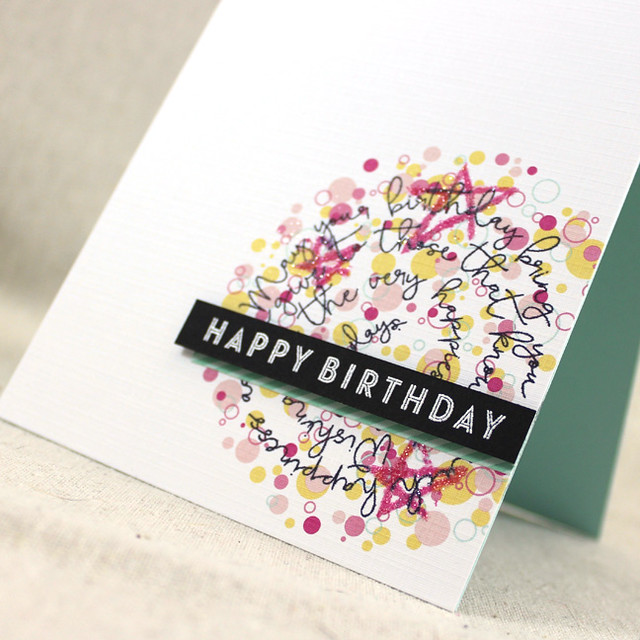
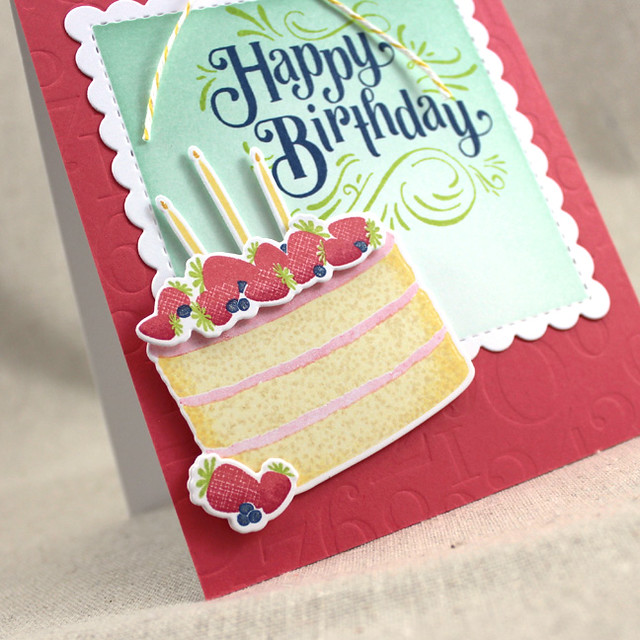
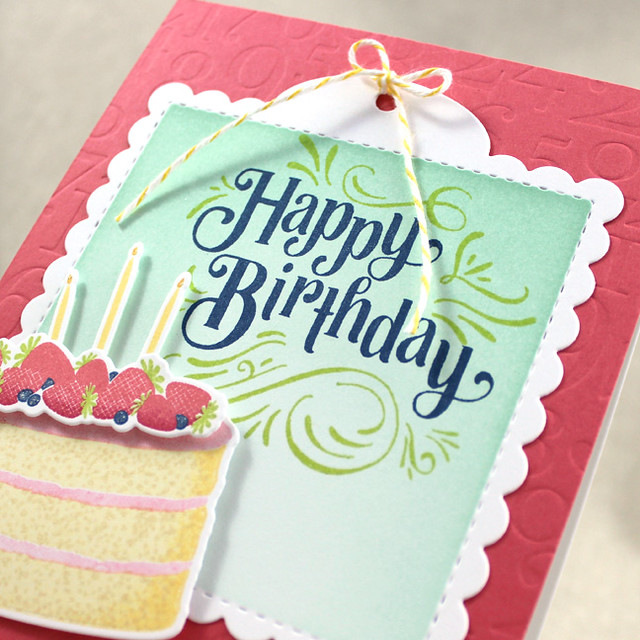
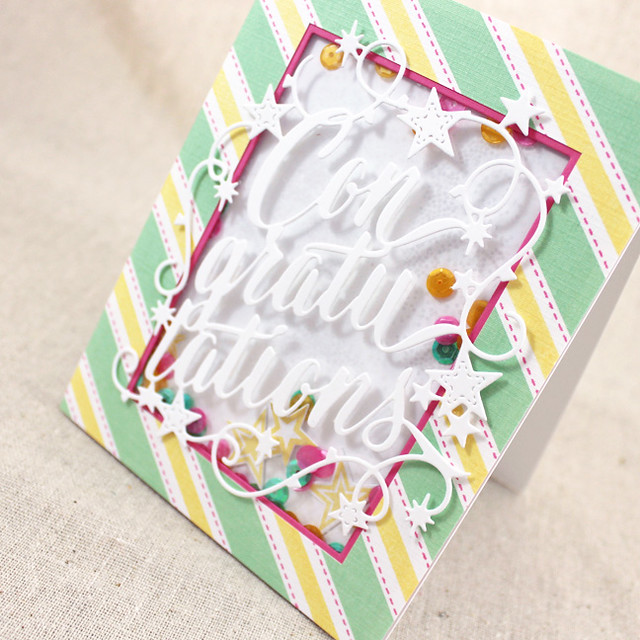
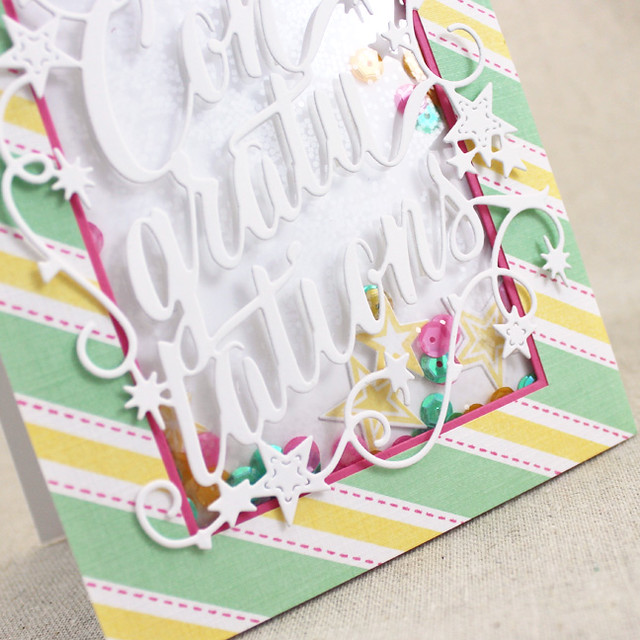
These sets are so fun! You can actually transform your card front into a cake. I began by white heat embossing the round sprinkles from the Sprinkles On Top set onto a piece of white cardstock. Next, I sponged stripes of color over the sprinkles to make the embossing pop and trimmed that panel to fit a standard card front.

Sweet As Can Be Close Up 1

I xyroned another piece of cardstock and die cut the Frosted Border shapes (still covered) sticky side up. I adhered those to the sponged panel and trimmed off the edges. Next, I stamped a sentiment, this one from Just Desserts Sentiments, onto a white card base using True Black ink. I mounted my sprinkle panel to the card front using foam tape and then peeled off the adhesive backing from the Frosted Borders. I sprinkled the card front using fine crystal glitter, making sure to really burnish the borders to get nice coverage.

Sweet As Can Be Close Up 2

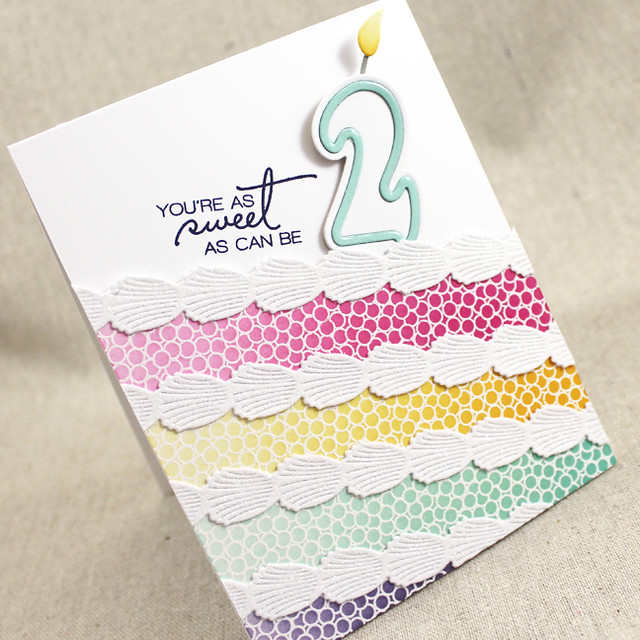
I then die cut the Big Birthday Candle from coaster board, white cardstock, and Aqua Mist cardstock. I adhered the white layer to cover the entire coaster layer and added the Aqua outline on top of that. I used Glossy Accents to give the Aqua layer a shiny coating and set it aside to dry. In the meantime, I die cut the wick and flame, giving both a sponged treatment. Once the candle was dry, I assembled the pieces and adhered them to the card front. I can't wait to give this to my niece on her birthday in a few weeks!

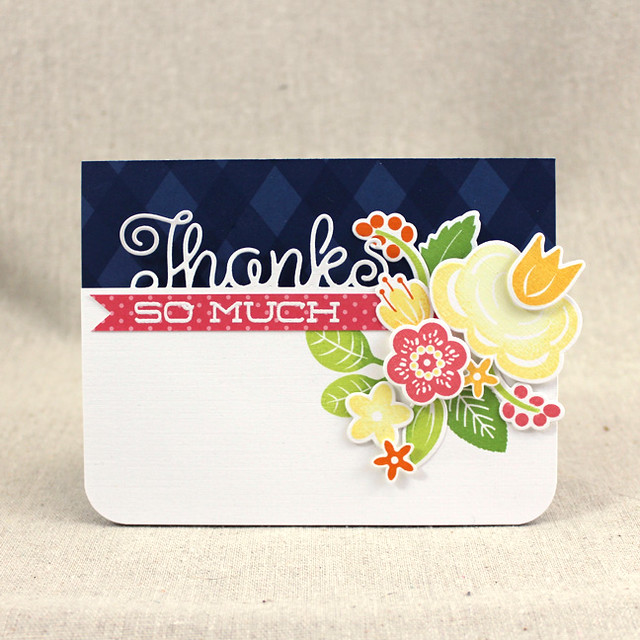
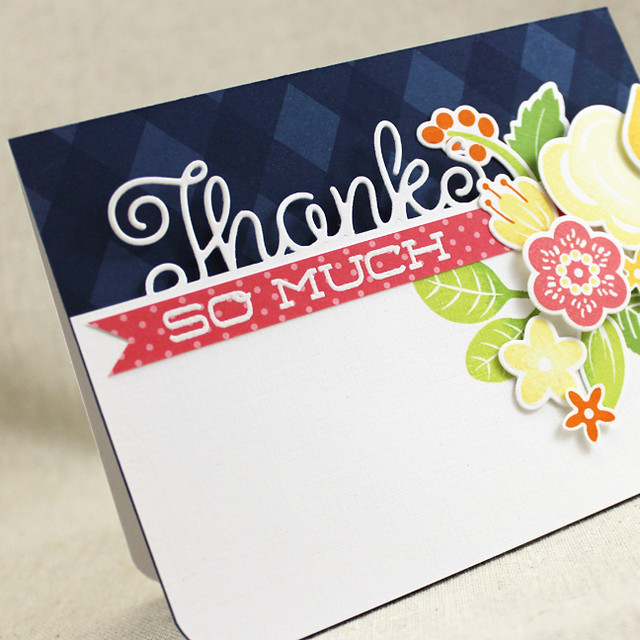
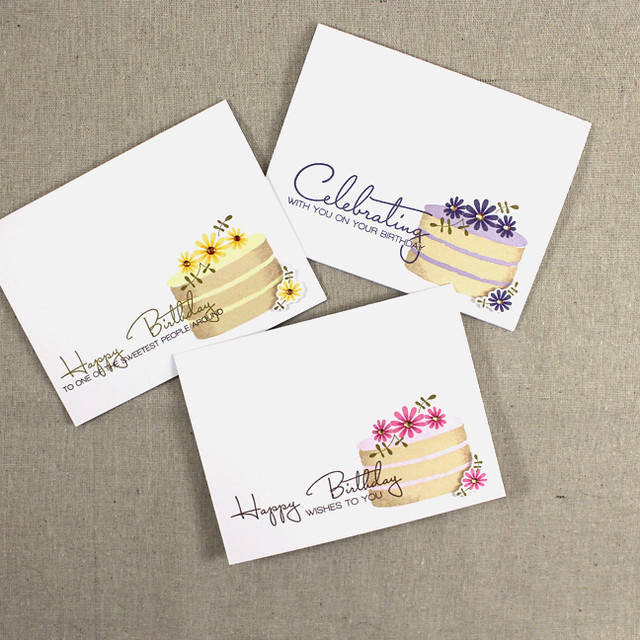
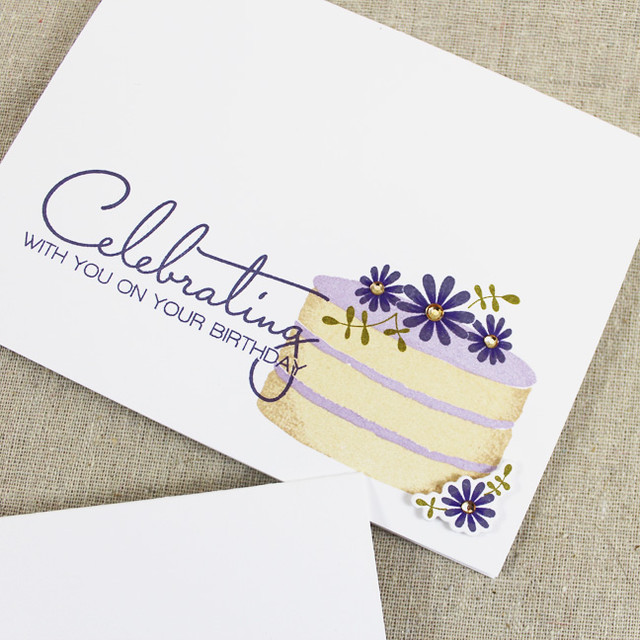
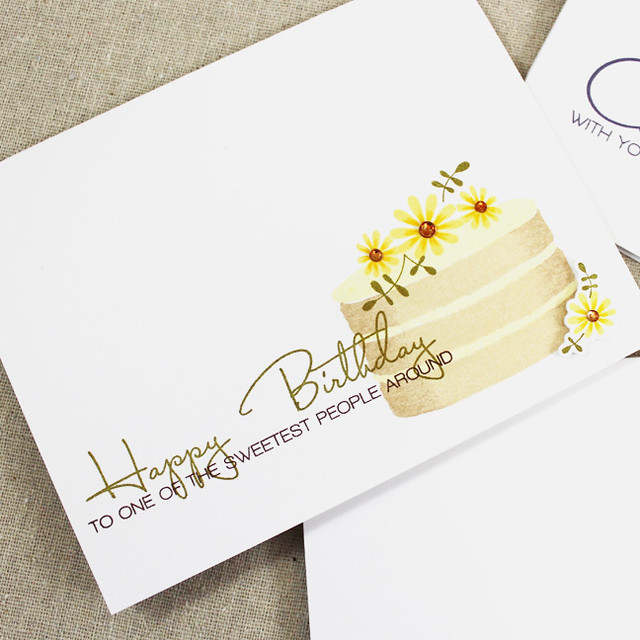
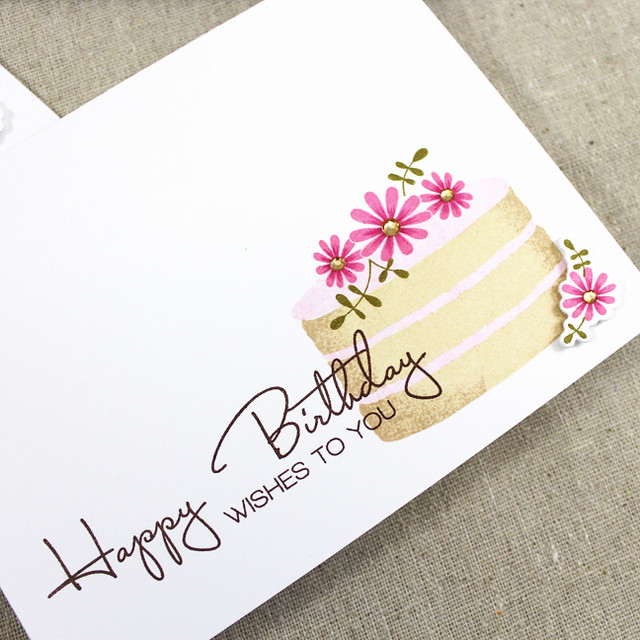
And last but not least, I have a quickie set of birthday cards to share. These came together really quickly, so they'd be great for bulking up your stash.

Floral Birthday Cake Set

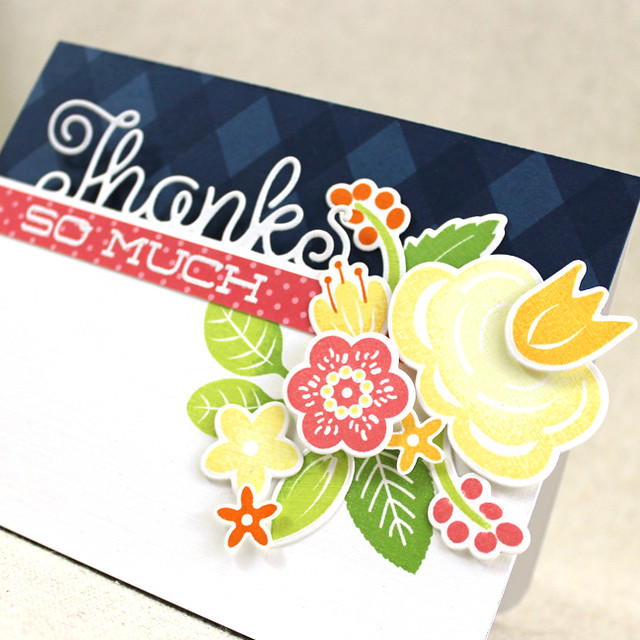
On each card I stamped the layers, frosting, and top flowers flat on the card base. Then, I used a colored pencil to add shading to the center of the flowers and give them a bit of extra dimension.

Celebrating With You Card

I added the sentiments, all from the main Just Desserts set, using coordinating colors.

One Of The Sweetest People Card

The small flower clusters were die cut and stamped before getting the same shading treatment as the top flowers. Those were mounted to the card fronts using foam tape.

Happy Birthday Wishes Card

The final touch was adding colored-to-match rhinestones to the flower centers. Seriously easy yet still so lovely.

That's all for me today. I hope you've enjoyed today's post! Make sure to check in with Nichole, Amy, Ashley, Betsy, Danielle, Dawn, Heather, Kay, Laurie, and Melissa to see more of these fun new products. Erin and Maile also have more to share with you, so be sure to pop over and check them out too. See you tomorrow!

Recipes:
Pink & Gold Birthday Wishes Ensemble
Stamps: Just Desserts, Just Desserts Sentiments - Papertrey Ink
Cardstock: Sweet Blush, Berry Sorbet, Fresh Snow Linen, Luxe Gold Patterned Paper - Papertrey Ink; white
Ink: Sweet Blush, Berry Sorbet - Papertrey Ink; VersaMark - Tsukineko
Other:Just Desserts Die, Frosted Borders Die, Basic Bookmark 2 Die, Berry Sorbet Twill Ribbon - Papertrey Ink; Gold Embossing Powder - Filigree; Foam Tape - Scotch; White Crochet Thread

Masculine Layer Cake Birthday Ensemble
Stamps: Just Desserts, Ombre Sentiments Birthday, Hooray, On The Links - Papertrey Ink
Cardstock: Classic Kraft, Simply Chartreuse - Papertrey Ink; white
Ink: Spring Rain, Harvest Gold, Classic Kraft, Fine Linen, Enchanted Evening, Dark Chocolate - Papertrey Ink
Other: Just Desserts Die, Tag Sale #7, Picnic Plaid Impression Plate, Pinking Shears Border Die, Simply Chartreuse Twill Ribbon - Papertrey Ink; Foam Tape - Scotch; White Crochet Thread

2nd Birthday Card
Stamps: Just Desserts Sentiments; Sprinkles On Top - Papertrey Ink
Cardstock: Aqua Mist, Soft Stone, Coaster - Papertrey Ink; white
Ink: True Black, Aqua Mist, Hawaiian Shores, Winter Wisteria, Plum Pudding, Hibiscus Burst, Raspberry Fizz, Harvest Gold, Summer Sunrise, Stormy Sea - Papertrey Ink
Other: Big Birthday Candles, Frosted Borders Die - Papertrey Ink; White Embossing Powder - Filigree; Fine Crystal Glitter - Martha Stewart Crafts; Glossy Accents - Ranger; Foam Tape - Scotch; Xyron

Floral Cake Birthday Card Set
Stamps: Just Desserts - Papertrey Ink
Cardstock: white
Ink: (purple) Winter Wisteria, Plum Pudding, Ripe Avocado, Fine Linen, Classic Kraft, (pink) Lovely Lady, Hibiscus Burst, Ripe Avocado, Fine Linen, Classic Kraft, Dark Chocolate, (yellow) Lemon Tart, Harvest Gold, Ripe Avocado, Fine Linen, Classic Kraft, Dark Chocolate - Papertrey Ink
Other: Just Desserts Die - Papertrey Ink; Rhinestones - Kaisercraft; Foam Tape - Scotch; Copic Markers