Thursday, December 28, 2017

Throwback Thursday: Phrase Play #9

Good morning, friends! I hope you're having a wonderful week! I'm popping in today to share a Papertrey Ink Throwback Thursday project. I’m not quite ready to put away my wintery stamp sets yet, so today’s Phrase Play #9 Throwback Thursday came at just the right time. This great die and the handy coordinating fill-in sentiments make sending warm winter wishes a snap!

Winter Greetings Card

So to start today's project, I sponged a white panel of cardstock with Spring Rain ink. Then, I stamped it with Fair Isle Borders using the same color. Next, I used the Mix & Mat: Scallops to cut that panel into a frame.

Winter Greetings Card 2

Then, I cut the stitched frame from Mix & Mat: Scallops and the insert from Mix & Mat: Berry Boughs from a Dark Indigo panel. I heat embossed the Phrase Play #9 sentiment in silver and then backed that panel with Self Adhesive paper. I sprinkled glitter on the exposed sticky bits to give the circles a snowy appearance and adhered the Fair Isle frame over the top of the Dark Indigo panel and set it aside.

Winter Greetings Card 3

Then, I die cut the "winter" banner from xyroned white cardstock and Luxe Silver paper. I inlaid the silver letters into the white banner and sprinkled glitter over the sticky white surface. I also die cut the snowflake from vellum. I adhered the snowflake to the card front (hiding the adhesive under a silver pearl) and used foam tape to add the banner over everything. I love how frosty and sparkly this card turned out!

Thank you so much for joining me today! Have a fantastic weekend and I'll see you again soon!

Supplies:

Friday, December 22, 2017

Papertrey Ink Design Team Tips: Quick & Easy Gift Card Packaging

Good morning, friends! I'm popping in today with a Papertrey Ink Design Team Tip just in time for Christmas. The holiday season gets busy quickly and sometimes that means things slip through the cracks a little bit. For me, one of those things tends to be gift cards. I don’t get excited about giving them, so they’re often the last thing on my mind when it comes to packing them up and making them feel special. So I’m sharing some of my favorite ways to package a gift card quickly and easily while also making the recipient know I cared enough to get them something they would truly enjoy.

Let's get started! First up is a dual purpose gift card holder. Not only does it keep a gift card nice and secure, but it acts as the tag for a package as well. Bonus!

Pop's Gift Card Tag

I began by die cutting a Gift Card Cozy from Green Parakeet cardstock. Then, I used the Bookprint Alphabet dies to add in the name. If you have someone with a longer name, I suggest the Headline Alphabet, Smooth Alphabet, or Modern Alphabet to give you a similar effect.

Pop's Gift Card Tag 2

I backed the opening with Bitty Big: Pure Poppy patterned paper and inset the letter negatives before assembling the Cozy. Then, I stamped the Gift Card Cozy Sentiments greeting on the back flap with Pure Poppy ink. It's really just that simple.

Pop's Gift Card Tag 3

All there was to do was tuck the gift card holder beneath the ribbon on Pop's gift. It may not seem like a big deal, but even personalizing gift card packaging with someone's name can make it feel more special.

Supplies:


Next up is a petal box that comes together in mere minutes, but gets a boost of simple style with the help of patterned paper.

Gift For You Petal Box

I began by die cutting the Petal Box from Bitty Big: Pure Poppy paper. I assembled it as normal, leaving one side open while I stuffed the box with a gift card and a handful of candies. Again, it may not seem like much, but using a few of your recipient's favorite candies as box filler is a great way to sweeten the whole gift card experience.

Open Petal Box

All that was left to create was the tag. I don't believe you have to go over the top on tags for small gift boxes like these. I simply die cut two tags (this tag shape comes with the Petal Box die), one from white and the other from Green Parakeet.

Gift For You Petal Box 2

I stamped the white tag with the Christmas tree cookie from Sweet Holiday Wishes and a sentiment from Gift Card Cozy Sentiments. On the Green Parakeet tag, I stamped the "To:/From:" from the same set. Then I just tied the tag to the box handle with baker's twine. It's a cute presentation and it took maybe ten minutes to create.

Supplies:


My last box pairs plain cardstock with a stencil to get a package with festive pattern super quickly.

Snowy Gable Box

I began by die cutting the Gable Box from Dark Indigo cardstock. Then I used Fresh Snow ink to stencil on the Snowfall Style pattern. I assembled my box as normal, again filling it with candies and a gift card.

Snowy Gable Box 2

To dress up the box a bit, I xyroned a piece of white cardstock and die cut it with the Snowfall Style 1 die. I glittered that snowflake and adhered it to the front of the box. Then, I stamped my recipient's name onto a banner (this one is from the Wine Bottle Tag #2 Die, I just shortened it a bit by double cutting one of the ends). I used Fresh Alphabet, but the Antique Alphabet is another favorite of mine for this purpose. I added the banner with foam tape and the box was complete.

Supplies:


I think it's important to make presents feel personal at the holidays, even if that present is a simple gift card. That said, I don't think you have to go crazy and give yourself a hard time to make that happen.

Gift Card Boxes


A little patterned paper, a customized tag, and maybe a touch of sparkle can go far in giving your small packages a big presence under the tree.

Happy Holidays, Merry Christmas, Season's Greetings, Happy Hanukkah, and Happy Kwanzaa to all of you. I wish you the very best this holiday season and I hope you and yours share good health, togetherness, and hope for a wonderful new year in the days to come. Until next time!

Thursday, December 21, 2017

Throwback Thursday: Candy Cane Christmas

Good morning, friends! It's Thursday and you know what that means: it's time for Throwback Thursday. Wanda, Heather, and I are showcasing Candy Cane Christmas today. I have been smitten with Candy Cane Christmas since the moment it was introduced. Over the years, I’ve used it for everything from Christmas cards to get well, thinking of you, and beyond. I just love that mug!

Candy Cane Christmas Tags 1

But today I decided to use this charming set on the last few gift tags I needed to get me through the holiday season.

Candy Cane Christmas Tags 2

I began by die cutting three Tag Sale #10 shapes from Aqua Mist cardstock and three of the scalloped frames from white cardstock. I adhered the frames to the tags and stamped the "To:" and "From:" from Gift Card Cozy Sentiments in Pure Poppy ink.

Candy Cane Christmas Tags 3

Next, I die cut and stamped the mug from Candy Cane Christmas using Pale Peony ink sponged with Berry Sorbet for depth. Then I die cut and stamped the peppermint stick and holly from Sweet Holiday Wishes.

Candy Cane Christmas Tags 4

I embellished the peppermint stick with clear glitter, using a fine point glue pen to get in between the stamped lines.

Candy Cane Christmas Tags 5

I tucked the peppermint sticks into the mugs (there's a handy, die-cut opening for just this purpose) and attached them to the tags with foam tape. Then I used tiny bits of coaster to attach the holly. That little bit of lift keeps things from feeling too flat and one dimensional. A bit of green baker's twine was the perfect finishing touch.

Thank you so much for joining me today! Make sure to pop in on Heather and Wanda to see how they've used Candy Cane Christmas too. Have a great day and I'll see you again soon!

Supplies:

Thursday, December 14, 2017

Papertrey Ink Featured Post: Stuck On You & Keep It Simple: Brighter Days

Good morning, friends, and welcome back for the last day of the December Papertrey Ink Countdown! The new release will be available tomorrow night at 10pm Eastern, but before that I have one more post for you. I have the pleasure of introducing the Keep It Simple: Brighter Days set along with my new set, Stuck On You. This mini set packs a lot of punch thanks to a coordinating die set that I think you're going to love! Let's get to some projects, shall we?

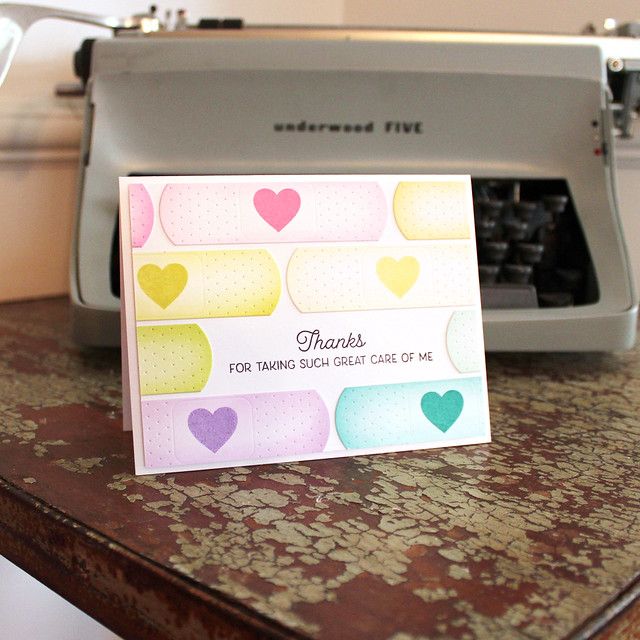
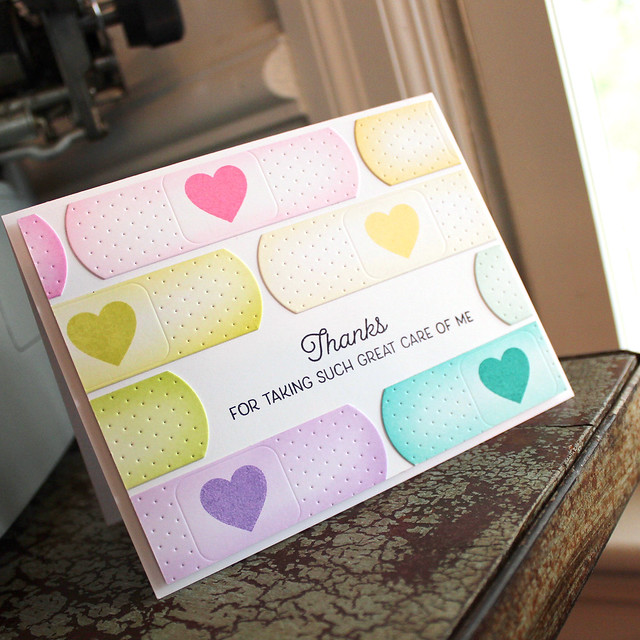
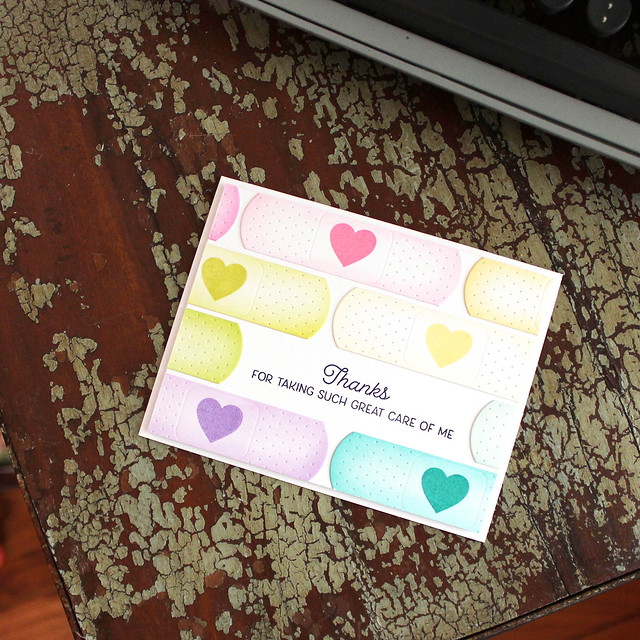
Let's kick off today with a cheerful thank you note. When you're on the other side of illness, sometimes you want to thank the people (or person) that supported you when you were down (Sean Jones, you're a rockstar). That's a time for bright, happy colors, am I right?

Thanks For Taking Care Of Me Card

I began by sponging a rainbow of colors onto scraps of white cardstock before die cutting them with the bandage die in the Stuck On You die set. Sponging and then die cutting allows you to avoid any harsh edges on the final piece.

Thanks For Taking Care Of Me Card 2

Then I stamped the bandages with hearts (included in the stamp set) and laid them out on a white panel, leaving space for my sentiment. I stamped that in True Black before adhering the bandages into place.

Thanks For Taking Care Of Me Card 3

To finish it off, I simply popped that panel up on a white card base with foam tape. Nice and easy, but with plenty of color and texture. I need to make a few of these to hand out after my week battling with a cold. It was not my shining moment, I'm afraid.
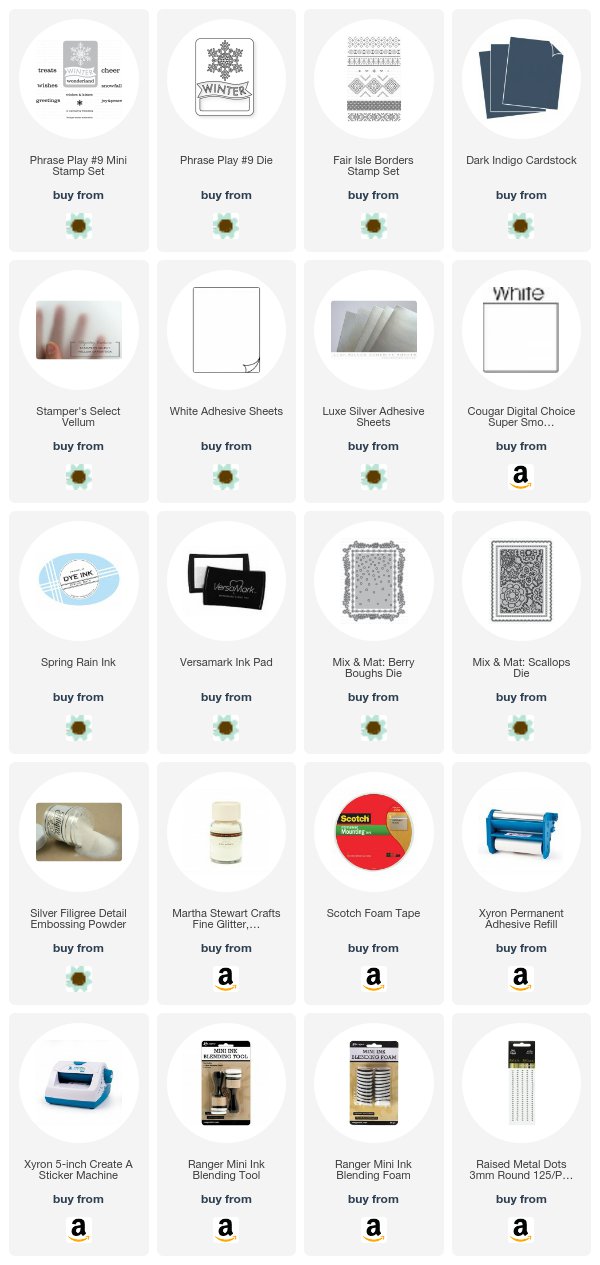
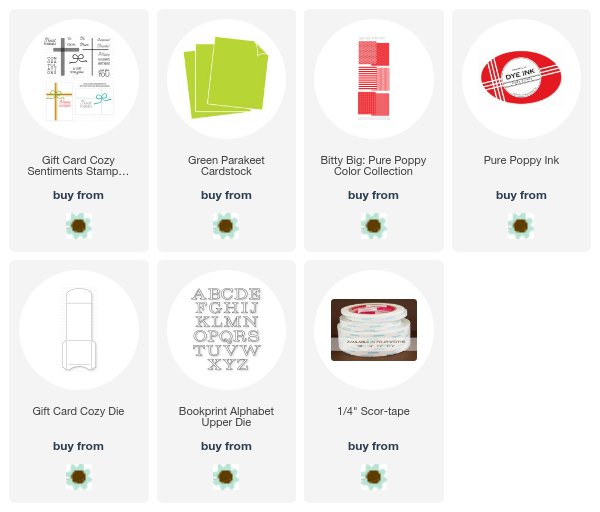
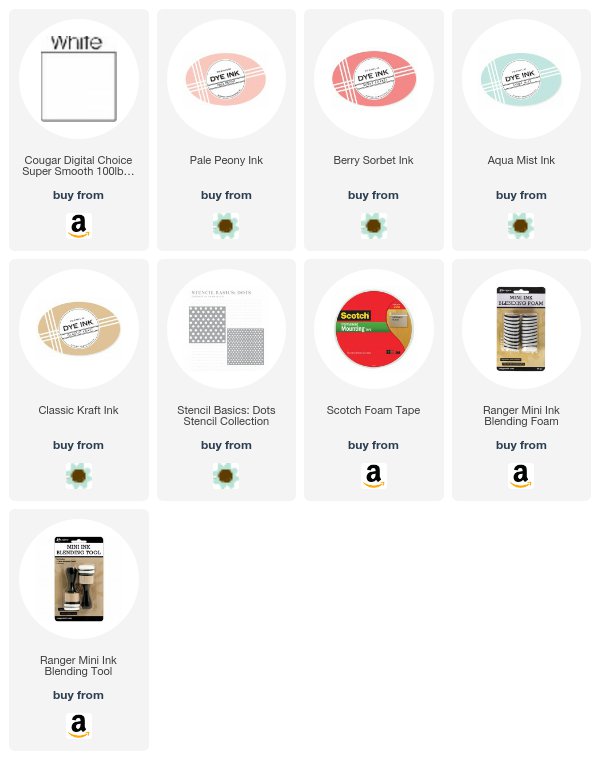
Supplies:


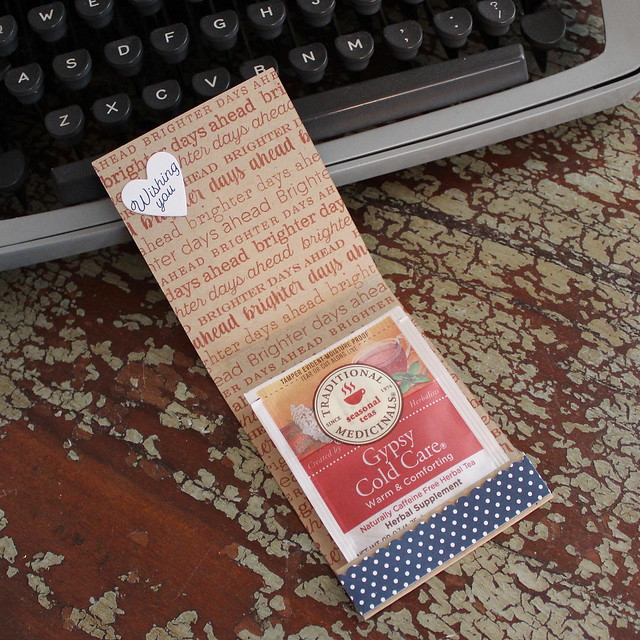
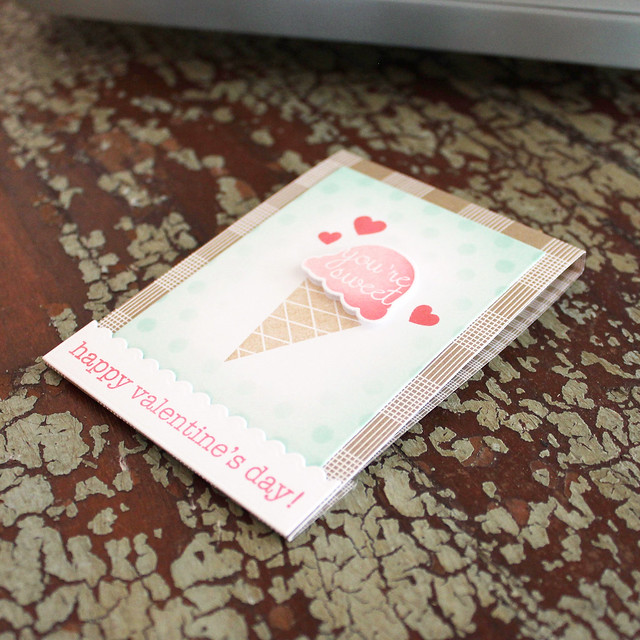
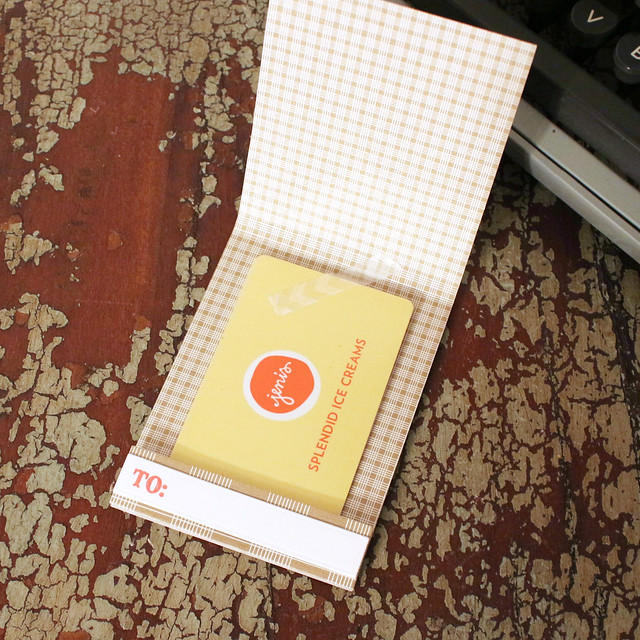
Next up, I have a little tea folder that I created with Lexi's Matchbook Medley die.

Thinking Of You Tea Folder 3

That handy die happens to fit a tea bag quite nicely (I checked two different brands, Yogi and Traditional Medicinals).

Thinking Of You Tea Folder 2

I began by die cutting the matchbook from Classic Kraft cardstock. Then I stamped the interior of the folder with several of the sentiments from Keep It Simple: Brighter Days. I like the idea of adding the text-based pattern to the inside of the project because it continues the message that you see on the front. I also added a die cut heart (this heart comes from the You Have My Heart set) stamped with a sentiment from Stuck On You in Dark Indigo.

Thinking Of You Tea Folder

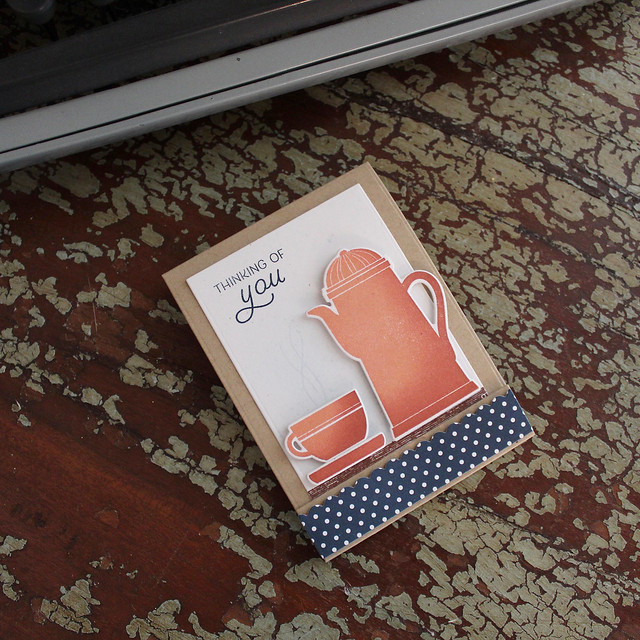
On the front of the matchbook, I created a little scene with Dawn's Cup Of Cheer set. I first sponged the Rustic White panel with a bit of Spring Rain ink and then added a few matching splatters (just for texture). I added a sentiment from Stuck On You in Dark Indigo before placing my tea pot and cup, stamped in Melon Berry and Americana. I also used a scalloped strip of Bitty Big: Dark Indigo paper to dress up the bottom flap. Isn't it a cute way to give an under-the-weather friend a little relief?

Supplies:


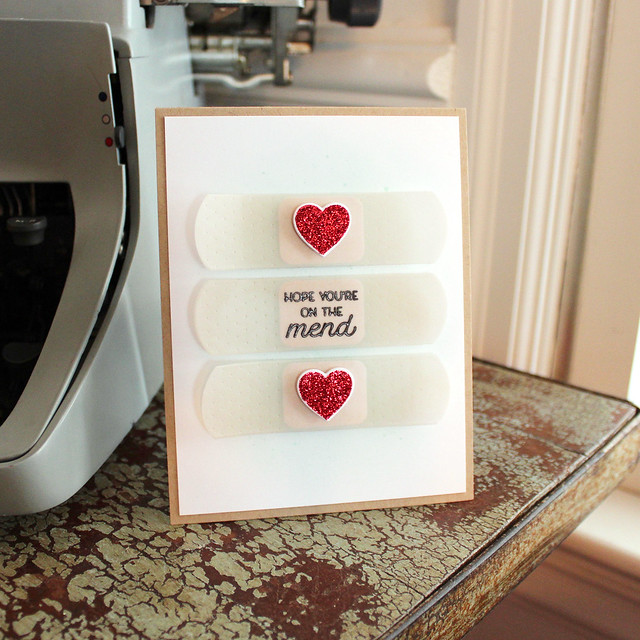
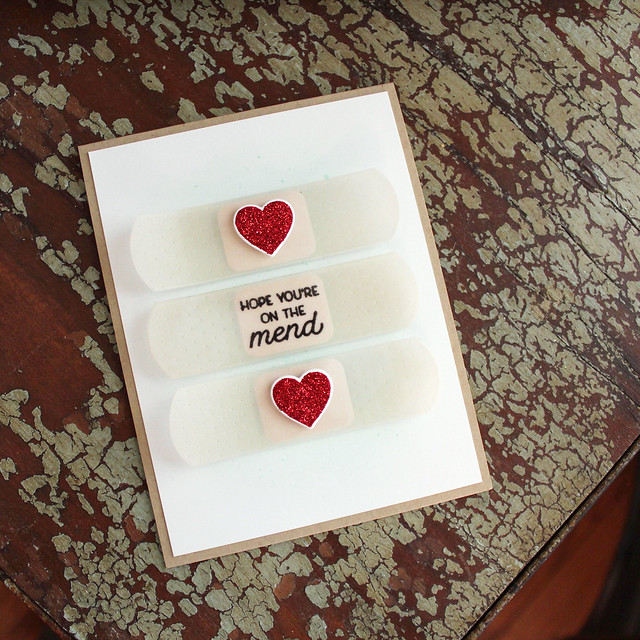
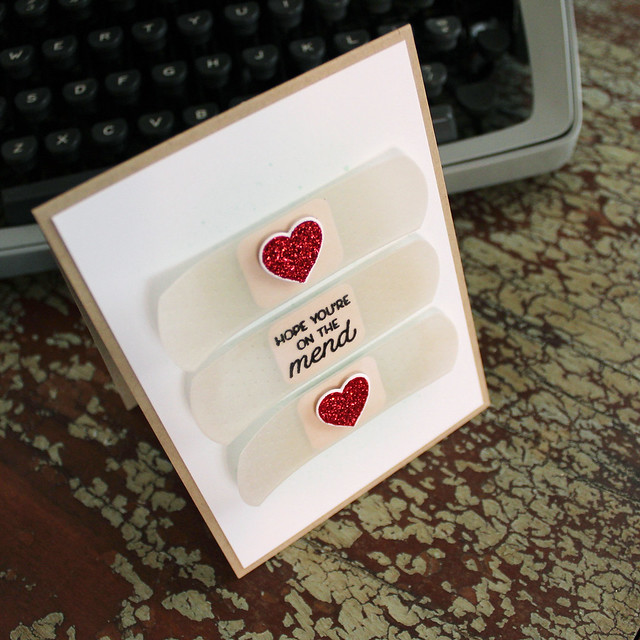
Next, I have a card for a friend who may have had a recent surgery or gotten themselves banged up somehow.

On The Mend Card

I began by sponging a bit of Aqua Mist ink onto a white panel. I splattered that with the matching reinker and adhered it to a Classic Kraft card base before setting it aside.

On The Mend Card 3

Next, I sponged three pieces of Stamper's Select Vellum with Classic Kraft ink. I sponged the ink on the back side just to be sure that if it didn't dry as quickly as I was expecting it to there wouldn't be any transfer from handling the card. Then I die cut those using the Stuck On You bandage die. I also xyroned and die cut the rounded rectangle from the set. That rectangle fits the embossed rectangle on the bandage exactly so you can layer that piece seamlessly.

On The Mend Card 2

I heat embossed my sentiment onto one of the bandages and then adhered the white rectangles to the back of each bandage to look like the cottony part of the real thing. I also stamped and die cut two hearts from the set and adhered those to the top of the bandages. I adhered the bandages to the card front with foam tape and then used a bit of fine Garnet glitter to embellish the hearts. If you wanted to make this one more masculine you could simply omit the glitter or use flocking to give the hearts some texture.

Supplies:


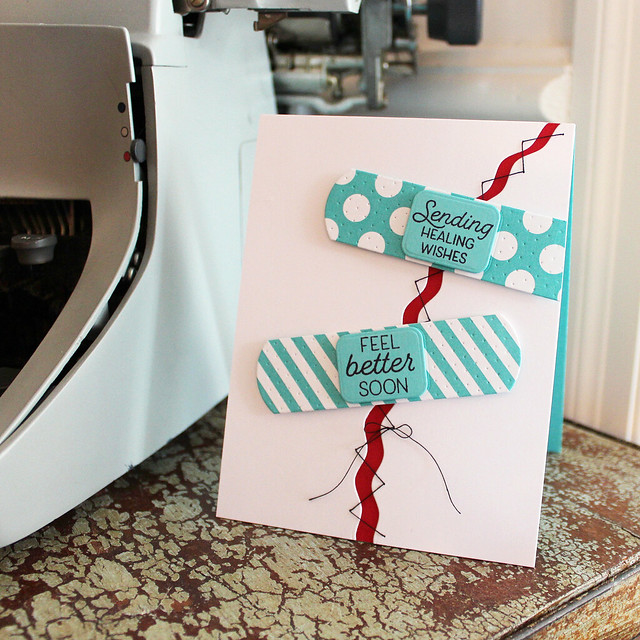
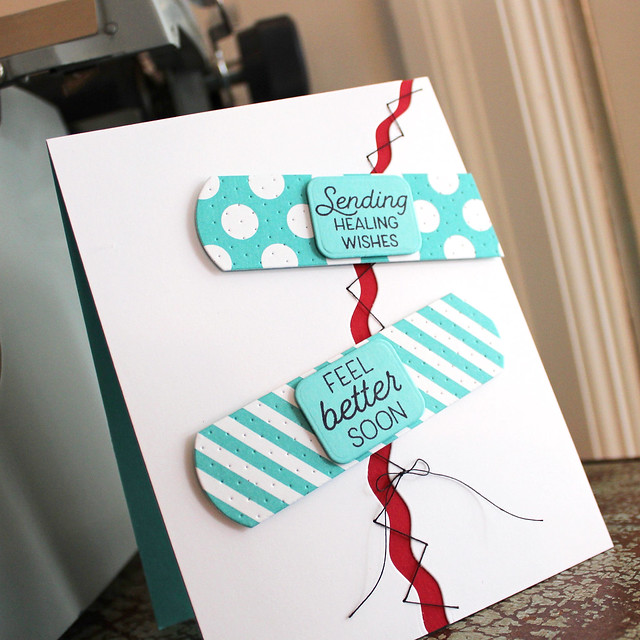
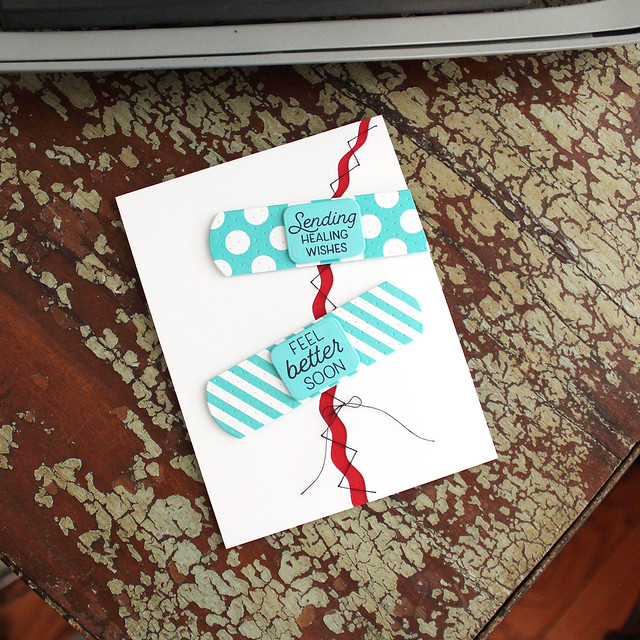
And one more! This one is a tad bit more playful. I used patterned paper for the bandages this time. I think that's a great way to add some upbeat flair to the bandages (which can be particularly important if you're making a card for a kiddo - no somber cards for the littles).

Sending Healing Wishes Card

I began by die cutting a white panel with one of the Round Off Edgers. I actually die cut twice, once at a bit of an angle, to get the askew line. I adhered those pieces to a Pure Poppy Panel and then used black thread to stitch the sides together before adhering the whole piece to a Hawaiian Shores card base.

Sending Healing Wishes Card 2

Next, I die cut the bandages from Bitty Big: Hawaiian Shores patterned paper (new this month!) and the rounded rectangles from Hawaiian Shores cardstock. I stamped the sentiments from Stuck On You onto the rectangles with True Black ink. The "Sending" sentiment is actually a two-part sentiment that can be finished different ways with a few phrases in the set.

Sending Healing Wishes Card 3

I adhered the rectangles to the patterned bandages with foam tape and then used more foam tape to adhere the bandages to the front of the card. Easy and fun!

Supplies:


Well, that's all for me today friends! Make sure to pop in and visit Amy, Betsy, Heather, Keeway, Laurie, Melissa, Michelle, Stephanie, and Wanda to see how they've used these great new products. Have a wonderful day and I'll see you tomorrow night on the Papertrey Ink Facebook page for Release Party Live! Julie, Stephanie, and I will be sharing a closer look at all of the great products coming out this month as well as answering your questions, so be sure to tune in and check it out. See you then!


Wednesday, December 13, 2017

Papertrey Ink December Countdown - Day 4

Good morning and welcome back for Day 4 of the Papertrey Ink's December countdown! I'm back today with a couple of really cute products from Betsy, Lexi, and Erin. Betsy is bringing you the latest in her Huggable series with the Huggable Bear and Monkey add ons. Lexi has her Fun Lovin' stamps and Matchbook Medley Dies. And Erin has her Arrows Dies and Paper Sack Closure Dies. All of today's introductions are fabulous for making treat packaging and Valentine's Day goodies for your favorite people.

I'm going to start today with a treat bag I made by pairing Betsy's Huggable Bear with Erin's Paper Sack Closure dies.

Lizzie Jones - Bear Hugs Treat Bag

I used a small kraft treat bag from Target rather than a full size lunch bag. I began by stamping the snowfall from Dash Away All on the bag using Fresh Snow ink. Then, I used the Paper Sack Closure die to cut the slots for threading my ribbon. I also stamped the sentiment from the Huggable: Bear mini with Pure Poppy ink.

Bear Hugs Treat Bag 2

Next, I die cut the full Huggable shape and bear head from white cardstock. I sponged the tummy area of the Huggable shape with Aqua Mist ink. Then, I xyroned another scrap of white cardstock and die cut that with the bear belly die shape. I removed the adhesive backing and covered the sticky surface with white flocking to make the belly fuzzy before adhering it to the Huggable shape.

Bear Hugs Treat Bag 3

Then, I sponged a bit of Lovely Lady onto the bear's cheeks and stamped the eyes. I die cut the muzzle and stamped it with the nose and mouth image. I adhered the bear's head to the Huggable body with foam tape and then added the googley eyes and inner ears (cut from Pink Posey Bitty Big paper). I cut the scarf from white copy paper and Auqa Mist felt, adhering the two together (I like that the paper kept the scarf from getting too stiff). I added foot pads to the bear's paws and attached the arms to the body. I then trimmed the body down to fit on the bag and adhered the bear into place with Scor tape. It sounds like a lot of steps, but things really went quickly and it turned out so cute!

Supplies:


Next up, I have a sweet Valentine's treat for someone special.

Lizzie Jones - Ice Cream Matchbook

I began by die cutting the Matchbox Medley shape from Classic Kraft Bitty Big paper. I stapled the end into place and then set about decorating the front.

Ice Cream Matchbook 2

I sponged the edges of a piece of white cardstock with Aqua Mist ink. I die cut that with the rectangle in the die set and then sponged over it again, this time with the Stencil Basics: Dots in place. I stamped the ice cream cone in the center of that panel with Classic Kraft ink and then topped it with a Pale Peony and Berry Sorbet scoop.

Ice Cream Matchbook 3

I added a handful of Berry Sorbet hearts around the ice cream cone and the sentiment on a scalloped strip cut with another die from the Matchbook Medley Die set. On the inside, I used a piece of decorative washi tape to secure a gift card to a favorite scoop shop. I also used another die cut rectangle stamped with the "To:" from Fun Lovin' to add my secret Valentine's name when the time is right. Nice and simple!

Supplies:


Thank you so much for joining me today! Have a fantastic day and I'll see you all back here tomorrow with even more inspiration from the Papertrey Ink December Release. In the meantime, Amy, Betsy, Heather, Keeway, Laurie, Melissa, Michelle, Stephanie, and Wanda to see how they've used these great new products. Have a wonderful day and I'll see you tomorrow!

Tuesday, December 12, 2017

December Papertrey Ink Countdown - Day 3

Good morning and welcome back for Day 3 of the Papertrey Ink new release countdown! I'm back today featuring Nichole's Quoted: Honeycomb stamp set and Dawn's Stencil Basics: Hexagons. Let's get to it!

Honey Comb Card 3

I began by card today by sponging Honey Nut ink onto a panel of Fine Linen cardstock. Then, I went back in with the small hexagon in the Quoted set and stamped Honey Nut onto a random selection of hexes in the background.

Lizzie Jones - Honey Comb Card

Next, I laid out a trio of hexagon dies onto a Rustic White panel. The largest and smallest shapes are from the Sincerely Yours: Modern + Marbled Kit and the medium shape is from the Two Toned die set. I cut those shapes from the panel and then sponged and splattered on a bit of Aqua Mist ink. Then, I laid the hexagon panel over top of the honeycomb panel and stamped the sentiment though the openings.

Honey Comb Card 2

I removed the frame and backed the smallest hexagon with clear cardstock. I used foam tape and champagne colored microbeads to create a shaker box. After I had adhered the top frame to the card front, I finished off the card with a bow tied with Rustic Jute Button Twine and a few hand cut bees.

Supplies:


That's all for me today. I apologize for not having more with Everyday Affection and Perfect Fit, but I'm currently a little under the weather and not really up to spending much time in my studio. I'll try to have more with those sets in the coming days. In the meantime, make sure to check out today's introductory post over on the brand new Papertrey Ink blog and then check in on Amy, Betsy, Heather, Keeway, Laurie, Melissa, Michelle, Stephanie, and Wanda to see how they've used these great new products. Have a wonderful day and I'll see you tomorrow!