Good morning, friends! It's my turn to share how I've been using my
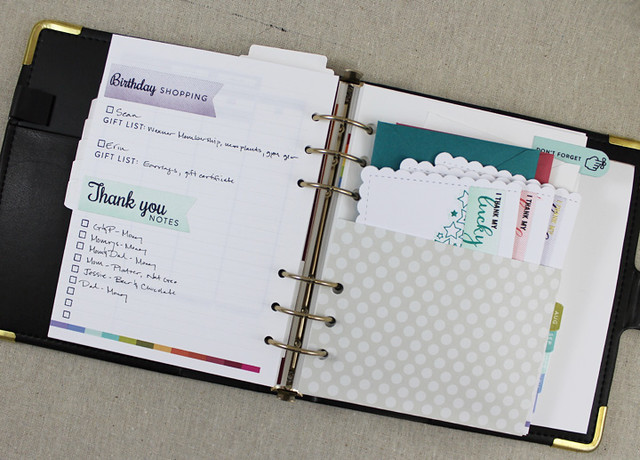
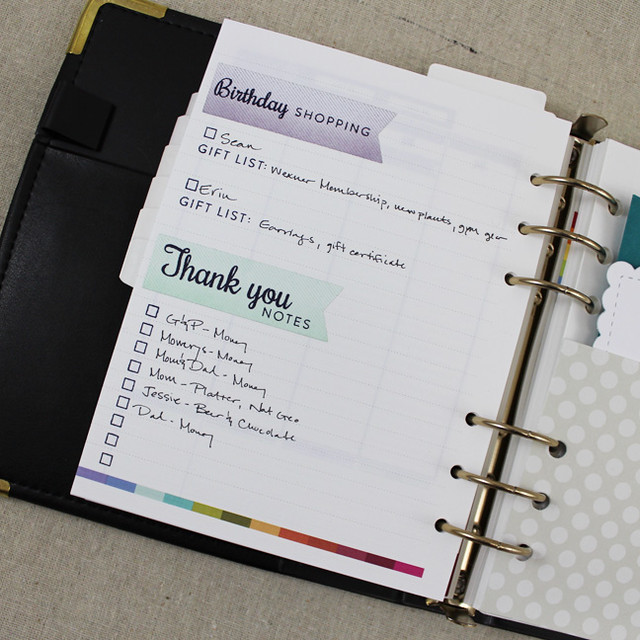
Moments Inked planner lately, so I thought I'd show you how I'm keeping track of birthday notes these days. You see, July is a big month for birthdays around here. Not only do Sean and I both celebrate birthdays, but we have other family birthdays tucked in there as well. I've been a little extra busy lately, so I thought it might help to organize all of the notes using the lined pages at the end of the month. Turns out, it's the perfect solution!
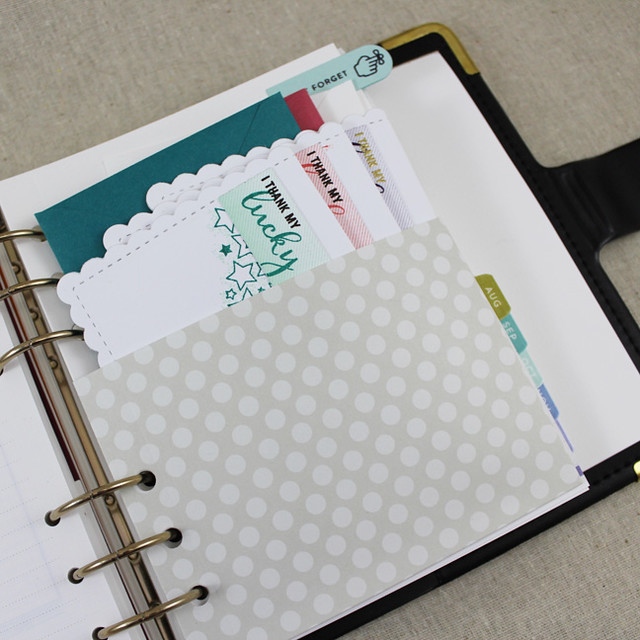
I wanted to make sure I had a section for shopping and gift ideas, a section for who I owe thank you notes, and a pocket to hold a handful of notes in the event that I have a few extra minutes that I can put to good use while I'm waiting for an appointment or something.
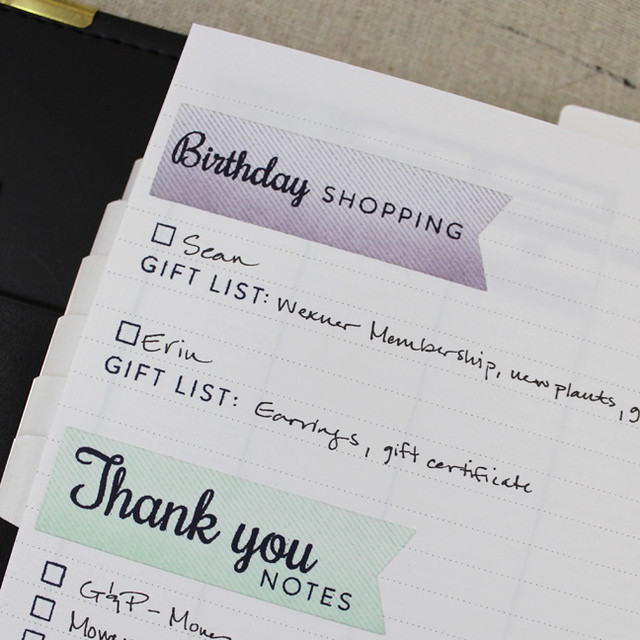
I created heading stickers for the gift and thank you note sections by pairing the new Background Basics: Galaxy set with Moments Inked: Listed and Tick Tock (the script sentiments). I sponged a bit of ink onto a piece of White Adhesive Sheet paper before stamping the striped banner and cutting with the coordinating die. Then, I added the sentiments in True Black and stuck them to the lined paper at the end of the month of July.
I used Moments Inked: Listed again to add check boxes below each sticker. I also stamped "gift list" to keep track of the gift ideas I have for the folks that need presents.
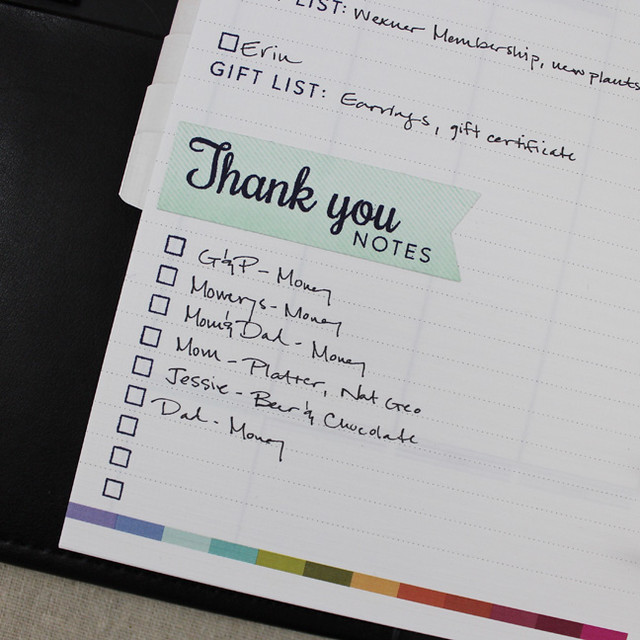
Under the Thank You Notes section I listed each friend or family member who sent a gift and what they sent. This way, I don't have to worry about forgetting who sent what and then be stuck writing a vague note of gratitude (not that I've ever had to do such a thing).
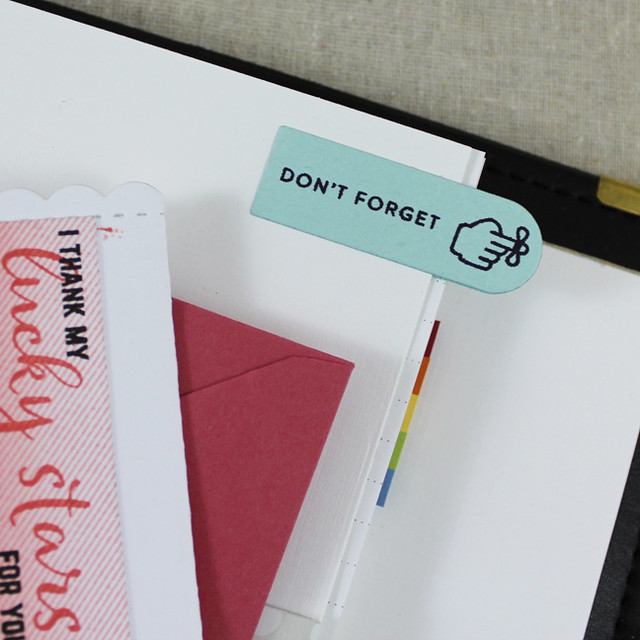
I created the pocket to have those thank you notes close at hand. I kept the colors fairly neutral, so I can move this pocket to other months should the need arise. I began by die cutting two of the largest Binder Page shapes, one from Fresh Snow Linen and the other from Polka Dot Soft Stone. I trimmed the Soft Stone down a bit and adhered the two together, using extra strips of patterned paper along the sides to create a very slight gusset. I like that I have a tiny bit of wiggle room that way.
I also added a tab using the Moments Inked: Divided Die and an image and sentiment from Moments Inked: Everyday Symbols. Not only is the tab cute, but it has the added benefit of sticking out just enough to make it easy to find the pocket when I want to flip right to it.
I kept the cards nice and simple, both so I could create a batch of them fairly quickly, but also because the flatter they are, the better they fit into my planner. I used Background Basics: Galaxy again, this time paired with the Noted: Scalloped A1 Die Collection. I've always liked this size for thank you notes. It's plenty of space to jot a nice note, but not so much space that you feel like you have to be Tolstoy to fill it.
I like this little set up so much that I think I just might have to get something similar ready for Christmas. It's coming sooner than you think!
Well, that's all for me today friends! Have a wonderful week and I'll see you this weekend for Stamp-A-Faire!
Recipe:
Stamps: Background Basics: Galaxy, Moments Inked: Listed, Tick Tock, Moments Inked: Everyday Symbols
Cardstock: Fresh Snow Linen, Soft Stone Polka Dot Paper, White Adhesive Sheets - Papertrey Ink; white
Ink: Winter Wisteria, Aqua Mist, True Black, Tropical Teal, Pale Peony, Berry Sorbet, Royal Velvet, Smokey Shadow - Papertrey Ink; Delicata Gold
Other: Number The Stars Banner Die, Moments Inked: Divided Die, Moments Inked: Binder Page Die, Noted: Scalloped A1 Die Collection - Papertrey Ink


1 comment:
Very nice system! It's beautifully organized :)
Post a Comment