Good morning,
Papertrey Ink fans! It's the first day of the July countdown and I have a whole, starry collection to share with you over the next several days. Today I'm introducing a sentiment set inspired by stars, a background set that coordinates, and a treat box that can also be used as an ornament or a super cute way to dress up string lights. Let's get to it!
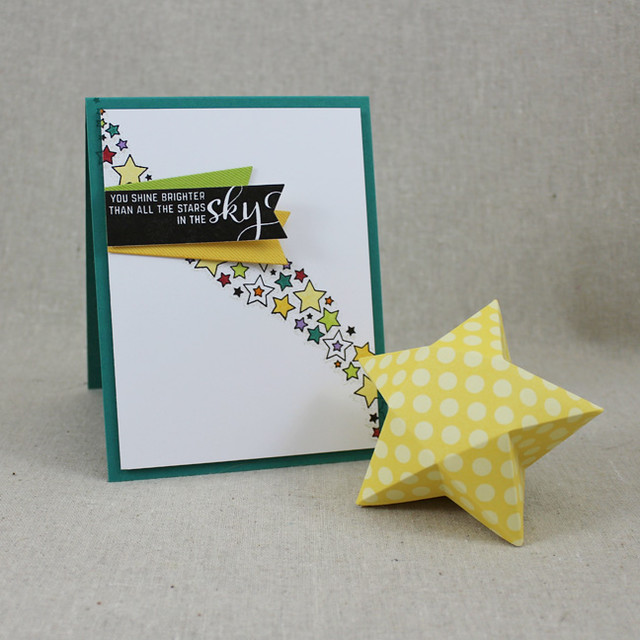
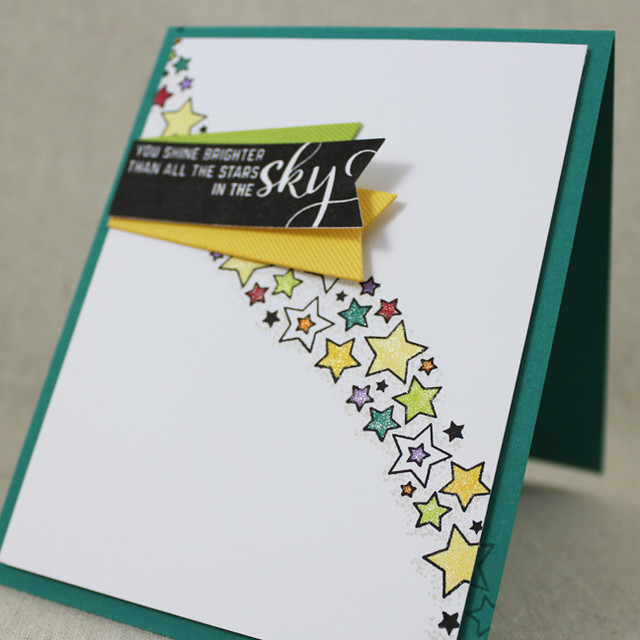
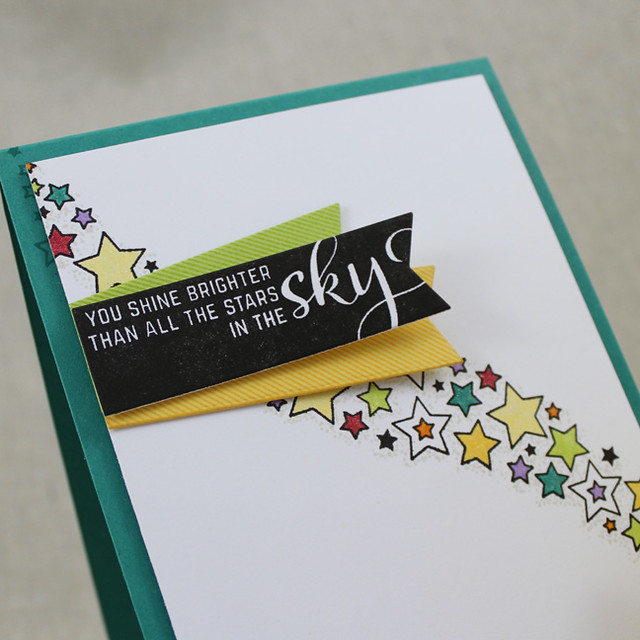
I began my first card by stamping outline stars from
Background Basics: Galaxy onto white cardstock using True Black ink. I followed up with the star dust strip in Soft Stone. Then, I filled in the star background with individual solid star stamps also included in the set using a rainbow of colors.
I mounted that panel to a Tropical Teal card base that I'd stamped with the outline stars strip using the corresponding ink. I used a clear Spica pen to add shimmer to each star before attaching a trio of banners to the card front.
The striped banner image is in the background set and the sentiment banner is from
Number The Stars.
The coordinating treat box came together just as easily. I know not everyone loves taking the time to watch videos, so I thought I'd try a photo tutorial this time instead (because how many times can you watch me apply adhesive to tabs, am I right?). So here are the steps:
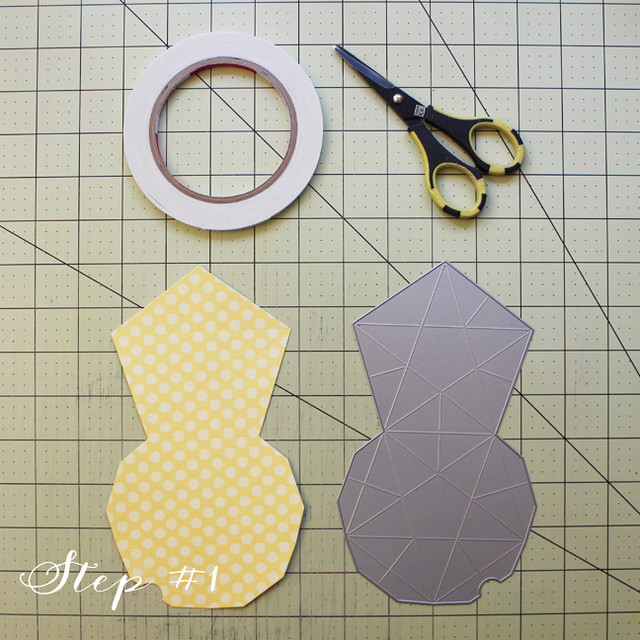
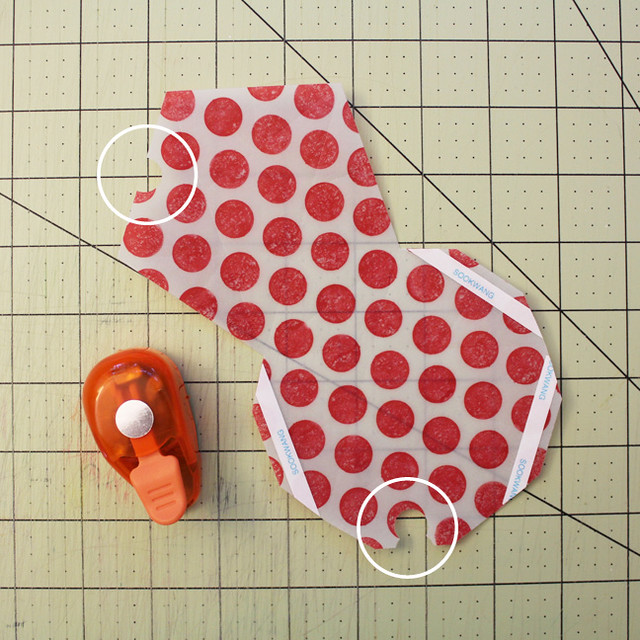
Step #1: Die cut your box from patterned paper, cardstock, vellum, etc. using the
Favor It: Star Box Die. Collect your adhesive and appropriate scissors.
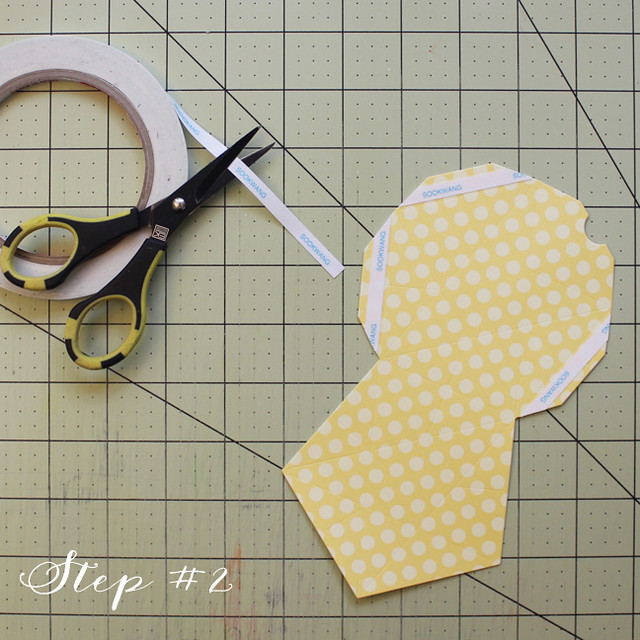
Step #2: Apply adhesive to tabs. This die includes score lines, so the tabs are easy to see. There are three tabs that need adhesive.
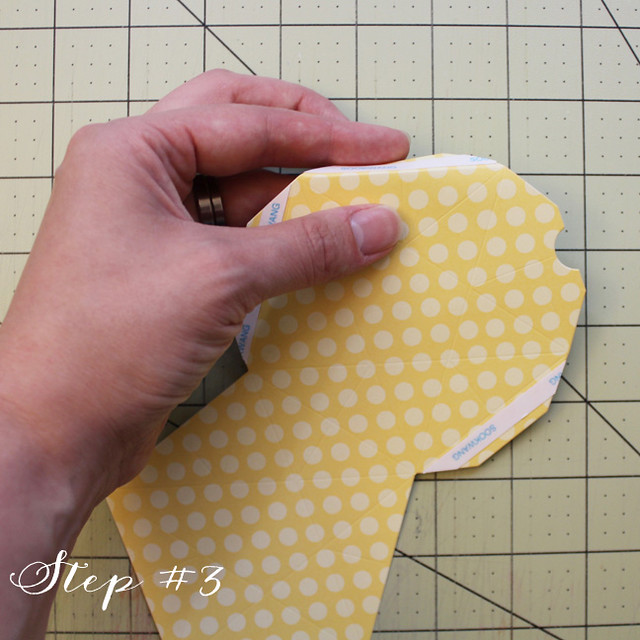
Step #3: Pre-fold the score lines. This will make assembly so much easier (especially if you're using something like vellum that can be tougher to fold).
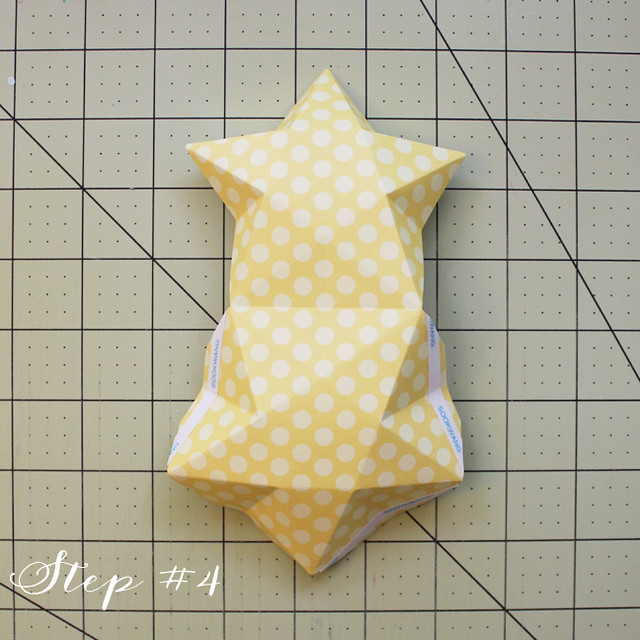
Step #4: Technically not a step. This is just what the box will look like when you're finished pre-folding.
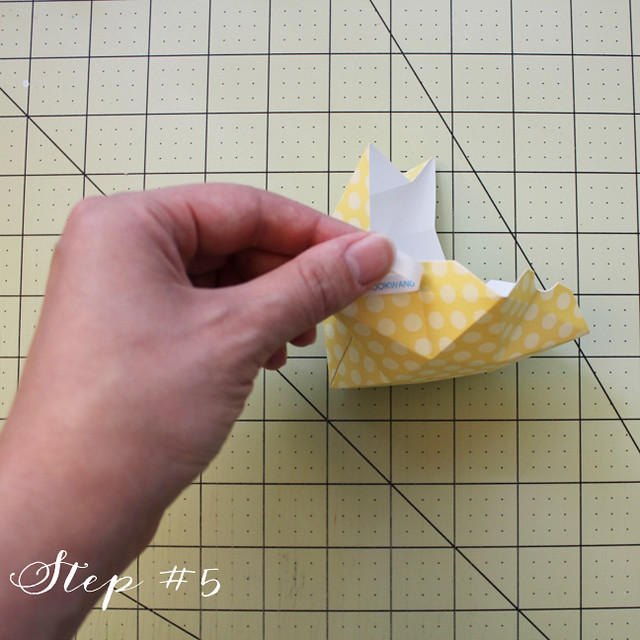
Step #5: Remove adhesive backing and press the corresponding edges together, one side at a time.
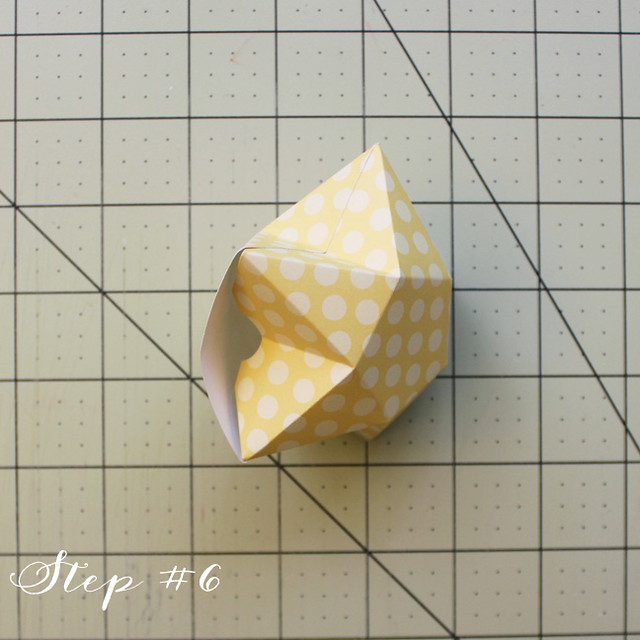
Step #6: The opening side can either be sealed with adhesive or left open so the box can be reused. The flap with the cut-out tucks inside to make it easier to open. The straight flap folds overtop to give a nice, finished edge.
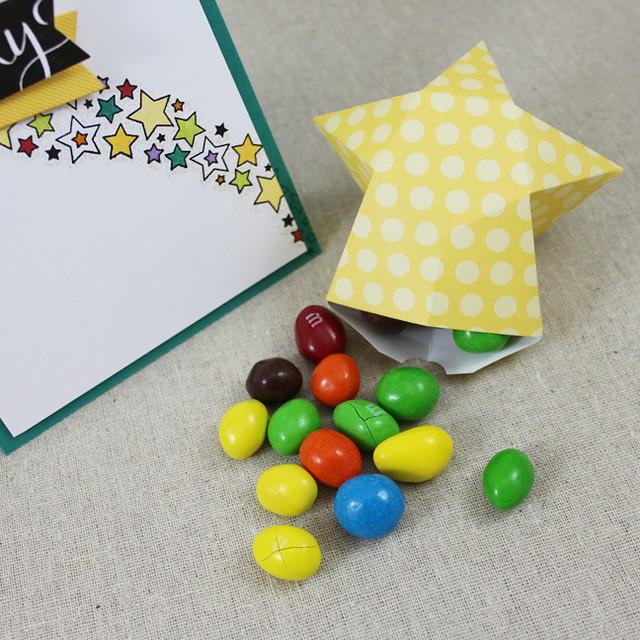
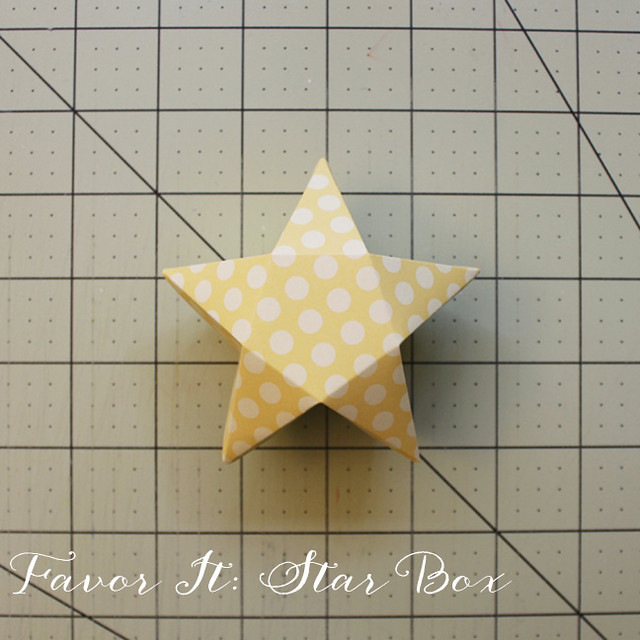
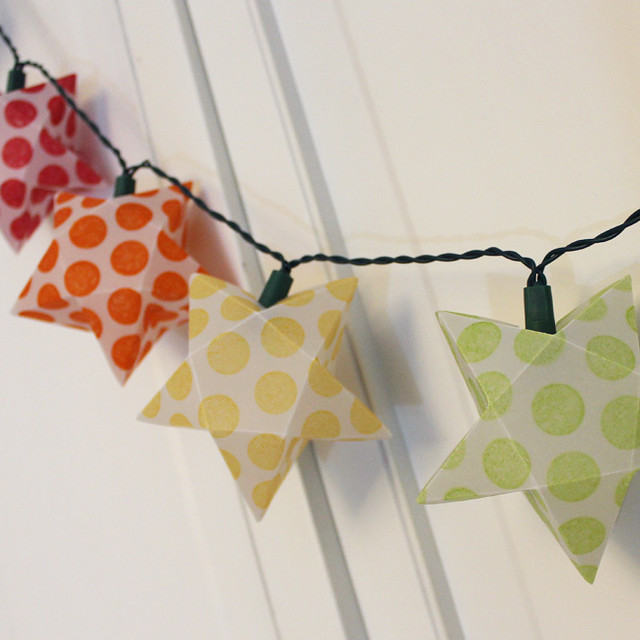
This is what the box looks like when it's complete. It's the perfect size for small candies (a portion of peanut M&Ms fit with plenty of space), jewelry, and other small trinkets.
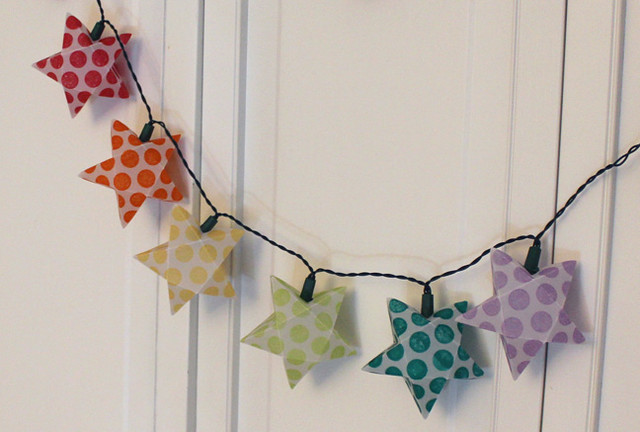
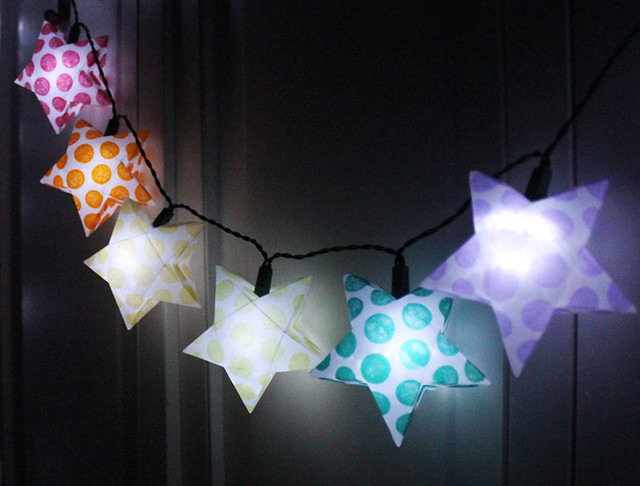
Like I mentioned before, this box is also perfect for dressing up string lights (stick to LEDs for safety though, please).
I used vellum cardstock and it worked beautifully. I stamped the pieces of vellum with Polka Dot Basics III and let them dry thoroughly before die cutting them with the new Favor It: Star Box die.
I followed the same assembly instructions with one adjustment. I used a 1/2" circle punch to make space in the open side for the bulb stems. It was a snap and the result looks like one of those fancy-schmancy light sets from a store.
I went with happy rainbow colors to coordinate with the card and gift box ensemble. Didn't they turn out cute?!
Thank you so much for joining me today! I'll see you back here again tomorrow with more of this month's release. In the meantime, make sure to check in with
Nichole,
Ashley,
Betsy,
Dawn,
Heather,
Erin, and
Maile to see what they have up their sleeves. Have a great day!
Recipes:
Shine Brighter Ensemble
Stamps: Number The Stars, Background Basics: Galaxy - Papertrey Ink
Cardstock: Tropical Teal, Harvest Gold, Green Parakeet, Harvest Gold Patterned Paper - Papertrey Ink
Ink: True Black, Soft Stone, Tropical Teal, Pure Poppy, Orange Zest, Summer Sunrise, Harvest Gold, Green Parakeet, Amethyst Allure - Papertrey Ink
Other: Number The Stars Banner Die, Favor It: Star Box Die - Papertrey Ink; Clear Spica Pen - Zig; Scor Tape
Rainbow Star String Lights
Stamps: Polka Dot Basics III - Papertrey Ink
Cardstock: Vellum Cardstock - Papertrey Ink
Ink: Tropical Teal, Pure Poppy, Orange Zest, Summer Sunrise, Green Parakeet, Amethyst Allure
Other: Favor It: Star Box Die - Papertrey Ink; Scor Tape

18 comments:
Especially love the lights!
Love the favor box projects. Those lights are so fun!
Wow! That is extremely clever. Didn't think I could possibly need a star box until I saw the lights. Absolutely brilliant!
Yikes - what an fantastic idea! Your lights are spectacular :-) Thank you!
Love this star box - so clever!! Wasn't sure I "needed" this die - until I saw it in action! Love love love the lights!!
That favor box is simply too cute!
Love your take with the light string. Now this die is a must have for me!
Fabulous everything this morning, Lizzie! I'm especially liking your Number the Stars stamp set - love the way some of the sentiments bleed off the banner.
Just love the stamps, but have to say the favor box has me hooked...add lights? Love it to the stars and back!
Just love the stamps, but have to say the favor box has me hooked...add lights? Love it to the stars and back!
Love the star box! Bravo! The string light idea is brilliant and fabulous!
Lizzie, you nailed it with your stars! Love your card but how clever is your light set? I also loved seeing those M&M's falling out of your star box. 😀
I am absolutely enthralled with the star box. The light set is sheer genius. Love boxes with a wow factor and you've certainly achieved that!
Love the Favor It: Star box. The light strand is genius!
love your step by step tutorial for the star box, and your idea for the string of lights: brilliant!!! Hugs, H
Love the star box! You make it look fool proof, and with the string of lights, it is simply stunning!
Wow I LOVE this new star box! Your lights are fantastic!!!!
can I use this die with sizzix?
Post a Comment