Good morning, friends, and welcome back to Day 1 of the
Papertrey Ink November countdown! We have a super release planned for you this month and I am absolutely positive you're going to love these new stamps and dies just as much as I do. Today, I have the pleasure of introducing you to Betsy Veldman's new
Enchanted Forest stamp set and my new
Nesting Basics: Rectangles die collection. It's a set of rectangles that cut perfectly even layers every time (and they have a coordinating collection you'll hear more about very soon).
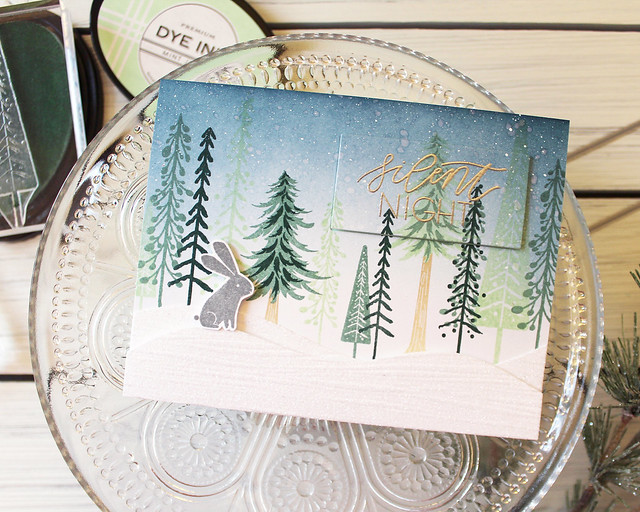
Betsy's stamp set makes me so happy. I often say I live in my own personal enchanted forest, complete with critter friends and songbirds. So for my first card today I thought a little furry friend was mandatory. It turns out, the bunny from
A Bit More: Bunny Blessings is the perfect fit!
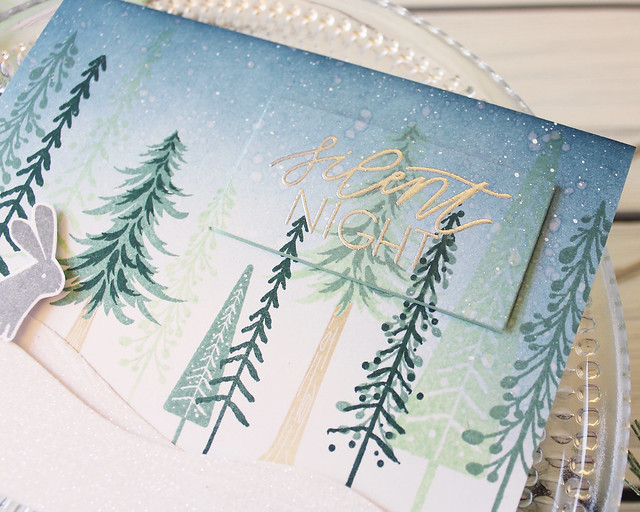
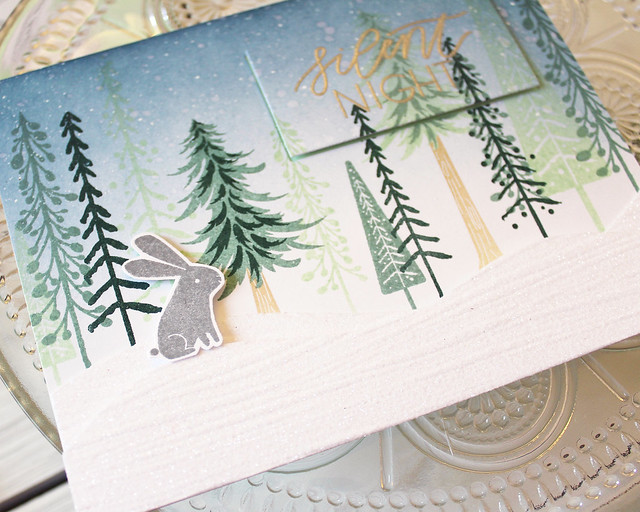
I began by sponging Spring Rain and Dark Indigo inks onto a white card front. I speckled the inked background with clean water and diluted Copic Opaque White Pigment. The mix of the two gives the impression of depth in the snow.
Then, I stamped a stand of Enchanted Forest trees using a Pinefeather, Ocean Tides, and Mint Julep color palette. I love these colors together. They're so dreamy! I used one of the dies from my new Nesting Basics: Rectangles set to cut a rectangle for my sentiment. I heat embossed the sentiment from Floral Fantasy: Christmas onto the rectangle. Then,I adhered the card front to a Mint Julep card base, adding the rectangle back in place with foam adhesive. This way the pattern stays seamless, but the dimension gives the greeting a sense of importance.
Next, I created snow banks using the In The Meadow dies. I textured them with the Woodgrain Impression Plate and coated them with glitter for a super glittery element. Then, I stamped the A Bit More: Bunny Blessings bunny using Weathervane ink and hand cut it (there isn't a die for this smaller fella). I adhered him to my card with foam tape so he could perch nicely on the snow bank. Doesn't this scene feel so serene?
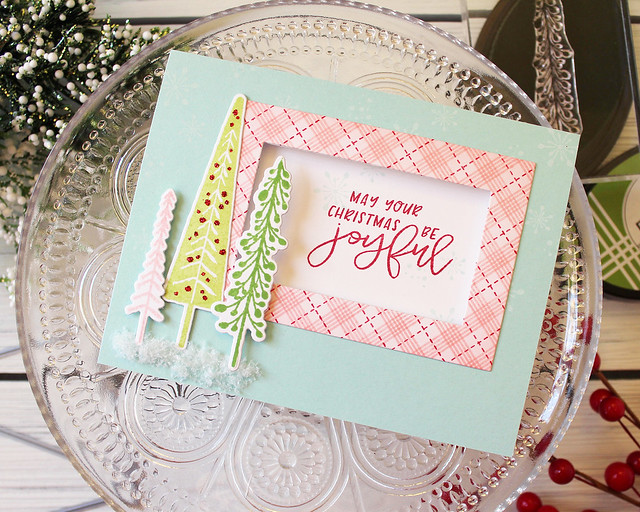
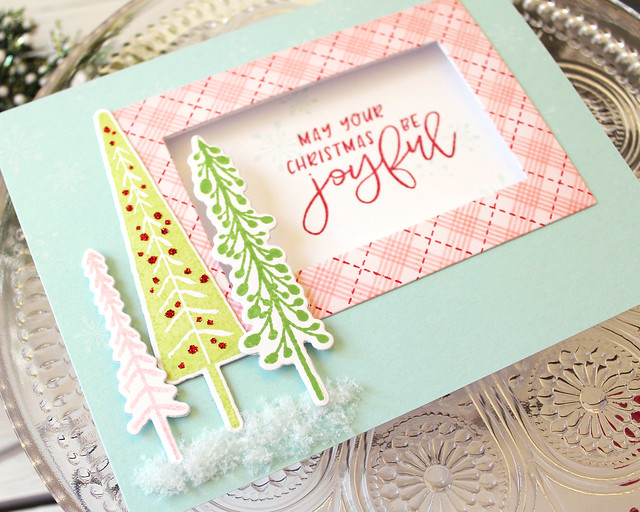
My second card today uses Enchanted Forest to create a cheerful Christmas card. I used the Nesting Basics: Rectangles to create a framed window so the sentiment is stamped directly inside the card.
I began by doing the die cutting for my window. I used the a rectangle to cut the opening in the front of the card base. Then, I used the next size up to cut an opening in the Aqua Mist layer I planned to use to cover my card front. I used the next size up because I knew my frame would eventually cover the opening and this way I didn't have to have the die in exactly the same spot as it was when I cut my base (because the openings didn't have to match up perfectly). It's a sneaky way to take the easy way out.
Next, I created my frame. I began by sponging Pale Peony ink onto a piece of white cardstock. Then, I stamped the plaid pattern using stamps from
Background Basics: Super Stripes and
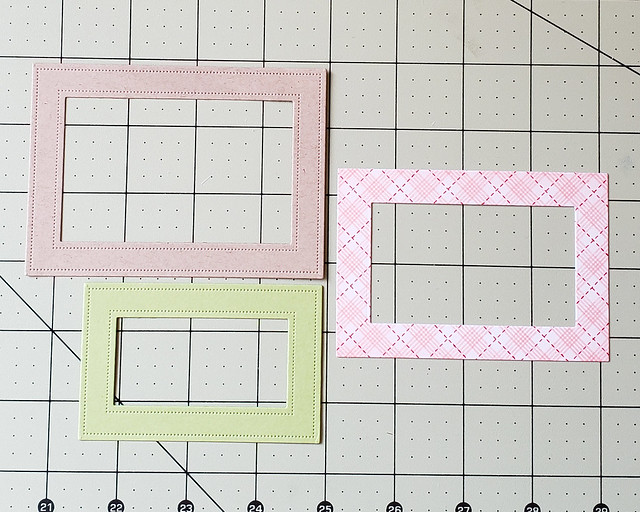
Plaid Builder using Pale Peony and Pure Poppy inks. I used the Nesting Basics: Rectangles to cut the frame. You may be wondering how this frame compares to the
Pierced Feature Frames dies, so here's a photo of this one with the medium and small frames.
I stamped the sentiment from
Words To Live By: Joyful on the inside of my card and accented with a handful of Enchanted Forest snowflakes. Then, I adhered the Aqua Mist layer to the front of the card and stamped on even more snowflakes. I added my plaid frame, hiding any uneven die cut edges (sneaky, sneaky).
Then, I stamped and die cut the Enchanted Forest trees using Pale Peony, Green Parakeet, and New Leaf inks. I embellished the baubles on the Green Parakeet tree with garnet glitter before attaching the trees with flat and foam adhesives. I used buffalo snow to create a ground for my trees and add a touch of soft dimension to my card.
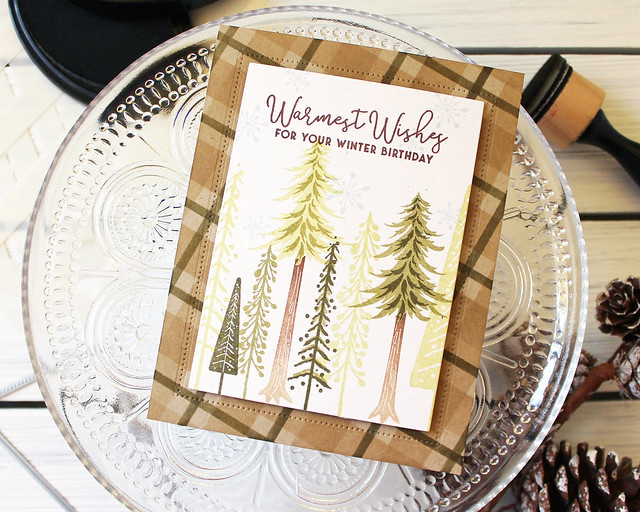
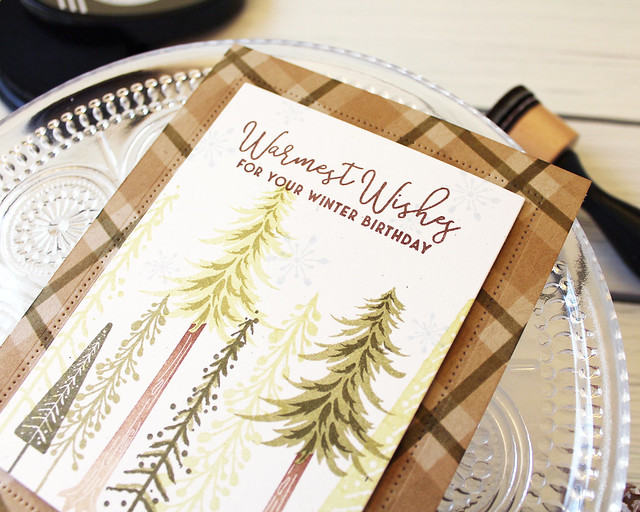
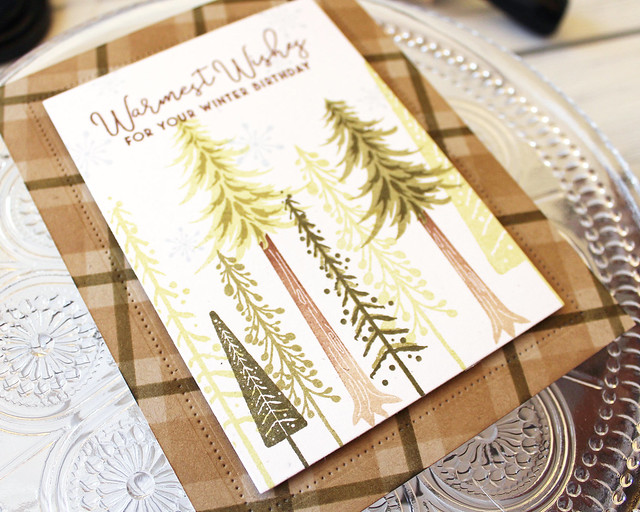
Finally, I have a masculine birthday card that pairs Enchanted Forest with my new Sentiment Staples: Warmest Wishes set (you'll see more of this set in a few days). Enchanted Forest has so many uses beyond the holiday season.
I began by die cutting a Rustic White mat using the Nesting Basics: Rectangles collection. Then, I stamped a row of trees using Olive Twist, Prairie Grass, and Spring Moss inks. I added snowflakes with Spring Rain and the sentiment from Sentiment Staples: Warmest Wishes in Dark Chocolate.
Next, I used the
Perfect Plaid Stencil Collection to create this masculine plaid on a Kraft card base. I die cut it with a pierced frame die (more on this soon) and mounted the stamped layer in the center with foam tape.
I'm not one to necessarily stick to neutrals and natural themes for masculine cards, but sometimes they do the trick perfectly. I can imagine this set will come in handy all year long!
Thank you so much for joining me for today's post! I'll be back tomorrow with another look at this month's lineup, but in the meantime make sure to pop in on
Betsy,
Dawn,
Heather,
Kelly,
Laurie,
Melissa B,
Melissa P,
Michelle, and
Stephanie. I'll see you in the morning!
Supplies:
Silent Night Card
 Joyful Christmas Card
 Winter Birthday Card


10 comments:
Three wonderful cards Lizzie and beautiful cards from all the DT today, but your first card is my absolute favorite from everyone today...it is GORGEOUS!! Your beautiful blended sky with all the snow, and then that lovely and FUN whimsical forest and cool snowbanks...well it all adds up to one STUNNING card!! LOVE the way you did the raised sentiment too! So much to love about that card...perfection my friend!! :0)
Hi Lizzie! Wow, your first card is stunning! A perfect beautiful enchanted forest. Just like home. :) Thank you for the Copic ink tip. And I LOVE how you placed your sentiment. Your masculine birthday (forest) is a perfect card for the guys. I always struggle with masculine cards because they seem so bland, but I LOVE your's! Your post is just wonderful in every way. (Lots of work too! Thanks Lizzie!) .
So far it is unanimous, your first card is really special, even among all the other outstanding cards today! Love these trees. your clever use of the Wood Grain die on the In the Meadow snowbank really inspired my creativity! And the plaid background...WOW!
Yup, I agree the winter scene on your first card is so serene and lovely. Thanks for the directions on how you achieved the look.
Your last card the masculine one is very, very nice, love the colors, gotta pull out my stencils and give 'em a try!
Lizzie, your cards are so inspiring and absolutely stunning.
Yay, Lizzie, your cards are all beautiful. Eager to see more during this fabulous release. I already want it all!
I'm joining the chorus praising the loveliness of your first card. It is my favorite card today. The color combination is gorgeous and the results truly are serene.
Love every one of your designs! The masculine card with the plaid is so awesome. But my very favorite is the magical scene with the bunny--so precious!
Beautiful cards!
as you know, my new job with the crazy hours means I have just Sundays to get inky. And here I am at crunch time pinning every single one of these gorgeous cards. What can I say except Thank you for making my life so much easier with these fantabulous designs. I'm about to case every single one!
Post a Comment