Wednesday, August 10, 2016

Introducing Lucky Break

Good morning and welcome to the first day of the Papertrey Ink August countdown (as always, the new products we're showcasing over the next several days will be available for purchase on the 15th from the Papertrey Ink website)! I have a unique little mini set called Lucky Break to share with you this month and I hope you get as much of a kick out of it as I do.

We're going to start this countdown with a Thanksgiving card. I absolutely love fall crafting, so this is going to be tons of fun!

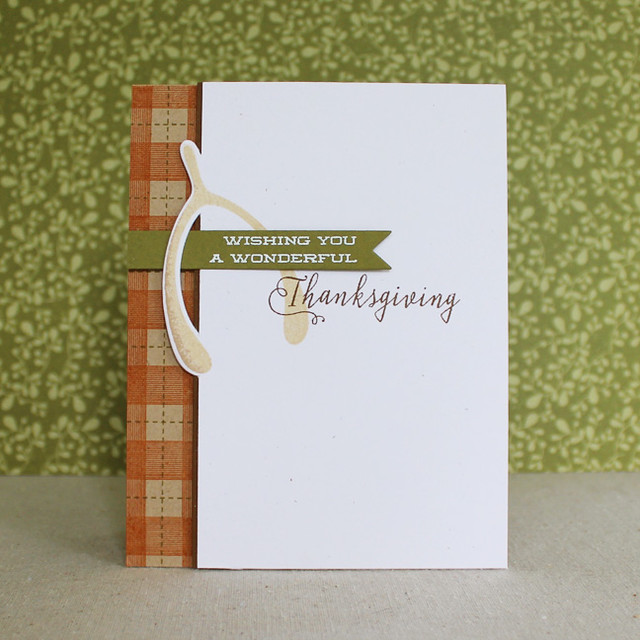
Wonderful Thanksgiving Card

I began by stamping the background pattern onto a Classic Kraft card base using Autumn Pattern Prints (in the Vault, but still one of my favorite background sets for this time of year) and the stitched line from Plaid Builder using Canyon Clay and Ripe Avocado inks. Next, I used some fancy selective die cutting magic (not really magic; just position your cutting plate only over the area you want to cut) to trim just one side of the wishbone from a panel of Rustic White cardstock. I stamped the wishbone in the resulting area using Fine Linen ink that I rock 'n rolled in Classic Kraft.

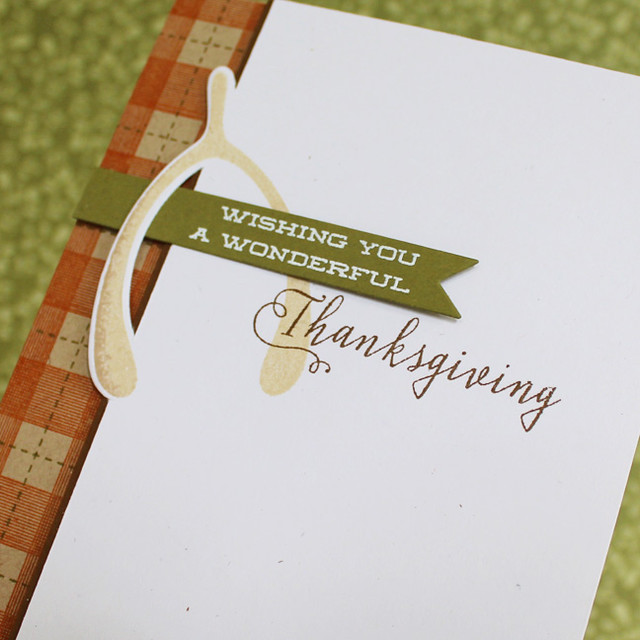
Wonderful Thanksgiving Close Up

I stamped "Thanksgiving" onto the Rustic White panel with Cocoa Bean ink and adhered a narrow mat of the matching cardstock along the wishbone edge. I mounted that panel to the card base with foam tape before adding a Ripe Avocado banner that I'd heat embossed with the rest of the phrase. I just weaved the banner through the open space in the wishbone panel to make it feel a bit more integrated.

Well, that's all for me today. I'll be back here tomorrow with more of Lucky Break so I hope to see you then. In the meantime, Nichole, Betsy, Dawn, Heather, Kay, Laurie, Lexi, and Maile all have more to share. See you soon!

Recipe:
Wonderful Thanksgiving Card
Stamps: Lucky Break, Autumn Pattern Pieces, Plaid Builder - Papertrey Ink
Cardstock: Classic Kraft, Cocoa Bean, Rustic White - Papertrey Ink
Ink: Canyon Clay, Ripe Avocado, Cocoa Bean - Papertrey Ink; VersaMark - Tsukineko
Other: Lucky Break Die, Sketched Shapes Die - Papertrey Ink; Foam Tape - Scotch; White Embossing Powder - Filigree

Saturday, July 23, 2016

Stamp-A-Faire 2016: Masterpiece Inspirations


Good afternoon, Papertrey Ink friends! Are you enjoying this year's Stamp-A-Faire festivities? I sure hope so! I love the challenge we're sharing this hour and I hope you enjoy it, too. Nichole challenged the Design Team to find a work of art that we found inspiring and then create a card based on that inspiration piece. Doesn't that sound like fun?! So here's how that all came together for me:


Impressionism has long been a favorite of mine and I knew I wanted to draw upon one of the French masters for this challenge. I found this piece, AnĂ©mones Roses, and simply fell head over heels.

Source

When I look at this painting by Berthe Morisot, I see romanticism, gorgeous, layered brush strokes, and a cool, serene palette that just draws you in. I love how she softens the edges of her subject and uses pops of bright pink to direct your eye. I hope I've done the original piece justice with my interpretation.

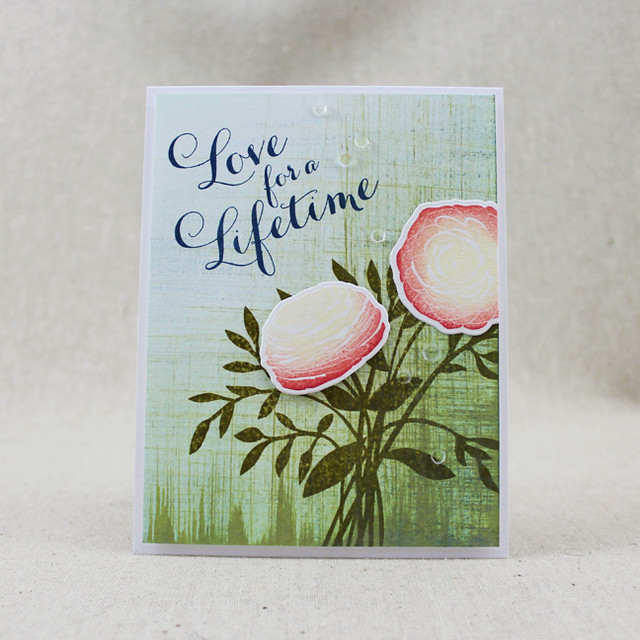
Love For A Lifetime Card

I began by creating the background. First, I sponged a bit of Aqua Mist onto a watercolor paper panel. Then...remember the technique I mentioned in yesterday's post featuring Art With Heart? I used that same technique here, but this time I layered a couple of colors. I started with a Ripe Avocado layer (it dried a bit lighter which worked out perfectly) and added a barely-there layer of Enchanted Evening, too. I wanted to recreate that same soft brushwork from the original piece and I feel pretty happy with how it turned out.

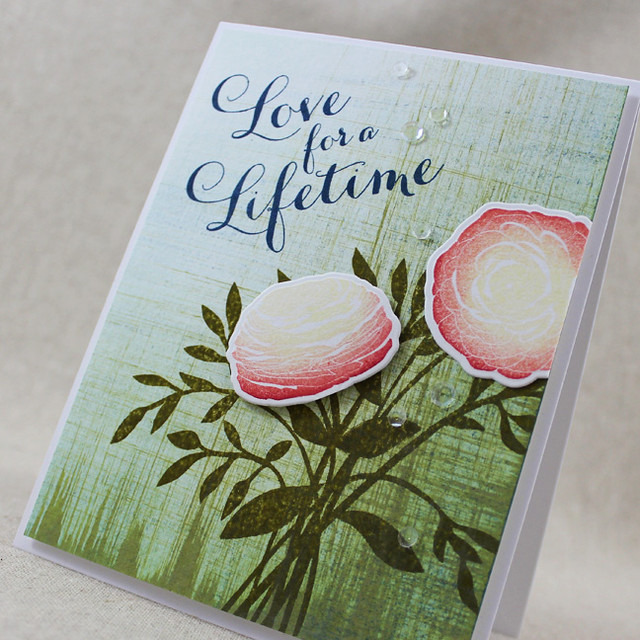
Love For A Lifetime Close Up

Once my background had dried, I trimmed it down a smidgen and stamped the stems from Friendship Jar Flowers and a sentiment from Graceful Greetings II. I stamped the flowers from Cutting Garden using Lemon Tart, Pale Peony, Berry Sorbet, and just a touch of Pure Poppy. I mounted the painted panel to a white card base using foam tape and then added the flowers with a mix of flat and foam adhesives. I finished off the card with a sprinkling of Sunshine & Rainbows sequins (I seriously can't get enough of those things).

Make sure to pop over to Nichole's blog to see all of the challenge details and inspiration and then head over to see Amy, Ashley, Betsy, Danielle, Dawn, Heather, Kay, Laurie, Lexi, and Melissa to see their beautiful projects. Enjoy the rest of Stamp-A-Faire and I'll see you around the Forum!

Recipe:
Stamps: Friendship Jar Flowers, Graceful Greetings II, Cutting Garden - Papertrey Ink
Cardstock: Watercolor Paper - Ranger; white
Ink: Ripe Avocado, Enchanted Evening, Lemon Tart, Pale Peony, Berry Sorbet, Pure Poppy - Papertrey Ink
Other: Cutting Garden Die, Sunshine & Rainbows Sequins - Papertrey Ink; Matte White Acrylic Paint - Martha Stewart Crafts; Foam Tape - Scotch; Paintbrushes

Friday, July 22, 2016

SAF Free Exclusive Set!

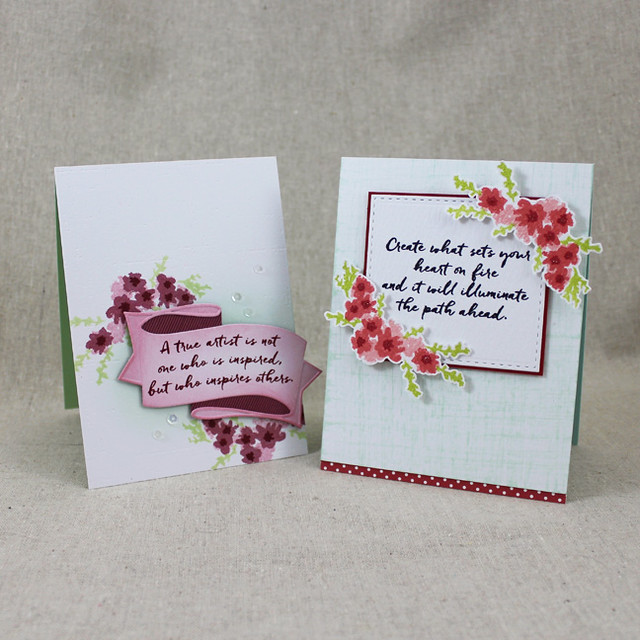
Good morning, friends! Tomorrow is Papertrey Ink's annual Stamp-A-Faire event and this morning the Design Team is getting together to share a few projects featuring this year's exclusive SAF stamp set, Art With Heart.

SAF 2016 Exclusive Set Cards

Art with Heart will ONLY be available on Stamp-a-faire day to all customers who make a qualifying $100 purchase. All orders made between 7am ET and 11:30pm ET on Stamp-a-faire Day tomorrow (July 23, 2016) that total $100 (before shipping) will receive the set for FREE! You will still earn Rewards Points on your order too, so it's an amazing offer! Please email Papertrey Ink Customer Service with any further questions. Now that the details are out of the way, let's get to the projects!

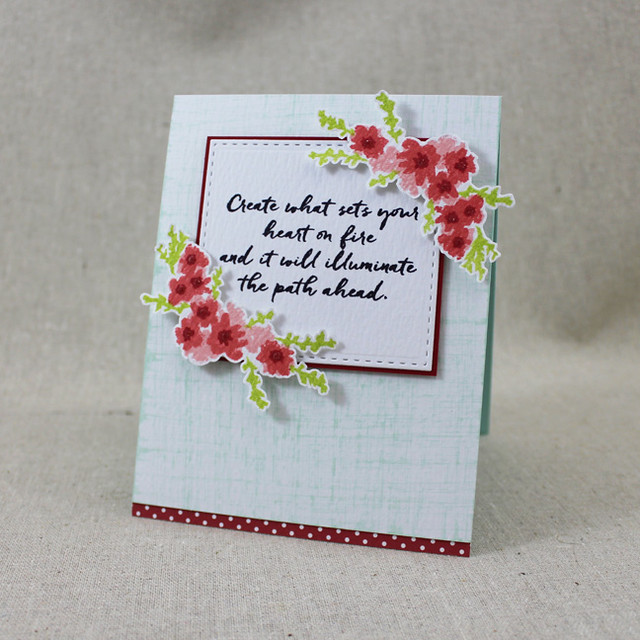
SAF 2016 Exclusive Set - Create Card

I love it when a set inspires me to try a new style or technique and this set does just that! I love the painted style of the flowers in this set. I wanted to create a background to complement that style, so I played around with a dry-brushing technique and I love how it turned out! I simply mixed a bit of water, white acrylic paint, and Aqua Mist reinker together and ran a barely-loaded brush over a piece of watercolor paper. I brushed both directions to create an almost linen-like effect. So fun!

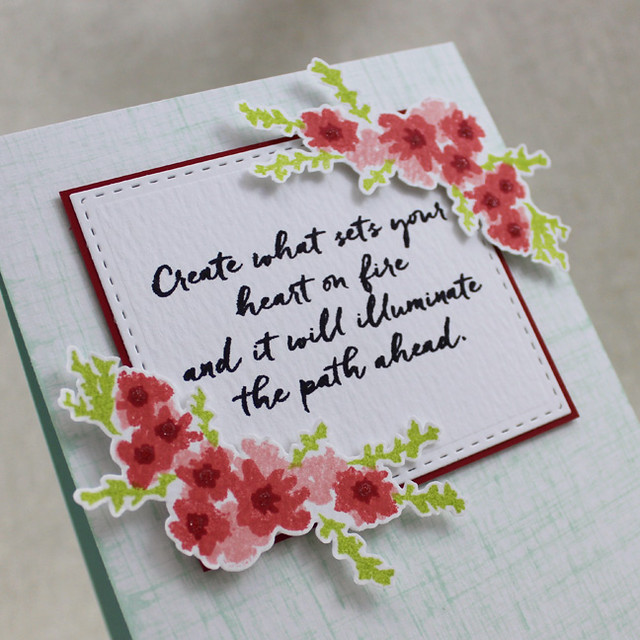
SAF 2016 Exclusive Set - Create Close Up

I adhered a piece of Pure Poppy + White polka dot paper and the watercolor panel to an Aqua Mist card base. I stamped one of the sentiments from the set using True Black ink on a stitched panel (cut with one of the Noted: Scalloped Square dies) that I matted with Pure Poppy and adhered to the card front. Next, I stamped the flowers from Art With Heart onto watercolor paper using Pale Peony, Berry Sorbet, Pure Poppy, and Green Parakeet inks. I fussy cut the flowers and added them to the sentiment panel with foam tape before embellishing the flower centers with crystal glitter. 

I went a softer, blended direction on this next card.

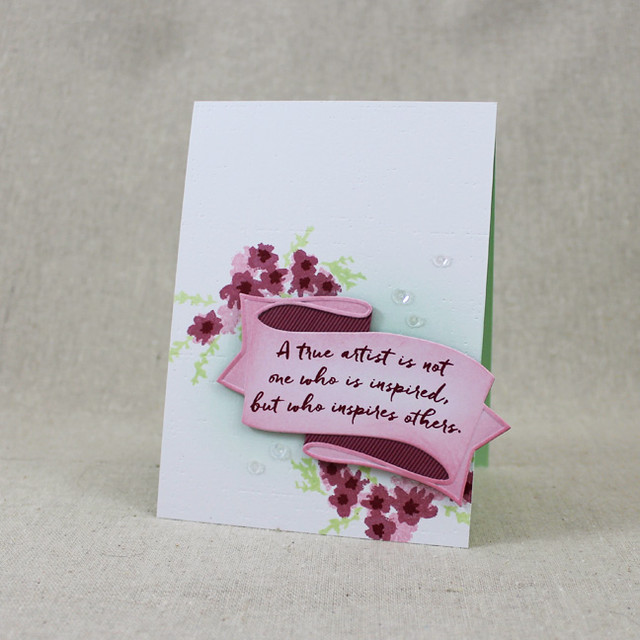
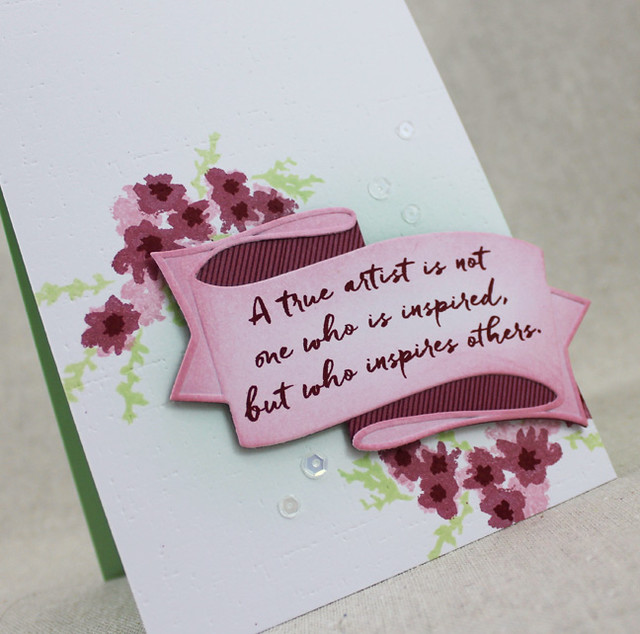
SAF 2016 Exclusive Set - True Artist Card

I began by sponging a bit of Aqua Mist ink onto a 4" x 5 1/2" white panel and then stamping the flowers from Art With Heart using Mint Julep, Lovely Lady, Autumn Rose, and Scarlet Jewel inks. I textured that panel with the Linen & Canvas Impression Plate and then adhered it to a Mint Julep card base.

SAF 2016 Exclusive Set - True Artist Close Up

Next, I sponged a scrap of white cardstock with Lovely Lady ink before die cutting with the top layer of the Layered Banner die. I stamped the sentiment from Art With Heart on that piece in Scarlet Jewel ink. The bottom layer I die cut from Autumn Rose and stamped with the lines from Layered Banner Banter using Scarlet Jewel ink. I adhered the two together and added the whole piece to the card front with foam tape. Finally, I embellished with a few sequins from the Sunshine & Rainbows Make It Market Mini Kit.

Thank you so much for joining me today! Make sure to check in with Nichole, Amy, Ashley, Betsy, Danielle, Dawn, Heather, Kay, Laurie, and Melissa to see even more of this year's SAF Exclusive set! Enjoy Stamp-A-Faire, everyone! I'll see you on the forum!

Recipes:
Create Card
Stamps: Art With Heart - Papertrey Ink
Cardstock: Aqua Mist, Pure Poppy, Pure Poppy + White Bitty Dot Paper - Papertrey Ink; Watercolor Paper - Ranger
Ink: Aqua Mist, Pale Peony, Berry Sorbet, Pure Poppy, Green Parakeet, True Black - Papertrey Ink
Other: Noted: Scalloped Square Die Collection - Papertrey Ink; White Acrylic Paint, Crystal Glitter - Martha Stewart Crafts; Foam Tape - Scotch

True Artist Card
Stamps: Art With Heart, Layered Banner Banter - Papertrey Ink
Cardstock: Mint Julep, Autumn Rose - Papertrey Ink; white
Ink: Mint Julep, Lovely Lady, Autumn Rose, Scarlet Jewel - Papertrey Ink
Other: Layered Banner Die, Sunshine & Rainbows Sequins, Linen & Canvas Impression Plate - Papertrey Ink; Foam Tape - Scotch

Monday, July 18, 2016

Moments Inked: Birthday Notes


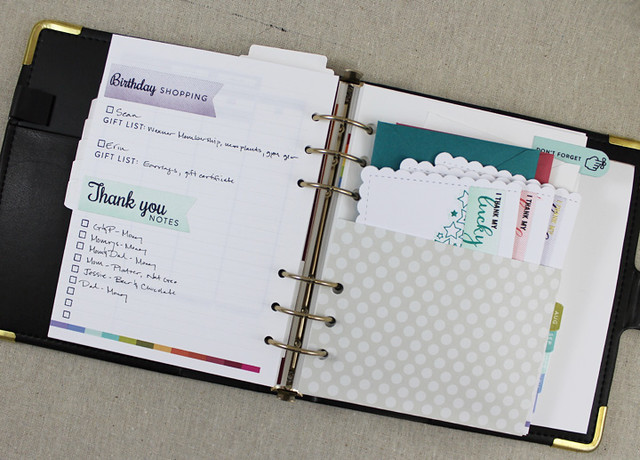
Good morning, friends! It's my turn to share how I've been using my Moments Inked planner lately, so I thought I'd show you how I'm keeping track of birthday notes these days. You see, July is a big month for birthdays around here. Not only do Sean and I both celebrate birthdays, but we have other family birthdays tucked in there as well. I've been a little extra busy lately, so I thought it might help to organize all of the notes using the lined pages at the end of the month. Turns out, it's the perfect solution!

Birthday Notes Spread

I wanted to make sure I had a section for shopping and gift ideas, a section for who I owe thank you notes, and a pocket to hold a handful of notes in the event that I have a few extra minutes that I can put to good use while I'm waiting for an appointment or something.

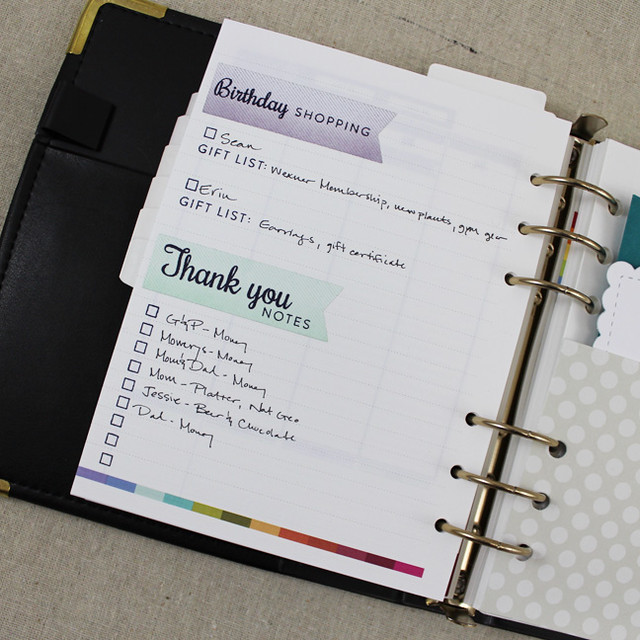
Birthday Notes Page

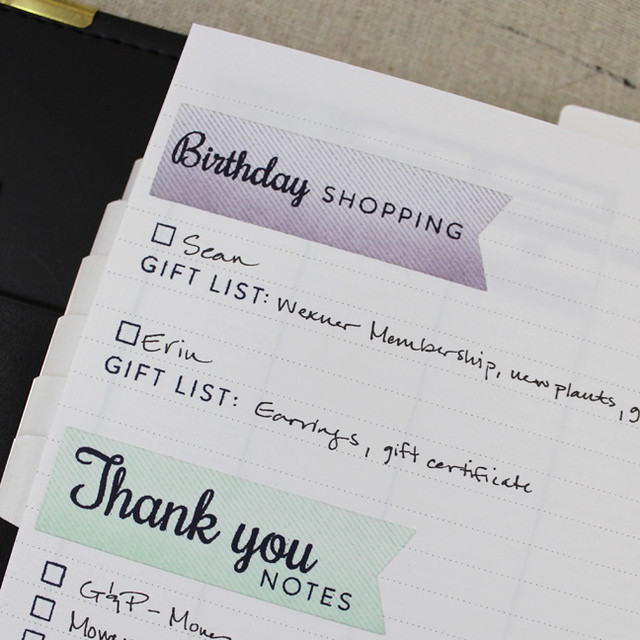
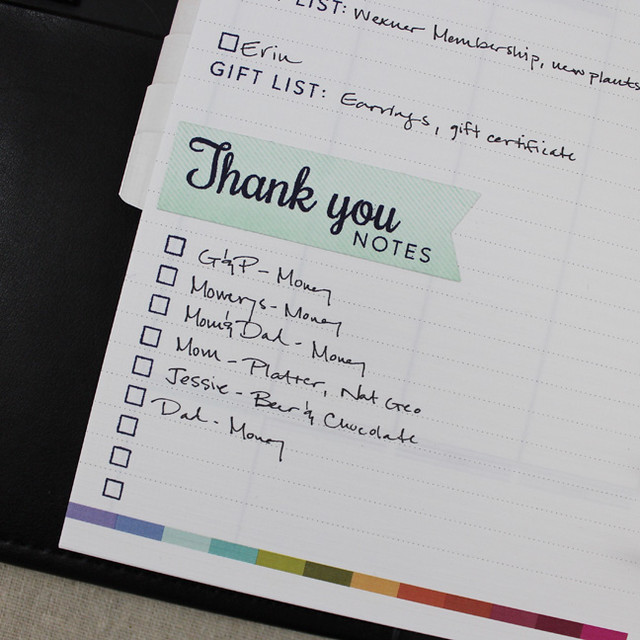
I created heading stickers for the gift and thank you note sections by pairing the new Background Basics: Galaxy set with Moments Inked: Listed and Tick Tock (the script sentiments). I sponged a bit of ink onto a piece of White Adhesive Sheet paper before stamping the striped banner and cutting with the coordinating die. Then, I added the sentiments in True Black and stuck them to the lined paper at the end of the month of July.

Birthday Shopping Section

I used Moments Inked: Listed again to add check boxes below each sticker. I also stamped "gift list" to keep track of the gift ideas I have for the folks that need presents.

Thank You Note Section

Under the Thank You Notes section I listed each friend or family member who sent a gift and what they sent. This way, I don't have to worry about forgetting who sent what and then be stuck writing a vague note of gratitude (not that I've ever had to do such a thing).

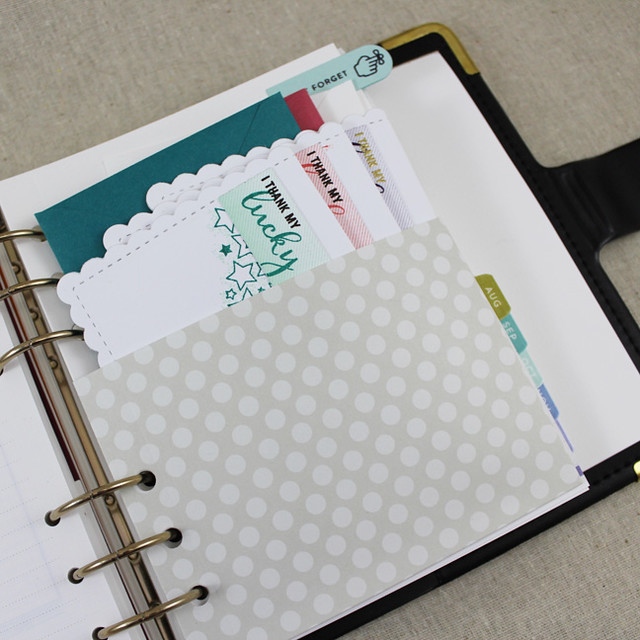
Thank You Note Pocket

I created the pocket to have those thank you notes close at hand. I kept the colors fairly neutral, so I can move this pocket to other months should the need arise. I began by die cutting two of the largest Binder Page shapes, one from Fresh Snow Linen and the other from Polka Dot Soft Stone. I trimmed the Soft Stone down a bit and adhered the two together, using extra strips of patterned paper along the sides to create a very slight gusset. I like that I have a tiny bit of wiggle room that way.

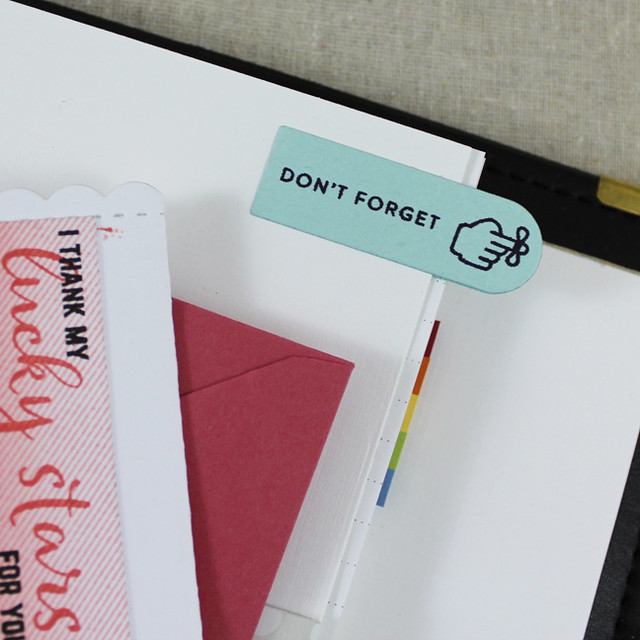
Don't Forget Tab

I also added a tab using the Moments Inked: Divided Die and an image and sentiment from Moments Inked: Everyday Symbols. Not only is the tab cute, but it has the added benefit of sticking out just enough to make it easy to find the pocket when I want to flip right to it.

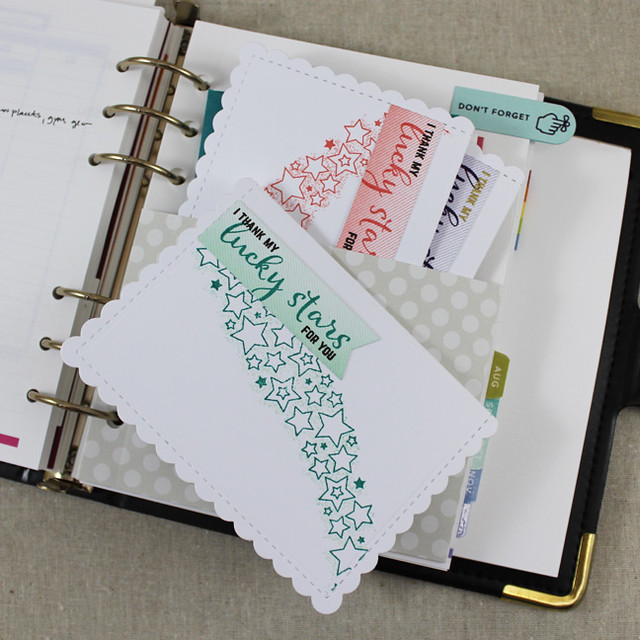
Starry Thank You Notes

I kept the cards nice and simple, both so I could create a batch of them fairly quickly, but also because the flatter they are, the better they fit into my planner. I used Background Basics: Galaxy again, this time paired with the Noted: Scalloped A1 Die Collection. I've always liked this size for thank you notes. It's plenty of space to jot a nice note, but not so much space that you feel like you have to be Tolstoy to fill it.

I like this little set up so much that I think I just might have to get something similar ready for Christmas. It's coming sooner than you think!

Well, that's all for me today friends! Have a wonderful week and I'll see you this weekend for Stamp-A-Faire!

Recipe:
Stamps: Background Basics: Galaxy, Moments Inked: Listed, Tick Tock, Moments Inked: Everyday Symbols
Cardstock: Fresh Snow Linen, Soft Stone Polka Dot Paper, White Adhesive Sheets - Papertrey Ink; white
Ink: Winter Wisteria, Aqua Mist, True Black, Tropical Teal, Pale Peony, Berry Sorbet, Royal Velvet, Smokey Shadow - Papertrey Ink; Delicata Gold
Other: Number The Stars Banner Die, Moments Inked: Divided Die, Moments Inked: Binder Page Die, Noted: Scalloped A1 Die Collection - Papertrey Ink

Friday, July 15, 2016

Release In Review

Good morning, friends! Today is the wrap up for the July Papertrey Ink Countdown and I have a few additional projects to share featuring the new goodies from this month's release. Let's get to it!

First up, I have a card I created with the latest in Betsy's Paper Clippings series, Paper Clippings: Done With Love.

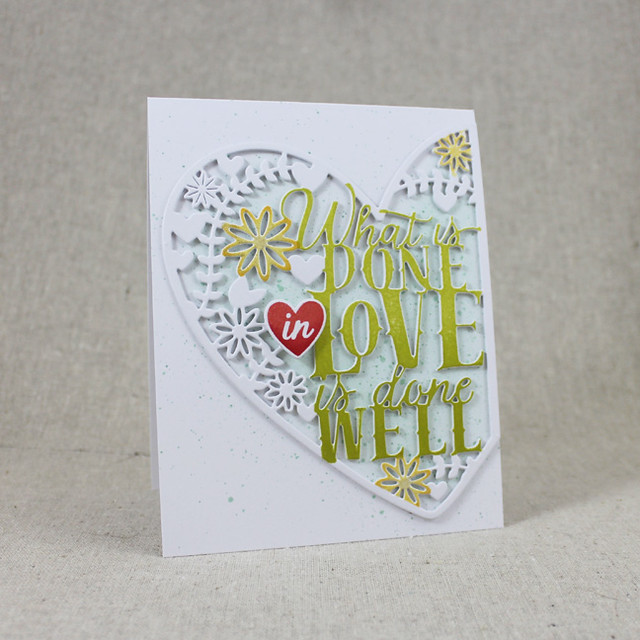
Done In Love Card

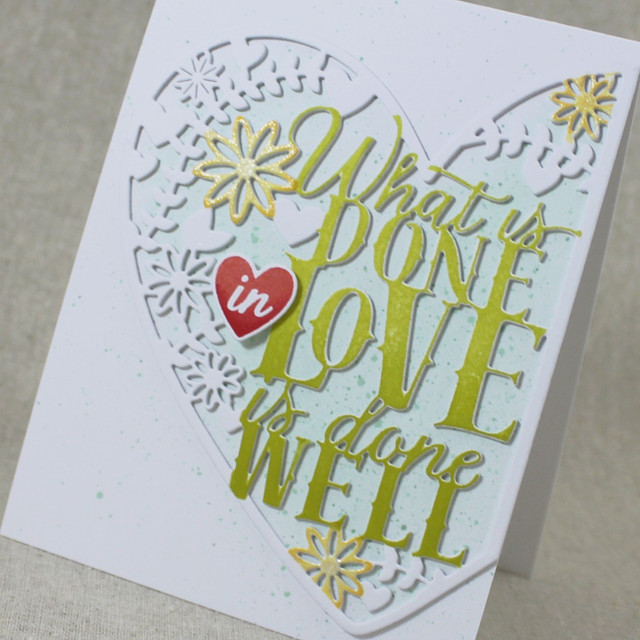
I started by xyroning and die cutting three of the large heart cover plate shapes. Next I stamped the sentiment into the appropriate place using Limeade Ice and Simply Chartreuse inks. I stamped a few select flowers with Harvest Gold and Summer Sunrise inks before adding shimmer with a clear Spica pen.

Done In Love Close Up

Next I stamped and die cut the "in" heart using Berry Sorbet and Pure Poppy inks. I layered the three large hearts together and then attached the small heart with a bit of foam tape. I sponged and splattered a bit of Aqua Mist ink onto a white card base before adhering the heart into place.

Next, I have a wedding card I made with Maile's Splits: Best Wishes set.

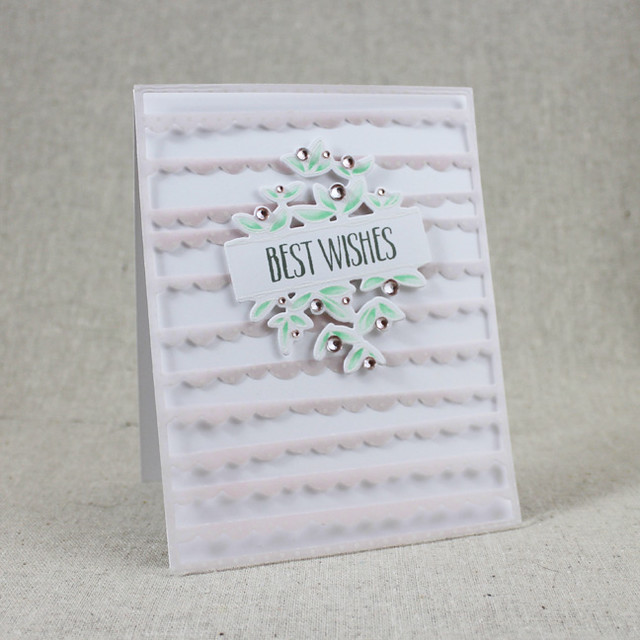
Splits Best Wishes Card

I began die cutting and heat embossing the Splits image onto white cardstock. I colored the leaves with a colored pencil and added the sentiment in Stormy Sea ink. Then I sponged Pale Peony ink onto the back of a piece of bitty dot Sheer Basics vellum. Once it was dry, I die cut it with the new Cover Plate: Scallops die.

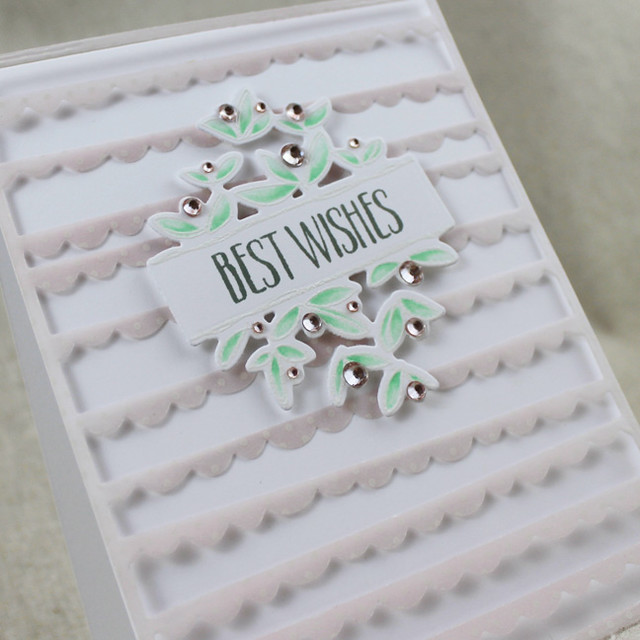
Splits Best Wishes Close Up

I layered that onto a white card base and used foam adhesive under the Splits shape to adhere both into place. Next, I colored several rhinestones in varying sizes with a Copic marker. I adhered those over the "berries" on the Splits frame for a card with tons of sparkle.

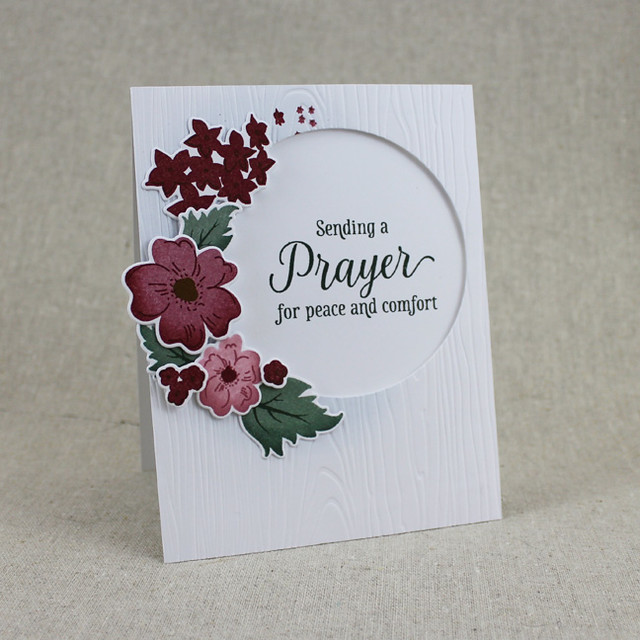
Next in line is a card featuring Betsy's new Inspired: Prayer set.

Sending A Prayer Card

I began by die cutting and stamping flowers and leaves from Dawn's Floral Sketches set onto white cardstock. Next, I sponged a bit of Spring Rain ink onto a panel of white cardstock before die cutting a circle out of the interior (it's not centered; it's off to the right a bit). I placed that over a white card base and then stamped my sentiment in the opening.

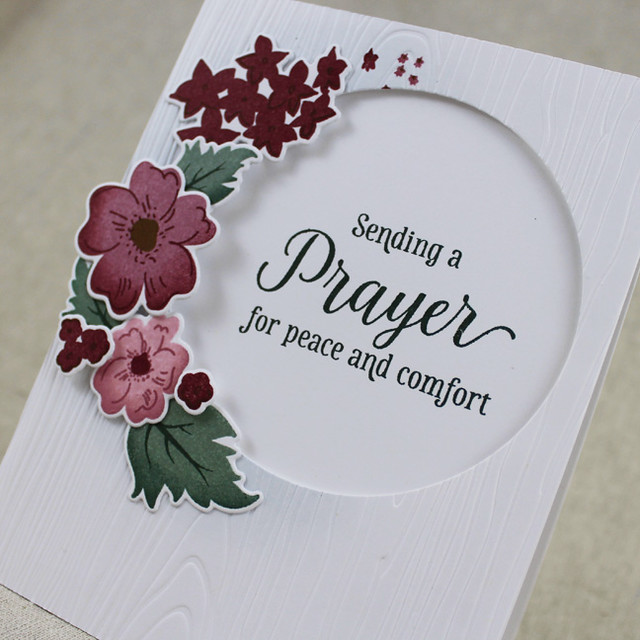
Sending A Prayer Close Up

I added texture to that panel with the Woodgrain Impression Plate before attaching it to the card base with foam tape. Finally, I arranged the die cut flowers and leaves around the left side of the circle with a mix of flat and foam adhesives.

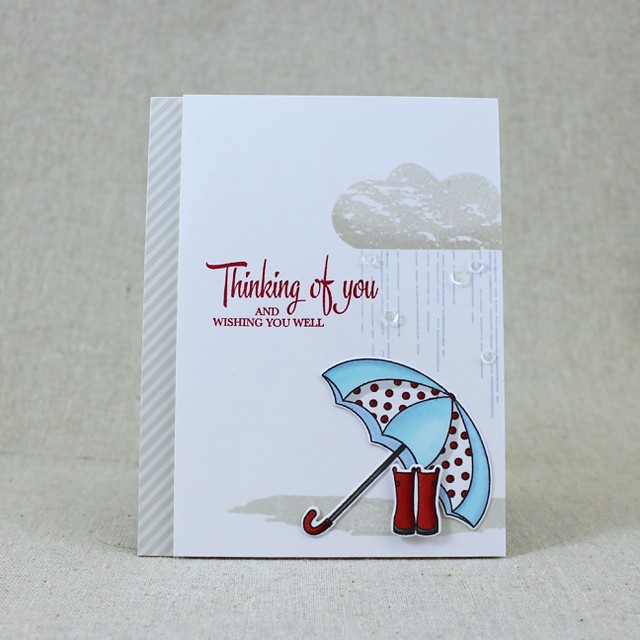
And last but not least I have a card pairing Dawn's It's The Thought with Betsy's Dress Up Dolls: Rainy Day.

Rainy Thinking Of You Card

I began by stamping, coloring, and die cutting the images from the Rainy Day set. Then, I stamped a white panel with images from So Striking and Watercolor Wonder to create a mini scene. I added the sentiment from Dawn's new set in Pure Poppy before attaching the panel to a Soft Stone card base that I had embellished with a strip of striped Soft Stone patterned paper.

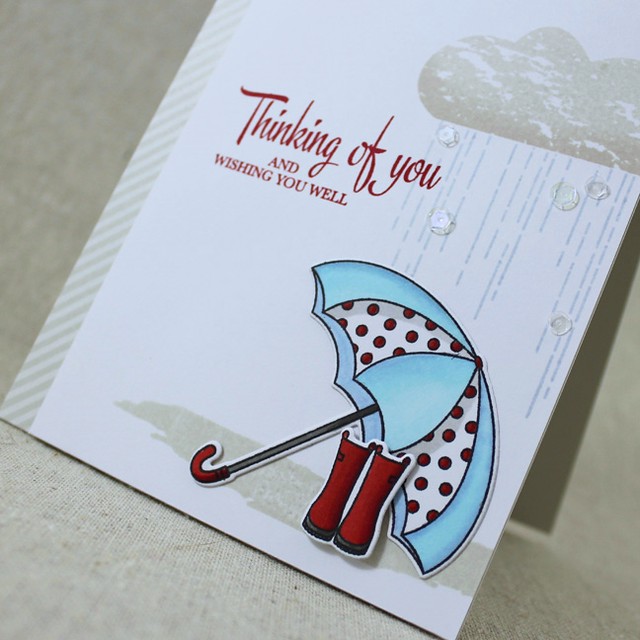
Rainy Thinking Of You Close Up

Next, I adhered the umbrella and galoshes into place before adding a sprinkling of Sunshine & Rainbows sequins.

That's all for me this time around. Thank you so much for joining me this week! Make sure to pop over and visit Nichole, Amy, Ashley, Betsy, Danielle, Dawn, Heather, Kay, Laurie, and Melissa to see more of their projects, too. Thanks again for stopping by and I'll see you again soon!

Recipes:
Done With Love Card
Stamps: Paper Clippings: Done With Love - Papertrey Ink
Cardstock: white
Ink: Limeade Ice, Simply Chartreuse, Berry Sorbet, Pure Poppy, Harvest Gold, Summer Sunrise, Aqua Mist - Papertrey Ink
Other: Paper Clippings: Done With Love Die - Papertrey Ink; Clear Spica Pen - Zig; Foam Tape - Scotch

Best Wishes Card
Stamps: Splits: Best Wishes - Papertrey Ink
Cardstock: Sheer Basics Bitty Dot Vellum - Papertrey Ink; white
Ink: Pale Peony, Stormy Sea - Papertrey Ink; VersaMark - Tsukineko
Other: Splits: Best Wishes Die, Cover Plate: Scallops Die - Papertrey Ink; White Embossing Powder - Filigree; Rhinestones - KaiserCraft, Mark Richards; Foam Tape - Scotch; Copic Marker; Prismacolor Pencils

Sending A Prayer Card
Stamps: Inspired: Prayer, Floral Sketches - Papertrey Ink
Cardstock: white
Ink: Scarlet Jewel, Autumn Rose, Lovely Lady, Ocean Tides, Pinefeather, Cocoa Bean, Spring Rain - Papertrey Ink
Other: Floral Sketches Die, Woodgrain Impression Plate - Papertrey Ink; Foam Tape - Scotch

Rainy Thinking Of You Card
Stamps: Dress Up Dolls: Rainy Day, It’s The Thought, Watercolor Wonder, So Striking - Papertrey Ink
Cardstock: Soft Stone, Soft Stone Stripe Patterned Paper - Papertrey Ink; white
Ink: Soft Stone, Spring Rain, Pure Poppy - Papertrey Ink; Tuxedo Black - Memento
Other: Dress Up Dolls: Rainy Day Die, Sunshine & Rainbows Sequins - Papertrey Ink; Foam Tape - Scotch; Copic Markers