Good morning, friends, and welcome back to Day 2 of the
Papertrey Ink August new release countdown! Today, I have the pleasure of introducing you to
Dawn McVey's new
Saying It Simply: Wishing You A Lovely Birthday Die and her
Scallop Stackers: Small die. Both of these products are absolutely going to be staples in your crafting collection. We can all use tools to make birthday cards quicker and easier! Let's get on to some projects, shall we?
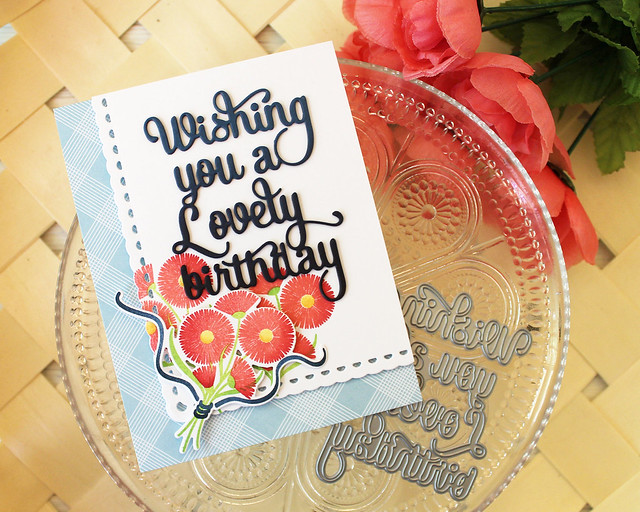
My first card was inspired by a vintage hanky. You all know how much Dawn loves her vintage linens, so I thought it was totally apropos inspiration.
I began by covering a white card base with Bitty Big: Spring Rain patterned paper before setting it aside. I wanted to do a little something different with the Scallop Stackers: Small shape, so I cut off the top and the right edge so I could align it in the top corner of the card. I think this helps with the hanky effect.
I started by stamping the Corner Adorner: May image a couple of times directly onto that shape and then stamped and die cut a separate one to have layered on top. I used a blending sponge to add in darker areas of color both on the flowers and the ribbon. I adhered those bits to the card base with foam adhesive.
Then, I xyroned and die cut three of the Saying It Simply sentiment shapes from Enchanted Evening cardstock. I sponged one of the die cuts with Dark Indigo ink to give it an ombré effect and layered all three to give the greeting depth. This sentiment die is nice and big, so it really commands attention, but it's not so huge that you can't still fit some other pretty elements on your cards. This one is definitely going to become a staple.
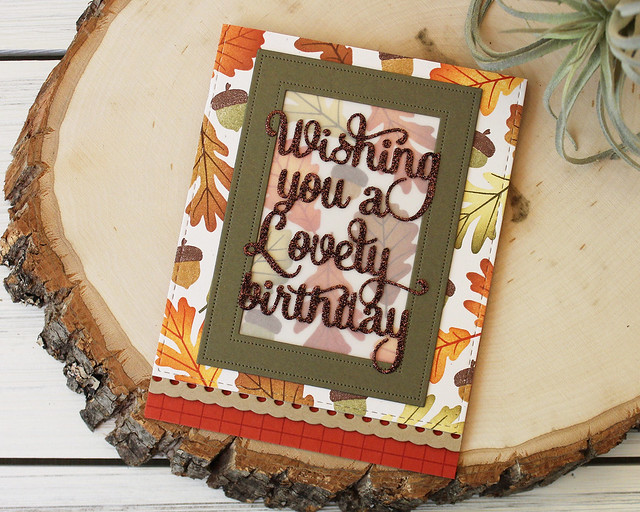
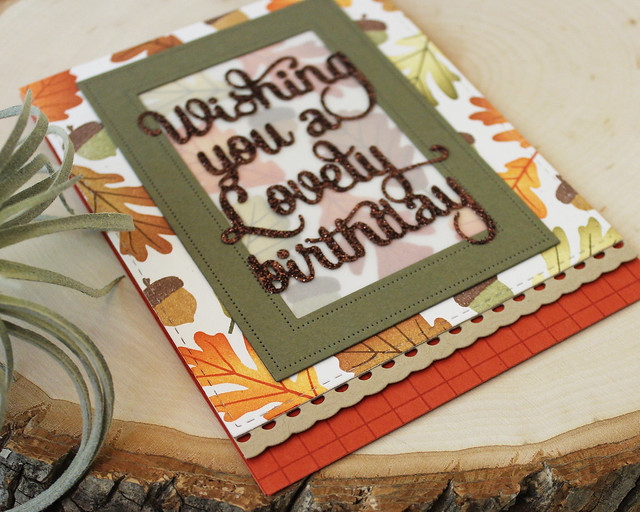
Next up, I have a more autumnal project to share. I had a heyday on this background!
I began by stamping the Cover Up: Grid onto a Terra Cotta Tile card base using the matching ink. I set that aside and went to work on that background. I stamped the leaves and acorns from the Forest Floor: Autumn set (you'll see more about this later in the countdown) using a variety of inks. I used blending sponges and a stamp platform to give each leaf plenty of color and dimension.
Once that background was finished, I die cut it using the Noted: Simply Stitched A2 Vertical die. I used the Scallop Stackers: Small to add a scalloped detail to the bottom edge of that panel before adhering it to the card base with foam tape. I really like that trim and think it adds so much to soften the straight lines of the rest of the card.
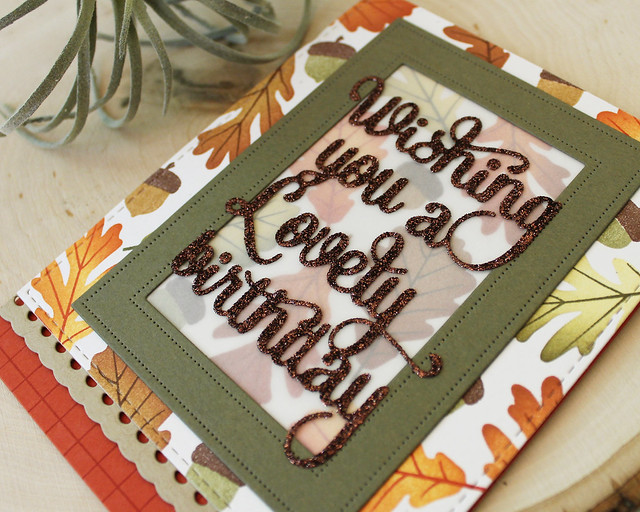
Then, I die cut a Pierced Feature Frame from Olive Twist cardstock and backed it with vellum. The vellum softens the leafy pattern without completely covering it up. Then, I xyroned a piece of Dark Chocolate cardstock, front and back. I die cut the Saying It Simply greeting and pulled the adhesive backing off of the front. I sprinkled Martha Stewart Brownstone glitter over the entire sticky surface. After burnishing it and using a paint brush to remove any loose bits, I adhered that to the center of the Olive Twist frame. The glitter is so striking on that beautifully designed sentiment die!
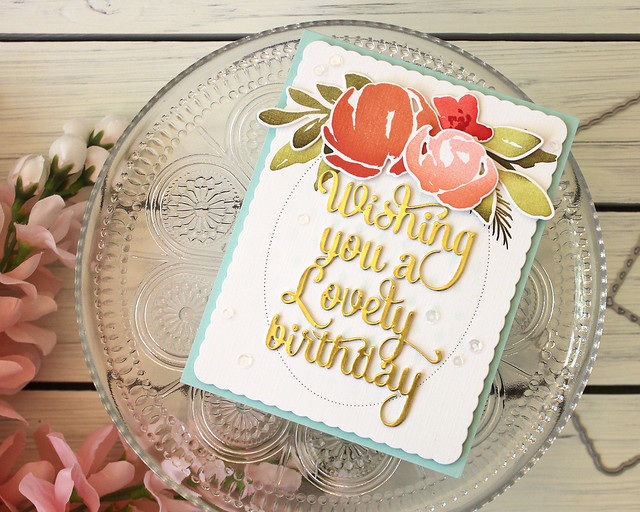
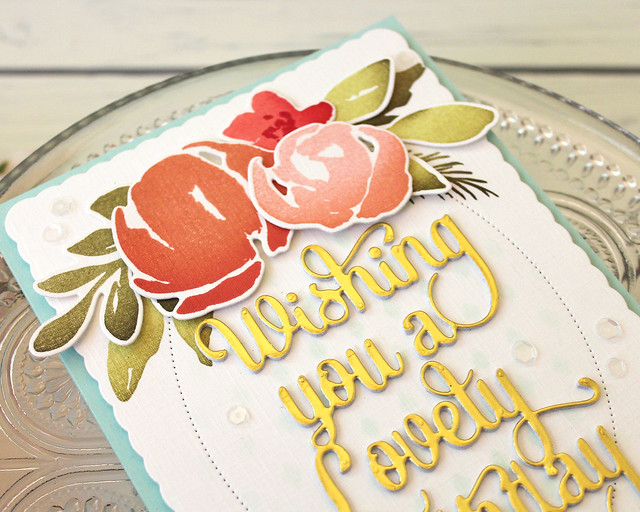
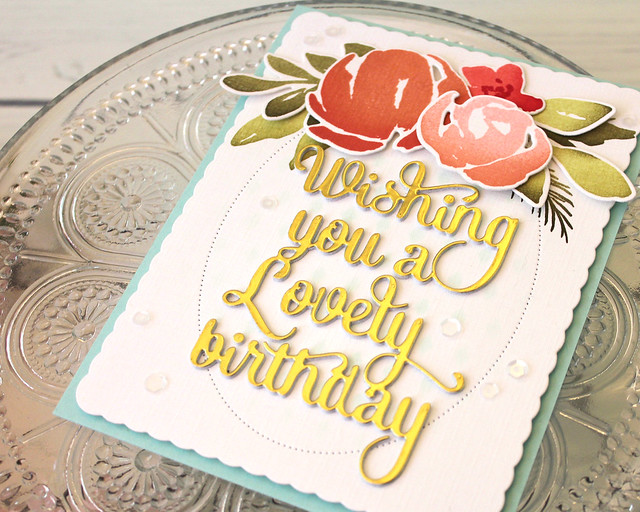
And lastly today, I have another sweet, feminine card. This time I used just the outer edge of the Scallop Stackers to create a solid layer without the eyelet detail. I really love that Dawn designed these dies with the flexibility to have that option.
I began by sponging a piece of Fresh Snow Linen cardstock with the Stencil Basics: Diamonds and Aqua Mist ink. I kept it nice and light so it wouldn't be too busy once I had my sentiment in place. Then, I die cut using the Scallop Stackers layer and added the pierced oval detail from Shape Shifters: Oval 2 die to really define my focal area.
Next, I stamped and die cut several flowers and leaves from Botanical Bounty 2, using blending sponges to add depth to each image. I also stamped a couple of the greenery bits onto the Scallop Stackers layer directly. I like the dimension this achieves once all of the florals are assembled together.
Then, I covered a piece of xyroned white cardstock with the Luxe Gold Adhesive paper. I die cut that and two additional white pieces with the Saying It Simply die and layered them together. That mirrored gold finish is so lovely with this die! It almost looks like it has been heat embossed, but the stacked die cuts make it so much more dimensional. I adhered that to the card front and embellished with a handful of clear sequins. The flowers paired with the soft blending and the gold greeting are so feminine and dainty.
That's all I have to share with you today. I hope you've enjoyed this peek at Dawn's new dies. I'm positive you're going to love them as much as I do! I'll be back tomorrow with more projects, but in the meantime,
Betsy,
Dawn,
Heather,
Laurie,
Melissa B,
Melissa P,
Michelle, and
Stephanie all have their beautiful work to share with you today. Have a wonderful Saturday and I'll see you soon!
Supplies:
Bouquet Birthday Card
 Autumnal Birthday Card
 Watercolor Floral Birthday Card


3 comments:
Lovely cards, Lizzie! I especially like the hand stamped background.
Gorgeous work. The leafy background is so pretty paired with the large sentiment. Thanks for sharing your creativity.
All three cards are brilliantly done. I love how delicate the scallops are. Most are big and really stand out. The leaves background is wonderful. I am glad that stamping out own backgrounds are coming back.
Post a Comment