Good morning, friends, and welcome back for Day 3 of the
Papertrey Ink June Countdown. I have the pleasure of getting to introduce you to the newest Make It Market Mini Kit coming your way in just a few days. The
Make It Market Mini Kit: Herb Garden is brimming with beautiful botanical images, gorgeous patterned paper, versatile stencils, and so much more. But then, what else would you expect when it comes to a Betsy Veldman kit, am I right? She has such a fabulous eye for detail and it makes her kits an absolute joy to use. Let's get started.
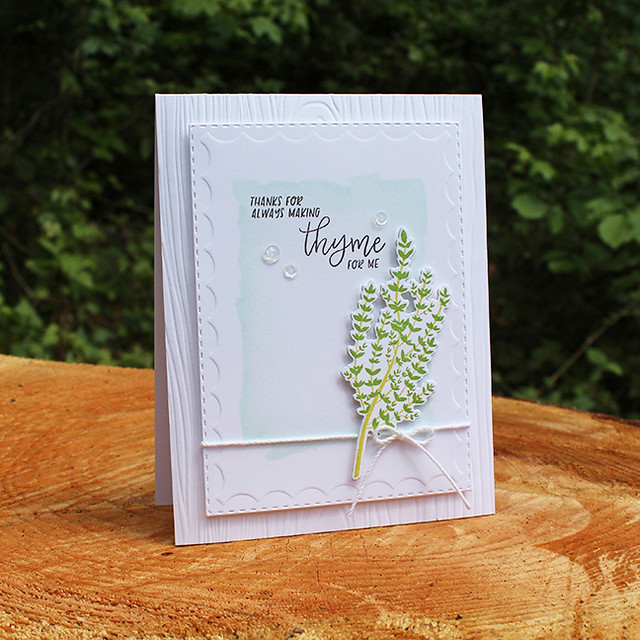
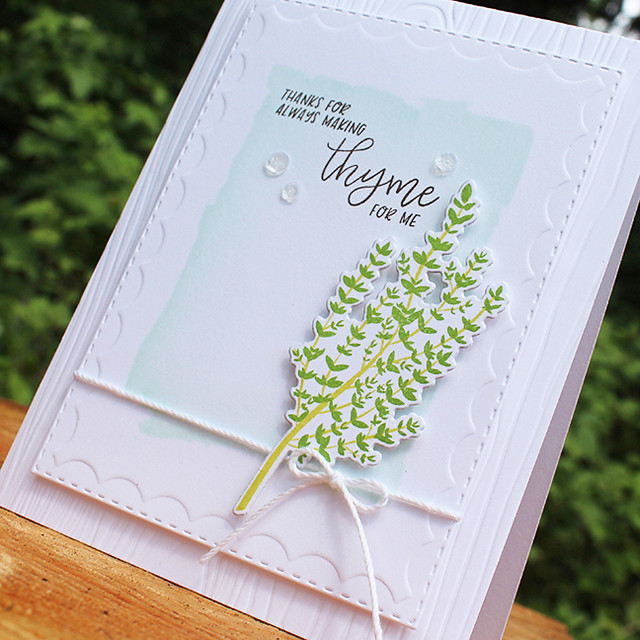
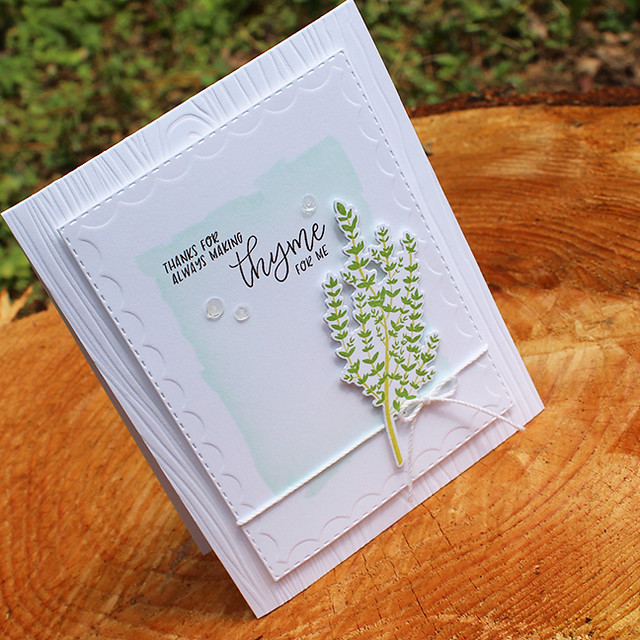
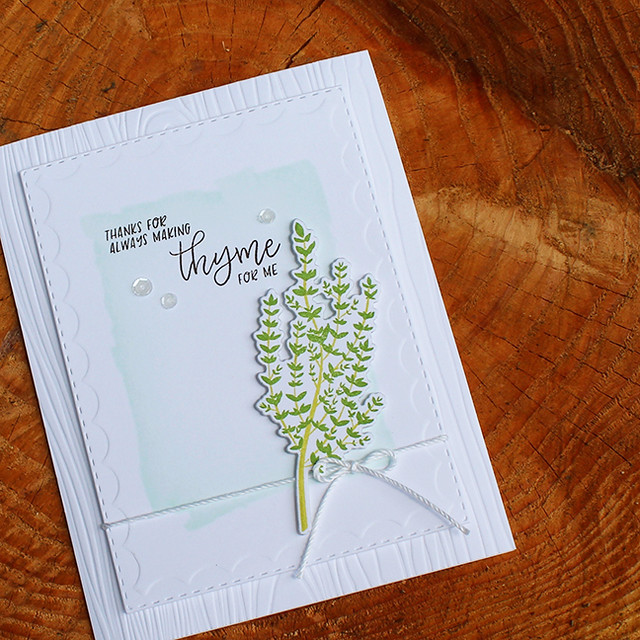
One of the things I noticed (and loved) about this kit right off the bat was how adaptable it is to different styles. My first project is a clean and light thank you card.
I started by die cutting a Double Ups: Rectangle panel from white cardstock. I used the rectangle stencil included in the kit to add a sponged mat in the center of that panel. I stamped the sentiment using Smokey Shadow ink and set that panel aside for a moment.
Next, I die cut the thyme sprig shape from white cardstock. I stamped it with the coordinating images using New Leaf and Limeade Ice inks.
Then, I tied white crochet thread around the Double Ups layer and added the thyme sprig over top with foam tape.
I used the Woodgrain Impression Plate to add texture to my card front before adhering the focal panel with foam tape. I used a few clear sequins from the Sunshine & Rainbows Mini Kit to add a touch of sparkle and draw your eye toward the sentiment.
Supplies:
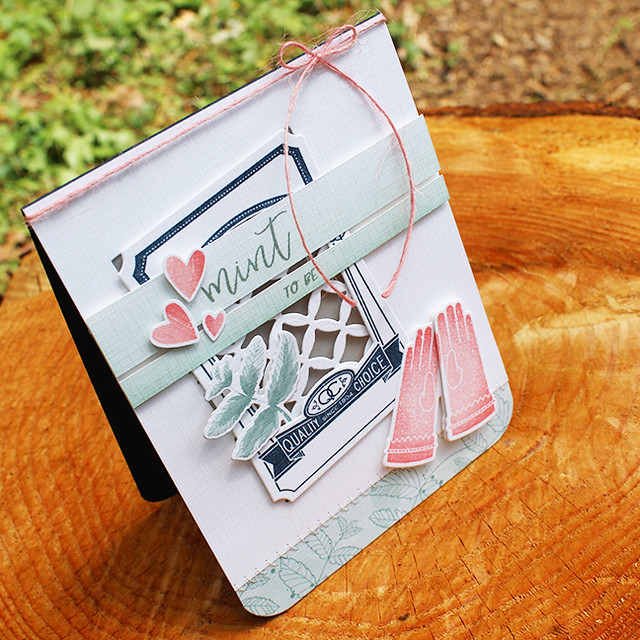
Next up, I have a slightly more homespun style. I'm no master of shabby chic design (that's solidly Melissa Phillips's territory) but let's think of this as a minimalist version of shabby chic, ok?
I began by die cutting a window into a Fresh Snow Linen panel using the new Mix & Mat: Pretty Brackets die. I cut a corresponding rectangle into a Deep Indigo card base and set it aside. I backed my window with a panel of Stamper's Select vellum and then I stitched a strip of Herb Garden patterned paper to the bottom of that panel. Then, I adhered the front panel to the card base and rounded the corners. I love how the vellum gives the window a frosted appearance.
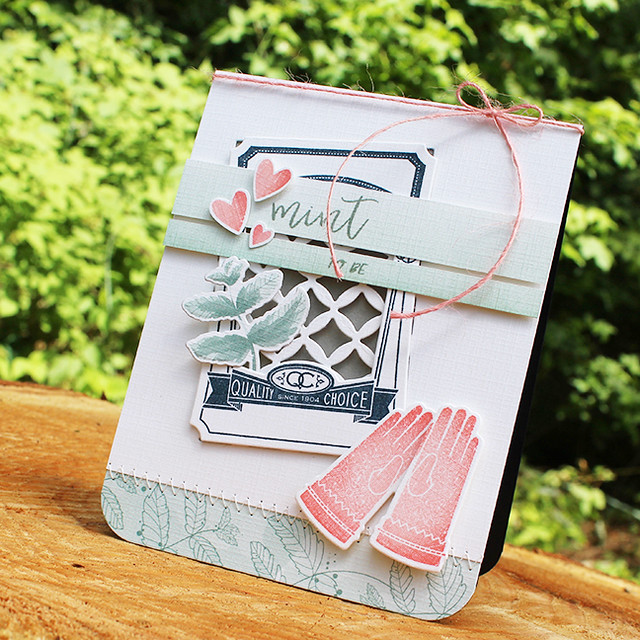
Next, I die cut the Seed Packet Frame II shape from Fresh Snow Linen cardstock and stamped it with the coordinating image from Garden Variety II using Deep Indigo ink. I used foam tape to attach the frame to the card front. Then, I used the Herb Garden die to die cut the pre-printed mint. I tucked it in the seed packet frame opening and adhered it into place. Then I sponged Ocean Tides ink onto Fresh Snow Linen cardstock. I cut it into strips and stamped the sentiment in Stormy Sea ink. I adhered those strips to the card front with foam tape so they would float above the seed packet frame.
Next, I stamped the garden gloves from Garden Variety and the hearts from Love Lives Here using Pale Peony and Berry Sorbet inks. I added those to the card front with foam tape before tying on a pink twine bow for my finishing touch.
Supplies:
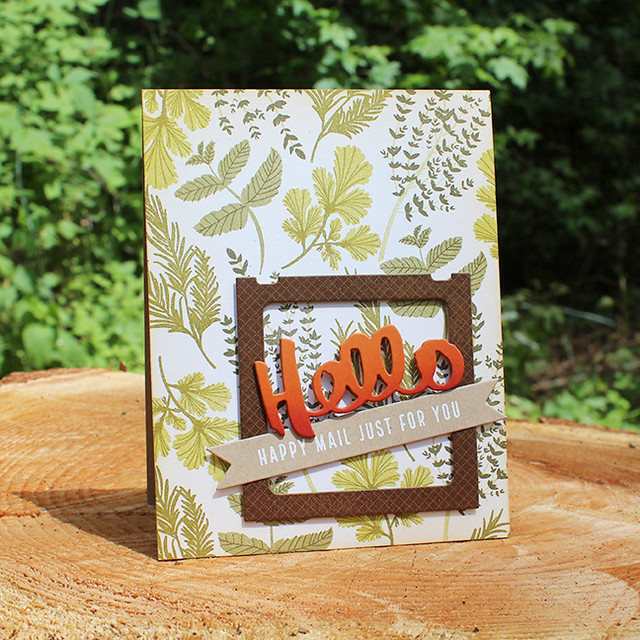
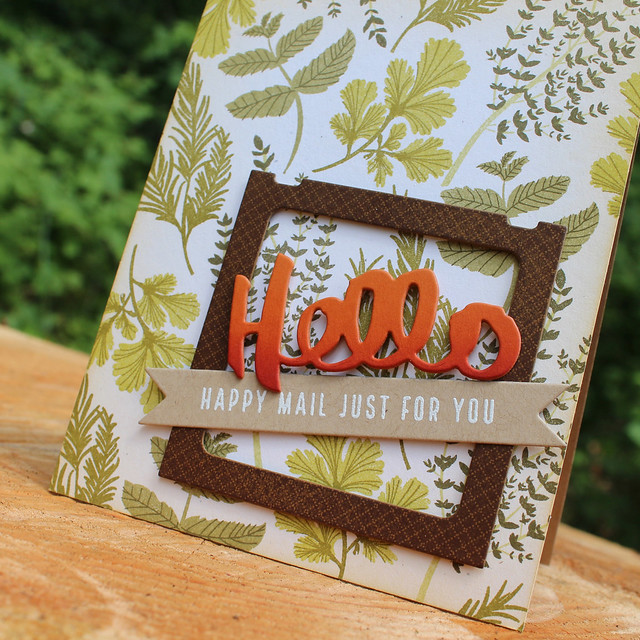
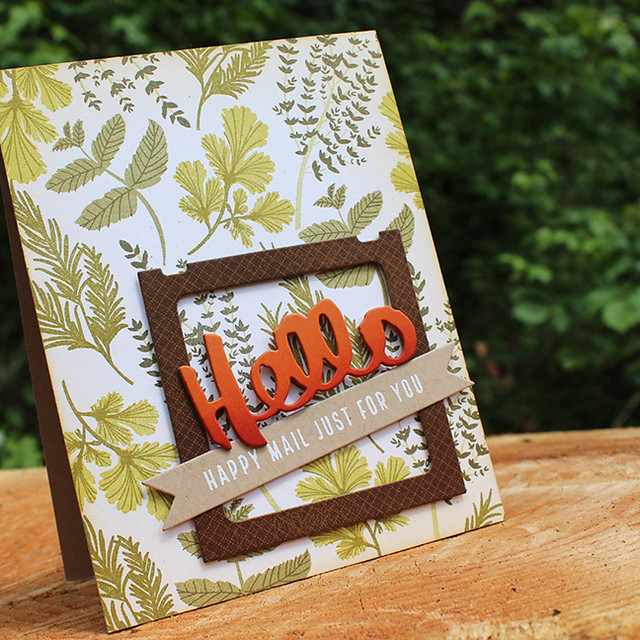
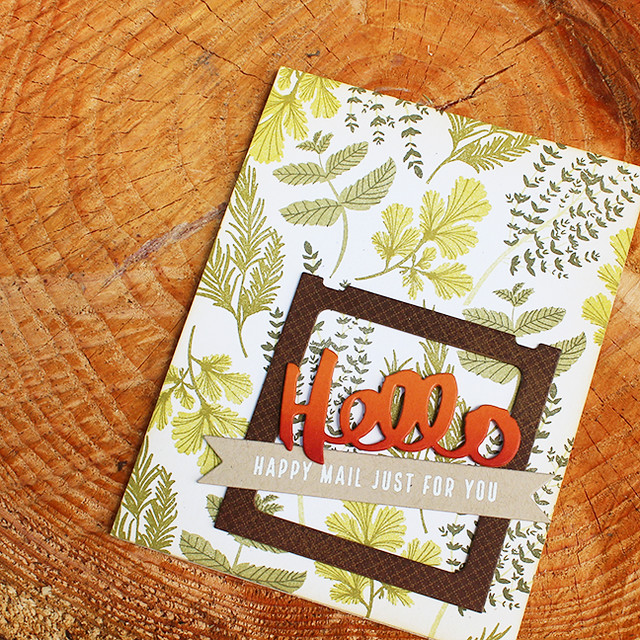
For my third card with this kit I decided to stamp my own background paper using all of the herb images. I wanted a little bit of an antique look, so I went with yellow greens rather than the bluish greens of my other two cards.
I began by sponging a bit of Fine Linen ink around the edges of a Rustic White panel. Then, I went about stamping my background. I used Spring Moss and Olive Twist for the thyme, Prairie Grass and Olive Twist for the Mint, Simply Chartreuse and Ripe Avocado for the parsley, and Ripe Avocado for the rosemary.
I adhered that panel to a Classic Kraft card base when I was finished. Then I die cut the Monthly Moments: Slide Frame shape from Cocoa Bean cardstock and stamped it with the coordinating image using Dark Chocolate ink.
Then I die cut a Double Ended Banner shape and heat embossed it with the Keep It Simple: Happy Mail sentiment using white powder. I adhered both to my card front.
Next, I sponged a piece of Canyon Clay cardstock with Terra Cotta Tile ink. I die cut that with the Noted die. I die cut two more shapes and layered all three to give the shape some thickness. Then I adhered it to my card front. I really love how that red-orange pops against all of that green!
Supplies:
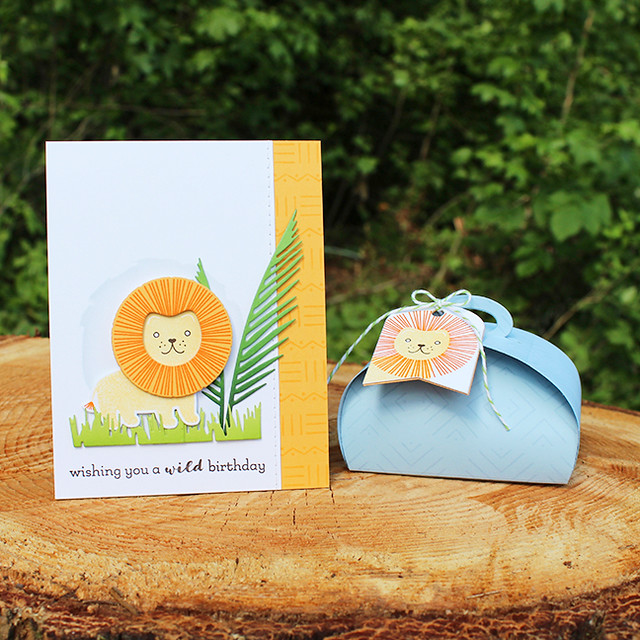
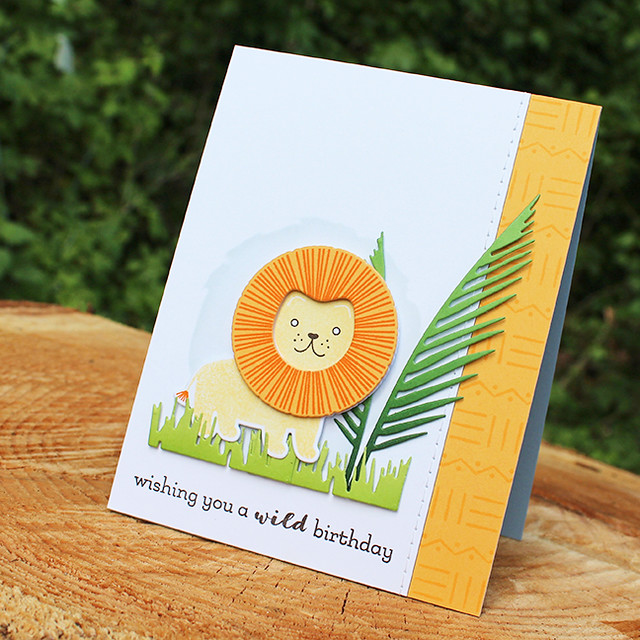
I have one more birthday ensemble to share today using
Jungle Buddies, my new
Textile Impressions stamp set, and my new
Petal Box Die.
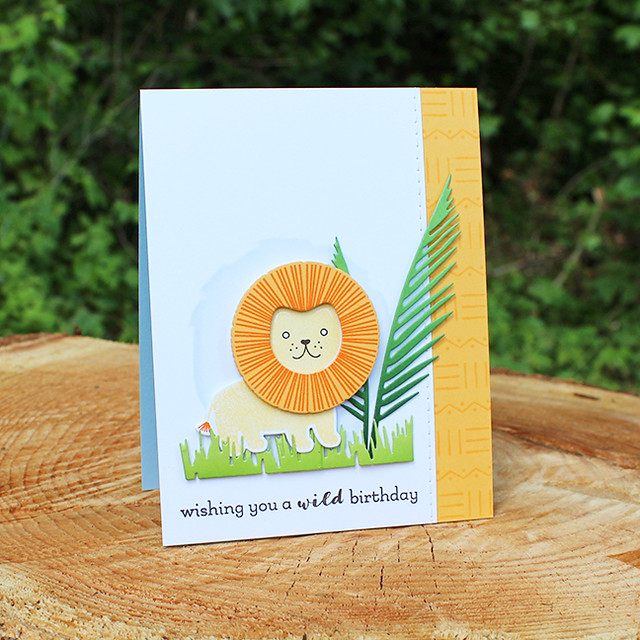
Let's start with the card, shall we?
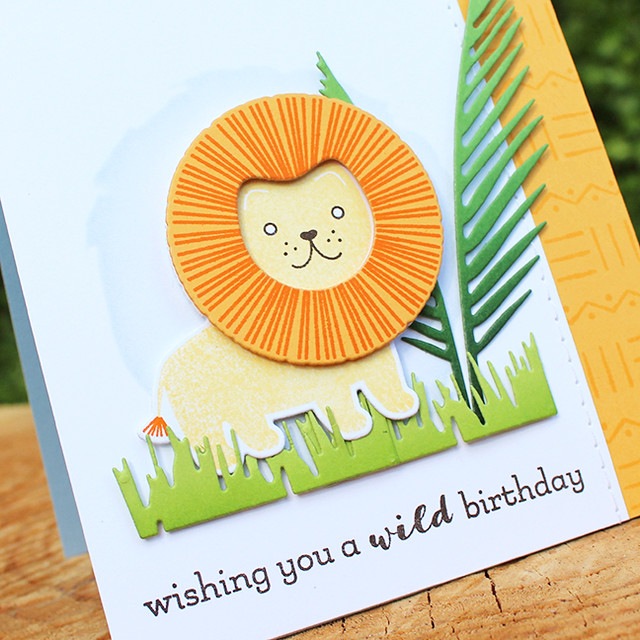
I began by stamping a strip of Summer Sunrise using a few of the images from Textile Impressions. Next, I used a stencil from the Herb Garden Kit to sponge a grounding circle onto a panel of white cardstock using Spring Rain ink. I stamped the sentiment in Smokey Shadow and added a stitched detail along the edge before adhering both panels to a Spring Rain card base.
Then, I sponged a bit of New Leaf ink onto Green Parakeet cardstock and die cut the grasses from the Cover Plate: Mighty Jungle. I also sponged Pinefeather ink onto New Leaf cardstock and die cut the palm fronds before adhering all of the pieces to the card front.
Next, I die cut the lion. I stamped his body on a white die cut with Harvest Gold ink and his mane on a Summer Sunrise die cut with Orange Zest ink. I added his tail fur with Orange Zest and his facial features with Smokey Shadow before attaching his mane to his body with foam tape. I added the lion to the card front with foam tape, tucking his paws between the blades of grass.
Supplies:
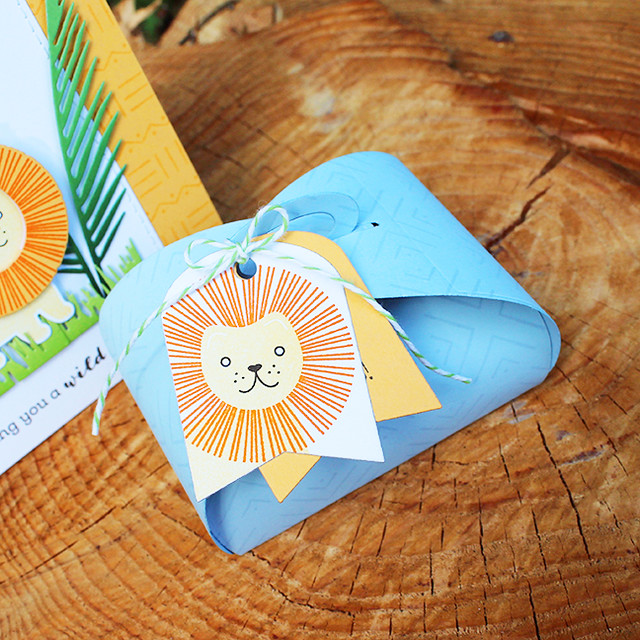
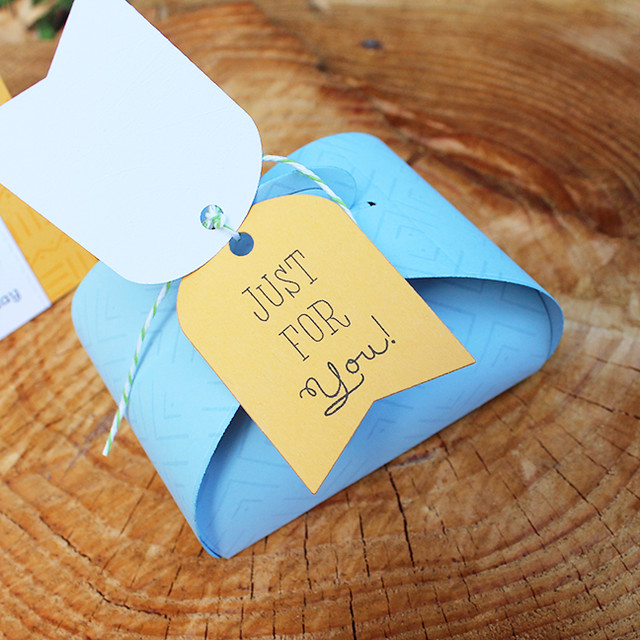
Last but not least I have a little birthday treat box made with my Petal Box Die.
I began by die cutting two of the box shapes from Spring Rain cardstock and stamped them with a Textile Impressions pattern in Spring Rain ink. I assembled the box (using the instructions I'll share in a moment) and set it aside.
Then, I die cut two tags using one of the mini tag dies included with the Petal Box. I cut one tag from Summer Sunrise cardstock and one from white cardstock. I stamped one tag with the lion using Harvest Gold, Orange Zest, and Smokey Shadow inks. I stamped the sentiment from So Sweet onto the Summer Sunrise tag using Smokey Shadow ink. I tied the two tags to the Petal Box handle with Green Apple baker's twine.
Supplies:
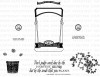
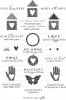
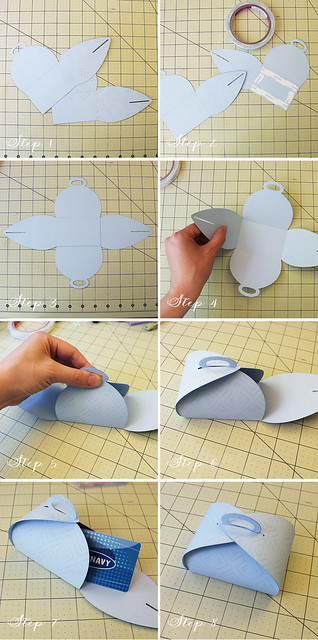
I wanted to share the assembly instructions for the Petal Box, but a video seemed excessive since it's so easy. I opted for a step-by-step photo tutorial instead and I hope it will be easy enough to follow. So here we go!
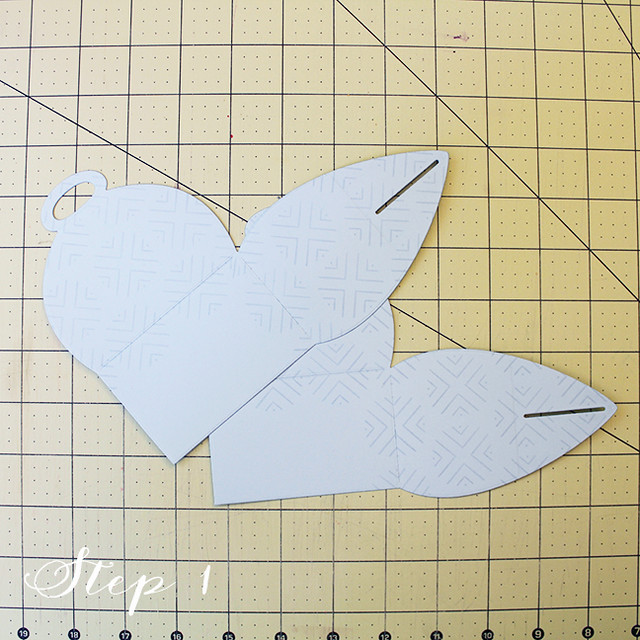
Step 1: Die cut two box pieces from cardstock or patterned paper using the Petal Box Die. You will be able to get two pieces from one sheet of cardstock.
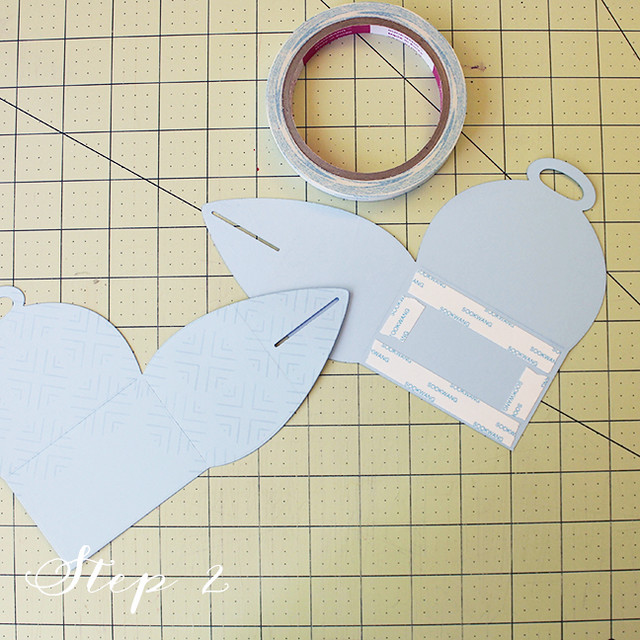
Step 2: Apply strong adhesive to the "wrong" side of the bottom rectangle on one of the box pieces. I prefer Scortape, but any similar adhesive should work well.
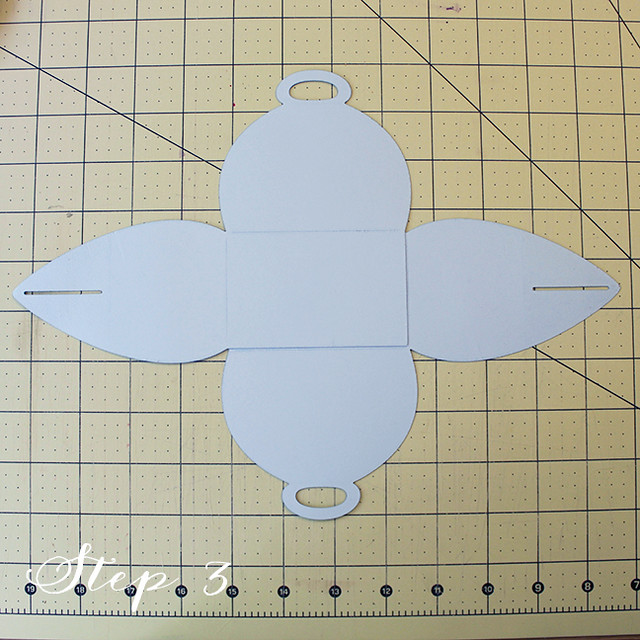
Step 3: Remove adhesive backing and adhere box pieces together, lining up the bottom rectangle pieces.
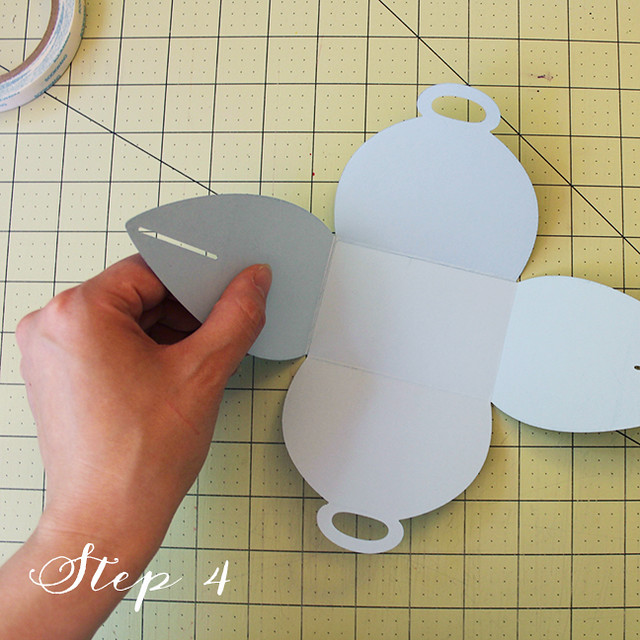
Step 4: Fold up all four sides.
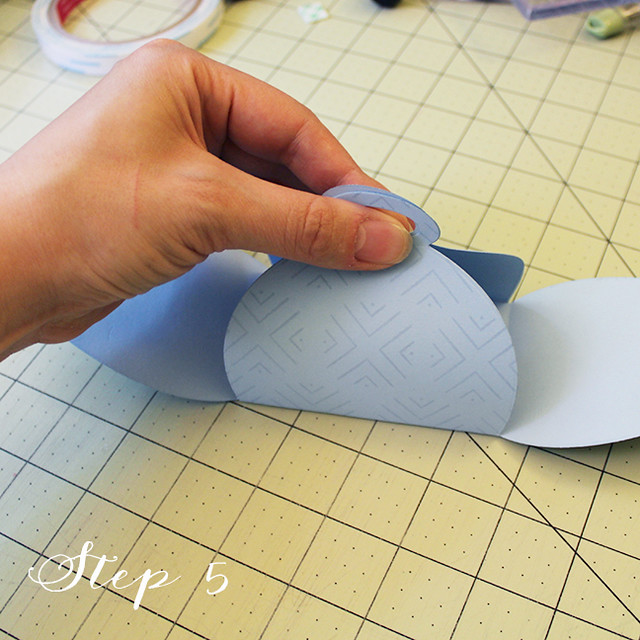
Step 5: Bring wider front and back together and hold by the handles while you push straight down gently. This will allow your front and back to round out softly.
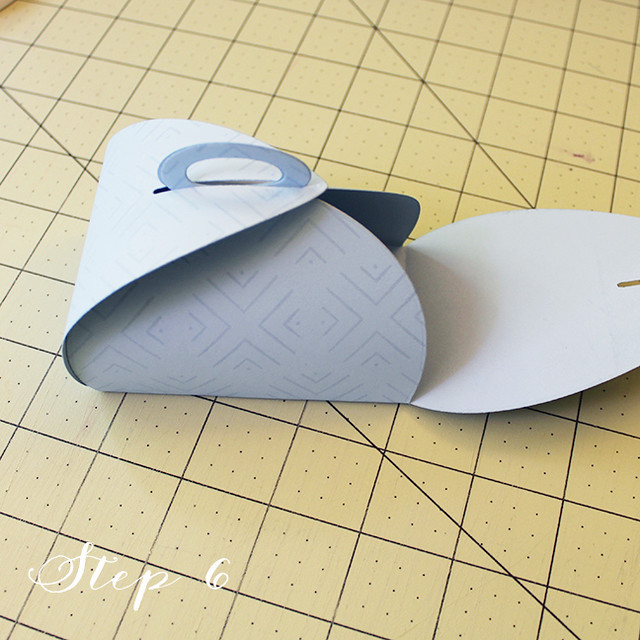
Step 6: Bring up the side panel and pull over the top, pulling the handles through the slot.
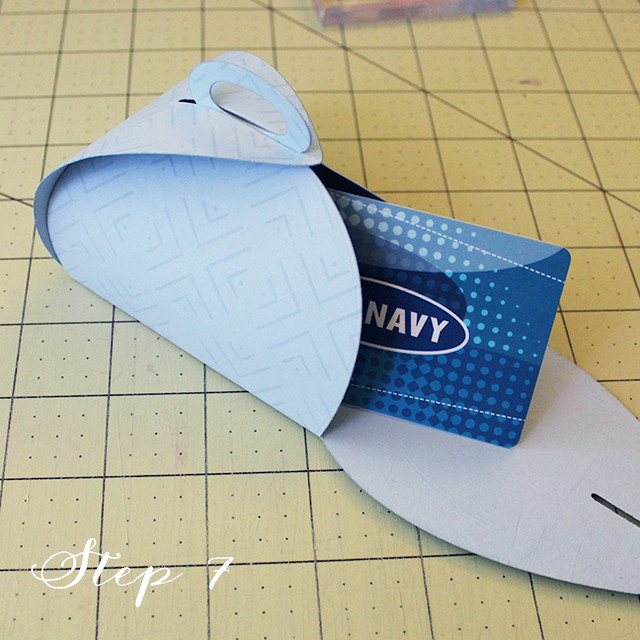
Step 7: This is the perfect time to fill the box since three of the four sides are secure. I designed this box to be the ideal size for a gift card (since that seems to be the one-size-fits-all gift most people ask for these days), but it would also fit sweets, jewelry, money, small toys...almost anything you can think to tuck into a little box!
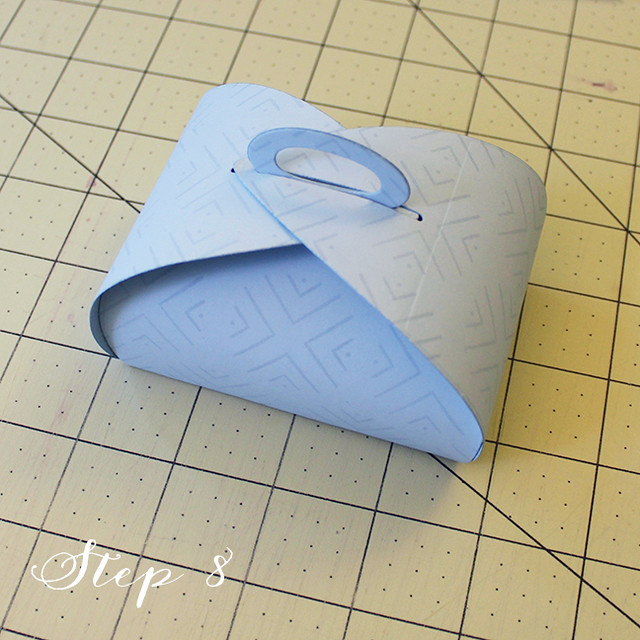
Step 8: Bring the other side panel up and pull it over the top just like you did with the first side. Easy!
I also designed the small tags in this set to coordinate with the sentiments in the So Sweet stamp set that was released a few months ago. So that should give you even more options for greetings on your tags.
Here's a pinnable graphic of the assembly instructions if you'd like to save it for your convenience.
Thank you so much for joining me today! Make sure to pop in on
Nichole,
Betsy,
Dawn,
Heather,
Michelle, and
Lexi for more inspiration today. Have a fantastic day and I'll see you again tomorrow!


4 comments:
The new box is adorable. I would love to see one with something in it besides a gift card.
Thank you for showing Herb Garden with some of the components of the previous garden sets. They're not a perfect match, unfortunately, but still work somewhat together. The thyme card is beautiful. Hope you show even more of the Textile Impressions set, Lizzie. I'm intrigued by all its possibilities.
I'm wild about your jungle ensemble, pun intended! I definitely want it all.
Wonderful projects Lizzie!! Terrific new products that make me smile!!
:)
Post a Comment