Good morning, friends, and welcome back to Day 3 of the
Papertrey Ink October New Release Countdown! I'm popping in today to share a little more of
Dash Away All, my new set releasing (
along with the rest of the new products) on October 15th at 10pm.
Wanda is also sharing her projects with this set today, so make sure to pop in and visit her too. Now let's get to the cards!
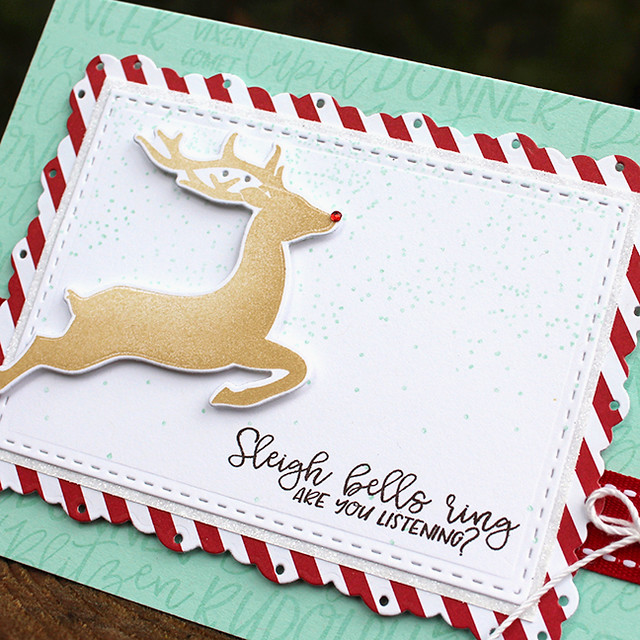
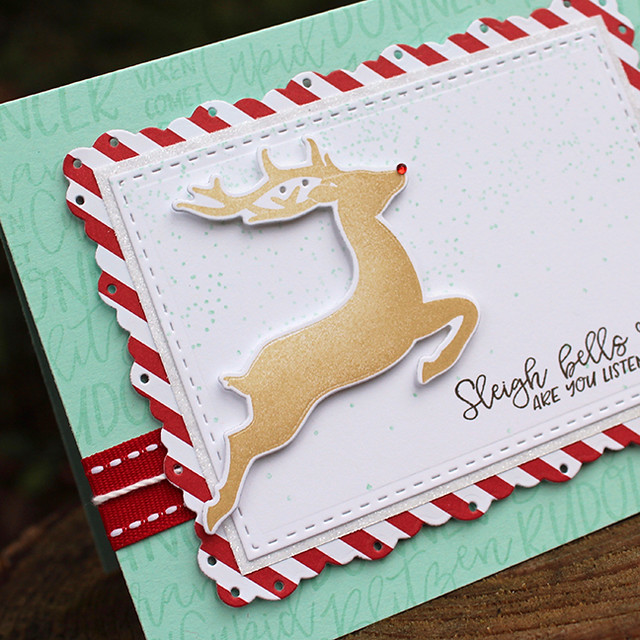
My first project today is a cheerfully festive card that incorporates the block of reindeer names as a background pattern. I love the way the casual hand-drawn fonts look together!
I began by stamping the reindeer names on an Aqua Mist card base using the matching ink. I shifted the placement around so that you'd be able to see different names around the edge of my card front. Next, I cut a panel of white cardstock using the Noted: Scalloped A2 Die Collection. I stamped it with the falling snow background in Aqua Mist ink and the sentiment in Smokey Shadow.
I matted that with a piece of White Adhesive Sheet (sticky side up) and sprinkled glitter on the exposed adhesive. Instant glitter mat! I adhered those pieces to a Mix & Mat: Snowflakes panel that I die cut from Bitty Big: Pure Poppy patterned paper. Next, I added a strip of Pure Poppy Saddle Stitch Ribbon to my card front (I wrap it around the inside and then secure the ends on the front under my focal panel) and tied on a crochet thread bow.
I adhered my snowy focal panel to the card front with foam tape. Then, I die cut and stamped my reindeer. I used Fine Linen sponged with Classic Kraft to get the shading and then added a tiny 2mm red rhinestone for its nose. I added that to the card front with more foam tape to finish things off. So fun!
Supplies:
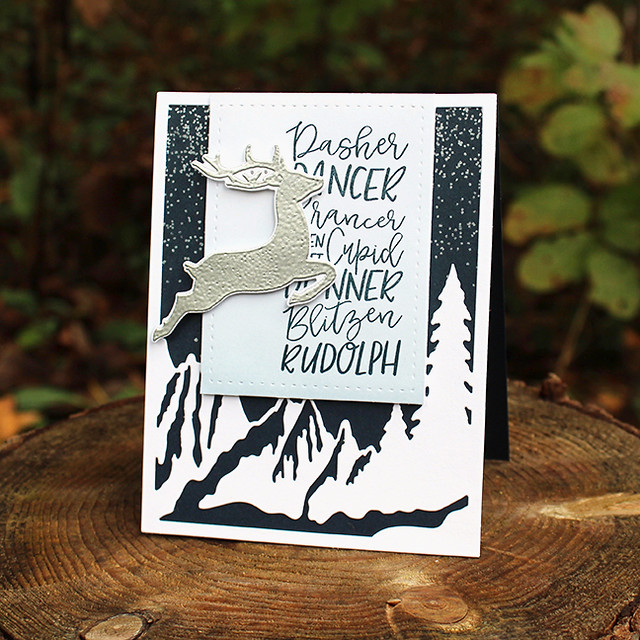
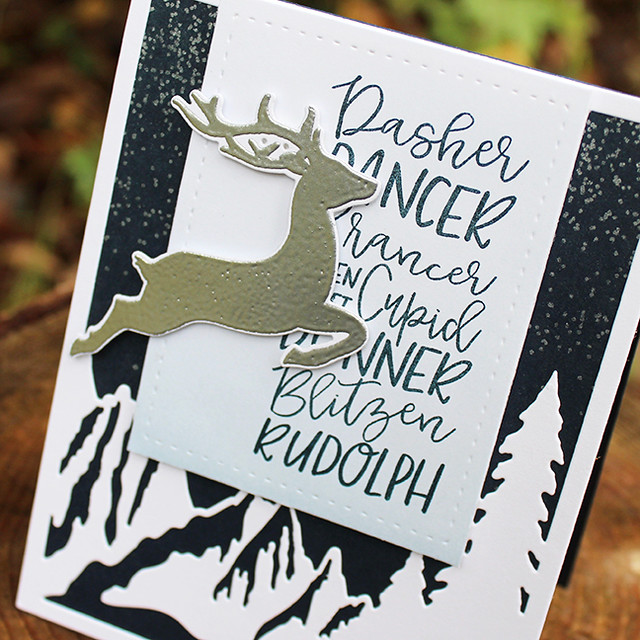
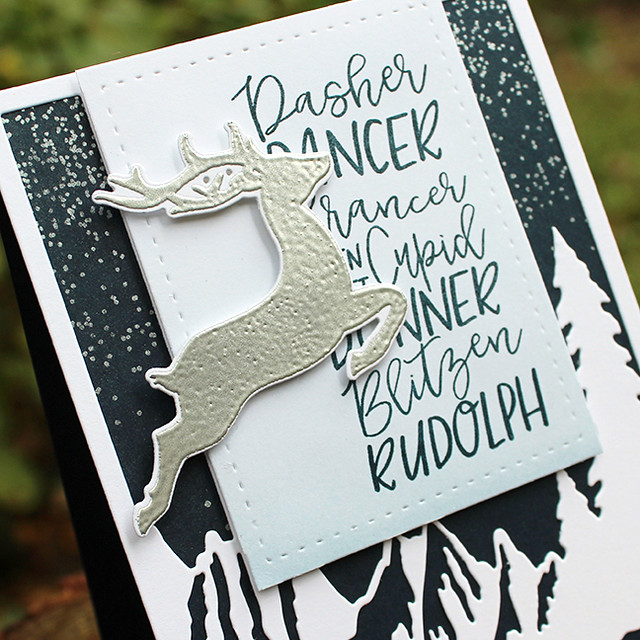
My second card is a bit more on the elegant side. I tried to keep the design of the images in
Dash Away All simple enough that you could go any number of style directions. I kept to a blue, white, and silver color scheme on this one.
I began by stamping the falling snow onto a Dark Indigo card front using VersaMark ink. Then, I sprinkled on Perfect Pearl pigment powder. The result is delicate, shimmery snow.
Next, I die cut the Cover Plate: Mountain Majesty twice. On one, I lightly sponged Spring Rain ink over the solid panel before trimming it out. Then, I stamped the reindeer names in Dark Indigo ink. I left the other die cut pure white and adhered it to the card front. The reindeer names panel came next, popped up on foam tape.
Next, I die cut and heat embossed the reindeer using silver powder. I did the embossing twice to help smooth out the surface a little. I adhered that to the card front with more foam tape, slightly overlapping the reindeer names. What do you think? Elegant?
Supplies:
Alrighty, friends, that's all for me today. I'll be back tomorrow with a project I am very excited to share. In the meantime, make sure to visit
Nichole,
Betsy,
Heather, and
Wanda for more of this month's release peeks. See you soon!


5 comments:
As much as I like the first card, I really like the second one! Love those reindeer names!
Hi Lizzie! Yes, I think your silver reindeer card is elegant. What I especially like is your originality. Anyway, beautiful work Lizzie. :)
Lizzie, I'm in love with your new Dash Away set as it's better than I expected...not just a cute leaping deer. You and Wanda have showcased it well. Can't wait to try Betsy's new stencils released as an addition to her Wonderland kit with your set. Care to share a card using those goodies together? Awesome release!
Love both cards Lizzie and yes the last one is very elegant!
I really like this reindeer !
Post a Comment