Good morning, friends! I'm popping in this morning with a
Papertrey Ink Design Team Tips post that I hope you're going to love. Adding a sentiment can sometimes pose a tricky challenge. You may not want to cover up your focal point with a banner or sentiment strip, but stamping directly on the card front doesn’t always work with the design. My solution is simple - just die cut around it! In today's post I’m sharing my favorite way to add a greeting that doesn’t get in the way and adds a unique detail to my projects.
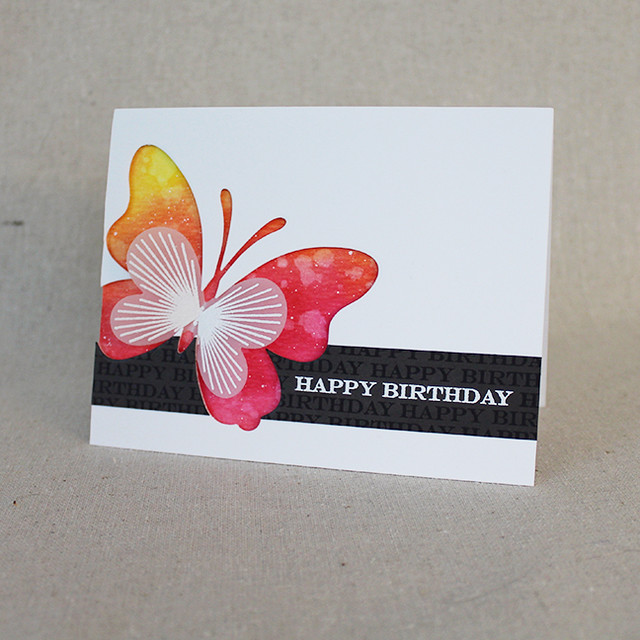
Let's get started with this birthday card.
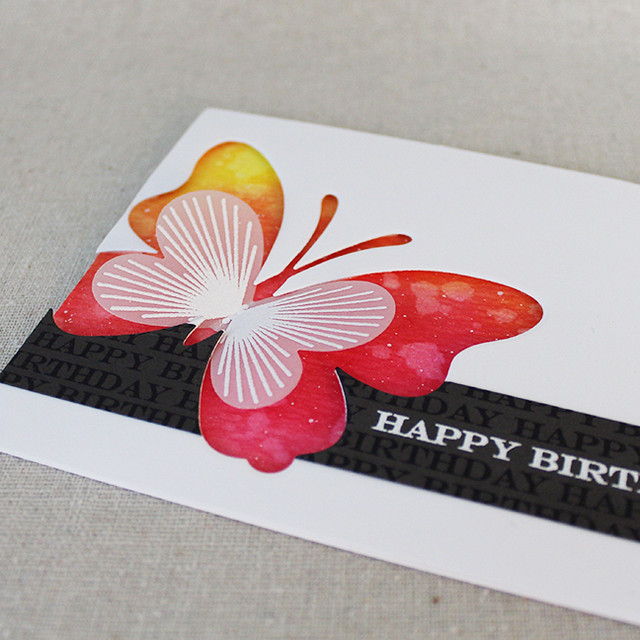
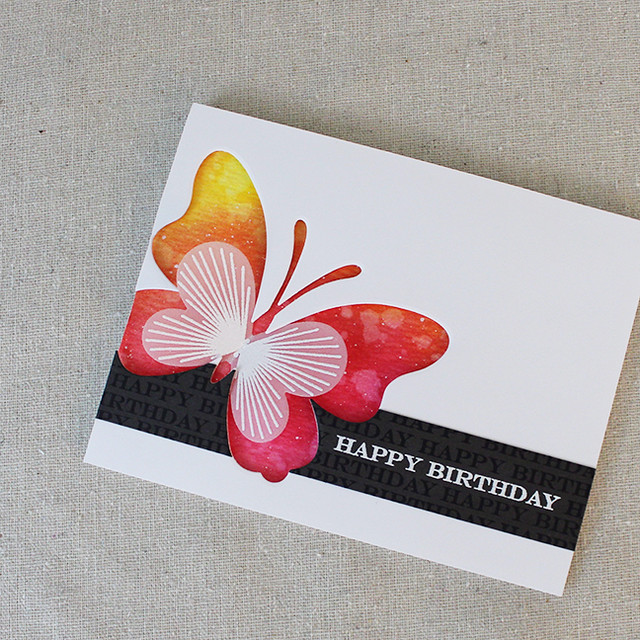
The focal point (the butterfly) is strong and colorful, so I didn't want to just stamp a simple greeting on the card front. This sentiment needed to be bold so it wouldn't get lost, but I still wanted to keep it neutral to really allow the butterfly to shine.
I decided to create a Smokey Shadow sentiment strip that I could carry the whole width of the card. Here's how I made that happen.
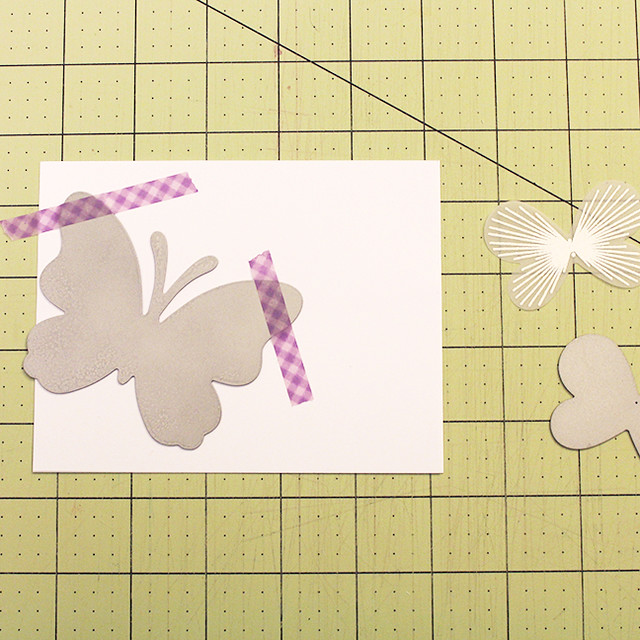
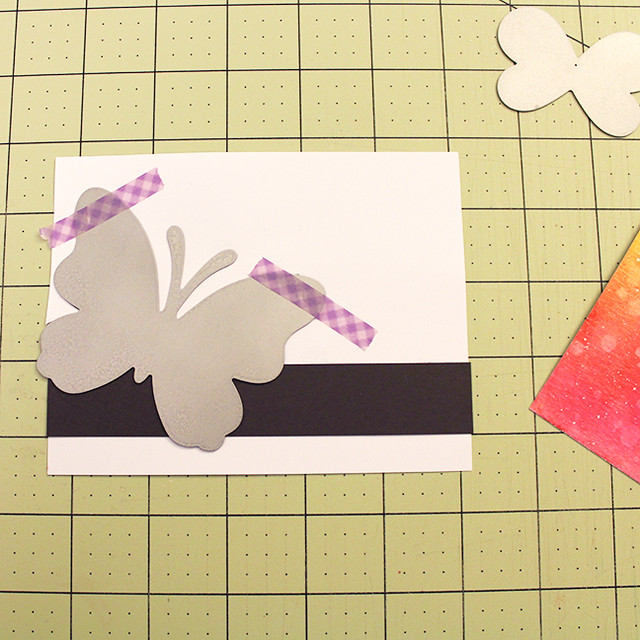
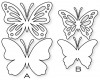
I started with a panel of white copy paper cut to the same size as my card front. I taped the butterfly die into place with washi and then layered the copy paper on top of the cardstock before running them through my die cut machine.
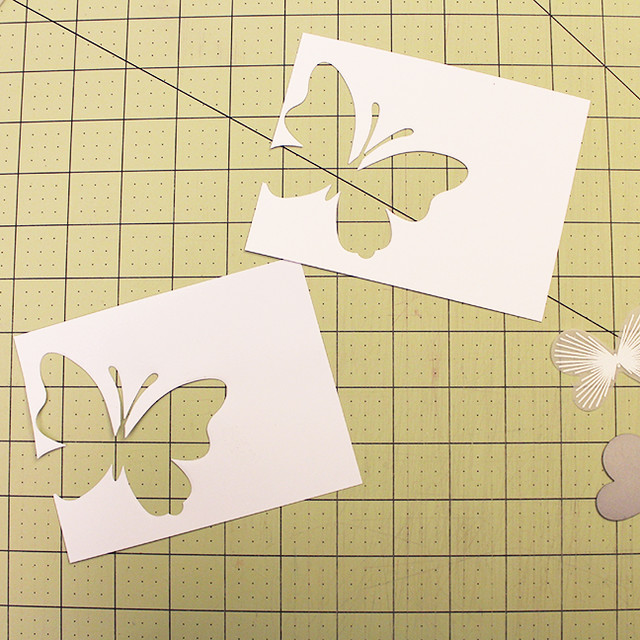
When it comes through the other side I have two panels with the butterfly die cut in the same place on both.
I set my cardstock panel aside and use my copy paper panel as a template for die cutting the sentiment strip. I simply lay the strip on the paper panel and then tape the butterfly die in the same place (I just shift it around until it "fits" in the negative) before running it through my die cut machine a second time. The result is a sentiment strip that lines up perfectly straight with the die cut on the front of my card.
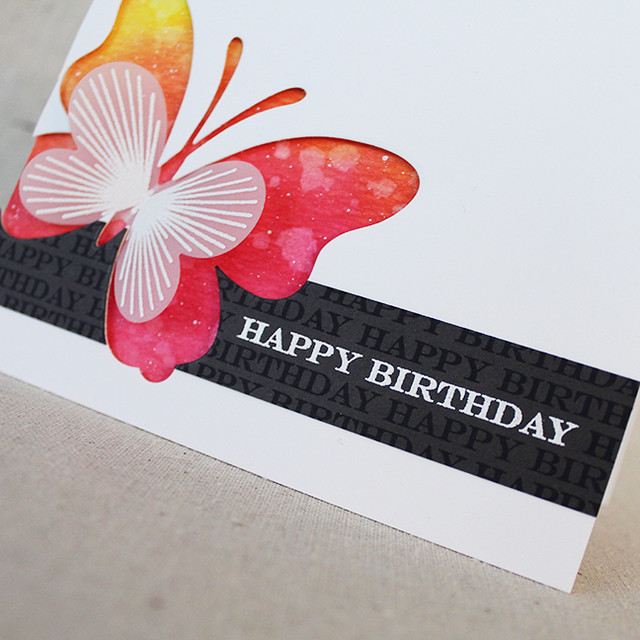
To create the rest of the card, I painted a watercolor panel to tuck behind the negative butterfly on the front of the card. I also die cut and heat embossed a Butterfly Kisses butterfly to nest inside the larger butterfly.
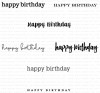
I finished the sentiment strip by heat embossing the greeting from Keep It Simple: Birthday III in white and then filling in around it using the same image in black. The white pops and the rest of the text adds interest to the strip. I used foam tape to attach the card front to the base and flat adhesive to add the sentiment strip.
Supplies:
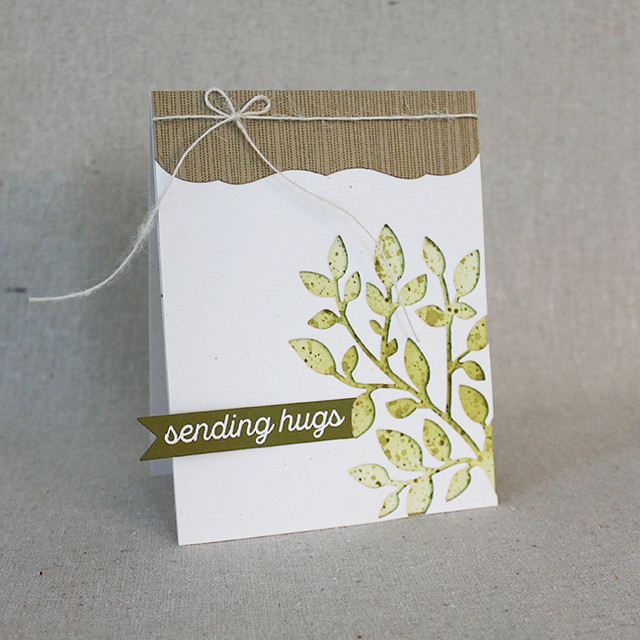
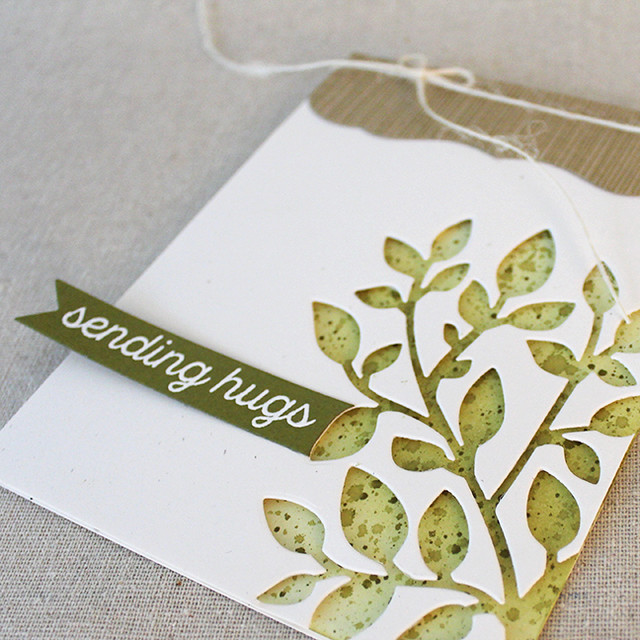
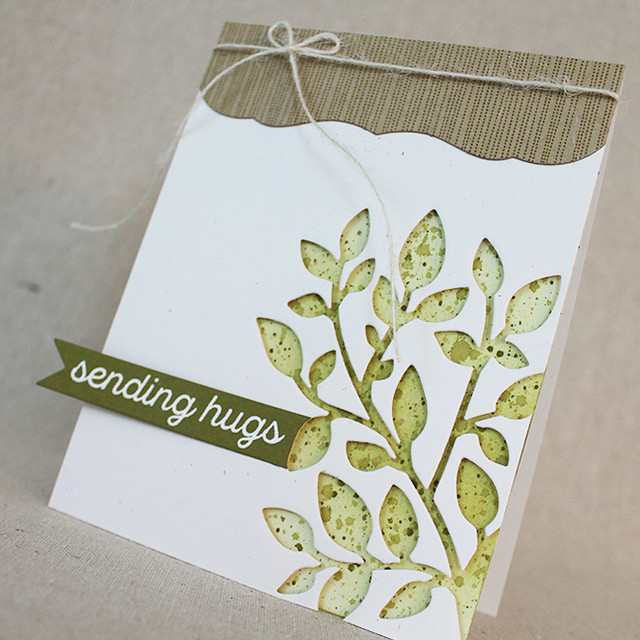
I have another card to share that incorporates a banner rather than a strip.
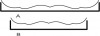
As I was planning this card, I realized that I wouldn't have room to stamp the sentiment onto the card front as the branch takes up too much room. Rather than shift the branch further off the side of the card, I chose to add a banner that would overhang (I'll need to either give this card in a larger envelope or glassine bag as a result of the overhang, but I'm fine with that).
I used the same steps to trim my banner to contour to the branch. Then I heat embossed the Keep It Simple: Sending Hugs sentiment with white powder and set it aside. Next, I sponged a Rustic White card base with Spring Moss ink and added Ripe Avocado speckles (I diluted a few times to get a variation in color).
I die cut a piece of Kraft cardstock with the Edgers #1 die to add a decorative edge and then stamped it with one of the strips in Ombré Borders using Ripe Avocado ink. I adhered that to the previously cut card front and tied a bow using a bit of Rustic Cream button twine. Then, I used foam tape to adhere the card front to the base.
Finally, I adhered the sentiment banner into place with a bit of flat adhesive. I just attached it at the very end (near the leaf) and then curled it a little with my fingers to give it some dimension.
Supplies:
So there you have it - contour cut sentiments! I hope you've enjoyed today's post. Have a wonderful weekend everyone!


12 comments:
LOVE both your cards!!
So Gorgeous and such a great idea!!
Love your cards. I am going to give it a try today.
Thanks Lizzie. I never would have thought of doing this on my own. I plan to give it a try!
Beautiful cards, Lizzie! Now I'm inspired to try contour cut sentiments. Many thanks! ♡
How lovely, your cards are beautiful - thank you for the step by steps :-)
Thanks Lizzie I appreciate the step by step instructions. Love your cards!
Ingenious idea & absolutely beautiful cards, Lizzie! The colors for the butterfly are stunning & the look you achieved for the leaves is fabulous! Thank you for the inspiration & enjoy your weekend!
Cool! Thanks for sharing your details in doing this. I really like your butterfly card!
Lizzie, not only love your sentiment technique, but your cards are lovely. Ombré stripes on edger die-cut looks awesome. Watercoloring, blending, splattering, smooshing or whatever looks great beneath your main images. That butterfly really pops. TFS!
Love these so much. And, even better, I have all the product to try my hand at something similar! Thank you.
Such a cool technique. Thanks for sharing.
Beautiful cards, really love the whole look of the butterfly card and those gorgeous watercolors behind it!
Post a Comment