
Stamping backgrounds is one of my favorite things to do. One of you lovely people (Nancy, I'm looking at you!) even mentioned the other day that my sneak peek photos are easily distinguished by the stamped backgrounds.
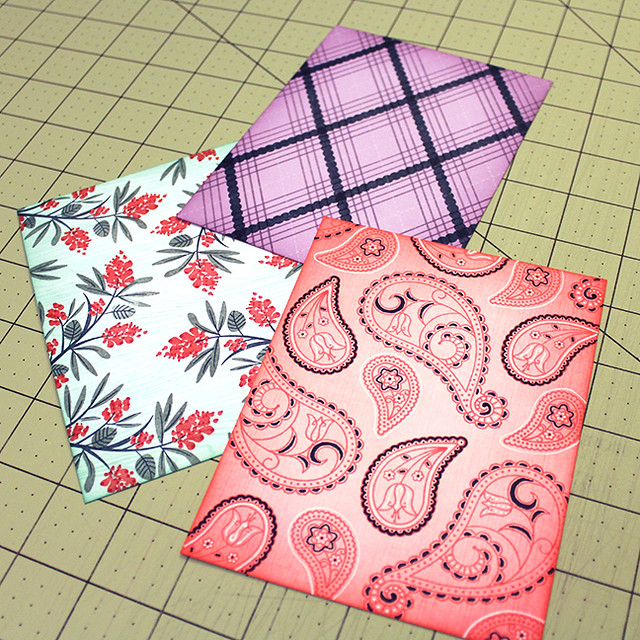
Whenever I’m stumped or simply in the mood to create, I pull out a few stamp sets and start to experiment. You can achieve such unique backgrounds by layering textures, colors, and patterns. The creative possibilities are truly endless! I thought you might like a peek at my background building process.
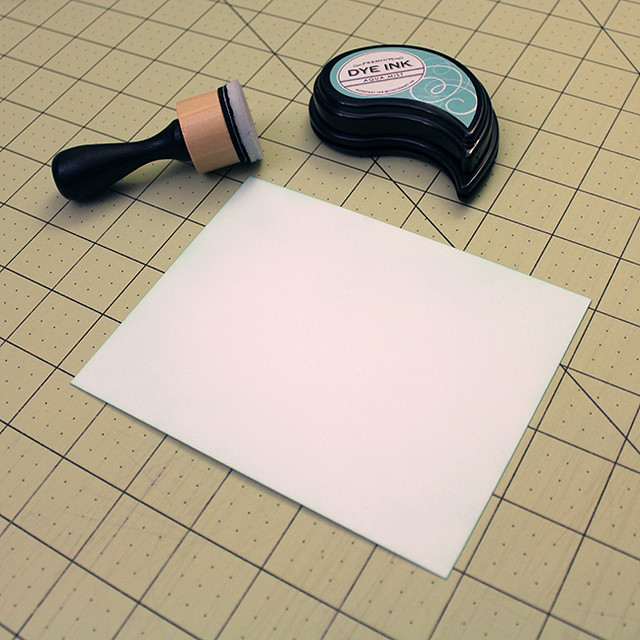
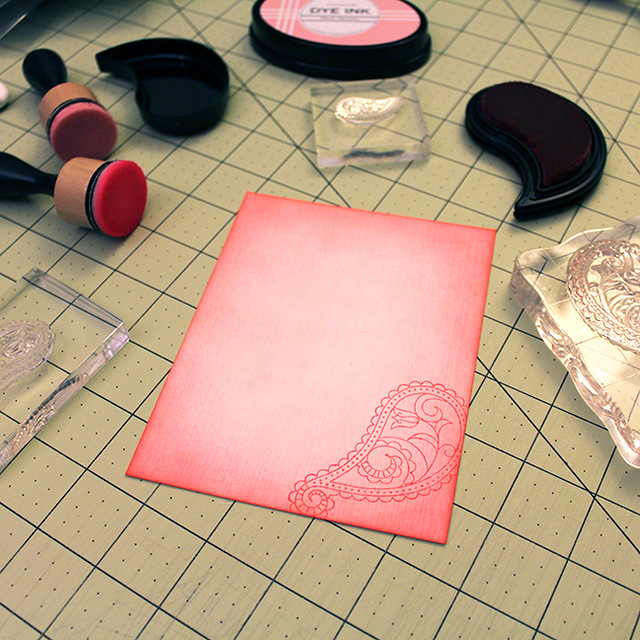
So I generally start with blending, especially if I'm using white cardstock. I love the depth that blending adds to edges and it keeps the final design from looking too flat. The wonderful thing about stamping on blended cardstock too is that you can often hide any imperfections in your sponging. On this panel I began by bending Aqua Mist over the entire face of the panel, concentrating on making the edges darker.
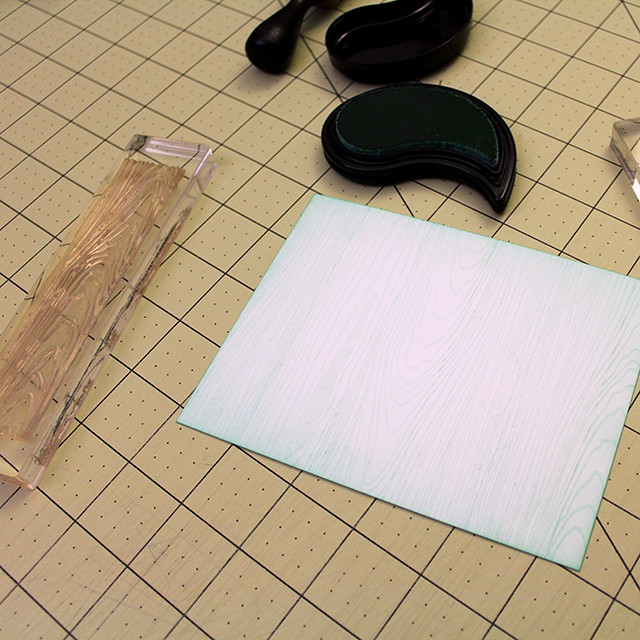
Then I stamped Background Basics: Woodgrain over the face of the panel using the same ink. The contrast is there, but it's subtle which is exactly what I want when I know I'm going to be stamping another layer on top.
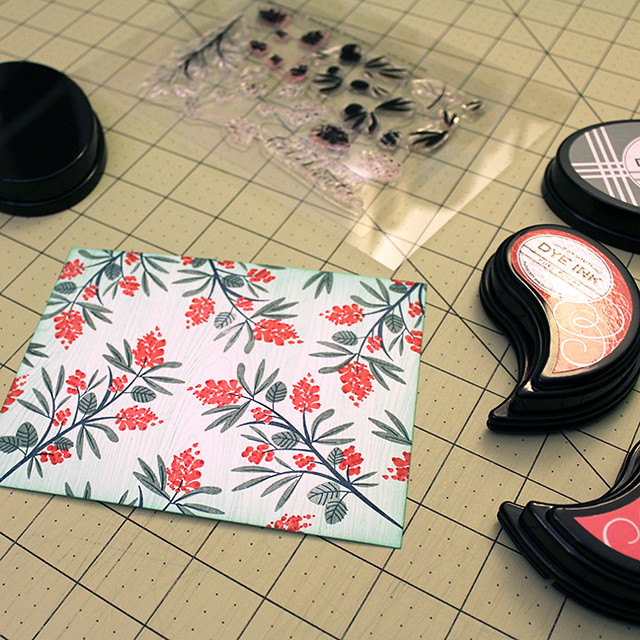
To finish my background I stamped the images from Beautiful Berries: Spring in Dark Indigo (branches), Stormy Sea (leaves), Berry Sorbet (berries), and Pure Poppy (berry details) inks. Creating your own backgrounds lets you play around with colors in unconventional ways. I wouldn't typically stamp gray leaves, but I realized how much I liked it after this experiment! When using multi-step stamps for backgrounds, I sometimes do a test layout on a piece of scrap paper. I keep basic printer paper cut to 4 1/4" x 5 1/2" in a little tray on my desk just for this purpose.
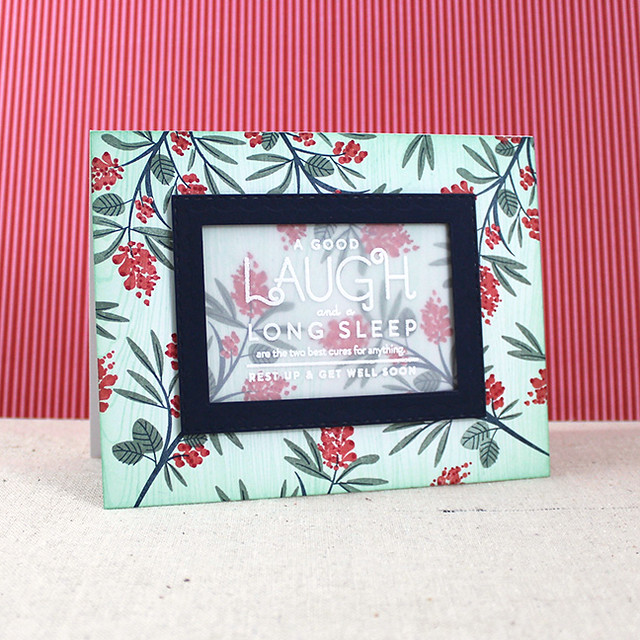
After putting that much effort into stamping a beautiful background, I don't want to hide it away under lots of heavy layers. To make sure the background is visible I tend to use a lot of die cut frames and vellum. On this card I used a frame that I cut using the Double Ups: Rectangles Die Collection and one of the Noted: Scalloped A2 Die Collection.
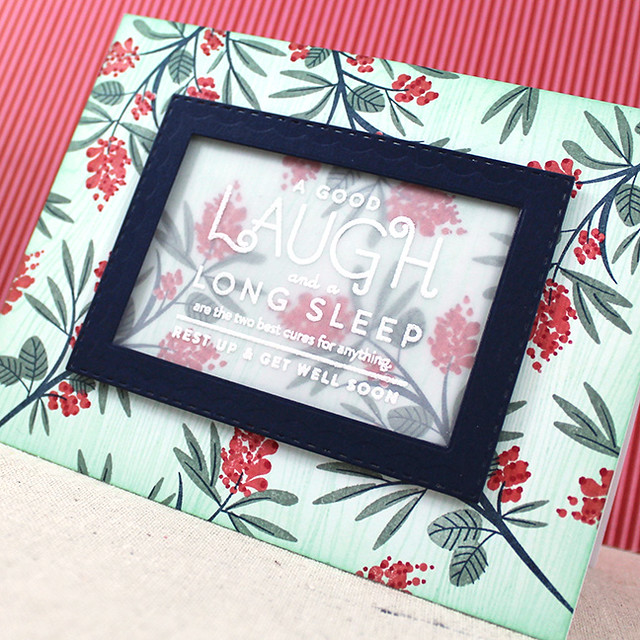
I heat embossed the Over Under Easy sentiment onto Stamper's Select Vellum and attached the frame with foam tape. I used flat adhesive to adhere the framed sentiment to the card front. Using flat adhesive below the vellum makes it lay closer to the pattern so it shows through more easily.
Supplies:


Next up, I want to show you what it looks like to build a pattern onto linen cardstock.
I like using textured cardstocks because of how the textures are enhanced when you blend inks on their surface. On this panel I blended Pale Peony and Berry Sorbet inks, keeping the Berry Sorbet on the outer edges.
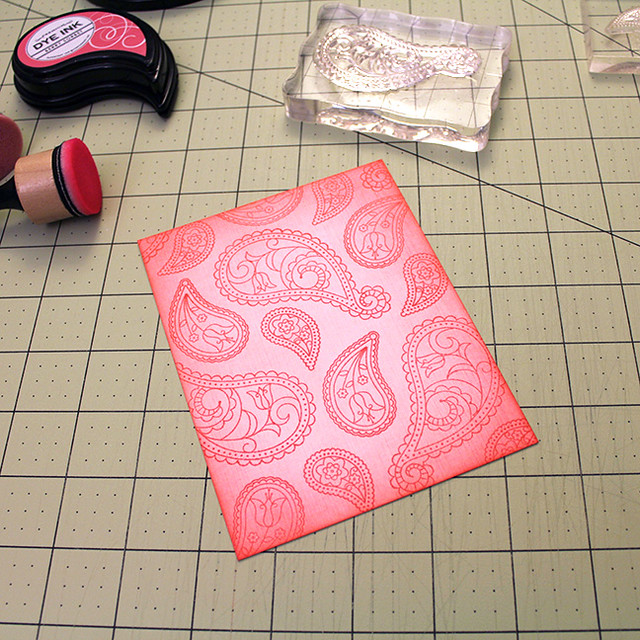
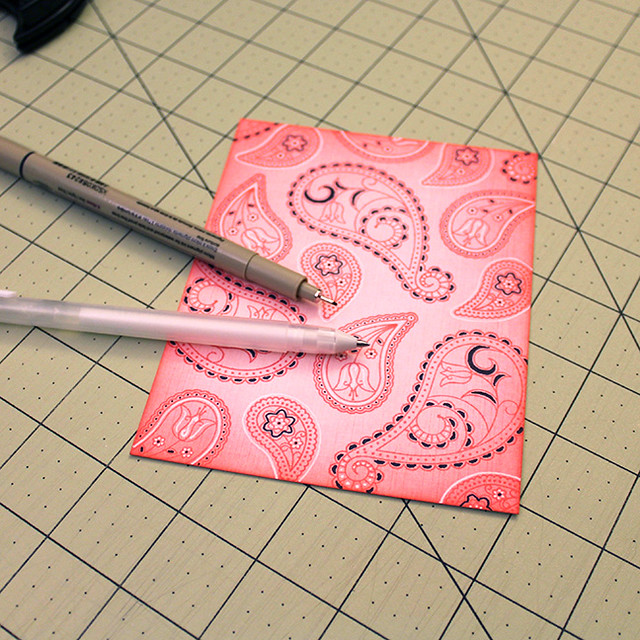
Once my sponging was done, I stamped an all-over pattern using What The Doodle: Paisley. I used all three paisley images to make sure there was plenty of variation in the pattern. Note that the largest images are in a visual triangle to help provide balance.

ETA: I had some questions about visual triangles so I thought I'd create this gif to help show what I mean. This isn't all of the triangles in the pattern, but it does show several to illustrate the point. I hope that helps!

ETA: I had some questions about visual triangles so I thought I'd create this gif to help show what I mean. This isn't all of the triangles in the pattern, but it does show several to illustrate the point. I hope that helps!
Supplies:


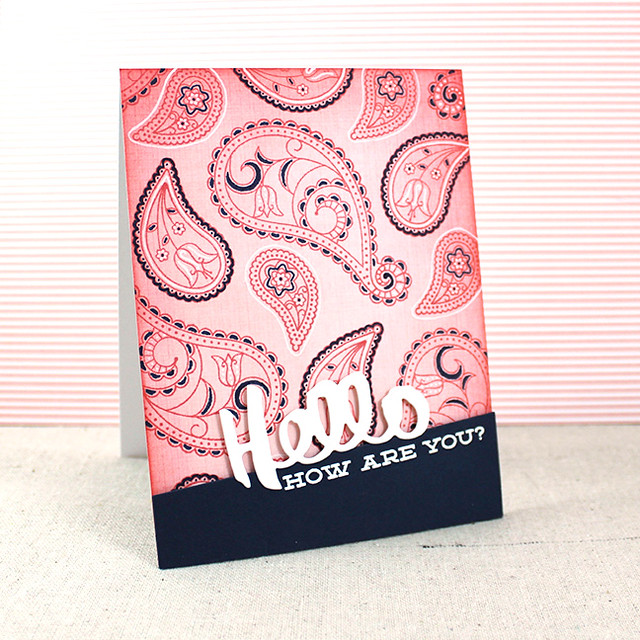
I have one last card to share. On this one I started with a Lilac Grace panel. When using a solid colored panel as your base you are already beginning with a more richly colored backdrop.
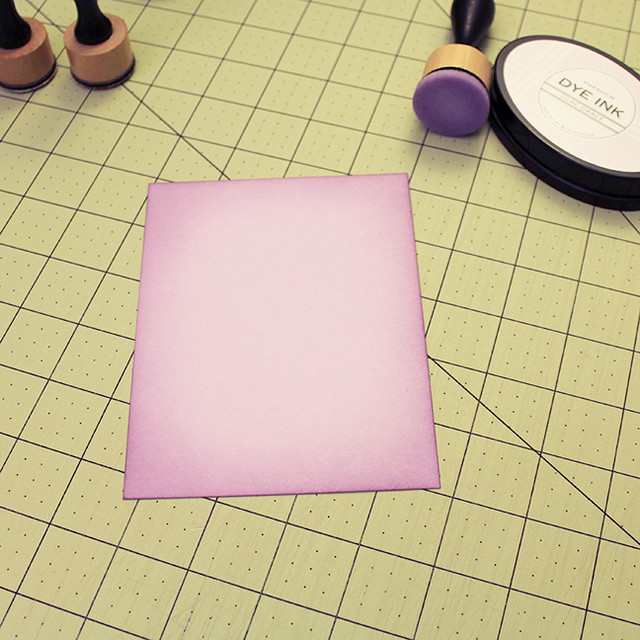
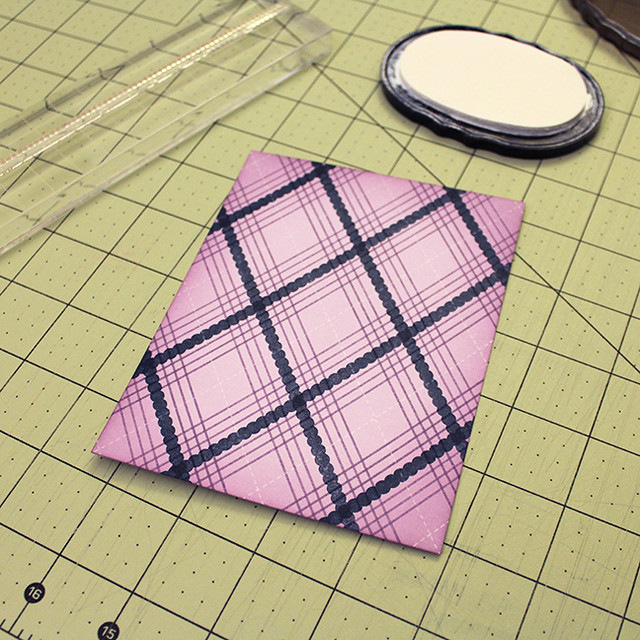
One of my favorite backgrounds to stamp is plaid. I love plaid. So I just had to pull out Plaid Builder to create today. Background Basics: Super Stripes is another that I reach for often to build backgrounds. I stamped this pattern with Winter Wisteria, Dark Indigo, and Fresh Snow inks.
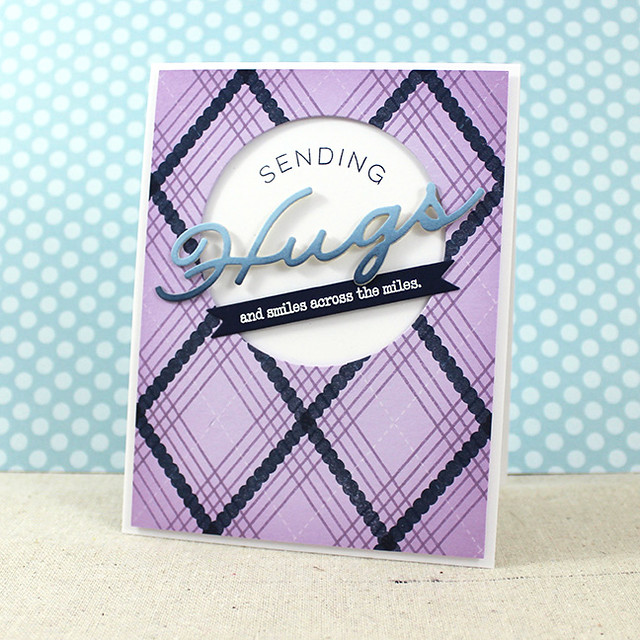
I wanted the background to be the frame this time around, so I cut a circle from the interior using a die from the Noted: Scalloped Square Die Collection. I trimmed down the panel a bit (about 1/8" on each side) and adhered it to a white card base with foam tape. I stamped the "sending" sentiment from Big Hugs directly onto the base, curving it a bit on the block to make it an arc.

Then I sponged a piece of Spring Rain cardstock with Dark Indigo ink and die cut it with the Big Hugs die. I adhered that in the panel opening with foam tape, anchoring the front and back to the patterned panel itself. I heat embossed the sentiment from Big Hugs onto a small banner and adhered it to the card front, tucking it under the "Hugs" die cut.
Supplies:


So there you have it! I hope you're inspired to try stamping your own backgrounds. Thank you for joining me and have a great weekend!
23 comments:
Very nice job and fresh new backgrounds!
These are just fabulous! I love the blending on the first layer, and can't wait to give it a try!
Thanks. Lizzie. I love all three projects. These great ideas will keep me busy all weekend! Happy St. Patrick's Day!
Wow, you're speaking right to me with this post -- I love making backgrounds and am so grateful for this tutorial. These are all so beautiful!
Love your cards Lizzie! Thank you for a new technique to try!
Thank you for sharing your tips to making great backgrounds. Your paisley background was the reason I purchased the paisley stamp and die and the reason I purchased the berry set as well. While my budget may not feel the same way, I so appreciate your inspiration!
Your backgrounds are beautiful. Thanks for letting us take a peek at your process.
Your color scheme on the Berry card is awesome! It has the feel of a Classic Movie that has been colorized. Thanks for the tutorial.
Amazing backgrounds.
These are all so beautiful, Lizzie! I still haven't gotten the Paisley set, but hopefully next release. I had too many wishes and not enough money!
A big WOW, Lizzie, a trio of beauties! Great tips and gorgeous color combos!
Great tutorial Lizzie. I love the look of blended backgrounds but am always afraid it won't look just right. To learn that stamping designs over the top might hide those imperfections is good news indeed. Thanks for the inspiration!
GREAT tutorial and 3 FABULOUS cards Lizzie! I haven't done anything with backgrounds in a looooong time and I'm excited to try your techniques out!! Thanks so much for all the great info and inspiration!! :0)
thanks for sharing - this looks such fun - and beautiful results!
Loved the backgrounds. I'm especially drawn to the plaids. Thank you for sharing your talents.
Thank you for the great post, Lizzie! Lots of wonderful tips & I love every one of these!
As soon as I opened the Design Tips e-mail and saw the bandana background, I thought, "Oh, Lizzie is our hostess today." I appreciated seeing all your different starting points today since each results in a slightly different effect. The first background with the navy and gray leaves over the subtle woodgrain is stunning, and one I'll have to try. Happy St. Patrick's Day!
Hi Lizzie! I want thank you for sharing your process of building backgrounds. It has helped me, not only because you explained it well but it doesn't seem as intimidating. I've learned several techniques, thanks to you! :) There is still one question, that has stumped for years. And that is the"visual triangle". Do you have any tips, or suggestions? When a designer notes the triangle in their work, for some reason, I don't see it. Anyway, thank you again, you're a wonderful designer and I'm so happy you're working with Papertrey products! Wishing you a happy weekend! :)
Stephanie, I can totally appreciate your confusion, so I put together a little gif that I hope will help. Thank you for asking and giving me the idea!
Lots of great tips. Thanks for sharing.
Love these cards and backgrounds, thanks for the awesome tips!
Loved all three of these! I love stamping backgrounds, but I think mine are usually more flat. Loved reading about your process and how you use sponging to create depth...I know I've noticed that before on your work, but I guess I'd never really thought about what that added to your projects. I'm excited to combine blending and stamped backgrounds on my own work now. Thanks, Lizzie!
What wonderful backgrounds and tips! This is just what I needed to inspire me to start playing with the Blog Hop inspiration photos. Thank you!
Post a Comment