

First up today we have a wedding ensemble featuring the Global Greetings: French set (available February 15th). I started by cutting two Front & Center #2 faces out of Aqua Mist cardstock and stamped the front with one of the medallions from Giga Guidelines. The faces were then adhered to a white lunch sack. Next, I took a piece of Soft Stone and sprayed it liberally with Pearl Glimmer Mist and placed it under a book until it was dry and flat.

In the meantime, I die cut a couple of bells from the Bells & Boughs set, stamped the cuts with silver ink, and finished them by heat embossing with clear powder. The dies were then hole punched and tied together with a length of 1/4" silk ribbon that I dyed with a marker. I finished off the bells with a few rhinestones (also colored with a marker) and set them aside.

Once the Soft Stone was ready I die cut it with the Mat Stack 4 Layerz die and stamped it with my sentiment in Plum Pudding ink. That piece was then mounted to my bag front with foam tape and topped with the bells I had already finished. In order to get a lot of dimension on the bells I added three layers of foam tape under the smaller bell. That lifted the bell away from the larger one and really gave a sense of drama and movement.
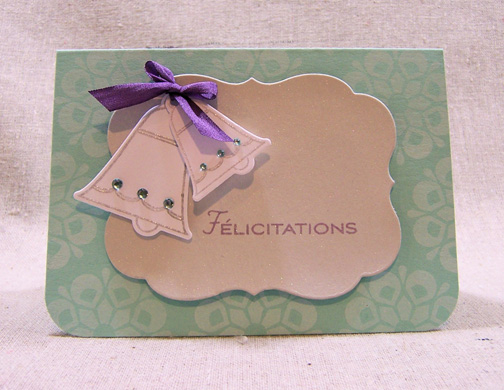
The steps for the card were much the same. The card measures 3 1/2" x 5." The petite size complements the bag nicely.
The second project for today is a general party bag featuring the Italian "congratulations" sentiment. This project would be great for someone recently promoted, graduated, or retiring (just a few examples). The colors could also be easily adjusted to fit the favorites of the recipient.

To start, I cut the Front & Center #1 twice out of Pure Poppy cardstock and stamped the front with the smallest dots in Polka Dot Basics 1. Then, I embellished the Front & Center piece with a strip of Aqua Mist ribbon and some baker's twine before attaching it to another little lunch bag.

Next, I cut the white stock and stamped it with the banner wires and sentiment from Global Greetings: Italian (available February 15th). Then, much like yesterday's cupcake card, I started randomly stamping the little flags to disperse the color in a way that I found visually appealing. There's really no rhyme or reason to the order. Once I had filled in all the little flags, I matted that piece with Harvest Gold cardstock and mounted the whole thing to the bag front with foam tape.

Just like with the first set, the steps for the petite coordinating card were much the same as for the bag.
That's all for me today. Thank you for stopping by and I hope to see you tomorrow for the final day of this month's countdown. Make sure to visit Nichole, Heather, Maile, Lisa, Melissa, and Tiffany for more projects and inspiration.
All products are from Papertrey Ink unless otherwise noted.
French Wedding Suite Recipe:
Stamps: Giga Guidelines, Bells & Boughs, Global Greetings: French
Cardstock: Aqua Mist, Soft Stone; generic white
Ink: Fresh Snow, Plum Pudding; Starlight Black - Brilliance
Other: 1/4" white silk ribbon, Filigree embossing powder, Front & Center #2 Die, Bells & Boughs dies, Mat Stack #4 Layerz die; Markers - Sharpie; generic rhinestones; foam tape - Scotch; white lunch sack - Target; Pearl Glimmer Mist - Tattered Angels
Italian Congratulations Set Recipe:
Stamps: It's A Celebration, Polka Dot Basics, Global Greetings: Italian
Cardstock: Pure Poppy, Harvest Gold; generic white
Ink: Smoky Shadow, Pure Poppy, Aqua Mist, New Leaf; yellow pigment - Studio G; Versamark - Tsukineko
Other: Front & Center #1 Die, Aqua Mist Saddle Stitched Ribbon; Oyster Baker's Twine - Divine Twine; Foam Tape - Scotch; White Lunch Sack - Target
5 comments:
Lizzie -
These little bags and cards are just so sweet! I really love how they turned out - awesome job!
Elaine Allen
Oh cute idea with the bags!! Love the birthday banner:)
LOVE your cards and bags today!! I'm going to have to get the Italian ones for sure: my hubby is 100% Italian.
Great sets: great concept and I love how it's playing out!! And congrats again on your new job designing stamps: you're doing a great job:-)
Cute and creative bags and card. Love the colors used on both. A linguist would love to receive these!
TFS how you created the awesome looking background! Lotsa work but looks super. Great bag and cards! :)
Post a Comment