Saturday, August 5, 2017
August Stitching Focus
Good morning and welcome to this month's Stitching Focus! I'm Lizzie Jones, your Stitching Ambassador, and this month I wanted to something that I made recently for myself. It's practical, but still cute (it even matches my shoes!) and I'm already loving it even though I've only been using it a week or so. Ready to see what I'm talking about? Let's take a peek at the products on today's agenda first.
The first product I'm featuring is the Stitched Key Fob die. This key fob is a great size and can be designed to suit either ladies or gents. The generous size can even help kids keep track of those slippery house keys while not being so bulky that it's a hinderance. It coordinates with a wide array of other dies, so it can be decorated with everything from a fancy medallion to a simple monogram.
1. Erin paired the Stitched Key Fob Die with the Seasonal Stitching: Ladybug Die and a few Sewing Staples: Floral Cluster blooms to create a decidedly feminine project. Isn't it sweet?!
2. Laura used the Stitched Medallion 2's "holes only" die to give her key fob an embroidered appearance. Her project proves that you don't always have to use all the layers of a die collection to achieve maximum impact.
3. Erin created these charming monogrammed key fobs for her daughter's teachers using the Stitched Medallion 1 Die and the Cross Stitch Alphabet Die. She even packaged them in Vintage Favor It Boxes. The key fobs fit perfectly and they made beautiful gifts.
4. Betsy used the Stitched Key Fob Die and the Seasonal Stitching: Ladybug Die to create activity kits for her daughter. She includes a photo to show how everything gets assembled along with thread wrapped on handy little die cut Thread Cards. What a wonderful way to keep boredom at bay!
5. Erin got ambitious on this key fob and embellished her stitches with beading. She truly created something extra special by adorning the Stitched Medallion 2. She also used the smaller layers of felt to give additional depth to her design.
6. Dawn also used the Stitched Medallion 2 Die to create her key fob, but she achieved a much more masculine feel with her color choices. She also layered on a Limitless Layers 1 3/4" Circle to incorporate more color and give her medallion a more streamlined look.
Next up is the Seasonal Stitching: Birds Die Collection. This lovely bird silhouette can be applied to coin purses, greeting cards, coffee sleeves, and tags. You can embroider using the "holes only" dies or combine felt and stitching for several different styles.
1. Nichole's whimsical pencil pouch incorporates pom-pom trim along with her patterned fabric Seasonal Stitching: Bird. The contrasting thread she chose really allows the stitching to shine.
2. Heather chose to embroider the Bird's body onto her Coin Purse, attaching a felt wing for contrast. The cascade of Lazy Daisies and French Knots is absolutely an impeccable accompaniment.
3. Erin used two birds facing one another on her Coin Purse. The beauty of felt is that you can flip your shapes over and there are no "bad" sides from your die cutting plates. You can use felt shapes on your paper projects in the same way!
4. Speaking of paper projects, Melissa used this sweet bird on her Easter card. She found an ideal pairing with the Chicken Scratch Cover Plate and Background Basics: Super Gingham stamps. It's a match made in homespun heaven!
I'm notorious for losing my earbuds. It seems like they walk away on their own, leaving me scrambling every time I want to go for a run. So I decided to make myself a little pouch to keep those evasive little suckers corralled.
I knew I wanted to use the Stitched Key Fob Die because I figured I could somehow create a pocket and a flap. I also figured that my key carabiner would be the most logical place for my earbuds to live. I usually end up driving to wherever I'm going to run (you can only do so many 1 1/2 mile loops in your own neighborhood, know what I mean?) so keeping my earbuds with my car keys seemed sensible.
So I started by cutting one of the key fob shapes from Hawaiian Shores felt and one from fabric (I stabilized the fabric first and left the backing paper on during the die cutting process to give the die something to really grab onto). Then I cut a second key fob piece from the same felt, this time only cutting one half of the die (one of the circle bits).
I used the "holes only" bird from the Seasonal Stitching: Birds Die to add stitching holes to one side of the fob and the Tiny Stitched Alphabet to add this cheeky phrase to the back (it says "get it, girl" in case you're having trouble reading it). Because who doesn't need a little encouragement before they hit the pavement? I know I do.
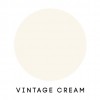
I die cut a bird body from the same stabilized fabric and a wing from Vintage Cream felt. I stitched the bird to the front of the key fob using white and aqua threads.
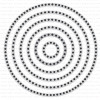
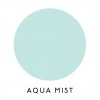
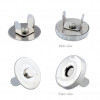
Next, I used the Stitched Circles: Holes die to add holes to the fabric piece and the Hawaiian Shores half-fob. Then I die cut a couple of Stitched Circles (the smallest in the set) from Aqua Mist. Those circles are mostly just to cover the prongs from the magnetic snap. I don't know that they would have tangled in my earbud cords, but better safe than sorry. I inserted the magnetic snaps and stitched the covers into place.
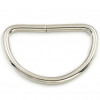
Then it was time to stitch everything together. I trimmed the half-fob down a few holes so it wouldn't reach all the way to the top, thus creating the pocket. Then I just stitched the fob together at the top around a 1 1/4" D-ring. The front and back were stitched separately, creating a pouch with a magnetic flap to keep my earbuds secure. I just wrap them up and tuck them into the pocket. And now I can always find my earbuds. The bright Hawaiian Shores felt even makes it easier to find my keys when they're in my gym bag or purse. Bonus!
Thank you so much for joining me today. I hope you've found this post helpful. Or at the very least, I hope it has inspired you to think outside the box when it comes to your dies. They can do more than you might think at first blush. Enjoy your weekend, everyone, and I'll see you again soon!
Supplies:
Subscribe to:
Post Comments (Atom)





2 comments:
Great idea...thanks
I love this I took me half a day to fine this post again lol
I am so want to make this for some of my daughter's friends.
Post a Comment