Friday, August 14, 2015

Hallows Eve Inspiration

Good morning, friends, and welcome back for Day 5 of the Papertrey Ink August countdown. Today it's all about Halloween! For me, Halloween crafting is all about treat packaging. This month's release is absolutely brimming with frightfully adorable products you'll love using to dress up little gifts for your favorite ghosties and ghouls! This is a jam-packed post, so let's just jump right in...

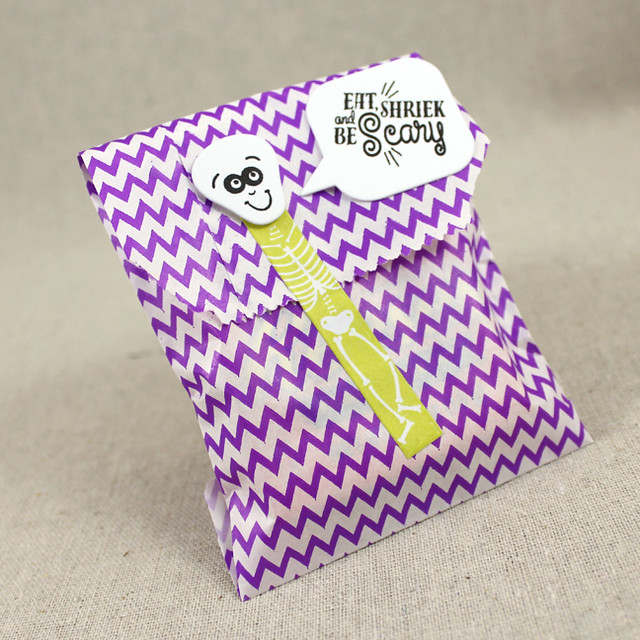
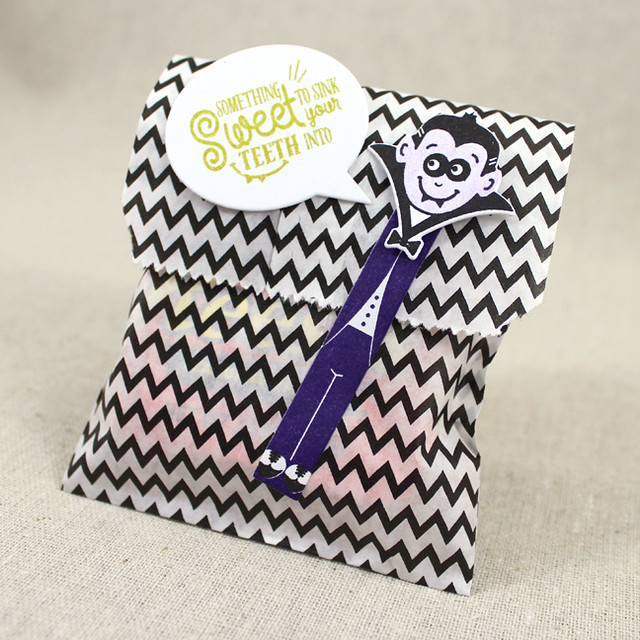
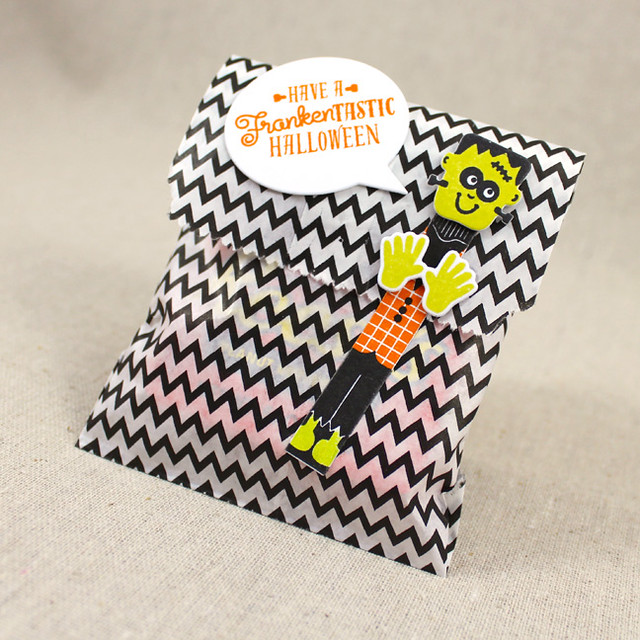
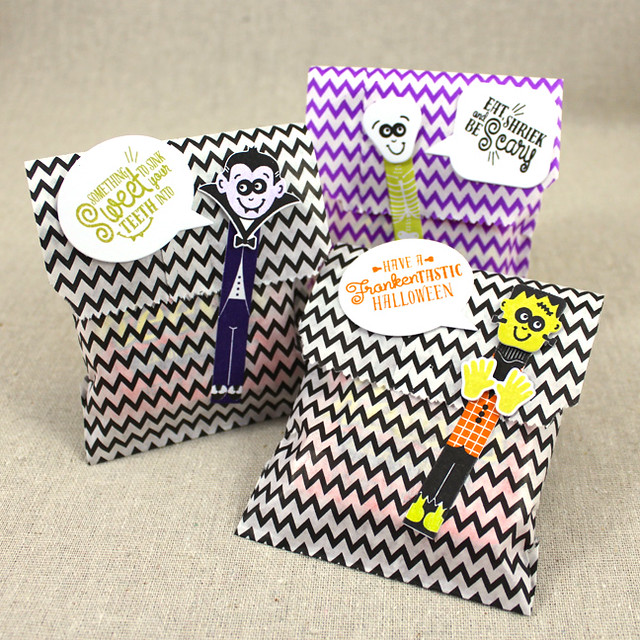
First, I'm going to share Betsy Veldman's new Make It Market Mini Kit: Halloween Pin Ups. This kit has everything you'll need to create festive treat bags. I used the included stamp set, die, and printed mini bags to create a trio of monster candy baggies.

Mini Monster Treat Pouches

The small bags in the kit are the perfect size for one snack size Reese's peanut butter cup (the .55oz ones), so I used those to fill my baggies. I opted to die cut and stamp white adhesive sheets and use the monsters' bodies as both decoration and an easy way to secure the flaps of the baggies.

Mini Skelly Treat Pouch

I used a black, white, and Limeade Ice color combo for Skelly. I popped his head up with foam tape and gave him a Bubble Talk speech bubble that I'd stamped with one of the sentiments from the stamp set in the kit.

Mini Vlad Treat Pouch

Vlad the Vampire is looking slick in a Royal Velvet suit and black wingtips. I colored his face ever-so-lightly with a colored pencil. He still looks a little pale though, no? His greeting is stamped in Simply Chartreuse.

Mini Frank Treat Pouch

Frank, who is totally my favorite, is wearing a black suit with an Orange Zest vest. He's barefoot, though I did give his legs and feet some color with a pencil. His hands and head were stamped in Limeade Ice and popped up with a bit of foam tape. His salutation is stamped in Orange Zest.

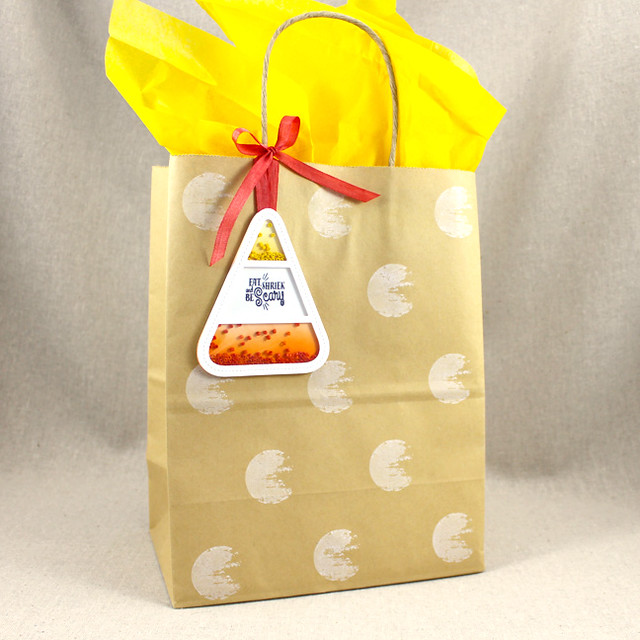
Next up is the Shaker Shapes: Candy Corn die. It makes an adorable shaker tag!

Candy Corn Gift Bag

To begin, I die cut the candy corn frame layer from white cardstock and the solid layer from white (twice) and clear cardstocks. Then, I masked off the different sections of the candy corn and sponged Orange Zest and Harvest Gold inks into the appropriate places. I stamped the sentiment, also from Betsy's mini kit, into the center section using True Black. I'm not sure who I'm giving this to yet, so I went with a generally Halloweeny sentiment, but you could always personalize with someone's name or initials instead. I bet the Antique Alphabet would look great!
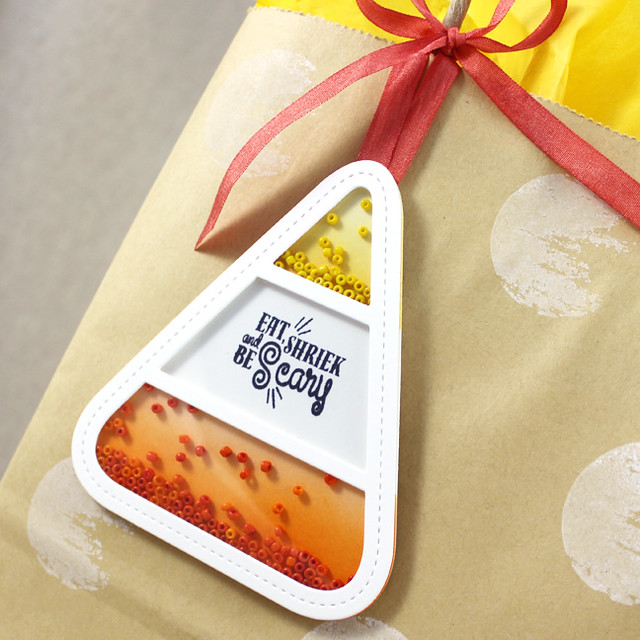
Candy Corn Shaker Tag

I attached the candy corn frame to the clear cardstock layer and then added foam adhesive to the back. I sprinkled seed beads into the colorful sections of my tag and then carefully placed the frame layer. I sandwiched dyed 1/4" silk ribbon between the back of the tag and the last white cardstock solid candy corn piece. It's thin enough that it doesn't add bulk and it holds well. I finished up by tying it to a kraft gift bag that I'd stamped with one of the images from Brushed Off using Fresh Snow ink.

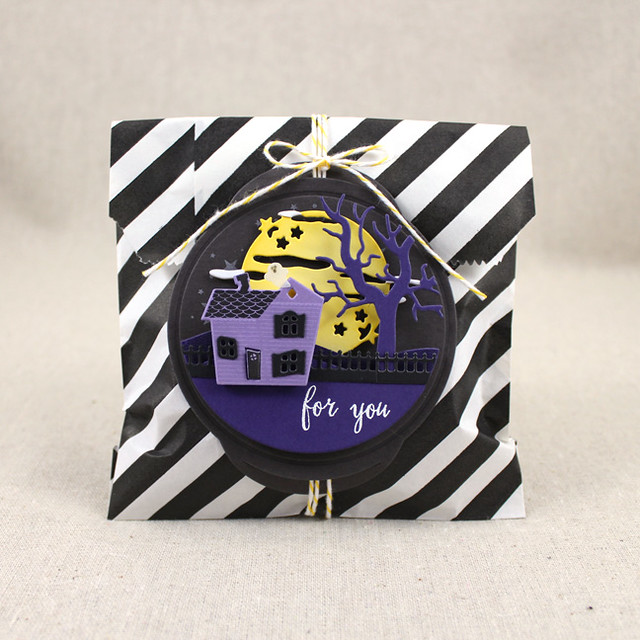
How about a peek at Petite Places: Spook Manor and the Scene It: Hallows Eve dies?

Haunted Manor Treat Bag

This tiny haunted house is too cute to ever scare anyone! I began by die cutting the house from Winter Wisteria cardstock. I stamped it with Winter Wisteria and black inks and embellished with a handful of True Black windows. I added foam tape to the back and then layered it onto Royal Velvet and Lemon Tart cardstocks (the Lemon is just in the attic window...creepy).

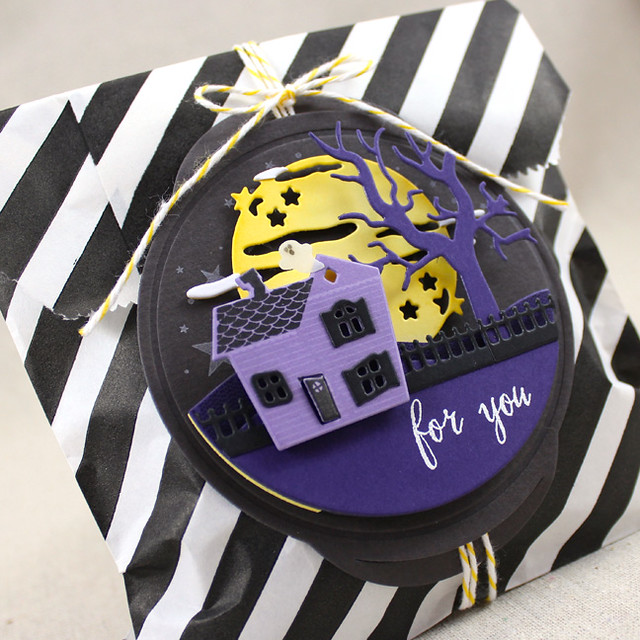
Haunted Manor Treat Bag Close Up 1

Next, I die cut the new Scene It dies from Lemon Tart and Royal Velvet cardstocks. I trimmed away the moon on the back Royal Velvet layer and stamped the hill with an Ombre Builders strip using black ink for a bit of depth. I sponged Harvest Gold ink onto the Lemon Tart moon before I layered it with the hill piece using foam tape. I heat embossed the sentiment onto the tree layer and then added it with a bit more foam tape. I adhered the fence into place and then added the house with flat adhesive. I die cut the moon from white cardstock and trimmed out the clouds. They were adhered to the Lemon Tart moon with a glue pen.

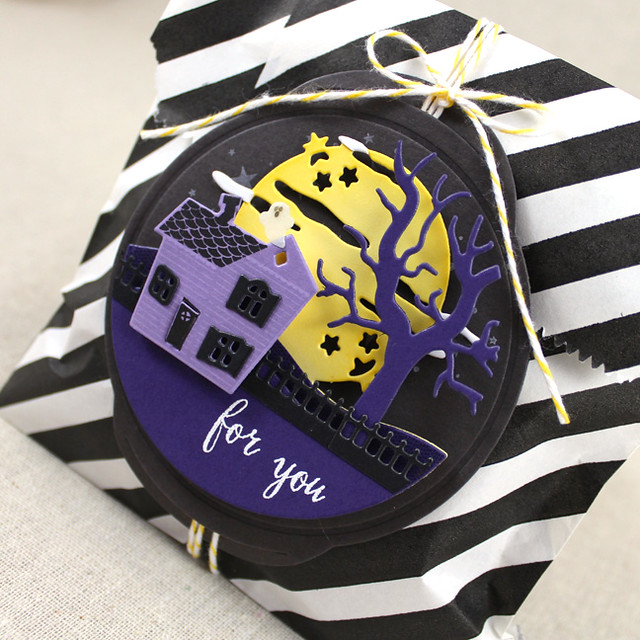
Haunted Manor Treat Bag Close Up 2

I attached everything to a Smokey Shadow Tag Base Die shape that I'd stamped with a handful of stars from Happy Spooky Halloween. I wrapped yellow bakers twine around one of the larger bags from the new Make It Market Mini Kit and tied on the haunted manor scene. A tiny vellum ghostie was the perfect finishing touch.

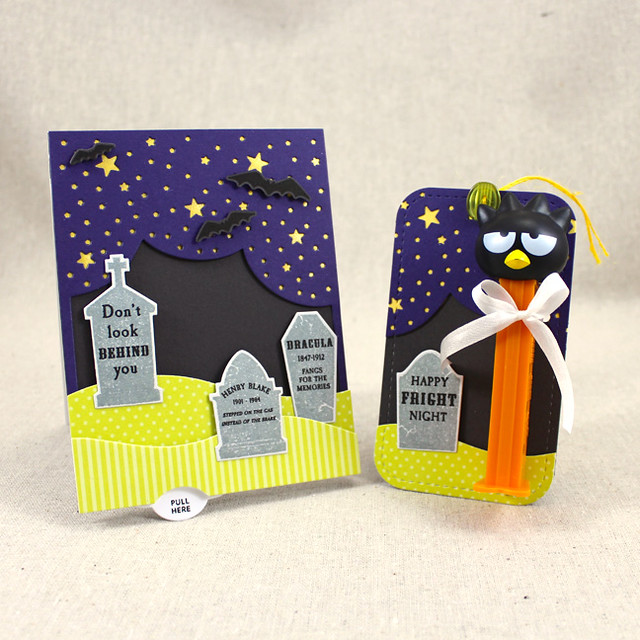
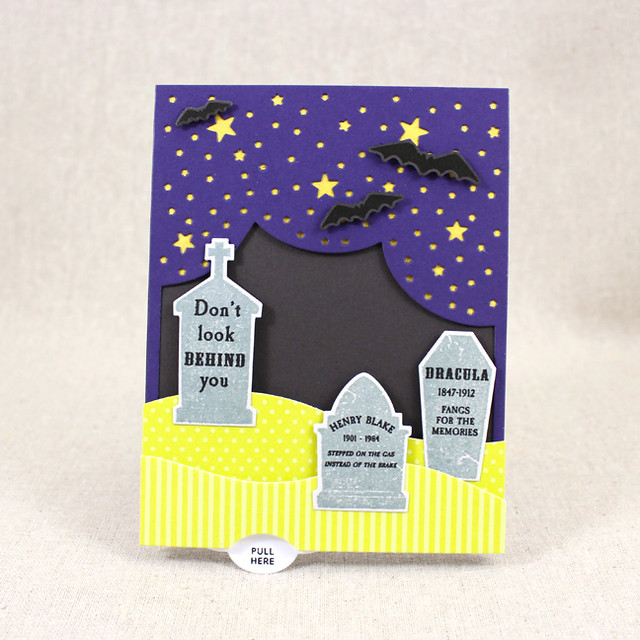
Ok! Last, but not least, is Haunted Headstones! I created a card and gift combo using these stamps and dies today.

Haunted Headstones Gift Set

I began with the card. I die cut a Cover Plate: Night Sky shape from Royal Velvet. I wanted the stars to stand out, so I layered just the top section with Harvest Gold cardstock that I sparkled with a Wink Of Stella pen.

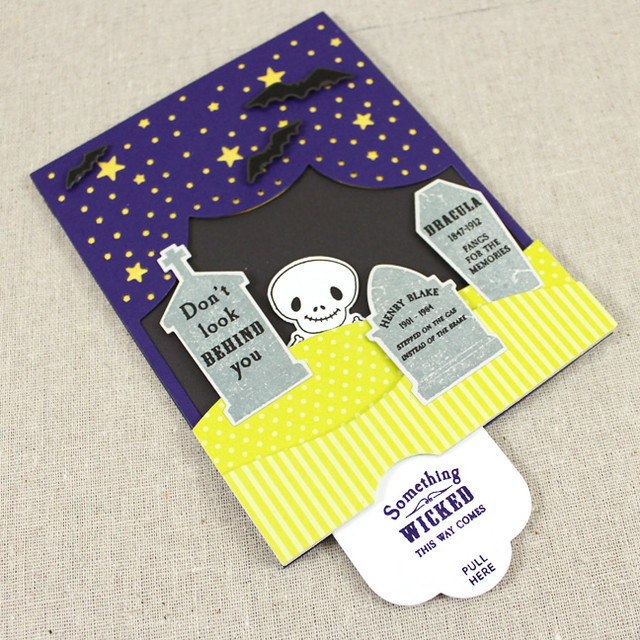
Something Wicked Card

That whole piece was then adhered to a Smokey Shadow card front. Now is where things get interesting.

Something Wicked Pop Up 2

I created a push 'n pull element behind the Limeade Ice hills, so when you pull on the tab at the bottom of the hill, Mr. Bones rises from the grave! It's a tad bit difficult to explain, so I'd just suggest watching a technique video over on YouTube if you're interested in doing one of these yourself. I found this video very helpful.

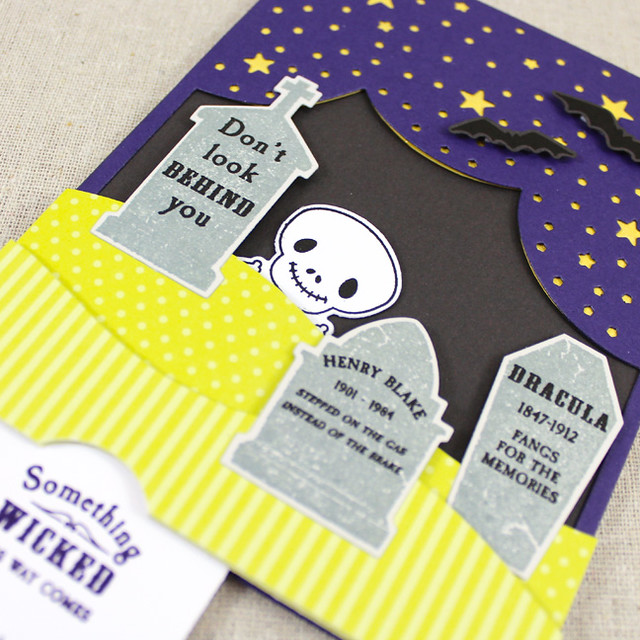
Something Wicked Pop Up

I added a few headstones to the hills along with a handful of bats in the sky. My favorite epitaph of the whole collection is shown here on the center headstone. Gives me a giggle every time.

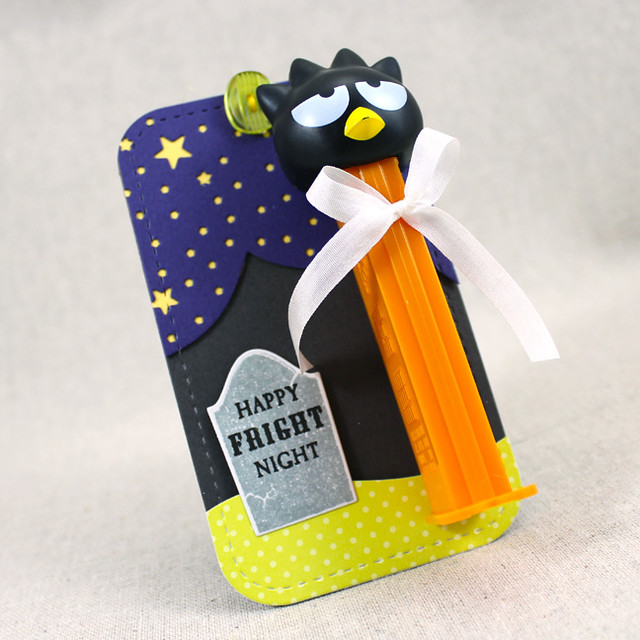
Finally, I have the coordinating tag to share with you today.

Happy Fright Night Candy Card

I followed many of the same steps for the card, but I used the Tasting Tag die as my canvas. I embellished the hole on the tag shape with a Limeade Ice button and some yellow hemp twine. I tied a Pez dispenser to the base in the space where a spoon might otherwise go. I was so thrilled at how easy it was to coordinate these two projects!

Alrighty, friends. That's all for me today. Make sure to visit Nichole, Amy, Ashley, Betsy, Dawn, Heather, Laurie, Maile, and Melissa for more of today's group post. Erin is also sharing her new Chicken Scratch patterned paper over on her blog today. Take care and I'll see you again tomorrow with even more of this month's release. Have a great day!

Recipes:
Monster Treat Bag Trio
Stamps: Halloween Pin Ups - Papertrey Ink
Cardstock: White Adhesive Sheets - Papertrey Ink; white
Ink: Limeade Ice, Simply Chartreuse, Orange Zest, Royal Velvet - Papertrey Ink; Onyx Black - Versafine
Other: Treat Bags, Halloween Pin Ups Die - Papertrey Ink; Foam Tape - Scotch

Candy Corn Shaker Tag
Stamps: Halloween Pin Ups, Brushed Off - Papertrey Ink
Cardstock: Clear Cardstock - Papertrey Ink; white
Ink: Orange Zest, Harvest Gold, True Black - Papertrey Ink
Other: Shaker Shapes: Candy Corn die, 1/4" silk ribbon - Papertrey Ink; seed beads; Foam Tape - Scotch

Haunted Manor Treat Bag
Stamps: Petite Places: Spook Manor, Happy Spooky Halloween, Scribbled Sentiments - Papertrey Ink
Cardstock: Royal Velvet, Winter Wisteria, True Black, Stamper's Select Vellum, Lemon Tart, Smokey Shadow - Papertrey Ink
Ink: Harvest Gold, Winter Wisteria - Papertrey Ink; Onyx Black - Versafine; VersaMark - Tsukineko
Other: Petite Places: Spook Manor Die, Scene It: Hallows Eve Die, Treat Bag, Tag Base Die (from Tinsel & Tags MIM Kit) - Papertrey Ink; Foam Tape - Scotch; White Embossing Powder - Filigree; Lemon Baker's Twine - Divine Twine

Something Wicked Card & Treat Set
Stamps: Haunted Headstones, Haunted Headstones Sentiments, Mr. Bones, Movers & Shakers Sentiments - Papertrey Ink
Cardstock: Smokey Shadow, Harvest Gold, Royal Velvet, Limeade Ice Patterned Paper, Soft Stone - Papertrey Ink; white
Ink: Royal Velvet - Papertrey Ink; Onyx Black - Versafine; London Fog - Memento
Other: Haunted Headstones Die, Cover Plate: Night Sky, Half & Half, In The Meadow Die Collection, Tasting Tag, Limeade Ice Button, 1/4" Silk Ribbon - Papertrey Ink; Foam Tape - Scotch; Yellow Twine - American Crafts; Thin Plastic Sheet; Clear Wink Of Stella Pen

Thursday, August 13, 2015

Introducing Choose Joy + Twig Wreath

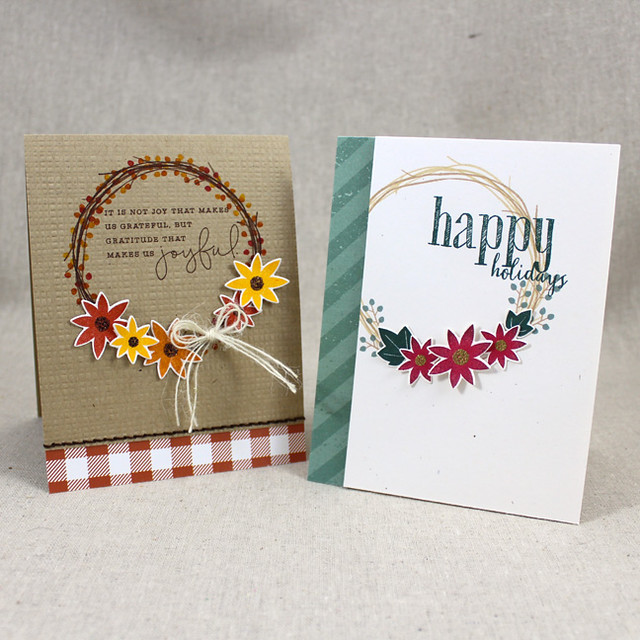
Good morning, friends! Welcome back for Day 4 of the Papertrey Ink August countdown. This morning we're sharing two new sets that are sure to put a smile on your face. I adore the homespun charm of wreaths, so Twig Wreath is right up my alley. Heather's new set is so full of character, with delightful details that make it perfect for any time of year (I have two seasons covered here today). Pair that with Choose Joy, a collaboration between Melissa Phillips and Nichole Heady, and you have a heartfelt and homespun all in one place. I love them and I'm sure you will, too! Let's get on to some projects, shall we?

I turned to the interwebs for a little inspiration to get me in the wreath-building spirit and found this lovely photo to get my juices flowing for this first card.

Source

Like I said, Twig Wreath is so versatile that it can be used for any time of year. I went with Autumn and Winter today, but I'm definitely looking forward to experimenting with the other seasons very soon.

Twig Wreath Cards

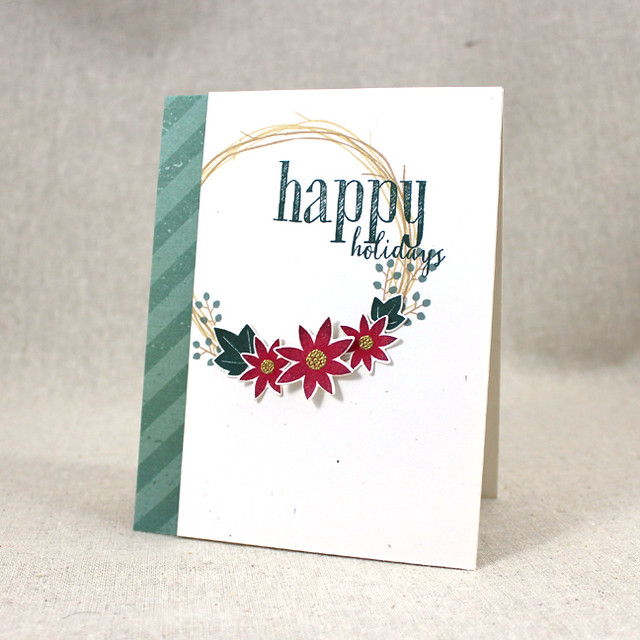
I began by stamping the wreath form onto Rustic White cardstock twice, once with Fine Linen and once with Classic Kraft ink. I then stamped a holiday greeting, from Scribbled Sentiments, in Pinefeather ink.

Poinsettia Wreath Card

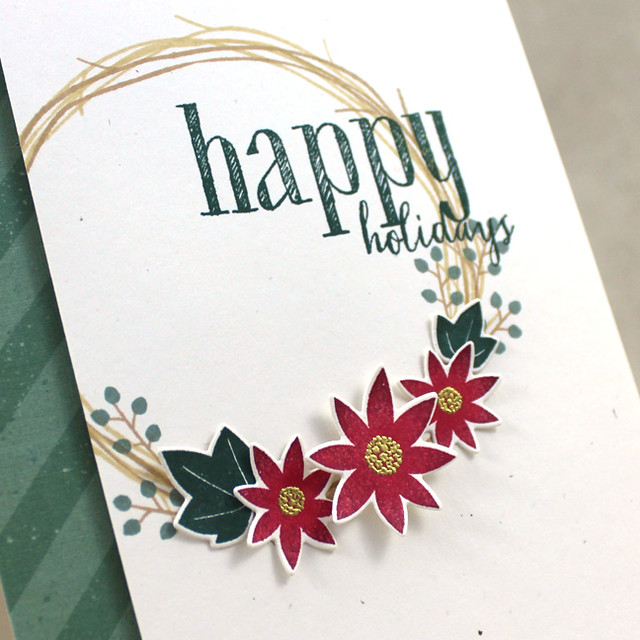
I embellished the wreath with berry branches and leaves using Ocean Tides, Classic Kraft, and Pinefeather inks. I mounted that panel to a Rustic White card base, tucking a strip of the new Twig Wreath patterned paper under the edge.

Poinsettia Wreath Close Up

The flowers look a bit like poinsettias to me, so I die cut them from additional Rustic White cardstock and stamped them with Pure Poppy that had been rolled in a bit of Scarlet Jewel around the edges. I heat embossed the flower centers with gold powder and curled up the petals a bit before adhering them onto the card front.

My next card is an Autumn version inspired by this photo.

Source

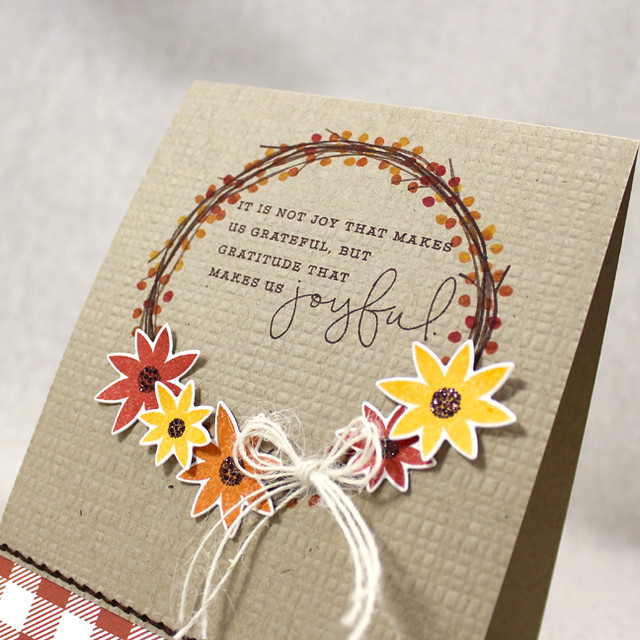
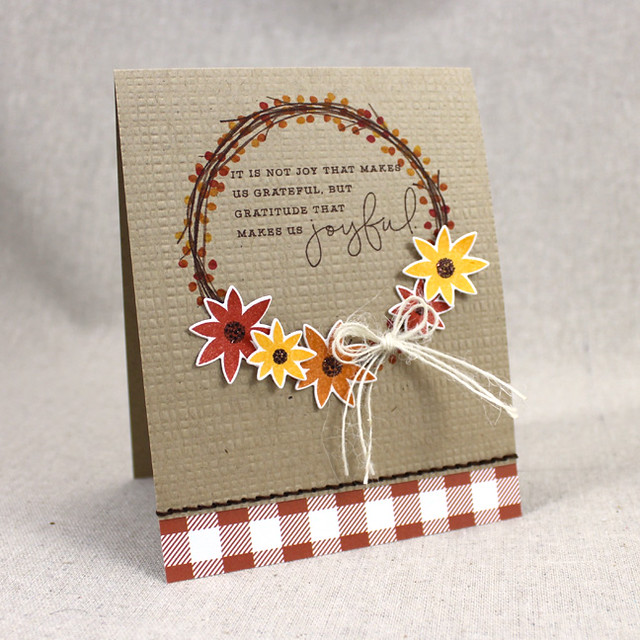
I began by stamping the wreath three times onto a Classic Kraft card base, once at full strength and twice after it had been stamped off. I then added the sentiment from Choose Joy and stamped around the entire wreath with the berry image. I rock 'n rolled it in Summer Sunrise, Canyon Clay, Terra Cotta Tile and Pure Poppy to get nice variation.

Joyful Autumn Wreath Card

Next, I trimmed off a portion of the front of the card and die cut the edge with stitching holes. Then, I textured the card with the Rustic Burlap Impression Plate. I added stitching holes to a strip of the new Chicken Scratch patterned paper and stitched the two parts together with embroidery floss (I used three strands).

Joyful Autumn Wreath Close Up

I die cut the flowers from Rustic White cardstock and stamped them with Terra Cotta Tile, Summer Sunrise, and Canyon Clay inks. I added the centers with Dark Chocolate and embellished them with dark brown glitter. I adhered the flowers to the wreath along with an offset Rustic Cream Twine bow.

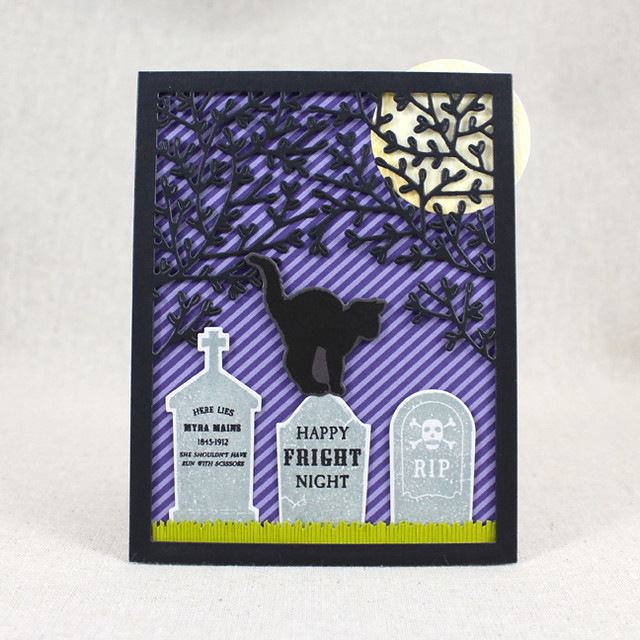
My last project today is another Halloween card made with the Haunted Headstones and Haunted Headstones Sentiments sets.

Fright Night Card

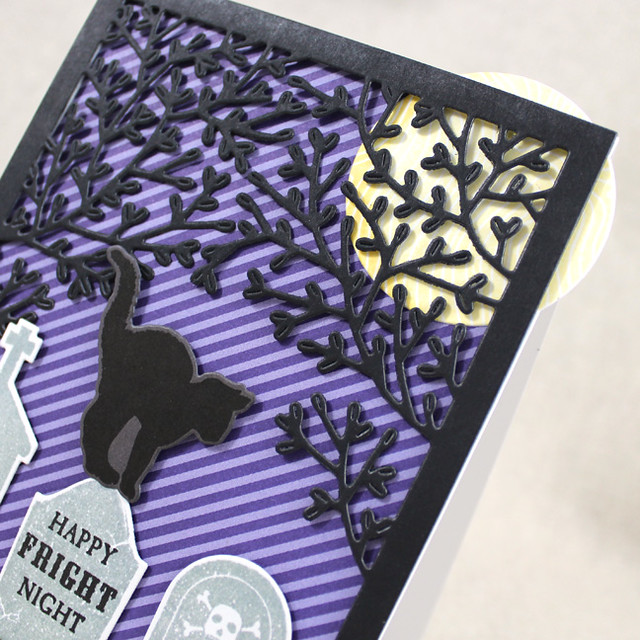
I began by die cutting a Cover Plate: In The Woods shape from True Black cardstock. I created a grassy strip from Simply Chartreuse cardstock and a moon using Modern Wood Mats rolled in Lemon Tart and Harvest Gold inks. I layered the Cover Plate shape over a panel of striped Royal Velvet, tucking the grass and moon in the appropriate places.

Fright Night Close Up 2

Next, I die cut the headstones from Soft Stone cardstock and stamped them using Memento London Fog ink. I added the epitaph (from Haunted Headstones Sentiments) and Halloween messages with Onyx Black Versafine before adding them to the card front.

Fright Night Close Up 1

Finally, I die cut and stamped a cat from Superstition and mounted it to the top of the center headstone using foam tape.

And there you have it for today! Thank you so much for stopping by! Make sure to check in with Nichole, Amy, Ashley, Betsy, Dawn, Heather, Laurie, Maile, and Melissa for more of today's group post. Erin also has more of her new Chicken Scratch patterned paper, so you'll definitely want to pop over there. I'll see you again tomorrow with even more of this month's release. Have a great day!

Recipes:
Poinsettia Wreath Card
Stamps: Twig Wreath, Scribbled Sentiments - Papertrey Ink
Cardstock: Rustic White, Twig Wreath Patterned Paper - Papertrey Ink
Ink: Pinefeather, Ocean Tides, Classic Kraft, Fine Linen, Pure Poppy, Scarlet Jewel - Papertrey Ink; VersaMark - Tsukineko
Other: Twig Wreath Die - Papertrey Ink; Foam Tape - Scotch; Gold Embossing Powder - Filigree

Joyful Autumn Wreath Card
Stamps: Twig Wreath, Choose Joy - Papertrey Ink
Cardstock: Classic Kraft, Chicken Scratch Patterned Paper - Papertrey Ink
Ink: Summer Sunrise, Canyon Clay, Terra Cotta Tile, Pure Poppy, Dark Chocolate - Papertrey Ink
Other: Twig Wreath Die, Rustic Burlap Impression Plate, Stitching Lines Die, Rustic Cream Button Twine - Papertrey Ink; Foam Tape - Scotch; Brownstone Glitter - Martha Stewart Crafts

Fright Night Card
Stamps: Haunted Headstones, Haunted Headstones Sentiments, Modern Wood Mats, Superstition - Papertrey Ink
Cardstock: True Black, Simply Chartreuse, Soft Stone, Royal Velvet Patterned Paper, Smokey Shadow - Papertrey Ink; white
Ink: Lemon Tart, Harvest Gold - Papertrey Ink; London Fog - Memento; Onyx Black - Versafine
Other: Haunted Headstones Die, Cover Plate: In The Woods, Superstition Die, Rainbow Circles Die Collection - Papertrey Ink; Foam Tape - Scotch

Wednesday, August 12, 2015

Autumn Style

Good morning, friends! Are you ready for Day 3 of the Papertrey Ink August countdown? Today is the first group post and we're sharing a look at the new Brushed Off stamps. I'm head over heels for this set! It's such a wonderful way to add artistic flair to your projects while maintaining a little control and keeping the painty mess to a minimum. I'm still getting my sea legs when it comes to some of the more paint-based techniques that have become popular recently, so Brushed Off strikes a great balance for me. Let's get to it!

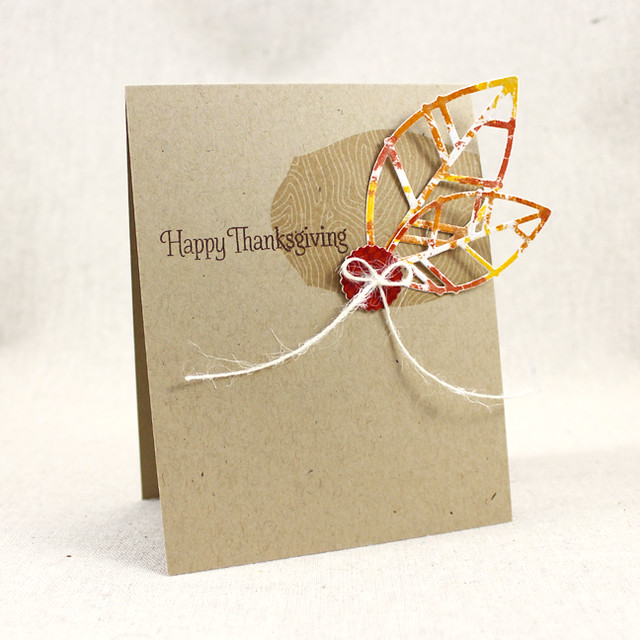
I began my first card thinking about beautiful autumn leaves. I paired Brushed Off with the Leaf Silhouettes dies to create delicate "painted" foliage.

Happy Thanksgiving Card

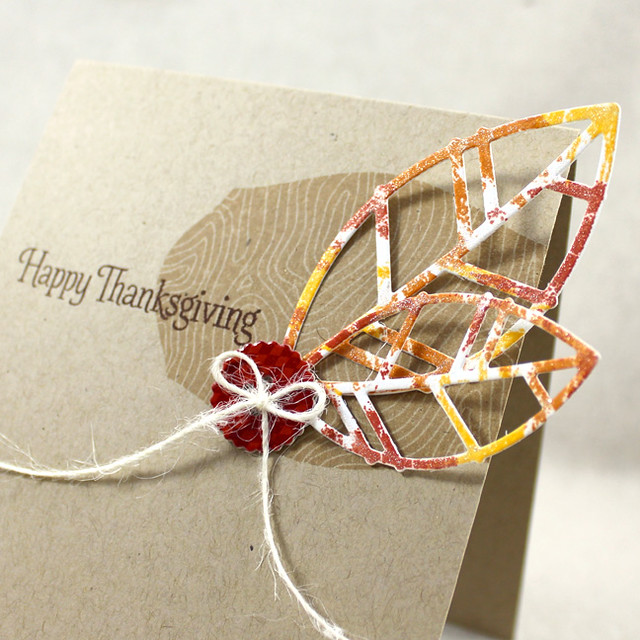
I started by die cutting the leaves from Rustic White cardstock. Then, I stamped several of the images in the set in random patterns using Terra Cotta Tile, Canyon Clay, Harvest Gold, and Summer Sunrise inks. Next, I coated the surface of each leaf with a clear Wink Of Stella pen to add shimmer and blend the colors together a bit.

Happy Thanksgiving Close Up

I adhered the base of the leaves to a Classic Kraft card base that I'd stamped with an image from Modern Wood Mats and a sentiment from Pumpkin Patch, curving them outward slightly. I finished with a handmade Terra Cotta Tile Button that I'd embellished with a Rustic Cream Button Twine bow. I love the simplicity. It really allows the multicolored leaves to pop.

My next card uses the Brushed Off stamps as a stylized sky backdrop.

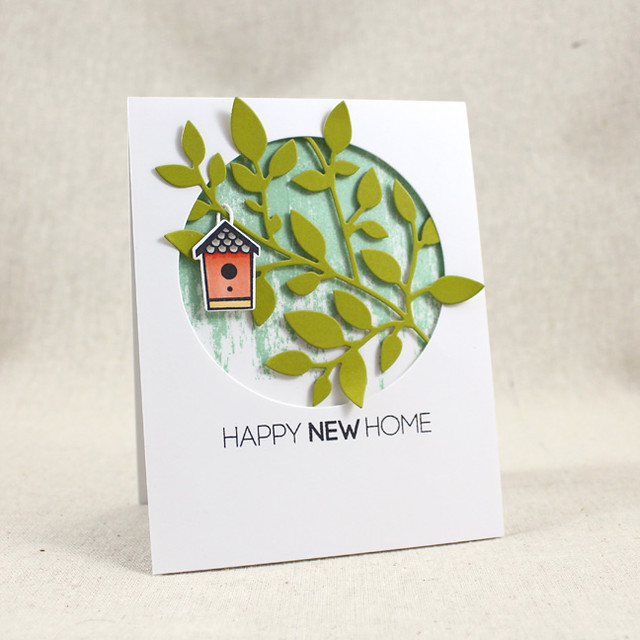
Happy New Home Card

I began by stamping the largest Brushed Off image onto a white card base with Aqua Mist ink. It almost looks like the sky is falling, doesn't it? I kind of love that. Then, I layered it with a die cut panel that I'd stamped with this month's Keep It Simple: Home sentiment.

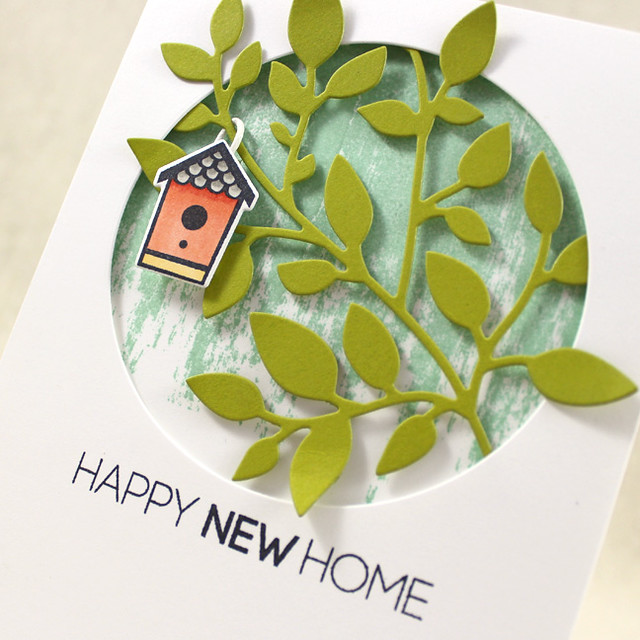
Happy New Home Close Up

I tucked the Simply Chartreuse Branching Out shape into the circular opening, fluffing out some of the leaves and keeping a few tucked. I die cut, stamped, and colored one of the bird houses from Little Bitty Bird Additions and added it to the branch with a piece of waxed cord.

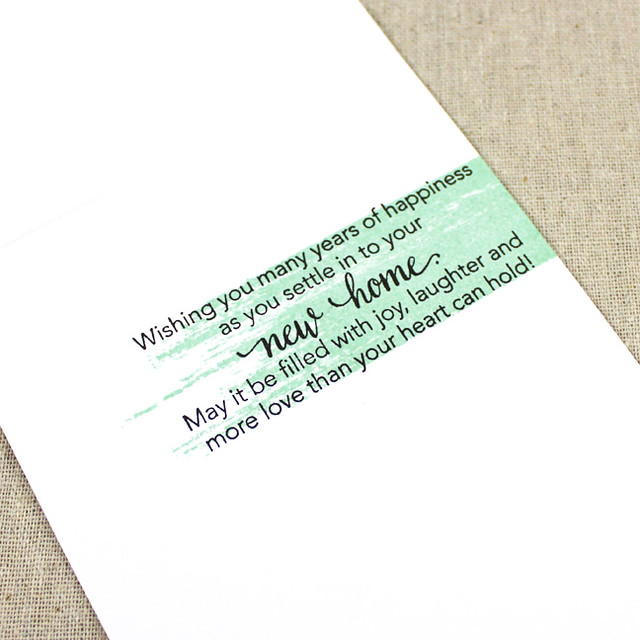
Happy New Home Inside

Inside the card, I stamped a Tucked In: New Home sentiment, embellishing it with another of the Brushed Off images. I like that the brushstroke image carries the design to the inside a little bit, rather than leaving the sentiment nekkid.

I have another Scribbled Sentiments card to share with you today, too! This one's a valentine.

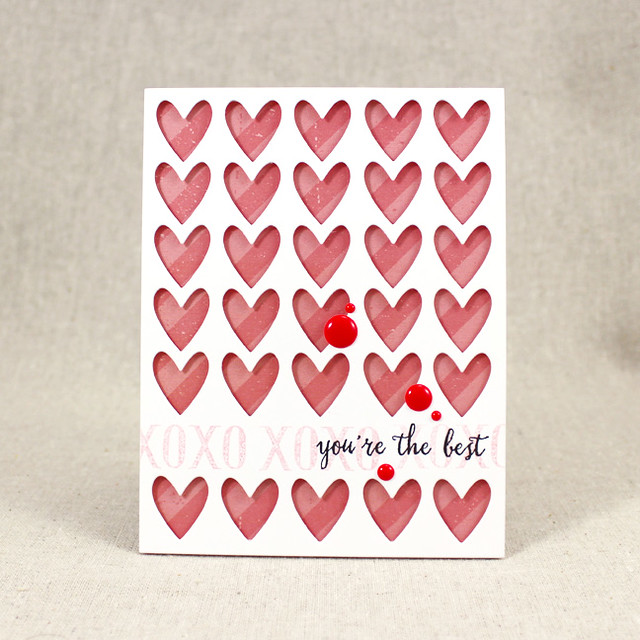
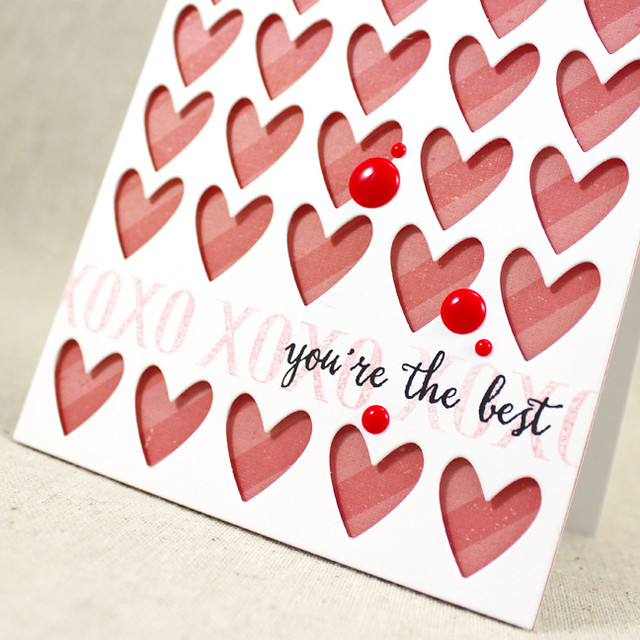
XOXO Valentine Card

I began by die cutting the Cover Plate: Hearts shape from white cardstock. I stamped the Scribbled Sentiments images in the solid space and layered it onto a piece of new patterned paper (more on this later) using foam tape.

XOXO Valentine Close Up

I embellished with a handful of pinky-red enamel dots. Quick and easy!

My final card today is all about Haunted Headstones and the coordinating Sentiments set.

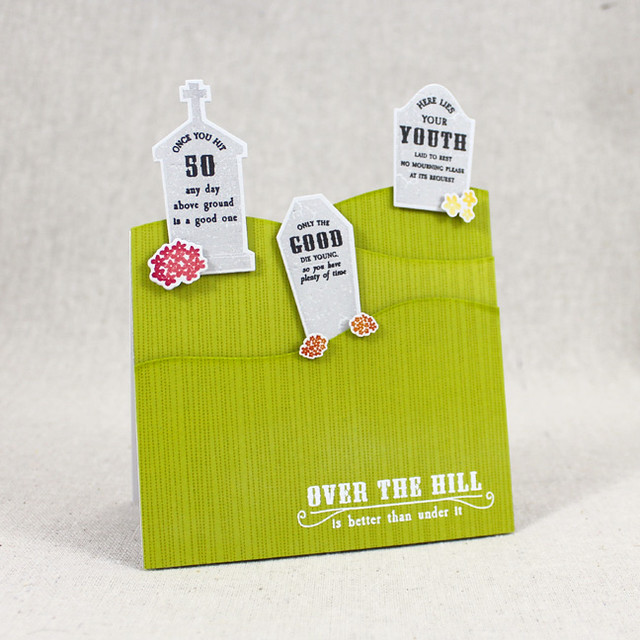
Over The Hill Graveyard Card

I began by creating hills from Simply Chartreuse cardstock using the In The Meadow and Sentiment Splits dies. I heat embossed my sentiment on the front panel with white powder and then added texture to each hill with an Ombre Builders strip. I mounted the hills to a mini card base with strips of coaster board. I didn't want as much height as foam tape would offer, so the coaster board was a perfect alternative.

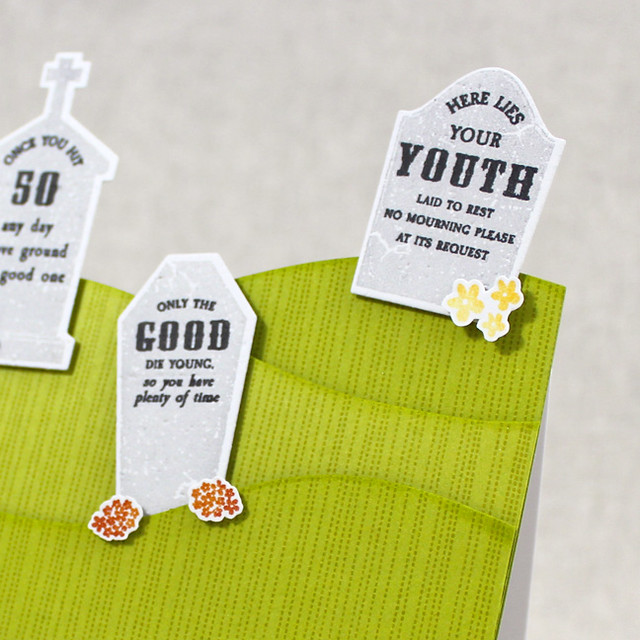
Over The Hill Graveyard Close Up 2

Next, I die cut three of the tombstones from Haunted Headstones and stamped them with the coordinating headstone images. Then, I added the "old-age" epitaphs from Haunted Headstones Sentiments using Versafine Onyx Black (it doesn't bleed and that's a good thing for the tiny type in this set).

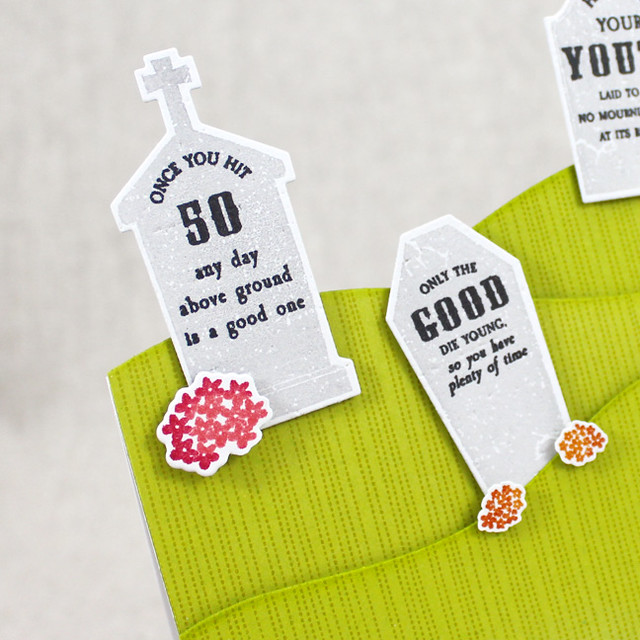
Over The Hill Graveyard Close Up 1

Obviously these sentiments wouldn't be ideal for everyone, but some folks may get a giggle (I can think of a few people that would love these). Know your audience. I attached the headstones to the card front with more coaster board and embellished with tiny flower clusters from Bitty Bouquets and Garden Variety II. The little pops of color keep the card from looking too bland.

That's it for me today! Make sure to check in with Nichole, Amy, Ashley, Betsy, Dawn, Heather, Laurie, Maile, and Melissa for more of today's group post. Erin also has more of her new Chicken Scratch patterned paper, so you won't want to miss that. I'll see you again tomorrow. Have a great day!

Recipes:
Happy Thanksgiving Card
Stamps: Brushed Off (available August 15th), Pumpkin Patch (available August 15th), Modern Wood Mats - Papertrey Ink
Cardstock: Classic Kraft, Rustic White, Terra Cotta Tile - Papertrey Ink
Ink: Terra Cotta Tile, Canyon Clay, Harvest Gold, Summer Sunrise, Classic Kraft, Dark Chocolate - Papertrey Ink
Other: Leaf Silhouettes Die (available August 15th), Button Up Die, Coaster Board, Rustic Cream Button Twine - Papertrey Ink; Wink Of Stella Pen
Happy New Home Card
Stamps: Brushed Off (available August 15th), Keep It Simple: Home (available August 15th), Tucked In: New Home (available August 15th), Little Bitty Bird Additions - Papertrey Ink
Cardstock: Simply Chartreuse - Papertrey Ink; white
Ink: Aqua Mist - Papertrey Ink; Tuxedo Black - Memento
Other: Branching Out Die (available August 15th), Little Bitty Bird Additions Die - Papertrey Ink; White Cord - May Arts; Copic Markers; Foam Tape - Scotch

XOXO Valentine Card
Stamps: Scribbled Sentiments (available August 15th) - Papertrey Ink
Cardstock: Twig Wreath Patterned Paper - Papertrey Ink; white
Ink: Sweet Blush, True Black - Papertrey Ink
Other: Cover Plate: Hearts Die - Papertrey Ink; Foam Tape - Scotch; Enamel Dots - Studio Calico

Over The Hill Graveyard Card
Stamps: Haunted Headstones (available August 15th), Haunted Headstones Sentiments (available August 15th), Bitty Bouquets, Garden Variety II, Ombre Builders - Papertrey Ink
Cardstock: Simply Chartreuse, Soft Stone - Papertrey Ink; white
Ink: Canyon Clay, Terra Cotta Tile, Berry Sorbet, Pure Poppy, Harvest Gold, Summer Sunrise, Simply Chartreuse - Papertrey Ink; Onyx Black - Versafine; VersaMark - Tsukineko
Other: Haunted Headstones Die (available August 15th), Coaster Board, In The Meadow Die, Sentiment Splits: Curve Vertical Die - Papertrey Ink; White Embossing Powder - Filigree

Tuesday, August 11, 2015

Papertrey Ink August Countdown - Day 2

Good morning, everyone! Welcome back for Day 2 of the August Papertrey Ink new release countdown! I'm back today sharing more of Pumpkin Patch and Scribbled Sentiments, but I'm also introducing Haunted Headstones. Nichole and Melissa will also be sharing more of Pumpkin Patch today, so you'll definitely want to check in with them. There's a lot to see today, so let's get started!

My first card pairs Pumpkin Patch with Betsy's new Quilted: Autumn set for a card simply bursting with fall style.

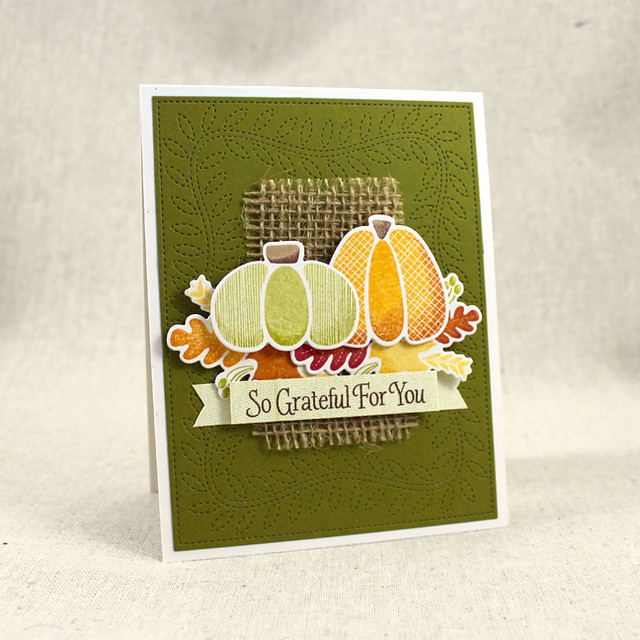
So Grateful For You Card

I began by adhering a Ripe Avocado Cover Plate: Stitched panel to a Rustic White card front and set that aside. Then, I die cut two of the leafy clusters from Quilted: Autumn and stamped those with the coordinating branches, varying the colors a bit from one to the other. Next, I die cut the two larger gourds from Pumpkin Patch and stamped them with their coordinating images, using the rock 'n roll technique to give a bit of depth.

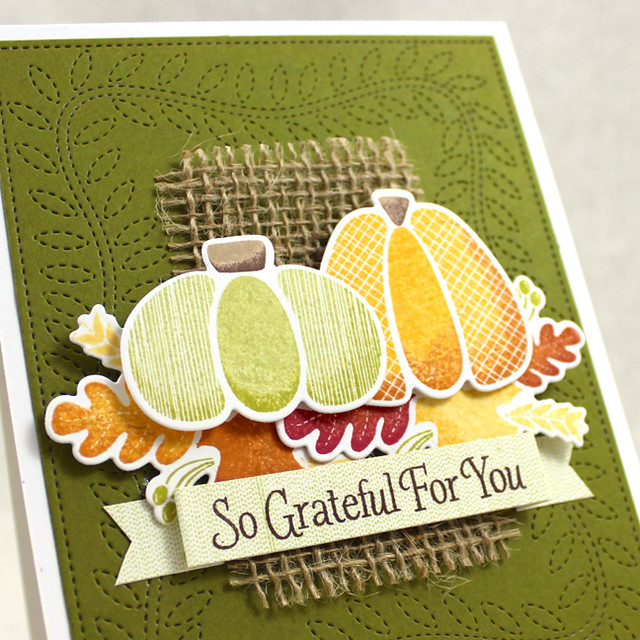
So Grateful For You Close Up

I created a sentiment banner from a strip of Rustic White cardstock and stamped it with one of the strips from Ombre Builders before adding my sentiment in Dark Chocolate. I trimmed the ends and added it to the card front with flat adhesive just on the ends. From there, I tucked a piece of burlap and the leafy clusters under the sentiment banner and added the pumpkins with foam tape. I also tucked a piece of foam tape under the sentiment banner for extra stability. It's more layering than I usually do, but I love the way it turned out.

My next card proves that Autumn can be bright, clean, and fresh.

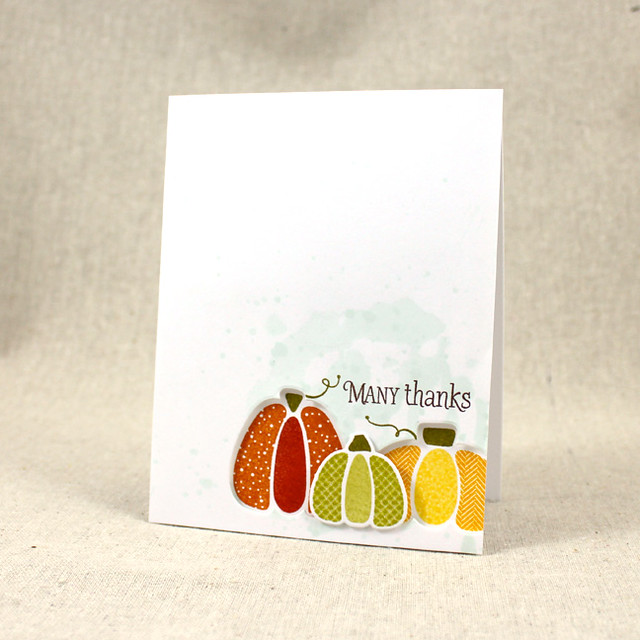
Many Thanks Card

I began by using a combination of smooshing and splatter to give a white panel a bit of dimension. Once that had dried, I die cut the two larger pumpkins out of the bottom right corner. I stamped on my sentiment and two of the tendril images and then used the panel as a guide for stamping my pumpkins onto a white card base.

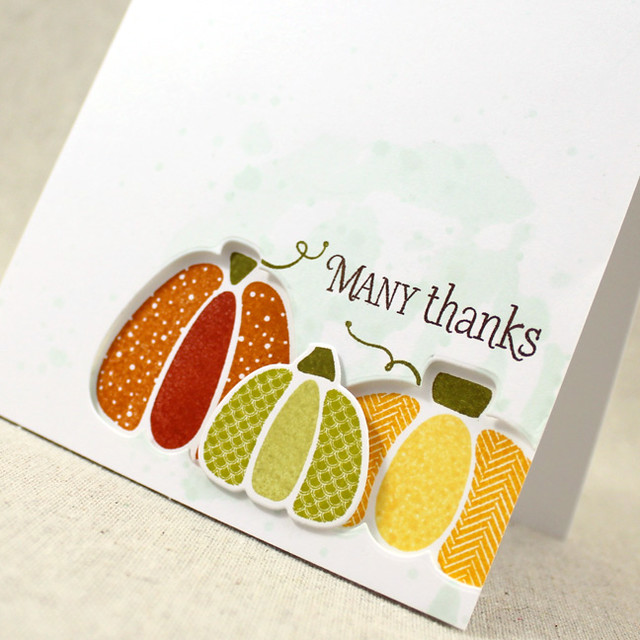
Many Thanks Close Up

I die cut the smallest pumpkin from white cardstock and stamped it with the coordinating image in Simply Chartreuse, Spring Moss, and Ripe Avocado inks. I adhered the top panel to the card front and layered on the small pumpkin, all using foam tape. I love how the ink splatters give an otherwise clean and simple, structured card a little hint of messy character.

Next up, we have one more with Scribbled Sentiments and it truly couldn't be easier.

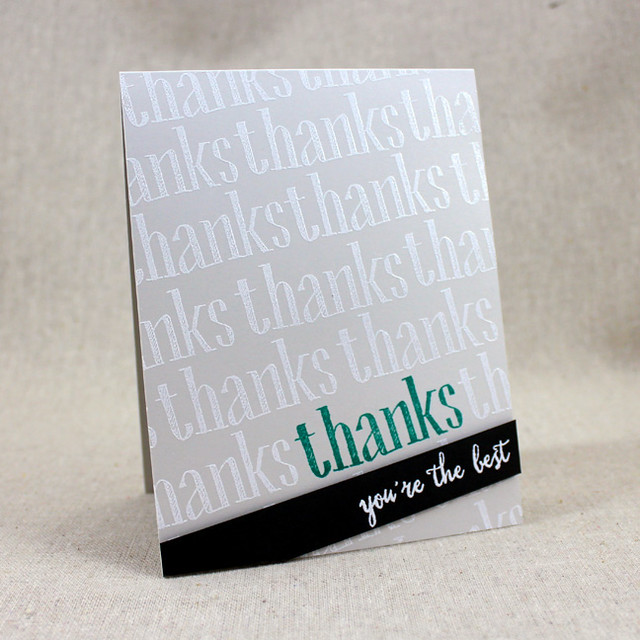
You're The Best Card

I began by stamping the "thanks" image onto a Soft Stone card base using Tropical Teal ink. Then, I followed up by stamping the same image repeatedly in VersaMark and sprinkling on white embossing powder. Tip: I would stamp a couple at a time and then sprinkle on my powder to make it easier to see where I had already stamped. Then at the end I heat embossed everything together.

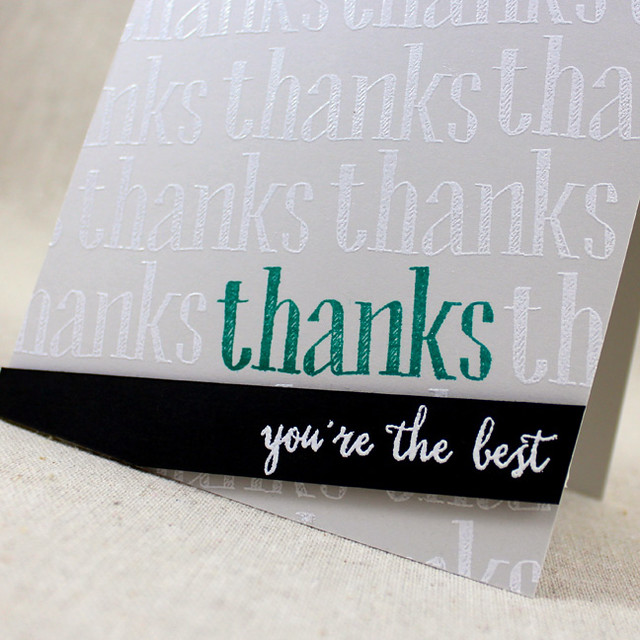
You're The Best Close Up

Next, I created a companion sentiment strip from True Black cardstock. I heat embossed the companion sentiment in white powder and adhered it to the card with foam tape. See. I told you it couldn't be easier. You could seriously whip up a huge batch of these in no time.

My final card today gives you a first look at Haunted Headstones. I have a sort of quirky sense of humor and I tried to let it out a little bit in this set. It won't be for everyone, but hopefully it will give some of you a chuckle (or at least a sly smirk). Anyway...

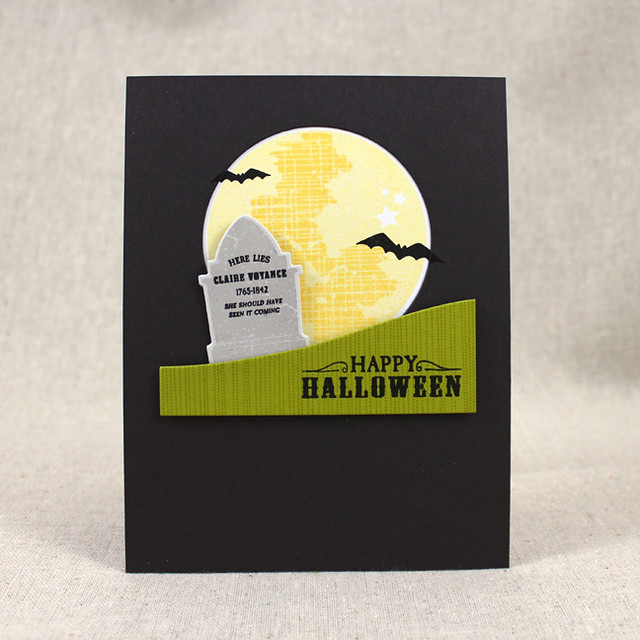
Claire Voyance Halloween Card

I began by die cutting a circle from a piece of Smokey Shadow cardstock. I stamped the moon from Full Moon in Lemon Tart and Harvest Gold inks onto a white card base in the negative space. Then I stamped the bats in True Black on both layers. Next, I die cut one of the headstones from Soft Stone and stamped the coordinating image in gray. I added the epitaph in True Black and adhered the headstone to the card front.

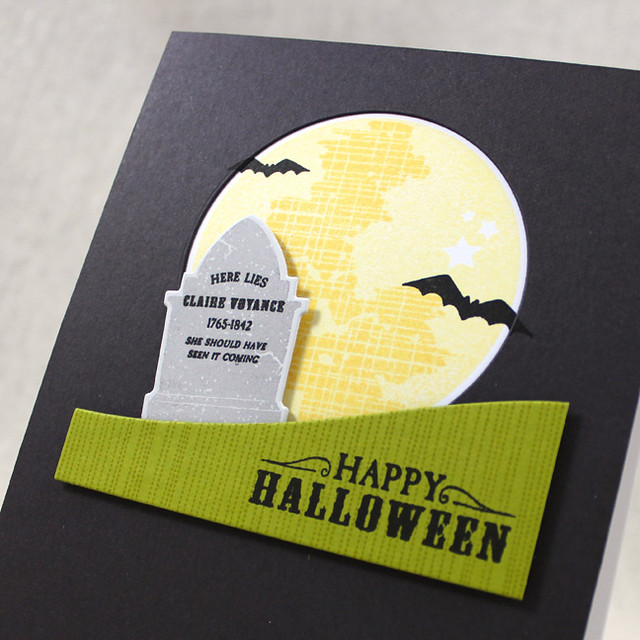
Claire Voyance Halloween Close Up

I die cut a Simply Chartreuse hill using the Cover Plate: Snow Drifts die (I trimmed off the tree) and stamped it with an Ombre Builders texture. The sentiment was added in True Black and the hill was added to the card front with foam tape. Nice and simple!

That's all for me today. Thank you so much for stopping by! Make sure to check in with Nichole, Amy, Betsy, Dawn, Heather, Melissa, and Erin for more of this month's release. I'll see you tomorrow!

Recipes:
So Grateful For You Card
Stamps: Pumpkin Patch (available August 15th), Quilted: Autumn (available August 15th), Ombre Builders - Papertrey Ink
Cardstock: Ripe Avocado, Rustic White - Papertrey Ink
Ink: Canyon Clay, Terra Cotta Tile, Spring Moss, Simply Chartreuse, Summer Sunrise, Harvest Gold, Ripe Avocado, Dark Chocolate, Classic Kraft - Papertrey Ink
Other: Pumpkin Patch Die (available August 15th), Quilted: Autumn Die (available August 15th), Burlap Craft Roll, Cover Plate: Stitched - Papertrey Ink; Foam Tape - Scotch

Many Thanks
Stamps: Pumpkin Patch (available August 15th) - Papertrey Ink
Cardstock: White
Ink: Canyon Clay, Terra Cotta Tile, Spring Moss, Simply Chartreuse, Summer Sunrise, Harvest Gold, Ripe Avocado, Dark Chocolate, Aqua Mist - Papertrey Ink
Other: Pumpkin Patch Die (available August 15th) - Papertrey Ink; Foam Tape - Scotch

You're The Best Card
Stamps: Scribbled Sentiments (available August 15th) - Papertrey Ink
Cardstock: Soft Stone, True Black - Papertrey Ink
Ink: Tropical Teal - Papertrey Ink; VersaMark - Tsukineko
Other: White Embossing Powder - Filigree; Foam Tape - Scotch

Claire Voyance Halloween Card
Stamps: Haunted Headstones (available August 15th), Full Moon, Ombre Builders - Papertrey Ink
Cardstock: Smokey Shadow, Soft Stone, Simply Chartreuse - Papertrey Ink; white
Ink: True Black, Lemon Tart, Harvest Gold, Simply Chartreuse - Papertrey Ink
Other: Haunted Headstones Die (available August 15th), Cover Plate: Snow Drifts Die - Papertrey Ink; Nested Circle Die - Quickutz; Foam Tape - Scotch

Monday, August 10, 2015

Introducing Scribbled Sentiments & Pumpkin Patch

Good morning, friends, and welcome to Day 1 of the Papertrey Ink August Countdown! We have so many fantastic new things to share with you this month (new releases will be available August 15th)! I'm kicking off today with two of my new sets, Scribbled Sentiments and Pumpkin Patch, but you'll definitely want to pop back in over the next few days as I introduce even more. Nichole and Heather are also sharing more of Scribbled Sentiments today, so you should absolutely pop over and see what they have up their sleeves this morning. How about we get on to a few projects, eh?

I wanted to start this morning with a little school-inspired card that I made with Scribbled Sentiments. Thanks to the handwritten nature of this set, it pairs perfectly with writing instruments and notebook paper!

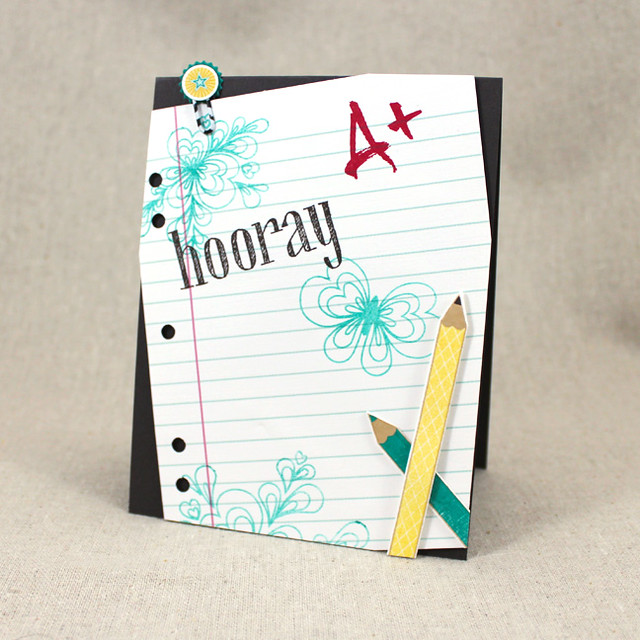
Honor Roll Hooray Card

I began by stamping the sentiment from Scribbled Sentiments onto a sheet of Pencil Me In patterned paper using Smokey Shadow ink. I wanted it to look like this could have been homework or something, so I stamped the A+ using the Wet Paint Alphabet with Pure Poppy ink. The "doodles" were stamped with the Quilled Elegance set in Tropical Teal that I'd softened by stamping off once.

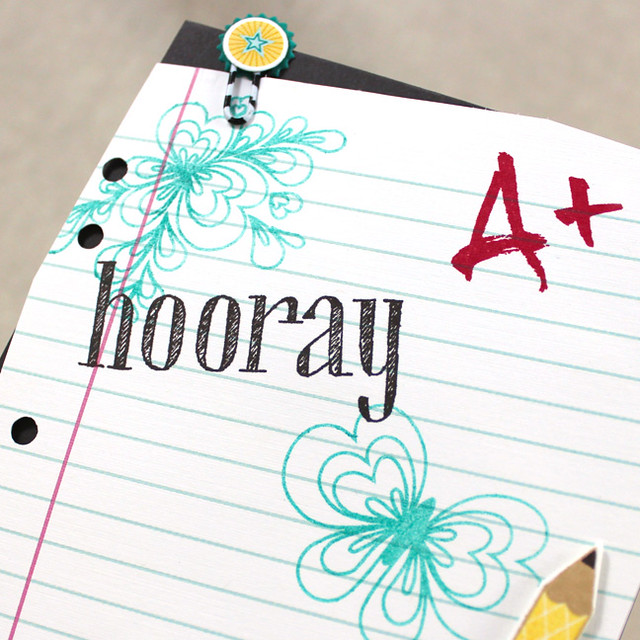
Honor Roll Hooray Close Up

I punched holes in the edge to make the panel look more like the real thing and then mounted it to a Smokey Shadow card base at an angle. I trimmed off the corners and added an embellished paper clip from the Clipsters Mini Kit. Then I die cut a couple of pencils and added those to the card front with a mix of flat and foam adhesives. The final result is an excellent first-day-of-school note or honor roll congratulations card for your favorite little scholar.

My next card using Scribbled Sentiments today is a totally colorful and cheerful birthday card.

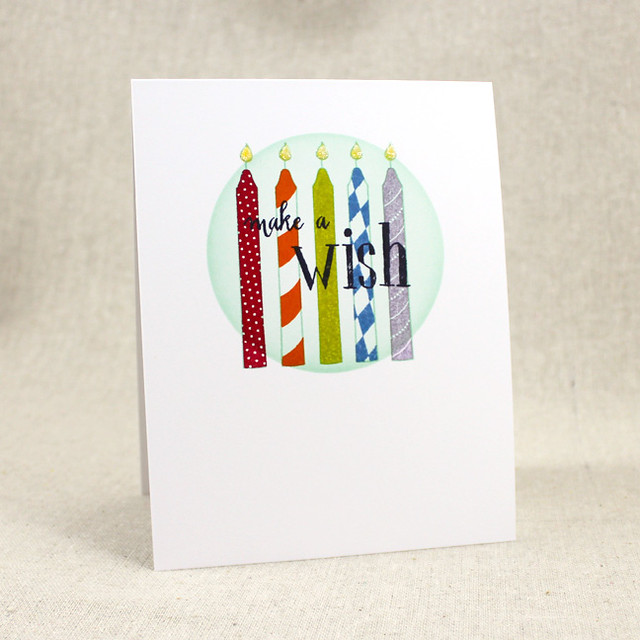
Make A Wish Card

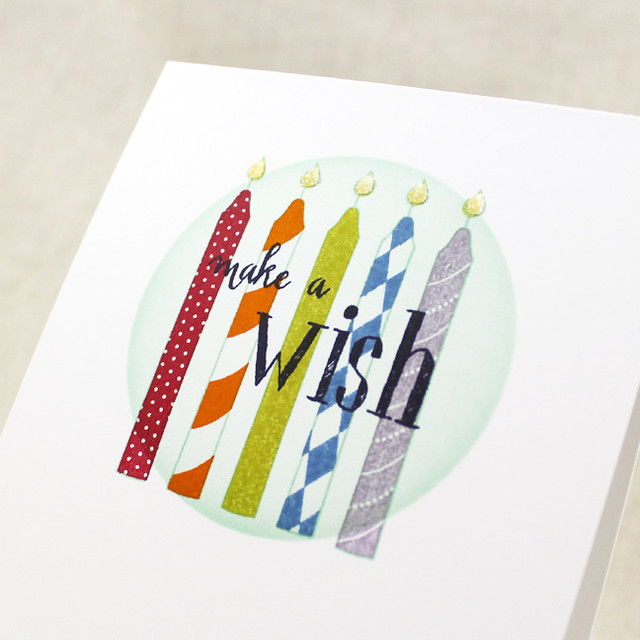
I began by masking off everything but a circle on the front of the card. I sponged Aqua Mist ink into the circle very lightly to create a highlighted area and then stamped the outline candle from Wishes Come True five times using Aqua Mist ink. I followed up by filling in the outlines with the patterned candles in the set using Pure Poppy, Orange Zest, Simply Chartreuse, Blueberry Sky, and Winter Wisteria inks.

Make A Wish Close Up

Then, I stamped the sentiment directly over top of the candles using True Black ink. The bold ink choice helps it pop against the bright colors. I finished the card by stamping the flames with Harvest Gold ink and embellishing them with crystal glitter for a bit of sparkle. I love the versatility of this new sentiment set! It truly covers so, so many occasions throughout the year.

My final project for today offers just a little taste of my new Pumpkin Patch set.

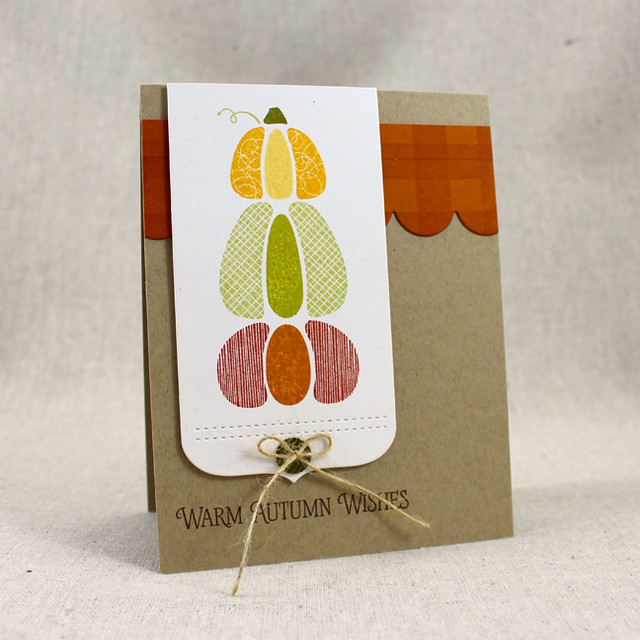
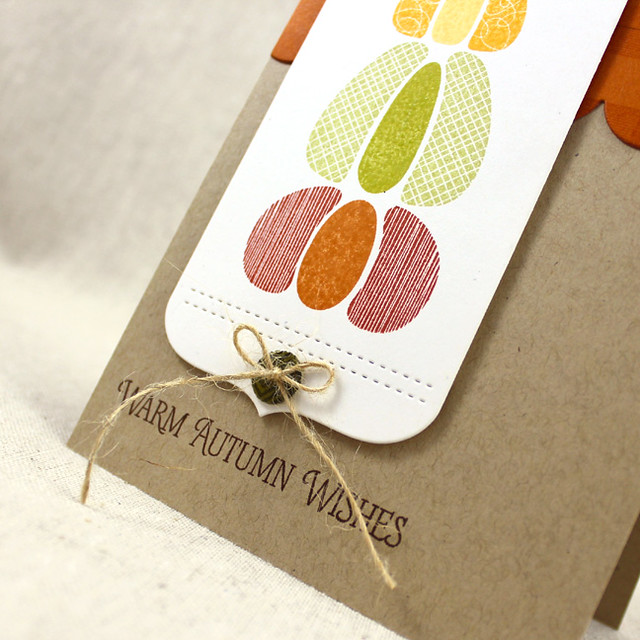
Pumpkin Stack Card

I set out to create a stack of pumpkins, like the ones I often see decorating porches during the fall. I began by die cutting a Basic Bookmark #2 from Rustic White cardstock.

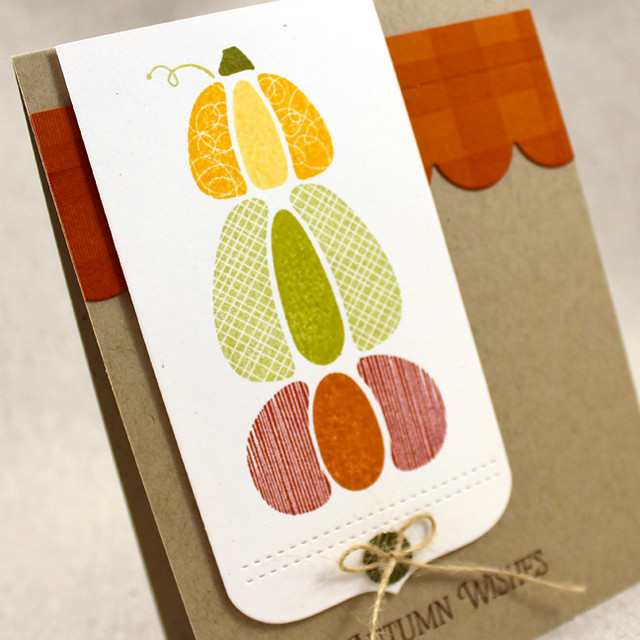
Pumpkin Stack Close Up 1

I stamped my pumpkins in a stack using Canyon Clay, Terra Cotta Tile, Spring Moss, Simply Chartreuse, Summer Sunrise, Harvest Gold, and Ripe Avocado inks. Then, I stamped a scalloped piece of Canyon Clay with a background from Autumn Pattern Pieces and adhered it to a Classic Kraft card base.

Pumpkin Stack Close Up 2

I embellished my pumpkin piece with a Ripe Avocado handmade paper button and mounted it to the card front with foam tape. The finishing touch was the sentiment, also from Pumpkin Patch, stamped in Dark Chocolate ink. I love Autumn crafting, don't you?

I'll be back tomorrow with more of this month's new release. I'll see you then, but in the meantime make sure to check in with Nichole, Betsy, Dawn, Heather, Maile, and Erin today. You won't want to miss a single post! Catch you tomorrow!

Recipes:
Honor Roll Hooray Card
Stamps: Scribbled Sentiments (available August 15th), Wet Paint Alphabet, Quilled Elegance, Pencil Me In - Papertrey Ink
Cardstock: Pencil Me In Patterned Paper Pad, Smokey Shadow, Fresh Snow Linen - Papertrey Ink
Ink: Smokey Shadow, Tropical Teal, Pure Poppy, Classic Kraft, Harvest Gold - Papertrey Ink
Other: Clipsters Mini Kit, Pencil Me In Die - Papertrey Ink; Foam Tape - Scotch

Make A Wish Card
Stamps: Scribbled Sentiments (available August 15th), Wishes Come True - Papertrey Ink
Cardstock: White
Ink: Aqua Mist, Pure Poppy, Orange Zest, Simply Chartreuse, Blueberry Sky, Winter Wisteria, True Black - Papertrey Ink
Other: Fine Crystal Glitter - Martha Stewart Crafts; Mini Blending Tool - Ranger; glue pen

Warm Autumn Wishes Card
Stamps: Pumpkin Patch (available August 15th), Autumn Pattern Pieces, Bitty Background Blocks II - Papertrey Ink
Cardstock: Classic Kraft, Rustic White, Canyon Clay, Ripe Avocado - Papertrey Ink
Ink: Canyon Clay, Terra Cotta Tile, Spring Moss, Simply Chartreuse, Summer Sunrise, Harvest Gold, Ripe Avocado, Dark Chocolate - Papertrey Ink
Other: Basic Bookmark #2, Button Stacks Die, Coaster, Rustic Jute Button Twine - Papertrey Ink; Foam Tape - Scotch; plastic wrap; Xyron