

Friday, November 29, 2019
Festive Friday...on Saturday?

Friday, November 22, 2019
Festive Friday - Gable Box & Tag Team Tag Ensemble
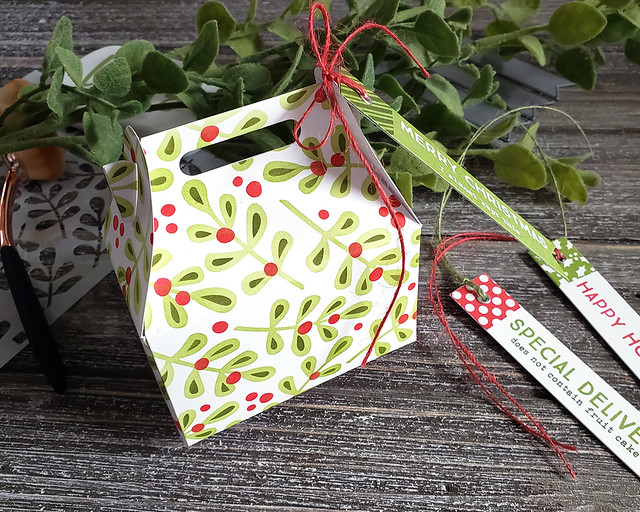

I used the stencil to decorate a gable box that I cut from white cardstock. I'm totally smitten with that pattern, aren't you?! Then, I cut tags from Cherry Kisses and Leafy cardstocks and stamped them with greetings from Heather's set. I made the tags double-sided with one side being white and the other being colorful for a nice contrast.
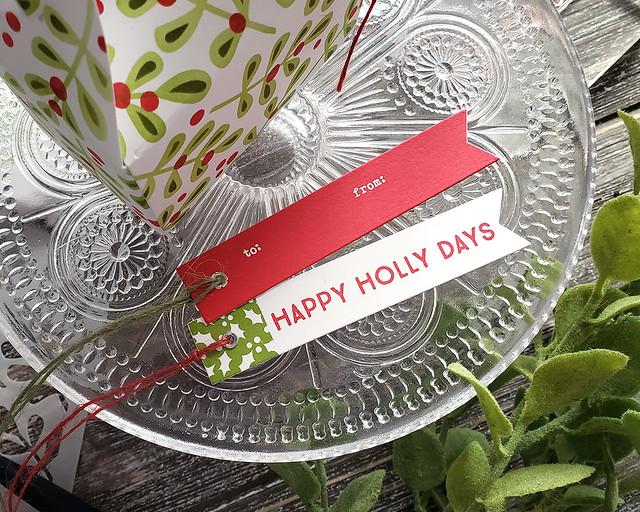
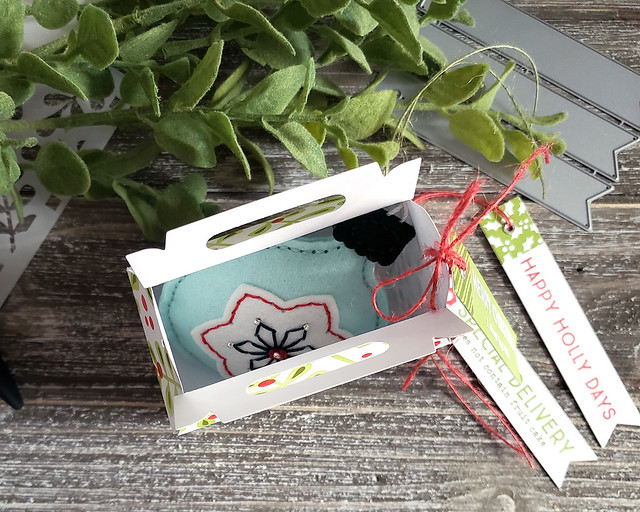
Heather's kit came with candy cane striped twine, but it wasn't exactly the right tone of red to go with the Cherry Kisses, so I used some red and green twines I happened to have on hand. I also discovered while playing around with the gable box that it's the perfect size for the round Heirloom Ornaments I designed last year, too, so now I have another option for gifting those. Bonus!
I hope you've enjoyed today's project! Have a fantastic weekend and I'll see you all again next week for another Festive Friday!
Supplies:
Gable Box & Tag Team Tag Ensemble
Thursday, November 21, 2019
We're Pining For New Botanicuts, Winter Sketches, and More From The Greetery
Good morning, friends! Today is the second introduction day for the new products coming your way from The Greetery. Day 2 is just as exciting as Day 1, so hold on to your hats!
If you were a fan of the previously released seasonal Sketches sets, the Winter Sketches set is sure to be a joy! These pine boughs are totally gorgeous and they make for quite a striking focal point.

I began by die cutting a Nordic Frames shape and trimming it at an angle to create a decorative panel. I stamped the sentiment from last month's Tree Trimmings stamp set. Then, I backed the panel with red cardstock to add a little contrast behind the die cut openings.
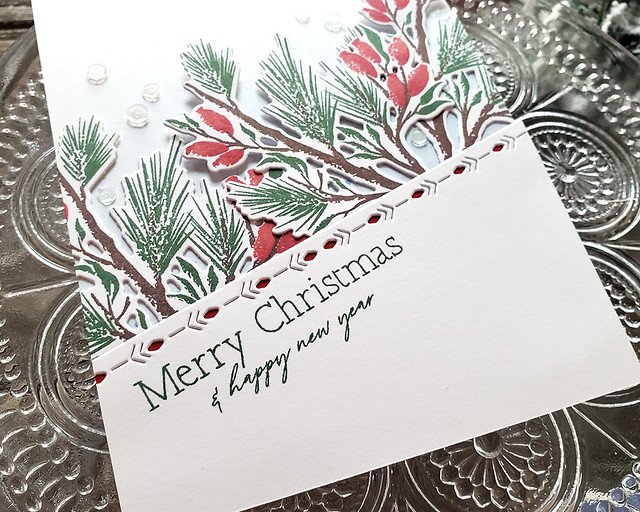
Next, I sponged a white card base with Slumber ink to give a little atmosphere and attached the decorative sentiment panel with foam tape. Then, I tucked three of the Winter Sketches branches below the sentiment panel, giving a nice, full appearance.

A few clear sequins were the perfect embellishment for adding a little shimmer and texture without introducing another color. The result is a frosty holiday card pulled right from nature.
Next up, I have a card made pairing the new Budding Beauties stamp set with the new Fit To Be Tied die.
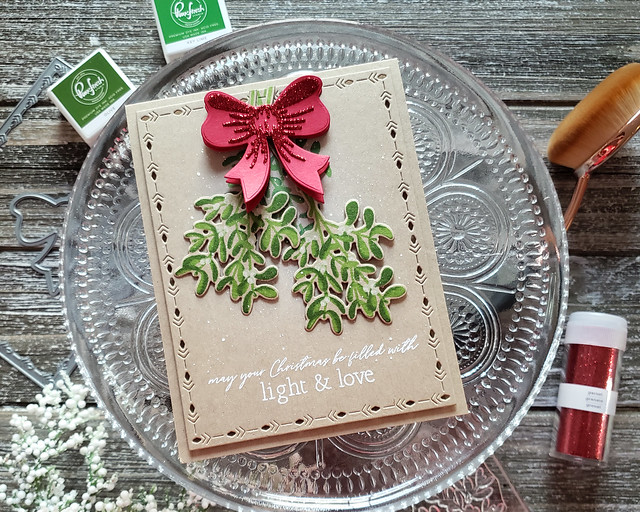
I wanted to use the mistletoe image to create a "kissing ball" on my card. Since the mistletoe berries are white in real life, I decided to stamp on Kraft cardstock. But quite honestly, these images would look lovely with a little creative license applied so go forth and create pink, red, yellow, whatever-color-your-heart-desires berries instead.

I sponged and sprinkled a bit of white ink onto a Nordic Frames shape and then heat embossed my sentiment before stamping one of the mistletoe images. I stamped and die cut two additional mistletoe sprigs and attached them to the panel before adhering that whole piece to a Kraft card base with foam tape.
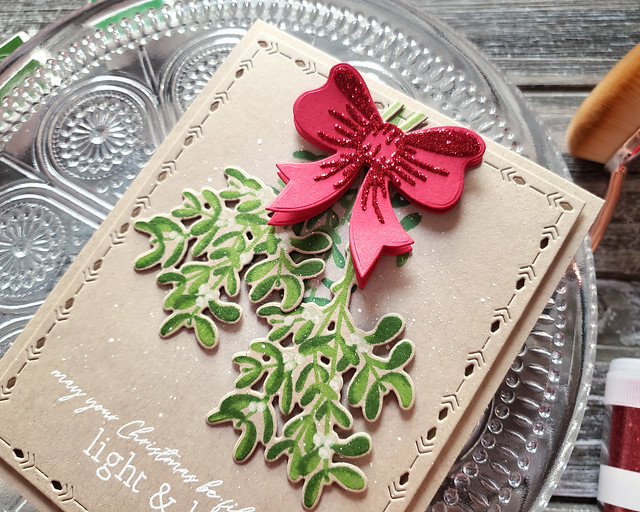
No kissing ball is complete without a bright red bow, so I used the new Fit To Be Tied die to finish things off in festive fashion. I layered two of the solid bows with foam tape and topped things off with a glittered bow detail. I couldn't be more tickled! Maybe I'll just hang this card in a doorway instead of getting the real thing!
Last up, I have a winter card pairing that same Fit To Be Tied bow with the Botanicuts Pine Bough. I wanted to use the same bow to show how it can be used through the seasons for more than just holiday projects.

I began by die cutting the Botanicuts pieces and sponging them with Spruce and Gathered Twigs inks for a bit of depth. I used the Copic Opaque White Pigment on the pinecone pieces to give them a slightly snowy appearance and assembled the pinecone.

I stamped the sentiment from Pine Blossom onto a Nordic Frames shape and attached it to a Kraft card base that I had stenciled with the Knit Wits pattern. Then, I attached the pine boughs and pinecone.
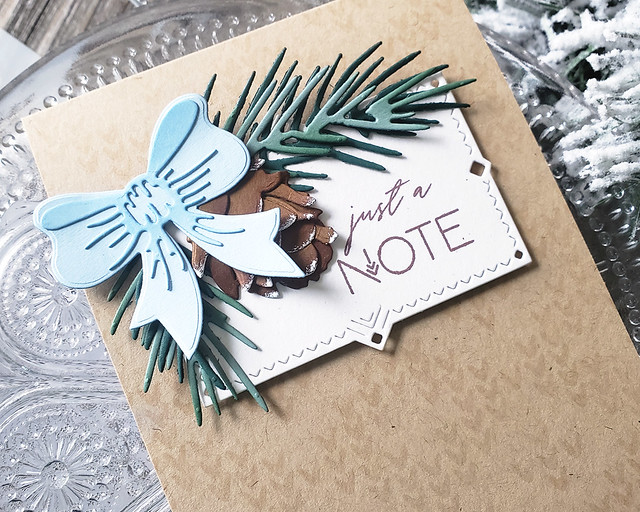
Next, I die cut the bow. This time, I just used one solid bow along with the detail die. And instead of glitter, I used sponging to give the detail die contrast. Those simple changes take the bow from an over-the-top-sparkling-holiday embellishment to everyday adornment. Don't you love a die that can do double duty?!
Well, that's it for my projects for the mini release from The Greetery. Thank you so much for joining me! Make sure to pop in on these lovely ladies to see more of what this month's release has to offer:
Now, a few quick thoughts about the Pinkfresh inks. In short, I really like them. They stamped crisply and cleanly, gave great coverage, and the inks in each color family work really well together. Not all of the inks cleaned off of my stamps easily, but that's something I expect from most inks these days regardless of brand (especially the reds and pinks). Using a stamp cleaner solution (like Ultra Clean) helps minimize staining. One thing I wasn't hugely fond of is the ease of use of the cubes, but that's not specific to the Pinkfresh inks. Some lids were really tight and I had a hard time getting a handful of them open. Inevitably, I lost my grip on a couple of them and they went flying. Luckily, no projects were harmed. Again, this is not a Pinkfresh issue. I'm sure there are some colors that I will gravitate to more often and I will probably order those colors in full pad sizes at some point. I would have no hesitation suggesting trying out these inks if you have a gap in your collection that you haven't been able to fill. It may seem crazy considering they just released 48 colors, but I, for one, would really love to see a family of more yellow-y greens. These inks are going to make layering stamps even easier and more fun to use.
Thanks again for joining me for The Greetery's mini release. All of the new products will be available on The Greetery's website at 10am ET tomorrow, November 22nd. I'll be back tomorrow with a Festive Friday post, so I hope to see you again soon! Take care!
Supplies:
Merry Christmas Card
Light & Love Card
Just A Note Card
If you were a fan of the previously released seasonal Sketches sets, the Winter Sketches set is sure to be a joy! These pine boughs are totally gorgeous and they make for quite a striking focal point.
Next up, I have a card made pairing the new Budding Beauties stamp set with the new Fit To Be Tied die.
Last up, I have a winter card pairing that same Fit To Be Tied bow with the Botanicuts Pine Bough. I wanted to use the same bow to show how it can be used through the seasons for more than just holiday projects.
Well, that's it for my projects for the mini release from The Greetery. Thank you so much for joining me! Make sure to pop in on these lovely ladies to see more of what this month's release has to offer:
Now, a few quick thoughts about the Pinkfresh inks. In short, I really like them. They stamped crisply and cleanly, gave great coverage, and the inks in each color family work really well together. Not all of the inks cleaned off of my stamps easily, but that's something I expect from most inks these days regardless of brand (especially the reds and pinks). Using a stamp cleaner solution (like Ultra Clean) helps minimize staining. One thing I wasn't hugely fond of is the ease of use of the cubes, but that's not specific to the Pinkfresh inks. Some lids were really tight and I had a hard time getting a handful of them open. Inevitably, I lost my grip on a couple of them and they went flying. Luckily, no projects were harmed. Again, this is not a Pinkfresh issue. I'm sure there are some colors that I will gravitate to more often and I will probably order those colors in full pad sizes at some point. I would have no hesitation suggesting trying out these inks if you have a gap in your collection that you haven't been able to fill. It may seem crazy considering they just released 48 colors, but I, for one, would really love to see a family of more yellow-y greens. These inks are going to make layering stamps even easier and more fun to use.
Thanks again for joining me for The Greetery's mini release. All of the new products will be available on The Greetery's website at 10am ET tomorrow, November 22nd. I'll be back tomorrow with a Festive Friday post, so I hope to see you again soon! Take care!
Supplies:
Merry Christmas Card
Light & Love Card
Just A Note Card
Wednesday, November 20, 2019
Winter's In Bloom With Pretty New Products From The Greetery
Good morning, friends! Today I'm excited to share a batch of beautiful new goodies from The Greetery. This month's release is a mini collection, but that doesn't mean it's lacking in fabulousness - not at all! You're going to love the crafty goodness coming your way!
One of the sets releasing this month is called Pine Blossom and it is absolutely gorgeous! And maybe my favorite part is that the foliage can look like pine boughs or cosmos foliage, so you can use it any time of year! I tried out several different color variations while playing with this set and I'm totally going to use these stamps well into spring and beyond!

I also used a new set of die cut frames coming this month called Nordic Frames on this sweet thank you card. I began by die cutting the center panel from a card front. Then, I clear embossed a woodgrain pattern on the outer frame. The result is super subtle, but the texture is lovely. I attached that to a mint-colored card base and set it aside.

Next, I stamped the sentiment from Pine Blossom onto the Nordic Frame and adhered it to the card base with foam tape. I love that the color of the card base peeks out from the tiny diamond negative cuts on the frame.
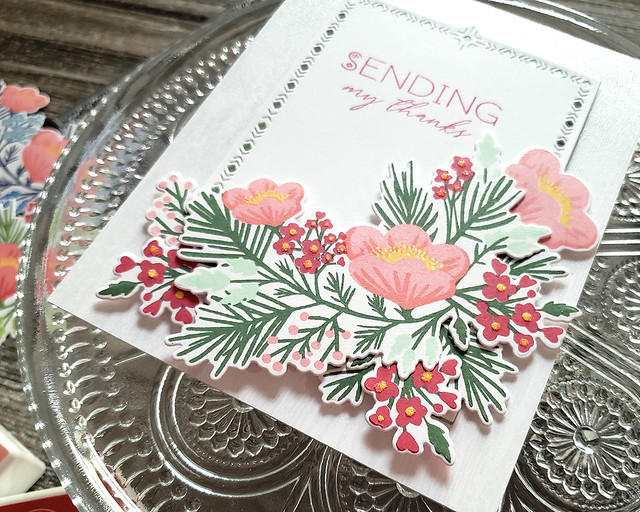
Then, I stamped and assembled my floral swath. I used the large bouquet to built the majority of the design and then used the smaller sprigs and individual flowers in the set to add fullness and shape. I also embellished the tiny flowers with small spots of clear glitter for sparkle. Betsy's design makes it so easy to create something quick and easy or more involved, depending on what you need in the moment. It's so handy!
My second card uses the new Berry Branch Stencil and Inside & Out Berry Branch Die. The Inside & Out die is super clever! In one pass you are able to die cut several leafy and berry branches along with a beautifully delicate outline shape. I've used the solid parts on my card and the outline on my final project below.
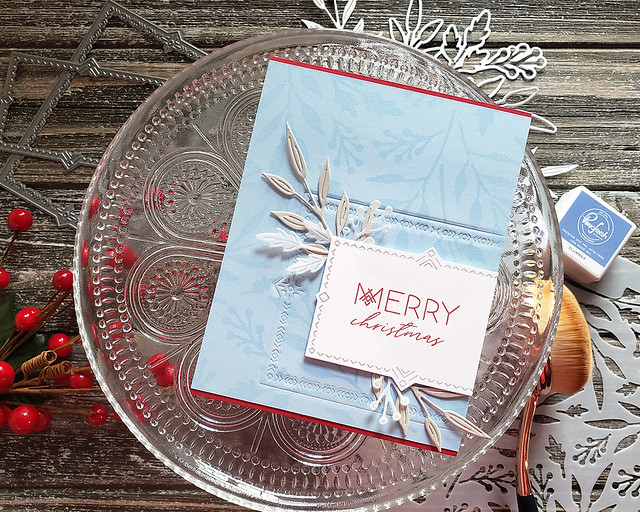
For this card, I wanted to create a Christmas card with a Scandinavian vibe, so I went with a frosty blue and silver scheme with a bold pop of red. I really think it fits the bill! I began by blending Slumber ink through the new Berry Branch stencil. I've always been fond of a botanical background and this one is no exception. It's super versatile and I can see it being useful year round depending on the color palette.

Next, I used the middle Nordic Frames shape to impress a design into the blue panel. I embellished the top and bottom of that panel with strips of bold red cardstock and adhered the whole shebang to a crisp white card base. Then, I die cut the smallest Nordic Frames shape and stamped it with a sentiment from Pine Blossom.

I trimmed off one side of the sentiment panel and mounted it to the card front with foam tape. Then, I used silver and vellum leafy branches to embellish the sentiment. They add dimension without packing on loads of volume, making the card easy to mail. I always appreciate an easy-to-mail option!
Last up, I have a handful of tags to share. You remember that totally ingenious Speed Tagging collection that came out last month? Well, prepare to be thrilled! Betsy is releasing Speed Tagging Prints paper to make your holiday tags even easier! Each pack includes two pages each of three separate patterns so you have tons of beautiful designs from which to choose.
I die cut one of each of the sheets and picked a handful to embellish with some quick stamping and die cuts.

I loved this dark, floral tag, but I didn't want to have to bother with heat embossing, so I simply stamped my "To:" and "From:" on die cut banners and added them to the tag with foam tape (if you're going to do something like this, I suggest dimensional adhesive that will give you full coverage to make writing later easier).
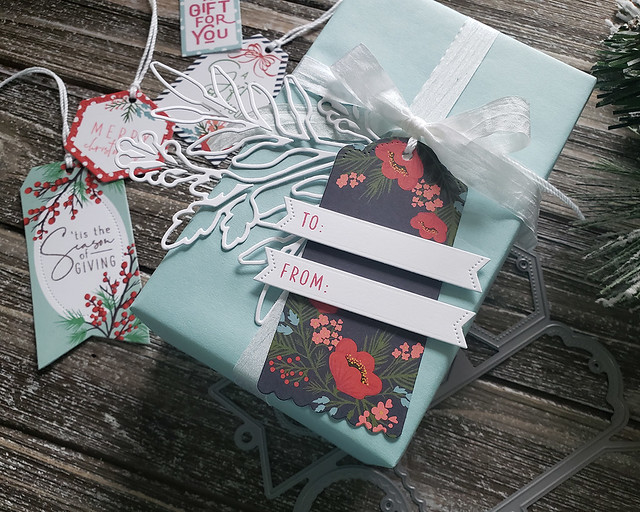
I wanted to amp up the botanical angle, so I took an Inside & Out Berry Branch die cut and tied it to the back of the tag with my crochet thread. Not using any adhesive allows the branch to move freely as the tag moves on my package.
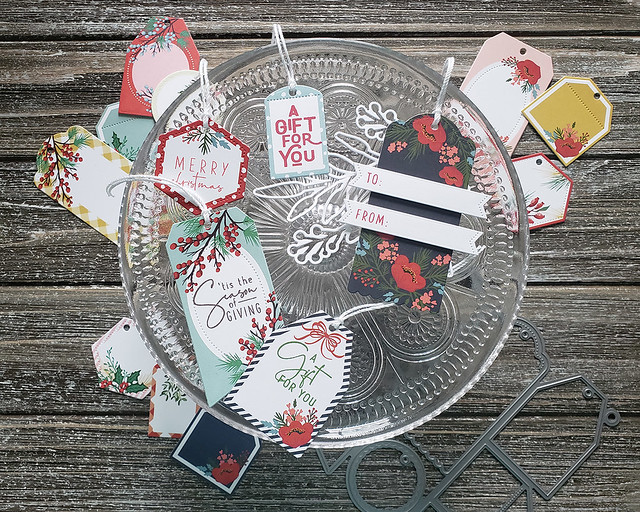
I used the Speed Tagging Christmas Sentiments set to add messages to the rest of my stamped tags. These patterned papers and that sentiment set together are a recipe for success when it comes to those last-minute tags. I'm super grateful to have them in my arsenal this holiday season!
One other quick note about my projects in the next couple of days: I was super fortunate to win a full set of the new Pinkfresh ink cubes recently. I've had several people ask about them and whether I like them, so I decided to dedicate this release to getting to know these inks. I used them almost exclusively on my projects (the only exceptions were specialty inks like Versamark and white pigment). I'll make sure to share my thoughts at the end of tomorrow's post.
Thank you so much for joining me today! Make sure to pop in on these lovely ladies to see how they're using this month's mini release to celebrate winter and I'll see you back here again tomorrow!
Supplies:
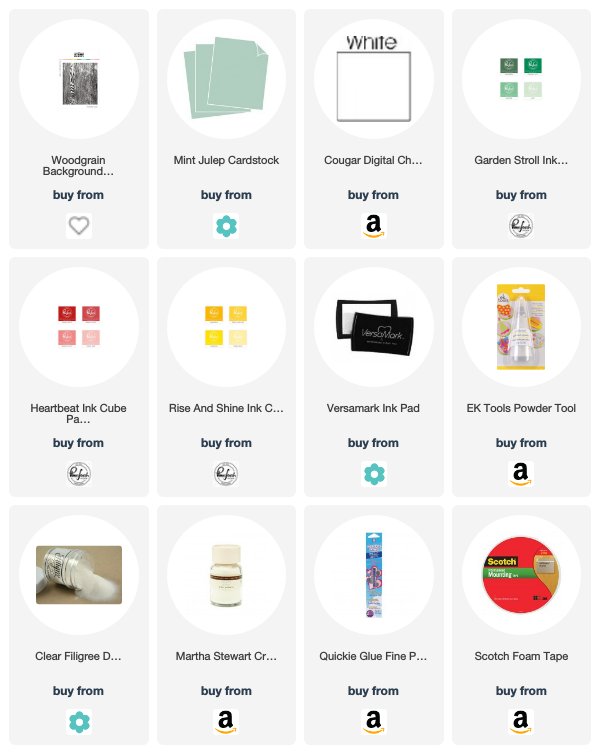
Merry Christmas Card
Speed Tagging Christmas Tags
One of the sets releasing this month is called Pine Blossom and it is absolutely gorgeous! And maybe my favorite part is that the foliage can look like pine boughs or cosmos foliage, so you can use it any time of year! I tried out several different color variations while playing with this set and I'm totally going to use these stamps well into spring and beyond!
Next, I stamped the sentiment from Pine Blossom onto the Nordic Frame and adhered it to the card base with foam tape. I love that the color of the card base peeks out from the tiny diamond negative cuts on the frame.
My second card uses the new Berry Branch Stencil and Inside & Out Berry Branch Die. The Inside & Out die is super clever! In one pass you are able to die cut several leafy and berry branches along with a beautifully delicate outline shape. I've used the solid parts on my card and the outline on my final project below.
Last up, I have a handful of tags to share. You remember that totally ingenious Speed Tagging collection that came out last month? Well, prepare to be thrilled! Betsy is releasing Speed Tagging Prints paper to make your holiday tags even easier! Each pack includes two pages each of three separate patterns so you have tons of beautiful designs from which to choose.
I die cut one of each of the sheets and picked a handful to embellish with some quick stamping and die cuts.
I wanted to amp up the botanical angle, so I took an Inside & Out Berry Branch die cut and tied it to the back of the tag with my crochet thread. Not using any adhesive allows the branch to move freely as the tag moves on my package.
One other quick note about my projects in the next couple of days: I was super fortunate to win a full set of the new Pinkfresh ink cubes recently. I've had several people ask about them and whether I like them, so I decided to dedicate this release to getting to know these inks. I used them almost exclusively on my projects (the only exceptions were specialty inks like Versamark and white pigment). I'll make sure to share my thoughts at the end of tomorrow's post.
Thank you so much for joining me today! Make sure to pop in on these lovely ladies to see how they're using this month's mini release to celebrate winter and I'll see you back here again tomorrow!
Sending My Thanks Card
Merry Christmas Card
Speed Tagging Christmas Tags
Friday, November 15, 2019
Festive Friday - Glittered Pocket Tags
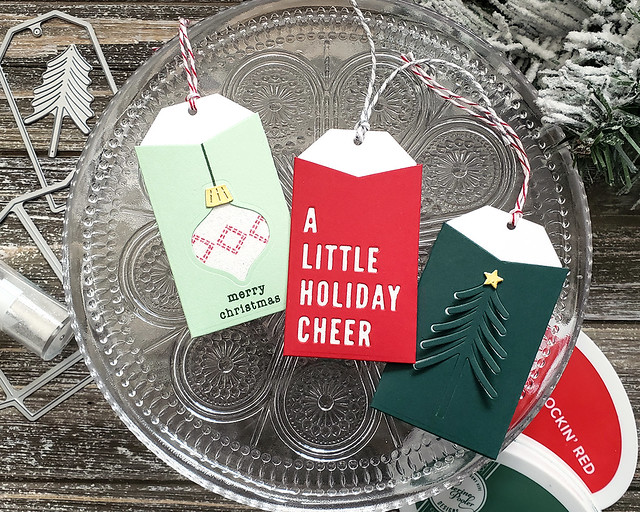
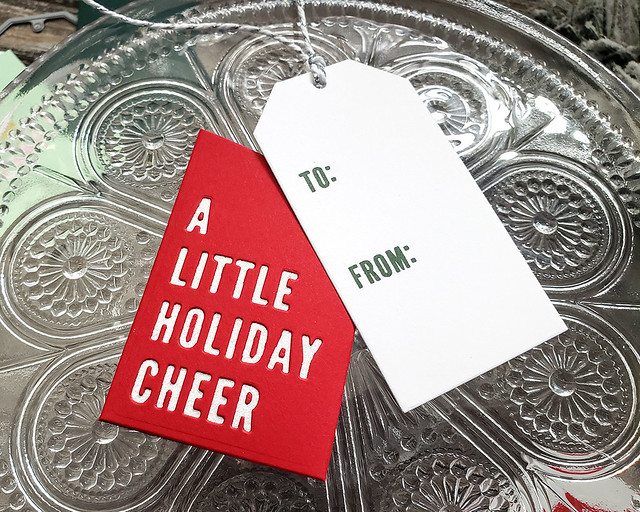
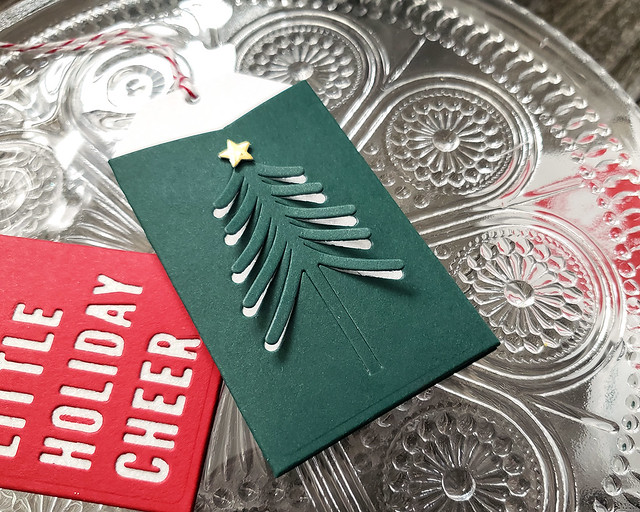
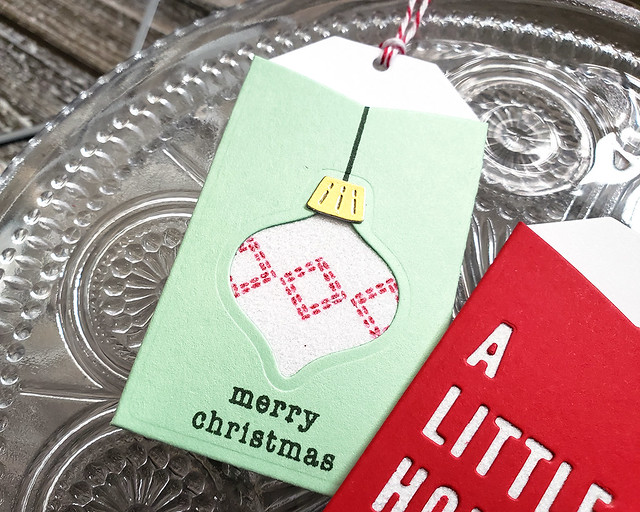
Thank you so much for joining me today! I hope you've enjoyed this week's Festive Friday! Have a wonderful, crafty weekend!
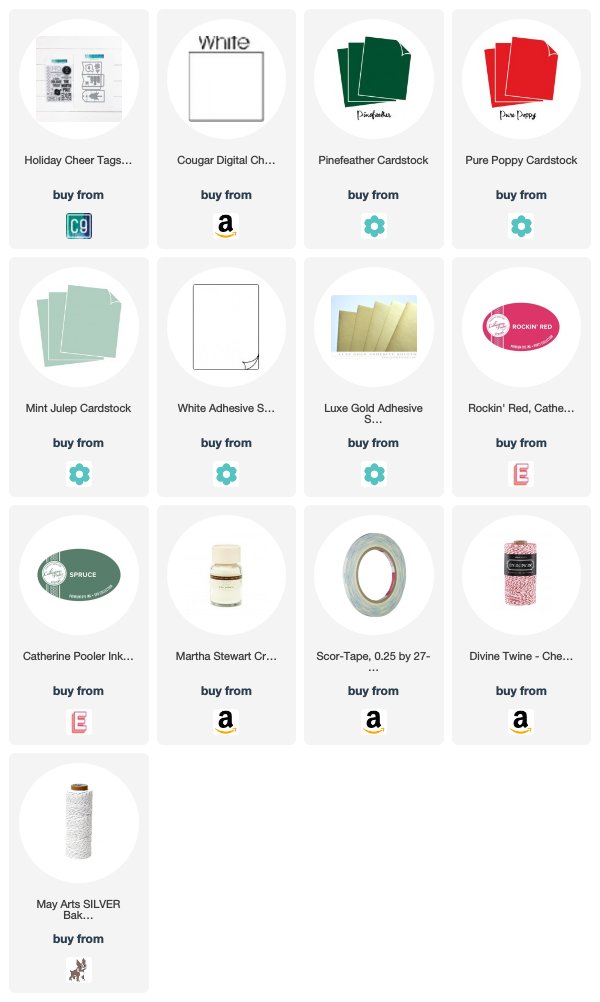
Supplies:
Glittered Pocket Tags
Subscribe to:
Posts (Atom)