Tuesday, October 13, 2015

Winter Florals

Good morning, everyone and welcome back for Day 4 of the Papertrey Ink October Countdown! Today we're sharing a handful of new products that showcase wintery foliage. The flowers and leaves available in the wintertime are some of my very favorites. I eagerly look forward to holly, evergreen boughs, and poinsettias every year. The stamps and dies we're featuring today are the perfect way to incorporate that gorgeous, seasonal greenery into your holiday projects. Let's get to it!

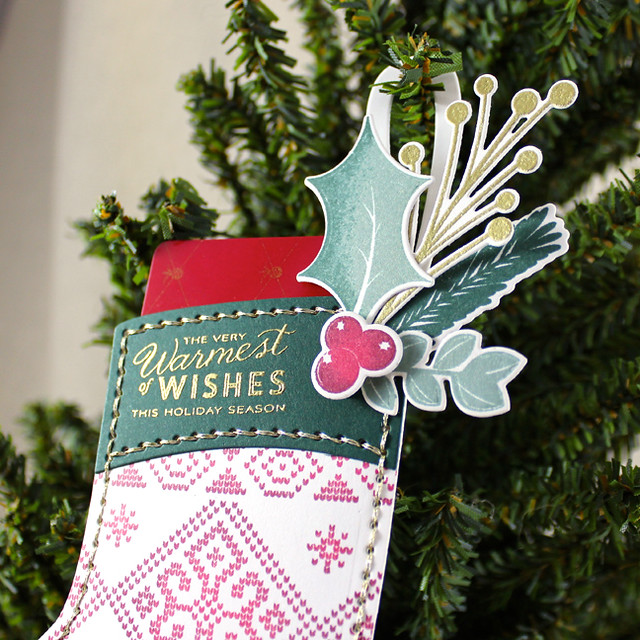
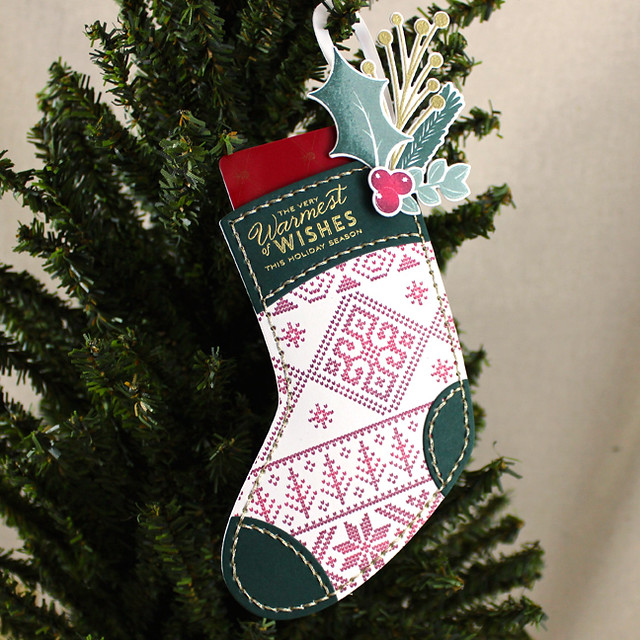
Today's first project is a gift card holder that I created using the stocking die from the Quick Stitch Beaded Holiday Kit (it's still available for now). The die paired beautifully with Dawn's new Spruce & Sprigs set and my new Fair Isle Borders set.

Fair Isle Stitched Stocking

I began by die cutting the stocking body and hanger out of Rustic White cardstock. I stamped it with my new Fair Isle Borders set by inking the strips in Pure Poppy ink and then rocking the edges with Scarlet Jewel. That deepened the color a bit and gave the borders fantastic dimension.

Stocking Cuff Close Up

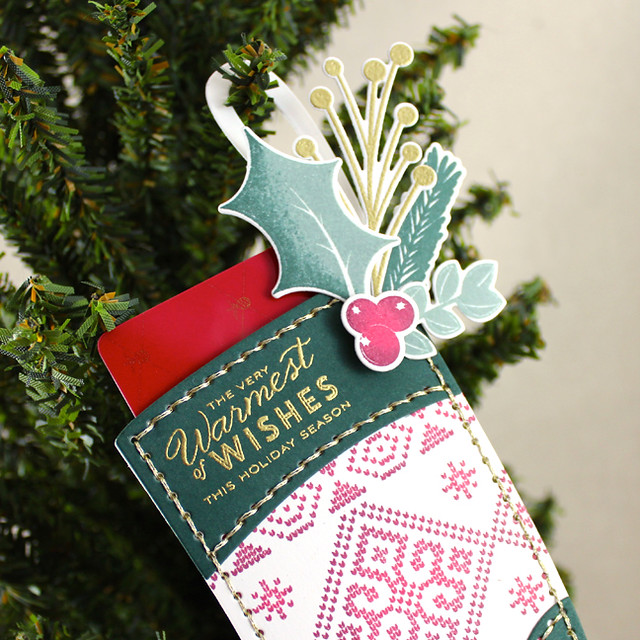
Next, I die cut the cuff and other detail pieces from Pinefeather cardstock. I stamped the sentiment onto the cuff and heat embossed with gold detail powder. I stitched the stocking together with gold embroidery floss and set it aside while I die cut and stamped my foliage.

Stitched Stocking Close Up

I used Pinefeather, Ocean Tides, Pure Poppy, Scarlet Jewel, and gold heat embossing to give the branches and berries a lush, rich appearance. I layered the branches and adhered them to the stocking with flat adhesive. The berries were then added with foam tape for added depth. I absolutely love how this turned out and I foresee a few more of them in my crafting future.

Next up is the coordinating stitched tag.

Christmas Pocket Tag

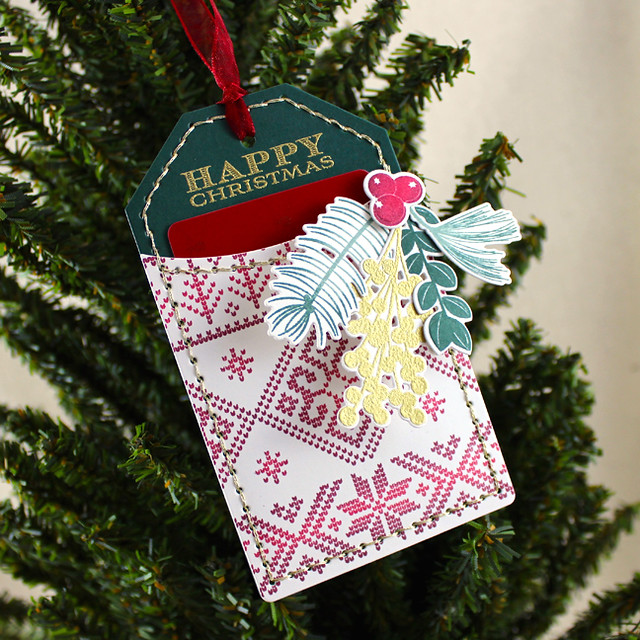
I wanted to create another gift card holder, this time with the Stitched Tag Die. We're giving so many gift cards at the Christmas these days that I like to have a little variety in my presentation while maintaining a similar feel.

Christmas Pocket Tag Close Up

I used the same basic materials on this tag, just swapping out the sentiment and a few of the branches. Can't you just see a handful of these hanging in the tree on Christmas morning. Wouldn't that be festive?!

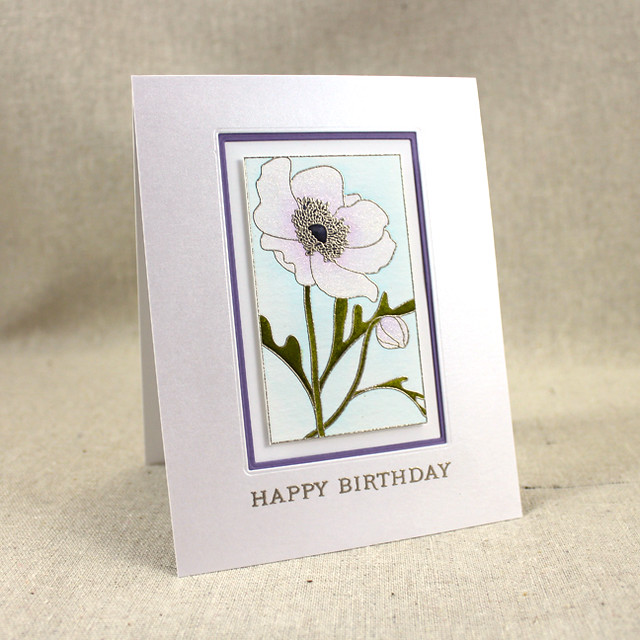
On to a winter birthday card! My sister's birthday is just a few days before Christmas, so I thought I would use the new Botanical Blocks III set to make her a seasonally appropriate birthday card that didn't scream "Look at me! I'm a Christmas Card!"

Birthday Anemone Card

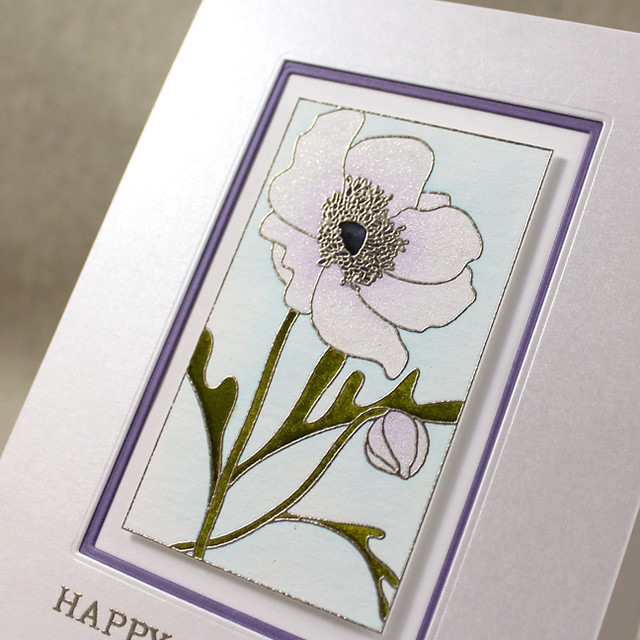
I began by heat embossing the anemone image onto watercolor paper using Liquid Platinum embossing powder. Then, I colored the flower with Zig markers and a water brush. I was aiming to replicate the anemone variety that is ever-so-slightly pale purple near the base of the petals with a dark, blackish-purple center. Once it had dried, I colored over the flower petals with a clear Wink of Stella pen to make the whole thing shimmer.

Birthday Anemone Close Up

Next, I used the new Botanical Blocks Basics dies to create an aperture in layers of White Shimmer and Winter Wisteria cardstocks. I heat embossed the sentiment onto the shimmer panel and then adhered both pieces to a white card base. I finished by adding the flower in the opening with foam tape. It's so shimmery in person. I hope she loves it!

Lastly today, I have a thank you card that I created with the new Cover Plate: Winter Floral.

Winter Floral Thank You Card

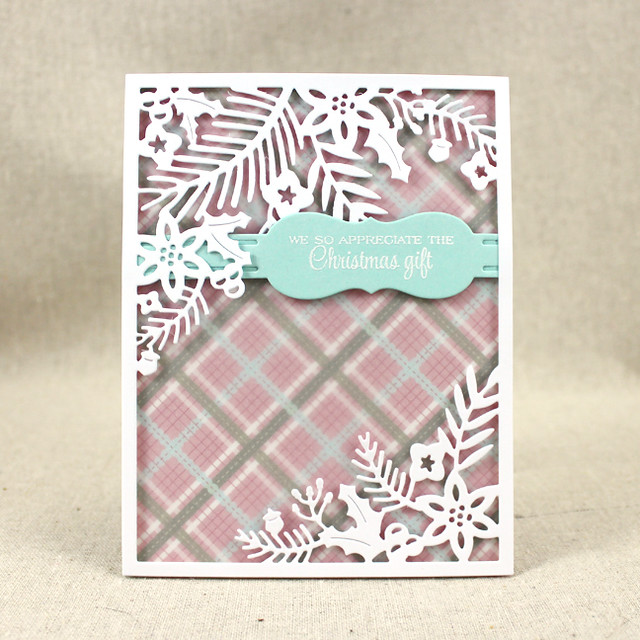
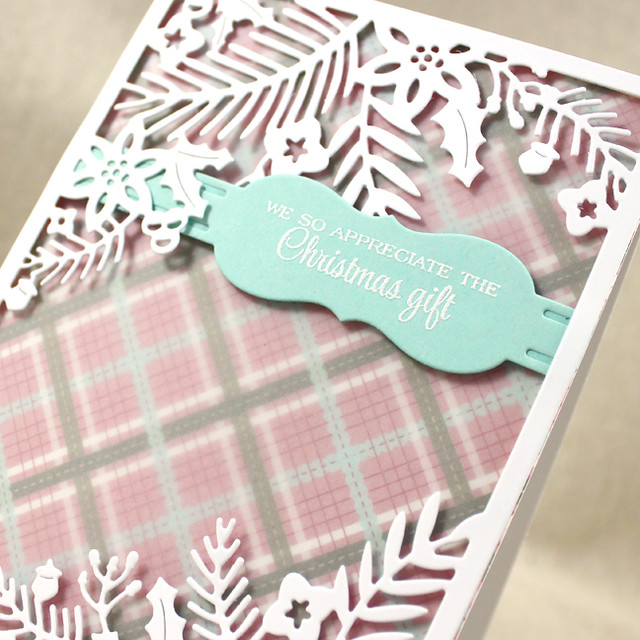
This card really couldn't be much easier. I began by adhering a piece of Betsy's new holiday plaid patterned paper to a white card base and adding a layer of vellum to soften it a bit. I die cut the Winter Floral panel from a piece of white cardstock and a Photo Finishers strip from Aqua Mist cardstock.

Winter Floral Thank You Close Up

I heat embossed the sentiment onto the Photo Finishers strip using white detail powder and then adhered it to the back of the Winter Florals panel. Then I used narrow pieces of foam tape to attach that whole piece to the card front. I like the idea of keeping Christmas thank you notes simple. The easier they are to put together, the more likely I am to have them finished and ready to go before the holidays arrive.

Well, that's all for me today. Thank you so much for joining me! Make sure to check in with Nichole, Amy, Ashley, Betsy, DanielleDawn, Heather, Kay, Laurie, Melissa, and Maile as they share more of this month's release with you today. I'll see you again bright and early tomorrow morning. Have a great day!

Recipes:
Stitched Stocking Gift Card Holder
Stamps: Spruce & Sprigs, Fair Isle Borders, Minute To Make: Holiday Tags #1 - Papertrey Ink
Cardstock: Rustic White, Pinefeather - Papertrey Ink
Ink: Pure Poppy, Scarlet Jewel, Ocean Tides, Pinefeather - Papertrey Ink; VersaMark - Tsukineko
Other: Stitched Stocking Die (Quick Stitch Beaded Holiday Kit), Spruce & Sprigs Die - Papertrey Ink; Gold Detail Embossing Powder - Filigree; Foam Tape - Scotch; Gold Embroidery Thread (#E677) - DMC

Stitched Tag Gift Card Holder
Stamps: Spruce & Sprigs, Fair Isle Borders, 2013 Holiday Tags - Papertrey Ink
Cardstock: Rustic White, Pinefeather - Papertrey Ink
Ink: Pure Poppy, Scarlet Jewel, Ocean Tides, Pinefeather - Papertrey Ink; VersaMark - Tsukineko
Other: Spruce & Sprigs Die, Stitched Tag Die - Papertrey Ink; Gold Detail Embossing Powder - Filigree; Foam Tape - Scotch; Gold Embroidery Thread (#E677) - DMC

Birthday Anemone Card
Stamps: Botanical Blocks, Botanical Blocks III - Papertrey Ink
Cardstock: White Shimmer, Winter Wisteria - Papertrey Ink; Watercolor Paper - Ranger; White
Ink: VersaMark - Tsukineko
Other: Botanical Blocks Basics Die - Papertrey Ink; Liquid Platinum Embossing Powder - Ranger; Foam Tape - Scotch; Clean Color Markers, Wink of Stella Pen - Zig

Christmas Thank You Card
Stamps: Holiday Thanks - Papertrey Ink
Cardstock: Aqua Mist, Holiday Plaid Paper Collection, Vellum - Papertrey Ink; white
Ink: VersaMark - Tsukineko
Other: Cover Plate: Winter Floral, Photo Finishers Die Collection - Papertrey Ink; Foam Tape - Scotch; White Detail Embossing Powder - Filigree

Monday, October 12, 2015

Holiday Pin-Ups Kit + Petite Places: Holiday Lane

Good morning, Friends! Today is Day 3 of the October Papertrey Ink Countdown and you know what that means...group post! Today we're featuring two of Betsy Veldman's new sets, the Make It Market Mini Kit: Holiday Pin Ups and Petite Places: Holiday Lane. I have plenty to share with you, so let's get to it!

How about we start with a trio of treat bags made with the new Pin Ups kit?

Holiday Pin Ups Treat Bags

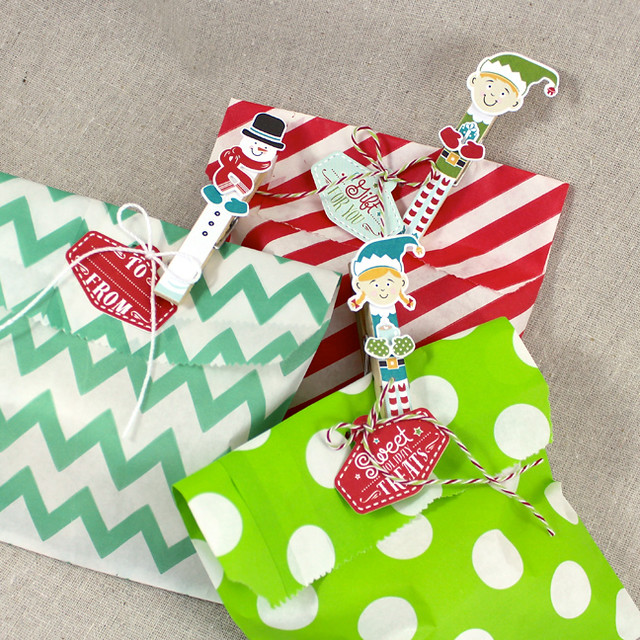
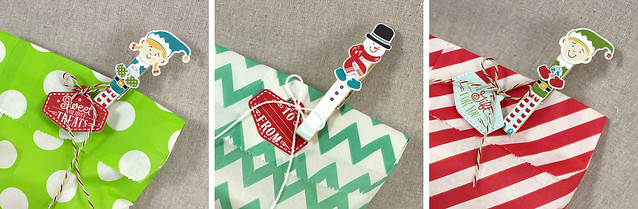
I used the printed papers in the kit to create these adorable packages. I cut out the individual pieces with the coordinating dies and assembled them onto the clothespins with a mix of flat and foam adhesives.

Christmas Treat Bags Close Up

These really couldn't be easier! I simply punched holes in the bags and threaded with twine (the red/green one is from the kit, the white is crochet thread I had on hand), adding a printed tag to each before tying a bow. The pins were clipped on at the end for an extra festive touch. I'll keep these on hand to use for my niece and nephew at the holidays.

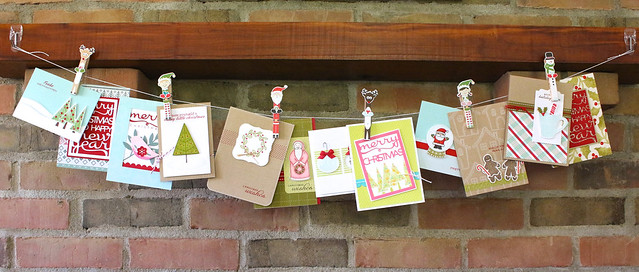
Next up is a little bonus. I kept thinking about how this kit would be perfect for creating a garland to display the cards we receive through the season. I couldn't get it out of my head, so I went ahead and put one together!

Holiday Pin Ups Card Garland

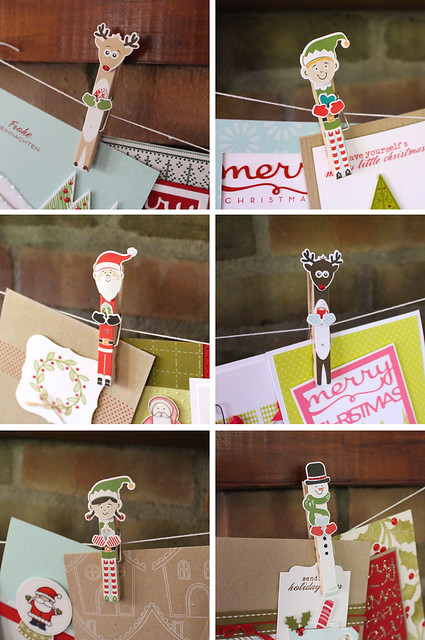
I pretty much followed the same steps for the garland that I had for the treat bags, but this time I added glitter here and there on these clips for a bit of extra sparkle.

Card Garland Pins

I'm quite tickled about how it turned out and can't wait to use it this year!

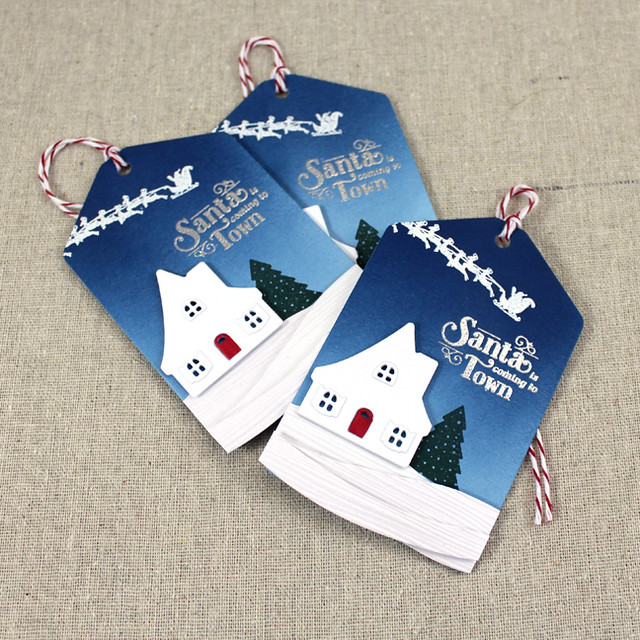
My next project might be my favorite of today's post. I used the Petite Places: Holiday Lane set and dies to create this set of gift tags. There's something magical about Santa Claus that still gets me excited for Christmas even now as an adult. I wanted to capture a little of that magic while keeping the tags on the understated side.

Santa Tags

I began by sponging Enchanted Evening ink onto Spring Rain cardstock. Next, I die cut the snow drifts from White Shimmer stock using the Cover Plate: Waves die and textured them with the Woodgrain Impression Plate. I also die cut the house and window frames from white cardstock using the Petite Places: Holiday Lane Die and colored the doors red for a pop of color.

Santa Tag Close Up

I stamped the trees onto the sponged tags with Pinefeather ink and heat embossed the sentiment and Santa's sleigh using white and silver powders. I layered my snow drifts onto the tags, added my assembled houses, and tied on some red baker's twine. They turned out just how I imagined they would.

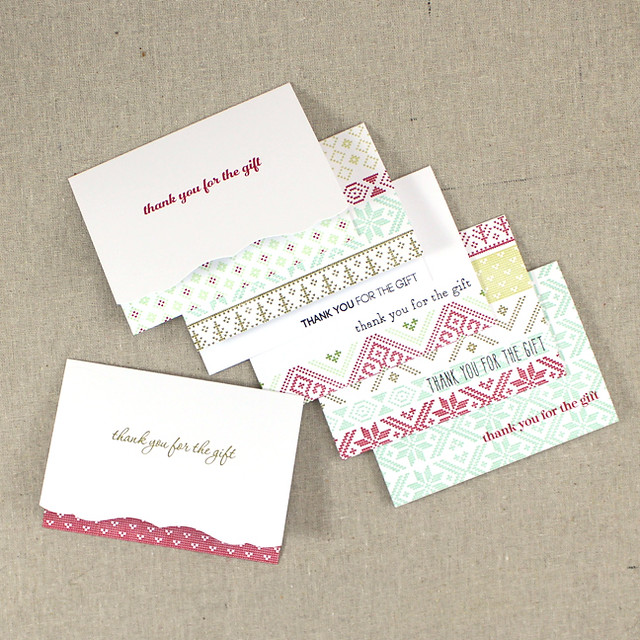
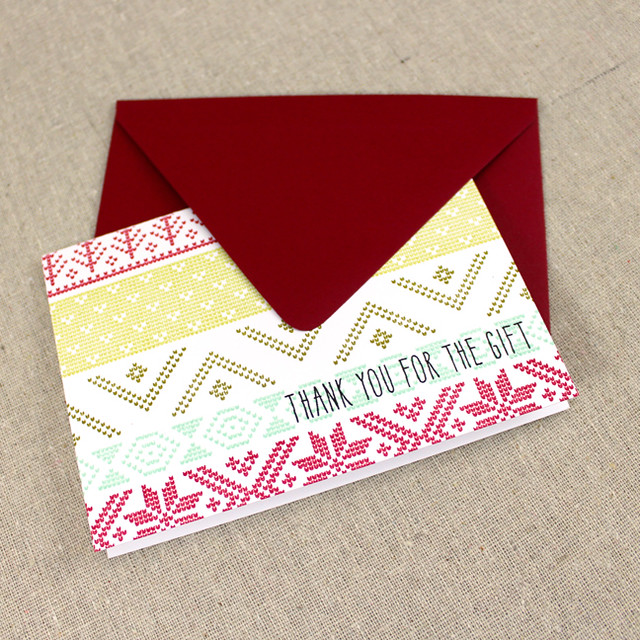
Lastly today I have a set of simple thank you notes that I created by pairing the Fair Isle Borders set with the new Keep It Simple Gift Thanks set.

Christmas Thank You Notes Full Set

It seems like every year we have a mad, post-Christmas scramble to find enough seasonally appropriate thank you notes to send messages of gratitude to our loved ones. Not this year, my friends!

Christmas Thank You Note

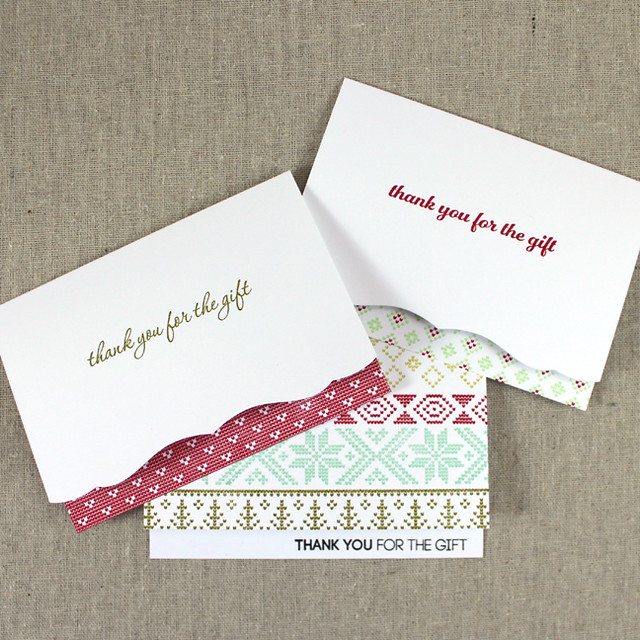
The cards in this set are all 4Bar size (4 7/8" x 3 1/2"), a size I really like for thank yous. I stamped the patterns on the inside of two of the cards and then used the Edgers #1 die for a peek-a-boo effect. One of the cards is just the opposite, with the sentiment on the inside and the pattern on the outside.

Christmas Thank You Notes 2

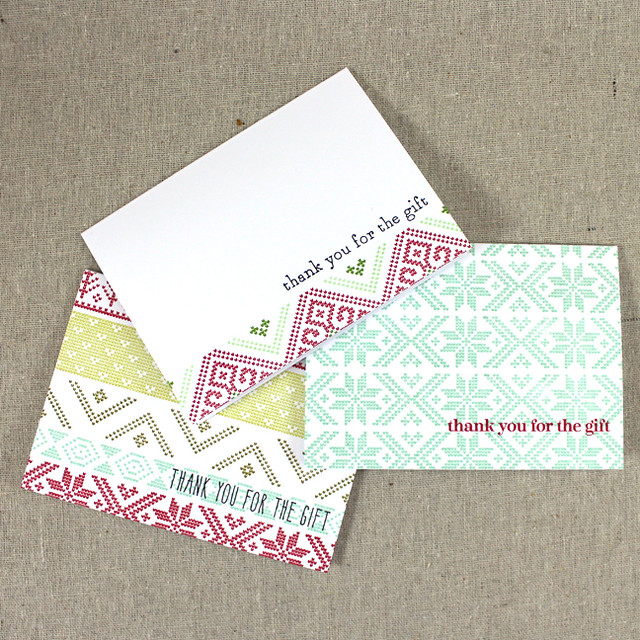
The rest of the cards have both the pattern and the sentiment on the front. The stamping is simple, but I kept the colors lively and cheerful to make them interesting.

Christmas Thank You Notes 1

I'll need to stamp a few more before we get to Christmas, but this is a pretty good start.

Well, that's all for me today. I hope you'll join me again tomorrow for more of this month's new releases. In the meantime, Nichole, Amy, Ashley, Betsy, Danielle, Dawn, Heather, Kay, Laurie, Melissa, and Maile have more to share with you today. See you soon!

Recipes:
Christmas Treat Bags
Supplies: Make It Market Mini: Holiday Pin Ups Kit (includes printed papers, dies, bags, and twine) - Papertrey Ink; White Crochet Thread; Foam Tape - Scotch

Christmas Card Garland
Supplies: Make It Market Mini: Holiday Pin Ups Kit (includes printed papers and dies) - Papertrey Ink; White Crochet Thread; Foam Tape - Scotch; Crystal, Onyx, Garnet Glitter - Martha Stewart Crafts; Tiny Clear Rhinestone - Mark Richards; Copic

Santa Tags
Stamps: Petite Places: Holiday Lane - Papertrey Ink
Cardstock: White Shimmer, Spring Rain - Papertrey Ink; white
Ink: Enchanted Evening, Pinefeather - Papertrey Ink; VersaMark - Tsukineko
Other: Petite Places: Holiday Lane Die, Tag Sale #10 Die, Cover Plate: Waves Die - Papertrey Ink; Cherry Baker's Twine - Divine Twine; Silver, White Embossing Powder - Filigree; Foam Tape - Scotch; Copic

Christmas Thank You Note Set
Stamps: Fair Isle Borders, Keep It Simple Gift Thanks - Papertrey Ink
Cardstock: White
Ink: Pure Poppy, Spring Moss, Ripe Avocado, Aqua Mist, Vintage Jadeite, New Leaf - Papertrey Ink; Onyx Black - Versafine
Other: Edgers #1 Die - Papertrey Ink

Sunday, October 11, 2015

Fair Isle Borders - Day 2

Good morning, Friends! Welcome back for Day 2 of the Papertrey Ink October Countdown. I'm so glad to hear you're all as excited about Fair Isle Borders as I am! Nichole and Dawn are featuring this set today, so make sure to check in with them for even more inspiration. In the meantime, I have a couple projects of my own to share.

Let's start out today with a card. I love the look of those heather gray Fair Isle sweaters with the multicolored, unique stacked stripes, so that's what I was going for on this card.

Fair Isle Text Block Card

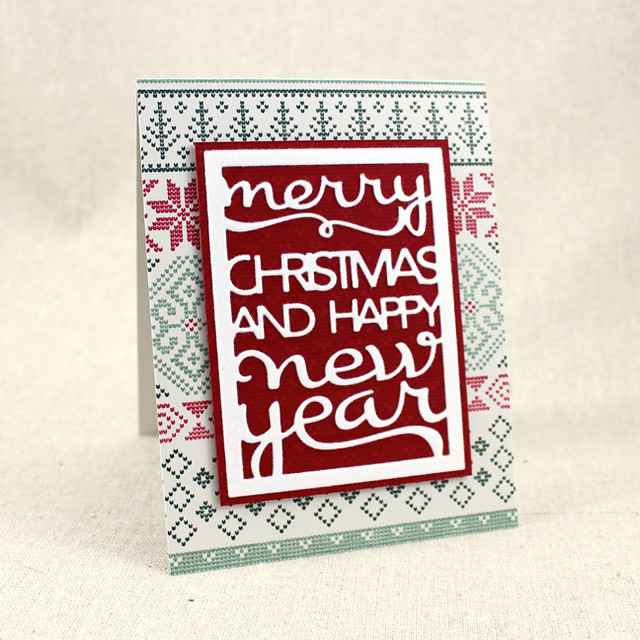
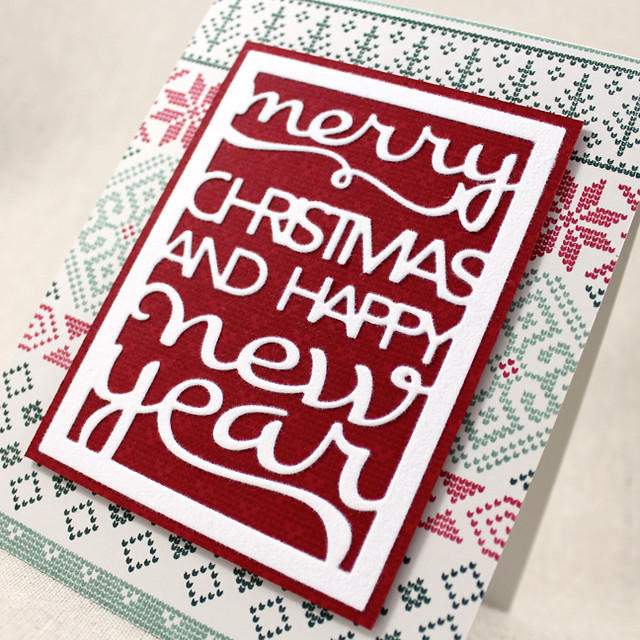
I began by stamping the different patterns from Fair Isle Borders onto a Soft Stone card base with Ocean Tides, Pinefeather, and Pure Poppy inks. Then, I xyroned a piece of white cardstock on both sides (leaving the adhesive backing in tact) before die cutting a Text Block: Christmas shape. I trimmed a Pure Poppy mat to be just larger than the Text Block and then stamped it repeatedly in the matching ink with one of the images from Fair Isle Borders so that the entire surface was covered (a grid line block helps immensely with placement).

Fair Isle Text Block Close Up

I removed the adhesive paper from the back of the Text Block die to adhere it into place. Then I removed the adhesive paper from the face of the die cut and sprinkled the sticky surface with white flocking. The results are delightfully fuzzy! To finish, I simply mounted the sentiment panel to the patterned card base with foam tape. Easy and a cinch to mail!

My second project of the day is a little set of festive gift tags.

Fair Isle Christmas Tags 1

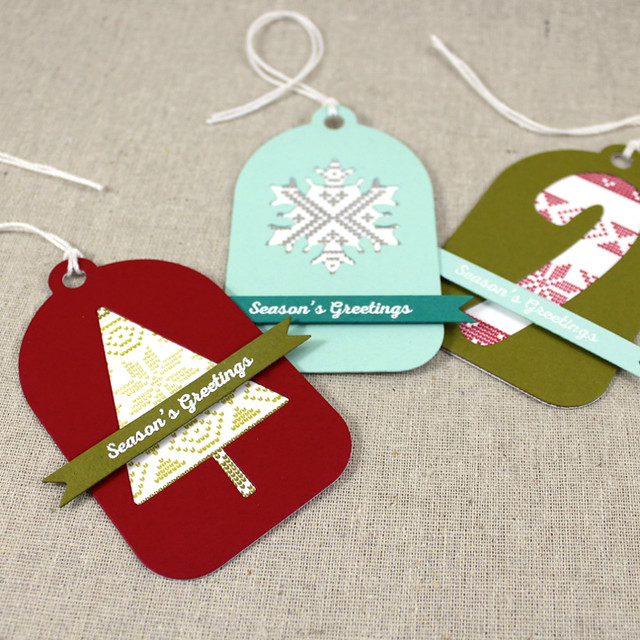
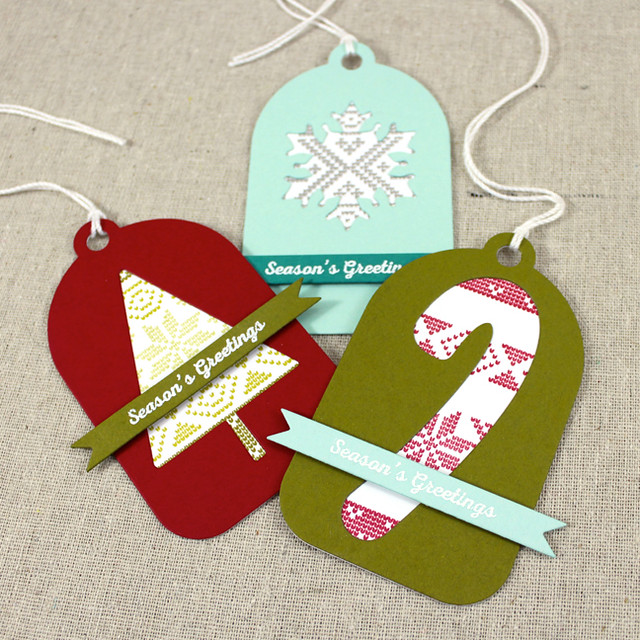
I began by die cutting the Tag Sale #2 die three times from white cardstock and once each from Pure Poppy, Ripe Avocado, and Aqua Mist cardstocks. I die cut a candy cane, Christmas tree, and snowflake from the colorful tags and set those aside. Then, I stamped the patterned strips from Fair Isle Borders onto the white tags using a variety of inks (Tree: Ripe Avocado, Simply Chartreuse, and Spring Moss - Candy Cane: Pure Poppy - Snowflake: Versamark with silver embossing).

Fair Isle Christmas Tags 2

I layered the colorful tags onto the white tags so that the patterns showed through the die cut negatives. I added sentiment banners that I'd die cut using the Tag Sale #10 die and stamped with a sentiment from Dawn's new Joyful Christmas set.

Well, that's all for me today. Thank you so much for joining me! Make sure to pop by tomorrow for another peek at Fair Isle Borders (and who knows what else)! I'll see you then, but in the meantime, make sure to check in with Nichole, Betsy, Danielle, Dawn, Heather, and Maile as they share more of this month's fabulous new release. Take care!

Recipes:
Fair Isle Text Block Card
Stamps: Fair Isle Borders - Papertrey Ink
Cardstock: Soft Stone, Pure Poppy - Papertrey Ink; white
Ink: Pure Poppy, Ocean Tides, Pinefeather - Papertrey Ink
Other: Text Block: Christmas Die - Papertrey Ink; White Fun Flock - Stampendous; Foam Tape - Scotch

Fair Isle Christmas Tags
Stamps: Fair Isle Borders, Joyful Christmas - Papertrey Ink
Cardstock: Pure Poppy, Ripe Avocado, Aqua Mist, Tropical Teal - Papertrey Ink; white
Ink: Pure Poppy, Ripe Avocado, Simply Chartreuse, Spring Moss - Papertrey Ink; VersaMark - Tsukineko
Other: Tag Sale #2, Tag Sale #10, Winterberry Die, Fancy Flakes Die Collection, Seasonal Stitching: Candy Cane Die - Papertrey Ink; Silver Embossing Powder - Filigree; Foam Tape - Scotch; White Crochet Thread

Saturday, October 10, 2015

Introducing Fair Isle Borders

Good morning, everyone! Are you ready for the October Papertrey Ink Countdown to begin? I sure hope so, because we have a pretty great line-up for you this month. I am super excited to be introducing my brand new set, Fair Isle Borders, to you over the next few days. You're going to love how easy this set makes creating cozy backgrounds and decorative borders for all of your winter projects. Let's get to a couple, shall we?

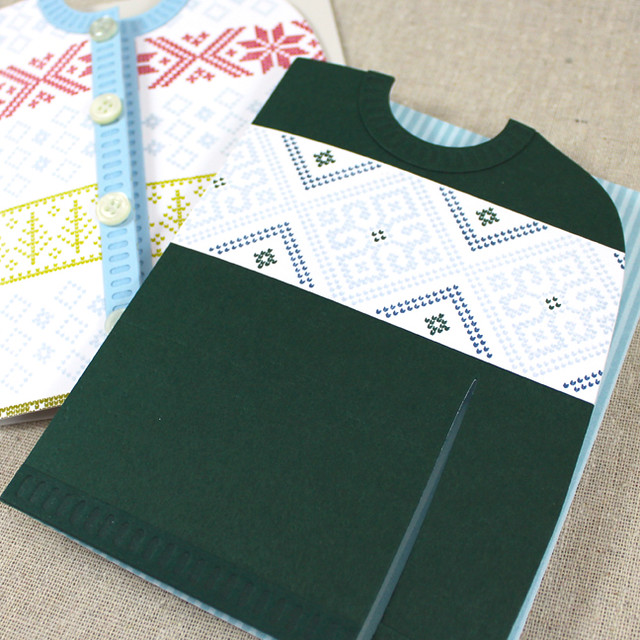
Fair Isle Sweater Cards

Fair Isle Borders + Shape Up: Sweater Die = Match Made In Heaven. I mean, seriously.

I wanted to make two sweaters for today to show how easy it is to make cards for the ladies and the fellas using this stamp and die combo. A quick color swap and you're in gender neutral territory. So easy and versatile.

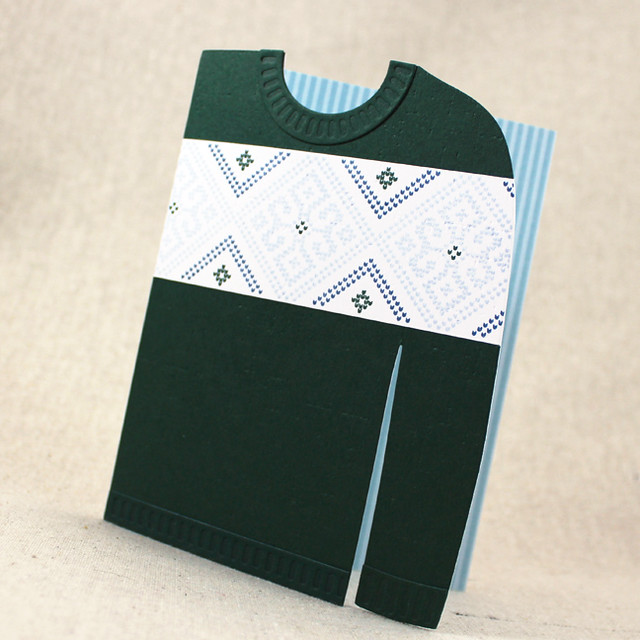
Masculine Fair Isle Pullover Card

Let's begin with the stylish gentleman's pullover. I began by die cutting the sweater shape from white and Pinefeather cardstocks. I stamped the multicolor medallion strip onto the white shape and then trimmed off the excess above and below. Then I trimmed out the same section on the Pinefeather sweater so that the pieces all inlay just right. I textured the pieces with the Linen & Canvas Impression Plate before adhering them to a white card base also cut with the sweater die. I then cut the trim pieces from additional Pinefeather cardstock and adhered them into place.

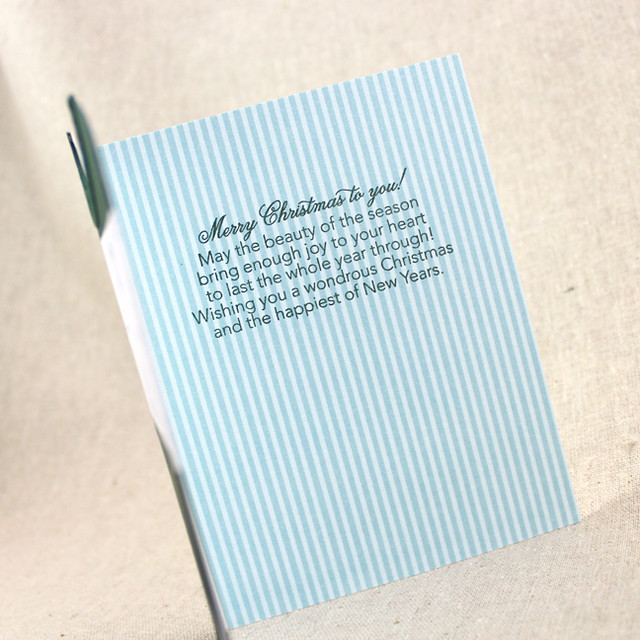
Masculine Fair Isle Pullover Inside

I wanted the visible interior of the card to coordinate with the medallion strip, so I trimmed a piece of striped Spring Rain patterned paper to fit inside and stamped it with one of the new Tucked In: Holiday sentiments from Dawn McVey. I used a Christmas sentiment here, but this card would also be perfect for a winter birthday.

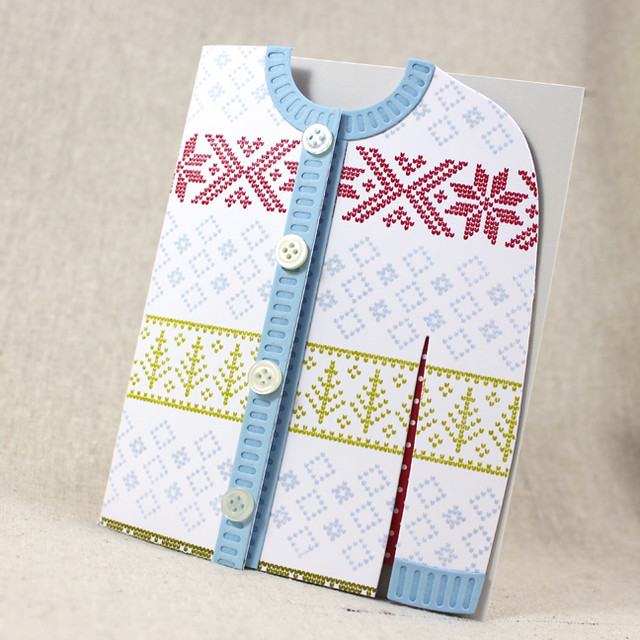
My second card today is a more feminine version with a little surprise inside.

Feminine Fair Isle Cardigan Card

I began by die cutting a white card base and an additional panel of white cardstock with the Shape Up: Sweater die. I stamped both pieces with the same pattern and then trimmed them so that they would overlap once the card was assembled (essentially, I just cut them both so that more than half of the sweater remained). I created a hinge for the outer sleeve by folding a piece of cardstock before cutting it with the sweater die. I embellished the neckline, sleeve, and waistline with Spring Rain trim pieces.

Feminine Fair Isle Cardigan Inside

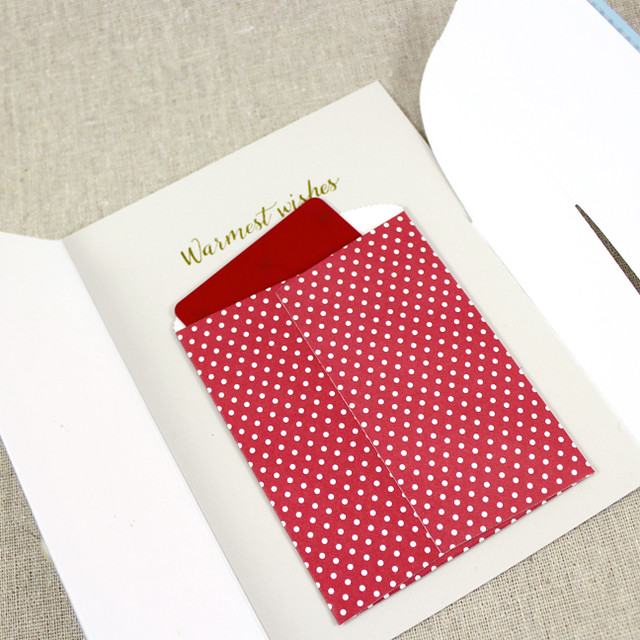
Next, I created a Soft Stone insert, cutting a slit to allow for the sleeve hinge, and stamped it with a sentiment from Cup of Cheer. Then, I die cut a Monthly Moments: Journal Card Pocket 1 Die from the swiss dot patterned paper out of the new Pure Poppy + White Basics Paper Collection. I adhered that to the inside of the card and tucked in a gift card. I embellished the outer cardigan flap with Fresh Snow buttons for a realistic finish.

And there you have it! Thank you so much for joining me today! I'll be back again tomorrow with more of Fair Isle Borders. Make sure to check in with Nichole, Betsy, Dawn, Heather, LaurieMelissa, and Maile for more of this month's fantastic new release. See you tomorrow!

Recipes:
Masculine Pullover Card
Stamps: Fair Isle Borders, Tucked In: Holiday - Papertrey Ink
Cardstock: Pinefeather, Spring Rain Stripe Patterned Paper - Papertrey Ink; white
Ink: Spring Rain, Pinefeather, Enchanted Evening - Papertrey Ink
Other: Shape Up: Sweater Die Collection, Linen & Canvas Impression Plate - Papertrey Ink

Feminine Cardigan Card
Stamps: Fair Isle Borders, Cup Of Cheer - Papertrey Ink
Cardstock: Spring Rain, Soft Stone - Papertrey Ink; white
Ink: Spring Rain, Pure Poppy, Simply Chartreuse - Papertrey Ink
Other: Shape Up: Sweater Die Collection, Monthly Moments: Journal Card Pocket 1 Die, Fresh Snow buttons - Papertrey Ink

Thursday, October 1, 2015

October Color Play

Good morning, friends, and welcome to the October Papertrey Ink Color Play feature! This month we're playing along with this photo:

Source

Isn't that lovely? The colors in this month’s scheme are perfect for autumn crafting. I love creating for this season and the chilly fall days are sure to feel a little warmer with this palette. I was inspired by the leaves falling outside my studio window and thought they might look nice on a Thanksgiving-y card. Lucky for me, that worked wonderfully with this month's combo!

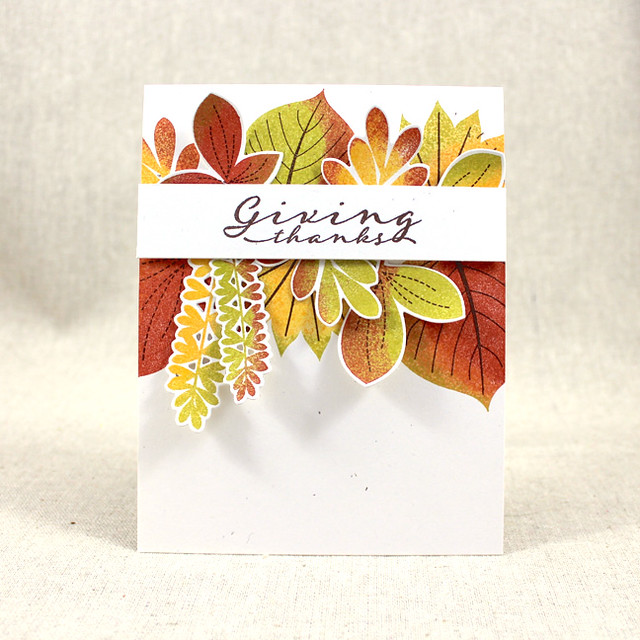
Giving Thanks Card

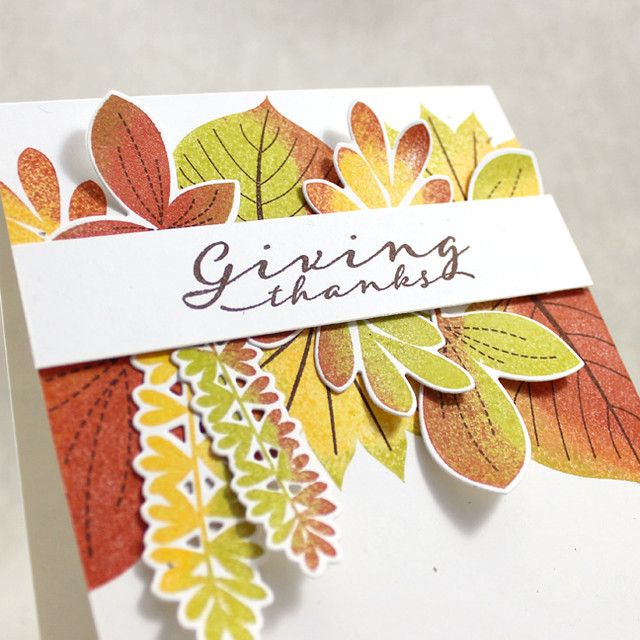
I began by die cutting several leaves from the Leave It Be collection. I used some rock 'n roll inking to stamp the leaves with the colors in the palette and set them aside. Next, I stamped the sentiment onto a strip of Rustic White cardstock using Dark Chocolate ink.

Giving Thanks Close Up

I stamped a few leaves onto a Rustic White card base and layered the die cut leaves in for a bit of dimension. I curled the leaves up a smidge and added the sentiment strip with foam tape. I love the simplicity of this card. It might not be terribly technical, but it more than makes up for that in the texture department.

That's all for me today. Thank you so much for joining me for this month's Color Play post. I'll see you again soon!

Recipe:
Stamps: Leave It Be, Scripted - Papertrey Ink
Cardstock: Rustic White - Papertrey Ink
Ink: Dark Chocolate, Terra Cotta Tile, Summer Sunrise, Simply Chartreuse - Papertrey Ink
Other: Leave It Be Die - Papertrey Ink; Foam Tape - Scotch