Monday, May 23, 2016

Moments Inked: Collecting Color Inspiration


Good morning, friends! It's my turn to show you how I'm using my Papertrey Ink Moments Inked planner lately and I thought it might be the perfect opportunity how I've been collecting color inspiration. I don't know about you, but I get into serious color ruts sometimes. I find myself always reaching for the same ink and cardstock hues despite the glorious Papertrey rainbow at my fingertips. So a few weeks back I set out to find photos that would motivate me to try some combos outside of my comfort zone. I came up with this simple way to keep my inspiration photos all in one place and I couldn't be happier!

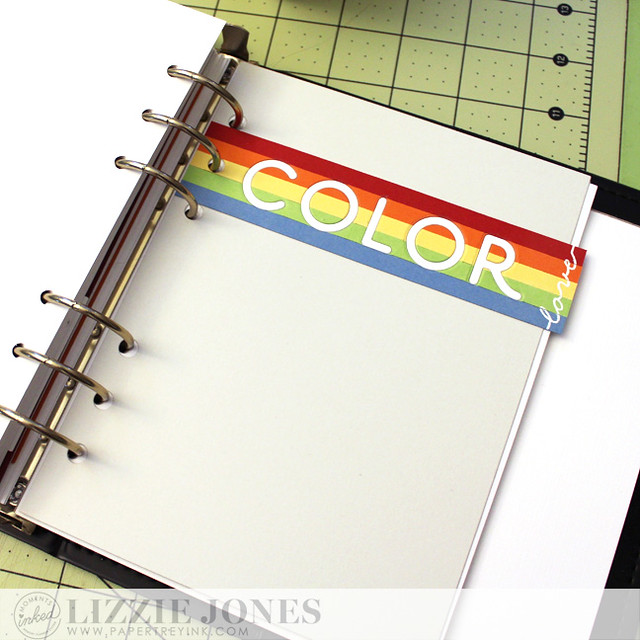
Color Love Divider Page

I created a divider page with a piece of Soft Stone cardstock and strips of colorful cardstock. I die cut the word "color" from the colorful stripes using the Smooth Alphabet and inlaid the negative spaces with letters die cut from Fresh Snow Linen cardstock.

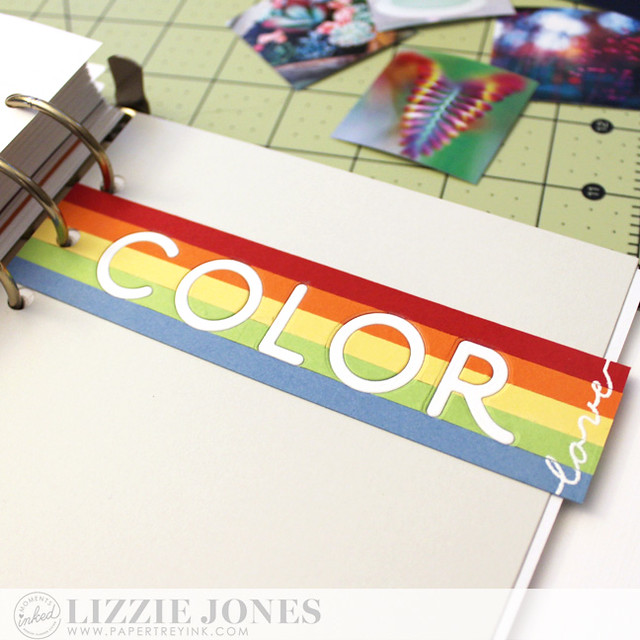
Color Love Divider Close Up

I let the colorful strips overhang the edge of the page to create a tab and I heat embossed the word "love" from the Happy Hearts set using white powder. I used clear packing tape to reinforce the very edge of the colorful strip and keep the tab in good shape.

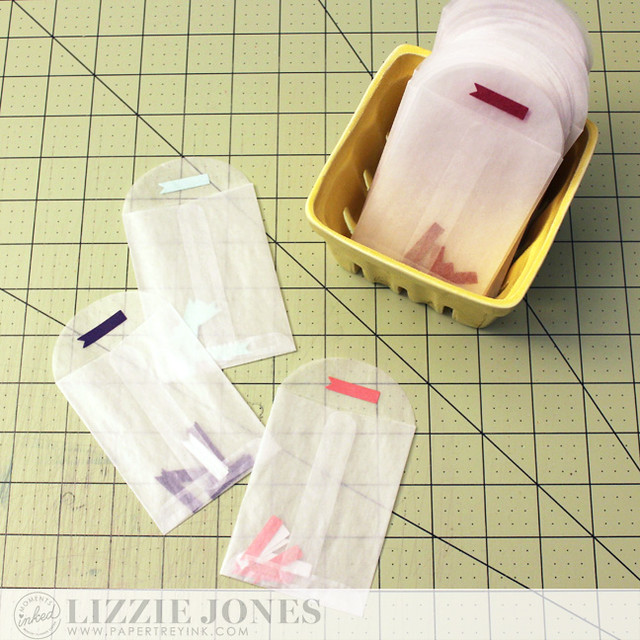
MI Color Stickers

Then, I considered how to most easily add the color combos next to the inspiration photos. I settled on creating little color flags using the Moments Inked: Planner Banners set and White Adhesive Sheets. I went this route for a handful of reasons: 1) The dark colors won't bleed through so I can use both sides of each page. 2) I can compare a few shades before committing to the color that best matches the photo. 3) I don't have to clean a single stamp between each color. 4) I can shuffle the flags in the combo to make the most attractive arrangement.

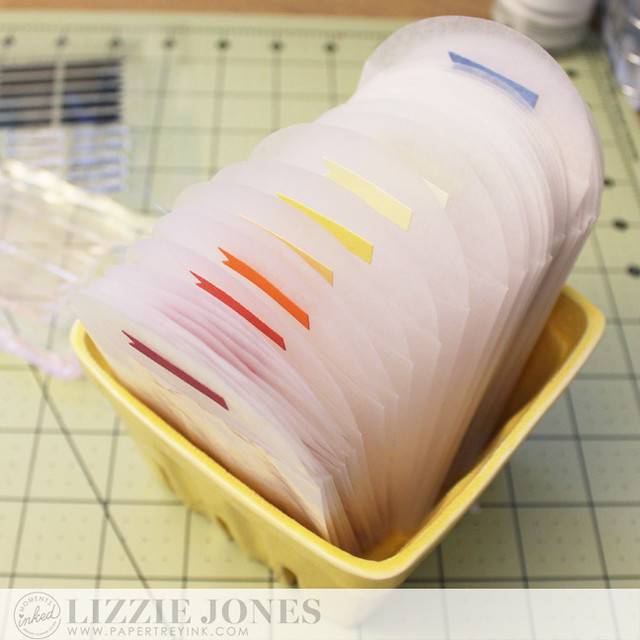
MI Color Sticker Envelopes

I created flags for each of the Papertrey Ink colors, neutrals, and a couple of metallics. It actually took much less time (and materials - only three sheets of adhesive paper) than I expected and now I have several of each color at the ready. I sorted the flags into glassine envelopes and organized them in rainbow order in a little ceramic fruit basket that sits on my desk. I adhered one of each flag to the top flap of the envelopes so I could easily see which color was in which envelope.

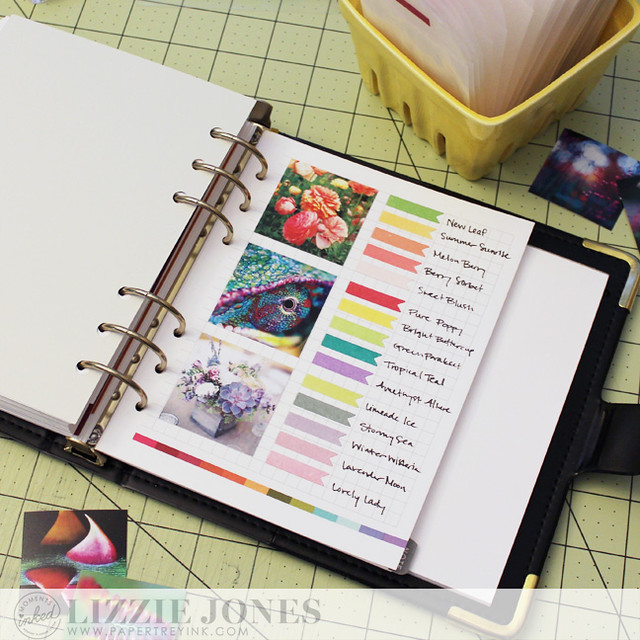
Color Inspiration Page

To create the color inspiration pages, I printed an assortment of photos 1 3/4" square onto nice quality paper. You could also use photo paper or have a photo processor print them for you if you don't have a color printer available.

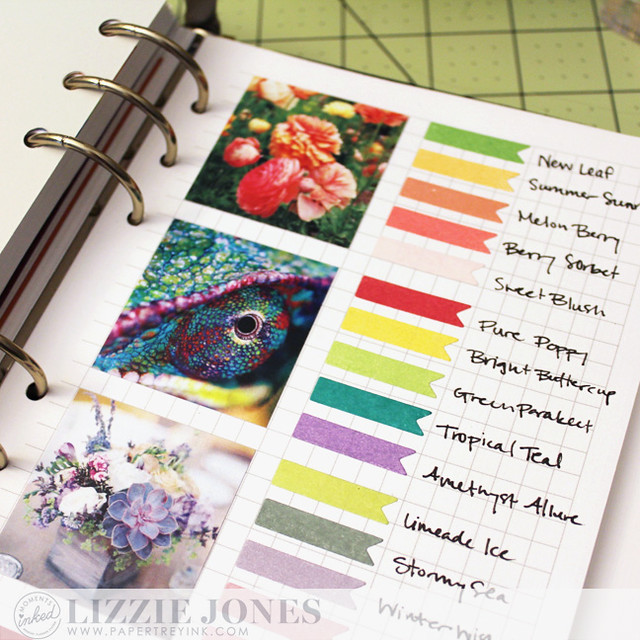
Color Inspiration Page Close Up

I trimmed out the photos and adhered them to the Graph binder pages. You can pick up 25 double-sided pages at the Papertrey Ink store for $5 which makes this project an absolute steal! I adhered the color flags next to the inspiration photos and then wrote the color names to their right.

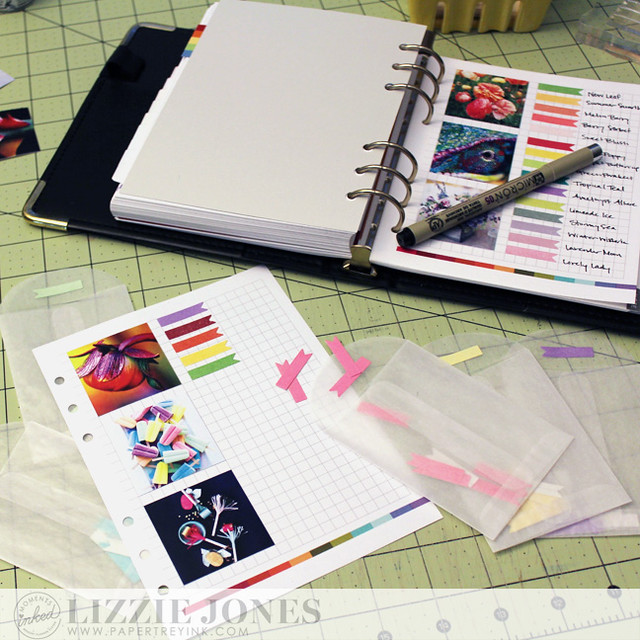
MI Color Inspiration Page In Progress

I've started searching for inspiration photos in the few minutes before fitness classes or during downtime between chores or waiting in lines. I save them in a Pinterest board I have entitled "Color," then, every week or so I can compile the new photos into one document and print a whole batch at once. It's so convenient, can be done in time I was just wasting before, and now I have an invaluable resource at my disposal.

Thank you so much for joining me today! Have a wonderful week everybody!


Recipe:
Stamps: Happy Hearts, Moments Inked: Planner Banners - Papertrey Ink
Cardstock: Soft Stone, Pure Poppy, Orange Zest, Harvest Gold, Green Parakeet, Blueberry Sky, White Adhesive Sheets - Papertrey Ink
Ink: All The Colors
Other: Smooth Alphabet Die Collection, Moments Inked: Refill Binder Pages, Moments Inked: Planner Banners Die - Papertrey Ink; White Embossing Powder - Filigree

Sunday, May 15, 2016

Release In Review

Good morning, everyone! Welcome back for my Release In Review post for this month's Papertrey Ink countdown. It's been a great release and I'm excited to show you how I've used these wonderful new products.

Let's start with Erin Lincoln's Sweet Dreams set.

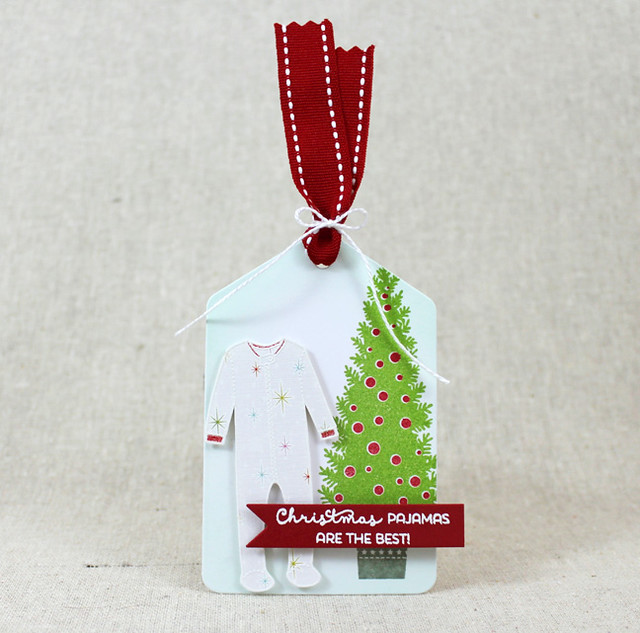
Christmas Pajamas Tag

I paper pieced the footie pajamas and paired them with the Christmas pjs sentiment and a tree from O Tannenbaum to create this super sweet tag. I sponged a Tag Sale #10 shape with Aqua Mist ink to give the tag a bit of background before stamping the tree and adhering the footies.

Christmas Pajamas Tag Close Up

The sentiment was heat embossed onto a Sketched Shapes banner and attached to the tag with foam tape. I'll have to send this along to my sister before the holidays this year. She gets her kiddos Christmas jammies each year, so hopefully she'll love it.

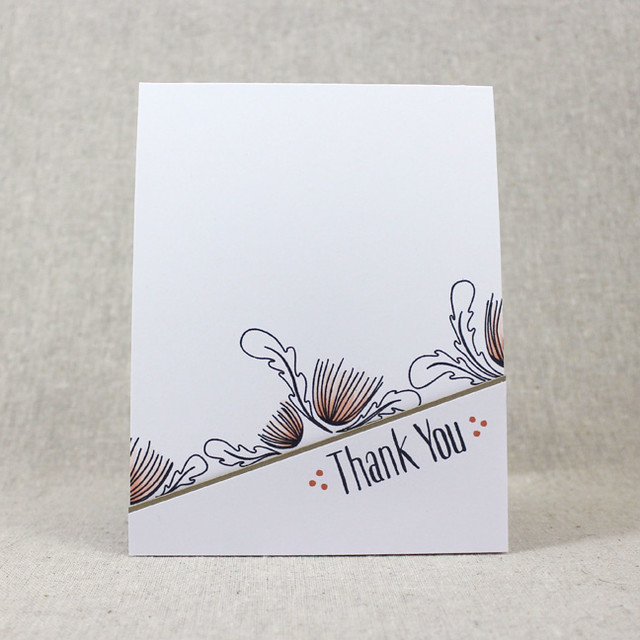
Next up is Maile Belles's Splits: Thank You.

Splits Thank You Card

I love that you can add just a hint of color to these Splits sets and they still look amazing. I stamped both sides of the main image in a sort of diagonal border across a white card front. Then I added two shades of coral pink to the blooms with my Copics.

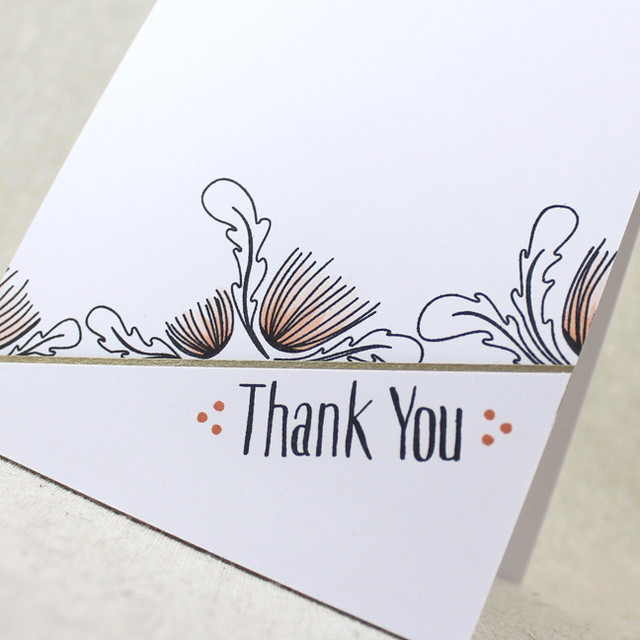
Splits Thank You Close Up

I stamped the sentiment on an angled layer and gave that piece a thin gold mat before adhering it to the card front with foam tape. You could knock out a whole set of these in no time and they look so chic!

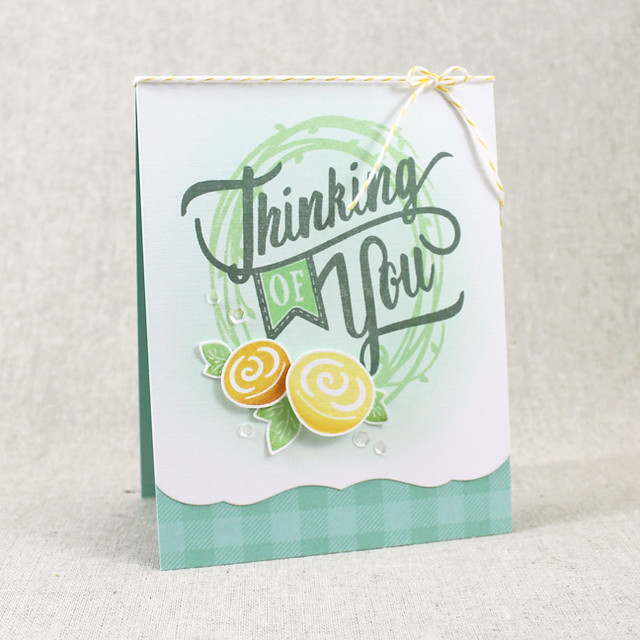
Betsy Veldman's Paper Clippings: Thinking Of You is next.

Thinking Of You Wreath Card

I began by sponging a pale, Aqua Mist background onto a piece of Fresh Snow Linen cardstock. I stamped the wreath image over that sponging and added the sentiment on top. Next, I trimmed the bottom edge with the Edgers #1 Die and adhered that panel to an Aqua Mist card base that I'd stamped with a Super Gingham strip.

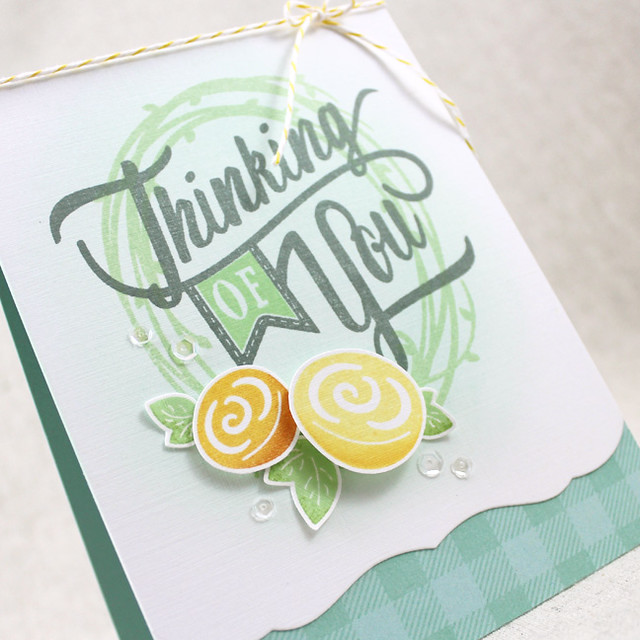
Thinking Of You Wreath Close Up

Then, I stamped and trimmed out the flowers and leaves. I attached those to the card front using flat and foam adhesives before adding a sprinkling of the sequins included in the Sunshine & Rainbows kit. A baker's twine bow finished it off nicely.

Betsy's Inspired series continues this month with Inspired: Praise.

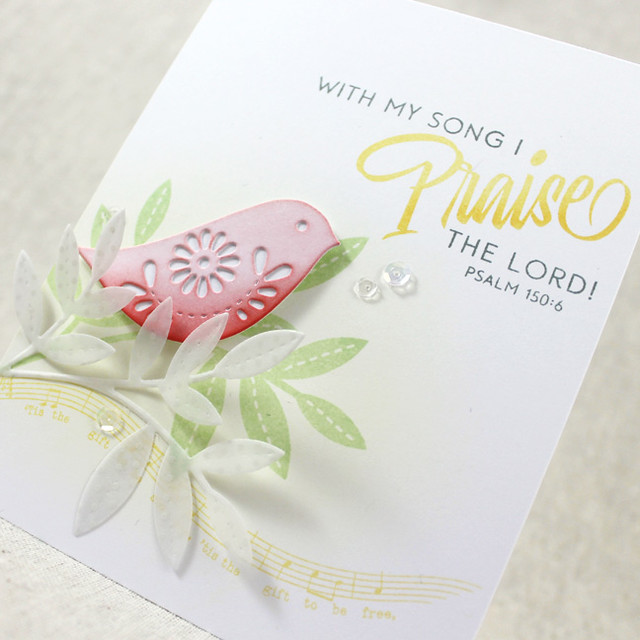
Praise The Lord Card

I began by sponging a light Lemon Tart background onto a white card front. I added a musical strip and the leafy branch from Songbirds before stamping the sentiment from Betsy's new set. Next, I die cut another leafy branch, this one from Bitty Dot Vellum, and adhered it to the card front with foam tape.

Praise The Lord Close Up

I also die cut one of the detailed birds in the Songbirds die collection and sponged it with Berry Sorbet ink before backing it with a solid bird die cut. I attached that to the card front with foam tape before rounding the bottom corners. A sprinkling of more Sunshine & Rainbows sequins (I seriously can't get enough of those sequins) was the perfect embellishment.

And last but not least is Nichole's Keep It Simple: God Bless The USA mini set.

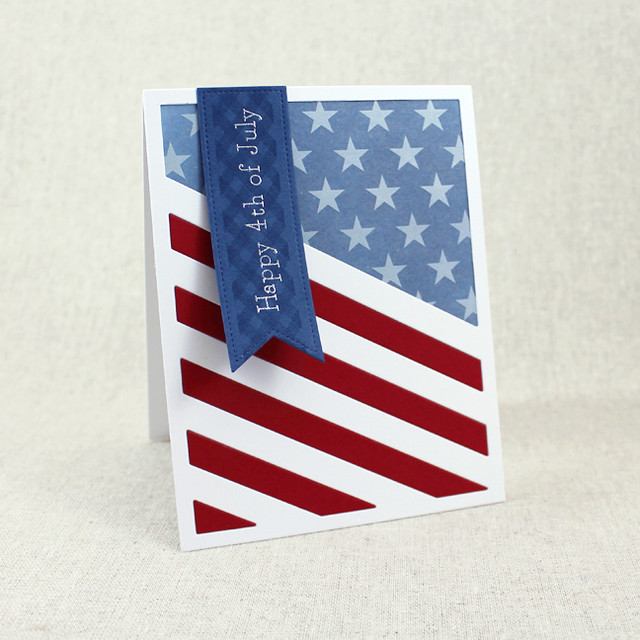
4th Of July Card

I know this set is one that has been oft requested, so hopefully there are a number of you out there that are super pleased. I began by sponging Enchanted Evening ink onto the back of a piece of star vellum and setting it aside to dry. Then, I die cut a Cover Plate: Stripes Diagonal Die twice, once out of white and once out of Pure Poppy. I trimmed a few of the stripes out of the white cut and backed that area with the inked vellum.

4th Of July Close Up

I adhered that whole piece to a white card base and inlaid the Pure Poppy stripes in the open areas in the Cover Plate. Next, I die cut a Keep It Simple Frame shape and heat embossed it with the sentiment from the set. I added a patterned strip to the frame using the banner image from Canned before attaching the sentiment banner to the card front. I'm ready for some fireworks!

Thank you for joining me today. Make sure to pop in on Nichole, Amy, AshleyBetsy, Danielle, Dawn, Heather, Kay, Laurie, and Melissa for more inspiration using this month's new releases. Have a great week, everyone!

Recipes:
Christmas Pajamas Tag
Stamps: Sweet Dreams, O Tannenbaum - Papertrey Ink
Cardstock: Pure Poppy, Sparkle & Shine Patterned Paper - Papertrey Ink; white
Ink: New Leaf, Pure Poppy, Aqua Mist, Stormy Sea - Papertrey Ink; VersaMark - Tsukineko
Other: Sketched Shapes Die, Tag Sale #10 Die, Pure Poppy Saddle Stitched Ribbon - Papertrey Ink; White Embossing Powder - Filigree; Foam Tape - Scotch; White Crochet Thread

Splits Thank You Card
Stamps: Splits: Thank You - Papertrey Ink
Cardstock: White, Gold
Ink: Melon Berry - Papertrey Ink; Tuxedo Black - Memento
Other: Markers - Copic

Thinking Of You Card
Stamps: Paper Clippings: Thinking Of You, Background Basics: Super Gingham - Papertrey Ink
Cardstock: Aqua Mist, Fresh Snow Linen - Papertrey Ink
Ink: Aqua Mist, Vintage Jadeite, Mint Julep, New Leaf, Harvest Gold, Summer Sunrise, Canyon Clay, Stormy Sea - Papertrey Ink
Other: Edgers #1 Die, Sunshine & Rainbows Sequins - Papertrey Ink; Foam Tape - Scotch; Lemon Bakers Twine - Divine Twine

Praise The Lord Card
Stamps: Inspired: Praise, Songbirds - Papertrey Ink
Cardstock: Sheer Basics Bitty Dot Vellum - Papertrey Ink; white
Ink: Lemon Tart, Harvest Gold, Summer Sunrise, Mint Julep, Berry Sorbet, Stormy Sea - Papertrey Ink
Other: Songbirds Die, Sunshine & Rainbows Sequins - Papertrey Ink; Corner Chomper - We R Memory Keepers; Foam Tape, Vellum Tape - Scotch

4th Of July Card
Stamps: Keep It Simple: Bless The USA, Canned - Papertrey Ink
Cardstock: Pure Poppy, Enchanted Evening, Sheet Basics Star Vellum - Papertrey Ink; white
Ink: Enchanted Evening - Papertrey Ink; VersaMark - Tsukineko

Other: Cover Plate: Stripes Diagonal Die, Keep It Simple Frames Die - Papertrey Ink; Silver Embossing Powder - Filigree

Saturday, May 14, 2016

NEW! Make It Market Mini Kit: Sunshine & Rainbows

Good morning, friends, and welcome back to today's Papertrey Ink countdown group post! Today we're showcasing Betsy Veldman's new Make It Market Mini Kit: Sunshine & Rainbows. Rainbows are one of the most cheerful parts of life. I don't know anyone who can frown while in the presence of a rainbow. It's simply unheard of!

Sunshine & Rainbows Cards

And just like real-life rainbows, this kit is sure to bring a great, big smile to your face. I paired the stamps and stencils with old and new products alike today to show you just how much you can do with this delightful new kit. Let's get to the projects!

My first card uses the kit with Erin Lincoln's new Colorful Words set.

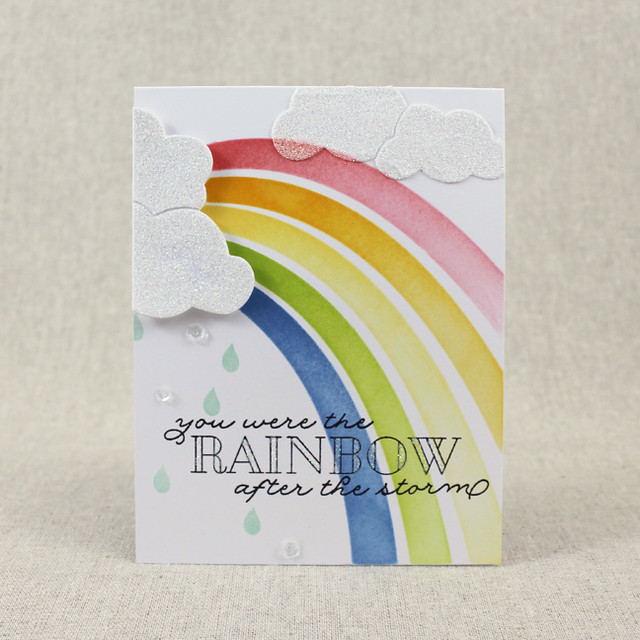
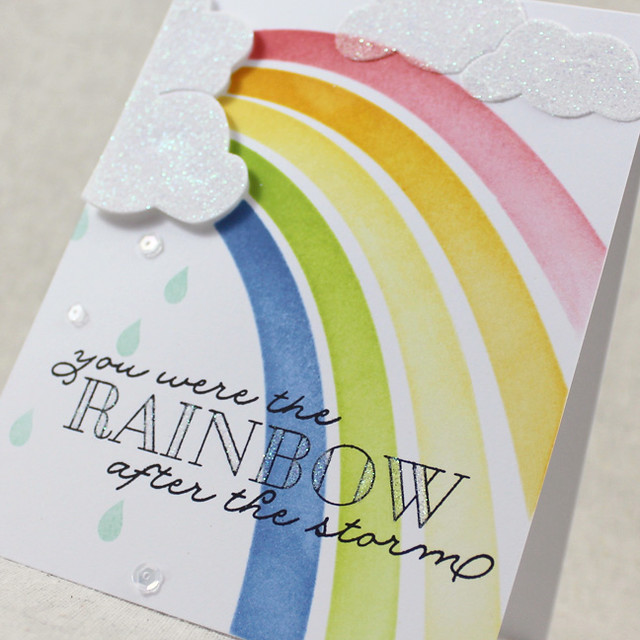
Rainbow After The Storm Card

I began by sponging the rainbow using Berry Sorbet, Summer Sunrise, Harvest Gold, Green Parakeet, and Blueberry Sky inks. The stencils Betsy has designed make this so easy! She's split the rainbow stripes into two parts which makes it a snap to add color only in the areas you want it. Next, I stamped the sentiment from Colorful Words. I filled the open areas of the sentiment with a glue pen and embellished with glitter.

Rainbow After The Storm Close Up

Then, I used the stencils to apply embossing paste to the clouds. I love the texture it added! One set of clouds was added directly to the card front, the other set I applied to a piece of scrap paper, and both were sprinkled with glitter. Once the clouds on the scrap paper were dry, I trimmed them out and attached them to the card front with foam tape. I finished off the card by stamping a handful of raindrops and adding a few iridescent sequins, both from the mini kit.

Next up, I have a softer rainbow that I paired with a sentiment from an older favorite set.

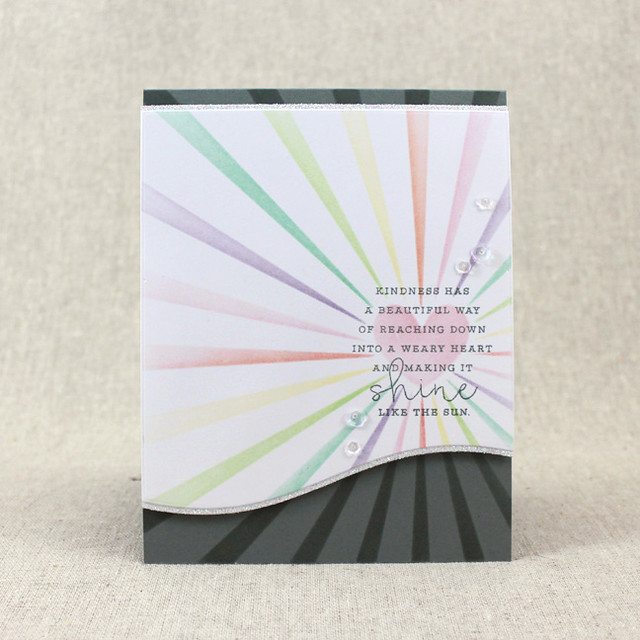
Shine Like The Sun Card

I began by creating the heart burst panel. I did a good bit of masking to be able to sponge all of the different colors, but I think the end result is worth it. You could always get a similar look with colored pencils though if you wanted to avoid the masking (markers bled a bit though, so I wouldn't necessarily recommend those). I die cut that panel with the Sentiment Splits: Curve Vertical Die and added the sentiment from Choose Joy. Isn't that just perfect?!

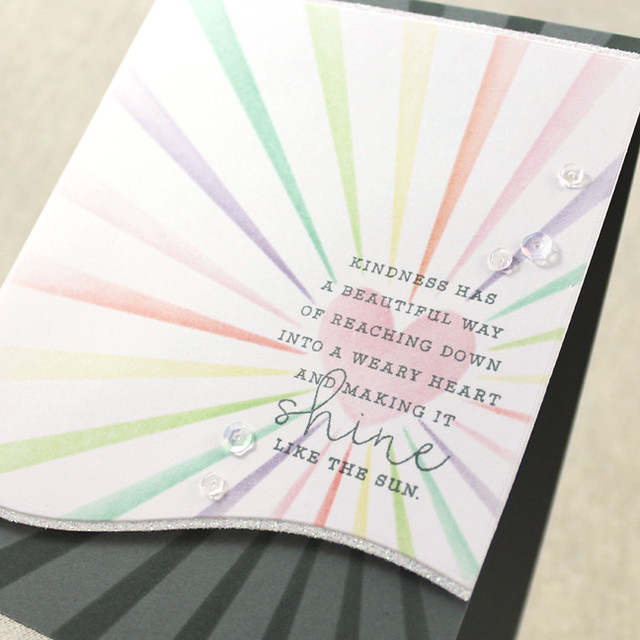
Shine Like The Sun Close Up

I added super thin mats of white adhesive paper behind the top and bottom edges of the heart panel and applied glitter to the sticky edges. It's a nice, subtle touch. Next, I sponged the same heart burst design on a Stormy Sea card base using the matching ink. I mounted the heart burst panel to the card base with foam tape and added a sprinkling of sequins from the kit.

Thank you so much for joining me today! Make sure to visit Nichole, Amy, Ashley, Betsy, Danielle, Dawn, Heather, Kay, Laurie, and Melissa for more of this wonderful new kit. Erin and Maile are also sharing more of their new designs, so make sure to visit them, too! I'll see you again tomorrow for the wrap up for this month's release.

Recipes:
Rainbow After The Storm Card
Stamps: Sunshine & Rainbows Mini, Colorful Words - Papertrey Ink
Cardstock: white
Ink: Berry Sorbet, Summer Sunrise, Harvest Gold, Green Parakeet, Blueberry Sky, Aqua Mist - Papertrey Ink; Onyx Black - VersaFine
Other: Sunshine & Rainbows Stencils, Sunshine & Rainbows Sequins - Papertrey Ink; Embossing Paste - Wendy Vecchi; Sugar Cube Glitter - Martha Stewart Crafts; Foam Tape - Scotch

Shine Like The Sun Card
Stamps: Choose Joy - Papertrey Ink
Cardstock: Stormy Sea, Adhesive Sheets - Papertrey Ink; white
Ink: Lemon Tart, Melon Berry, Sweet Blush, Mint Julep, Aqua Mist, Winter Wisteria, Stormy Sea - Papertrey Ink
Other: Sunshine & Rainbows Stencils, Sunshine & Rainbows Sequins, Sentiment Splits: Curve Vertical Die - Papertrey Ink; Sugar Cube Glitter - Martha Stewart Crafts; Foam Tape - Scotch

Friday, May 13, 2016

Summer Inspirations

Good morning, friends, and welcome back to the second group post in this month's Papertrey Ink countdown. Today we're celebrating summer!

Summer Inspirations Cards

The summer themed sets that we're introducing this morning are so much fun! And you'll be amazed at how versatile they can be. You can create for everything from bon voyage to birthday with these fantastic new stamps.

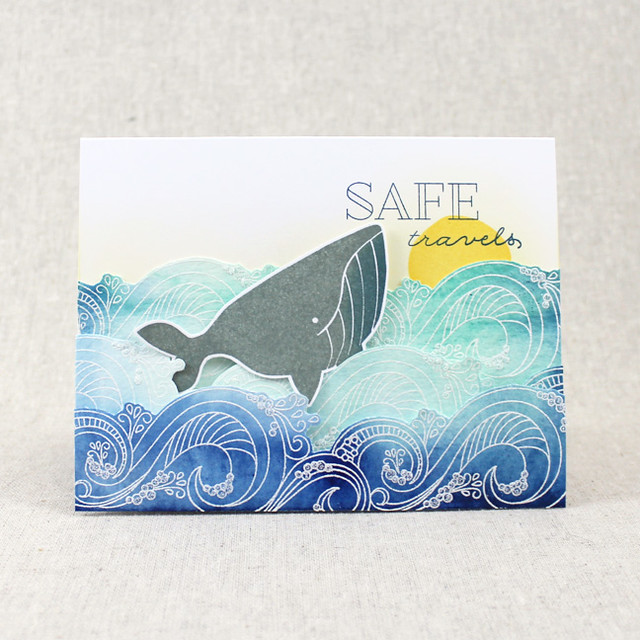
My first card today features Heather's new Keep Swimming set, Betsy's What The Doodle: Waves, and Erin's Colorful Words. There's also another set hiding in there, but it's very sneaky. Whales are supposed to be a symbol of safe passage over water, so I made this card for a friend heading out on a seafaring vacation soon.

Safe Travels Card

I began by watercoloring the blue/green background onto watercolor paper using my Gansai Tambi paints. While that was drying I sponged a white card base with a bit of Harvest Gold ink (I was working on this card one morning during a sunrise and got inspired). I added a sun with the urchin base image from Nichole's Simple Seashells set (see...sneaky) before adding the sentiment in Enchanted Evening. Next, I stamped the whale from Keep Swimming in Stormy Sea and Enchanted Evening inks and trimmed that out (again, there are dies but they haven't made it to me yet).

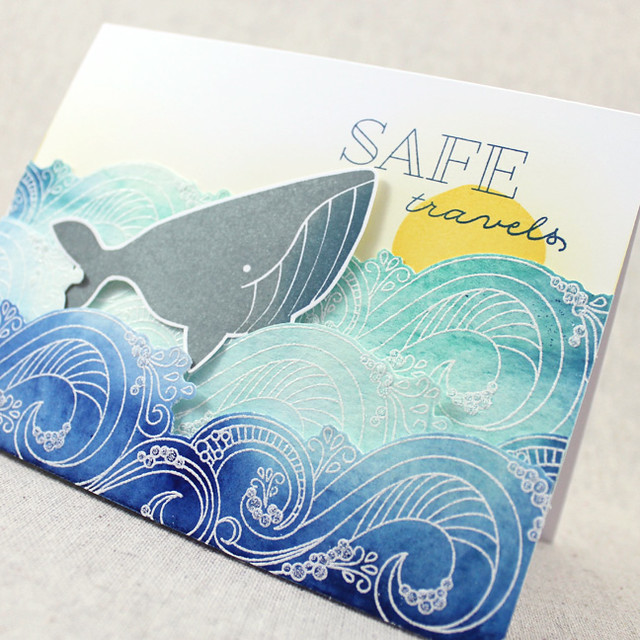
Safe Travels Close Up

Once the watercolored background was dry, I heat embossed the What The Doodle: Waves image in white powder and trimmed out three strips of waves. I adhered the strips to the card base with flat and foam adhesives, each adhesive layer a bit thicker than the last. I tucked my whale into place and embellished the sea spray with fine glitter. I'm really loving those waves!

My next project is a bit more somber. I had the "Footprints In The Sand" poem in mind while I was making this card. I thought it would work perfectly for a loved one in need of support.

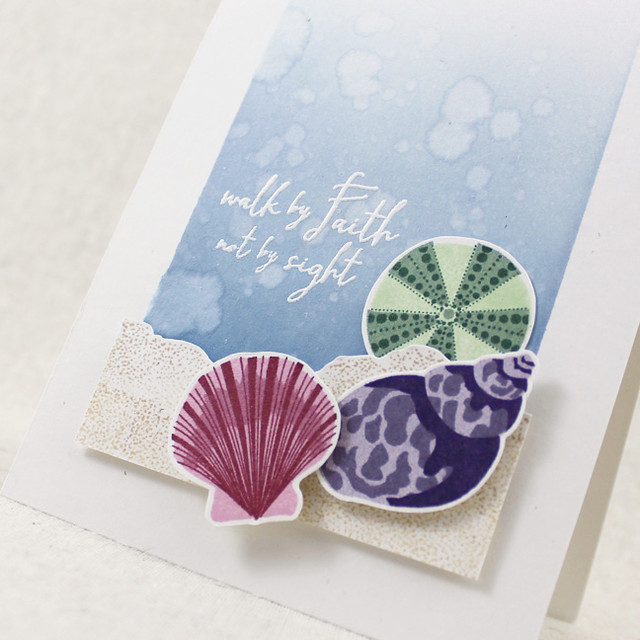
Walk By Faith Card

I began by masking off a rectangle on a Rustic White card base. I sponged Spring Rain and Enchanted Evening inks and then dripped on water droplets. When that had dried, I heat embossed the sentiment from Walk By Faith using white powder. Next, I created a sandy bank by stamping the Sand Swatch images in Fine Linen and Classic Kraft inks. I trimmed that out and adhered it to the card front with foam tape.

Walk By Faith Close Up

Then, I stamped three of the seashells from Simple Seashells onto Rustic White cardstock before trimming them out and adhering them to the card front. I stamped the urchin in Mint Julep, Ocean Tides, and Pinefeather inks. The tulip shell was stamped in Winter Wisteria, Plum Pudding, and Royal Velvet. The scallop was stamped in Lovely Lady, Autumn Rose, and Scarlet Jewel. This card could very easily be adapted to be more masculine with just a few simple ink substitutions.

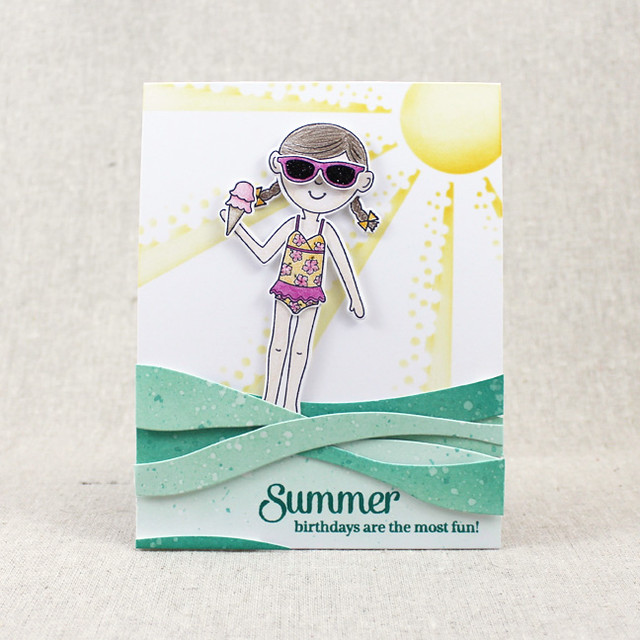
And last but not least today I have a card featuring Betsy's new Dress Up Dolls: Summer. We have several summer birthdays in our family and I thought this set would make a really cute birthday card.

Summer Birthdays Card

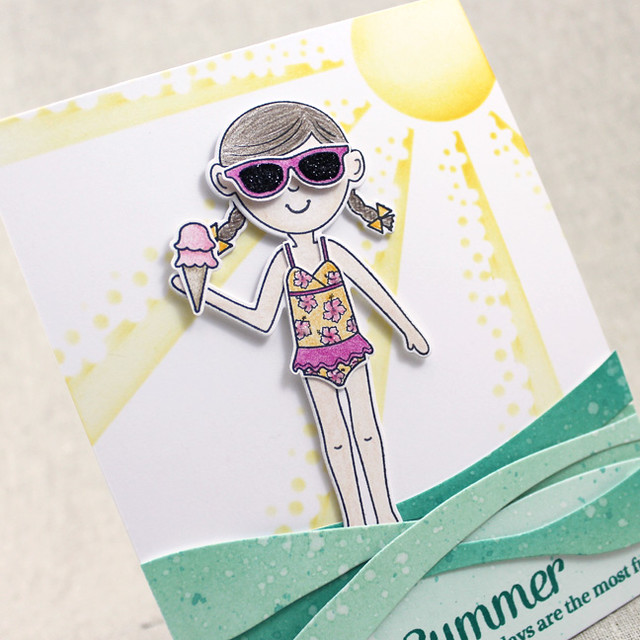
I began by sponging the sun using Betsy's new Sun & Surf Stencil Collection. I used Harvest Gold with just a touch of Summer Sunrise to give dimension. Next, I set about making my waves. I sponged Aqua Mist and Tropical Teal inks onto white cardstock and splattered that with water and Tropical Teal reinker. Then, I die cut the panel with the Cover Plate: Waves die. I stamped the sentiment, from Birthday Classics: June, onto the largest piece using Tropical Teal ink. I adhered that to the card base using foam tape and then wove several of the other pieces together to create a textured pool. Some pieces are adhered with foam tape, some with flat adhesive, and some have both.
Summer Birthdays Close Up

Next, I die cut and colored the Dress Up Dolls: Basics girl. I stamped and colored the Dress Up Dolls: Summer accessories (sunnies, bathing suit, and ice cream cone) and trimmed them out. I adhered the accessories to the girl and embellished with glitter on her bathing suit and glasses. I tucked her into the pool where she looks mighty happy enjoying her birthday treat!

Aren't these new sets so much fun?! And I absolutely love that they're great for a broad variety of uses. Thanks so much for joining me today. Make sure to check in with Nichole, Amy, Ashley, Betsy, Danielle, Dawn, Heather, Kay, Laurie, and Melissa for more summertime inspiration. Erin and Maile are also sharing more of their new designs, so make sure to visit them, too! Have a great day, everyone!

Recipes:
Safe Travels Card
Stamps: Keep Swimming, Colorful Words, What The Doodle: Waves, Simple Seashells - Papertrey Ink
Cardstock: Watercolor Paper - Strathmore; white
Ink: Harvest Gold, Enchanted Evening, Stormy Sea - Papertrey Ink; VersaMark - Tsukineko
Other: White Embossing Powder - Filigree; Carerra Marble Glitter - Martha Stewart Crafts; Foam Tape - Scotch; Watercolor Paints - Gansai Tambi

Walk By Faith Card
Stamps: Simple Seashells, Sand Swatch, Walk By Faith - Papertrey Ink
Cardstock: Rustic White - Papertrey Ink
Ink: Spring Rain, Enchanted Evening, Mint Julep, Ocean Tides, Pinefeather, Winter Wisteria, Plum Pudding, Royal Velvet, Lovely Lady, Autumn Rose, Scarlet Jewel - Papertrey Ink; VersaMark - Tsukineko
Other: Foam Tape - Scotch; White Embossing Powder - Filigree

Summer Birthdays Card
Stamps: Dress Up Dolls: Basics, Dress Up Dolls: Summer, Birthday Classics: June - Papertrey Ink
Cardstock: white
Ink: Aqua Mist, Tropical Teal, Harvest Gold, Summer Sunrise - Papertrey Ink; Tuxedo Black - Memento
Other: Sun & Surf Stencil Collection, Dress Up Dolls: Basics Die, Cover Plate: Waves Die - Papertrey Ink; Crystal, Onyx Glitter - Martha Stewart Crafts; Foam Tape - Scotch; Colored Pencils - PrismaColor

Thursday, May 12, 2016

Introducing Floral Sketches & Classic Calligraphy

Good morning, friends! Welcome to the first group post for this month's Papertrey Ink new release countdown. Today we're showcasing the Floral Sketches and Calligraphy Classics stamp sets. Who doesn't love a wonderful floral? Especially when it pairs beautifully with a gorgeous script. These new sets from Dawn and Nichole are absolutely made for each other!

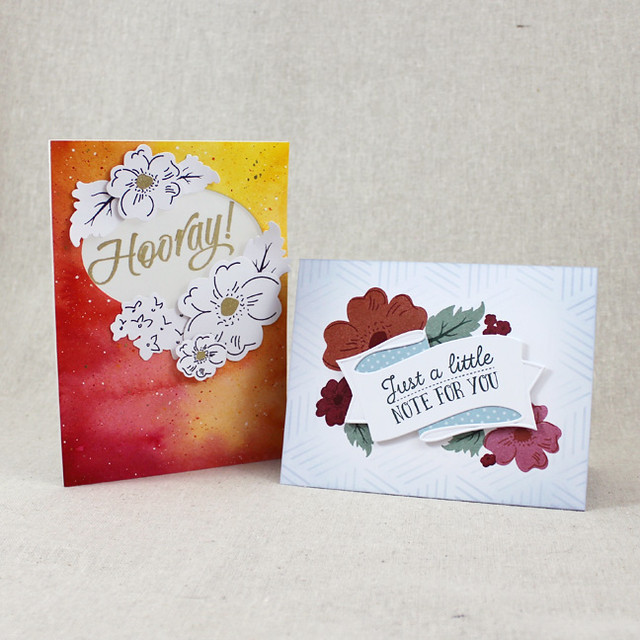
Floral Sketches Cards

I had a blast playing with a handful of techniques to see how many different styles I could achieve. How about we get to some projects, eh?

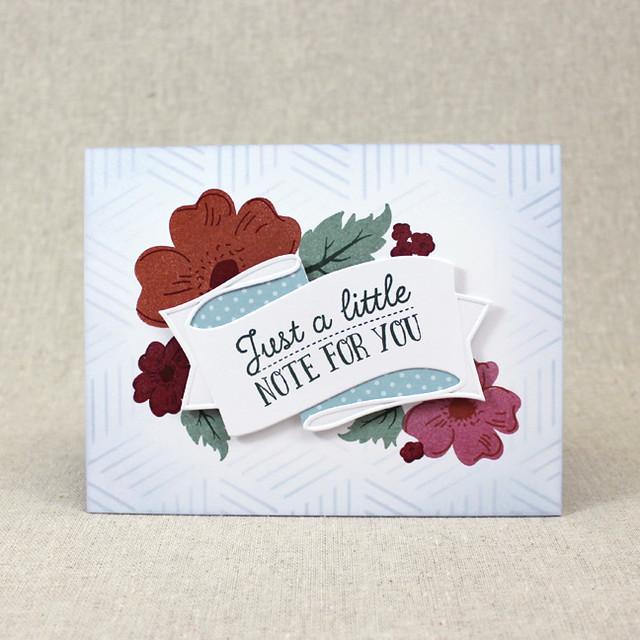
Just A Little Note Card

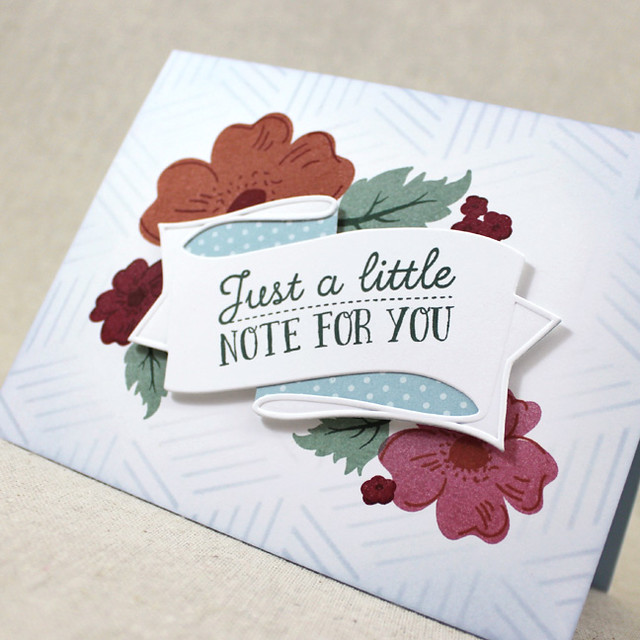
This first card has a bit of a vintage vibe about it. I began by stenciling the background using the Modern Basics stencil and Spring Rain ink. I also did a bit of extra blending around the edges to soften things a bit. Next, I stamped the Floral Sketches flowers in an Americana, Scarlet Jewel, and Autumn Rose color scheme. The details came next in Scarlet Jewel, Dark Chocolate, and Americana. Then, I added the leaves in Ocean Tides and Pinefeather. I mounted that panel to a Spring Rain card base and set it aside for a moment.

Just A Little Note Close Up

Next, I die cut a Layered Banner and stamped the top layer with one of the sentiments in the Floral Sketches set using Pinefeather ink. I curved the stamp slightly when sticking it to my block, resulting in a subtle arc that matches the curve of the banner. I attached a Spring Rain bitty dot layer to that before mounting the whole piece to the card front with foam tape.

The second card is also a departure for me colorwise, but in a totally different way. This time it's all about the brights! I also went with a larger format card with this one. It's an A6 instead of the standard A2 that we cardmakers usually use.

Floral Hooray Card

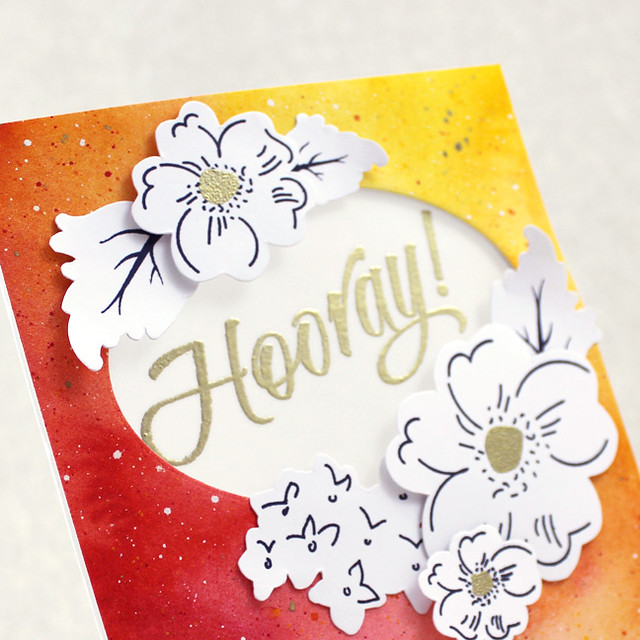
I began by watercoloring a background using bold, warm colors. Once it had dried I splattered more concentrated paint in tiny flecks, this time adding gold and white to the mix. I set it aside to dry again while I cut out my flowers (my dies fell into a gaping black hole on the way to Granville so I had to hand cut them, but there are dies that coordinate with this set). I stamped each shape with the its coordinating detail image in True Black ink and heat embossed the flowers centers with gold powder for a pretty metallic touch.

Version 2

Once the watercolored panel had dried, I die cut a window with the simple oval from Limitless Layers 3 1/2" Ovals Die Collection. Then, I mounted the panel to a vellum card base on which I had heat embossed the sentiment from Calligraphy Classics using gold powder. I lined the inside so the adhesive wouldn't show and then I attached the floral bits with a mix of flat and foam adhesives. I love the contrast of the black, white, and gold blooms against that bright background. This is a style I'm sure to try again!

Thank you so much for joining me today! Make sure to pop over and visit NicholeAmy, Ashley, Betsy, Danielle, Dawn, Heather, Kay, Laurie, and Melissa to see more of these beautiful new sets. Erin and Maile are also sharing more of their new designs too, so make sure to check them out, too. Have a wonderful day and I'll see you again very soon!

Recipes:
Just A Little Note Card
Stamps: Floral Sketches - Papertrey Ink
Cardstock: Spring Rain, Spring Rain Bitty Dot Patterned Paper - Papertrey Ink; white
Ink: Americana, Scarlet Jewel, Autumn Rose, Spring Rain, Ocean Tides, Pinefeather, Dark Chocolate - Papertrey Ink
Other: Layered Banner Die, Modern Basics Stencil Collection - Papertrey Ink; Foam Tape - Scotch

Floral Hooray Card (A6 size)
Stamps: Floral Sketches, Calligraphy Classics - Papertrey Ink
Cardstock: Vellum - Papertrey Ink; Acquarello Watercolor Paper - Fabriano Artistico; white
Ink: True Black - Papertrey Ink; VersaMark - Tsukineko
Other: Limitless Layers: 3 1/2" Oval Die Collection - Papertrey Ink; Watercolors - Gansai Tambi; Opaque White Pigment - Copic; Gold Embossing Powder - Filigree; Foam Tape - Scotch