Tuesday, September 15, 2015

Release In Review

Good morning, everyone! Have you enjoyed this month's Papertrey Ink countdown? I admit, I was a little resistant to the idea of Christmas crafting when it's still so warm outside, but I really got into the holiday spirit before too long. I'm sharing the last of my countdown projects with you this morning, so let's get to it!

Let's start with the new Keep It Simple Surgery and Tucked In: Get Well stamp sets.

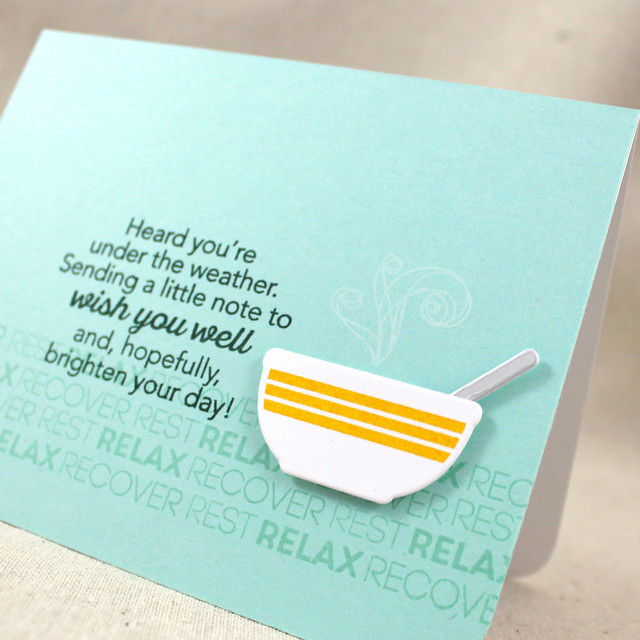
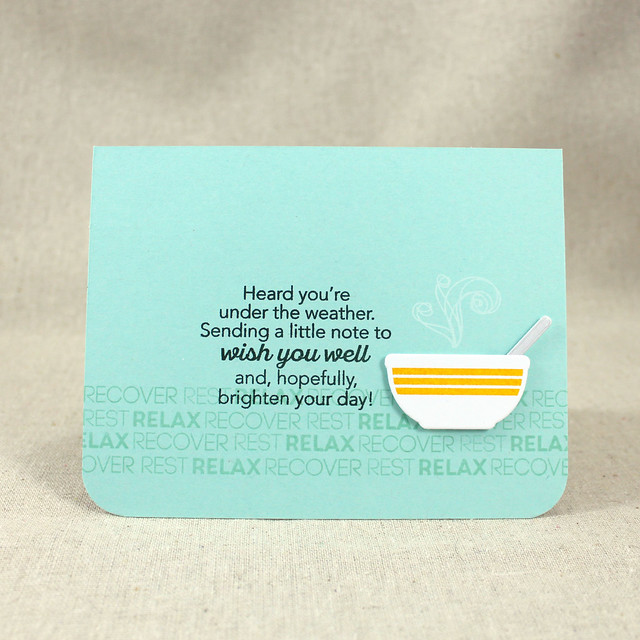
Under The Weather Card

I began by repeatedly stamping one of the Keep It Simple sentiments to form a sort of border on an Aqua Mist card front. Then, I die cut and stamped one of the Bowl Of Sunshine bowls and added a "spoon" by die cutting a L'Shanah Tovah honey wand from Luxe Silver cardstock.

Under The Weather Close Up

I stamped the Tucked In sentiment in Pinefeather ink and the steam swirl from Remember before adding the bowl with foam tape. I finished the card with rounded corners for a softer touch. Nice and simple!

Next up is Maile's Treetops Glisten set.

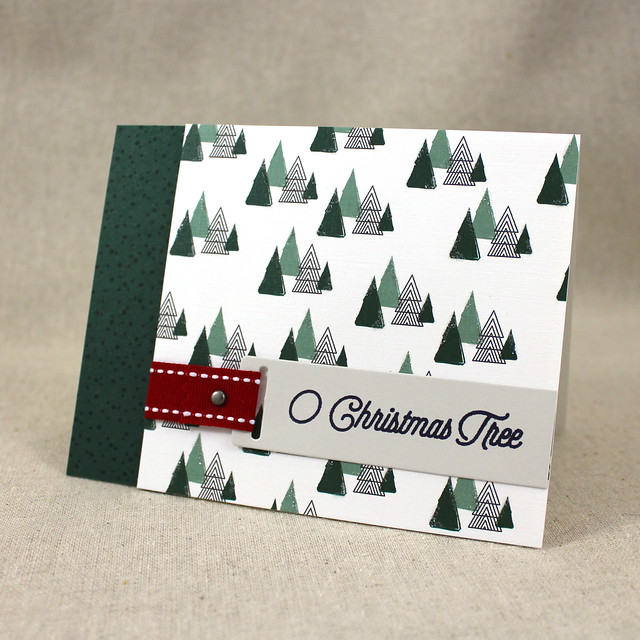
O Christmas Tree Card

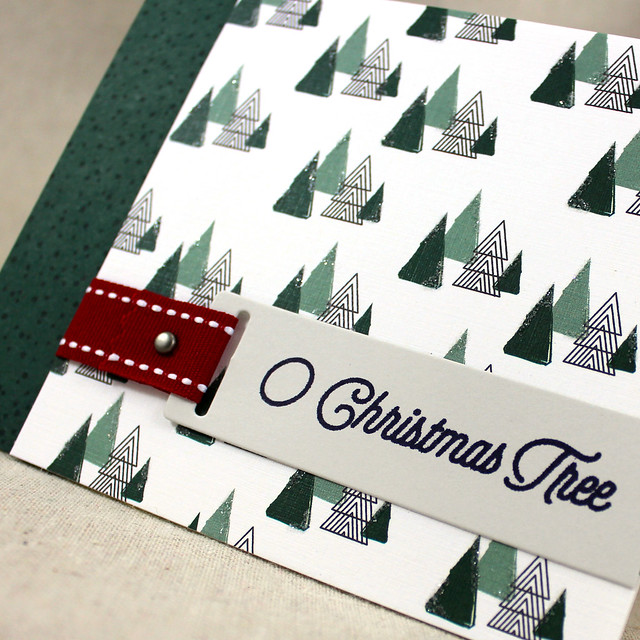
I began by trimming a narrow panel of Pinefeather cardstock and stamping it with the polka dotty tree overlay image using Pinefeather ink. Then, I adhered that panel to a white card base. Next, I trimmed an edge off of a piece of Treetops Glisten patterned paper before embellishing the trees with fine crystal glitter.

O Christmas Tree Close Up

Then, I die cut a Ribbon Slider tag from Soft Stone cardstock, trimmed off the edge, and stamped it with the sentiment from Treetops Glisten. I trimmed a piece of Pure Poppy saddle stitch ribbon with pinking shears and attached it to the tag with a pewter brad. I adhered the sentiment tag to the patterned paper layer and wrapped the ribbon around to the back side. I mounted that panel to the card front using foam adhesive. It's so glittery in real life!

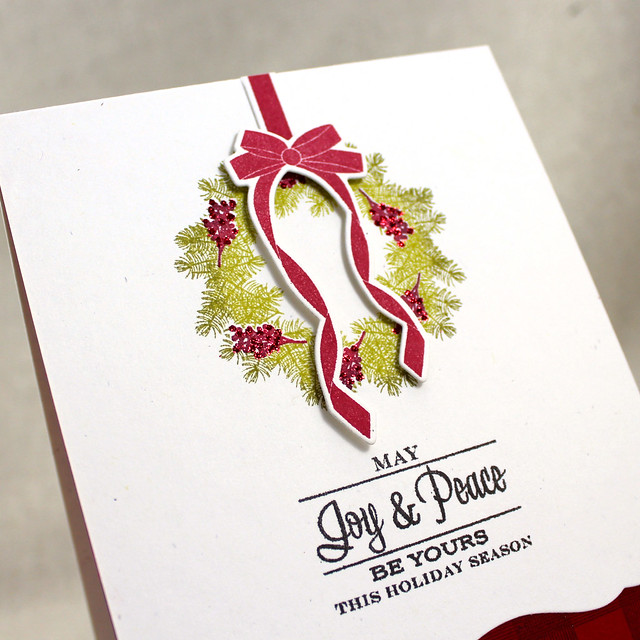
The last card for this release features Dawn's Deck The Halls set. I love this wreath and it's gorgeous bow so, so much!

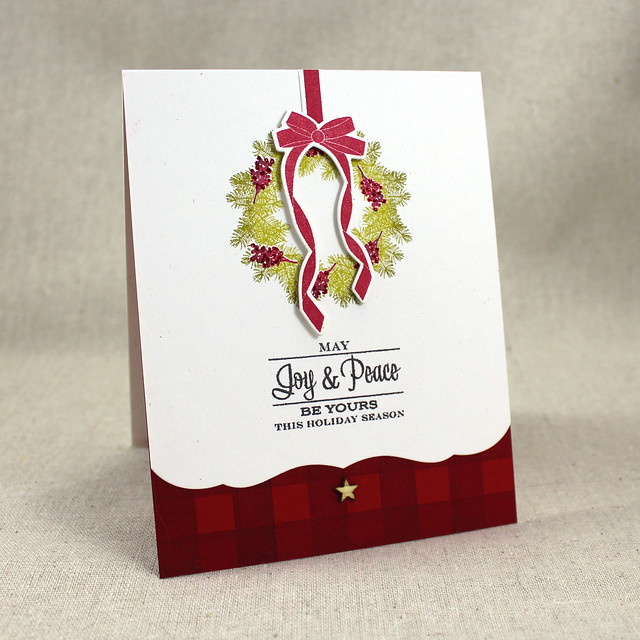
Joy & Peace Wreath Card

I began by die cutting a Rustic White card front with the Edgers #1 die to give it that decorative edge. Then, I stamped the wreath greenery by rock & rolling it in Simply Chartreuse and Ripe Avocado inks. I added the berry sprigs by inking in Pure Poppy and Scarlet Jewel inks. I added the sentiment below the wreath in Smokey Shadow ink.

Joy & Peace Wreath Close Up

Next, I die cut the bow and hanging ribbon shapes and stamped them with their coordinating images using Pure Poppy ink. I embellished the berry clusters with garnet glitter and added the ribbon and bow with a mix of flat and foam adhesives. Next, I stamped a panel of Pure Poppy cardstock with the buffalo plaid from Autumn Pattern Pieces with Scarlet Jewel ink. I adhered that to the inside of the card front and embellished with a single wooden star.

And there you have it! Another countdown in the books. Make sure to check in with Amy, Ashley, Betsy, DawnHeather, Laurie, Maile, and Melissa for more inspiration from this month's release. Enjoy the rest of your week and I'll see you soon!

Recipes:
Under The Weather Card
Stamps: Bowl Of Sunshine, Keep It Simple Surgery, Tucked In: Get Well, Remember - Papertrey Ink
Cardstock: Aqua Mist, Luxe Silver - Papertrey Ink; white
Ink: Aqua Mist, Pinefeather, Summer Sunrise, Fresh Snow - Papertrey Ink
Other: Bowl Of Sunshine Die, L'Shanah Tovah Die - Papertrey Ink; Foam Tape - Scotch

O Christmas Tree Card
Stamps: Treetops Glisten - Papertrey Ink
Cardstock: Pinefeather, Treetops Glisten Pattern Pack - Papertrey Ink; white
Ink: Pinefeather, True Black - Papertrey Ink
Other: Ribbon Slider Tag Die, Pure Poppy Saddle Stitch Ribbon - Papertrey Ink; Crystal Glitter - Martha Stewart Crafts; Foam Tape - Scotch; Pewter Mini Brad - Making Memories

Joy & Peace Wreath Card
Stamps: Deck The Halls, Autumn Pattern Pieces - Papertrey Ink
Cardstock: Pure Poppy, Rustic White - Papertrey Ink; white
Ink: Ripe Avocado, Simply Chartreuse, Pure Poppy, Scarlet Jewel, Smokey Shadow - Papertrey Ink
Other: Deck The Halls Die, Edgers #1 Die, Wooden Star (Holiday Folk Kit) - Papertrey Ink; Garnet Glitter - Martha Stewart Crafts; Foam Tape - Scotch

Monday, September 14, 2015

Nativity Inspiration

Good morning, friends! Welcome back to Day 5 of the Papertrey Ink September countdown! Anyone who loves the nativity story is sure to find joy in the sets we're showcasing today. The beautiful images and sentiments are perfect for meaningful Christmas crafting. If religious projects are at the top of your list this Christmas, you're sure to enjoy today's inspiration. Let's get right to it!

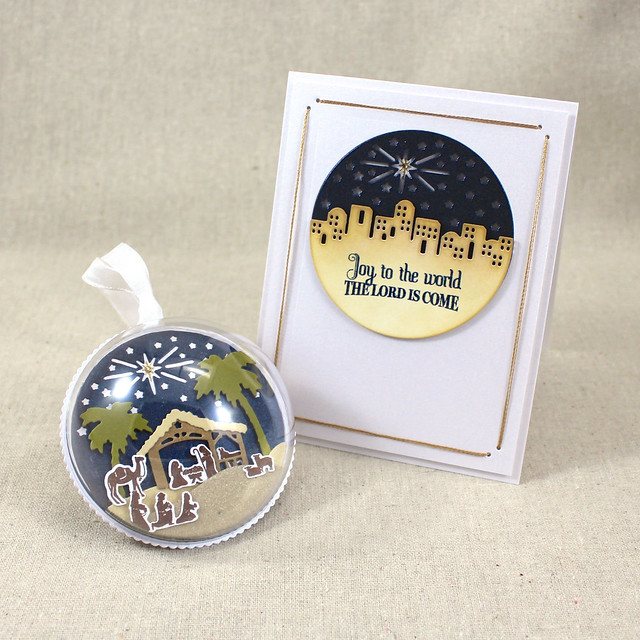
Despite having been in love with them since Tinsel & Tags released last year, I had yet to create a Petite Places dome. So to remedy that, I created a gift set featuring the Petite Places: Nativity collection as well as Dawn's new O Holy Night sentiment set.

Nativity Gift Set

I wanted the items in this set to coordinate, but I didn't want them to be exactly the same. I like giving gift and card sets with a little variety.

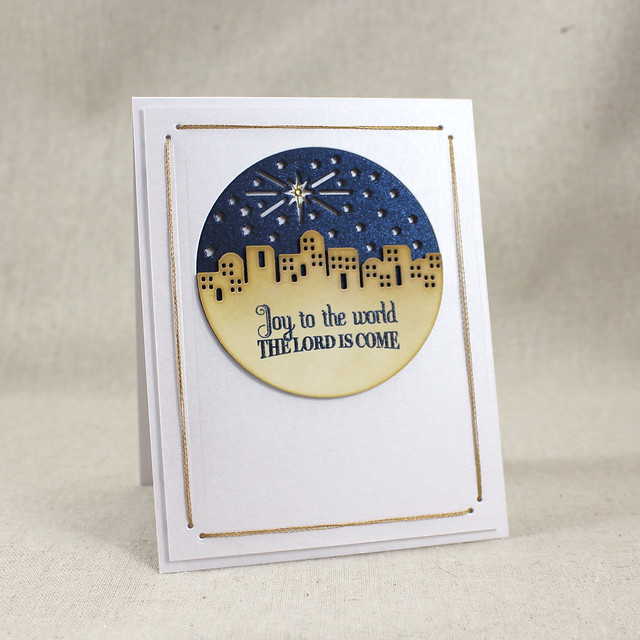
Joy To The World Card

I began with the card. I die cut the Bethlehem scene from white cardstock and blended Fine Linen and Classic Kraft inks until I was happy. I then stamped that piece with a partial sentiment from O Holy Night using Enchanted Evening ink. The full sentiment was too long for the space I was working with, so I just masked off the part of the sentiment I didn't want to use before inking. I followed up with Versamark and clear powder to give the sentiment a shine and to make it stand out against the matte finish of the buildings.

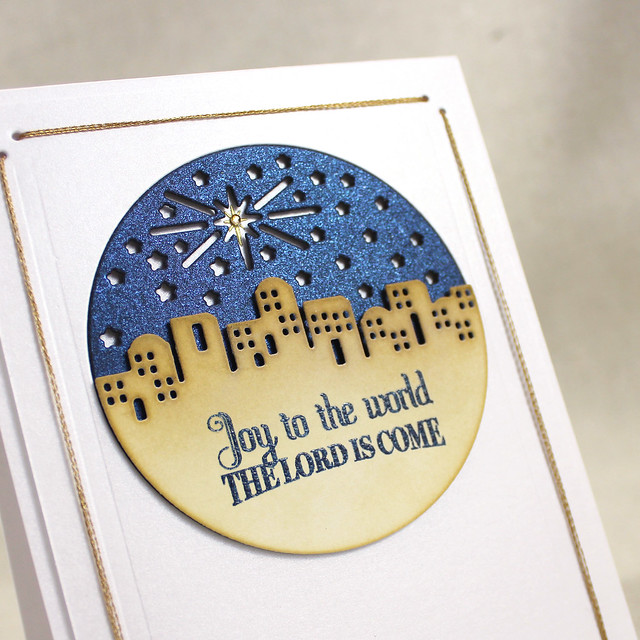
Joy To The World Close Up

Next, I die cut the starry Scene It piece from Night Sky Shimmer cardstock. I inlaid that into a panel of White Shimmer that I'd embellished with the new String Frames die and some metallic gold embroidery floss. I gold heat embossed the star from Petite Places: Nativity onto a White Shimmer card base and mounted the night sky panel using foam tape. I added the Bethlehem piece with more foam tape and embellished the star with a tiny self-adhesive rhinestone for a touch of added sparkle.

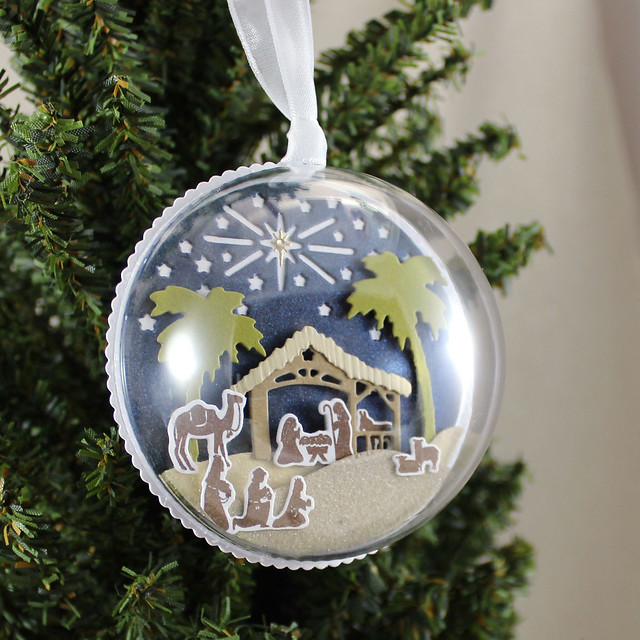
The ornament came next and I had so much fun putting it together that I see many more domes in my future!

Nativity Ornament On Tree

I began by die cutting the night sky Scene It shape from Night Sky Shimmer cardstock and a Scene It: Basic Backer shape from White Shimmer stock. I gold embossed the star before adhering the night sky layer to the backer layer and set that whole piece aside. Next I went about creating the sand dunes. I xyroned pieces of Fine Linen and Classic Kraft cardstock before die cutting them with the Scene It: Bethlehem palm tree layer and the small hill in the Scene It: Everyday set. I removed the adhesive backing and sprinkled the sticky surfaces with decorative sand to give them a realistic appearance. I then die cut the palm tree layer from Ripe Avocado cardstock and adhered that to the back of the Fine Linen dune. I attached the dunes to the night sky layer with foam tape and then die cut the stable, people, and animals from Petite Places: Nativity.

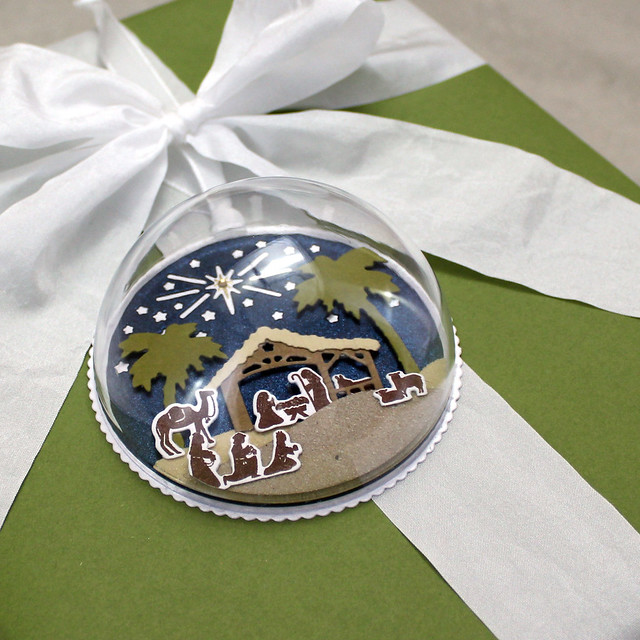
Nativity Dome Orament On Gift

I stamped the figures and stable with their coordinating images. I textured the straw roof with the Woodgrain Impression Plate before attaching it to the stable. I used foam tape and liquid adhesive to adhere the stable and figures into place in the Bethlehem scene. Once everything was in place, I embellished the star with another self-adhesive rhinestone. Finally, I secured the dome into place by running liquid adhesive around the bottom edge before pressing it to the backer layer. I used E6000 and it seems to be holding up quite well.

Next up, I have a quick tag that uses many of these same elements, but with a slightly more modern color scheme. Plus, it really couldn't be much easier. Bonus!

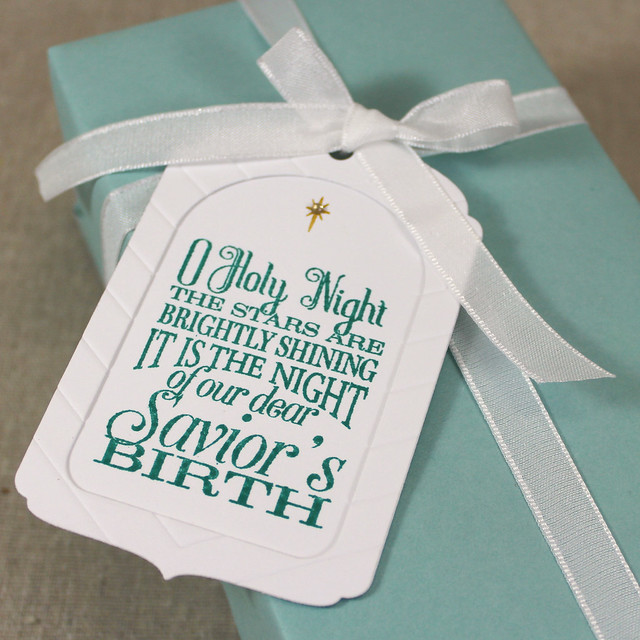
O Holy Night Tag

I began by die cutting two of the Tag Sale #8 shapes from white cardstock. I die cut the coordinating frame from one of the tags and textured it with the Cover Plate: Center Stage die (I just used the impression plate sandwich to make sure it didn't cut all the way though). I stamped the sentiment from O Holy Night and added a heat embossed star. I adhered the frame into place and added a rhinestone to the star. Easy as can be!

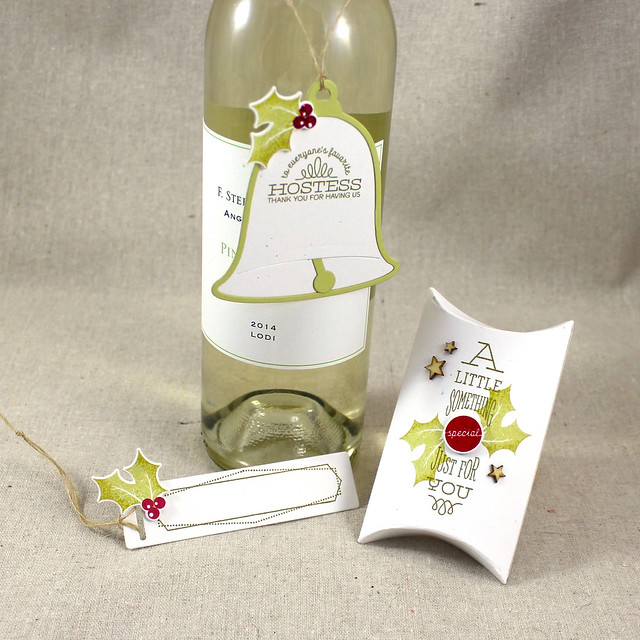
Finally, I have a set of packaging items that I created by pairing my Ribbon Slider Sentiments and die with Dawn's new Enclosed: Bell set.

Holly Packaging Set

First up is the frame tag. I love the simplicity. I just die cut the Ribbon Slider tag from Rustic White cardstock and stamped it with the Ripe Avocado frame. I die cut the holly and stamped it with the coordinating images from Dawn's set.

Next up is the pillow box.

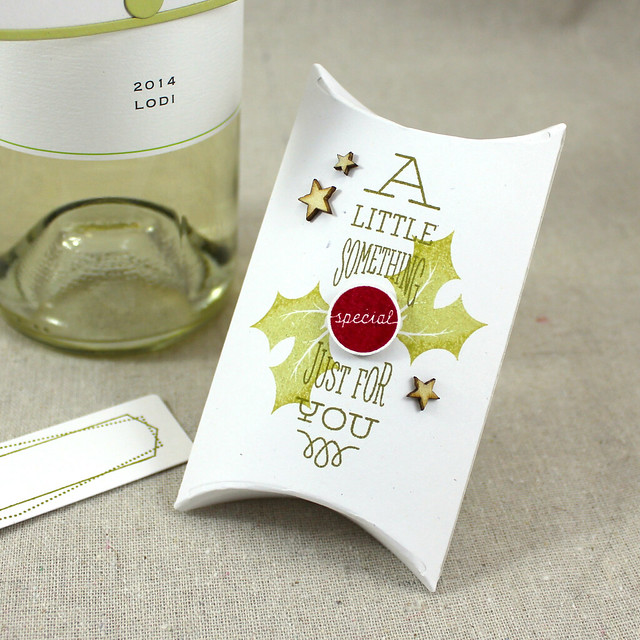
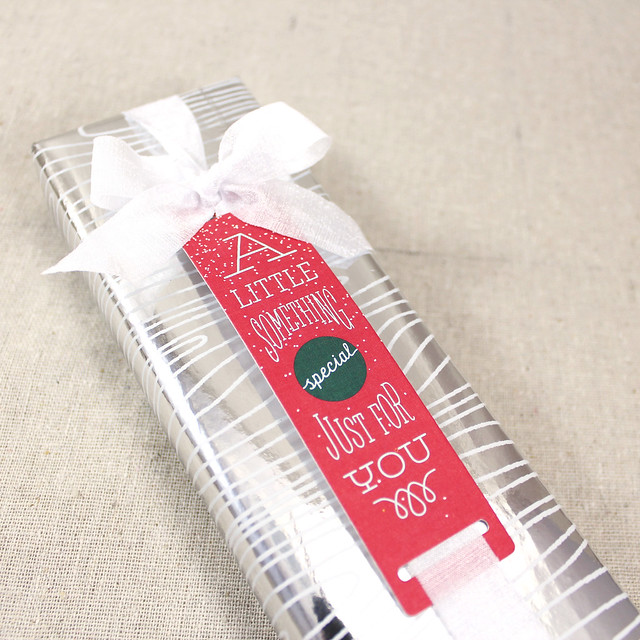
A Little Something Pillow Box

I die cut the Essential Pillow Box shape from Rustic White cardstock and stamped the Ribbon Slider Sentiment onto the front with Ripe Avocado ink. Next, I added the holly that I'd inked with Spring Moss and Simply Chartreuse inks. I stamped the sentiment a second time, this time with Pure Poppy, onto a scrap of Rustic White and then clear heat embossed it for a bit of shine. I then punched out the "special" circle. I added that atop the circle on the pillow box with foam tape and embellished with a few wooden stars from Betsy's Make It Market Mini: Folk Holiday kit. Cute!

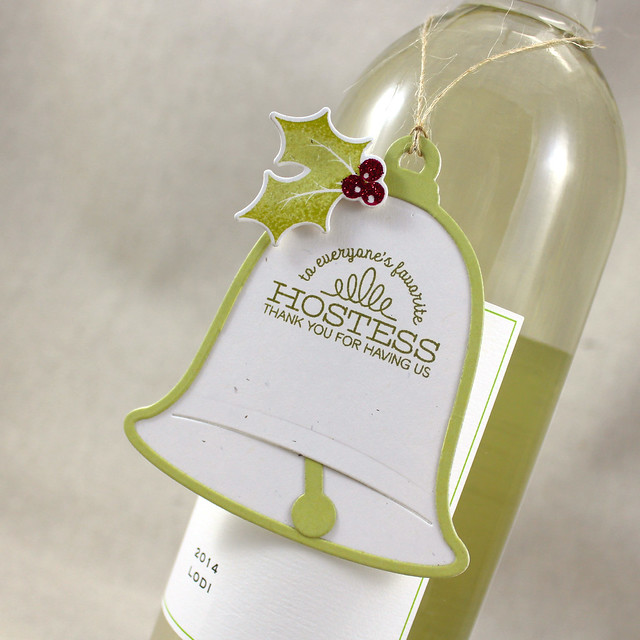
And finally we have the bell hostess tag.

Bell Hostess Tag

I die cut the solid bell and holly from Rustic White cardstock and the outline bell and clapper from Spring Moss cardstock. I trimmed "joy" from the center of the bell outline and adhered it to the solid bell before stamping the sentiment from the Ribbon Slider set. I stamped the holly with the coordinating images and adhered it to the bell with foam tape. I embellished the berries with fine garnet glitter as a finishing touch.

Thank you so much for joining me today! I'll be back again tomorrow with this month's wrap-up post, but in the meantime Nichole, Amy, Ashley, Betsy, Dawn, Heather, Laurie, Maile, and Melissa all have projects to share with you. Erin is also sharing additional projects featuring her new Christmas Tree Change-Up set. I'll see you tomorrow!

Recipes:
Joy To The World Card
Stamps: Petite Places: Nativity, O Holy Night - Papertrey Ink
Cardstock: White Shimmer, Night Sky Shimmer - Papertrey Ink; white
Ink: Classic Kraft, Fine Linen, Enchanted Evening - Papertrey Ink; VersaMark - Tsukineko
Other: Scene It: Bethlehem Die, String Frames Die - Papertrey Ink; Foam Tape - Scotch; Metallic Gold Embroidery Thread - DMC; Gold, Clear Embossing Powder - Filigree; Self-Adhesive Rhinestone - Mark Richards

Nativity Ornament
Stamps: Petite Places: Nativity - Papertrey Ink
Cardstock: Ripe Avocado, Classic Kraft, Fine Linen, White Shimmer, Night Sky Shimmer - Papertrey Ink; white
Ink: Dark Chocolate, Classic Kraft - Papertrey Ink; VersaMark - Tsukineko
Other: Scene It: Bethlehem Die, Clear Tag Dome - Papertrey Ink; Foam Tape - Scotch; Gold Embossing Powder - Filigree; Self-Adhesive Rhinestone - Mark Richards; Xyron; Sand

O Holy Night Tag
Stamps: Petite Places: Nativity, O Holy Night - Papertrey Ink
Cardstock: white
Ink: Tropical Teal - Papertrey Ink; VersaMark - Tsukineko
Other: Tag Sale #8, Cover Plate: Center Stage - Papertrey Ink; Self-Adhesive Rhinestone - Mark Richards

Holly Gift Packaging Set
Stamps: Enclosed: Bell, Ribbon Slider Sentiments - Papertrey Ink
Cardstock: Rustic White - Papertrey Ink
Ink: Ripe Avocado, Pure Poppy, Spring Moss, Simply Chartreuse - Papertrey Ink; VersaMark - Tsukineko
Other: Enclosed: Bell Die, Ribbon Slider Tag Die, Essential Pillow Box Die, Rustic Jute Button Twine, Wooden Stars (Folk Holiday Mini Kit) - Papertrey Ink; Garnet Glitter - Martha Stewart Crafts; Foam Tape - Scotch

Sunday, September 13, 2015

Quick + Easy Holiday Wraps

Good morning and welcome back for Day 4 of the Papertrey Ink countdown! Today is another fantastic group post, this time showcasing seasonal gift wrap. I love gift wrapping at the holidays (it may even be my favorite part of gift giving). I set up a table with all of my supplies and I enjoy taking my time carefully wrapping each gift for our friends and family. This year my tags will be just as lovely as the rest of my packaging, thanks to the fantastic stamps and dies coming out this month! There's a lot to see, so let's get to it!

First off I'm going to share the new Minute To Make: Holiday Tags 1 set.

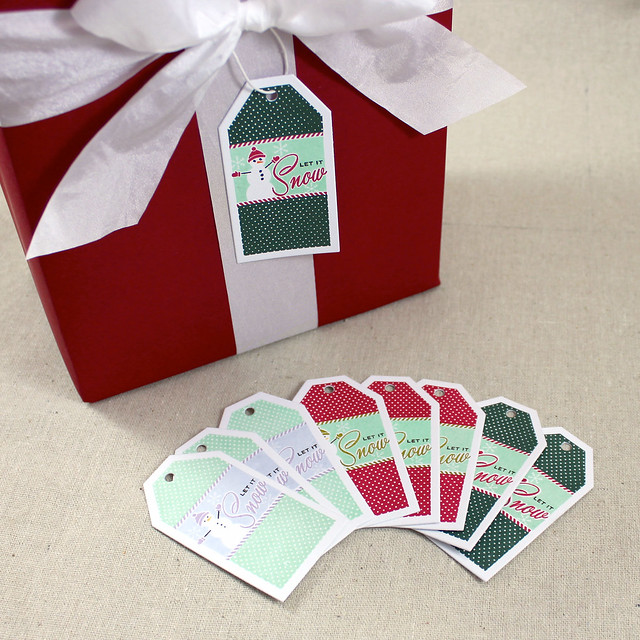
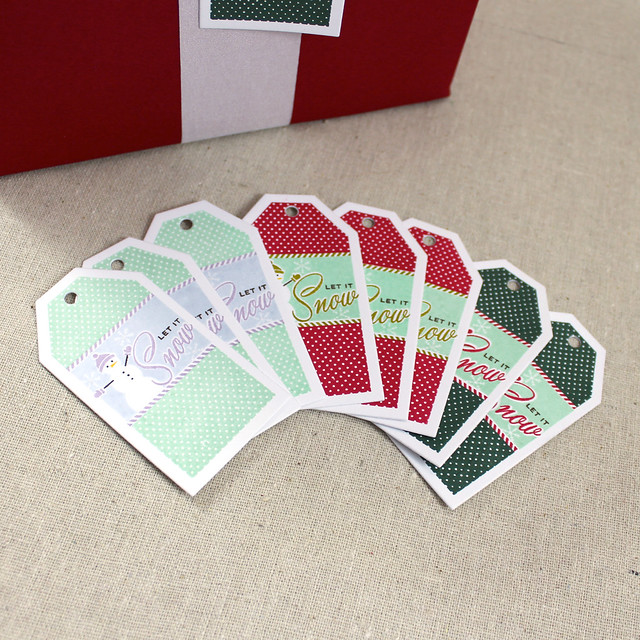
Let It Snow Gift Tag Set
Once I started making these tags I just couldn't stop! They are so easy and they come together so quickly that I made all nine of these tags in about 15 minutes (and that includes embellishing them with glitter).

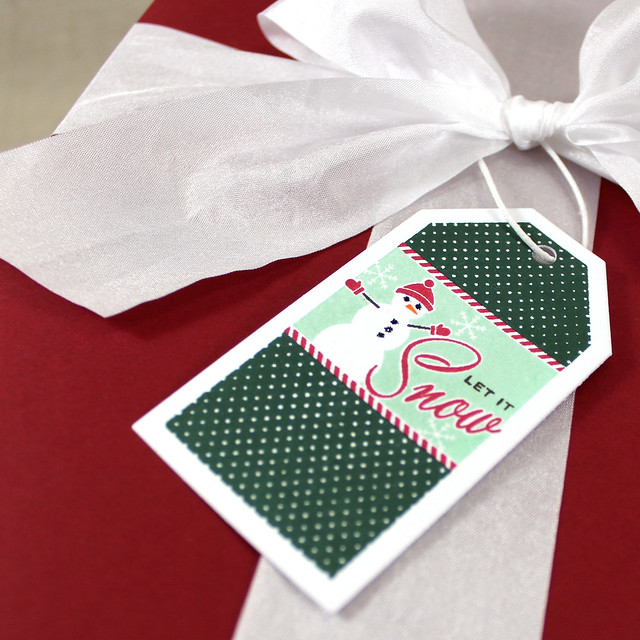
Let It Snow Tag Close Up

I use the new Minute To Make: Holiday Tags Die to cut the tag shapes out of the new White Tag Stock. This new stock is incredibly thick, but still easily die cut, resulting in tags with a nice weight and sturdiness. I simply chose a tag design (isn't that snowman the cutest?!), stamped the coordinating images, and embellished with glitter (some tags got glitter on the snowflakes, others on the buttons and eyes).

Let It Snow Gift Tag Set Close Up

I was just going to do one set, but things were going so well that I went ahead and made two more sets of three. Honestly, the thing that took the most time about the process was cleaning my stamps between ink colors.

Next up, I'm going to share more of my Ribbon Slider Tags.

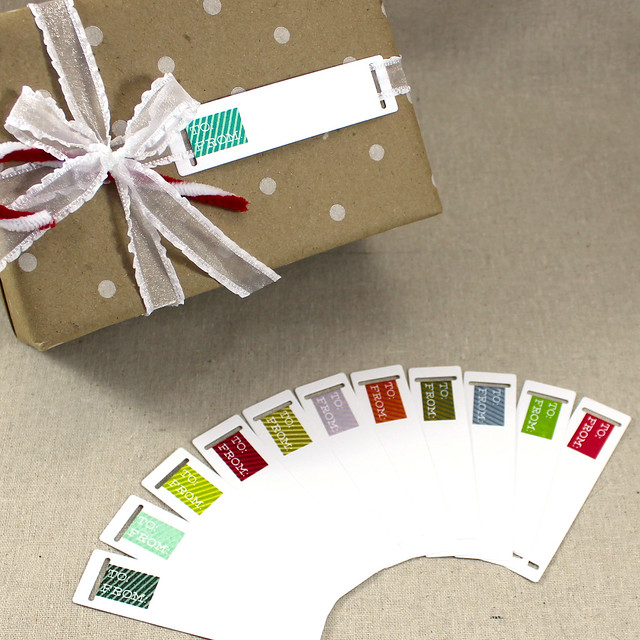
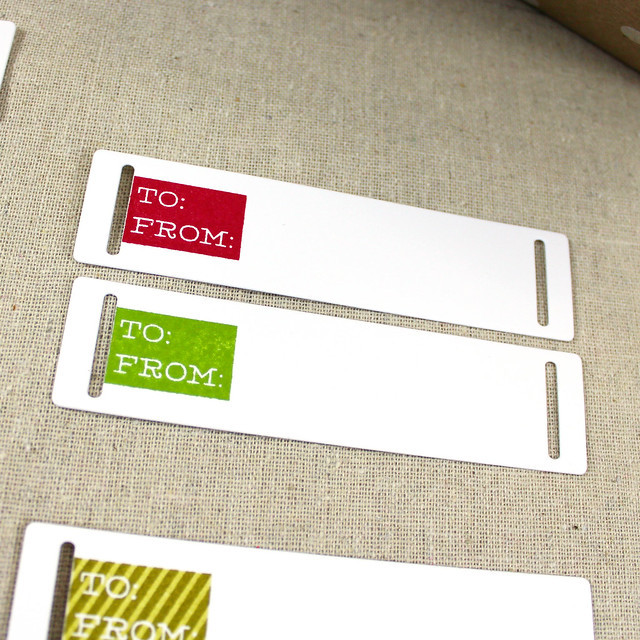
To From Gift Tag Set

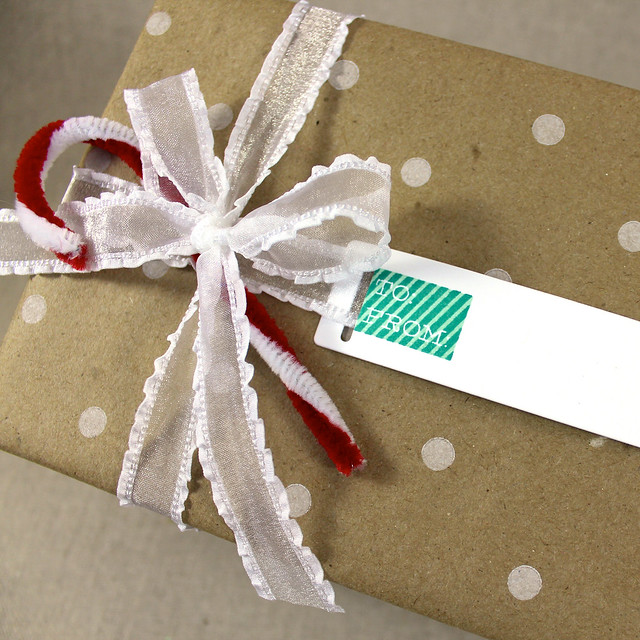
I wanted to create a set of tags in assorted colors that could work with any wrapping paper I happened to dig out. This "To:/From:" image is a nice basic image that can be dressed up or down depending on technique, so I thought it would lend itself well to creating a large set of tags.

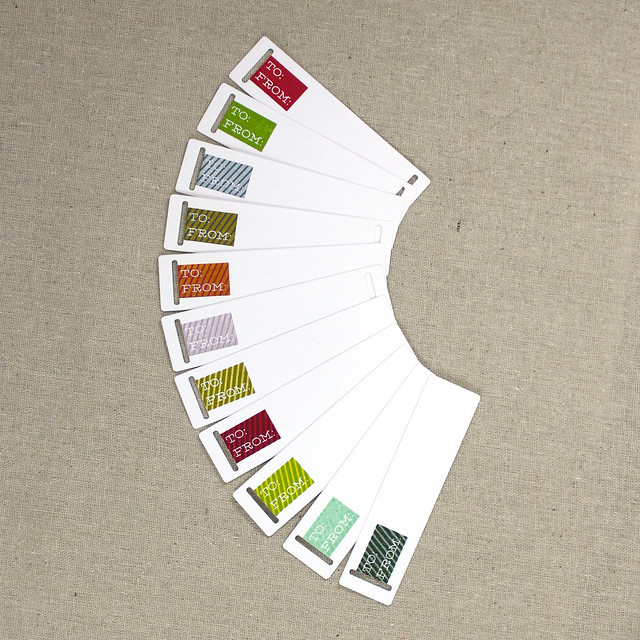
To From Tag Set

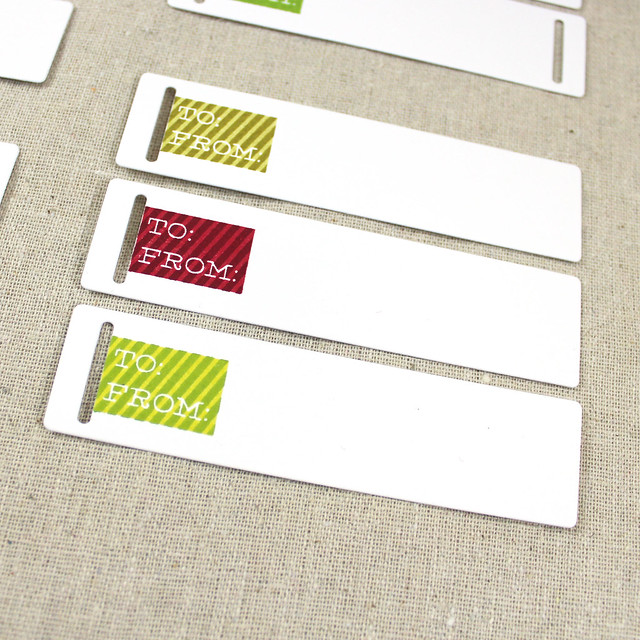
The image has solid and striped layers that you can use together or separately. They're actually fairly simple to line up if you use this tip: Always stamp the darker color first. If you remember to do that, you're golden.

To From Tag Package Close Up

I wanted to experiment with assorted styles on this tag set, so I tried a few different things.

On these tags I simply used the solid image by itself. These tags would work particularly well on busy wrapping paper.

Solid To From Tags

These ones use both the solid and striped images together to create a monochromatic striped appearance. The Pure Poppy/Scarlet Jewel tag might be my favorite of the whole bunch.

Striped To From Tags

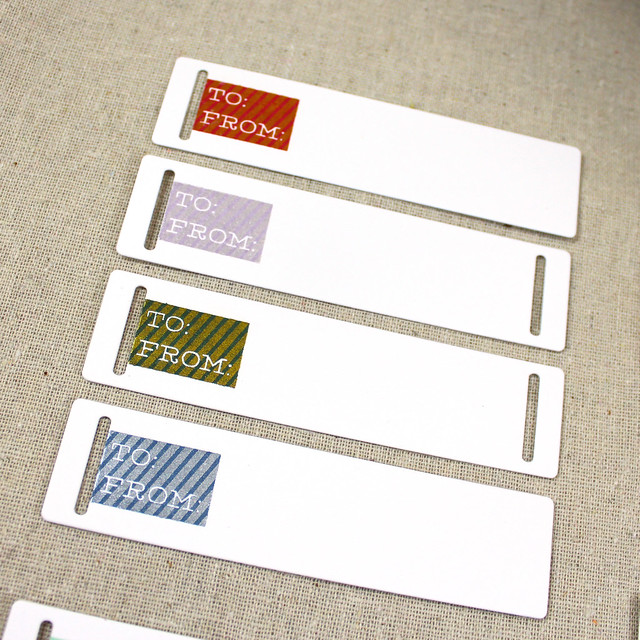
On these, I stamped the solid image in a color and then added the stripes with VersaMark and Perfect Pearls pigment powder.

Perfect Pearls To From Tags

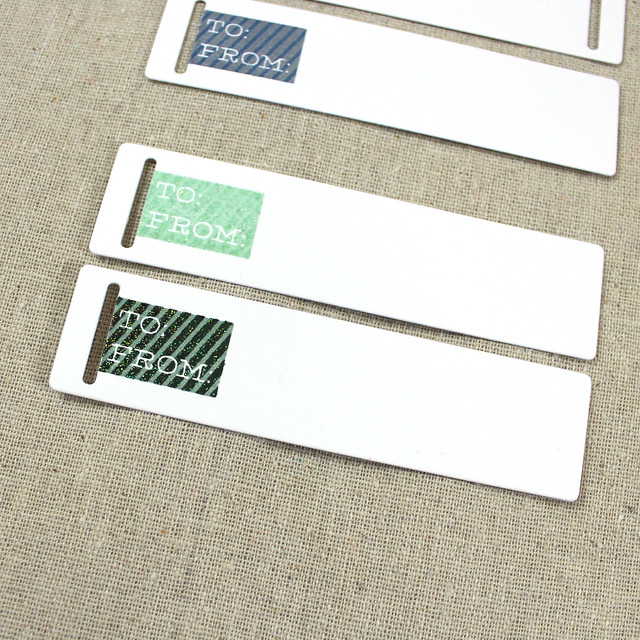
And finally, on these, I used holographic embossing powder on the stripes to add a bit of glitz.

Glittered To From Tags

I'm really looking forward to having these handy when I do my wrapping this year!

Now let's take a look at the In The Bag collection. More and more, it seems like gift cards are the most practical gift for certain members of our family. While I appreciate the practicality, I'd still like to present them with a little pomp, know what I mean? These stamps and dies help you do just that.

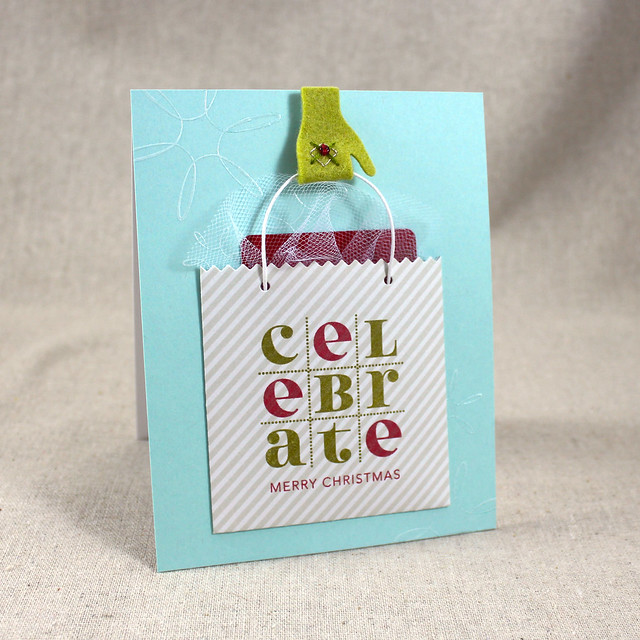
Celebrate Christmas Mitten Card

I began by die cutting the bag from Soft Stone patterned paper and the mitten from Simply Chartreuse felt. I stamped the bag with the "celebrate" image and the companion Christmas image from the In The Bag set. Then, I gave the bag a handle using waxed paper cord and added a bit of tulle to the inside of the bag to look like tissue paper. I stamped an Aqua Mist card front with snowflakes from Freshly Fallen using Fresh Snow ink and embossed with clear powder. Pairing the white ink with the clear powder makes the background particularly subtle which was ideal for what I wanted. The snowflakes are just a whisper.

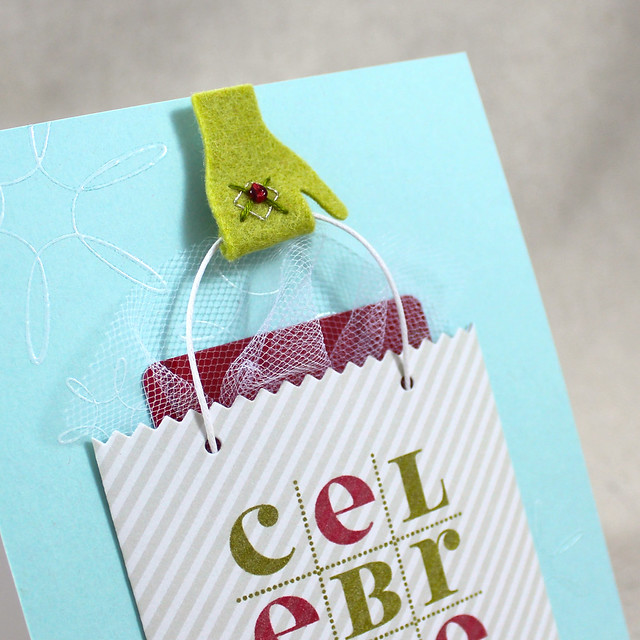
Celebrate Mitten Close Up

I adhered the bag to the card front and set about embellishing my mitten. I stitched a simple argyle pattern using silver and green threads and then added a bead right in the center for a pop of color.

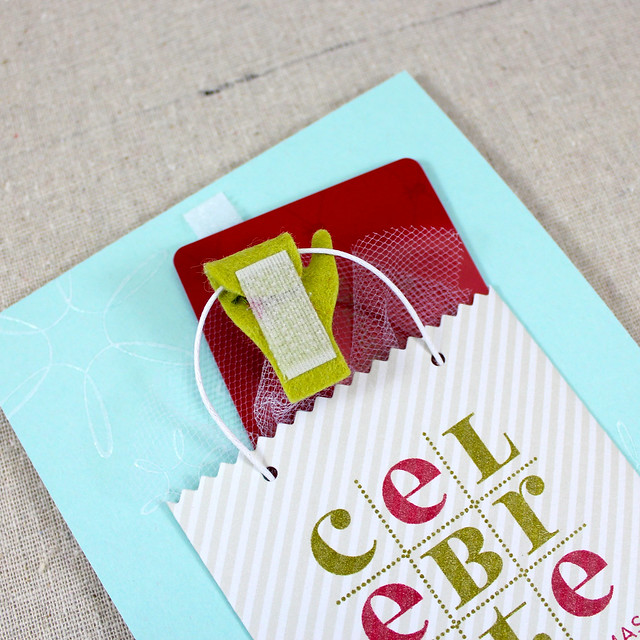
Celebrate Mitten Velcro Closure

I folded the mitten around the handle and secured it with a piece of self-adhesive hook and loop tape (velcro). The companion piece of velcro was secured to the card front. This allows the recipient to get the gift card out of the bag easily while also keeping it secure in the meantime. Perfect!

Lastly today, I'm sharing Erin's new Christmas Tree Change Up dies.

Tree Ornament Gift Toppers

I wanted to create some felt gift toppers that could be used as Christmas tree ornaments after the presents have been opened. And, because I can't help myself when it comes to felt projects, I made two. One 3D and one flatter version.

Let's start with the 3D, shall we?

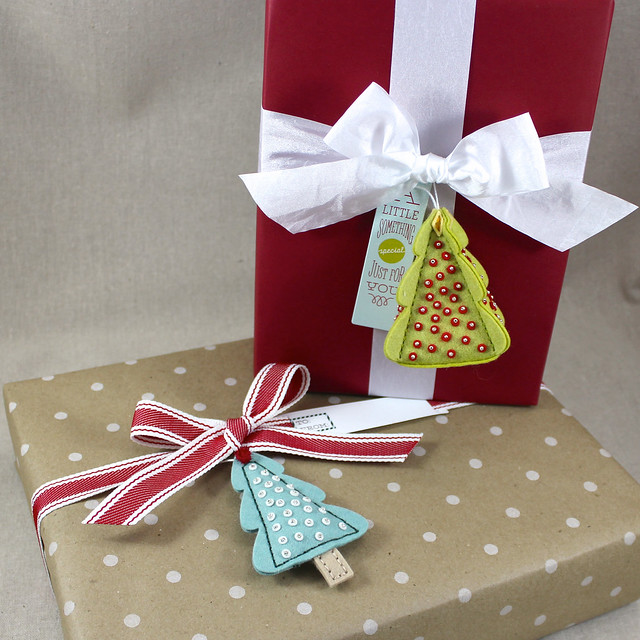
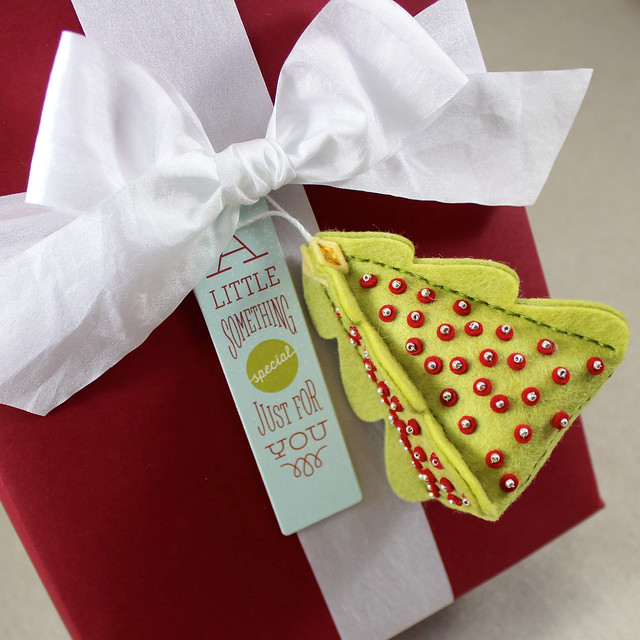
3D Tree Ornament Gift Package

I began by die cutting the tree twice from Simply Chartreuse felt. I used the coordinating stitching dies to add holes to the tree shapes. I then die cut a whole mess of tiny red felt "sequins" and four Harvest Gold diamonds. I beaded each side of the tree using the red sequins and silver seed beads. Then I stitched together the bottom and sides of my tree, stuffing with polyfil and adding a crochet thread loop before closing it up. I added the diamonds at the top as a final touch. I've paired it here with one of the tags in my new Ribbon Slider Tag Paper collection. Cute!

The flatter ornament/topper is my last share of the day.

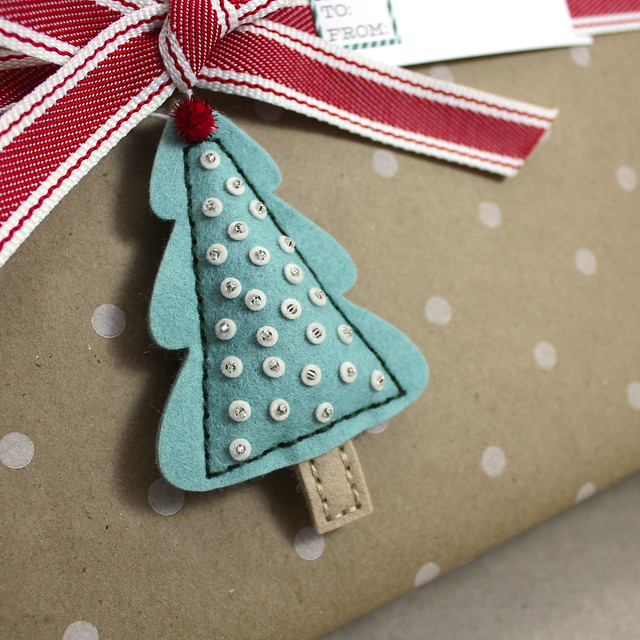
Flat Tree Ornament Close Up

I began by die cutting the tree from Ocean Tides felt, using the same stitching holes die to make it sewable. I also die cut a trunk from Classic Kraft felt using the smallest shape in the Stitched Rectangles Die and the same sequins from Vintage Cream felt. Then I trimmed the trees from their base, giving them a slightly curved bottom, and continued beading like I did on the first ornament.

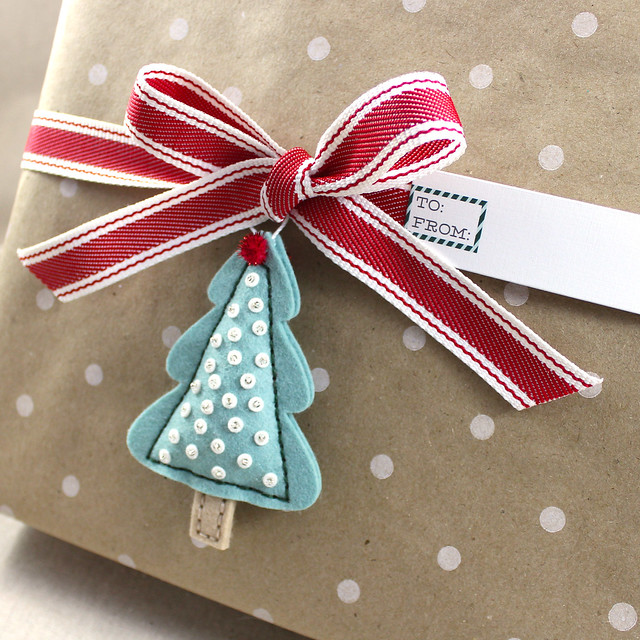
Flat Tree Ornament Gift Package

I tucked the trunk between the layers while sewing the tree together and, again, stuffed with polyfil and added a crochet thread loop before closing it up. The glittered pom pom was added as the very last step. I simply stitched through it to secure it to the top of the tree. I've paired this one with another of the pre-printed tags from my new patterned paper collection.

Whew! That was a big one! I hope you've enjoyed today's post. Make sure to check in with  NicholeAmy, Ashley, Betsy, Dawn, Heather, Laurie, Maile, and Melissa for more of today's group post. Erin is also sharing additional projects featuring her new Christmas Tree Change-Up set. I'll see you tomorrow!

Recipes:
Let It Snow Tags
Stamps: Minute To Make: Holiday Tags 1 - Papertrey Ink
Cardstock: White Tag Stock - Papertrey Ink
Ink: Aqua Mist, Pinefeather, Pure Poppy, Winter Wisteria, Spring Rain, Simply Chartreuse, Orange Zest, Summer Sunrise, Smokey Shadow - Papertrey Ink
Other: Minute To Make Tag Die - Papertrey Ink; Crystal, Onyx Glitter - Martha Stewart Crafts

To:/From: Tag Set
Stamps: Ribbon Slider Sentiments - Papertrey Ink
Cardstock: white
Ink: Pure Poppy, Scarlet Jewel, Ripe Avocado, New Leaf, Limeade Ice, Aqua Mist, Tropical Teal, Pinefeather, Ocean Tides, Winter Wisteria, Enchanted Evening, Simply Chatreuse - Papertrey Ink; VersaMark - Tsukineko
Other: Ribbon Slider Tag Die - Papertrey Ink; Perfect Pearls Pigment Powder, Holographic Embossing Powder - Ranger

Celebrate Gift Card
Stamps: In The Bag, Freshly Fallen - Papertrey Ink
Cardstock: Aqua Mist, Soft Stone Patterned Paper - Papertrey Ink; white
Ink: Pure Poppy, Ripe Avocado, Fresh Snow - Papertrey Ink
Other: In The Bag Die, Simply Chartreuse Felt - Papertrey Ink; Clear Embossing Powder - Filigree; Embroidery Floss - DMC; Glass Seed Bead; Tulle; Waxed Cord - May Arts; Hook & Loop Tape - Singer

3D Christmas Tree Ornament/Topper
Cardstock: Ribbon Slider Tag Papers - Papertrey Ink
Felt: Simply Chartreuse, Harvest Gold, Pure Poppy - Papertrey Ink
Other: Christmas Tree Change Up Box Die, Christmas Tree Change Up Stitching Die, Stitched Rectangles Die - Papertrey Ink; Embroidery Floss - DMC; Stuffing - Polyfil; Glass Seed Beads

Flat Christmas Tree Ornament/Topper
Cardstock: Ribbon Slider Tag Papers - Papertrey Ink
Felt: Ocean Tides, Classic Kraft, Vintage Cream - Papertrey Ink
Other: Christmas Tree Change Up Box Die, Christmas Tree Change Up Stitching Die, Stitched Rectangles Die - Papertrey Ink; Embroidery Floss - DMC; Stuffing - Polyfil; Glittered Pom Pom; Glass Seed Beads

Saturday, September 12, 2015

Introducing Make It Market Mini Kit: Holiday Folk

Good morning, Friends, and welcome back for Day 3 of the September Papertrey Ink countdown! The whole team is sharing projects using Betsy's new Make It Market Mini Kit: Holiday Folk today, so you'll definitely want to hop around to see all of the inspiration. Folk art and Christmas are a match made in heaven! Betsy has designed a kit full of gorgeous images, papers, and accessories that make homespun seasonal greetings a joy to create. Let me show you!

Holiday Folk Cards
The patterned papers and die-cuttable elements in this kit make it so easy to create quick cards that still have a lot of folksy charm. My first card today is one such card.
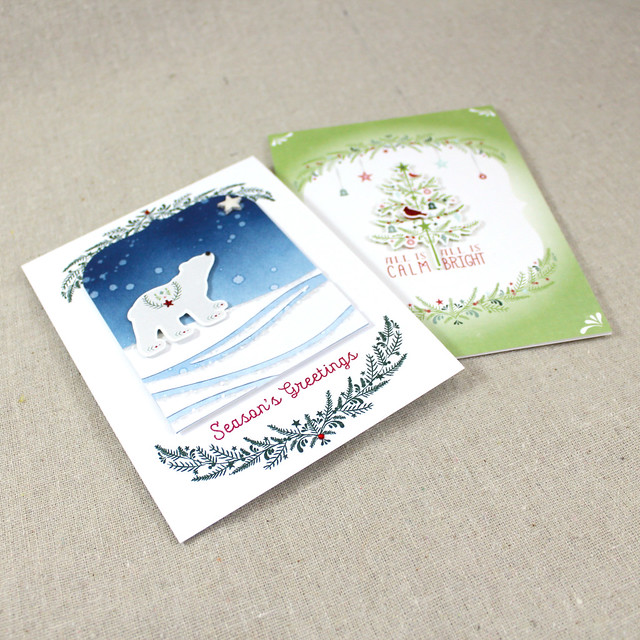
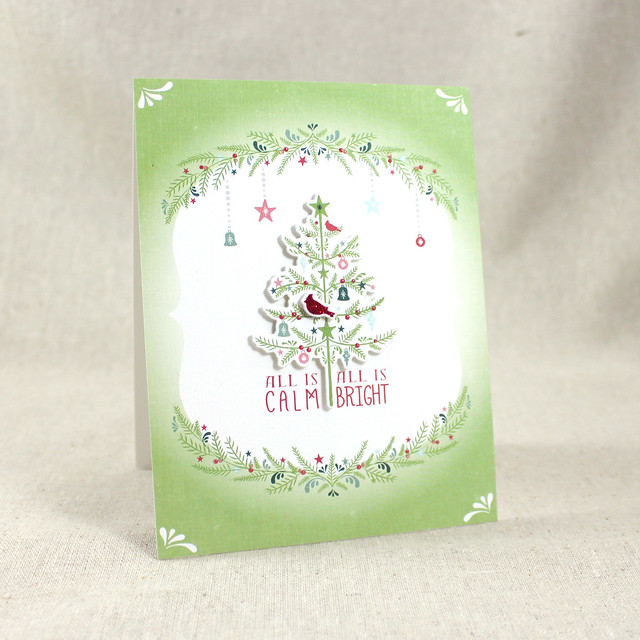
All Is Calm Card

I used one of Betsy's printed card fronts to whip this card together. I simply die cut one of the printed trees and attached it to the card with foam tape. Then, I die cut and stamped the cardinal, embellishing it with glitter before adding it to the tree.

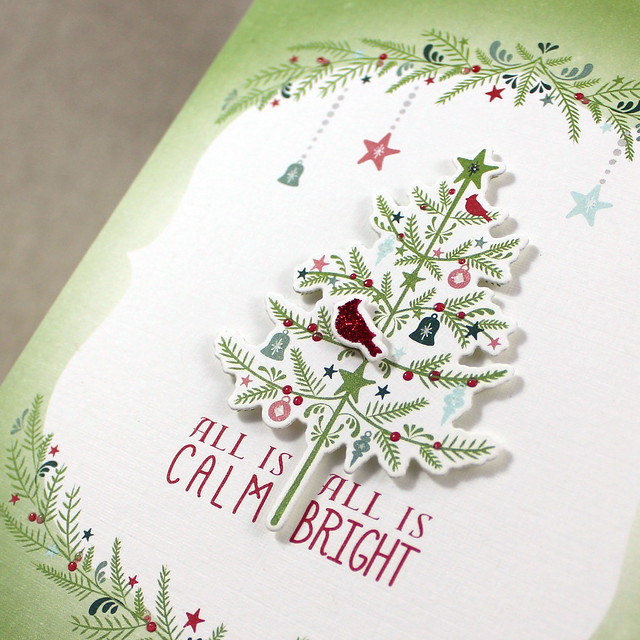
All Is Calm Close Up

I used a fine point glue pen to add glitter to a few choice elements (mainly the baubles) and then added Glossy Accents to the round ornaments to give them a little shine. That's really all there was to it!

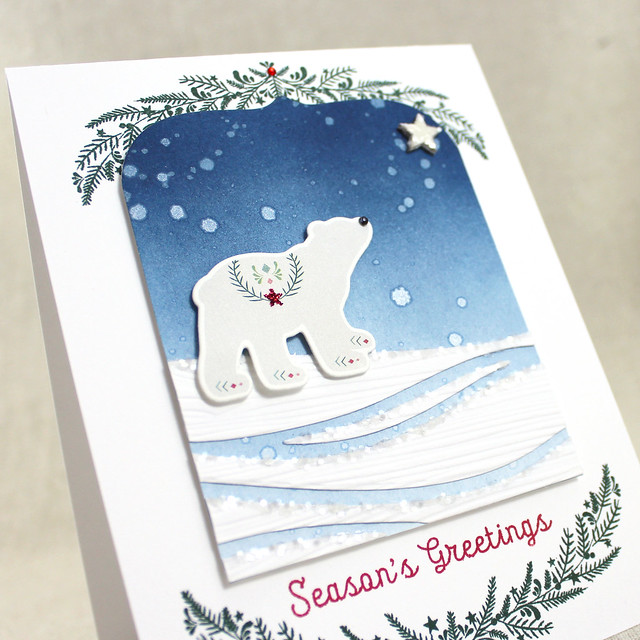
It's also easy to create more involved cards with this kit. From the moment I saw that gorgeous polar bear, I knew I wanted to create a mini scene to show him off.

Polar Bear Season's Greetings Card

I began by sponging a panel of white cardstock with Enchanted Evening ink. Once I was happy with the ink coverage, I splattered it with Glimmer Mist to make it look like random stars or snowflakes (I just took the sprayer out of the bottle and flicked the straw). Then I used the Mat Stack 5 Layerz die to partially die cut the top edge of the panel. Next, I went about creating his snowbank. I die cut the Cover Plate: Waves shape from white cardstock and then textured the pieces with the Woodgrain Impression Plate. I sponged the top edge of each piece with Spring Rain ink and embellished with chunky glitter before attaching them to the sky panel.

Polar Bear Season's Greetings Close Up

Next, I stamped a white card base with the garland images from the kit's stamp set using Pinefeather ink. I added the sentiment, from Ribbon Slider Sentiments, using Pure Poppy Ink and attached the snow and sky panel to the card front using foam tape. I die cut one of the printed polar bears and added that to the card front using foam tape. I embellished him with a black rhinestone nose and a spot of glitter on his back. Then I added a wooden star (that I'd coated with Fresh Snow ink and chunky glitter) to the sky. Two additional tiny, red rhinestones added a touch sparkle to the garlands and finished this card off nicely. This is one of those cards that was just a lot of fun to create.

Finally today I have a few tags to share. I have a confession to make; I've been holding out on you a little bit. It's taken me until today to introduce you to the Ribbon Slider Tag Papers.

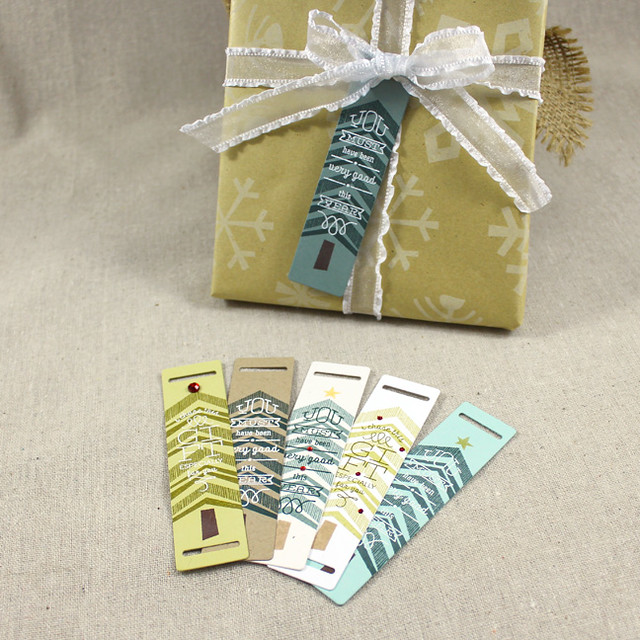
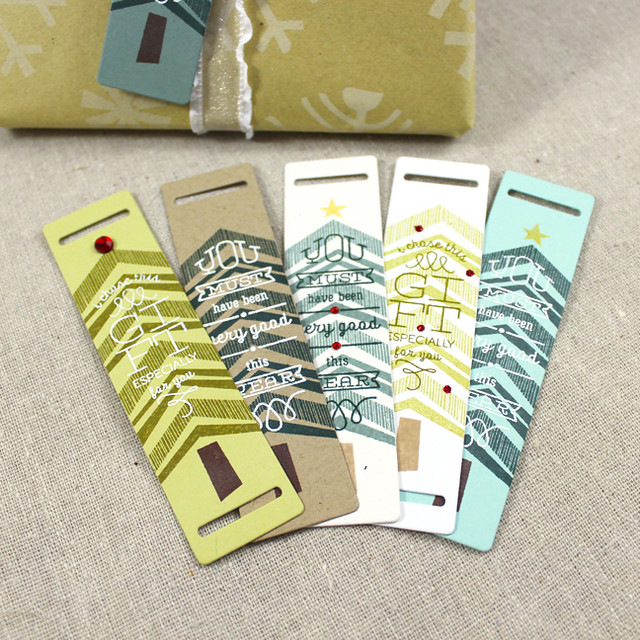
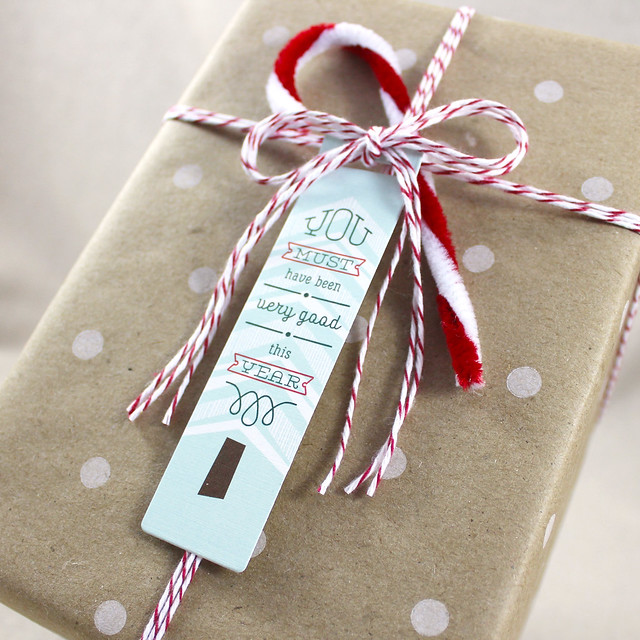
Very Good Tag Paper

This paper collection is full of sheets of printed tags that you can simply die cut and use straight away.

Hex Frame Tag Paper
There are a couple of designs that I've left open for a name, like this hexagon frame tag (I stamped this one with the Fresh Alphabet)...

Falling Snow Tag Paper

Or for a sentiment from the coordinating sentiment set, like this falling snow tag.

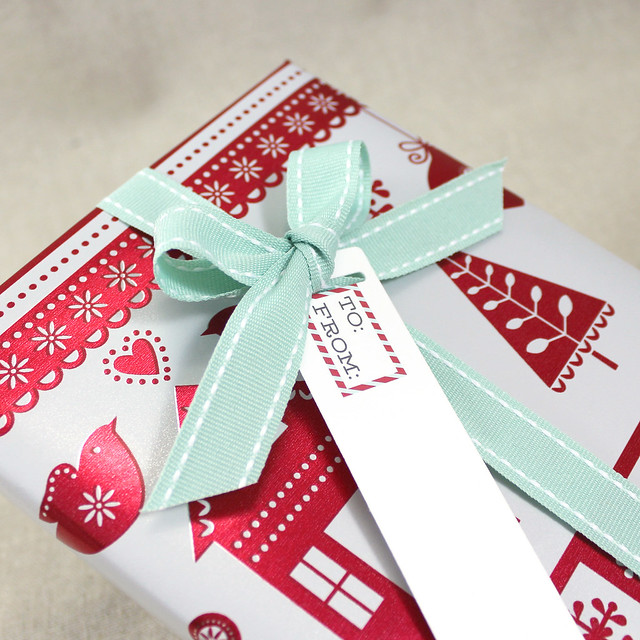
To From Tag Paper

There's also a basic "To:/From:" tag that comes in four different color varieties, many of which can be used year-round!

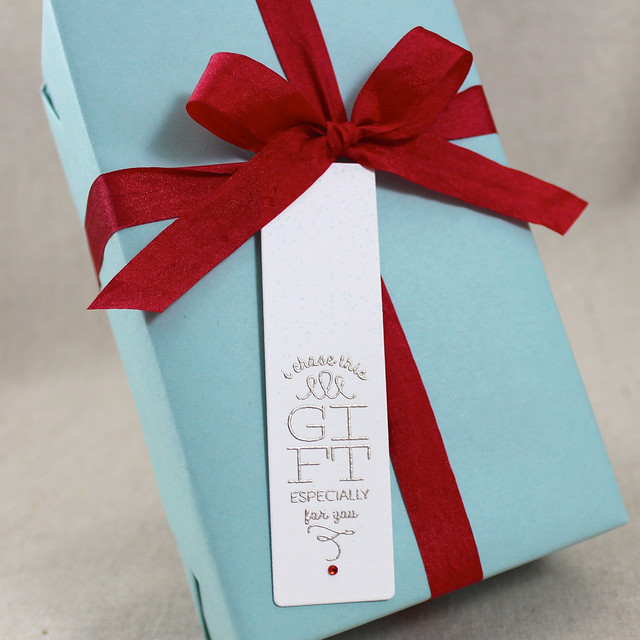
A Little Something Tag Paper

These tags can be dressed up with rhinestones, glitter, or Glossy Accents, but they can also be left alone for a super-quick option that shines on its own.

I hope you've enjoyed today's post! I'll see you back here again tomorrow with more of the Ribbon Slider collection. In the meantime, make sure to visit Nichole, Amy, AshleyBetsy, Dawn, Heather, Laurie, Maile, and Melissa for more of today's group post. Erin is also sharing additional projects featuring her new Christmas Tree Change-Up set. I'll see you tomorrow!

Recipes:
All Is Calm Card
Stamps: Holiday Folk - Papertrey Ink
Cardstock: Holiday Folk Kit, Fresh Snow Linen - Papertrey Ink
Ink: Pure Poppy - Papertrey Ink
Other: Holiday Folk Die - Papertrey Ink; Foam Tape - Papertrey Ink; Crystal, Garnet Glitter - Martha Stewart Crafts; Foam Tape - Scotch; Glossy Accents - Ranger

Season's Greetings Card
Stamps: Holiday Folk, Ribbon Slider Sentiments - Papertrey Ink
Cardstock: Holiday Folk Kit - Papertrey Ink; white
Ink: Enchanted Evening, Spring Rain, Pinefeather, Pure Poppy, Fresh Snow - Papertrey Ink
Other: Cover Plate: Waves, Mat Stack 5 Layerz, Woodgrain Impression Plate, Holiday Folk Die, wooden star - Papertrey Ink; Coarse Crystal Glitter, Garnet Glitter - Martha Stewart Crafts; self-adhesive rhinestones - Mark Richards; Glimmer Mist - Tattered Angels

Ribbon Slider Tags
Stamps: Ribbon Slider Sentiments, Fresh Alphabet - Papertrey Ink
Cardstock: Ribbon Slider Tag Paper Collection - Papertrey Ink
Ink: VersaMark - Tsukineko - Papertrey Ink
Other: Ribbon Slider Tag Die - Papertrey Ink; Liquid Platinum Embossing Powder - Ranger; Self-Adhesive Rhinestone - Mark Richards

Friday, September 11, 2015

Ribbon Slider Tags - Day 2

Good morning, friends! I'm back this morning for Day 2 of the September Papertrey Ink countdown. I'm so glad to hear that you're all as excited as I am about these great new stamps and die! I have more Ribbon Slider Tags to share with you today, so let's get to it!

Hostess Gift Tags

We give a handful of hostess gifts over the course of the holiday season, so I thought I'd get a jump start on those today.

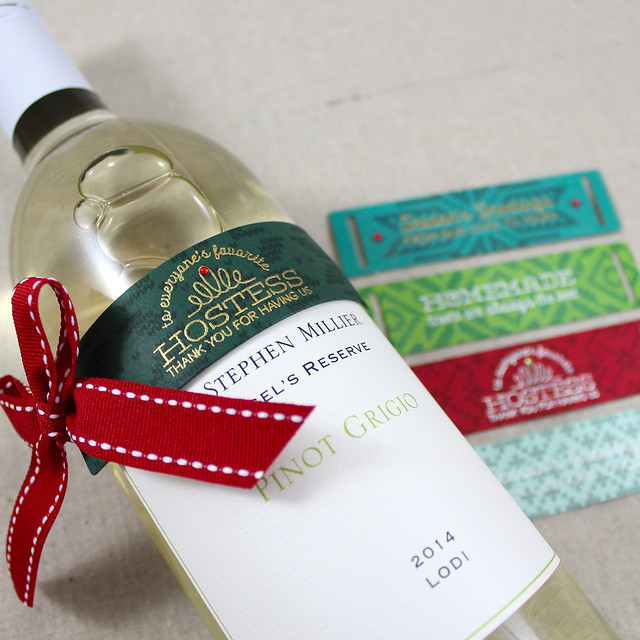
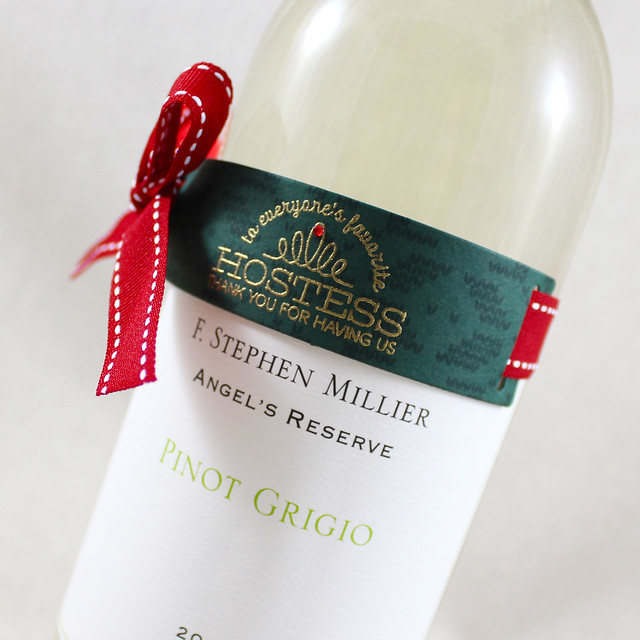
Hostess Wine Bottle Tag Close Up

I'm fond of giving wine and candles, so I went with the double-ended tag for these tags.

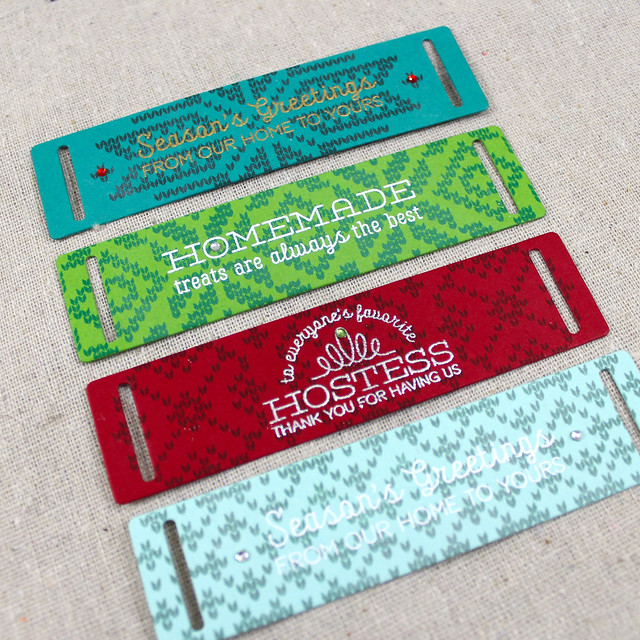
Hostess Gift Tag Set

I die cut tags from Pinefeather, Aqua Mist, Pure Poppy, Tropical Teal, and New Leaf cardstocks. I stamped each with Fair Isle Motifs in monochromatic ink colors and then heat embossed the sentiments.

Wine Bottle Hostess Gift

I embellished each tag with tiny self-adhesive rhinestones. The rhinestones give the tags a special touch that's nice and subtle.

I also wanted to share a card that features the hex frame as a background motif.

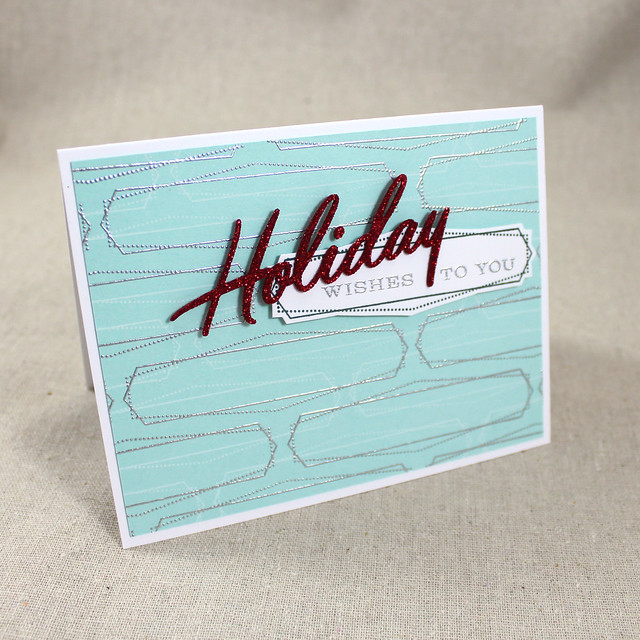
Holiday Wishes Card

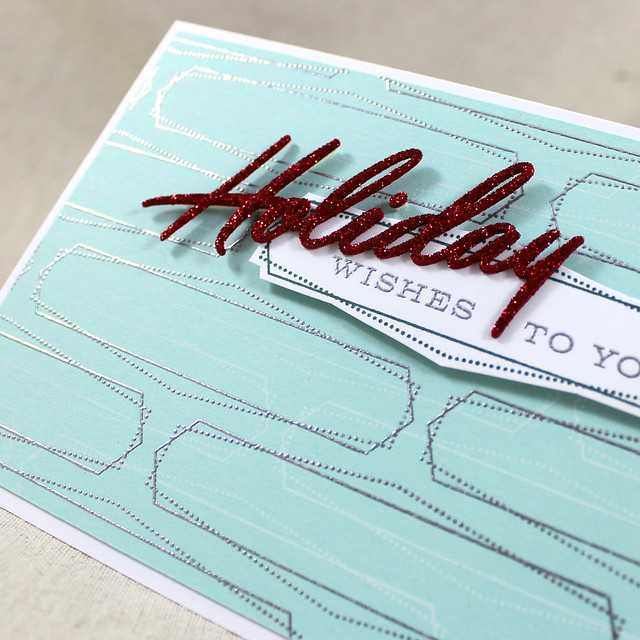
I began by stamping the frame repeatedly with Fresh Snow ink. I let that dry completely and then followed up with silver heat embossed frames before adhering that panel to a white card base. I stamped one frame onto white cardstock using Pinefeather ink and heat embossed the sentiment from Christmas Cheer with more silver powder. I fussy cut that piece and added it to the card front with foam tape.

Holiday Wishes Close Up

Then, I added the die cut and glittered "Holiday" with a mix of flat and foam adhesives. The sparkle of the glitter and the shine of the metallic embossing make this one a show-stopper!

That's all for me today, everyone! I'll see you back here again tomorrow. In the meantime, Nichole, Betsy, Danielle, DawnHeatherMaile, and Erin all have more inspiration to share. See you tomorrow!

Recipes:
Hostess Gift Tag Set
Stamps: Ribbon Slider Sentiments (available September 15th), Fair Isle Motifs - Papertrey Ink
Cardstock: Pinefeather, Aqua Mist, Pure Poppy, Tropical Teal, New Leaf - Papertrey Ink
Ink: Pinefeather, Tropical Teal, Scarlet Jewel, Ocean Tides - Papertrey Ink; VersaMark - Tsukineko
Other: Ribbon Slider Tag Die (available September 15th), Pure Poppy Saddle Stitch Ribbon - Papertrey Ink; Self-adhesive Rhinestones - Mark Richards; Silver, Gold, White Embossing Powder - Filigree

Holiday Wishes Card
Stamps: Ribbon Slider Sentiments (available September 15th), Christmas Cheer (available September 15th) - Papertrey Ink
Cardstock: Pure Poppy, Aqua Mist - Papertrey Ink; white
Ink: Fresh Snow, Pinefeather - Papertrey Ink; VersaMark - Tsukineko
Other: Christmas Cheer Die (available September 15th) - Papertrey Ink; Garnet Glitter - Martha Stewart Crafts; Foam Tape - Scotch; Xyron

Thursday, September 10, 2015

Introducing the Ribbon Slider Tag Die & Ribbon Slider Sentiments

Good morning, friends, and welcome to Day 1 of the September Papertrey Ink countdown! This month kicks off our holiday releases and you're absolutely going to love what we have in store! I am very excited to be introducing the Ribbon Slider Tag Die and its coordinating Sentiments set with you today. These stamps and dies make creating beautiful tags a snap! You can dress them up or stick with simple stamping; either way, they come together in moments. Want to see them in action?

Tree Gift Tag Set

I created this set of Christmas tree tags in no time. Each one is different, but they all use the same layout. Simplifying that step in the process let me keep things quick and allowed me to put my creative energy into the embellishments.

Tree Gift Tags Close Up

I used the star from last year's O Tannenbaum set and the smallest dot from Polka Dot Basics to add baubles to some of the tags. Then, I used rhinestones, glitter, and pigment powder to embellish them further. I also used both tag shapes (one has slider openings at both ends, the other has the slider opening at one end only) to give me more options come gift-wrapping time.

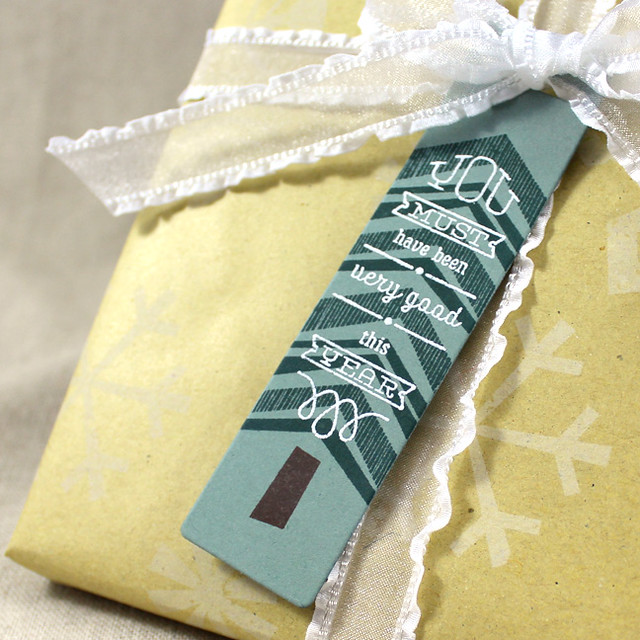
Very Good Tag Close Up

One thing I sometimes notice with my holiday tags is their tendency to run a little on the feminine side. This tree has a sort of modern, woodblock printing vibe that can be dressed up or down depending on the recipient. No rhinestones for Dad this year (unless he likes them, of course)!

These stamps can be useful for so much more than tags. This simple holiday card is the perfect example.

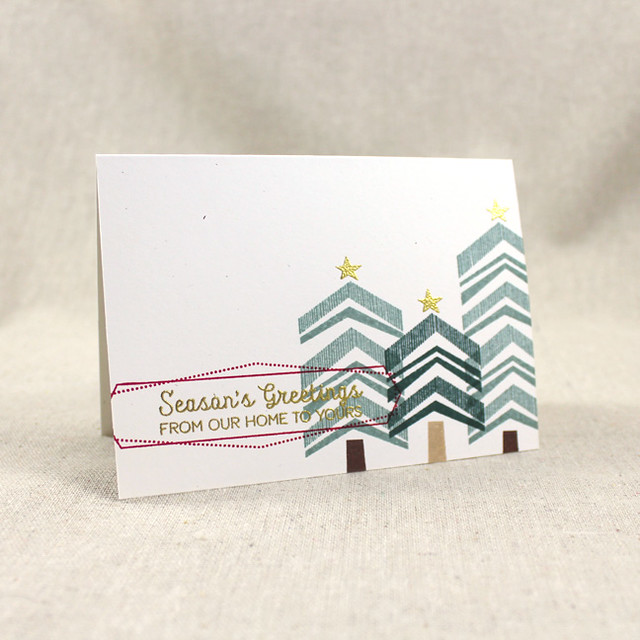
Tree Trio Card

I began by cutting a 4Bar (4 7/8" x 3 1/2") card base from Rustic White cardstock. I stamped the trees using Ocean Tides and Pinefeather inks, adding the trunks in Classic Kraft and Dark Chocolate. Then, I heat embossed the sentiment and stars with gold powder.

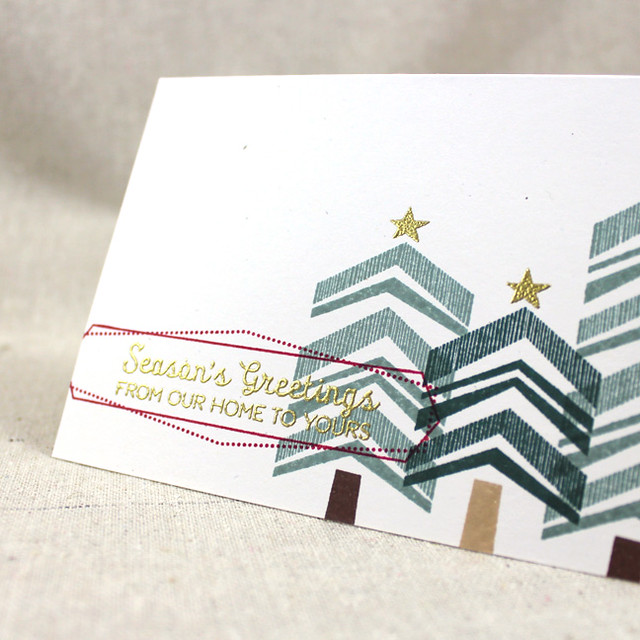
Tree Trio Close Up

It still needed a little something, so I added the hexagon frame (also from Ribbon Slider Sentiments) with Pure Poppy ink. This smaller-than-average card could be sent on its own or tucked into a gift bag with a note. And it came together in less than 10 minutes. How's that for handy?! Especially when time is tight at the holidays.

Well, that's all for me today. Thank you so much for stopping by! I'll see you back here tomorrow with more inspiration, but in the meantime Nichole, Ashley, Betsy, Dawn, Erin, Maile, and Melissa all have projects to share. See you tomorrow!

Recipes:
Christmas Tree Tags
Stamps: Ribbon Slider Sentiments, O Tannenbaum, Polka Dot Basics - Papertrey Ink
Cardstock: Ocean Tides, Classic Kraft, Rustic White, Spring Moss, Aqua Mist - Papertrey Ink; white
Ink: Pinefeather, Ocean Tides, Pure Poppy, Ripe Avocado, Spring Moss, Dark Chocolate, Classic Kraft, Harvest Gold - Papertrey Ink; VersaMark - Tsukineko
Other: White Embossing Powder - Filigree; Perfect Pearls Pigment Powder - Ranger; Garnet Glitter - Martha Stewart Crafts; Mini Self-Adhesive Rhinestones - Mark Richards; Large Rhinestone - Darice

Season's Greetings Card
Stamps: Ribbon Slider Sentiments, O Tannenbaum - Papertrey Ink
Cardstock: Rustic White - Papertrey Ink
Ink: Ocean Tides, Pinefeather, Pure Poppy - Papertrey Ink; VersaMark - Tsukineko
Other: Gold Embossing Powder - Filigree