Friday, September 28, 2018

Festive Friday: Ornament Tags

Festive Friday Banner


Good morning and welcome to Festive Friday! I decided to start this weekly feature to not only help myself prepare for the upcoming holiday season, but to inspire you to get ready, too! I sort of kicked this thing off last weekend with this post and I heard from several of you that you'd appreciate having more gift packaging and tags in your lives. So what the heck?! Let's make it a thing.

A little bit of what to expect: these projects will likely be some level of "not fancy." I am a real person making real packaging to use for my real gift giving this holiday season. I'm not being sponsored to do these posts (though I do use affiliate links), I just thought it would be fun. I celebrate Christmas and that's the vast majority of what you will see, but some things will definitely be adaptable to more generic celebrations with color substitutions and such.

Ok, enough fine print.

LizzieJones_BrilliantBaubles_FestiveFriday_ShapedOrnamentTags

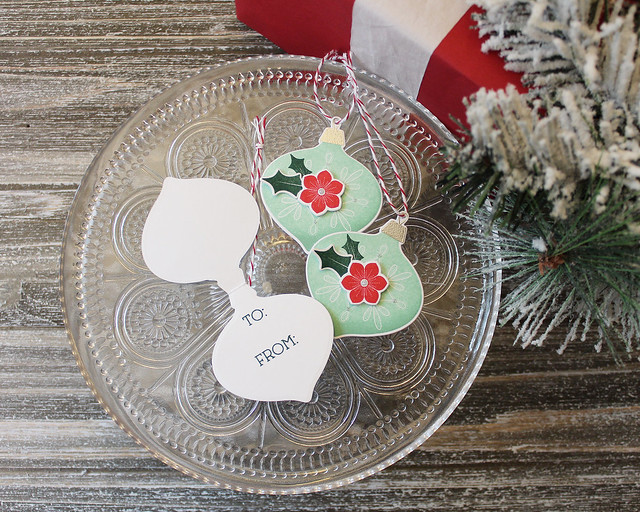
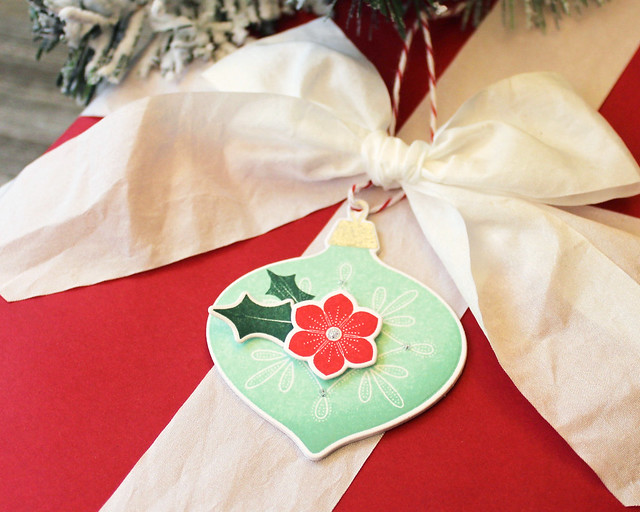
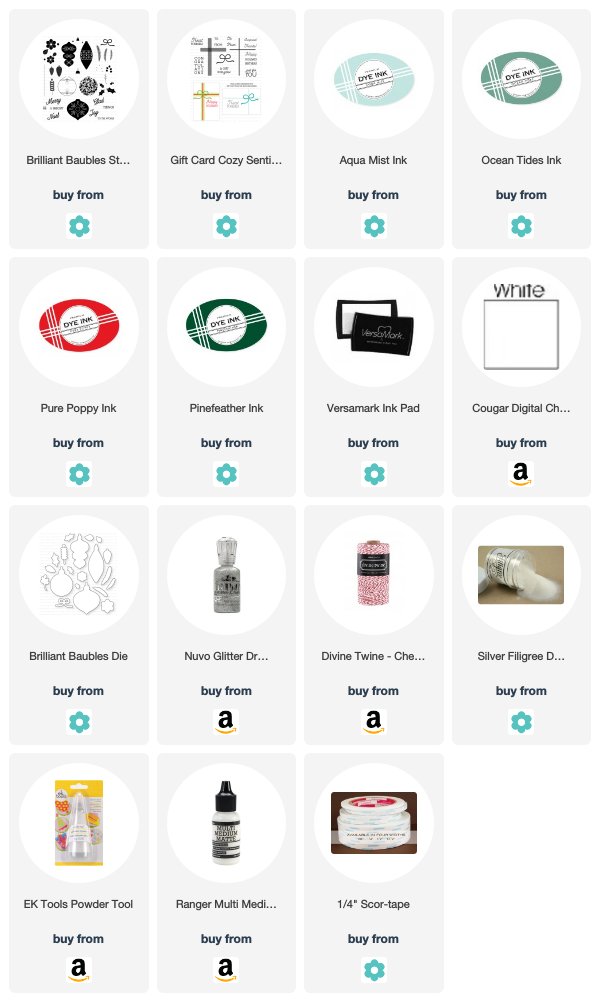
So this week I made a set of tags using the same basic techniques as the mug tags I created for this post. I used the Brilliant Baubles stamp set and dies to make these shaped tags. I began by stamping and die cutting the ornaments. I used Aqua Mist and Ocean Tides ink for the bulbs and Versamark with silver powder for the toppers.

LizzieJones_BrilliantBaubles_FestiveFriday_ShapedOrnamentTags2

I stamped one holly leaf directly on each bulb and added a second stamped and die cut one to add dimension. Then, I added a poinsettia on top of that using foam tape. Then, I embellished a handful of spots on the ornaments with Nuvo Silver Moondust drops.

LizzieJones_BrilliantBaubles_FestiveFriday_ShapedOrnamentTags3

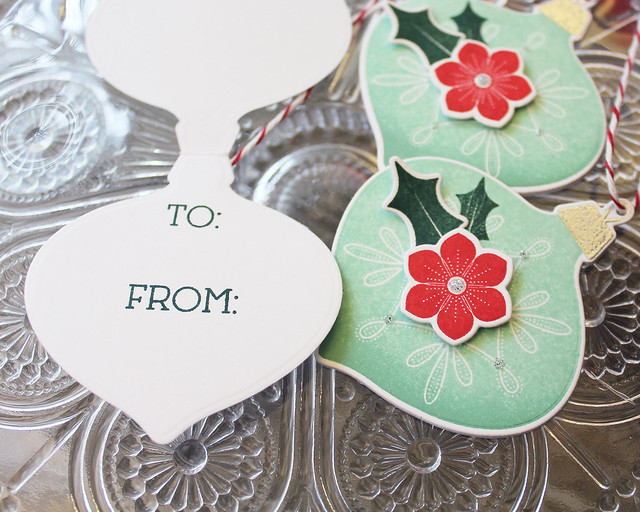
For the insides, I folded my cardstock before die cutting, leaving part of the die over the edge to preserve the fold. I stamped the "To:" and "From:" in Pinefeather ink using the Gift Card Cozy Sentiments stamp set. I adhered the folded element to the back of each die cut ornament and used an anywhere hole punch to pop holes in the ornament toppers to string baker's twine. Cute!

So there you have it! Week one of Festive Friday is in the books. I hope you enjoyed today's post and will join me each week all the way up until Christmas for more inspiration for your holiday crafting and packaging needs. I'll see you again soon. Have a great weekend!

Supplies:
Shaped Ornament Tags

Thursday, September 27, 2018

Throwback Thursday: Mighty Oak Collection

Good morning and welcome to this week's Papertrey Ink Throwback Thursday feature. This week, Laurie, Lexi, and I are showcasing the Mighty Oak Collection.

LizzieJones_PapertreyInk_ThrowbackThursday_MightyOak_WineBottleTag2_PetalBox_ThanksgivingHostessEnsemble

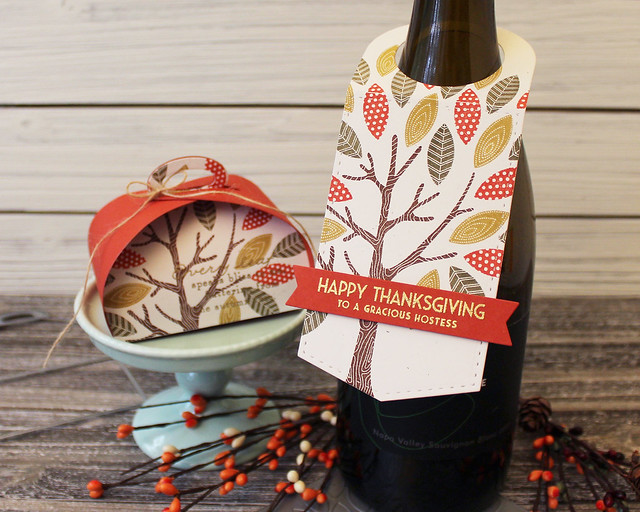
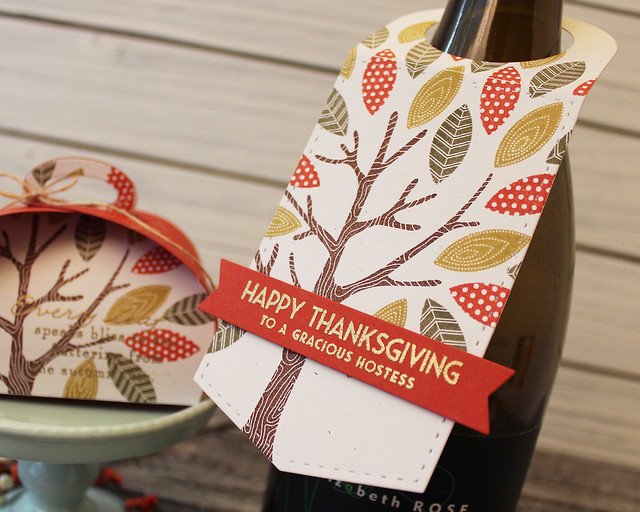
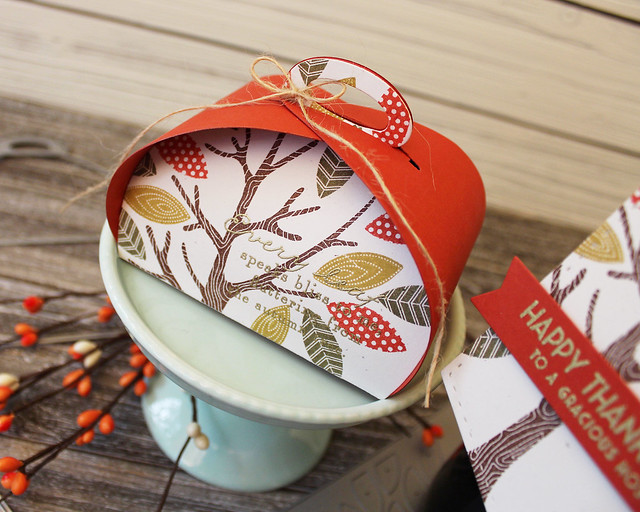
This time of year I love using a brilliant variety of colors to make foliage the star of the show. The Mighty Oak Collection is the perfect choice for those vivid autumn projects! The stamp set is packed with patterned leaves and the coordinating cover plate makes arranging them an absolute snap. I paired Mighty Oak with a couple of my favorite packaging dies to create a Thanksgiving hostess ensemble that I can't wait to give!

LizzieJones_PapertreyInk_ThrowbackThursday_MightyOak_WineBottleTag2_PetalBox_ThanksgivingHostessEnsemble2


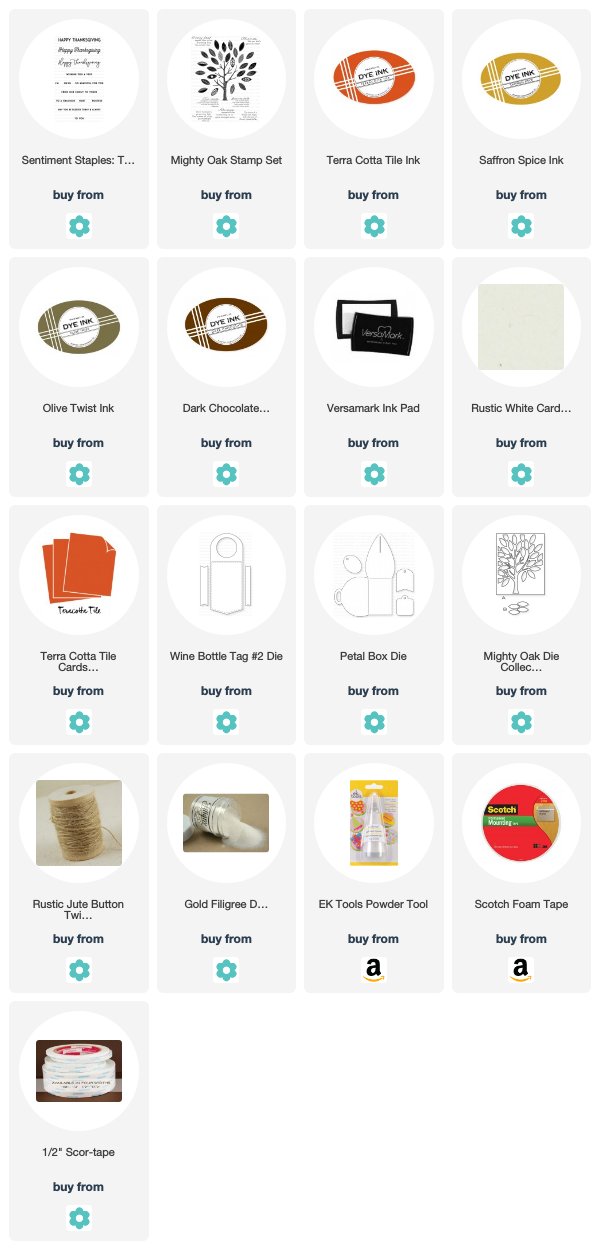
I began with the wine bottle tag. I die cut the Wine Bottle Tag #2 from Rustic White cardstock and stamped it with the tree trunk from Mighty Oak. I die cut the Cover Plate: Might Oak from thin copy paper and placed it over the stamped trunk, using it as a template for stamping my leaves. Then, I heat embossed the Sentiment Staples: Thanksgiving greeting in gold on a Terra Cotta Tile banner (cut using the Wine Bottle Tag #2 die). I added that to the bottle tag with foam tape for a touch of dimension.

LizzieJones_PapertreyInk_ThrowbackThursday_MightyOak_WineBottleTag2_PetalBox_ThanksgivingHostessEnsemble3


The treat box is just as simple, but with the same vibrant colors. I began by die cutting a Petal Box front panel from Rustic White and two full box pieces from Terra Cotta Tile. I stamped the Rustic White panel with the tree trunk and leaves just as I had with the wine bottle tag. Then, I heat embossed the sentiment from Mighty Oak using gold powder. I adhered that panel to the front of one of the box pieces and then assembled it as normal. I finished it off with a twine bow tied around the handle.

Thank you so much for joining me, friends! Make sure to check in with Laurie and Lexi to see what they're doing with the Mighty Oak Collection today. I'll be back tomorrow with a Festive Friday post featuring a set of holiday tags that I hope you'll love. See you soon!

Supplies:
Thanksgiving Hostess Ensemble

Saturday, September 22, 2018

Glittered Window Gift Card Cozies

The most wonderful thing happened today, friends. The weather, which has been hot and sticky and no fun at all, finally turned cool! As I sit writing this, I can smell wood smoke in the air and I'm cuddled up wearing a sweater. I have plans for warm, earthy foods for dinner and all is right with the world. I couldn't have asked for a better beginning to Autumn. It's my favorite.

Another wonderful thing happened today, too. The cooler temperatures seem to have awakened my creativity a bit and I spent a little "just because" time in my studio. That so rarely happens that I felt compelled to share the results of my crafty time.

LizzieJones_ChristmasWindowGiftCardCozies

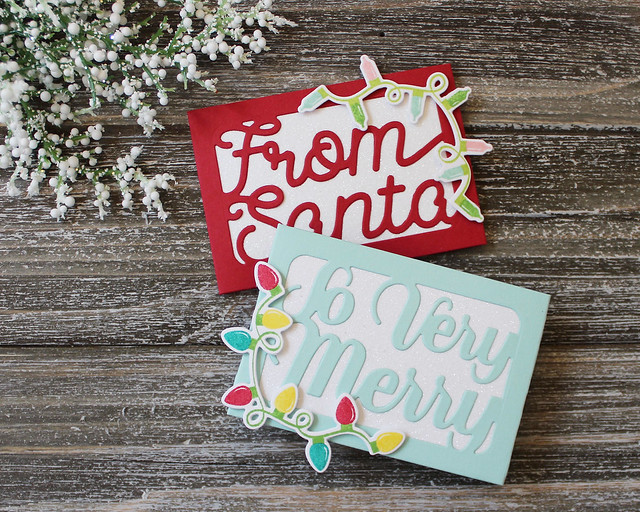
I wanted to pair the Hinged Gift Card Box: Christmas Windows with the Gift Card Cozy Die because I had a sneaking suspicion that they would work well together. And, oh joy of joys, they did! I backed the windows with Xyroned cardstock and sprinkled the sticky surface with glitter so that the whole area sparkles. Then, I die cut and stamped the strings of lights from Corner Adorner: September and added those with foam tape.

LizzieJones_ChristmasWindowGiftCardCozies2

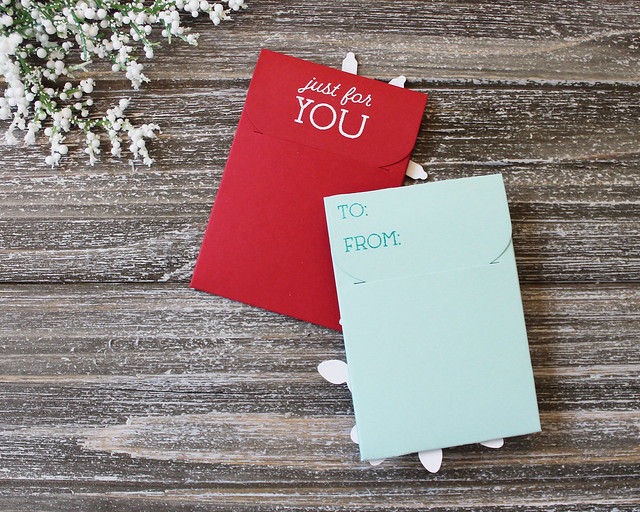
On the flap of each of the little envelopes I stamped sentiments from the Gift Card Cozy Sentiments stamp set. The Santa envelope's greeting is embossed while the Merry envelope's message is simply stamped. These came together quickly and easily and pairing these two dies together makes both of them more versatile. I love that!

As I've mentioned before, I love tags and gift card packaging. I'm going to need to get on it if I want to make sure I have enough for the upcoming season. Would you like to see more posts like these? Little quick ones that show either a set of tags or some other packaging? Let me know! Enjoy the rest of your weekends, friends!

Supplies:

Saturday, September 15, 2018

It's Release Day!

Good morning, friends! It's release day for the Papertrey Ink September product lineup and I wanted to pop in today to share another project with the Heirloom Ornaments 2 Die Collection.

LizzieJones_PapertreyInk_September2018_HeirloomOrnaments2_StitchedOrnamentTags2

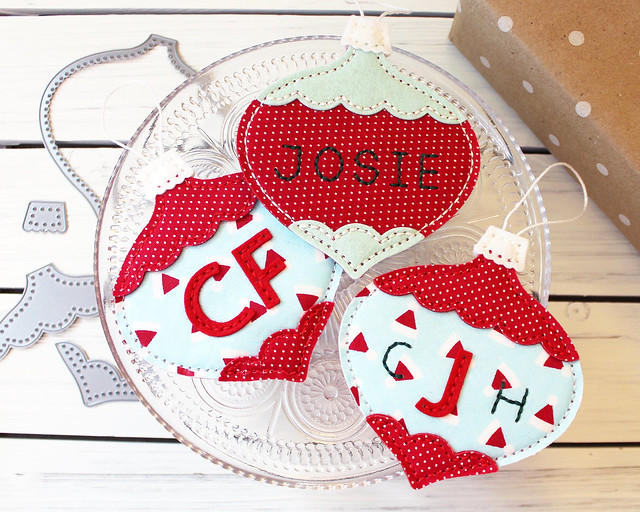
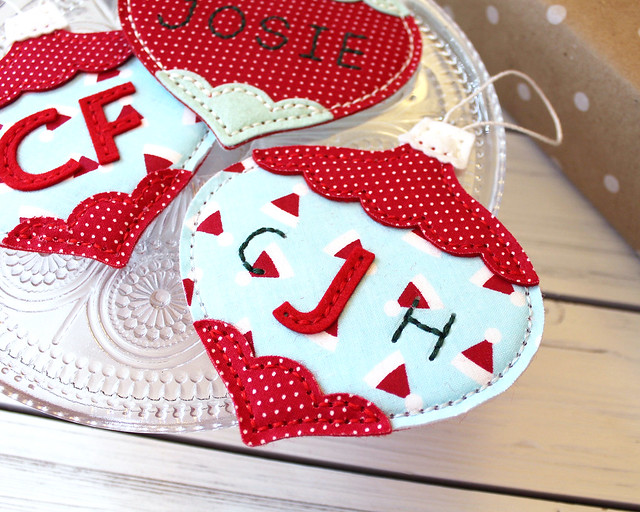
In my introduction post, I mentioned that these ornaments are perfectly sized to add personalization. Today, I thought I would show you how I used stitched alphabets to transform the onion style ornament into customized tags for the littles in our life.

LizzieJones_PapertreyInk_September2018_HeirloomOrnaments2_StitchedOrnamentTags

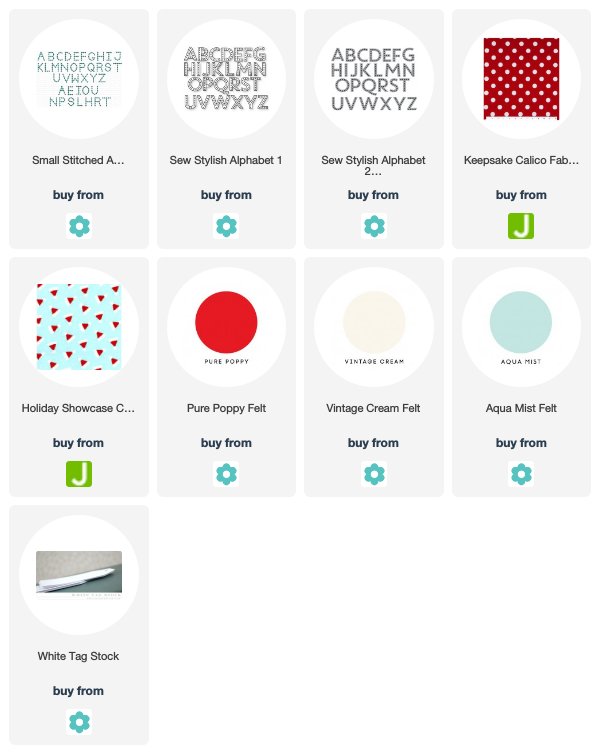
I fused patterned fabric to our wool and die cut it with the onion-shaped bulb. Then, I used the Sew Stylish Alphabet 1, Sew Stylish Alphabet 2, and Small Stitched Alphabet to add the personalization to the ornaments.

LizzieJones_PapertreyInk_September2018_HeirloomOrnaments2_StitchedOrnamentTags3

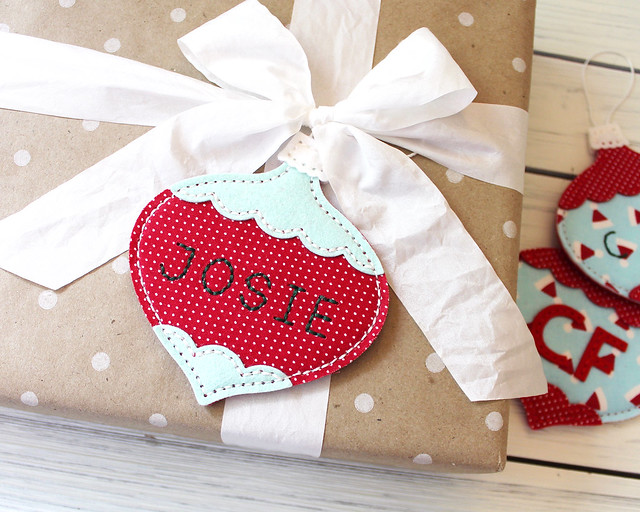
I stitched on the details and then stitched up the outer edges of the ornaments. Rather than stuff these, since I knew I intended to use them as tags, I actually inserted tag stock between the layers to give them a sturdy, flat appearance. These can be reused as tree ornaments once the gifts are given. You could also create them out of cardstock or patterned paper if you wanted something a little more disposable.

Thank you so much for joining me today! Have a wonderful time with tonight's release and I'll see you again soon!

Supplies:
Stitched Ornament Gift Tags

Friday, September 14, 2018

Introducing Penned Elegance: Christmas & Seasonal Borders: Winter

Good morning, friends, and welcome back to Day 5 of the Papertrey Ink September countdown. Today's post is a lengthy one, so I suggest you grab a cuppa get comfy. I have the pleasure of introducing you to Jennifer's new Penned Elegance: Christmas and Betsy's Seasonal Borders: Winter sets. Both are beautiful, sophisticated stamp sets that will make your holiday projects feel truly special. Let's get started!

This first card is all about pastels and metallics! A little non-traditional, but lovely none the less.

LizzieJones_PapertreyInk_September2018_PennedEleganceChristmas_SeasonalBordersWinter_HappyHolidaysCard

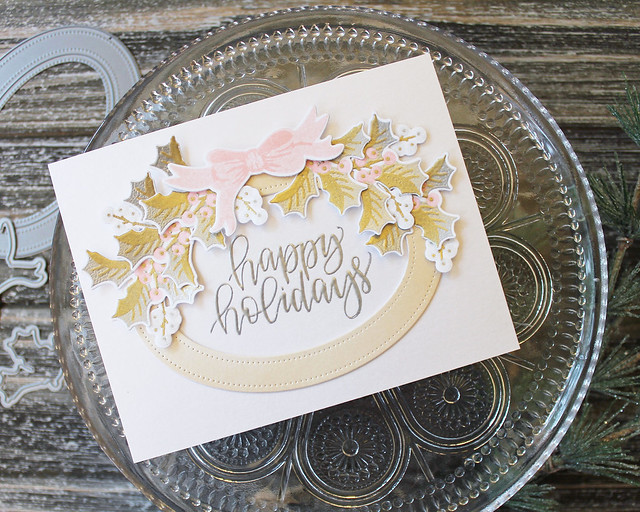
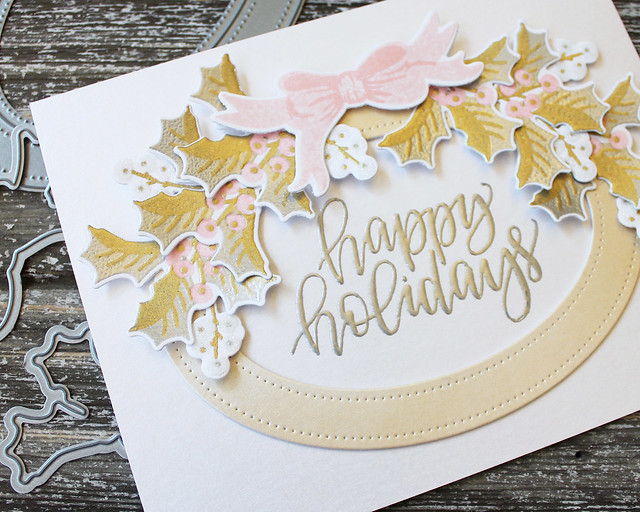
I began by heat embossing the Penned Elegance: Christmas sentiment in silver onto a White Shimmer panel. I adhered that to a Sweet Blush card base and set it aside.

LizzieJones_PapertreyInk_September2018_PennedEleganceChristmas_SeasonalBordersWinter_HappyHolidaysCard3

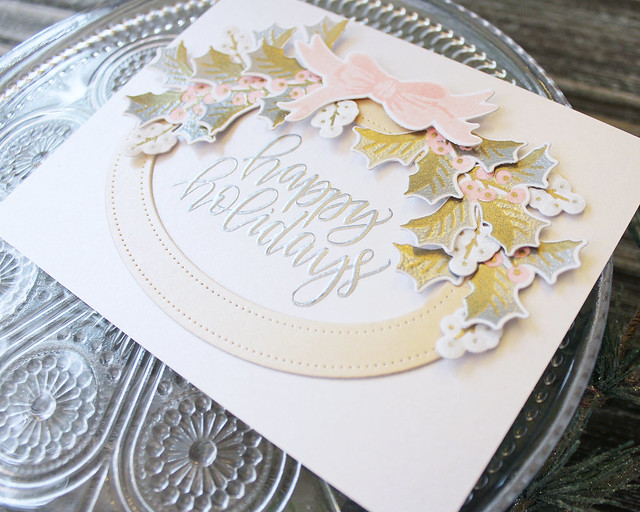
Next, I heat embossed several holly sprigs using gold and silver powder. It was a two-step process, but it actually went fairly quickly. I also heat embossed the berry stems in gold, stamped the bow, and then die cut all of those pieces. I used a glue pen to draw in the berries and embellished the stems with crystal glitter.

LizzieJones_PapertreyInk_September2018_PennedEleganceChristmas_SeasonalBordersWinter_HappyHolidaysCard2

I die cut a medium Pierced Feature Frames: Oval from White Shimmer stock and sponged it with Classic Kraft ink. The result is a champagne gold effect that I just love! I adhered the frame into place and arranged the holly and berry sprigs, curving them a bit to add texture. Finally, I added the bow to the top with foam tape. The two-tone metallics on this card are truly awesome in real life.

Next up, I have a fairly traditional Christmas card pairing these two sets with Dawn's new Sweet Stitching collection.

LizzieJones_PapertreyInk_September2018_PennedEleganceChristmas_SeasonalBordersWinter_SweetStitching_MerryChristmasCard

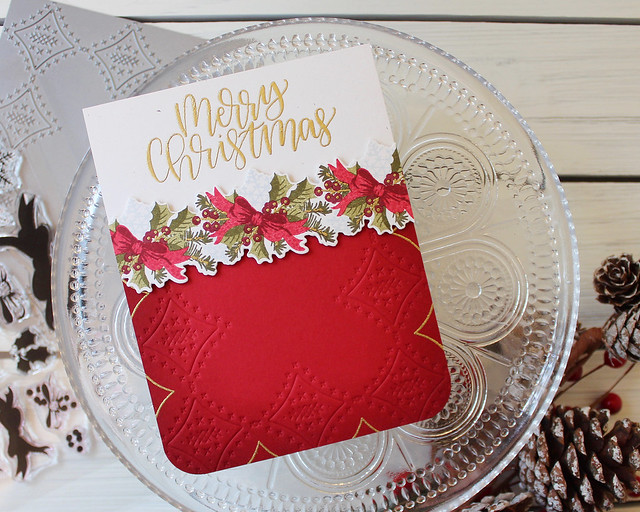
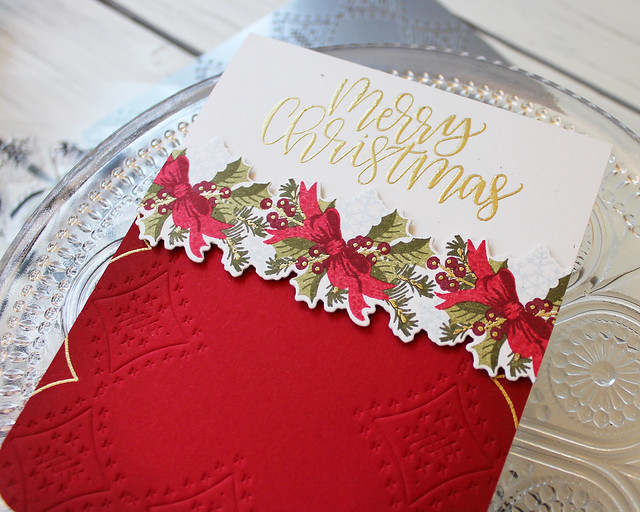
I started by stamping the Seasonal Borders strip onto a Rustic White die cut. I heat embossed one of the layers to add a hint of gold to the border.

LizzieJones_PapertreyInk_September2018_PennedEleganceChristmas_SeasonalBordersWinter_SweetStitching_MerryChristmasCard2

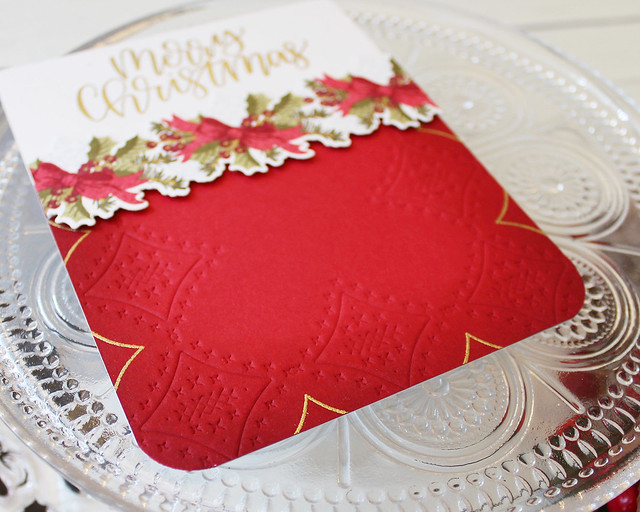
Then, I sponged a piece of Pure Poppy cardstock with Scarlet Jewel ink and impressed it with the Sweet Stitching plate. I used the diamond detail from the coordinating stamp set to add another hint of gold to this panel. Just little touches, but they all tie together in the end.

LizzieJones_PapertreyInk_September2018_PennedEleganceChristmas_SeasonalBordersWinter_SweetStitching_MerryChristmasCard3

Finally, I heat embossed the Penned Elegance sentiment onto a Rustic White card base. I adhered the Pure Poppy panel into place and then covered the raw edge with the botanical border. I rounded the bottom corners to give the final design a touch of softness. I really love the way this one turned out.

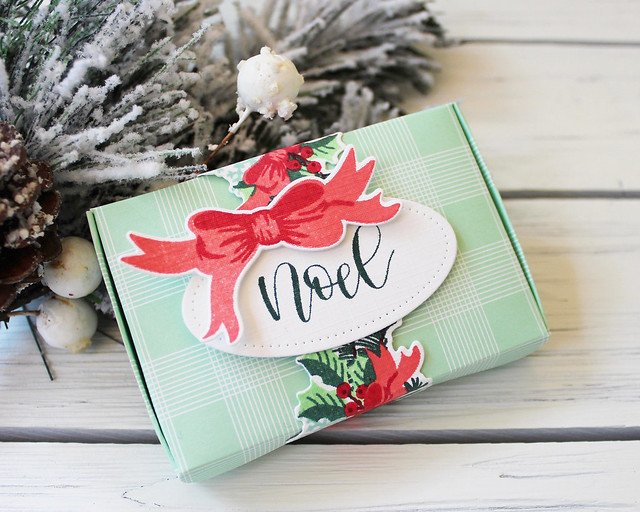
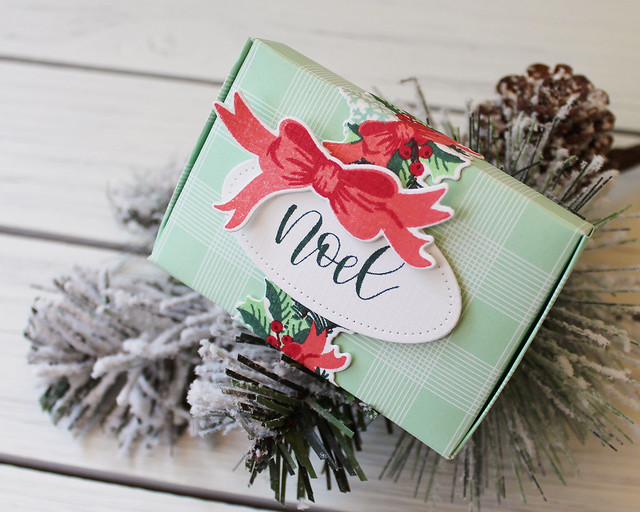
On to a gift box! I discovered that the Seasonal Borders: Winter strip is the perfect length to wrap around the Hinged Gift Card Box to create a belly band. Just secure the ends to a label or other die cut and you're good to go!

LizzieJones_PapertreyInk_September2018_PennedEleganceChristmas_SeasonalBordersWinter_SweetStitching_NoelGiftCardBox

I began by die cutting and assembling the Hinged Gift Card Box from Bitty Big: Mint Julep patterned paper.

LizzieJones_PapertreyInk_September2018_PennedEleganceChristmas_SeasonalBordersWinter_SweetStitching_NoelGiftCardBox3

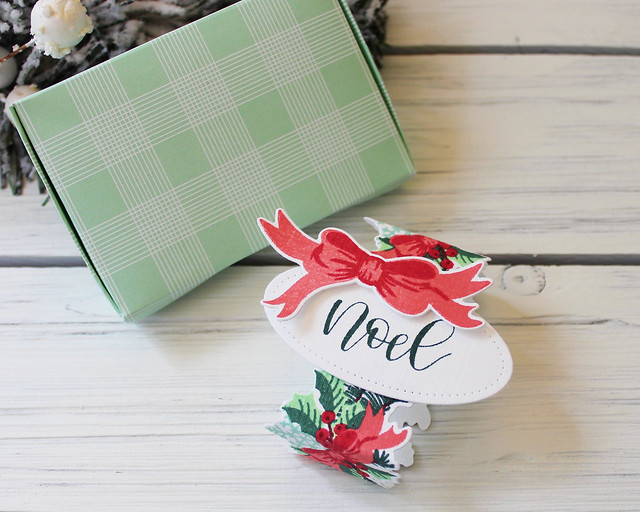
Then, I stamped the Seasonal Borders: Winter strip onto a Fresh Snow Linen die cut. I laid the strip upside down and used a pencil to mark where the edges of the box would fall. I scored along those lines so the folds would be nice and crisp.

LizzieJones_PapertreyInk_September2018_PennedEleganceChristmas_SeasonalBordersWinter_SweetStitching_NoelGiftCardBox2

The strip isn't quite long enough to adhere to itself when wrapped around the box, so you need a label or other die cut to secure the ends. I die cut a small Pierced Feature Frames: Oval and stamped the Penned Elegance greeting on the center mat. Then, I adhered the strip to the back of the oval. I added a bow to give the label a little dimension.

Now I have a couple of quick and easy tags to share with you. Like I mentioned the other day, tags are some of my very favorite holiday projects so whipping up a few tags was right up my alley.

LizzieJones_PapertreyInk_September2018_MerryMug_ChristmasCocoaTag

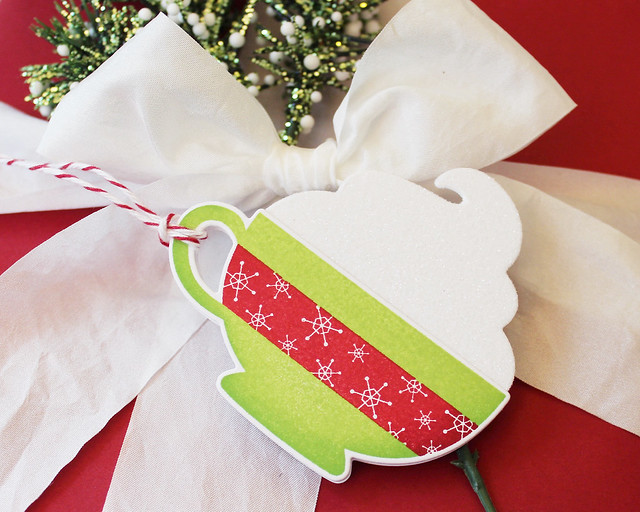
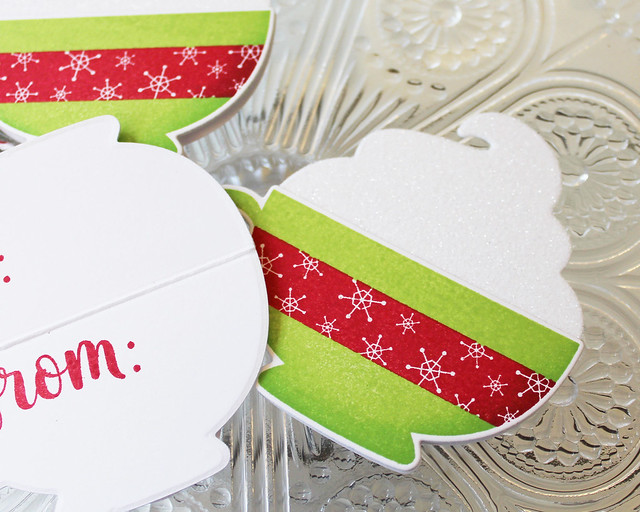
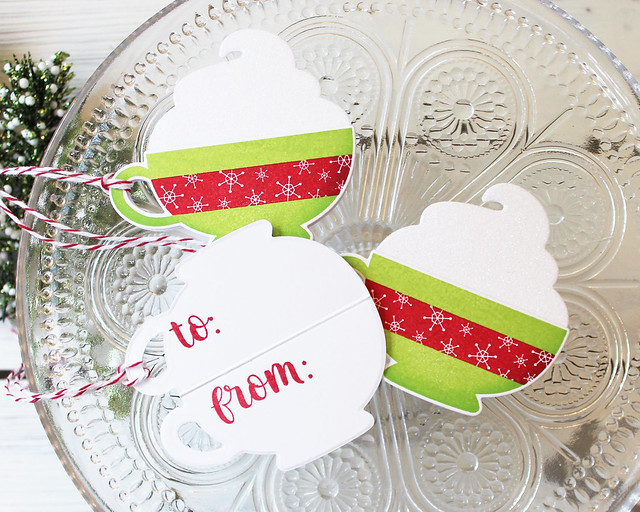
This first set is a mug shaped tag that I created with my new Merry Mug set. I began by stamping and die cutting the mugs. Then, I scored a piece of cardstock and cut the mugs again, making sure the fold was inside the top edge of the mug die. That created a folded mug shape. I stamped the to:/from: using the Keep It Simple: To & From set in Pure Poppy ink.

LizzieJones_PapertreyInk_September2018_MerryMug_ChristmasCocoaTag2

Next, I xyroned a piece of white cardstock and die cut it (sticky side up) with the whipped cream die. I removed the adhesive backing and stuck the whipped cream to the back of the stamped mugs (there's a 1/4" adhesive tab built in to the die cut shape to make this simple). I coated the rest of the exposed adhesive with crystal glitter.

LizzieJones_PapertreyInk_September2018_MerryMug_ChristmasCocoaTag3

Then, I adhered the folded mug to the back of the assembled piece. I tied cherry baker's twine around the handle and now the tags are good to go. I absolutely love these! They're so sparkly!

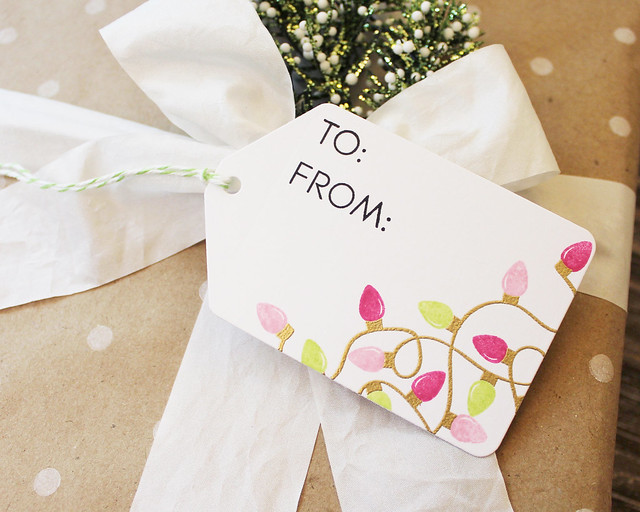
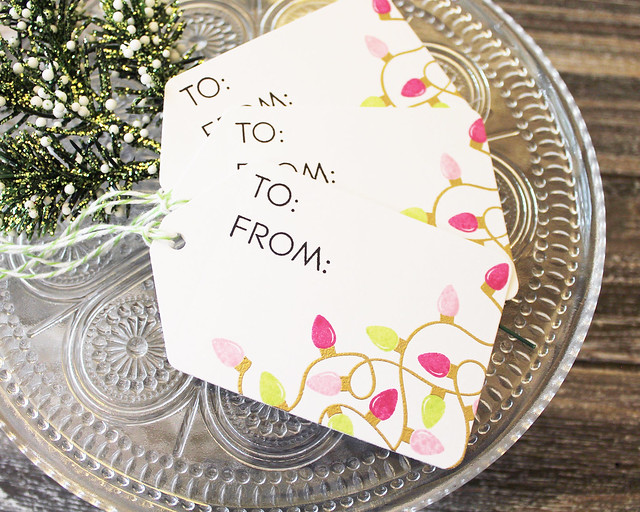
And lastly today I have a set of Christmas lights tags that I created with my new Corner Adorner: September set.

LizzieJones_PapertreyInk_September2018_CornerAdornerSeptember_ChristmasLightsTag

I began by heat embossing the bigger strand of lights onto white Tag Sale #10 shapes using gold embossing powder. Then, I added the bulbs with Raspberry Fizz, Lovely Lady, and Green Parakeet inks.

LizzieJones_PapertreyInk_September2018_CornerAdornerSeptember_ChristmasLightsTags2

I followed up with the to:/from: using the same Keep It Simple set. Then, I tied the tags with apple baker's twine. These came together so fast and they'd be even quicker without the embossing (though I do really like the festive shine it adds).

Thanks for sticking with me through that super long post. I hope you've enjoyed it! I'll be back tomorrow with one last post, so be sure to check back. In the meantime, Betsy, Dawn, Heather, Laurie, Melissa B, Melissa P, Michelle, and Stephanie all have beautiful projects to share. See you tomorrow!

Supplies:
Happy Holidays Card

Merry Christmas Card

Noel Gift Card Box


Christmas Cocoa Gift Tags

Christmas Lights Gift Tags