Thursday, April 14, 2016

The Hoopla Stitching Collection & More

Good morning and welcome to Day 5 of the Papertrey Ink April countdown. It's all about the stitching projects today! This new batch of stitching dies is truly going to knock your socks off! Erin has thought of everything to make stitched home decor a snap. Embroidered hoops are some of my favorite gifts to give, so I know these dies will be in heavy rotation around here. Let's get on to my project!

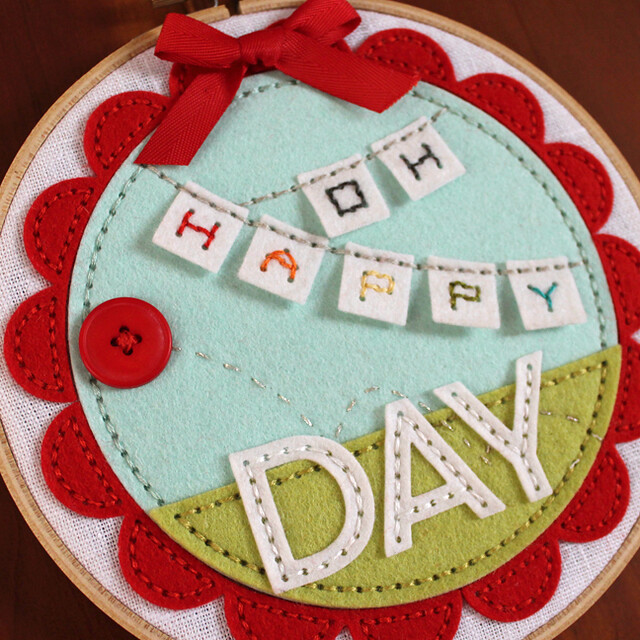
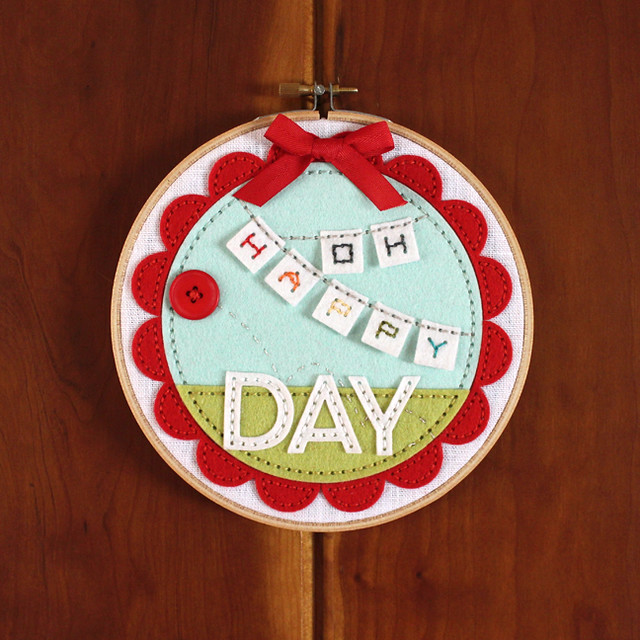
Isn't this the cutest thing?! I used a 6" hoop and some white linen as the foundation for my design.

Oh Happy Day Hoop

I used the largest of the previously released Stitched Circles as a base and then used the new Hoopla: Stitched Circle Bases to add "grass" to my little scene.

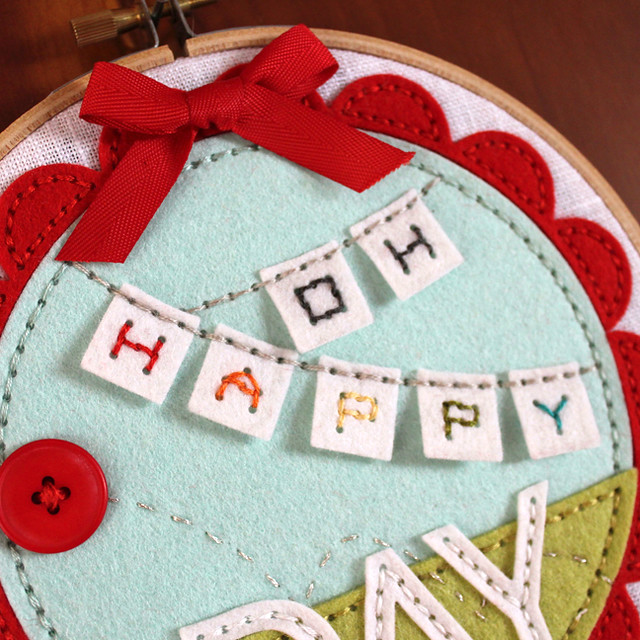
Oh Happy Day Hoop Close Up 2

I thought it would be fun to work with the Hoopla: Stitched Banners dies. I used the Tiny Stitched Alphabet to add lettering to the individual pennants. Then I stitched them to the hoop with light gray thread.

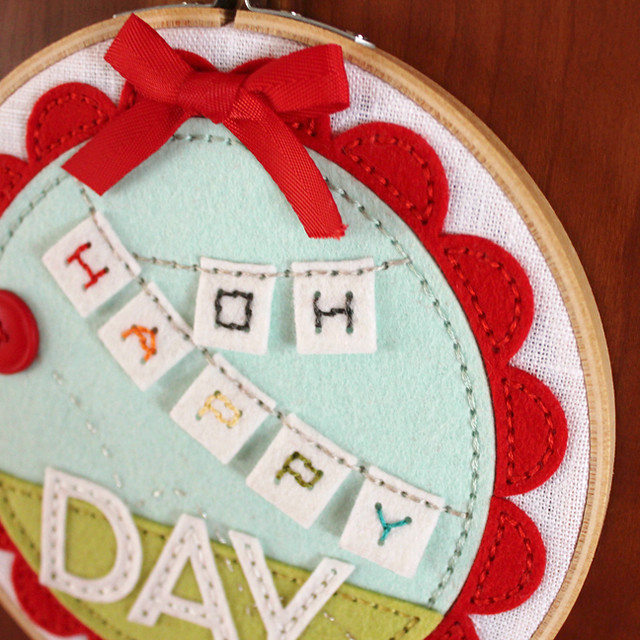
Oh Happy Day Hoop Close Up 3

I added Pure Poppy scallops to the entire outer edge using the new Hoopla: Stitched Scallop Dies. I added a Pure Poppy Twill bow at the top of the hoop for an extra detail.

Oh Happy Day Hoop Close Up 1

I incorporated a bouncing red rubber ball, mostly because it just felt playful, using a Pure Poppy button and some metallic thread. I just free-handed the bounce.

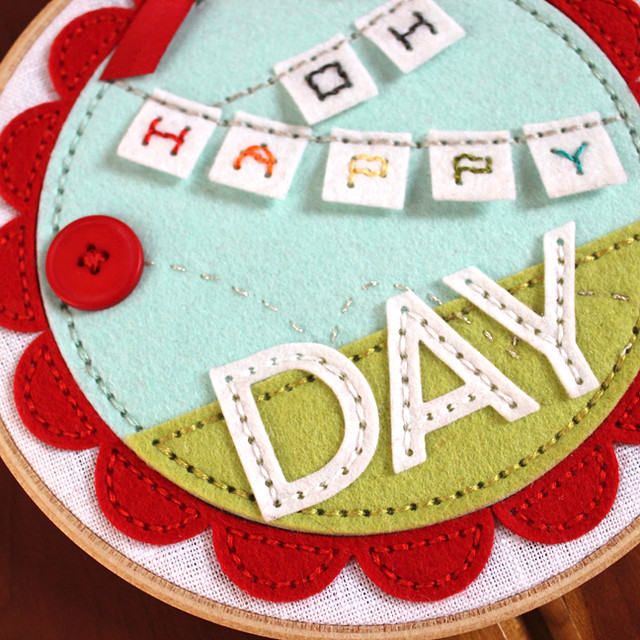
Oh Happy Day Hoop Close Up 4

I finished my sentiment with the previously released Sew Stylish Alphabet 1 Die. I love how much versatility is built in to every single stitching die Erin has designed. They all work together so seamlessly (don't mind the pun).

Thank you so much for stopping by today! I'll be back tomorrow with a handful of additional projects featuring this month's releases. See you then!

Recipe:
Oh Happy Day Hoop
Felt: Pure Poppy, Aqua Mist, Simply Chartreuse, Vintage Cream - Papertrey Ink
Dies: Stitched Circles Die, Hoopla: Stitched Circle Bases Die, Hoopla: Stitched Banners Die, Hoopla: Stitched Scallop Die, Tiny Stitched Alphabet Die, Sew Stylish Alphabet 1 Die - Papertrey Ink
Other: Pure Poppy Button, Pure Poppy Twill Ribbon - Papertrey Ink; Embroidery Floss - DMC; white linen

Wednesday, April 13, 2016

Color Pop Butterflies

I'm still under the weather, so I'm going to keep the chatting at a minimum, but please feel free to leave questions and I'll get back to them as soon as possible.

Good morning, Friends! Welcome back for Day 4 of the Papertrey Ink countdown. Today we're showcasing Betsy's new Color Pop Butterflies kit and you're going to fall head over heels!

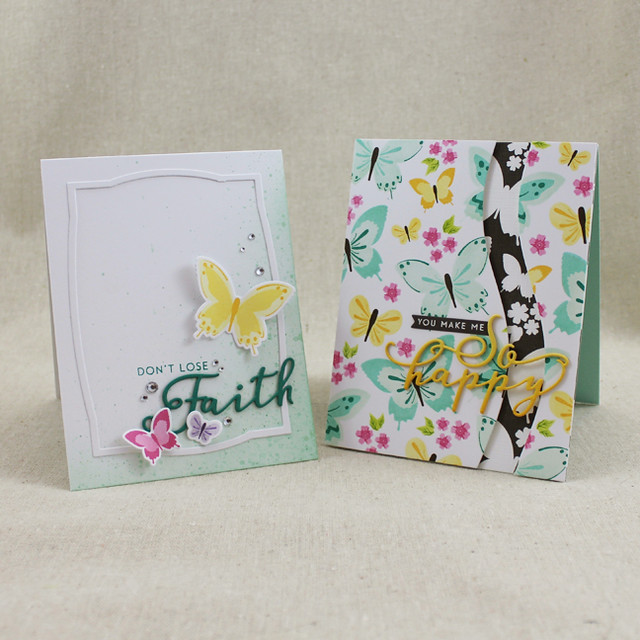
Color Pop Butterfly Cards

Butterflies are such a lovely symbol of hope and happiness and I couldn't be more thrilled to see them featured in this amazing new kit. The stencils and stamp set make it so easy to create bright, colorful butterflies in no time at all.

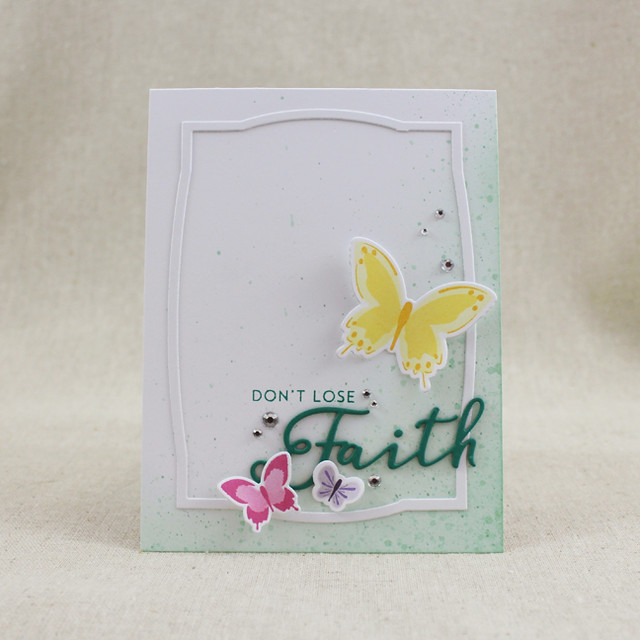
Don't Lose Faith Card

I started with the Don't Lose Faith card. I started by sponging and die cutting the three butterflies. I stamped them with the detail images included in the mini set in the kit and gently folded their wings upward for a bit of dimension.

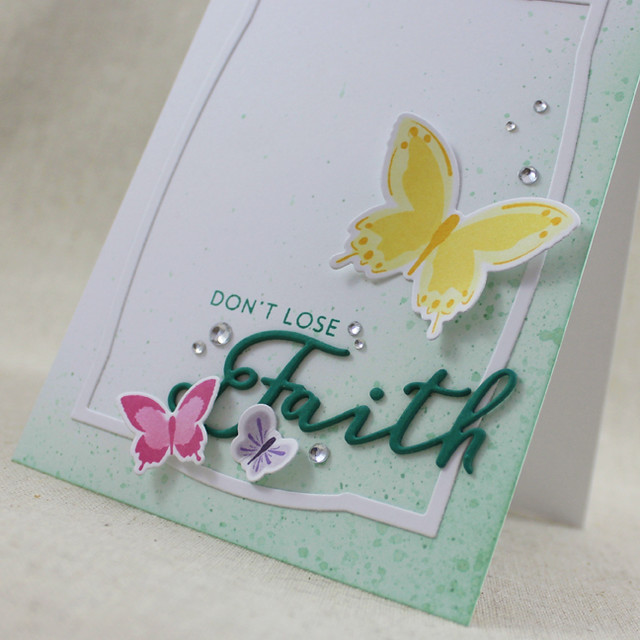
Don't Lose Faith Close Up

Next, I sponged the card base with Aqua Mist and flicked on varying concentrations of reinker. I attached a frame from Erin's new Cover Plate: Delightful and added the sentiment from Inspired: Faith. I used flat and foam adhesives to adhere the butterflies and then sprinkled in a handful of rhinestones.

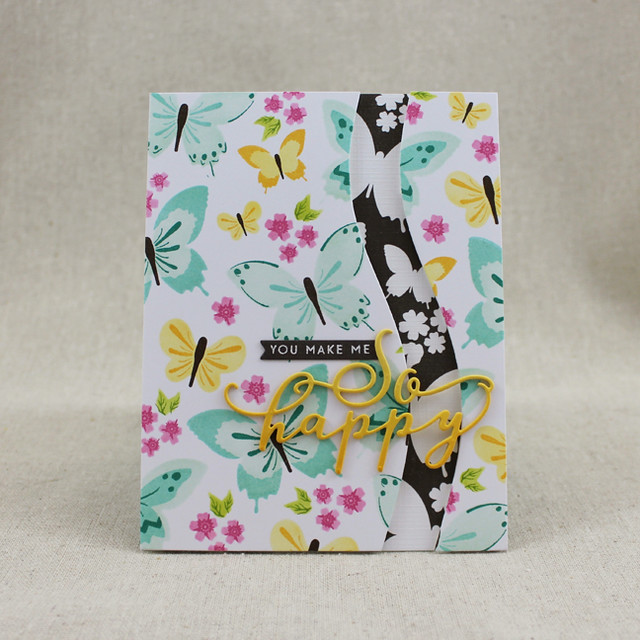
The second card uses the stencils to create a multicolor background.

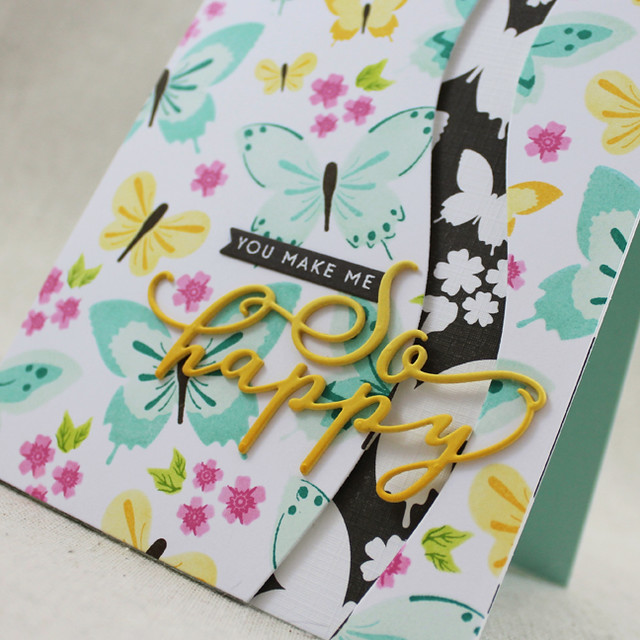
You Make Me So Happy Card

I stenciled the different layers onto a white panel before adding the stamped details. I cut the panel with the Sentiment Splits: Curve Horizontal Die and layered the pieces over one of the patterned papers in the Color Pop kit, matching up the pattern. I left the patterned paper unstamped to give a bold contrast to the colorful panels.

You Make Me So Happy Close Up

Next, I sponged and die cut the sentiment. I also heat embossed the small companion sentiment and die cut that with the small banner in the kit. To finish the card, I simply attached those elements over the gap.

Next up, I have another King Of The Grill project to share.

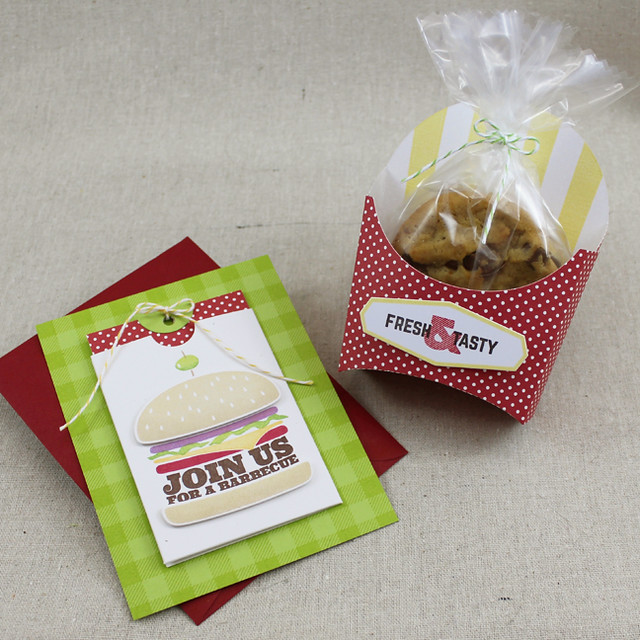
BBQ Ensemble

Let's start with the invitation.

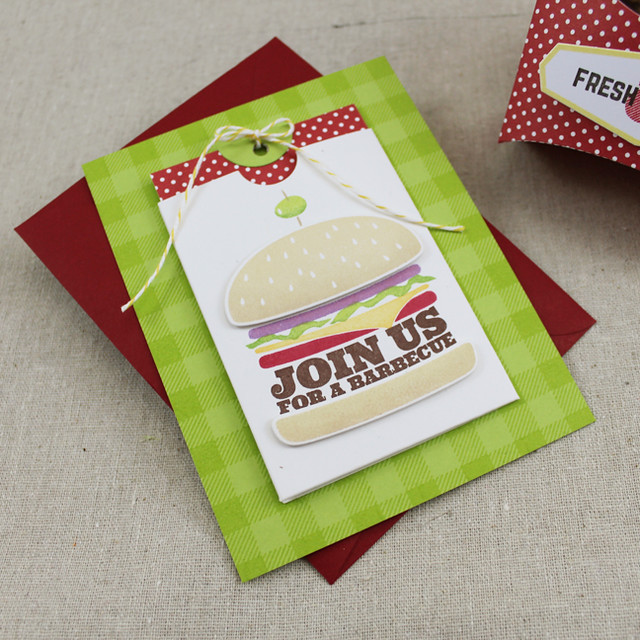
BBQ Invitation

I started by stamping an A2 Green Parakeet panel with Background Basics: Super Gingham in the matching ink. I created the pocket with the Monthly Moments: Journal Pocket 2 die and stamped it with the King Of The Grill burger.

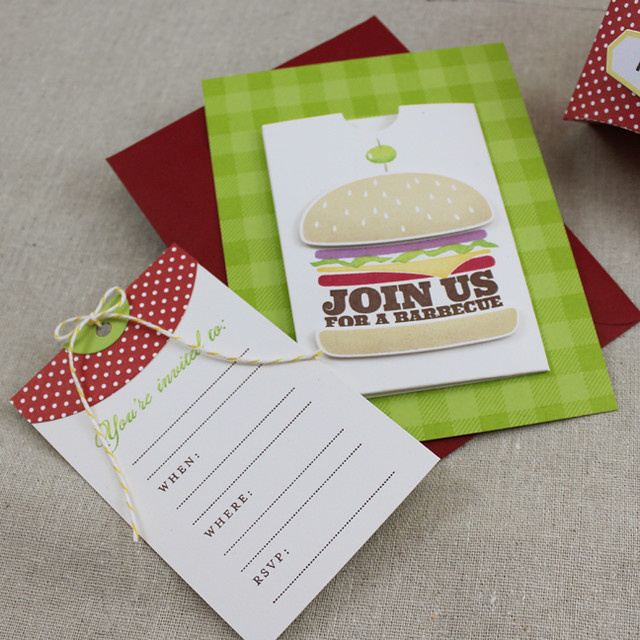
BBQ Invitation & Insert

I assembled it and adhered it to the Green Parakeet panel. I stamped the By Invitation text onto a piece of Rustic White and embellished with a piece of patterned paper and a hole reinforcer. I tied on some baker's twine and tucked it into the pocket.

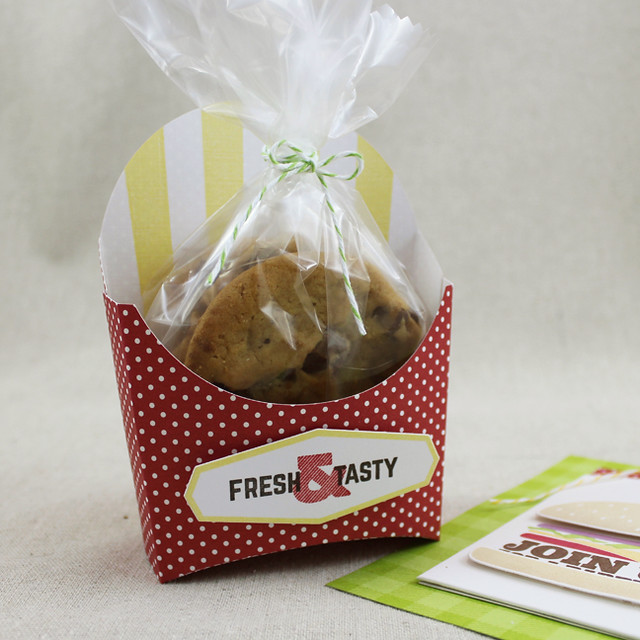
It wouldn't be a party without favors, so I also created a treat box using the new Fry Box die.

Fresh & Tasty Cookie Box

I created the box using Pure Poppy + White patterned paper. I stamped the Boxed Background Stripes on the inside for an extra pop of color and embellished with a Treat Box Tag Lines label. I tucked a sweet treat into the box that's sure to make any party goer smile.

Thank you so much for joining me today! Make sure to check in with NicholeAmy, Ashley, Betsy, Danielle, Dawn, Heather, Kay, Laurie, and Melissa to see more of these fun new products. Erin and Maile also have more to share with you, so be sure to pop over and check them out, too. See you soon!

Recipes:
Don't Lose Faith Card
Stamps: Color Pop Butterflies Kit, Inspired: Faith - Papertrey Ink
Cardstock: white
Ink: Aqua Mist, Tropical Teal, Lemon Tart, Harvest Gold, Summer Sunrise, Hibiscus Burst, Raspberry Fizz, Winter Wisteria, Amethyst Allure, Plum Pudding - Papertrey Ink
Other: Color Pop Butterflies Die, Inspired: Faith Die, Cover Plate: Delightful Die - Papertrey Ink; Rhinestones - Kaisercraft/Mark Richards; Foam Tape - Scotch

You Make Me So Happy Card
Stamps: Color Pop Butterflies Kit - Papertrey Ink
Cardstock: Smokey Shadow, Aqua Mist, Harvest Gold, Color Pop Florals Patterned Paper - Papertrey Ink
Ink: Aqua Mist, Hawaiian Shores, Tropical Teal, Harvest Gold, Summer Sunrise, Hibiscus Burst, Raspberry Fizz, Green Parakeet, New Leaf, Smokey Shadow - Papertrey Ink; VersaMark - Tsukineko
Other: Color Pop Butterflies Die, Sentiment Splits: Curve Horizontal Die - Papertrey Ink; Foam Tape - Scotch

Barbecue Ensemble
Stamps: King Of The Grill, Boxed Background Stripes, Treat Box Tag Lines, By Invitation, Background Basics: Super Gingham - Papertrey Ink
Cardstock: Green Parakeet, Rustic White, Pure Poppy + White Patterned Paper - Papertrey Ink; white
Ink: Harvest Gold, Smokey Shadow, Pure Poppy, Green Parakeet, New Leaf, Fine Linen, Classic Kraft, Autumn Rose, Amethyst Allure, Summer Sunrise, Dark Chocolate - Papertrey Ink
Other: Fry Box Die, Treat Box Tag Die, King Of The Grill Die, Monthly Moments: Journal Pocket 2 Die, Tag Sale #3 Die - Papertrey Ink; Foam Tape - Scotch; Lemon, Green Apple Baker's Twine - Divine Twine

Tuesday, April 12, 2016

Fathers, Food Fun, and More

Good morning, Friends! Welcome back to Day 3 of the Papertrey Ink countdown! We're featuring some great new products for the men in our lives today. Masculine projects can be a challenge, but we're making them easy and fun with today's line-up! You're going to love how simple it is to create projects for the fellas in your life!
One quick note before we get started: I'm battling a major cold and all I want to do is climb back into bed, so please forgive my brevity. If you have any questions about today's projects just leave them in the comments and I'll get back to you as soon as possible.

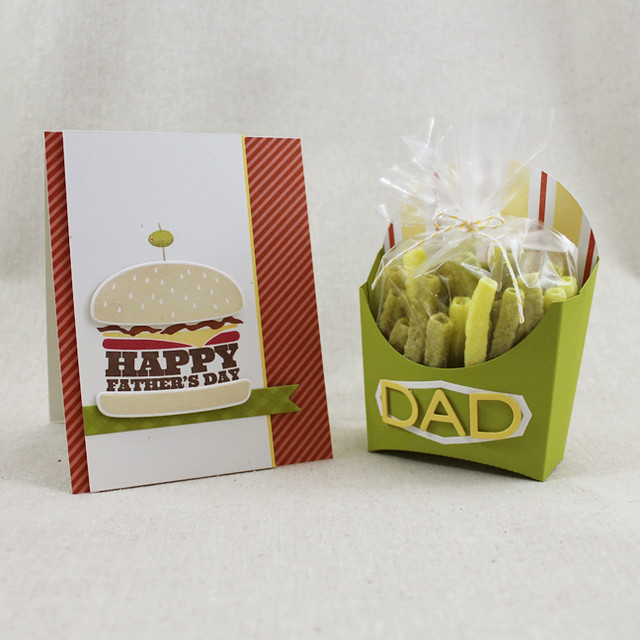
First up I have a Father's Day ensemble featuring King Of The Grill and the new Fry Box Die.

Father's Day Burger Ensemble


I've put together a video to introduce you to the Fry Box Die. It's fairly simple, but sometimes a video can really clear up any questions you might have.


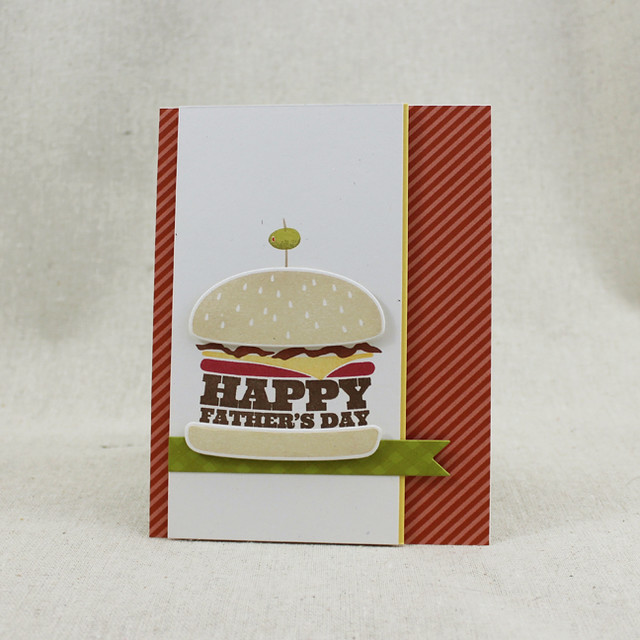
I started with the card.

Father's Day Burger Card

I stamped my burger insides onto a panel of Rustic White cardstock. The "lettuce" image does double duty as bacon for those of you that want to build bacon cheeseburgers. The banner was stamped and adhered into place and the buns were added with foam tape.

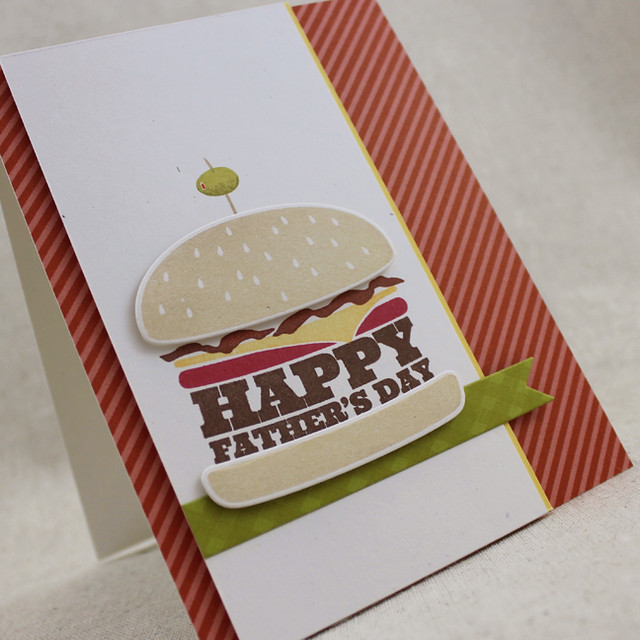
Father's Day Burger Close Up

I added a narrow strip of Harvest Gold cardstock before mounting the whole panel to a Terra Cotta Tile striped card front with foam tape.

The coordinating fry box came next.

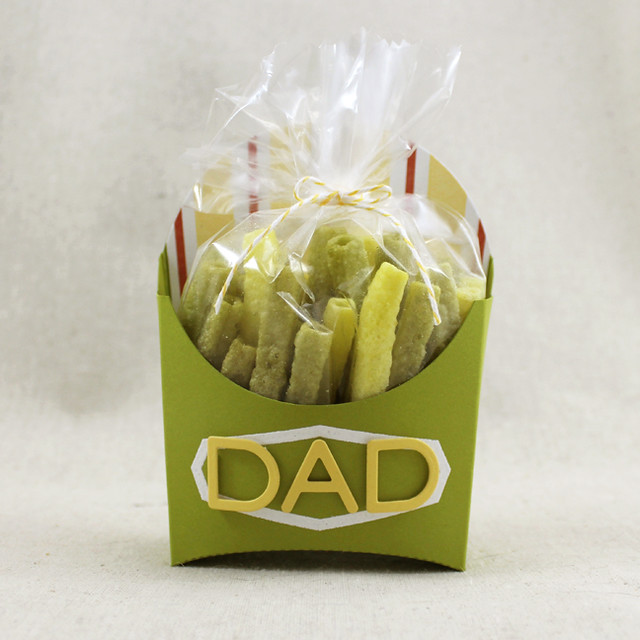
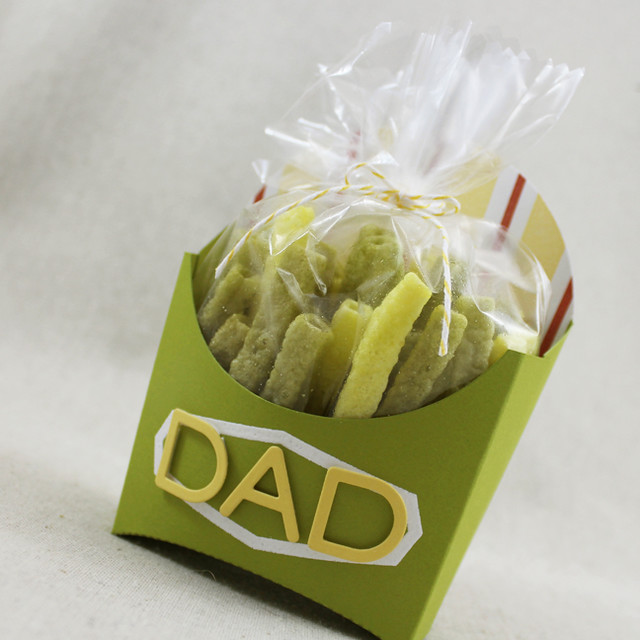
Dad Fry Box

I began by die cutting the box from Simply Chartreuse cardstock. I heat embossed the Treat Box Tag Lines label shape on the front before assembling the box. The die cut letters were added to the front of the box with foam tape.

Dad Fry Box Close Up

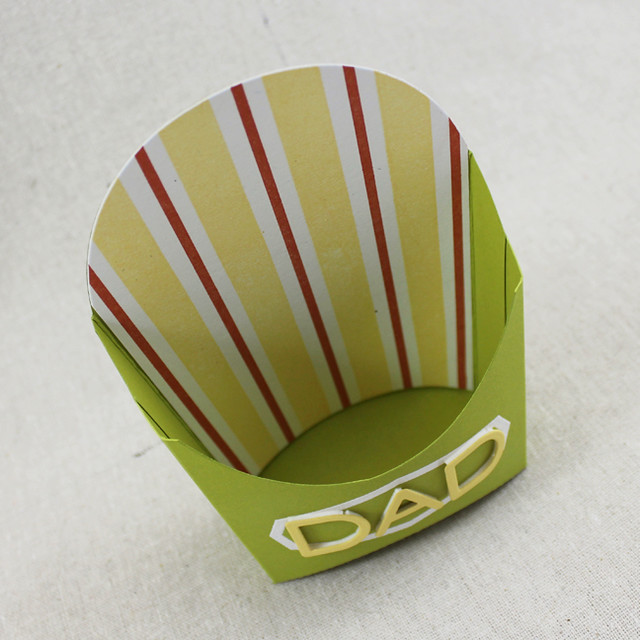
I wanted to line my box for an extra pop of color, so I die cut another box shape from Rustic White. I trimmed off the sides and bottom and stamped it with the Boxed Backgrounds: Stripes image. Then I added the narrower Terra Cotta Tile stripes with Background Basics: Super Stripes. Then, I simply adhered it into place with flat adhesive.

Dad Fry Box Inside

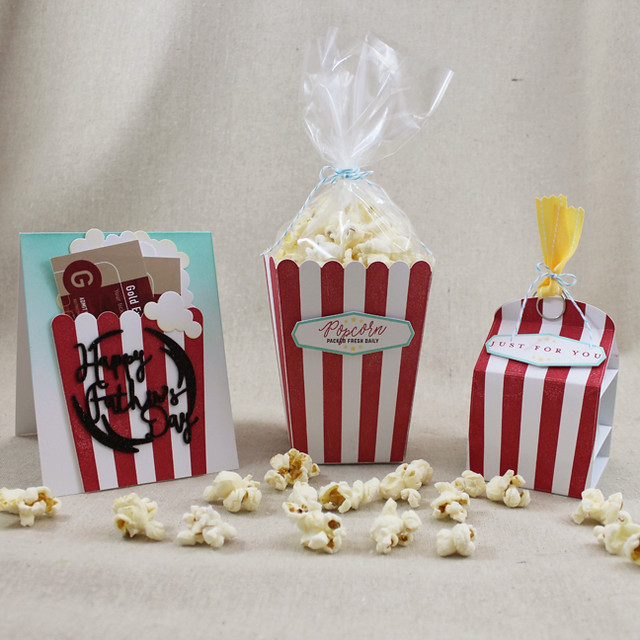
Next up I have another Father's Day ensemble - this one featuring the new Popcorn Bucket and the Snack Cup Box & Wrap.

Father's Day Popcorn Ensemble

I have another video introducing you to the Popcorn Bucket Die. Again, nothing earth-shattering, but it might help answer someone's questions.


I began with the Popcorn Bucket on this ensemble.

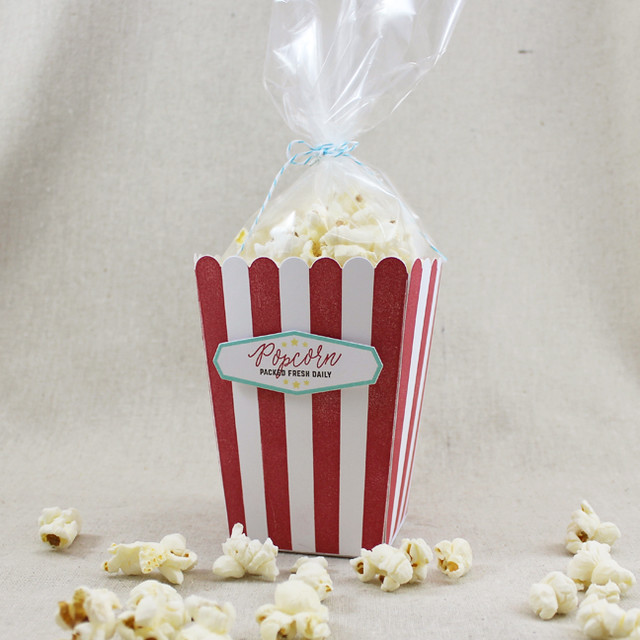
Packed Fresh Popcorn Bucket 1

I die cut four panels with the new Popcorn Bucket Die. I stamped each one with the Boxed Backgrounds: Stripes image using Pure Poppy ink. I used a stamp press and a piece of fun foam to make sure that I was getting the best impression possible.

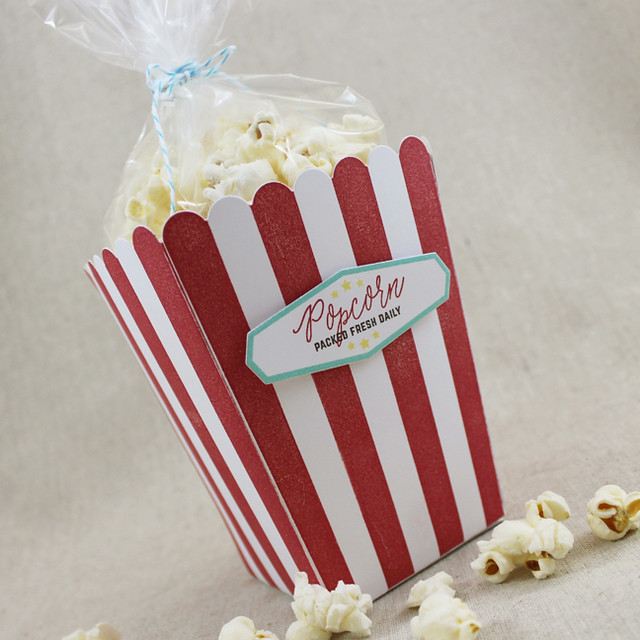
Packed Fresh Popcorn Bucket Close Up

I assembled the box and embellished it with a Treat Box Tag Lines label. The sentiments on the label are from the Treat Box Tag Lines mini set, the stars are from the Boxed Backgrounds: Stripes set. Then, I just filled it with popcorn. Easy!

Next came the seasoning wrap.

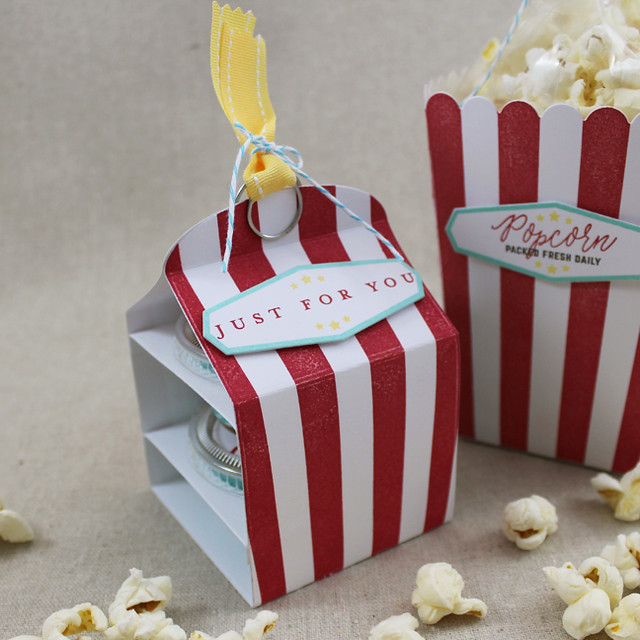
Popcorn Seasoning Container

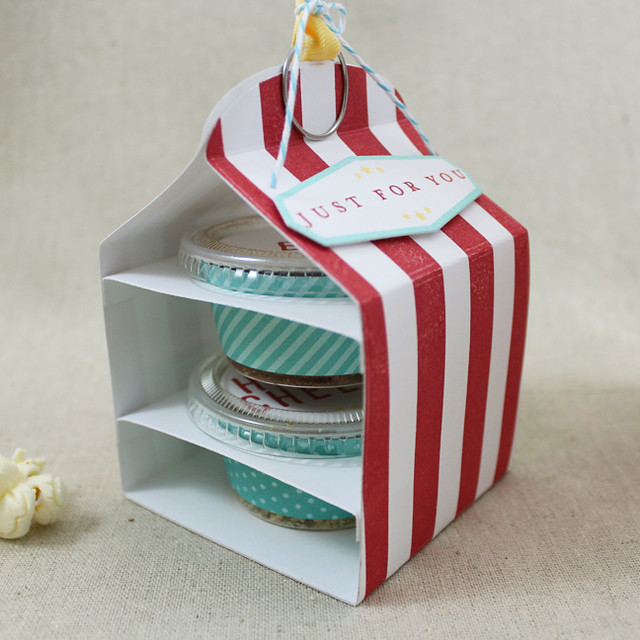
I began by die cutting the and stamping the Snack Cup Box. I assembled it and embellished the top with a Treat Box Tag Lines label that I'd stamped with the Keep It Simple: Just For You sentiment. I used an embellished round paper clip to keep my Snack Cup Box closed.

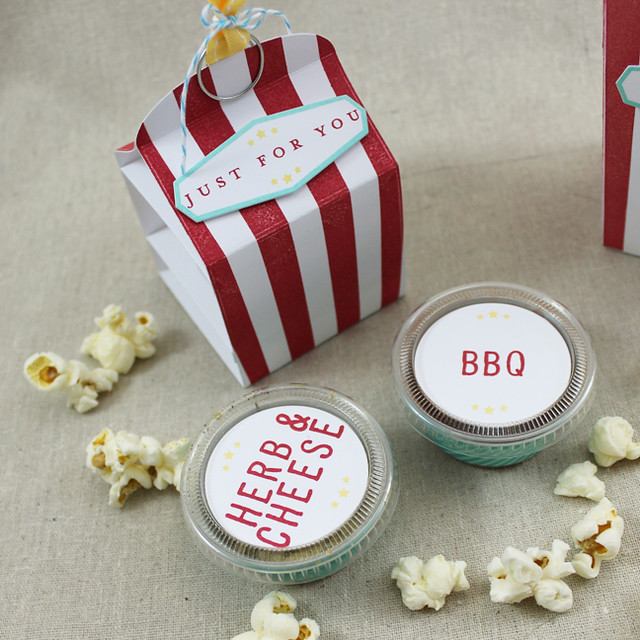
Next, I die cut the Snack Cup Wraps from Hawaiian Shores patterned paper and adhered them to the seasoning ramekins. I stamped the tops with the types of seasoning before adhering them into place on the lids.
Popcorn Seasoning Container & Ramekins

The ramekins fit right inside the Snack Cup Box nestled into little dividers.

Popcorn Seasoning Container Side

The last part of this ensemble is the Father's Day card.

Movies & Popcorn Father's Day Card

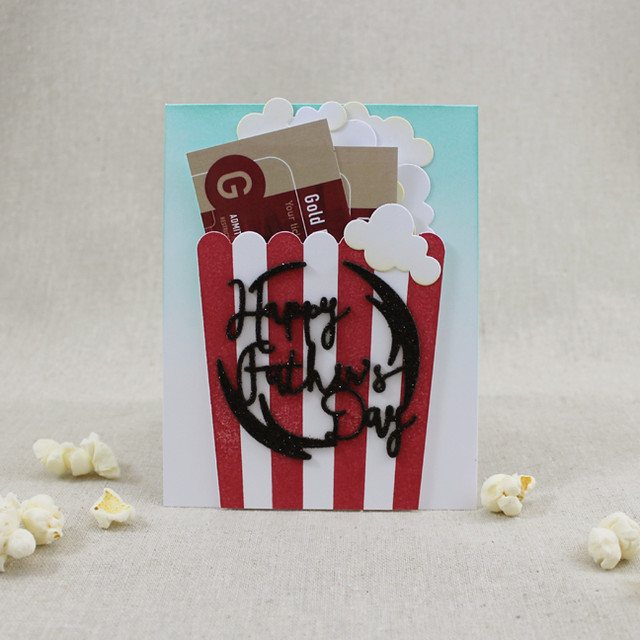
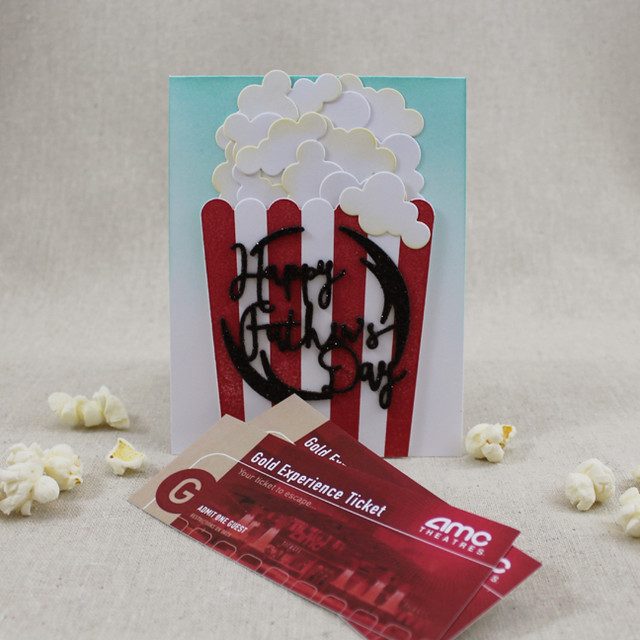
I began by sponging Hawaiian Shores ink onto a white card base. Then I created a pocket on the card by trimming down a Popcorn Bucket panel and adhering it to the card base with foam tape.

Movies & Popcorn Father's Day Card2

I filled it with "popcorn" made from clouds that I sponged with Harvest Gold ink.

Movies & Popcorn Father's Day Close Up

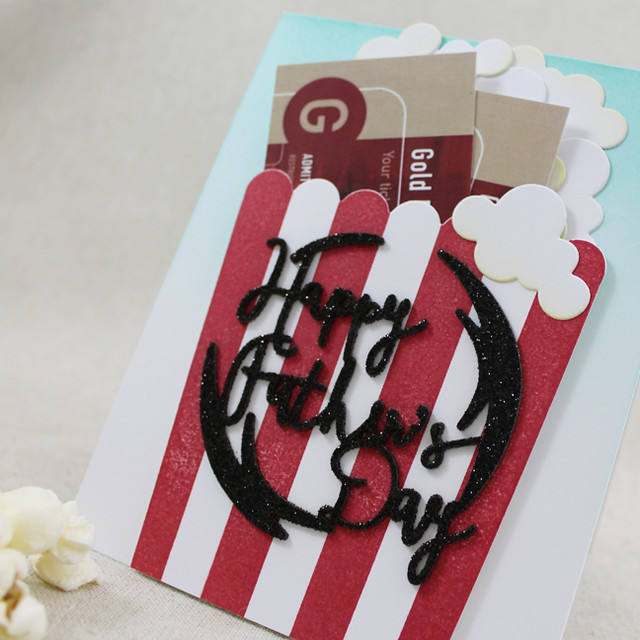
I added a glittered Shaped Sayings: Father's Day shape to the front of the popcorn box.

Thank you so much for joining me today! I'll be back again tomorrow with more of this month's release. In the meantime, make sure to check in with Nichole,Amy, Ashley, Betsy, Danielle, Dawn, Heather, Kay, Laurie, and Melissa to see more of these fun new products. Erin and Maile also have more to share with you, so be sure to pop over and check them out, too. See you soon!


Recipes:
Father's Day Burger Ensemble
Stamps: King Of The Grill, Treat Box Tag Lines, Canned - Papertrey Ink
Cardstock: Rustic White, Simply Chartreuse, Harvest Gold, Terra Cotta Tile Patterned Paper - Papertrey Ink
Ink: Harvest Gold, Simply Chartreuse, Terra Cotta Tile, Dark Chocolate, Pure Poppy, Summer Sunrise, Ripe Avocado, Fine Linen, Classic Kraft - Papertrey Ink; VersaMark - Tsukineko
Other: Fry Box Die, King Of The Grill Die, Sketched Shapes Die, Smooth Alphabet Die - Papertrey Ink; Foam Tape - Scotch; Embossing Powder - Filigree

Father's Day Popcorn Ensemble

Stamps: Treat Box Tag Lines, Boxed Backgrounds: Stripes, Antique Alphabet - Papertrey Ink
Cardstock: Hawaiian Shores Patterned Paper, Smokey Shadow - Papertrey Ink; white
Ink: Hawaiian Shores, Smokey Shadow, Harvest Gold, Pure Poppy - Papertrey Ink
Other: Shaped Sayings: Father's Day Die, Popcorn Bucket Die, Snack Cup Box Die, Snack Cup Wrap Die, Harvest Gold Saddle Stitched Ribbon - Papertrey Ink; Foam Tape - Scotch; Onyx Glitter - Martha Stewart Crafts; Paper Clip

Monday, April 11, 2016

Introducing Treat Box Tag Lines, Boxed Backgrounds: Stripes, & More King Of The Grill

Good morning, friends! Welcome back to the Papertrey Ink April countdown! I'm so glad to hear that you're all as excited about King Of The Grill as I am. It's super fun to build custom burgers with this set and I have more to share with you today. I also thought today would be a perfect time to introduce a couple of additional sets coming your way this month. Let's get to it, shall we?

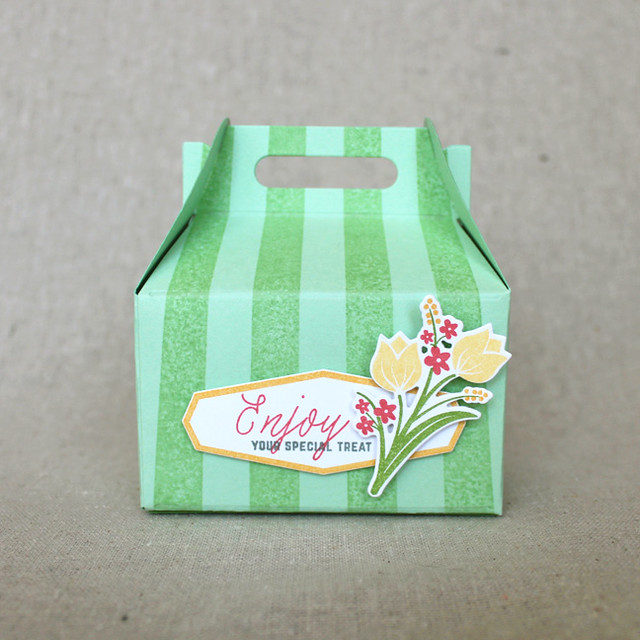
First off, I'd like to present Treat Box Tag Lines and Boxed Backgrounds: Stripes! These two sets are designed to compliment the treat packaging dies that you'll see later this week, but they're also wonderful for dressing up the boxes and bags you may already have in your collection.

Enjoy Bouquet Treat Box

I wanted to use these new sets with my Gable Box Die to kick things off. The stripes are the perfect length and width to fit on the face of the box! With just a few simple impressions you have a charming striped package. I began by tracing around a die (just so I knew where to position my stripes) and stamping Mint Julep stripes onto the coordinating cardstock. I used the whole image for the front and back, but only the two center stripes for the sides. Then, I simply die cut the pieces and assembled as normal.

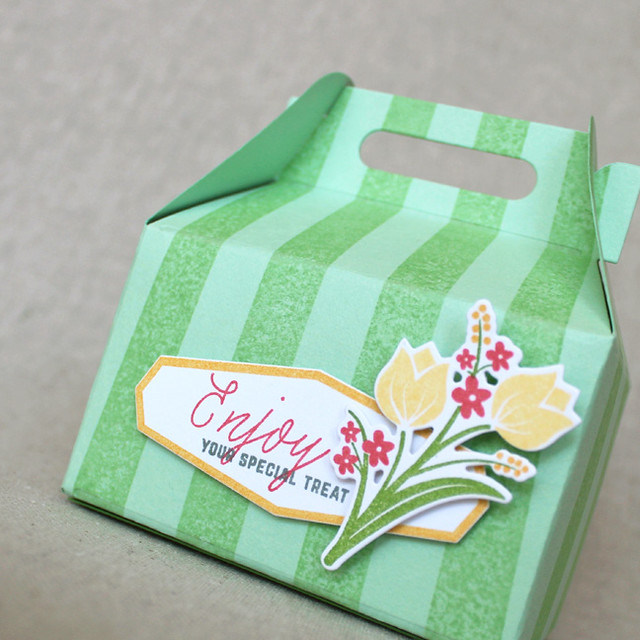
Enjoy Bouquet Treat Box Close Up

Next, I die cut the Treat Box Tag Lines label shape and stamped it with the coordinating frame image using Summer Sunrise ink. I added the sentiments, also from Treat Box Tag Lines, using Berry Sorbet and Stormy Sea ink. Then, I die cut and stamped the Bitty Bouquet using New Leaf, Harvest Gold, Summer Sunrise, and Berry Sorbet inks. I attached the label shape and bouquet to the front of my striped box using foam tape. So cute!

Next up I have another look at King Of The Grill to share with you.

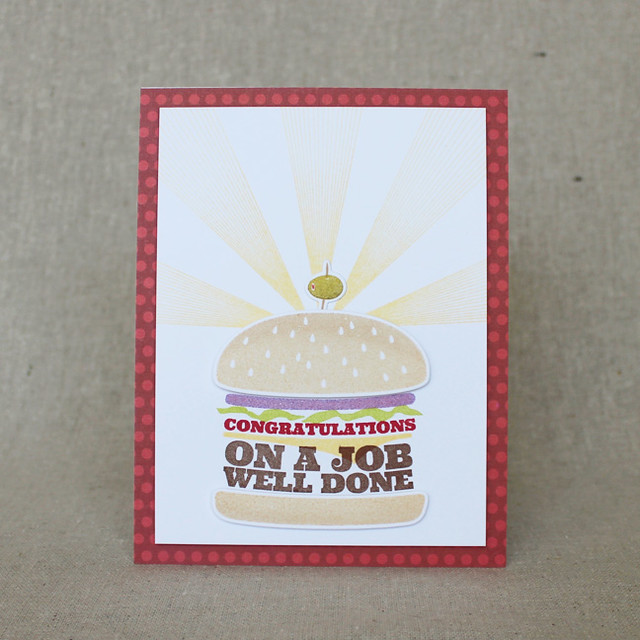
Well Done Burger Card

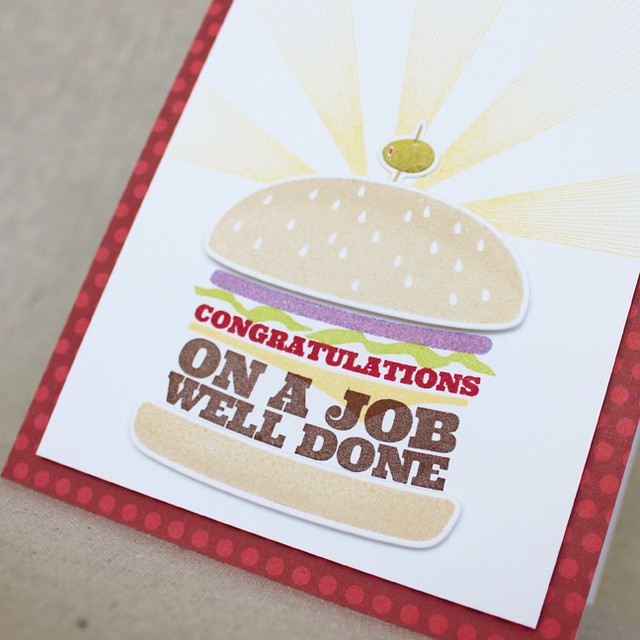
Some of the longer sentiments in this set can be paired with other sentiment elements to create super thick and juicy burgers or they can be split out on their own to look more like condiments. The "Congratulations" sentiment is the perfect example. In this case it's representing a tomato slice. Isn't it fun what simple color substitutions can do for us?

Well Done Burger Close Up

Anyway, I began by stamping the Hello Sunshine rays, inked in Lemon Tart and Harvest Gold, onto a white panel. I built my burger in the space below, adding the die cut buns and olive with foam tape. Most of the colors are fairly self-explanatory, but I wanted to mention that I got the onion color by inking first in Autumn Rose and then tapping in Amethyst Allure ink. I mounted the white panel with foam tape to a card front that I'd covered with patterned paper from the Comic Strip Patterned Paper Collection. Well done? I think so.

Thank you so much for joining me today! Make sure to check in with Nichole, Amy, BetsyHeather, Melissa, Erin, and Maile for more inspiration. I'll see you again soon!

Recipes:
Enjoy Bouquet Treat Box
Stamps: Treat Box Tag Lines, Boxed Backgrounds: Stripes, Bitty Bouquets - Papertrey Ink
Cardstock: Mint Julep - Papertrey Ink
Ink: Mint Julep, Summer Sunrise, Berry Sorbet, New Leaf, Harvest Gold, Stormy Sea - Papertrey Ink
Other: Treat Box Tag Lines Label Die, Gable Box Die - Papertrey Ink; Foam Tape - Scotch

Well Done Burger Card
Stamps: King Of The Grill, Hello Sunshine - Papertrey Ink
Cardstock: Comic Strip Patterned Paper Collection, Papertrey Ink; white
Ink: Lemon Tart, Harvest Gold, Pure Poppy, Green Parakeet, Autumn Rose, Amethyst Allure, Simply Chartreuse, Ripe Avocado, Fine Linen, Classic Kraft, Dark Chocolate - Papertrey Ink
Other: King Of The Grill Die - Papertrey Ink; Foam Tape - Scotch

Sunday, April 10, 2016

Introducing King Of The Grill

Good morning! Welcome to the first day of Papertrey Ink's April countdown. I have a few things to share with you this month and today we're kicking it off with King Of The Grill (this and all of the other new sets releasing this month will be available in the Papertrey Ink store on April 15th). This set is great for the fellas and foodies in your life. You can build your burger with a variety of sentiments and toppings to truly customize it for your recipient. Let's get on to a project, shall we?

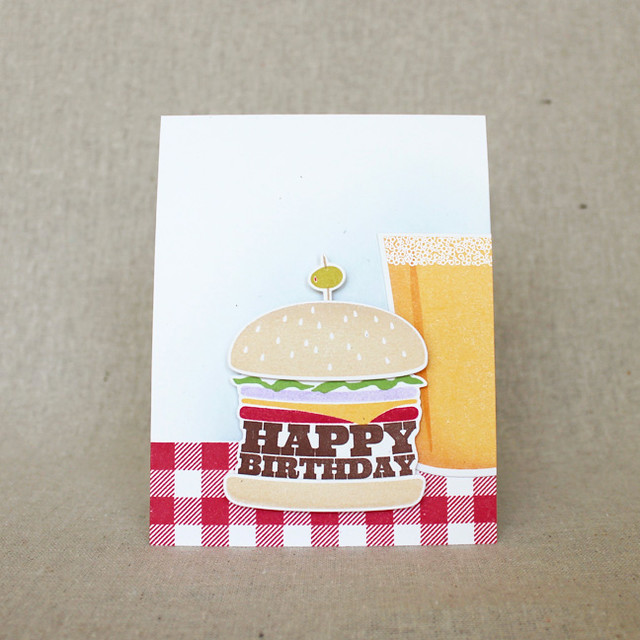
Beer & Burger Birthday Card

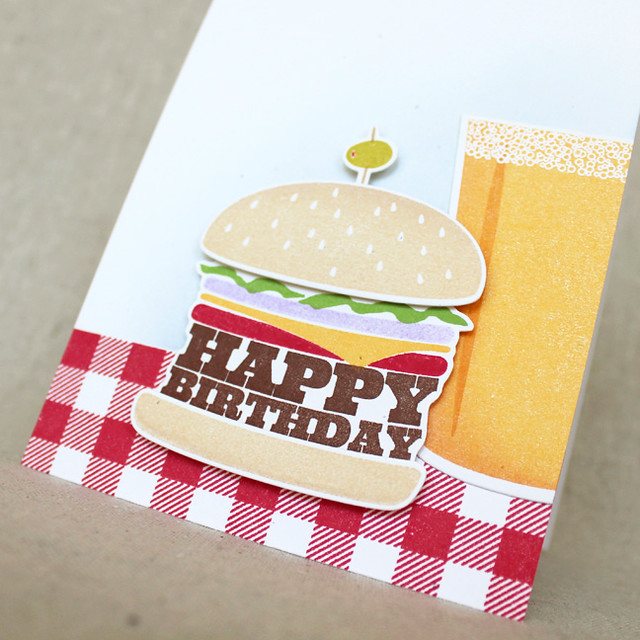
I thought King Of The Grill might pair wonderfully with Erin Lincoln's Craft Brew set and much to my delight it does! I began by stamping and die cutting my burger bun and olive. I inked the bun with Fine Linen and sponged the edges with Classic Kraft to give a little dimension (though it's fairly subtle). I stamped the olive with Simply Chartreuse and the toothpick with Classic Kraft and colored in the pimento (or the hole in the olive) with a red colored pencil. I set all of those pieces aside while I stamped the inner burger bits. I stamped the "happy" and "birthday" sentiments with Dark Chocolate, the tomato with Pure Poppy, the cheese with Summer Sunrise, the onion in second generation Amethyst Allure, and the lettuce in New Leaf. I trimmed around that whole piece and attached the bun pieces to the top and the bottom with foam tape.

Beer & Burger Birthday Close Up

Next, I die cut and stamped the pint glass. I inked the beer with Summer Sunrise and sponged Canyon Clay around the outside edge before heat embossing the head at the top. Then, I stamped a Background Basics: Super Gingham strip along the bottom edge of a Rustic White card base using Pure Poppy ink. Then, I masked the gingham and sponged a bit of Spring Rain onto the card front. I attached the pint glass onto the card with flat adhesive before adding the burger with additional foam tape. It's a simple card, but it's perfectly dudely, don't you think?

Thank you so much for joining me today! Make sure to check in with Nichole, Betsy, Danielle, Dawn, Erin, and Maile to see more of this month's release. I'll see you again soon!

Recipe:
Stamps: King Of The Grill, Craft Brew - Papertrey Ink
Cardstock: Rustic White - Papertrey Ink
Ink: Fine Linen, Classic Kraft, Dark Chocolate, Pure Poppy, Summer Sunrise, Canyon Clay, Spring Rain, Amethyst Allure, New Leaf, Fresh Snow - Papertrey Ink
Other: Burger Bun Die, Pub Glass Die - Papertrey Ink; Foam Tape - Scotch; White Embossing Powder - Filigree