Good morning, friends, and welcome to Day 4 of the
Papertrey Ink January countdown! Today we're featuring Betsy's new Potbellies: Unicorn and I couldn't be more excited! This die is so darn versatile and adorable. A-dor-a-ble, people. And it can be so many critters!
The unicorn (duh), a horse, a cow, a piggy, a hippo, a rhinoceros, and so, so many more. To go along with the new die Betsy has also designed a set of everyday sentiments. We're also introducing Betsy's Words To Live By: Smile stamp set. It's jam packed with sweet and clever greetings that you're sure to enjoy. Let's get to it, friends!
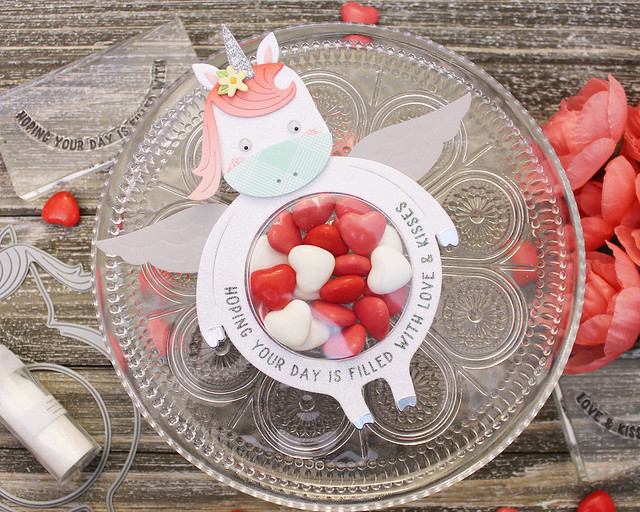
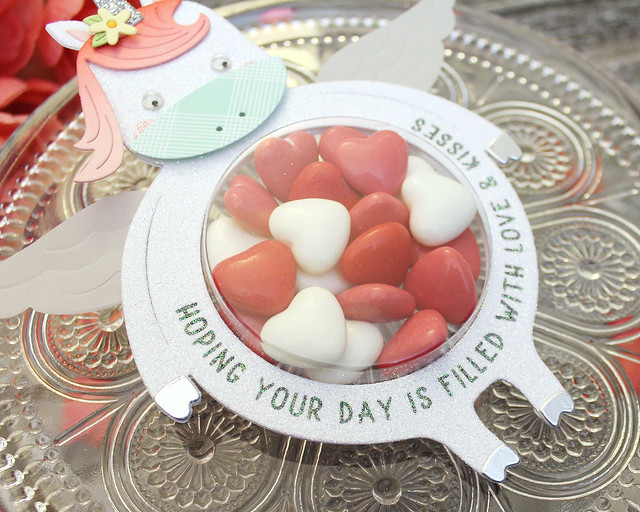
I'm going to start with my Potbellies: Unicorn treat package. I went a little glitter crazy and I don't regret a single thing.
I began by xyroning a piece of white cardstock and die cut it with the sticky side up (but still covered). I cut the circle out of the center and then set it aside. Next, I die cut the hooves out of Luxe Silver self adhesive paper and the inner ears from Pale Peony cardstock. I cut the muzzle from Bitty Big: Aqua Mist paper and the mane from sponged Pale Peony cardstock. Then, I xyroned a piece of the silver paper (adding adhesive to the shiny side) and glittered it before die cutting with the horn die. Die cutting after glittering allowed me to keep the horn details.
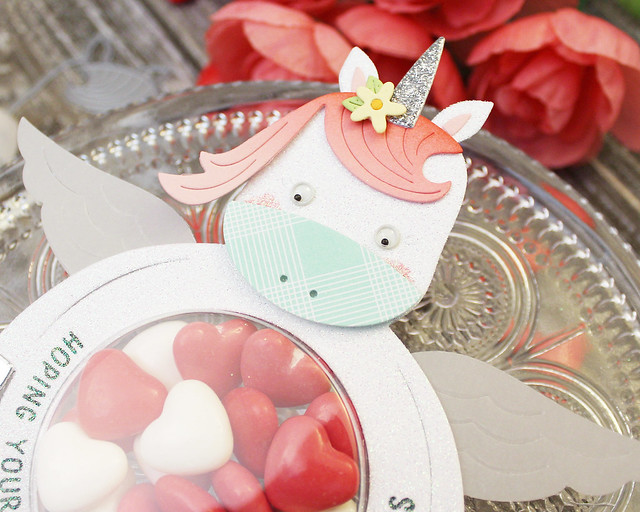
Then, I removed the adhesive backing and stamped the sentiment directly onto the sticky surface. I wasn't sure if it would work, but it did and I'm so tickled! I placed the hooves, ears, and colored in the cheeks before applying Sugarcube glitter. All the sparkles!!! I attached the mane and glittered horn as well as the muzzle. Next, I die cut a back piece from white cardstock and adhered both pieces around two sandwiched bubbles filled with candies. I used mini glue dots so it would be fairly easy for someone to get to the sweets.
I adhered the googley eyes and embellished the horn with a little flower. I still wanted to add those fabulous wings, so I die cut them from vellum and attached them to the back of the unicorn. Oh my good gravy, friends. I LOVE this thing. I had intended to give it to my niece, but...maybe I'll make her another one.
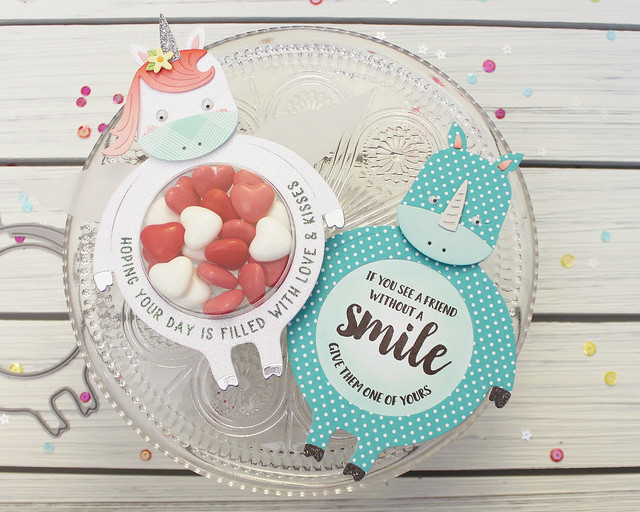
My second project today is a shaped card. As soon as I saw the Potbellies: Unicorn die I started daydreaming about all of the other animals it could be.
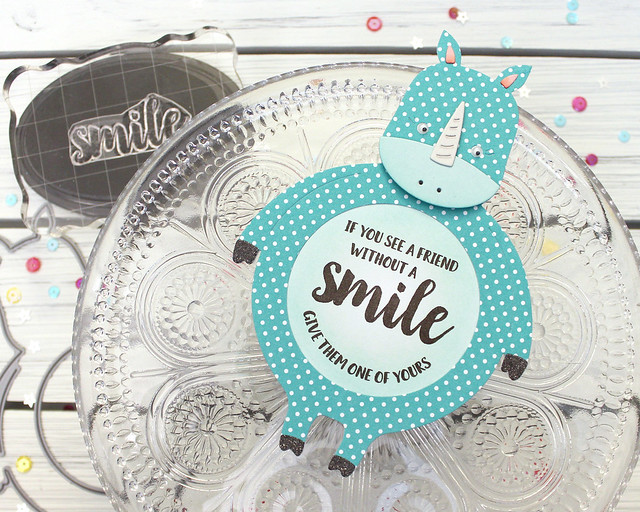
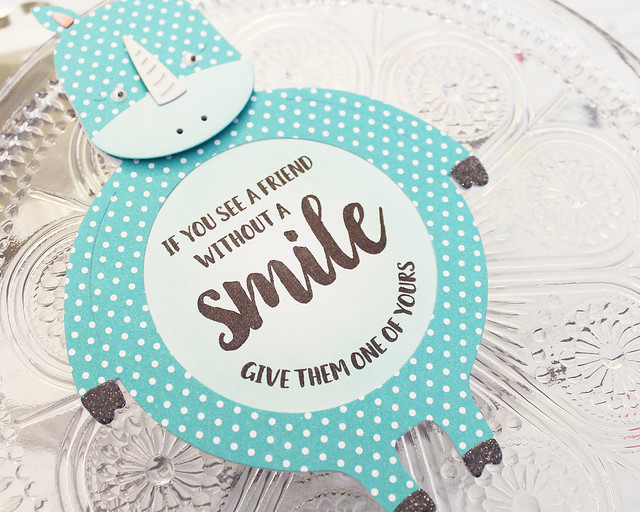
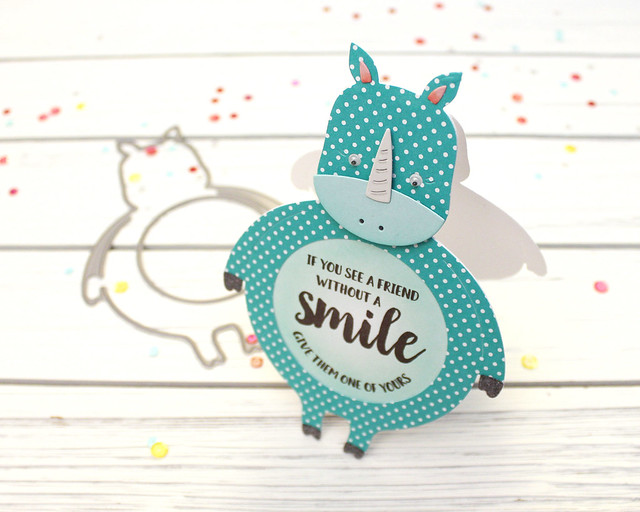
I knew some folks would be concerned that a Unicorn has limited potential, so I chose to share a Rhino with you today! I began by die cutting the face of my shaped card from Bitty Big: Hawaiian Shores paper. I cut the circle from the tummy to make space for the Words To Live By: Smile sentiment.
Next, I die cut a card base from white cardstock. I sponged the tummy opening area with Aqua Mist, Hawaiian Shores, and Tropical Teal inks to give it some depth. I stamped the sentiment in Smokey Shadow ink and adhered the Hawaiian Shores shape into place.
Next, I die cut the inner ears from Pale Peony cardstock and used Copic markers to give them a bit of dimension. I also die cut the muzzle from Aqua Mist cardstock and sponged on a bit of Hawaiian Shores ink for the same purpose. I used a "v" shaped piece of cardstock to attach the muzzle to the rhino's face and make it pop out just a bit. Then, I die cut the horn from Soft Stone cardstock, embellished it a bit with a gray Copic marker, and used foam tape to attach it to the rhino's face.
Then, I xyroned a piece of Smokey Shadow cardstock and die cut it (sticky side up) with the hooves die. I adhered them into place and removed the adhesive backing, sprinkling glitter over the sticky surface. I also glued on a pair of googley eyes to amp up the cute factor. This card is perfect for my nephew. I think he'll love it!
That's all for me today!
Betsy is giving you a complete intro to her new Potbellies: Unicorn, so I hope you'll pop over to her blog to take a peek.
Ashley,
Dawn,
Kelly,
Laurie,
Melissa B,
Melissa P,
Michelle, and
Steph are also sharing today, so make sure to visit them too. I'll see you back here tomorrow for Day 5!
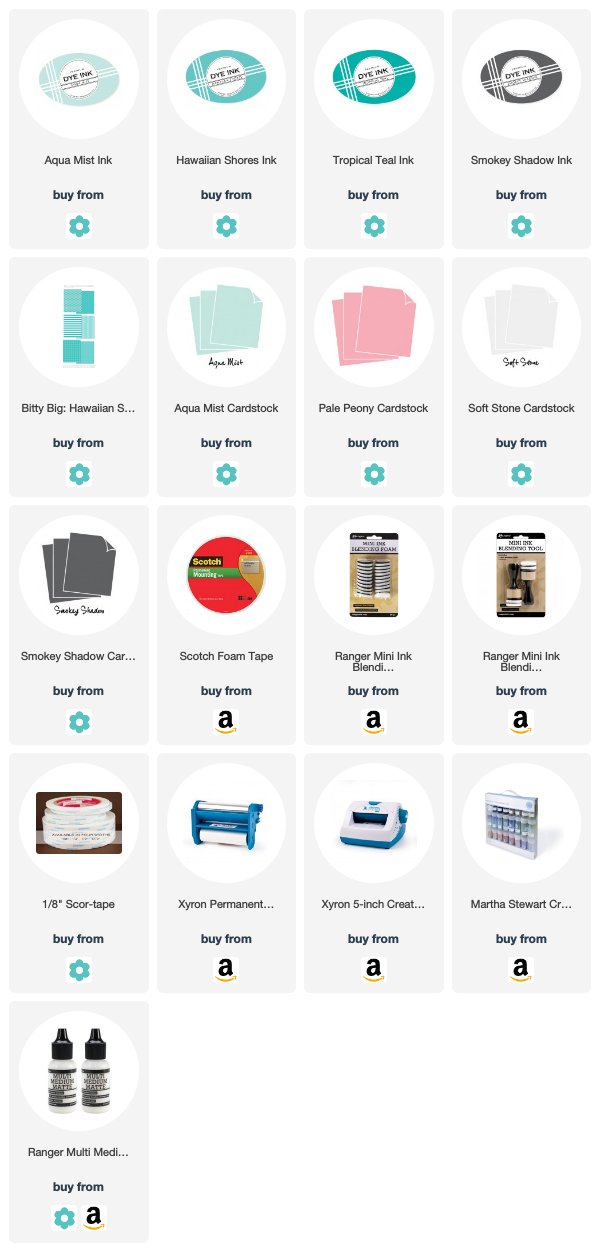
Supplies:
Unicorn Treat Package
Rhino Smile Card


4 comments:
Love your rhino creation! :) And the unicorn, too, but oh that rhino!!
Adorable critters and very clever transformation to a rhino!
Good morning oh creative one! Lol. I’m continually amazed at how you make your designs with courage. Using the adhesive sheets to add glitter and then directly stamping the sentiment,. Wow! Your unicorn 🦄 is totally cute. And adorable. And don’t your rhino too, how clever. Your last pic does him justice! I guess I’m a little giddy this morning with my comments, but I have had a super fun morning reading the blogs. Thank you Lizzie, for sharing your process, which gives so many great tips. 😍
These are the cutest and are lovely in every color combo.
Post a Comment