Good morning, friends, and welcome to this month's
Papertrey Ink Simple To Spectacular feature!
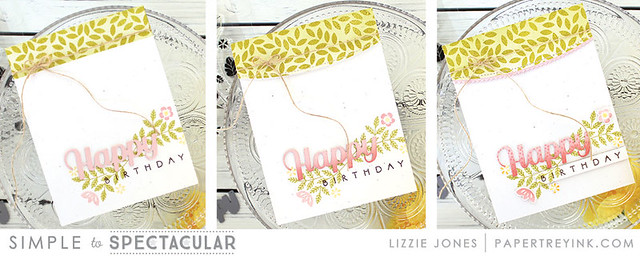
I love this challenge because it shows just how different a design can look with even the subtlest of changes.
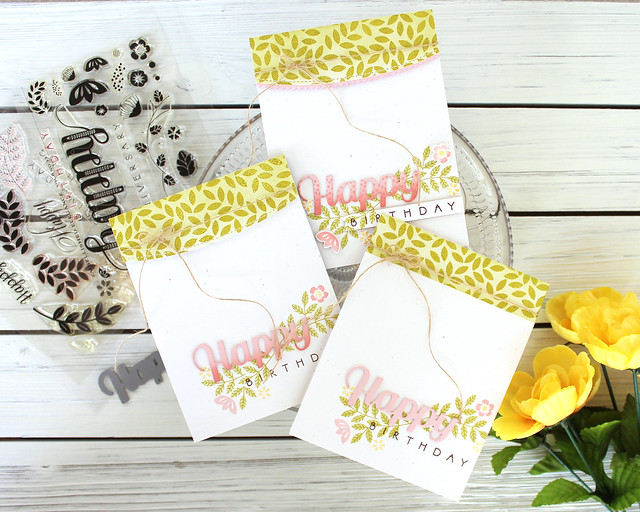
Embellished Elegance is also one of those sets with so many options to build your images as boldly or as simply as you can imagine, which makes it a perfect set for this feature. It was such a fun set to pull out again and now I have a handful of birthday cards ready for the next few celebrations!
I've heard several questions about how the designers choose to go from one level to the next with these Simple To Spectacular projects. Sometimes I come up with the more embellished version first and then think of ways to simplify. Other times, the simplest card comes to me easily and then I think up ways to take the others over the top. Today, it was somewhere in the middle. I came up with the Intermediate card first and then thought up ways to add more depth and interest for the Spectacular version while streamlining the design for the Simple card. I really love all three this time around though and I hope you will too!
For the sake of keeping things linear though, I'm going to start today with my Simple card.
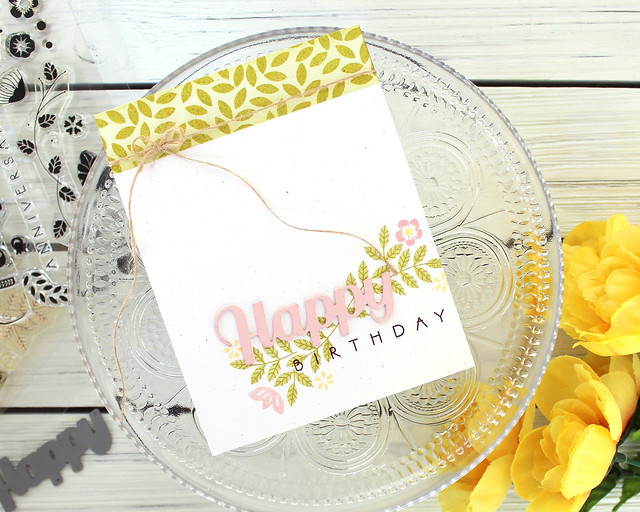
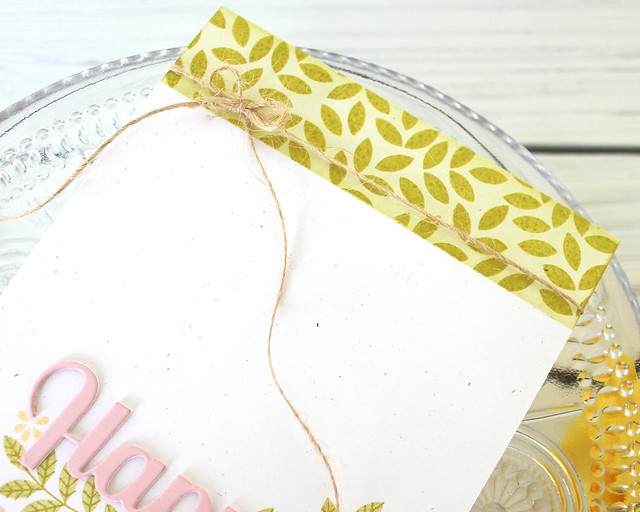
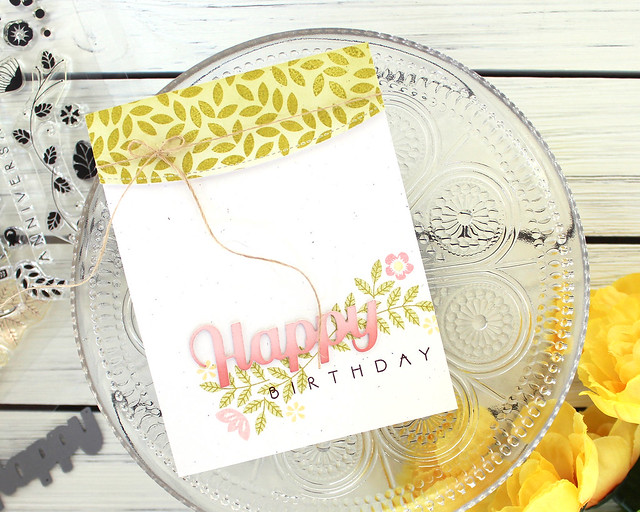
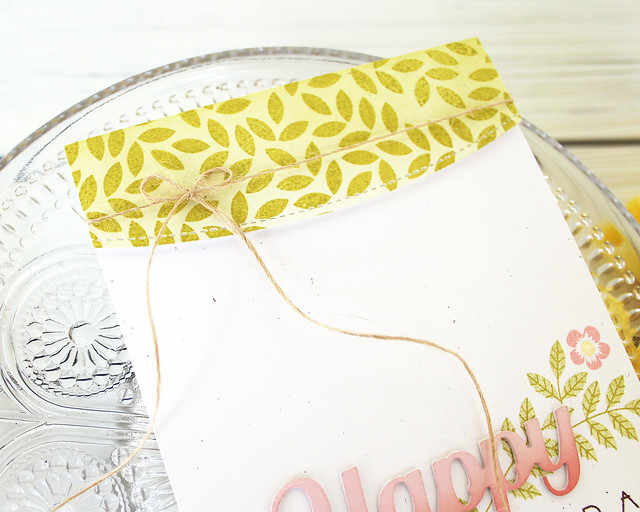
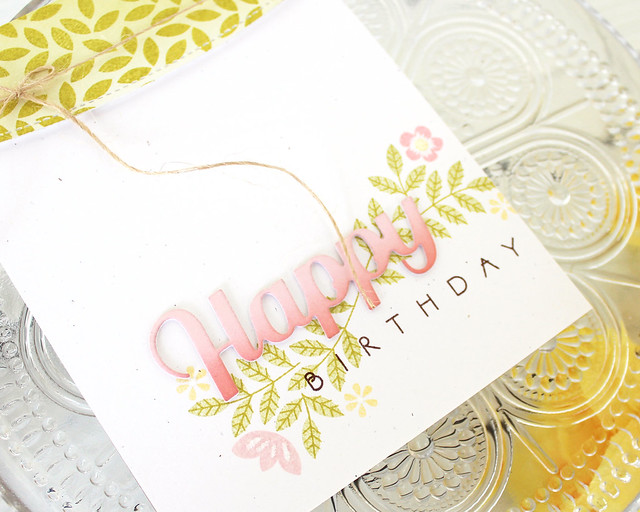
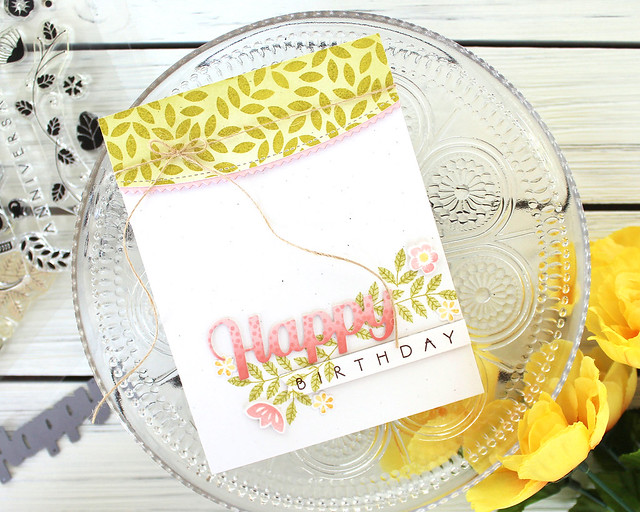
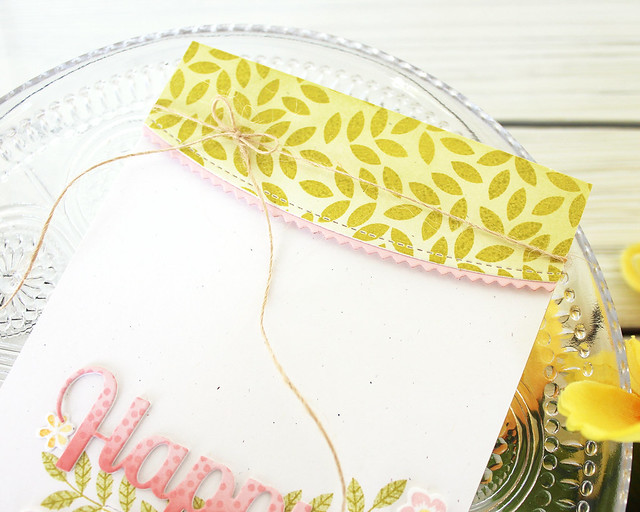
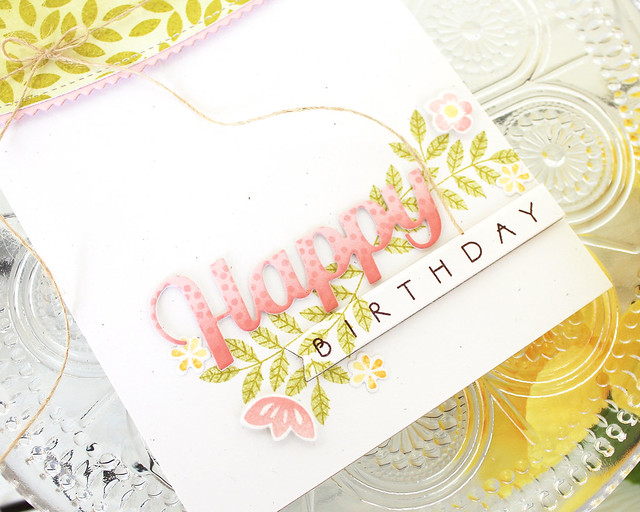
I began by sponging a Spring Moss band onto a Rustic White card base. I stamped that with a leafy cluster from Embellished Elegance using Simply Chartreuse ink and then removed my masks. Next, I stamped that same leafy cluster and its coordinating branch image onto the card front.
I followed up with flowers from the set in Sweet Blush, Pale Peony, and Harvest Gold inks. Then I added the sentiment in Dark Chocolate. I die cut the "Happy" using the sentiment die that comes with the
Bold Borders: Flare die from one piece of Sweet Blush and two pieces of xyroned Rustic White.
I stacked those sentiments and adhered them to the front of the card. Finally, I tied on a
Rustic Jute bow to add a little softness to the design.
For the Intermediate card I followed many of the same steps, just adding a little extra dimension here and there.
I used the same cardstock for the front of my card, but this time I adhered a panel to a Classic Kraft card base. I like that there's a contrast from the front of the card to the inside.
I also used the
Round Off Edgers to create a leafy, raised panel instead of sponging and stamping directly onto the card base.
The die cut sentiment got a bit of an ombre treatment thanks to some blending and the flowers are all touched with a spot or two of glitter to make them sparkle.
For the Spectacular card I amped everything up with additional layers of texture and pattern while keeping the color palette and the supplies largely the same.
Again, I used the Rustic White card front on a Classic Kraft base. I used the pinked edge border in the
Round Off Edgers set to add an extra layer of Sweet Blush cardstock to my leafy layer in order to reintroduce a pink element one more time.
I die cut the birthday sentiment using the
Direct Messages die to give it a little lift and the "Happy" got a specked appearance thanks to one of the floral elements in the Embellished Elegance set. I also die cut all of the flowers for this card, using the Rock 'N Roll technique to give each bloom a bit more interest.
I attached some with flat and others with foam adhesives to mix things up a little. They all got the same sparkly glitter accents, too, for a bit of shine.
I think that's all I have to share with you today.
Betsy and
Melissa are both sharing Simple To Spectacular:
Embellished Elegance projects today too, so be sure to pop in on their blogs and see how they're using this set. Thank you so much for joining me and I'll see you again soon!
Supplies:
Embellished Elegance Card Trio


3 comments:
WOW...LOVE all 3 cards Lizzie, from the simplest to the last one! Really like how you stamped the leaves on the birthday banner to match with the leaves stamped on the card base in your 3rd card...so eye catching! Lovely, lovely cards!! :0)
These simple to spectacular cards are simply spectacular. Saw the others on the Papertrey Ink blog and enjoyed all of them. These are great for the options of needing a quick card to taking time for that special someone. tfs
These are so beautiful! I really enjoy this series; I get so many good ideas for pumping up various elements from a CAS card to one that’s spectacular
Post a Comment