Good morning, all! It's my turn to share a tip with you and I’m going to do something a little different with this week’s
Papertrey Ink Design Team Tips. Rather than share a cardmaking technique, I’m going to share an organizational solution that I hope you’ll find useful.
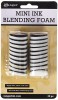
I think most of you have come to notice that I love ink blending - I seem to be blending on nearly every card these days! And thanks in part to all of Papertrey’s beautiful ink colors, my blending sponges were starting to get a little unruly. So I set out to find a solution that would be cost effective, easy to establish, and effortless to keep organized. So here's the result of my search.
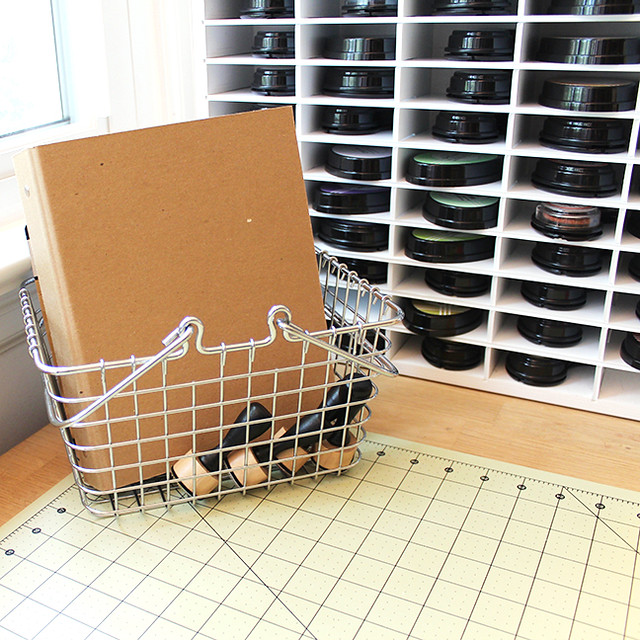
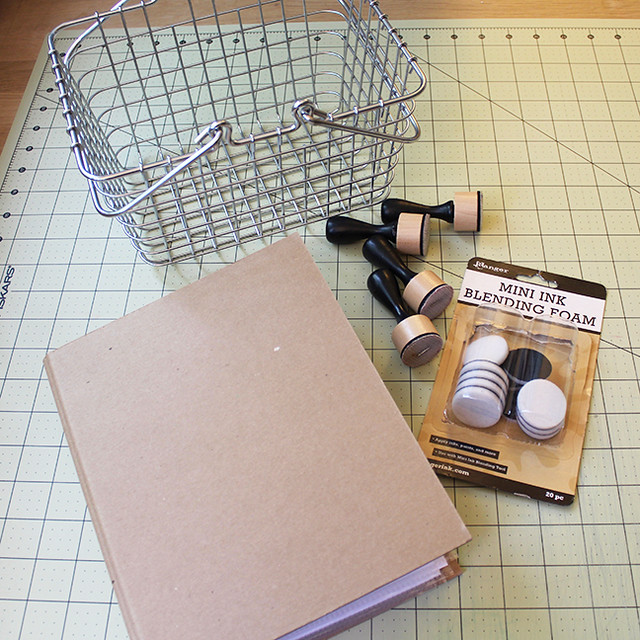
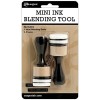
On my workbench there sits a small wire basket. I bought it at Target ages ago and it's proven its worth over the years.
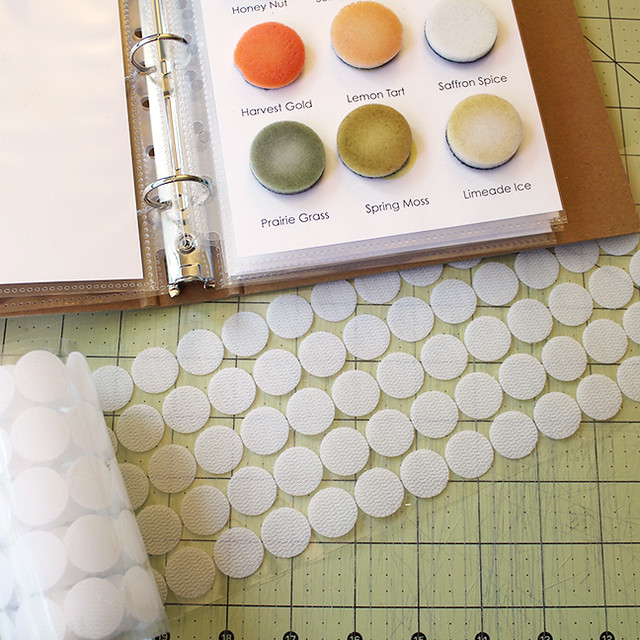
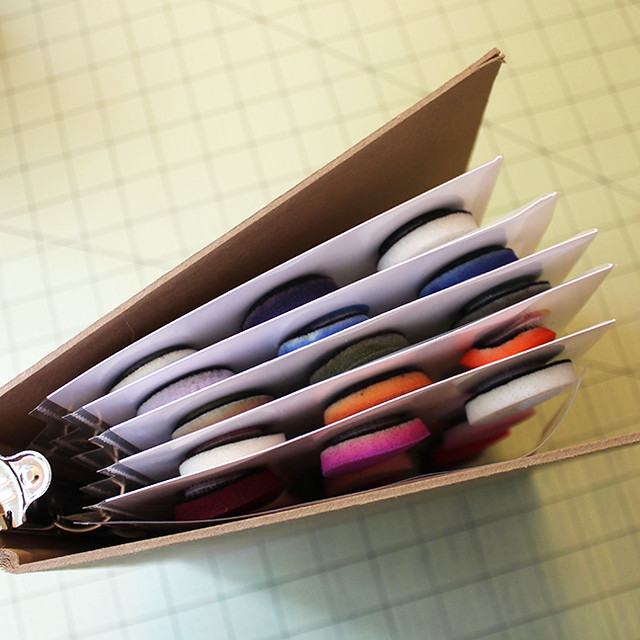
The basket holds a few blending tools, an extra pack of sponges, and one of Papertrey's kraft binders (now, of course the binders went out of stock between my planning of this post and this moment, but hopefully they will be back soon - any other mini 3-ring binder should work just as well).
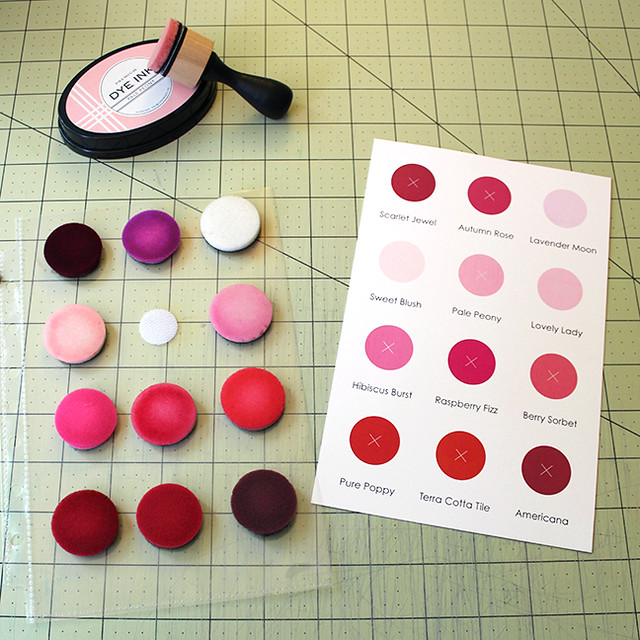
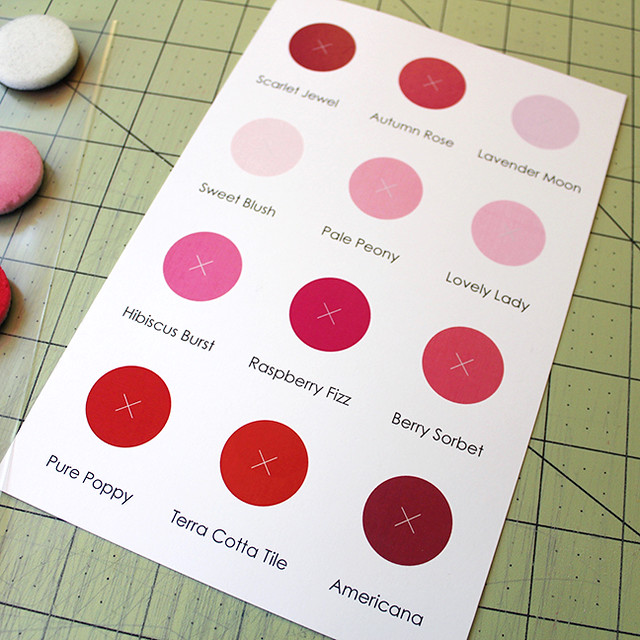
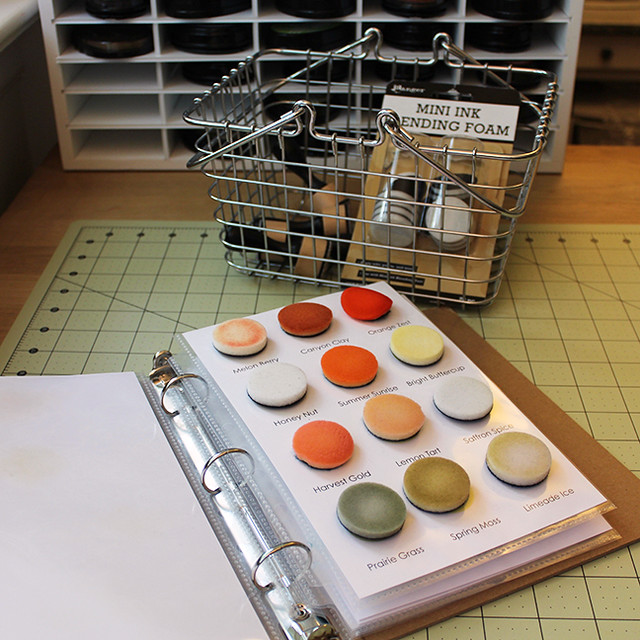
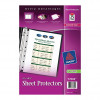
Now, here's where the magic happens. I have five 5 1/2" x 8 1/2" pages tucked into mini page protectors inside the binder. On each page I've printed twelve circles and their corresponding color names. The colors are arranged in rainbow order and there's still a bit of space at the back under the blues and purples. I put the neutrals on their own page. This is an idea I got from
Gina on the Papertrey Ink forum. I simply made a few adjustments to make it fit my needs even better.
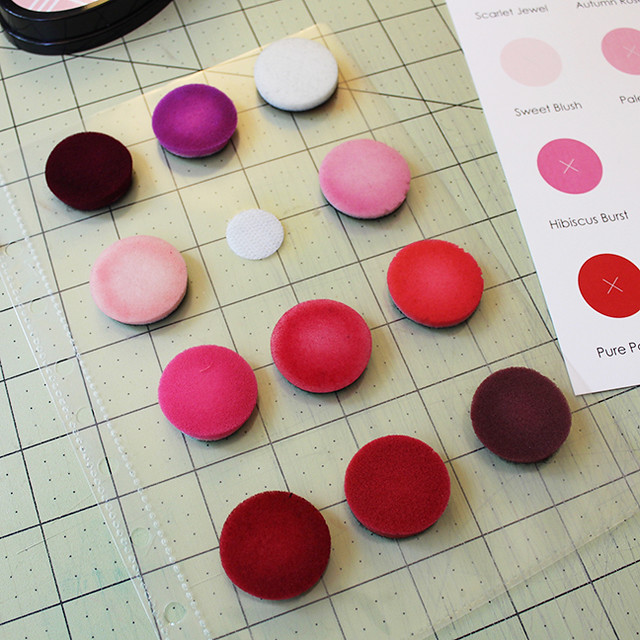
Each circle has a velcro tab in the center. I just used the pokey parts of each pair of hook and loop sets since the blending sponges are already equipped with the soft part.
These are the velcro dots I bought to do this project. They can be expensive, so I picked these up online. There are 250 sets of dots (500 pieces total) in the package I bought and they're sure to last me a very long time. You could make this organizational system even more cost effective by splitting a package with a friend or two.
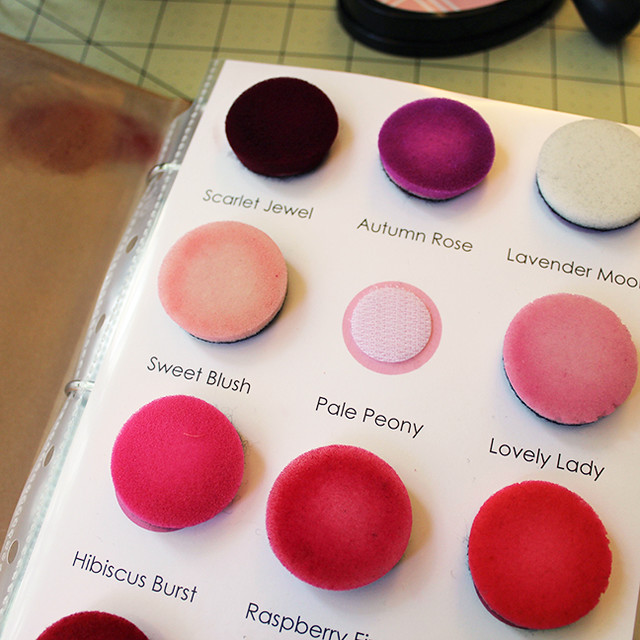
When I designed the pages I included a gray "x" in the center of each circle. That was an easy way to know where to place my velcro circles. I pulled the colors from the Papertrey Ink website and laid out the pages so that each sponge would have an ample amount of space.
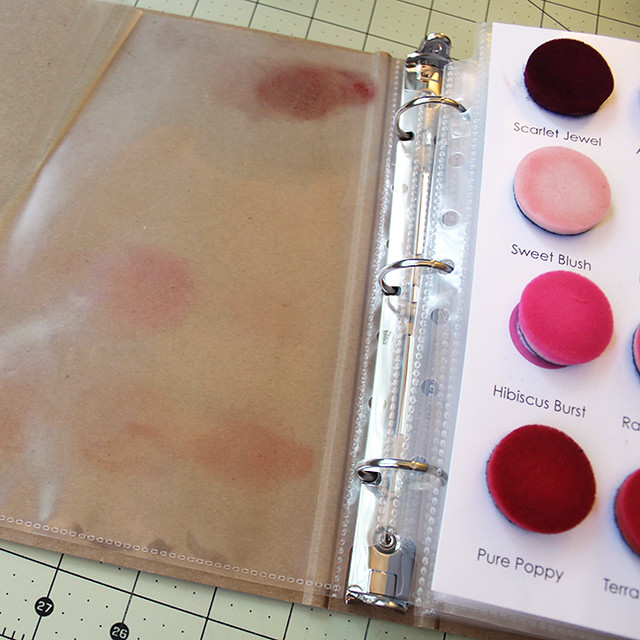
I decided to use page protectors (rather than cardstock sheets that I hole punched myself or laminated pages) for a few reasons. In the first place, I happen to use these page protectors for my stamp set organization, so I already had them handy. Also, if a new color is introduced I can adjust the printed pages without having to replace the velcro on the page protectors (since the spacing will always be the same and the blending sponges are movable).
And thirdly, the page protectors help protect (duh) the back of each page against ink transfer from the sponges behind it. You can see here that the greens would have left residue on the yellows page, but the page protector keeps the back of that sheet clean.
I did the same thing in the front of the binder, just using an empty page protector rather than a filled one. If you had several binders you could use this for a title page, but I haven't bothered to put anything inside. This is real life, people.
One binder holds five sheets (filled with sponges) comfortably. I've spread it out a bit here so it would stand up for the photo, but it closes perfectly for normal use. Also, it's a good idea not to accidentally spike your binder at the floor and bend a corner. Just throwing that out there. Don't be like me.
So there you have it - my perfect ink blending solution. I use this binder almost every time I sit down to stamp. It has saved me so much time! I used to keep my sponges in small baggies thrown into that small wire basket, but whenever I wanted a particular color I'd end up searching through all of the sponges to find it. No more, friends, no more.
I hope you've enjoyed this peek into my blending sponges binder. Here's a list of the supplies I used and a downloadable PDF of the pages in case you'd like to create a binder of your own!
Ink Blending Sponges Pages
Have a wonderful weekend, everyone!
Supplies:


53 comments:
What a cool idea! Thanks for posting.
Love it! Sometimes organization is fun too!
GREAT idea...thanks for sharing!
Oh, this is fantastic.I am going to be moving and I needed a way to compact my blending sponges. Wow, thanks for sharing.
Such a great solution for storing our ink blending sponges, Lizzie! My Papertrey ink collection is growing, so it's time for me to create a binder of my own. Many thanks for sharing your ink color pages as a download. So much great inspiration here today! ♡
Love your organizational tip, Lizzie. Thank you for all the helpful pictures and for creating a pdf so we can get organized, too :)
This.is.brilliant!
Great idea, and thanks for the download of your well-designed pages!
Thank you so much for sharing this great idea. Now that I have a good way to store the sponges, I will probably do more blending!
I love it! I'm using little baggies myself, and it takes FOREVER for me to find the right color.
A binder and page protectors! Yes!!!! What a great idea!!!! Thank you for the printable, Lizzie. I'm switching to your method...so much easier than laminating. Love, love, love!!!!!!
Thank you for this neat way to store these. I have put small velcro (squares cut in quarters) on the backs of my sponges AND the bottom of SOME of the inkpads. BUT the sponges still stick out and ink up anything they touch--so this is a great help. Thank you!
Great idea. Would love to do this with my Distress Oxides. The Velcro Dots are on sale for $8.99 right now at Amazon if anyone is interested.
I love this idea. Thanks for sharing.
You just gave me a good reason to switch to this blending system from what I'm currently using! Thanks so much!!
AWESOME, Lizzie! While I was reading through your very detailed post, I was so hoping you'd include a PDF for us. And, once again you never let us down. Thank you so much! Mine are currently in a divided plastic container (for jewelry making I think), but I ran out of space and my color labels keep falling off. Lizzie to the rescue and TFS!
Very clever idea!
mine is on sheets like yours but I have my sheets taped to my wall in front of my desk, of course I only have 2 sheets full at the moment,which are all tim Holtzs 24 new oxides!!! I dont have the space for on desk basket...I have 2 sets of 60 ink daubers on my desk....
Awesome way to organize the sponges, thanks for showing us
GREAT idea. Thank you to you (and Gina) for the wonderful organization tip.
Genius! Great tips! Thank you!
What a great idea, better than putting them in a container and guessing what color they are, I am not admitting anything! :)
Such a great tip. I never thought about ink getting on stuff getting on with spots on back of pads.
I enjoyed this better that normal tips, thanks.
SUPER IDEA, LIZZIE! I used to do the same thing, hunting through a drawer! UGH!
I use Plastic Coin Sheets now for my blending sponges, & keep them in a container with their inks, so the sponges & the inks are all together. I also have a sample of the color sheet in there also, all labeled. I COULD cut that sheet apart & put it in the coin sheet pockets with the sponges for each color, but I am happy right now with the way it is. I COULD also put the sheets in a binder, if I wanted to. I ALMOST did the Velcro dots.... LOL I LOVE the organization, but in reality, I am NOT that organized! LOL You can ask my husband! ;)
That is a great idea! Thanks much!
great idea! I plan to try this org tip. I store my new ink sponges in a pill bottle - they fit perfectly and it holds a lot so they aren't going astray!
I love this idea. But I have a hard time getting the pads off the handle, plus I get ink all over my fingers. So I've been slowly buying more and more handles.
What a fantastic idea!!! Loved this tip and will be putting it into action. Can you say where you bought the Velcro?
Wow, great idea. I love the use of the page protectors. I ordered some of these binders during the pre-Anniversary sale so I'm set. All I need is the velcro pieces. Thanks for sharing.
Fantastic idea!!
Brilliant idea :-) Thank you so much!!
Great idea, Thanks!
Regina
Oh my god you are an organizing GENIUS. This is fabulous! Going to try this -- my blending sponges are in a haphazard pile on the corner of my craft table. Definitely need something tidier...
Great organization tip!
Thank you so much, I will share your post with some online groups, I hope that is OK.
Fabulous idea. Wish I was more technically savvy to do this with all my inks. A cheep place for velcro is the Dollar Store or 99 cent stores. I also find that type of thing at garage sales and estate sales, believe it or not!
Did this a couple of years ago - but mine isn't half as pretty as yours!!
Ok I totally love this idea Lizzie! As soon as I read this I went and ordered all the supplies, lol. I was wondering if there was a way we could customize this, as I'd love to be able to do this for my distress inks too? I'm so not computer savvy at all. Thanks for sharing and inspiring.
Love this idea - you're a genius! Thanks so much for sharing
I too, as Lisaerica said. I would love to use your system for other inks I have, is there a way for me to be able to use your format (since you've done all the creative work) substituting other colors and ink names. I've tried, but unsuccessfully.
Thanks for any help you may offer.
Thank you so much for posting this. I've just done it for the Ranger Distress Oxides, and am absolutely in love with this. You rock. :)
Fantastic solution - mine are a mess in a plastic tray and I waste time trying to find the right color. The tops of my distress ink are covered in ink from stacking them with sponges underneath. The oxides are not going to end up this way and you have found the solution! Great work, Sherlock!
Very smart! TFS!
Neat Idea. Thanks for posting.
Regina
Interesting idea. I have a question: Are the sponges inside or outside the page protectors? It is difficult to tell from the photos.
Very useful suggestions. Love it. Thanks
Fantastic idea! My slab of cardboard with my blending sponges looks pretty sad now. I think I may need to change things up!
Wonderful idea. I too kept my sponges in little baggies. It drove me crazy to find the right one to do a project. I made myself one of these books yesterday, it's brilliant and most of all workable. Thanks for this solution to a frustrating problem.
Hey Very Nice Blog!!! Thanks For Sharing!!!!
Oh my gosh, I was so busy and forgot all about being on the net and watch and buy my stamp set. I hope I can still do so. I did reserve it.
This site is a great stepping stone for any player that is just getting started with online gambling. 파워볼
Thank you a bunch for sharing this with all of us you actually realize what you are talking about! Bookmarked. Please also seek advice from my site =). We could have a hyperlink change contract between us 안전놀이터
Royalcasino1061
Post a Comment