Good morning and welcome back for Day 5 of the
Papertrey Ink March countdown. Today the whole team is getting together to showcase the newest additions to Erin Lincoln's stitching dies series. I absolutely love stitching projects and the new Stitched Tray Dies have me delighted to be reaching for my needle and thread. These petite trays are so adorable! Not only are they sweet, but super functional too. How about we get on to the projects, eh?
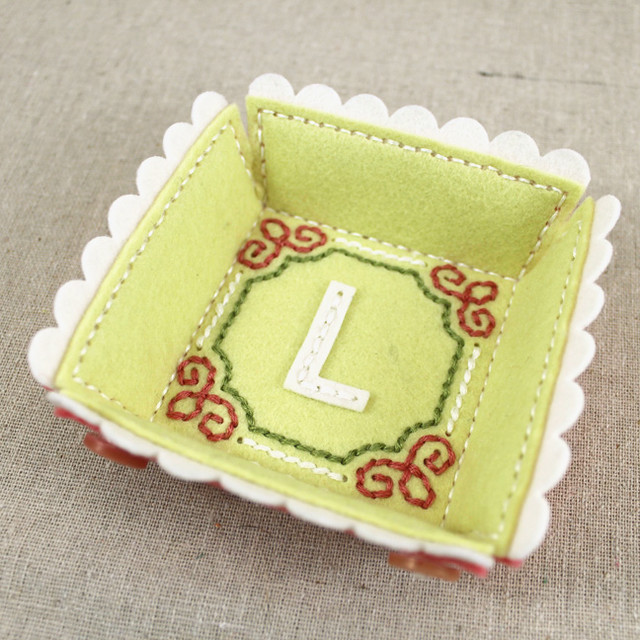
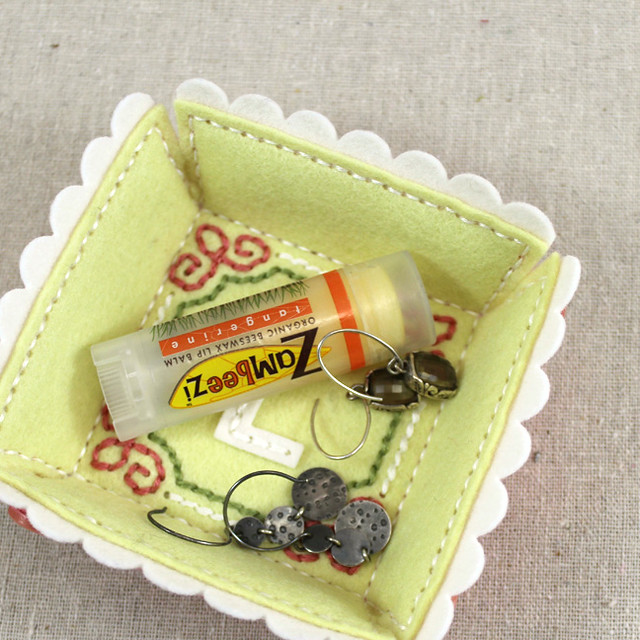
I created this adorable monogrammed catch-all to sit on my dresser. I often have small things in my pockets at the end of the day and now they'll all be corralled rather than just rolling around the top of (and usually off of) my dresser.
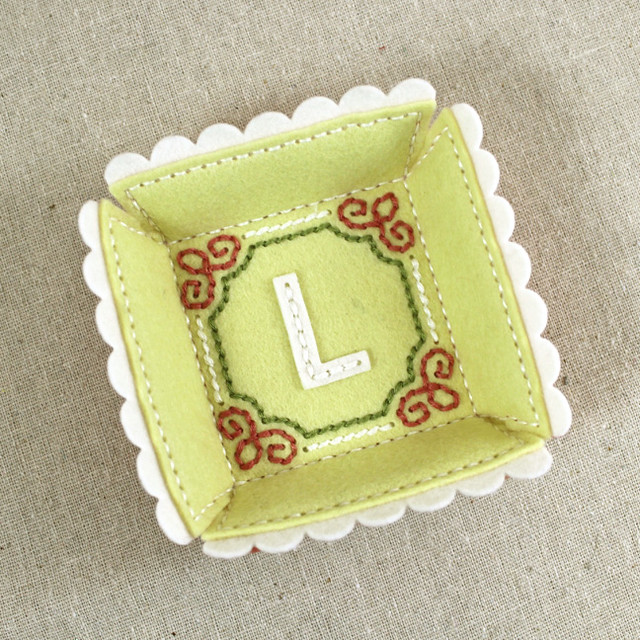
I began by die cutting three tray shapes, one from Berry Sorbet felt, one from Spring Moss felt, and the third from White Tag Stock. I used the new Stitched Monogram Frame: Square to add the detail holes to the Spring Moss layer. I also die cut an "L" and some scalloped borders from Vintage Cream felt.
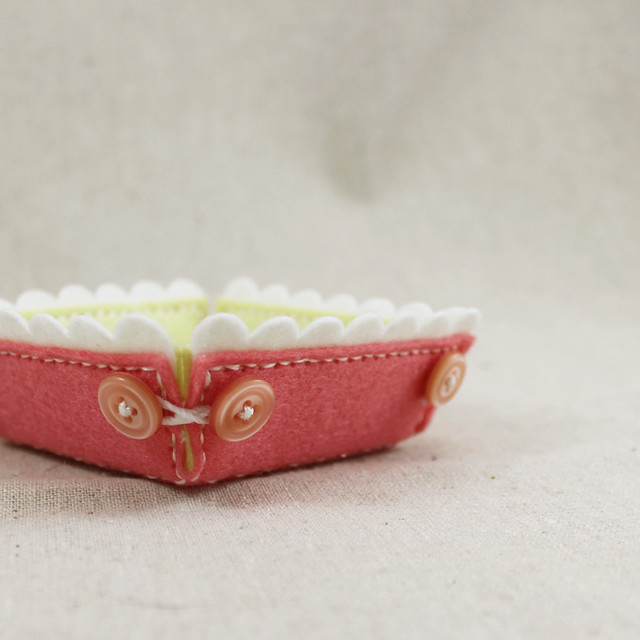
I stitched the monogram and scroll designs on the Spring Moss layer. Usually I use three strands of floss, but I wanted the stitching patterns to be nice and bold here, so I used all six strands of floss. Next, I stitched the buttons to the Berry Sorbet layer and trimmed the scalloped borders to fit the sides of the tray. I cut the Tag Stock tray into sections that I could sew into the bottom and sides of the tray. This isn't an absolutely necessary step, but it does add a nice level of stability to the finished product.
I began stitching the tray parts together (this was done with the typical three strands of floss). I started by sewing the bottom of the tray, sandwiching the Tag Stock between the felt layers. Next came the sides. The scalloped borders didn't have stitching holes, so I just held them in place while I stitched. The holes in the tray were easy enough to follow to keep my stitches neat and tidy.
To connect the corners, I simply wrapped crochet thread in a figure eight around the buttons on opposing sides. It's so cute! I can't wait to make another one.
The whole time I was stitching together my tray, I couldn't help but think of how great it would be for a little treat tray. So that's what I created next. It's perfect for a cupcake.
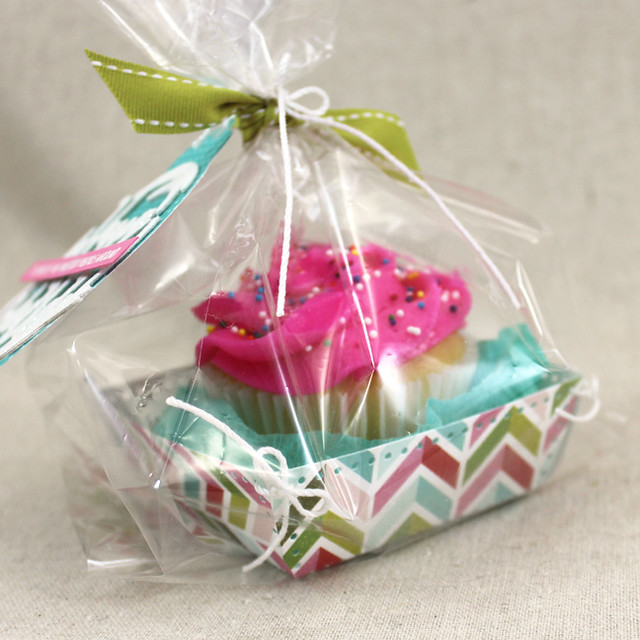
I began by die cutting the tray from Sparkle & Shine patterned paper. I scored the bottom along the holes and snipped the bottom of each "V" so things would fold more easily. I folded up the sides and tied each corner together with a piece of white crochet thread. The holes just end up looking like a charming eyelet detail.
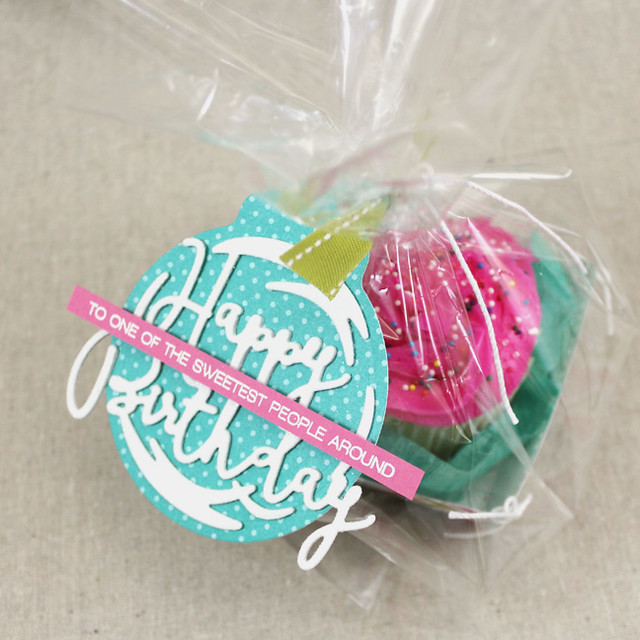
I wanted to include a tag with my treat tray, so I die cut a Tag Sale #4 shape from Hawaiian Shores patterned paper to use as my base. Next, I die cut three Shaped Sayings: Birthday shapes and adhered them together for stability.
I attached those to the tag base and attached a strip of Hibiscus Burst cardstock that I'd heat embossed with a sentiment from Just Desserts. I then glittered the Shaped Sayings: Birthday shape with fine Crystal glitter for sparkle.
I scrunched up some crepe paper and nested it around a cupcake inside the tray. Then, I placed the whole thing in a clear cello treat bag and tied it closed with some Simply Chartreuse Saddle-Stitched ribbon. I tied on my tag with white crochet thread and it was ready to deliver.
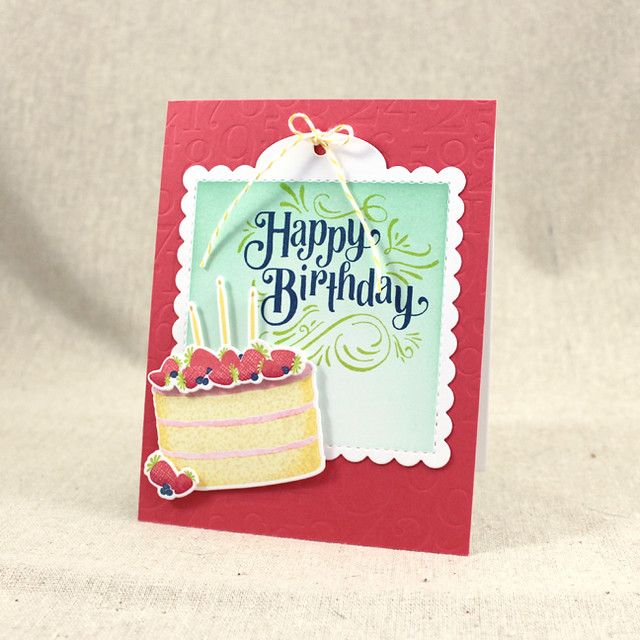
Last, but not least I have one more Just Desserts project to share with you today. This time I paired it with Erin's new Fancy Pants Sentiments set. I love these sets together!
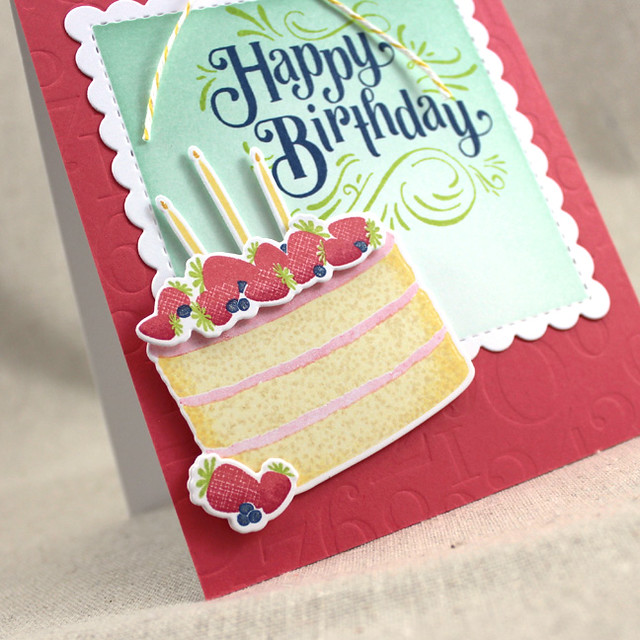
I began by die cutting the Tag Sale: Quilted shape from white cardstock. I masked off the scalloped edges and sponged the center with Aqua Mist ink. Next, I die cut the cake, strawberries, and candles from white cardstock. I stamped the layers of the cake with Lemon Tart and Harvest Gold inks. The crumbs were added using a kissing technique and Fine Linen ink. I stamped the frosting in third generation Berry Sorbet for a nice soft pink color.
Next, I stamped the berries. The strawberries were inked with Berry Sorbet and Pure Poppy ink. I added the hulls with Green Parakeet ink and the blueberries with Enchanted Evening ink. I added the berries to the cake with foam tape before adding the Harvest Gold candles with flat adhesive.
Then, I stamped the Fancy Pants sentiment on the tag shape using Enchanted Evening and Green Parakeet inks. I tied baker's twine to the tag before adhering it to a Berry Sorbet card front that I'd textured with the By The Numbers Impression Plate. I mounted the cake with foam tape and then added a bit of Wink Of Stella to the candles and blueberries to make them shimmer.
That's it for me today. I'll see you back here tomorrow for this month's wrap up. In the meantime, make sure to check in with
Nichole,
Amy,
Ashley,
Betsy,
Danielle,
Dawn,
Heather,
Kay,
Laurie, and
Melissa to see more of the new stitching dies.
Erin and
Maile also have more to share with you, so be sure to pop over and check them out too. See you tomorrow!
Recipes:
Felt Monogram Tray
Felt: Berry Sorbet, Spring Moss, Vintage Cream - Papertrey Ink
Dies: Stitched Tray: Square Dies, Stitched Monogram: Square Die, Sew Stylish Alphabet 1 Die, Small Scallop Border Die - Papertrey Ink
Other: Sweet Blush Buttons, White Tag Stock - Papertrey Ink; Embroidery Floss - DMC; White Crochet Thread
Cupcake Treat Tray & Tag
Stamps: Just Desserts - Papertrey Ink
Cardstock: Fresh Snow Linen, Hawaiian Shores Patterned Paper, Hibiscus Burst, Sparkle & Shine Patterned Paper - Papertrey Ink
Ink: VersaMark - Tsukineko
Other: Shaped Sayings: Birthday Die, Tag Sale #4 Die, Stitched Tray: Square Dies, Simply Chartreuse Saddle-Stitched Ribbon - Papertrey Ink; Fine Crystal Glitter - Martha Stewart Crafts; White Detail Embossing Powder - Filigree; Foam Tape - Scotch; White Crochet Thread; Crepe Paper
Happy Birthday Card
Stamps: Just Desserts, Fancy Pants Sentiments - Papertrey Ink
Cardstock: Berry Sorbet - Papertrey Ink; white
Ink: Aqua Mist, Berry Sorbet, Pure Poppy, Green Parakeet, Enchanted Evening, Lemon Tart, Harvest Gold, Fine Linen - Papertrey Ink
Other: Just Desserts Die, Tag Sale: Quilted Die, By The Numbers Impression Plate - Papertrey Ink; Foam Tape - Scotch; Baker's Twine - Divine Twine; Clear Wink Of Stella - Zig


9 comments:
You sold me! Love the idea of the tray out of paper instead of felt. Such great projects, as always.
Love your creativity with the scallop edge! And as a cupcake holder! And your tags are great too!
Love how you added that beautiful scallopped edge. And Just Desserts is mouth-wateringly good. Can't wait to own it!
The scalloped edge really takes your design over the top! And the little paper baskets are a nice gift wrap idea, too.
Love the scalloped border. It was so unusual after seeing all the other baskets. Great job. Your cards are very nice too. I had not thought about using it to make paper baskets as well.
WOW! Such a great release. I love all the stitch options.
Monogram tray - check (scalloped border, colors and monogram)
Cupcake Tray and Tag - check (imagination galore, colorful and so sweet)
Birthday Card - check (your cake looks yummy and so realistic)
Awesome work, Lizzie!
speaking of PAPER,I'm going to make some using KRAFTEX which comes in several colors.It's the stuff that the Levi's label on jeans is made from.
Love the trays!
Post a Comment