Good morning, everyone! Welcome back to Day 2 of the
Papertrey Ink 9th anniversary countdown! Thank you all so much for your kind words yesterday. I feel truly lucky to be able to have this job and I appreciate every thoughtful word you shared with me. Today
Nichole is introducing
Betsy Veldman's new Dress Up Dolls series and she invited the rest of us to play along, too (
all of the new products being introduced today will be available for sale at 10pm on February 15th). You're going to absolutely fall in love with these adorable little dolls! But if you're not a doll maker, don't worry! These sets are going to be great for cards and tags, maybe even scrapbook pages. Let's get to some projects, shall we?
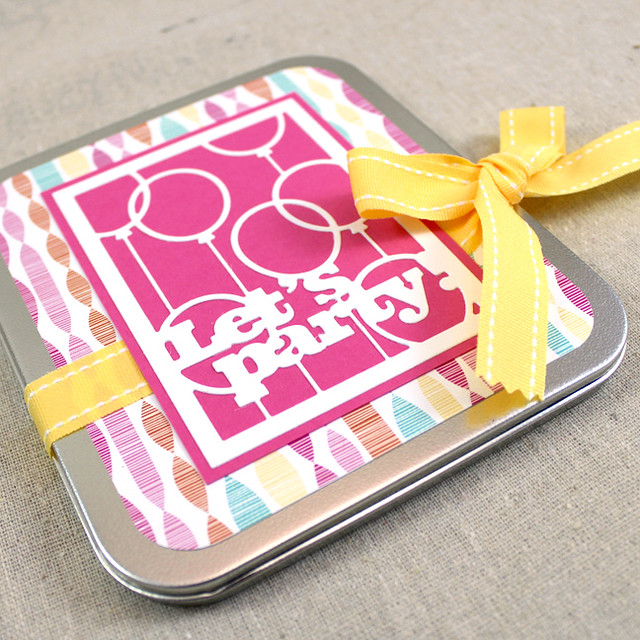
First off, let's start with a little magnetic doll set. This set is perfectly stored in a metal tin, ready for play.
I began by decorating the outside of the tin with a piece of Hooray patterned paper and a Text Block: Party Time shape. I adhered the patterned paper directly to the front of the tin and then wrapped a piece of Harvest Gold ribbon around it before adhering my layered Text Block into place (I only have adhesive on the top and bottom edges of the Text Block so the ribbon can slide). I left everything flat so there would be a smaller chance of damage when traveling.
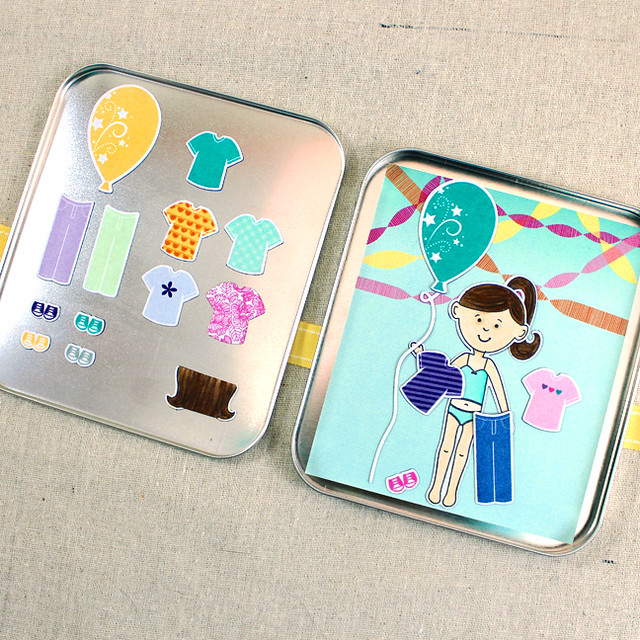
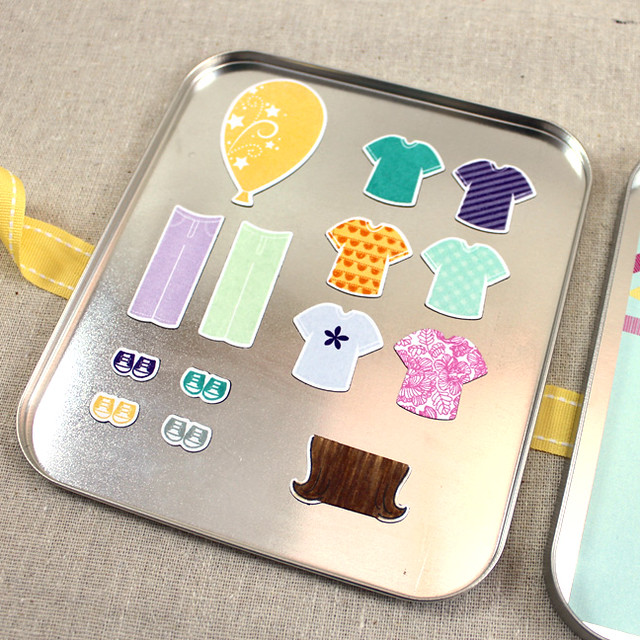
Inside is where the party really starts though! Betsy has designed both girl and boy figures along with basic clothing staples that you can mix and match to your heart's content. I created a little girl and gave her a whole wardrobe full of fun clothes.
I stamped and die cut the t-shirts (in that order was easiest for me) from Adhesive Sheets paper and then added patterns to her clothes by using a kissing technique. The Bitty Background Blocks sets were totally perfect for that. Betsy has really thought of everything with this set. There are even tiny tennis shoes!
I also die cut and colored two hair styles and the little girl herself. It wouldn't be a party without balloons, so I included two balloons and a balloon string in the set, too. Next, I die cut magnet versions of all of the stamped pieces and applied the adhesive paper bits to the magnet shapes. I lined the "scene" side of the tin with another sheet of Hooray patterned paper and placed all of the doll pieces inside. I can't wait until my niece is older so I can give it to her.
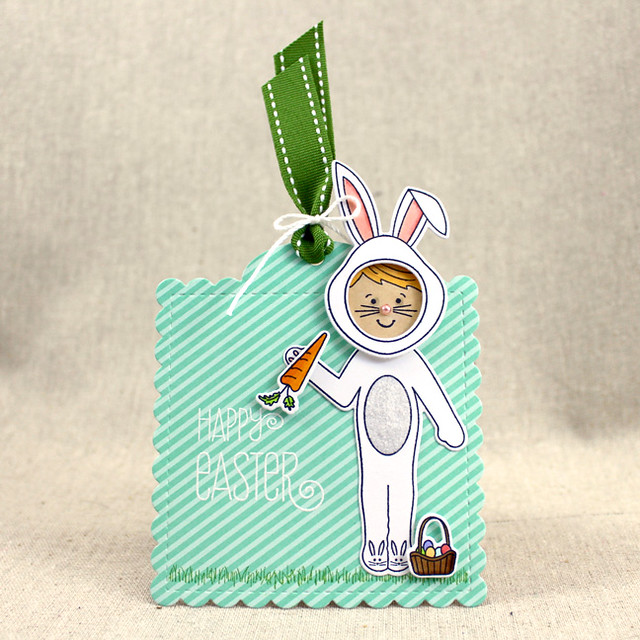
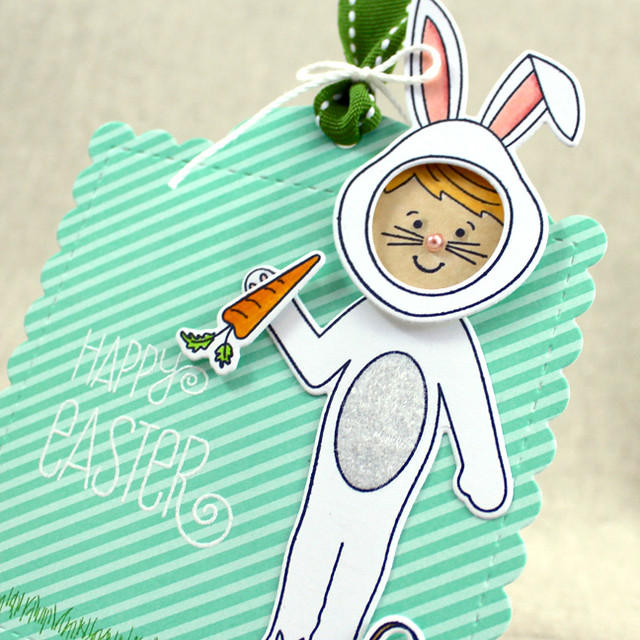
I also wanted to use Betsy's Dress Up Dolls: Easter set to create a tag for my nephew's Easter basket.
I started by die cutting a Tag Sale: Quilted shape from Aqua Mist patterned paper. On that, I heat embossed a sentiment and stamped a row of grass. Next, I die cut the bunny suit pieces and boy's face from white cardstock. I colored in a few select areas and added flocking to the suit's tummy to make it fuzzy. I also added a bunny nose with a colored-to-match, self-adhesive pearl.
I adhered those piece to the tag using flat and foam adhesives. He needed a few accessories, so I die cut and colored the carrot and Easter basket and added those to the tag with foam adhesive. A little New Leaf ribbon and a crochet thread bow finished it off nicely.
So there you have it! Thank you so much for joining me today. I'll see you back here again soon with more of this month's countdown. In the meantime,
Nichole,
Betsy, and
Melissa all have some Dress Up Doll inspiration to share with you today. Have a wonderful Saturday!
Recipes:
Party Doll Tin
Stamps: Dress Up Dolls: Basics, Bunny Basket, Bitty Background Blocks, Bitty Background Blocks II, Balloon Bash - Papertrey Ink
Cardstock: Hooray Patterned Paper, Adhesive Sheets, Raspberry Fizz - Papertrey Ink; white
Ink: Enchanted Evening, Winter Wisteria, Mint Julep, Spring Rain, Royal Velvet, Summer Sunrise, Orange Zest, Lovely Lady, Raspberry Fizz, Aqua Mist, Hawaiian Shores, Tropical Teal, Plum Pudding - Papertrey Ink; Tuxedo Black - Memento
Other: Dress Up Dolls: Basics Die, Balloon Strings Die, Balloon Bash Die, Text Block: Party Time Die, Harvest Gold Saddle Stitch Ribbon, Magnet Sheets, Metal Tin; Copic Markers; Xyron
Bunny Boy Tag
Stamps: Dress Up Dolls: Basics, Dress Up Dolls: Easter, Simply Spring Borders - Papertrey Ink
Cardstock: Aqua Mist Patterned Paper - Papertrey Ink; white
Ink: New Leaf - Papertrey Ink; Tuxedo Black - Memento; VersaMark - Tsukineko
Other: Dress Up Dolls: Basics Die, Dress Up Dolls: Easter Die, Tag Sale: Quilted Die, New Leaf Saddle Stitch Ribbon - Papertrey Ink; Foam Tape - Scotch; White Embossing Powder - Filigree; Self-adhesive Pearl - Mark Richards; Cotton Ball White Fun Flock - Stampendous; Copic Markers; Crochet Thread


8 comments:
Love the party in a box idea! So cute!
Whoo-hoo, let's party! That's adorable, Lizzie.
LOVE THE NEW DRESS UP DOLL ideas. I have been wanting to create the exact same projects for my granddaughters for several years now. Just kept pitting it off cause all of the ingredients weren't there. Can't wait til there release now.
What an adorable party ensemble and gift tag! Someone's going to have fun partying :)
Okay, Lizzie, sometimes I think you and I may be a separated set of twins (separated by decades that is)! If I had made an initial project with this collection, I would have done exactly what you did. Make lots of different t-shirts. That's what cut-outs were all about! Having more clothing choices than you did in real life. Love this!!
I love the cute bunny tag you made to go with the paper doll set!
Adorable. Thanks for sharing.
Linda D.
Love the variety you've shared with us. A great design team display for this fun release.
Post a Comment