Good morning, friends, and welcome back for Day 5 of the Papertrey Ink August countdown. Today it's all about Halloween! For me, Halloween crafting is all about treat packaging. This month's release is absolutely brimming with frightfully adorable products you'll love using to dress up little gifts for your favorite ghosties and ghouls! This is a jam-packed post, so let's just jump right in...
First, I'm going to share Betsy Veldman's new
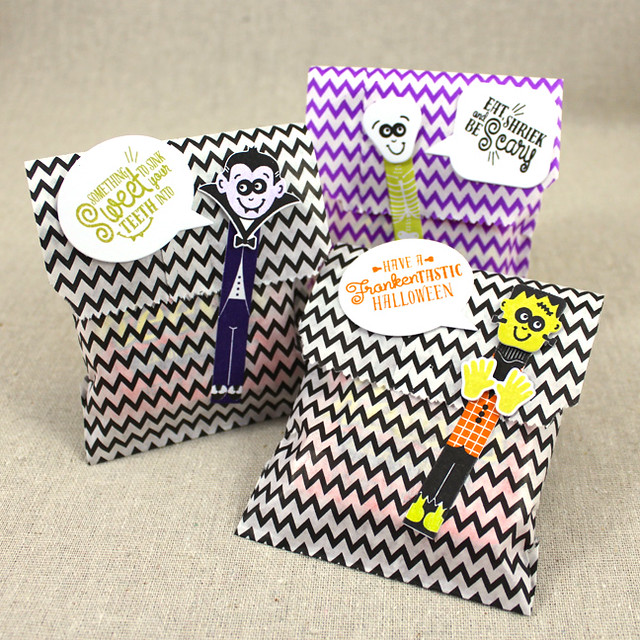
Make It Market Mini Kit: Halloween Pin Ups. This kit has everything you'll need to create festive treat bags. I used the included stamp set, die, and printed mini bags to create a trio of monster candy baggies.
The small bags in the kit are the perfect size for one snack size Reese's peanut butter cup (the .55oz ones), so I used those to fill my baggies. I opted to die cut and stamp white adhesive sheets and use the monsters' bodies as both decoration and an easy way to secure the flaps of the baggies.
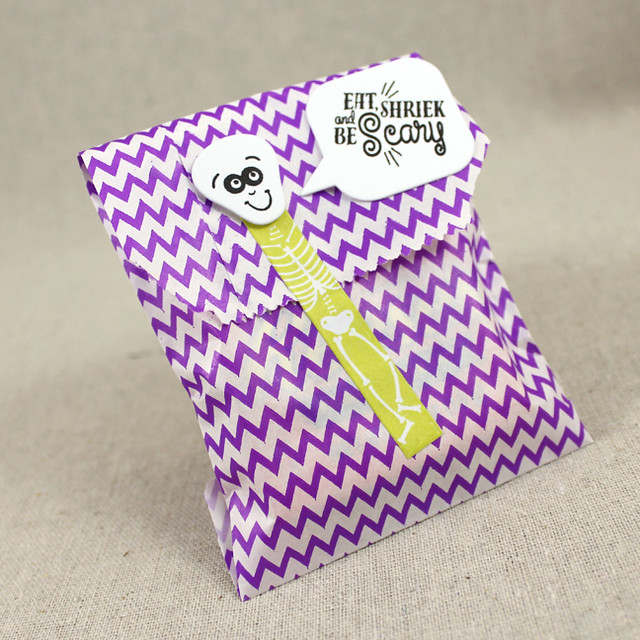
I used a black, white, and Limeade Ice color combo for Skelly. I popped his head up with foam tape and gave him a Bubble Talk speech bubble that I'd stamped with one of the sentiments from the stamp set in the kit.
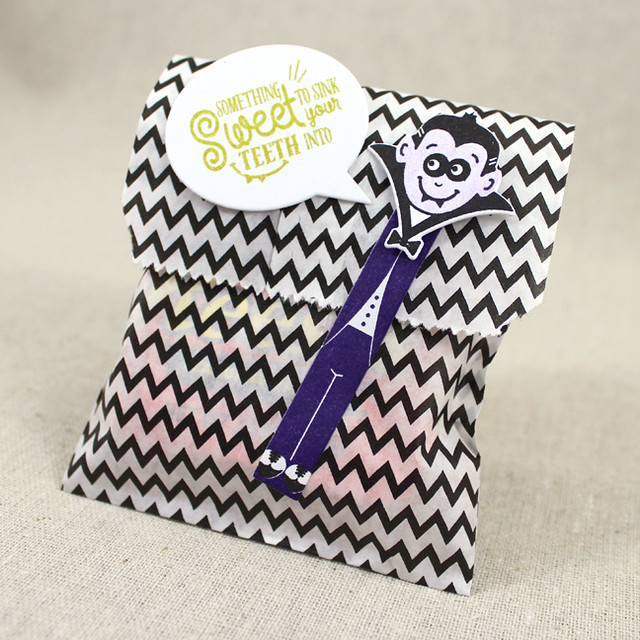
Vlad the Vampire is looking slick in a Royal Velvet suit and black wingtips. I colored his face ever-so-lightly with a colored pencil. He still looks a little pale though, no? His greeting is stamped in Simply Chartreuse.
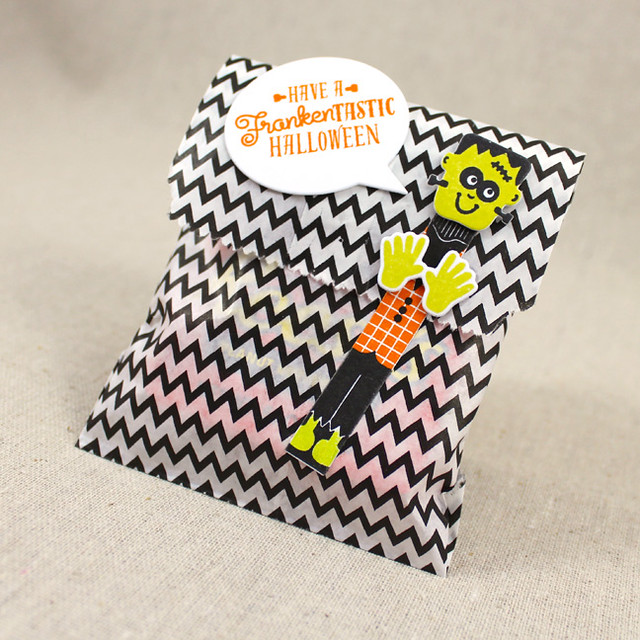
Frank, who is totally my favorite, is wearing a black suit with an Orange Zest vest. He's barefoot, though I did give his legs and feet some color with a pencil. His hands and head were stamped in Limeade Ice and popped up with a bit of foam tape. His salutation is stamped in Orange Zest.
Next up is the
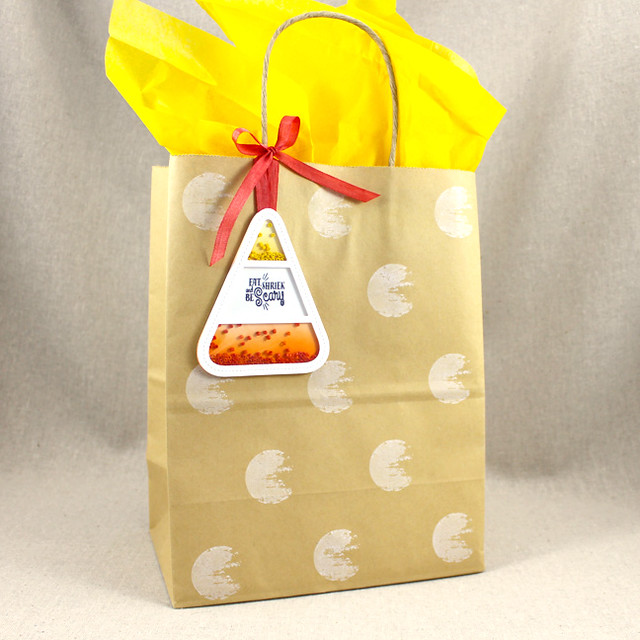
Shaker Shapes: Candy Corn die. It makes an adorable shaker tag!
To begin, I die cut the candy corn frame layer from white cardstock and the solid layer from white (twice) and clear cardstocks. Then, I masked off the different sections of the candy corn and sponged Orange Zest and Harvest Gold inks into the appropriate places. I stamped the sentiment, also from Betsy's mini kit, into the center section using True Black. I'm not sure who I'm giving this to yet, so I went with a generally Halloweeny sentiment, but you could always personalize with someone's name or initials instead. I bet the Antique Alphabet would look great!

I attached the candy corn frame to the clear cardstock layer and then added foam adhesive to the back. I sprinkled seed beads into the colorful sections of my tag and then carefully placed the frame layer. I sandwiched dyed 1/4" silk ribbon between the back of the tag and the last white cardstock solid candy corn piece. It's thin enough that it doesn't add bulk and it holds well. I finished up by tying it to a kraft gift bag that I'd stamped with one of the images from Brushed Off using Fresh Snow ink.
How about a peek at
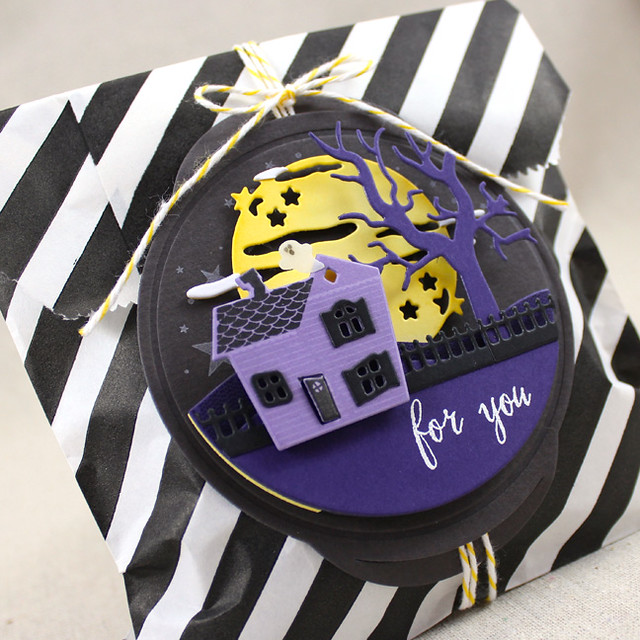
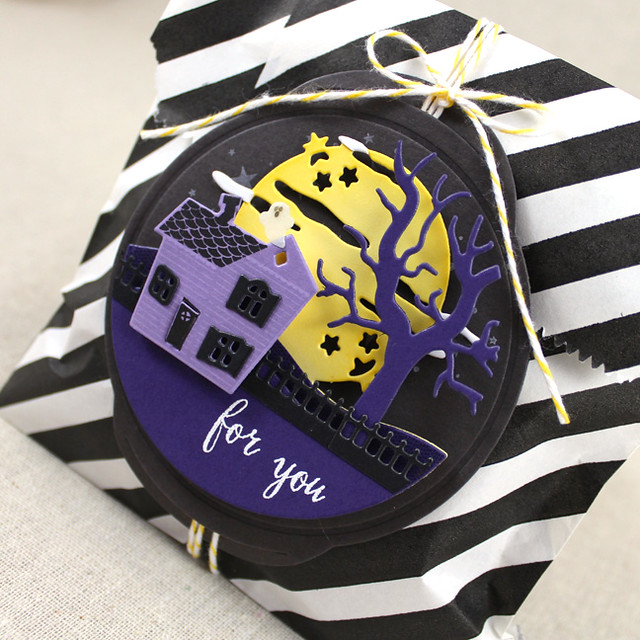
Petite Places: Spook Manor and the
Scene It: Hallows Eve dies?
This tiny haunted house is too cute to ever scare anyone! I began by die cutting the house from Winter Wisteria cardstock. I stamped it with Winter Wisteria and black inks and embellished with a handful of True Black windows. I added foam tape to the back and then layered it onto Royal Velvet and Lemon Tart cardstocks (the Lemon is just in the attic window...creepy).
Next, I die cut the new Scene It dies from Lemon Tart and Royal Velvet cardstocks. I trimmed away the moon on the back Royal Velvet layer and stamped the hill with an Ombre Builders strip using black ink for a bit of depth. I sponged Harvest Gold ink onto the Lemon Tart moon before I layered it with the hill piece using foam tape. I heat embossed the sentiment onto the tree layer and then added it with a bit more foam tape. I adhered the fence into place and then added the house with flat adhesive. I die cut the moon from white cardstock and trimmed out the clouds. They were adhered to the Lemon Tart moon with a glue pen.
I attached everything to a Smokey Shadow Tag Base Die shape that I'd stamped with a handful of stars from Happy Spooky Halloween. I wrapped yellow bakers twine around one of the larger bags from the new Make It Market Mini Kit and tied on the haunted manor scene. A tiny vellum ghostie was the perfect finishing touch.
Ok! Last, but not least, is
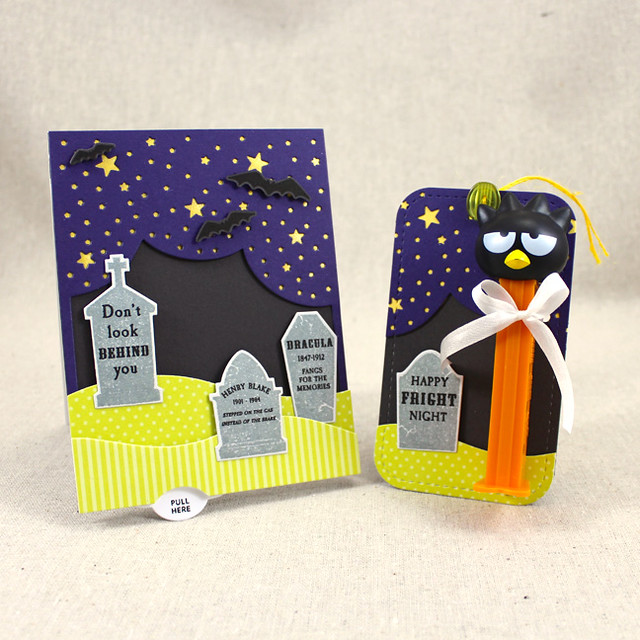
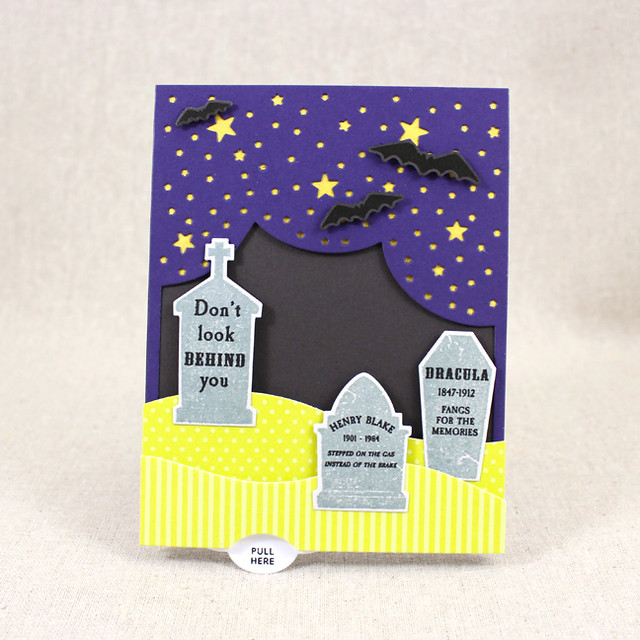
Haunted Headstones! I created a card and gift combo using these stamps and dies today.
I began with the card. I die cut a Cover Plate: Night Sky shape from Royal Velvet. I wanted the stars to stand out, so I layered just the top section with Harvest Gold cardstock that I sparkled with a Wink Of Stella pen.
That whole piece was then adhered to a Smokey Shadow card front. Now is where things get interesting.
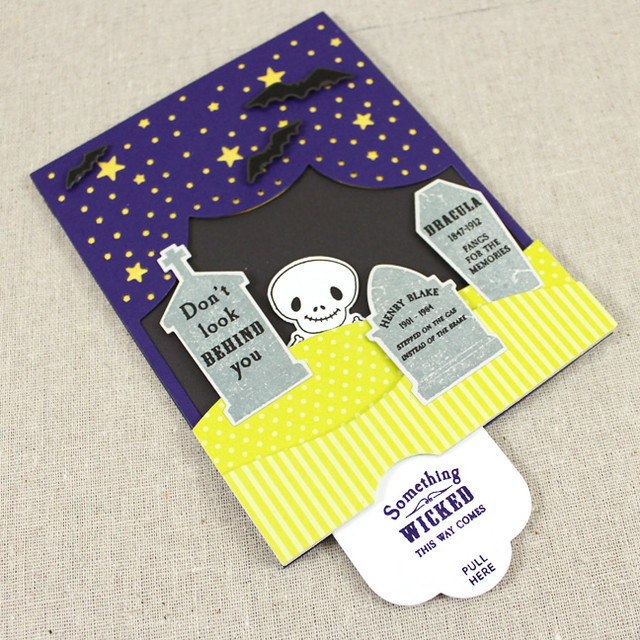
I created a push 'n pull element behind the Limeade Ice hills, so when you pull on the tab at the bottom of the hill, Mr. Bones rises from the grave! It's a tad bit difficult to explain, so I'd just suggest watching a technique video over on YouTube if you're interested in doing one of these yourself. I found
this video very helpful.
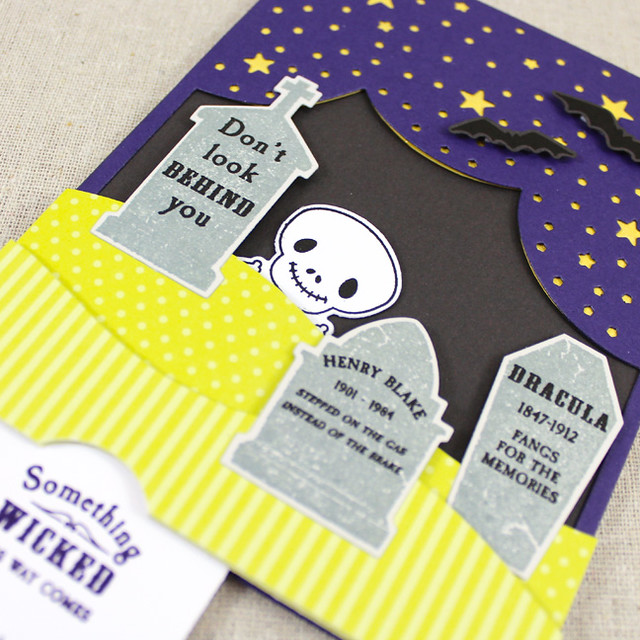
I added a few headstones to the hills along with a handful of bats in the sky. My favorite epitaph of the whole collection is shown here on the center headstone. Gives me a giggle every time.
Finally, I have the coordinating tag to share with you today.
I followed many of the same steps for the card, but I used the Tasting Tag die as my canvas. I embellished the hole on the tag shape with a Limeade Ice button and some yellow hemp twine. I tied a Pez dispenser to the base in the space where a spoon might otherwise go. I was so thrilled at how easy it was to coordinate these two projects!
Alrighty, friends. That's all for me today. Make sure to visit
Nichole,
Amy,
Ashley,
Betsy,
Dawn,
Heather,
Laurie,
Maile, and
Melissa for more of today's group post.
Erin is also sharing her new Chicken Scratch patterned paper over on her blog today. Take care and I'll see you again tomorrow with even more of this month's release. Have a great day!
Recipes:
Monster Treat Bag Trio
Stamps: Halloween Pin Ups - Papertrey Ink
Cardstock: White Adhesive Sheets - Papertrey Ink; white
Ink: Limeade Ice, Simply Chartreuse, Orange Zest, Royal Velvet - Papertrey Ink; Onyx Black - Versafine
Other: Treat Bags, Halloween Pin Ups Die - Papertrey Ink; Foam Tape - Scotch
Candy Corn Shaker Tag
Stamps: Halloween Pin Ups, Brushed Off - Papertrey Ink
Cardstock: Clear Cardstock - Papertrey Ink; white
Ink: Orange Zest, Harvest Gold, True Black - Papertrey Ink
Other: Shaker Shapes: Candy Corn die, 1/4" silk ribbon - Papertrey Ink; seed beads; Foam Tape - Scotch
Haunted Manor Treat Bag
Stamps: Petite Places: Spook Manor, Happy Spooky Halloween, Scribbled Sentiments - Papertrey Ink
Cardstock: Royal Velvet, Winter Wisteria, True Black, Stamper's Select Vellum, Lemon Tart, Smokey Shadow - Papertrey Ink
Ink: Harvest Gold, Winter Wisteria - Papertrey Ink; Onyx Black - Versafine; VersaMark - Tsukineko
Other: Petite Places: Spook Manor Die, Scene It: Hallows Eve Die, Treat Bag, Tag Base Die (from Tinsel & Tags MIM Kit) - Papertrey Ink; Foam Tape - Scotch; White Embossing Powder - Filigree; Lemon Baker's Twine - Divine Twine
Something Wicked Card & Treat Set
Stamps: Haunted Headstones, Haunted Headstones Sentiments, Mr. Bones, Movers & Shakers Sentiments - Papertrey Ink
Cardstock: Smokey Shadow, Harvest Gold, Royal Velvet, Limeade Ice Patterned Paper, Soft Stone - Papertrey Ink; white
Ink: Royal Velvet - Papertrey Ink; Onyx Black - Versafine; London Fog - Memento
Other: Haunted Headstones Die, Cover Plate: Night Sky, Half & Half, In The Meadow Die Collection, Tasting Tag, Limeade Ice Button, 1/4" Silk Ribbon - Papertrey Ink; Foam Tape - Scotch; Yellow Twine - American Crafts; Thin Plastic Sheet; Clear Wink Of Stella Pen


17 comments:
Lizzie, all of these are fantastic (candy corn!) but, I absolutely adore the little treat ensemble you have posted last. That set is so cute and the tasting tag as a way to give a Pez dispenser? Such a blast!!
I really love shakers and your candy corn shaker is too cute and clever!
Great projects! Love the candy corn shaker with seed beads! Even noticed you offset a little star in your scene it, it was the perfect little touch!
Lizzie, Mr. Bones has been in my cart so many times, and always other things have taken precedence. Not this time! Your push-pull card is one of the most fantastic things I've seen in quite some time. Love it! I'm thinking it would make fun birthday cards too!
I'm all about the treat packaging also, so I love each one of your ideas. You really outdid yourself on Halloween projects!
What fun Halloween projects! Love the little push & pull card and the coordinating tag especially. Thanks for the link to the how-to video! Can't wait to get the Haunted Headstones ensemble :)
WOW, Lizzie, you are really on a roll for Halloween! Your push/pull card is adorable. Love your headstone sentiments. Woo-hoo!
These are all so inspiring!
You are always so thoughtful with your projects. Guess that's why they're as clever as they are. Well, actually, you are clever, not the projects. Each and every one is fantastic. Your candy corn tag is my favorite, though, since Halloween is all about the candy (corn).
Love the candy corn shaker tag. What a neat idea!
Hi Lizzie,
Cute and Lovely work!!!
Cariños,
María Alba
Amazing projects! The candy corn tag and the scene it treat bag are just adorable!!
The monster stick figures are so cute. And the candy corn tag is a winner.
The projects are all so imaginative and beautifully done!!! Using seed beads as the elements inside a shaker shape is really growing on me! ......Maybe more shakey than sequins are. Wonderful, Lizzie!
Fabulous projects. Love the push pull card.
WOW!
Hi Lizzie, I love your stamps and designs and am so glad your are a part of the PTI DT. You have a very fresh outlook on everything and stay so true to your style. That's a good thing. Wishing you many more years of crafty fun.
Post a Comment