Friday, March 11, 2016

Just Desserts - Day 2

Good morning, friends, and welcome back for Day 2 of the Papertrey Ink March countdown! I'm so happy to hear about your enthusiasm for my new sets this month. They're really fun and we've just scratched the surface. Let's take another look, shall we?

I loved creating the ensemble from yesterday's post, so I decided to go that route again with today's projects.

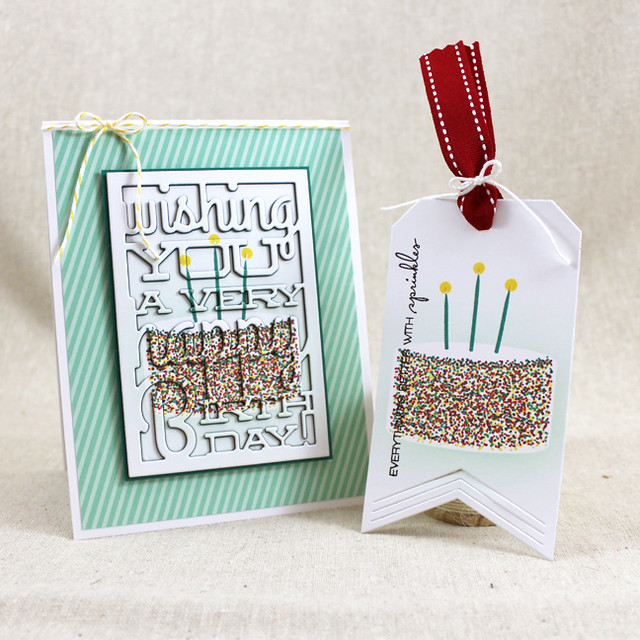
Rainbow Sprinkle Birthday Ensemble

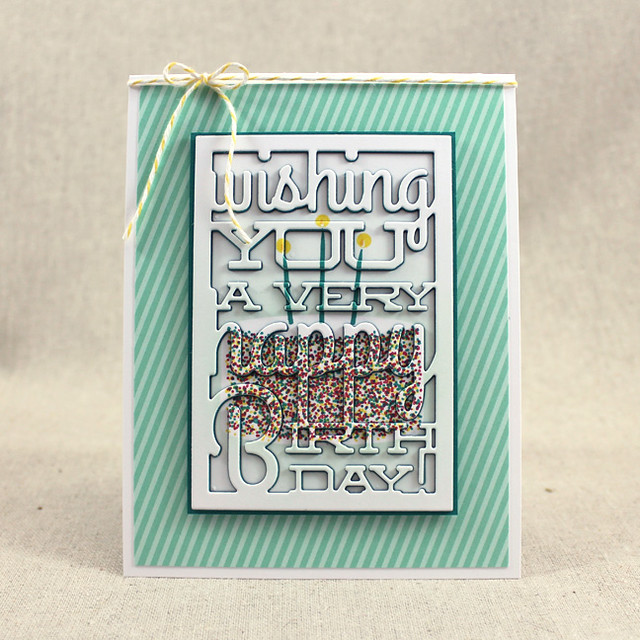
I began with the card. I started by die cutting the simple cake shape from a post it note and attaching it to a panel of white cardstock. I sponged Aqua Mist ink around it to make the flat cake shape stand out. I removed the mask and stamped the layers of sprinkles using Tropical Teal, Bright Buttercup, and Pure Poppy inks.

Rainbow Sprinkle Birthday Cake Card

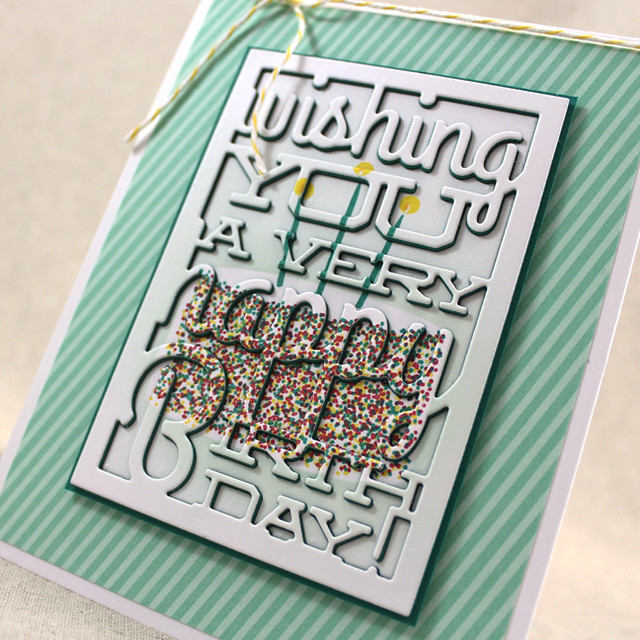
I think these sprinkle layers are one of the coolest features of this set. All three are different, so you can stamp in multiple colors for a truly colorful final product. You don't have to worry about shifting one image to make it look random (and then having it not look quite as random as you want). And different color combos can make it look like you have as many as six colors happening at once. Sean asked me three times "Wait...how many stamps are there again? I see so many colors." Yup. It's pretty cool.

Rainbow Sprinkle Birthday Cake Close Up

Anyway, I also stamped the candles and the flames before using the Text Block: Birthday die to cut that panel. I also cut three of the same shape from Tropical Teal cardstock. I trimmed a fourth panel of Tropical Teal and layered the die cut pieces like a puzzle. I adhered a piece of Aqua Mist patterned paper to a white card base before attaching the die cut panel with foam tape. A baker's twine bow finished things off nicely. This would be an easy design to make more masculine, too, if that's what you needed.

Next up is the coordinating tag.

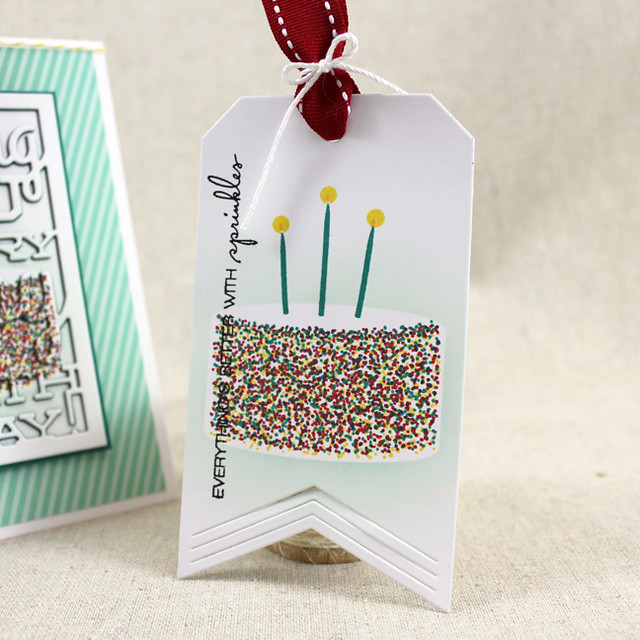
Rainbow Sprinkle Birthday Cake Tag

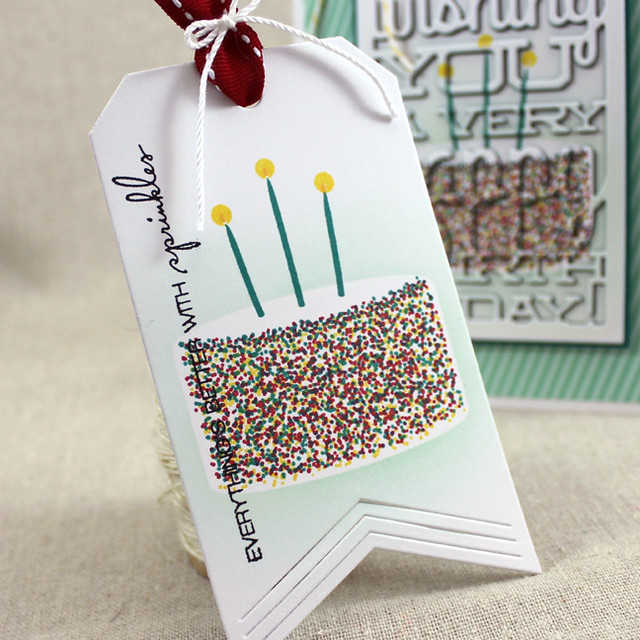
I began by using the whole "sponging a negative" technique again before die cutting the piece of cardstock with the Basic Bookmark 1 Die. I shortened it a smidge by double cutting one end. I continued by stamping the sprinkle layers and candles using the same inks as the card.

Rainbow Sprinkle Birthday Cake Tag Close Up

This time though, I stamped a sentiment, this one from Just Desserts Sentiments, using black ink. I finished things off with some Pure Poppy Saddle-Stitched ribbon and white crochet thread.

That's all for me today. I hope you've enjoyed today's post. I'll see you back here tomorrow with more of this month's release. Make sure to check in with Nichole, Amy, BetsyHeatherKay, Erin, and Maile for even more inspiration today. See you soon!

Recipe:
Rainbow Sprinkles Birthday Ensemble
Stamps: Just Desserts, Just Desserts Sentiments - Papertrey Ink
Cardstock: Tropical Teal, Aqua Mist Striped Paper - Papertrey Ink; white
Ink: Tropical Teal, Aqua Mist, Bright Buttercup, Pure Poppy, Summer Sunrise - Papertrey Ink; Onyx Black - VersaColor
Other: Just Desserts Die, Text Block: Birthday Die; Basic Bookmarks 1 Die, Pure Poppy Saddle-Stitched Ribbon - Papertrey Ink; Foam Tape - Scotch; Lemon Baker's Twine - Divine Twine; white crochet thread; Xyron

Thursday, March 10, 2016

Introducing Just Desserts & Sentiments

Good morning, friends! Welcome to this month's Papertrey Ink countdown! I am very excited about the sets I get to introduce to you this month. Just Desserts is a super-fun set all about cake, birthdays, and sprinkles (and who doesn't love sprinkles?). I also designed a coordinating mini set with even more sentiment options that will work beautifully with these colorful cakes. Just Desserts (and the rest of the March release) will be available for sale on March 15th at 10pm Eastern, but in the meantime let's get on to some projects!

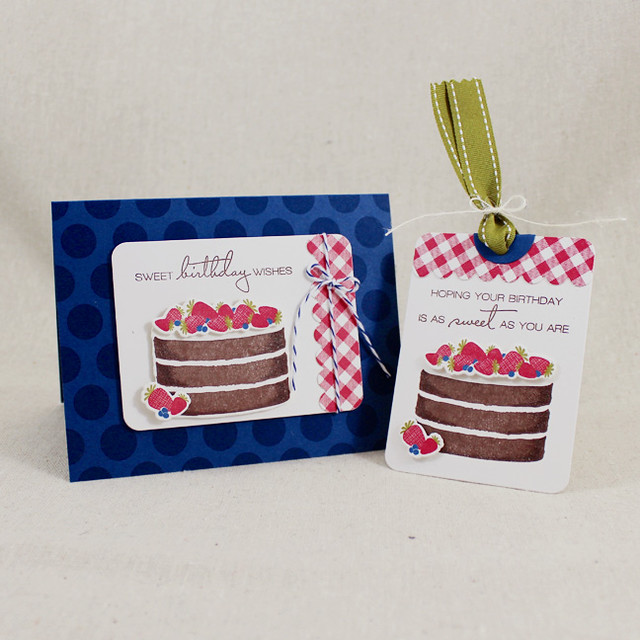
Gingham Strawberry Birthday Ensemble

I thought it would be fun to create a card and tag ensemble using these new sets.

Version 2

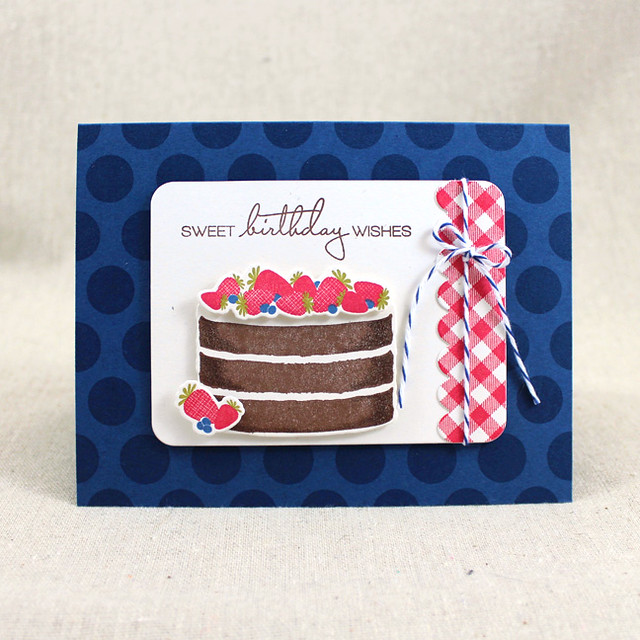
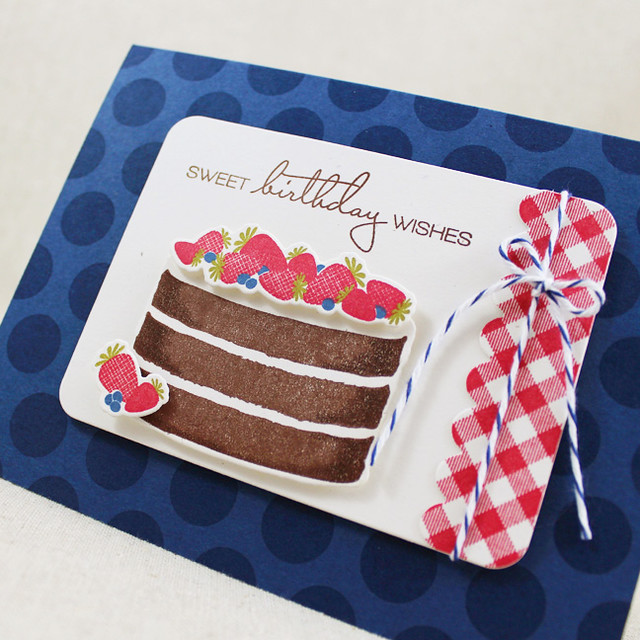
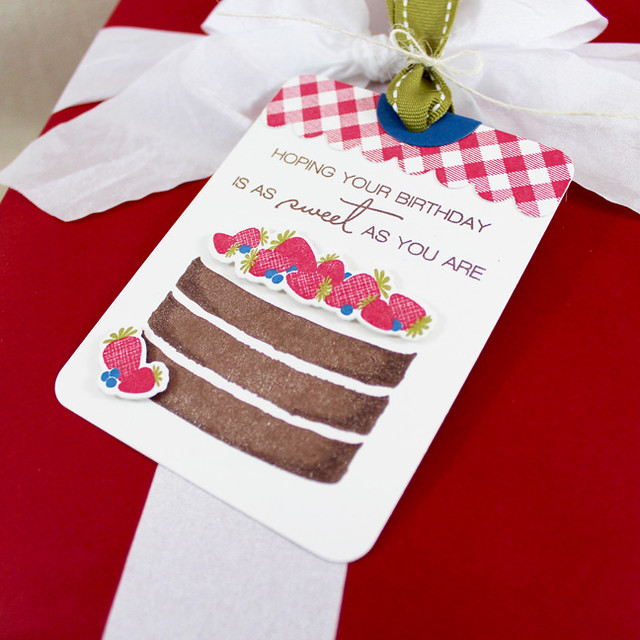
I began with the card. I die cut the scalloped Journal Card Borders shape from Rustic White cardstock and stamped it with the Background Basics: Super Gingham using Pure Poppy ink. I adhered that to a Monthly Moments Journal Card 1, also from Rustic White cardstock, and stamped that with a sentiment from Just Desserts using Dark Chocolate ink. Next, I die cut the cake and fruit embellishments.

Sweet Birthday Wishes Close Up

The cake layers were stamped using Dark Chocolate ink and then I used a colored pencil to add shading. I left the frosting layer blank to make it appear to be vanilla frosting. The berry clusters were stamped with Pure Poppy, Ripe Avocado, and Enchanted Evening inks. I adhered the cake and fruit clusters to the Journal Card with foam tape and tied on a bit of baker's twine. I stamped an Enchanted Evening card base with polka dots using the matching ink before adding my focal point with foam tape.

Next up is the coordinating tag.

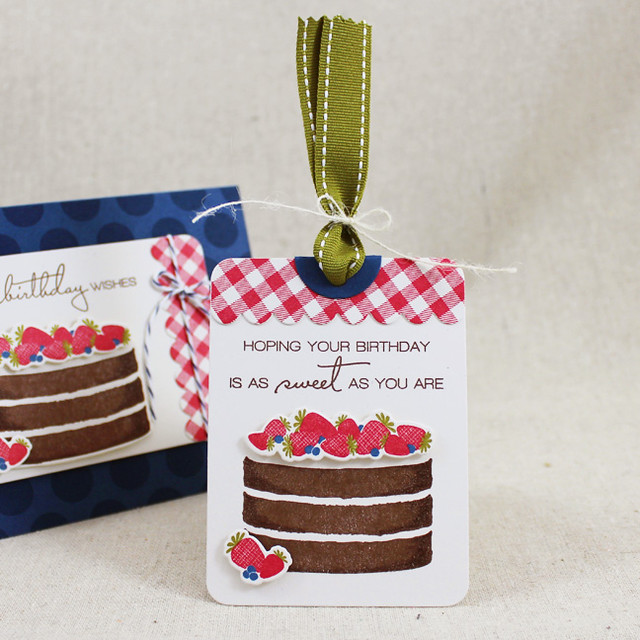
Sweet Birthday Tag

I wanted to keep things fairly similar, so I die cut the same Journal Card shape to use as the base of my tag. I also die cut and stamped the same Journal Card Borders shape. I stamped the sentiment, this one from Just Desserts Sentiments, and the cake layers on the Journal Card before attaching the scalloped gingham border. I die cut and stamped the berries with the same color combo as the card and adhered them into place with foam tape.

Sweet Birthday Tag Close Up

In order to make the Journal Card feel more like a tag, I added the hole reinforcer shape from Tag Sale #3 in Enchanted Evening cardstock. I used a Crop-A-Dile to punch a hole through the card and threaded it with Ripe Avocado Saddle-Stitched ribbon. I finished it off with a small Rustic Cream Button Twine bow.

So there you have it! I hope you've enjoyed this first look at my new sets. I'll be back tomorrow to share more with you. In the meantime, make sure to check in with Nichole, Betsy, Danielle, Melissa, Erin, and Maile to see more of this month's new products. See you soon!

Recipe:
Strawberry Gingham Birthday Ensemble
Stamps: Just Desserts, Just Desserts Sentiments, Background Basics: Super Gingham, Polka Dot Basics III - Papertrey Ink
Cardstock: Rustic White, Enchanted Evening - Papertrey Ink
Ink: Pure Poppy, Dark Chocolate, Ripe Avocado, Enchanted Evening - Papertrey Ink
Other: Just Desserts Die, Monthly Moments Journal Card 1 Die, Monthly Moments Journal Card Borders Die, Tag Sale #3 Die, Rustic Cream Button Twine, Ripe Avocado Saddle-Stitched Ribbon - Papertrey Ink; Baker's Twine - Divine Twine; Foam Tape - Scotch; Colored Pencil - PrismaColor

Tuesday, March 8, 2016

March Sneak Peek

The Papertrey Ink countdown is coming your way and I have a very sweet set that I can't wait to share!


This one is all about birthday confections (though you could certainly eat cake anytime, as far as I'm concerned). See you in a couple of days!

Monday, February 15, 2016

Release In Review

Well, everyone, here we are. We've made it to the end of this year's Papertrey Ink anniversary countdown. You should see my studio. The word "avalanche" doesn't even begin to describe it. But all that mess has most certainly been worth the fun, friends, and I have a handful of final projects to share with you.

Let's start with a walk through the Spring Woods (designed by Nichole).

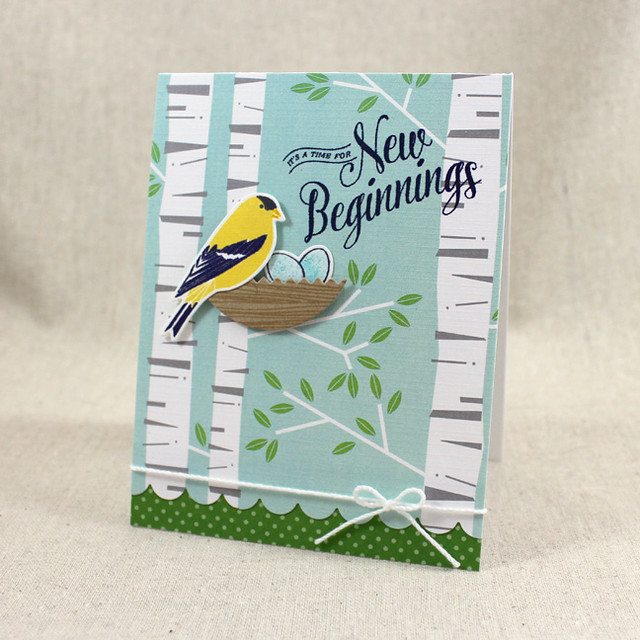
New Beginnings Card

I loved the first set that Nichole designed, so this one is going to be a fast favorite as well. I began by die cutting and stamping the chickadee using Bright Buttercup and True Black inks. Then, I die cut, stamped, and colored (with Copics) the Simply Spring Borders eggs. I added speckles to the eggs with a stippling brush and some Tropical Teal ink.

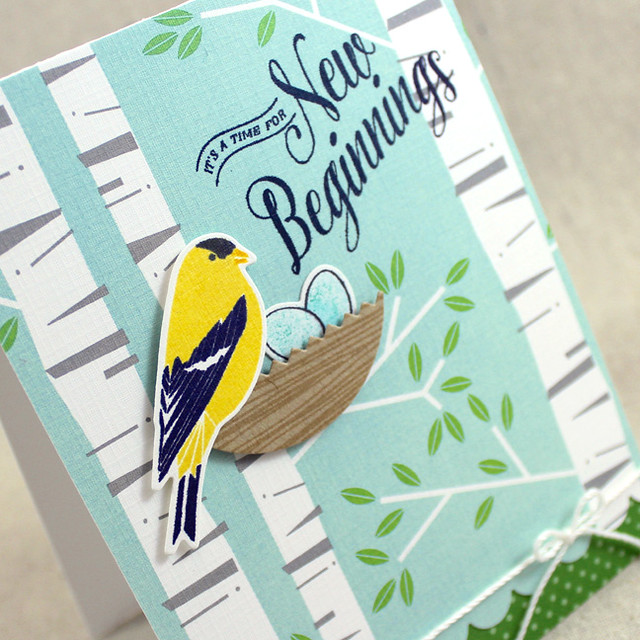
New Beginnings Close Up

I die cut a circle from Classic Kraft cardstock and trimmed it down using the Pinking Shears Border Die to create a nest shape. I stamped it with Background Basics: Woodgrain for a little visual texture and adhered it to a Spring Woods Patterned Paper panel that I'd trimmed with the Small Scalloped Border Die. I adhered that to a white card base that I'd embellished with New Leaf Bitty Dot paper and tied a crochet thread bow around the front. Next, I stamped the sentiment, from Tulip Time, using True Black ink and attached my bird and my eggs to the card front.

Next up we have Heather's Be and Nichole's Keep It Simple: St. Patrick's Day.

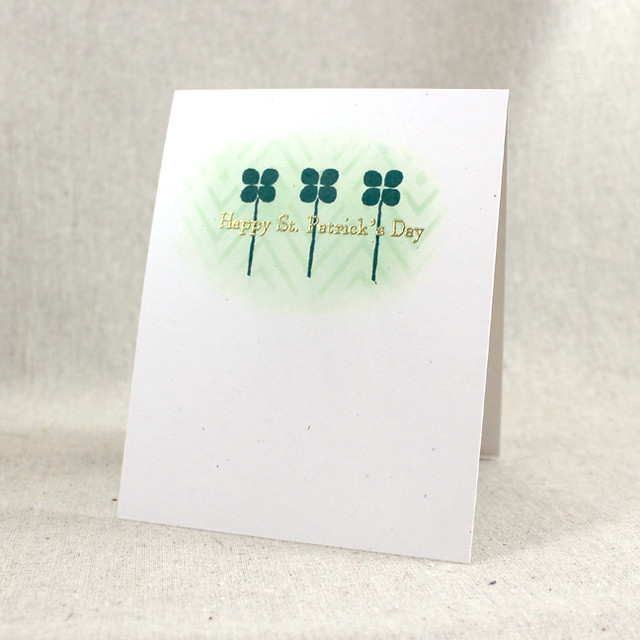
St. Patrick's Day Card

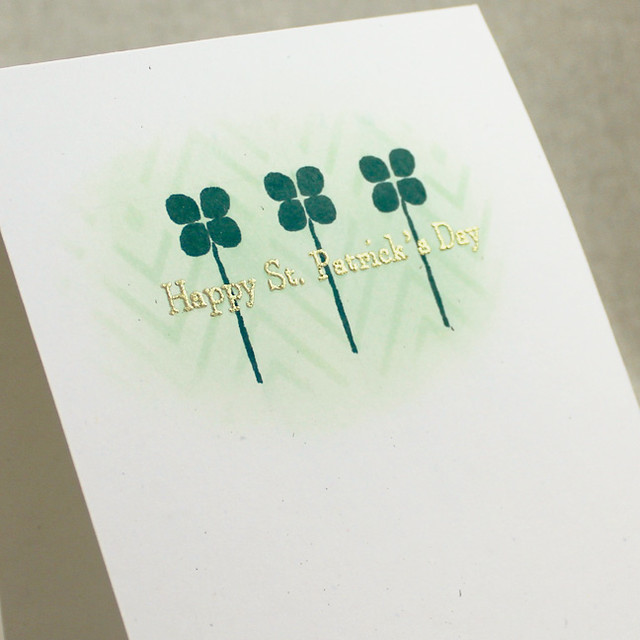
I began by sponging Mint Julep ink through one of the Modern Background Stencils onto a Rustic White card base. I removed the stencil and sponged a bit more ink for a tone-on-tone look. Next, I chose one of the small dots and a stem from Be and used it to create three four leaf clovers in that sponged area.

St. Patrick's Day Close Up

This particular dot has an ever-so-slightly-teardrop shape, so it worked perfectly. The last step was to heat emboss the sentiment using gold detail powder. Nice and simple.

It's Splits: Just A Note's turn in the spotlight. I love the sketchy feel of this set. It's a great little mini and I'm sure it's going to get plenty of attention around here.

Splits Just A Note Card

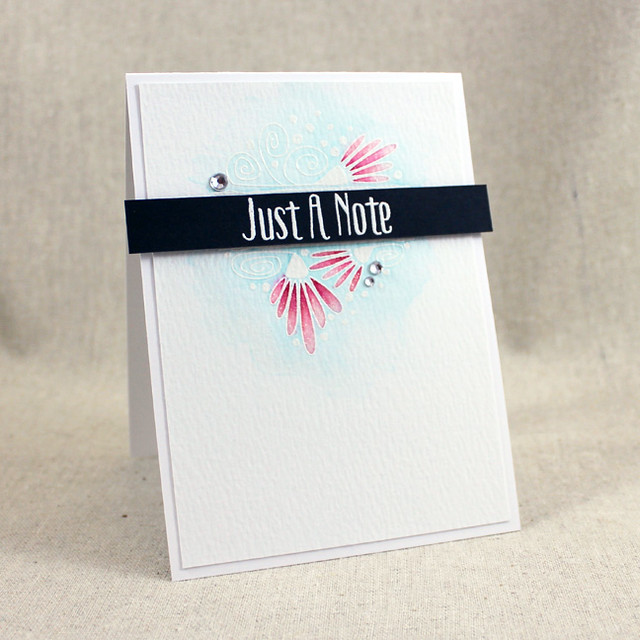
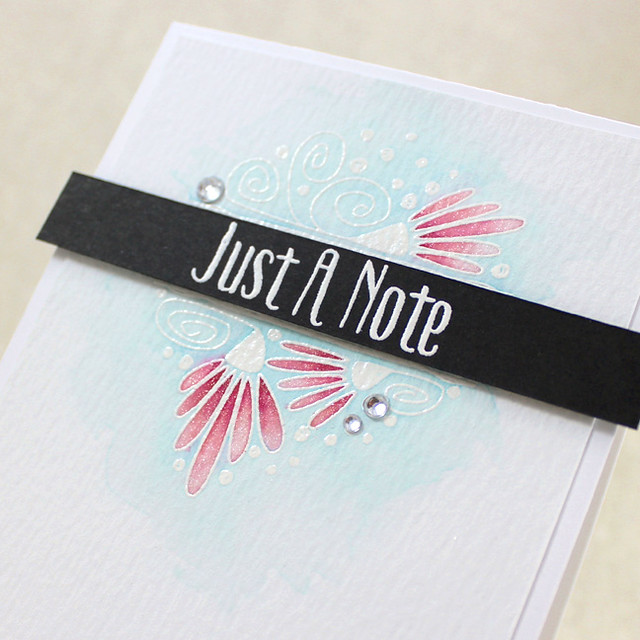
I began by heat embossing the large frame onto watercolor paper using white powder. I watercolored that image using my Zig pens and set it aside to dry. In the meantime, I heat embossed the sentiment onto a strip of True Black cardstock using white powder.

Splits Just A Note Close Up

Once the watercolored panel had dried I trimmed a bit off the edges and adhered it to a white card base I used a clear Wink Of Stella pen to add a bit of shimmer to the flowery images before adhering the sentiment strip with foam tape. A few clear rhinestones were the perfect finishing touch.

Both of my final two cards use Dawn's new Peonies On Parade. I love peonies and I was so excited when peony bushes popped up at our new(ish) house last Spring. Thanks to Dawn's new set, I can enjoy peonies anytime!

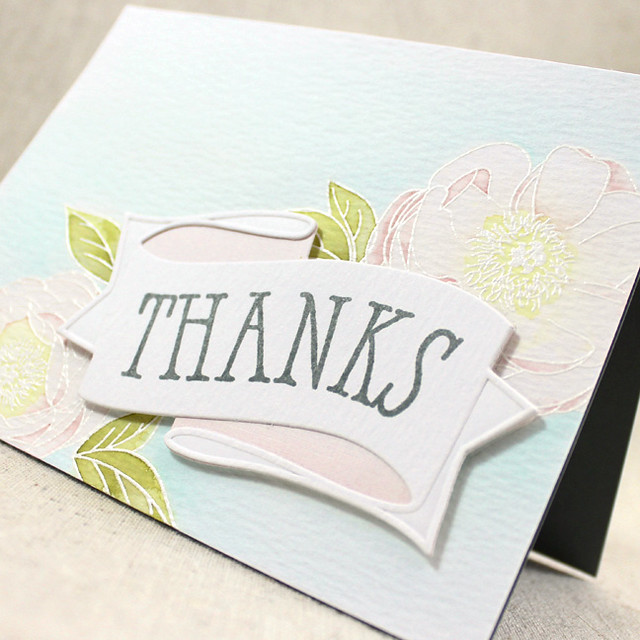
Peony Thanks Card

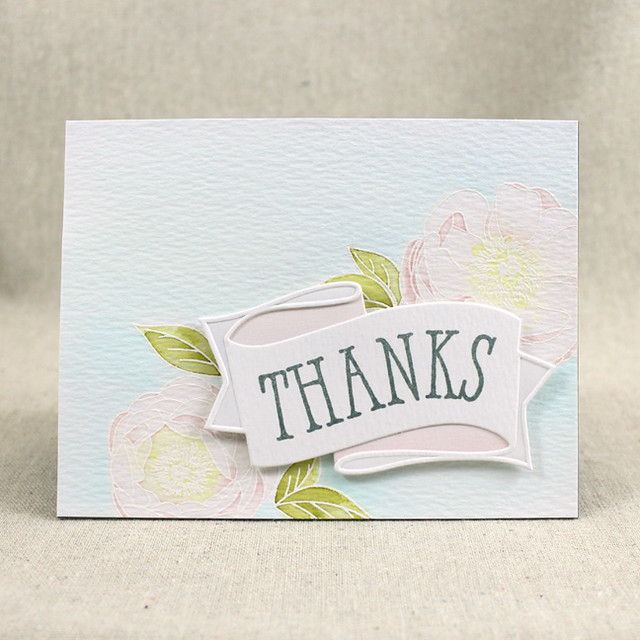
I began this first card by heat embossing the blooms onto watercolor paper using white powder. I colored the flowers in pale pastels to mimic the flowers in my garden and followed with more saturated greens for the leaves. The background is a pale blue, just dark enough to give the embossed lines a bit of definition. Once it was dry, I attached that panel to a Stormy Sea card base.

Peony Thanks Close Up

Next, I die cut the Layered Banner shapes from Hooray Patterned Paper (the pastel pink) and additional watercolor paper. I stamped the top layer with a sentiment from Layered Banner Banter using Stormy Sea ink an then adhered the pieces together. Those were then mounted to the card front with foam tape. I wanted to keep this design simple enough to let the watercolor shine. I think it worked out pretty well.

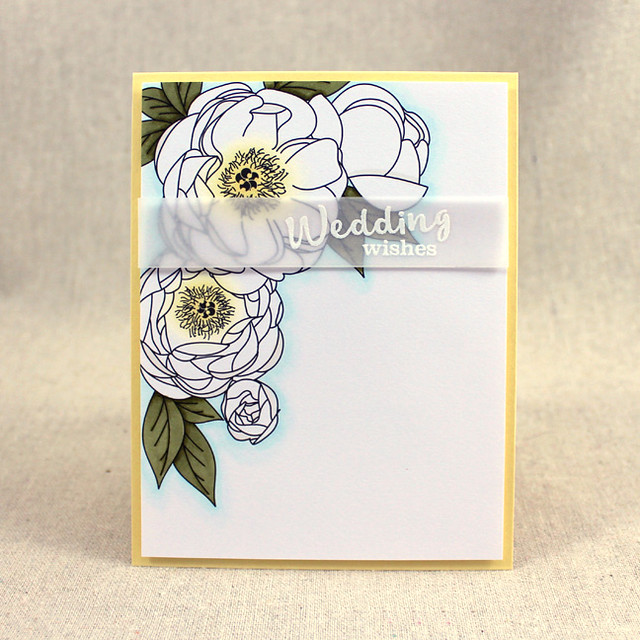
My final card for this release is a quickie made with the Peonies On Parade Coloring Sheets. These sheets are wonderful for creating cards in minutes!

Wedding Wishes Card

I began by coloring the leaves on the sheet with a nice deep green Copic combo. I wanted my peonies to appear white, so I colored them very simply. I sponged a bit of Harvest Gold ink onto the flower centers and then added small touches of warm gray in a few strategic areas. I then outlined the entire image with a pale blue marker to make it pop a bit.

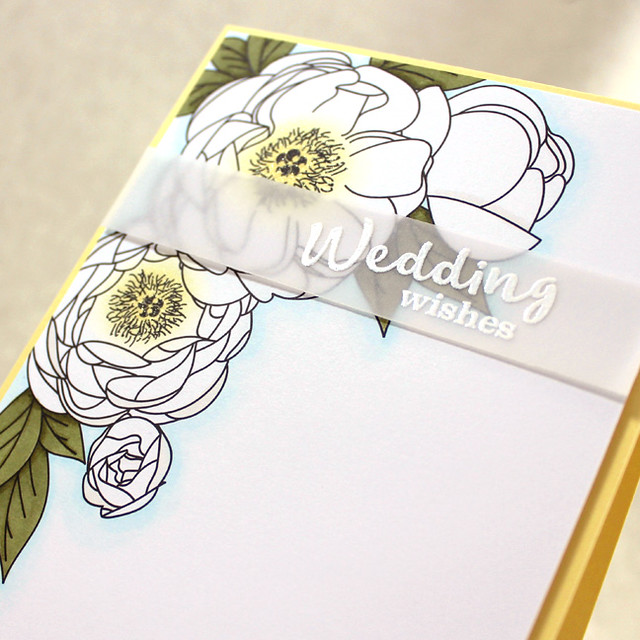
Wedding Wishes Close Up

I embellished the flower centers with a clear Wink Of Stella pen before trimming the panel down a smidge and mounting it to a Lemon Tart card base with foam tape. Next, I heat embossed a sentiment from Spring Woods onto vellum using white powder. I adhered it to the front of the card by hiding tiny strips of adhesive behind the embossing. Super quick and easy.

Well, that's it for me this time around. I hope you've enjoyed the festivities the past several days! Make sure to check in with Nichole, Amy, Ashley, Betsy, Danielle, Dawn, Heather, KayLaurie, and Melissa as they wrap up this countdown too. See you again soon!

Recipes:
New Beginnings Card
Stamps: Spring Woods, Tulip Time, Simply Spring Borders, Background Basics: Woodgrain - Papertrey Ink
Cardstock: Classic Kraft, Spring Woods Patterned Paper, New Leaf Bitty Dot Patterned Paper - Papertrey Ink; white
Ink: True Black, Bright Buttercup, Tropical Teal, Classic Kraft - Papertrey Ink; Tuxedo Black - Memento

Other: Spring Woods Die, Simply Spring Borders Die, Two Toned Die, Pinking Shears Border Die, Small Scalloped Border Die - Papertrey Ink; Foam Tape - Scotch; Copic Markers

Happy St. Patrick’s Day Card
Stamps: Be, Keep It Simple: St. Patrick’s Day - Papertrey Ink
Cardstock: Rustic White - Papertrey Ink
Ink: Mint Julep, Pinefeather - Papertrey Ink; VersaMark - Tsukineko
Other: Modern Backgrounds Stencil Collection - Papertrey Ink; Gold Embossing Powder - Filigree

Just A Note
Stamps: Splits: Just A Note - Papertrey Ink
Cardstock: True Black - Papertrey Ink; Watercolor Paper - Ranger; white
Ink: VersaMark - Tsukineko
Other: White Detail Powder - Filigree; Rhinestones - Kaisercraft; Foam Tape - Scotch; Clean Color Brush Pens - Zig

Thanks Card
Stamps: Peonies on Parade, Layered Banner Banter - Papertrey Ink
Cardstock: Stormy Sea, Hooray Patterned Paper Collection - Papertrey Ink; Watercolor Paper - Ranger
Ink: Stormy Sea - Papertrey Ink; VersaMark - Tsukineko
Other: Layered Banner Die - Papertrey Ink; White Embossing Powder - Filigree; Clean Color Brush Markers - Zig; Foam Tape - Scotch

Wedding Wishes Card
Stamps: Spring Woods - Papertrey Ink
Cardstock: Peonies On Parade Coloring Sheets, Lemon Tart, Vellum - Papertrey Ink
Ink: VersaMark - Tsukineko
Other: White Embossing Powder - Filigree, Foam Tape - Scotch; Wink Of Stella Pen - Zig; Copic Markers

Sunday, February 14, 2016

2016 Anniversary Set: Painted Petals

Good morning! It's Day 10 of the Papertrey Ink 9th anniversary countdown and today the team is introducing you to this year's anniversary set.

Painted Petals Cards

I think the thing I love most about this year's anniversary set, Painted Petals, is how versatile it is. This set lends itself well to all sorts of styles. It can be bright and bold on one project, earthy and rustic on the next, and then shabby and delicate on yet another card. This is one must-have floral, for sure! Let's get on to some projects!

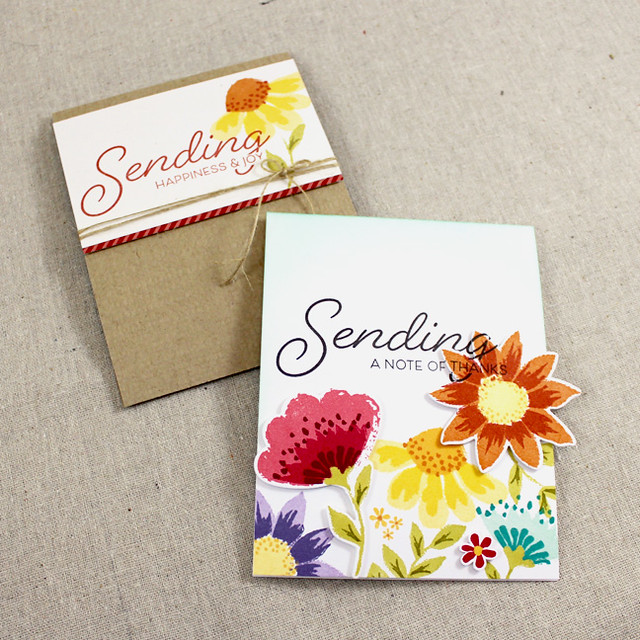
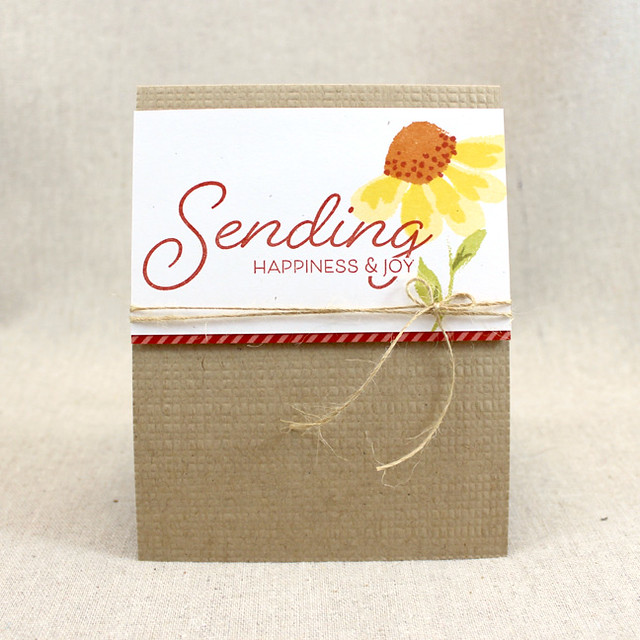
Happiness In Joy Card

I began this first card by stamping the flower onto a piece of Rustic White cardstock using Harvest Gold and Bright Buttercup inks. I added the flower center with Canyon Clay, the individual seeds with Terra Cotta Tile, and the stem with Simply Chartreuse. The tiny leaf details were then added with Ripe Avocado. There are so many opportunities to layer color and add interest with this set.

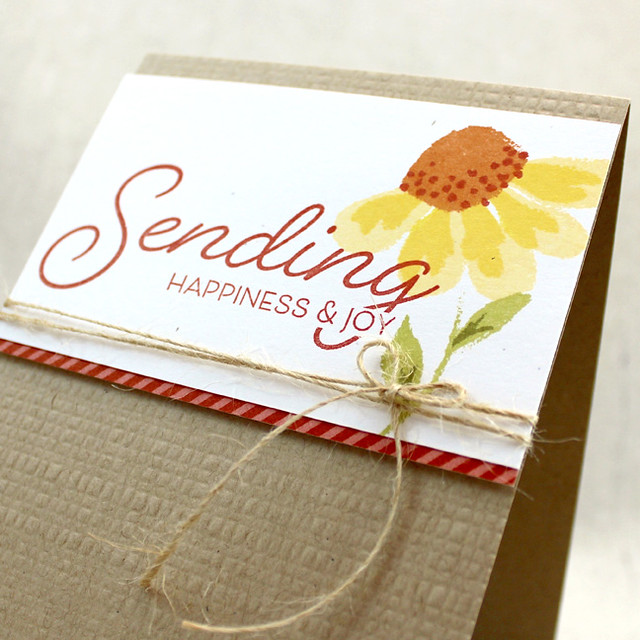
Happiness & Joy Close Up

Next, I stamped the sentiment with Terra Cotta Tile and added a strip of striped Terra Cotta Tile patterned paper to the bottom edge of the panel. I wrapped that piece with Rustic Jute Button Twine and mounted it to a Classic Kraft card base that I'd textured with the Rustic Burlap Impression Plate. Clean and simple goes rustic.

Next up is a much brighter project using this set.

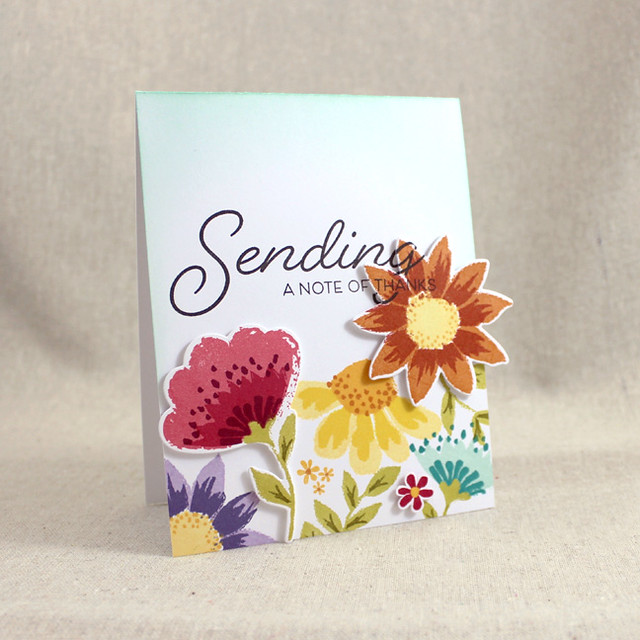
Note Of Thanks Card

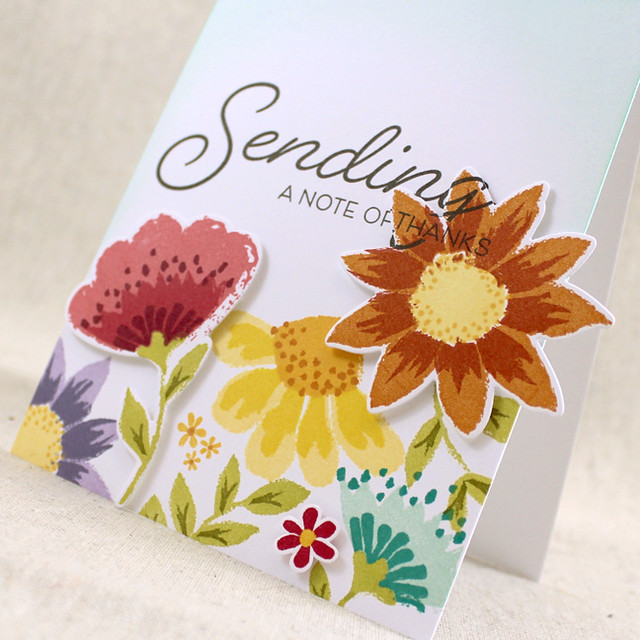
I began by sponging a bit of Aqua Mist along the top edge of a white card front. Then I started stamping an assortment of flowers along the bottom edge with a rainbow of color. I left some open spaces to allow for additional flowers that I added with foam tape. I stamped the sentiment with Smokey Shadow, layering part of the text onto the Canyon Clay flower.

Note Of Thanks Close Up

I really had so much fun with these flowers. I played around with color combinations on a piece of scrap paper and discovered some combos that I'd never really considered before. The Berry Sorbet, Pure Poppy, and Scarlet Jewel might be my unexpected favorite.

Well, that's all for me today. Thank you so much for visiting me today. Make sure to check in with NicholeAmy, Ashley, Betsy, Danielle, DawnHeather, Kay, Laurie, and Melissa for more of this year's anniversary set. Have a great day and I'll see you back here tomorrow for this month's wrap-up. Have a great day!

Recipes:
Happiness & Joy Card
Stamps: 2016 Anniversary Set: Painted Petals - Papertrey Ink
Cardstock: Classic Kraft, Rustic White, Terra Cotta Tile Striped Paper - Papertrey Ink
Ink: Harvest Gold, Bright Buttercup, Canyon Clay, Terra Cotta Tile, Simply Chartreuse, Ripe Avocado - Papertrey Ink
Other: Rustic Jute Button Twine, Rustic Burlap Impression Plate - Papertrey Ink; Foam Tape - Scotch

Note Of Thanks Card
Stamps: 2016 Anniversary Set: Painted Petals - Papertrey Ink
Cardstock: white
Ink: Winter Wisteria, Plum Pudding, Harvest Gold, Bright Buttercup, Berry Sorbet, Pure Poppy, Scarlet Jewel, Simply Chartreuse, Ripe Avocado, Summer Sunrise, Canyon Clay, Terra Cotta Tile, Aqua Mist, Tropical Teal, Smokey Shadow - Papertrey Ink
Other: Painted Petals Die - Papertrey Ink; Foam Tape - Scotch