Friday, October 5, 2018

Stitching Focus - What's In Your Holiday Bag Of Tricks?

Good morning and welcome to the October Stitching Feature! I’m Lizzie Jones, your Stitching Ambassador, and this month I’m introducing a couple of brand new stitching dies that I truly hope you’re going to love.
The first is one that has been heavily requested the past several months. It’s the Stitched Years: 2018-2022 Die Collection and it will be available at 10pm ET, October 15th on our website.
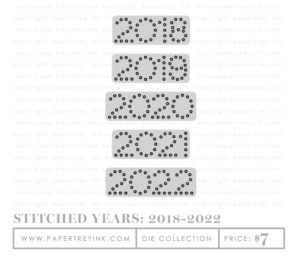
This die will make it a cinch to stitch the next several years onto your Heirloom Ornaments, coin purses, Hoopla projects, and so much more!
The next new release this month (also releasing on the 15th at 10pm ET) is something I have personally wanted for a very long time. Finally it has become a reality!
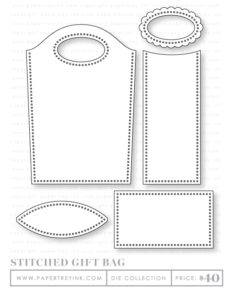
I used to work in a boutique that sold little felt bags similar to these and I always wanted to create my own. The Stitched Gift Bag Die can be used to create a pocket bag, a narrow gift bag, or a deeper gift bag all with one versatile collection! Use these bags to give gift cards, candles, jewelry, and more. Pair it with other Seasonal Stitching dies in your collection to create a truly special keepsake that can be used again and again. You won’t believe how much fun you have creating these fabulous little bags! I’ve made several now and I’m already thinking up new and exciting ways to use these dies that I hadn’t even considered when I designed the collection!
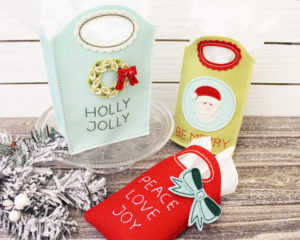
Today I’m going to share a few of my Stitched Gift Bags. They are so easy to decorate with the Seasonal Stitching Dies, but they would also be fantastic cut from reinforced fabric or patterned felt for a simpler, quicker option.
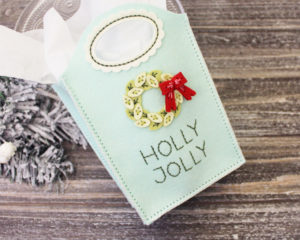
Let’s take a closer look at the Holly Jolly Bag I put together to share with you today. This is the largest of the bags I’ve made thus far. I used the wide bottom and side panels along with two of the front/back panels. The finished size of this bag is 5″W x 7″H x 2 1/2″ D.
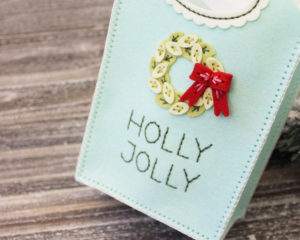
I cut the base of the bag from Aqua Mist felt and the scalloped handle embellishment from Vintage Cream (more on that in a minute). The wreath is cut from Simply Chartreuse and Spring Moss while the bow is Pure Poppy. I decided to blanket stitch this bag to add a unique detail along the edges.
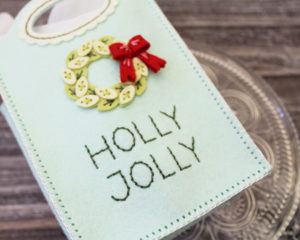
I used the Seasonal Stitching: Wreath and Stitched Holiday Words dies to embellish the front of my bag. The words die made it so easy to add a message and the wreath was so much easier to assemble than I expected. Such a pleasant surprise!
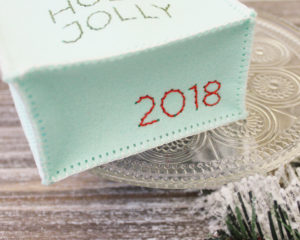
I’ve always imagined these little bags being useful year after year, so I decided to use the new Stitched Years: 2018-2022 die to add a date to the bottom of this bag. My mama-in-law tends to use cute holiday bags as home decor, so I figure even if this bag doesn’t get regifted it could still find new life as a seasonal decoration. It would be nice to be able to keep track of when each bag was made.
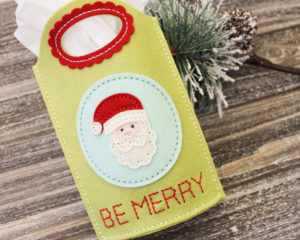
The next bag I’m going to share is this sweet little Santa number. This time I used just two of the front/back panels with the oval bottom. The sides are stitched together with a basic running stitch and the bottom is flat. The finished dimensions of this bag are 5″W x 7″H x 1 1/2″D (though it does narrow at the sides).
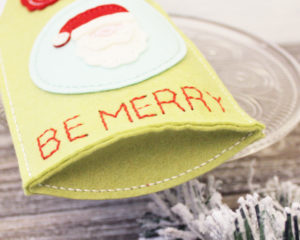
I cut the bag base from Simply Chartreuse and then used Aqua Mist, Vintage Cream, Sweet Blush, and Pure Poppy to create the Seasonal Stitching: Santa feature. I used a Stitched Circle to give his sweet face a ground and then used the same Stitched Holiday Words die to add a greeting.
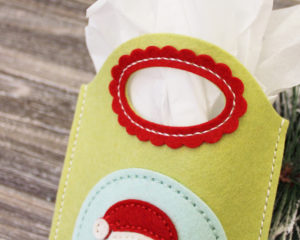
I used Pure Poppy felt for my scalloped handle enforcer. The handle has the holes built in and you can simply stitch them (to reinforce the handle) or you can add this embellishment. It not only reinforces, but it’s cute too!
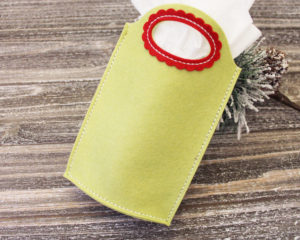
I also wanted to show you what a plain bag might look like (this is just the back of this bag. You certainly don’t have to embellish the bags if you don’t want to spend the time – they’re adorable either way! Can you imagine this in patterned felt or reinforced fabric with a contrasting handle?!

The last bag I’m going to share today uses the front/back panels only. I sewed the right sides together using a basic running stitch along all of the edges. Then, I simply flipped the finished bag right side out when I was finished. The finished dimensions of this bag are approximately (it’s a little harder to measure because it’s poofy) 4 1/2″W x 6 3/4″H x 1″D.

I cut the bag base from Pure Poppy felt and then added a Seasonal Stitching: Bow using Ocean Tides and Pinefeather felts. Again, the Stitched Holiday Words came in quite handy for the greeting.
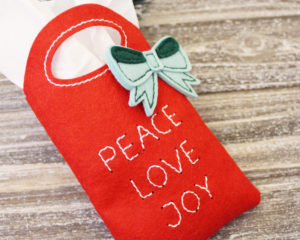
I decided to just do the basic reinforcement stitches for the handle on this bag. It’s a cleaner look and I thought the scallops might compete too much with the bow being so close.
I’m smitten with these bags, friends. Like, head-over-heels, all-I-want-to-do-is-make-little-bags, floating-on-air smitten. You may be wondering, “What can I put in these bags, Lizzie?” I’m so glad you asked! Here’s a brief list:
Cosmetics (nail polish, make up, lip balm)
A Coffee Mug (in the biggest bag)
Cookies
Tea or Coffee
Small Toys (yoyo, slinky, playing cards)
Novelty Socks
Art Supplies (crayons, markers, paint tubes, glitter, sequins)
Gift Card
Jewelry
Candles
Bath Bombs
Stitched Ornaments
Perfume or Cologne
The list goes on and on!
I also wanted to share another quick peek at the Stitched Years: 2018-2022 Die. If you check in on my blog regularly, you may have seen these personalized tags I made for the kiddos in my life using the Heirloom Ornaments 2 last month.
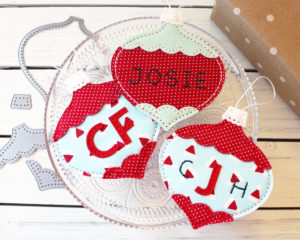
What you didn’t know was that they already had the year stitched on the back! Sneaky, sneaky!
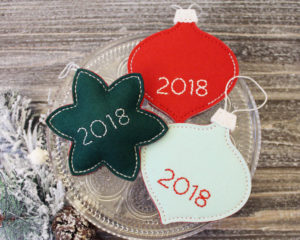
You can also see the original Heirloom Ornament there too. The “2018” die fits beautifully!
Thank you so much for joining me today! I hope you’re looking forward to these new dies. If you popped in looking for my Festive Friday post, stay tuned! I'll have it up a little later today. Have a wonderful weekend and I’ll see you again soon!
Supplies:
Holly Jolly Gift Bag
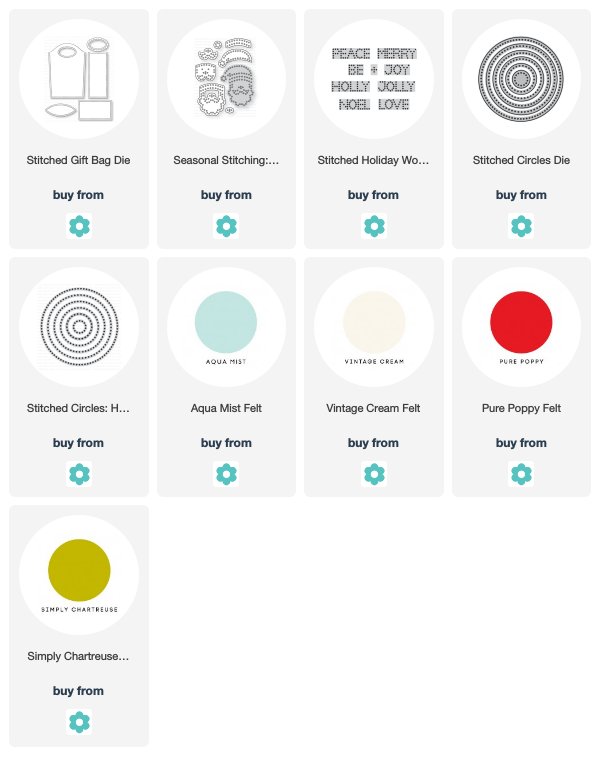
Be Merry Gift Bag

Peace Love Joy Gift Bag
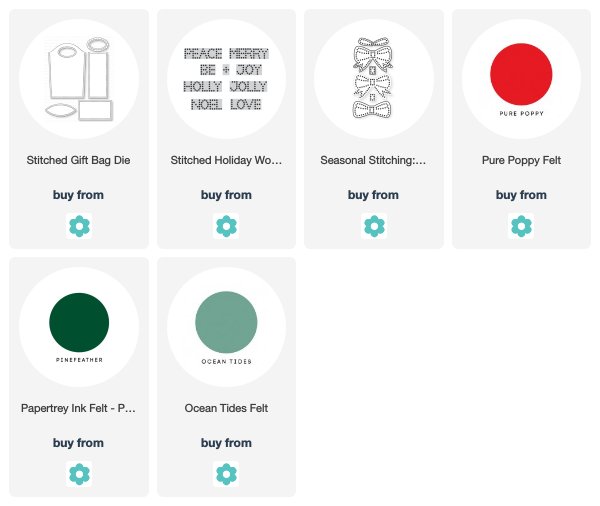
Personalized Ornaments
Tuesday, October 2, 2018

Transformation Tuesday

Good morning, friends! I'm back today with a Papertrey Ink Transformation Tuesday post to share with you. I have a confession to make. I haven't liked my original card from the moment I created it for the last countdown. It's true; sometimes we all make cards that we simply don't love once they're finished.

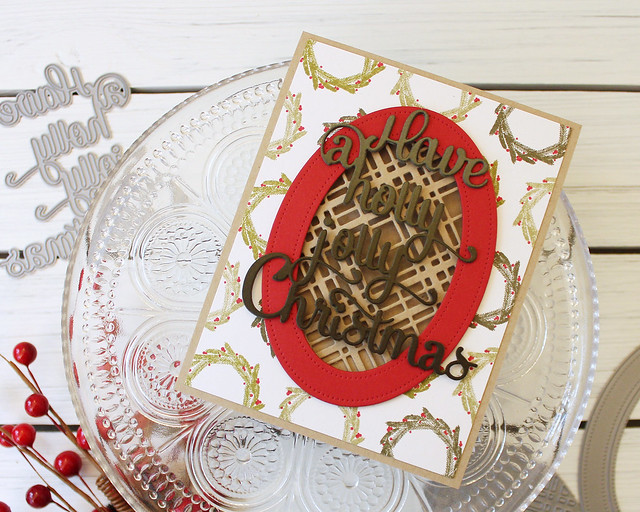
LizzieJones_PapertreyInk_September2018_GloriousGlobes_ShapeShifters_SayItSimply_HollyJollyChristmasCard

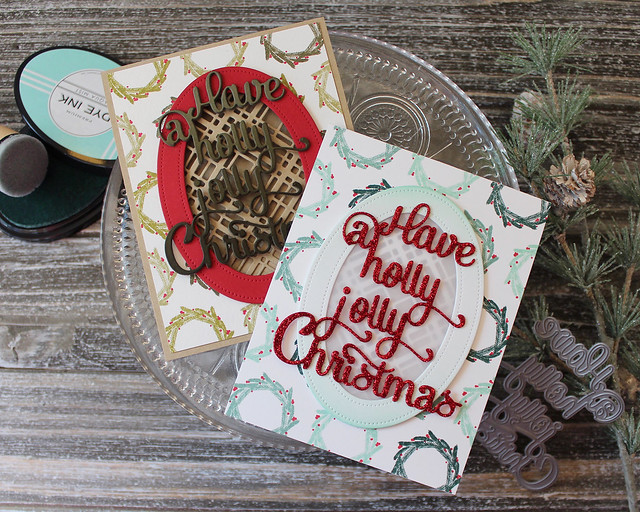
I liked all the individual parts of this card (the layout, the colors, the products), but once they were all put together I wasn't pleased. So I decided to give this one a makeover! Let's take a look at how I "fixed" my original design.

LizzieJones_TransformationTuesday_PapertreyInk_HollyJollyCards

I think my displeasure stemmed from the fact that my original card ended up being too dark and simply not festive enough. It also didn't have any pizzaz and I felt like the plaid window was competing too much with the die cut sentiment (probably because they were so similar in tone).

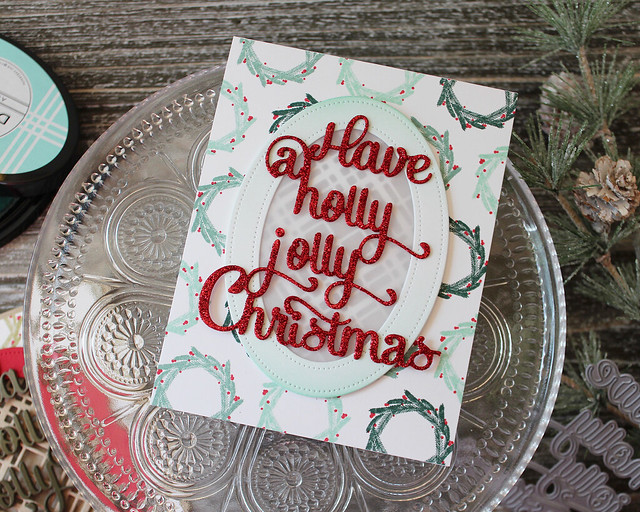
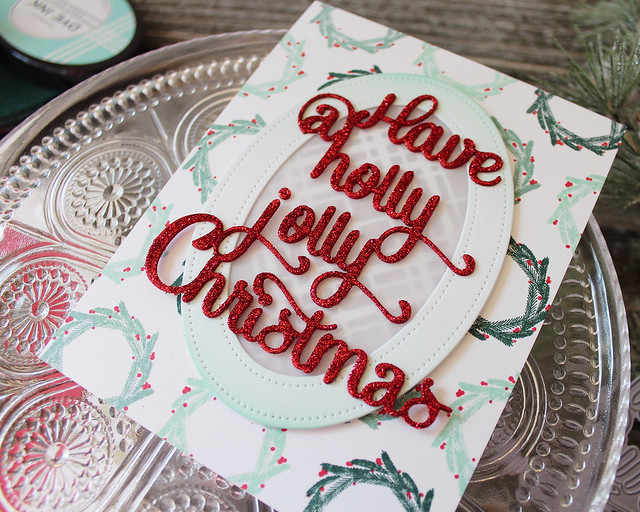
LizzieJones_TransformationTuesday_PapertreyInk_HollyJollyChristmasCard

So on my second version I decided to opt for brighter colors, a healthy dose of glitter (naturally), and a little vellum to soften the pattern a bit (and hide the message that will eventually be written inside). I also wanted to simplify the design slightly and remove the extra, unnecessary layer, so I decided to  stamp the wreath pattern directly on the base this time.

LizzieJones_TransformationTuesday_PapertreyInk_HollyJollyChristmasCard3

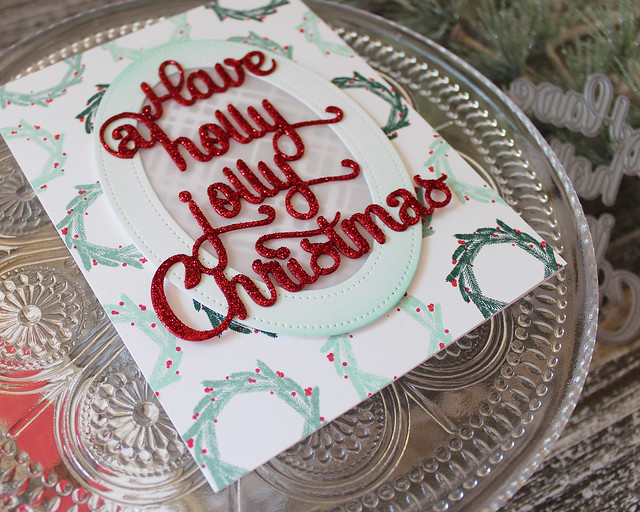
I also chose to swap the ink blending on the sentiment for ink blending on the frame. The solid color on the original card was just a little bit bolder than I wanted it to be. Also, the blending on the sentiment didn't help the "it's too dark" issue as it only served to make it darker and heavier and...ugh.

LizzieJones_TransformationTuesday_PapertreyInk_HollyJollyChristmasCard2

Enter glitter. Have I mentioned that I love glitter on holiday cards. It's true. I usually sneak some in here or there, but on this one I went the "all glitter, all the time" route and I'm not sorry. I just xyroned the Pure Poppy cardstock before die cutting and then coated the entire greeting once I had stacked the die cuts.

There you have it. So much better! I'm very happy with the second version and I think it feels much more "me." Thank you for joining me for this week's Transformation Tuesday! I hope you'll head over to the Team Blog to link up your own transformed project. There's a $25 gift card on the line after all. Have a great week and I'll see you soon for Festive Friday!

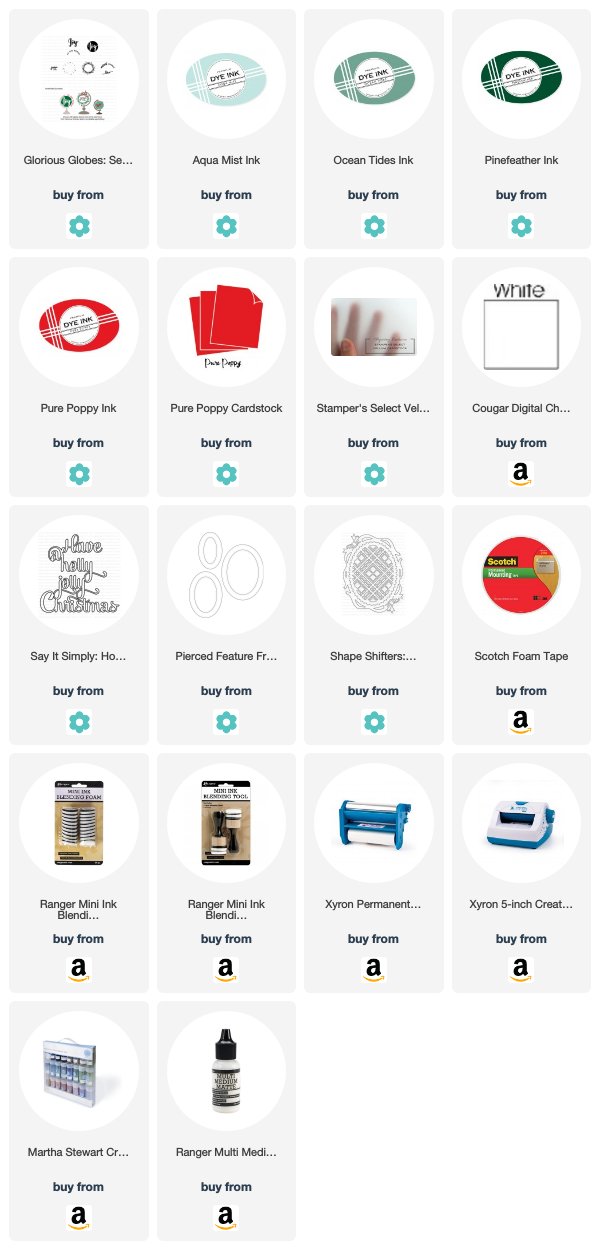
Supplies:
Holly Jolly Christmas Card

Monday, October 1, 2018

Make It Monday!

It's my week to play host for Papertrey Ink's Make It Monday! This week I'm encouraging you to incorporate packaging dies in your cards. It's time to whip out those tags and boxes to create unique elements on your cards.
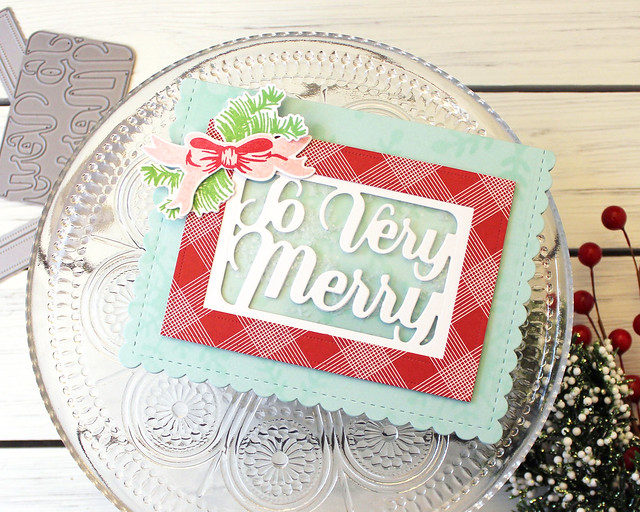
LizzieJones_MakeItMonday_IncorporatingPackagingDies_PapertreyInk_SoVeryMerryCard

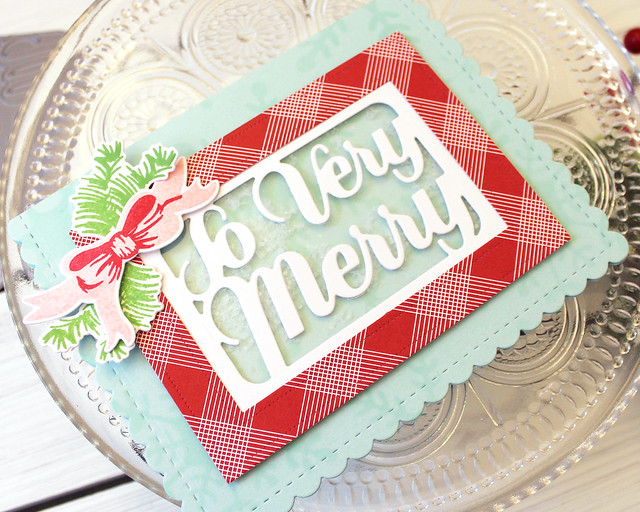
Here's my project for this week. I used the Hinged Gift Card Box: Christmas Windows die to create a shaker box for my cheerful holiday card.

LizzieJones_MakeItMonday_IncorporatingPackagingDies_PapertreyInk_SoVeryMerryCard2

I've used packaging dies on plenty of cards in the past though. Here are a few other examples:

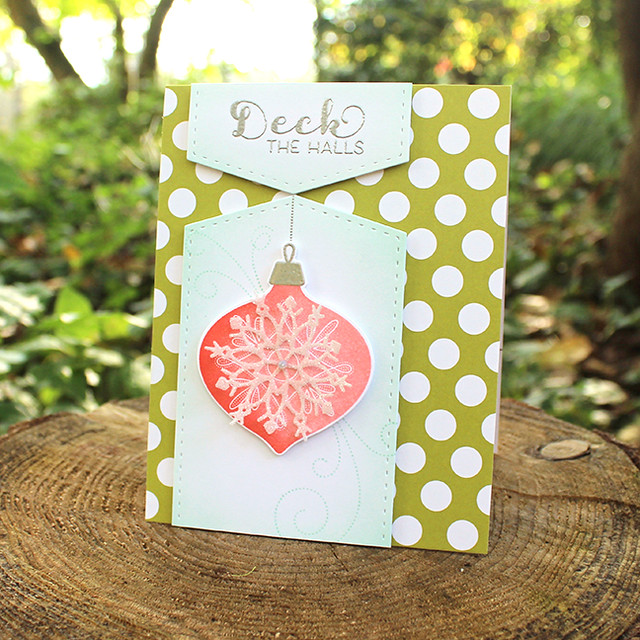
I used the Wine Bottle Tag #2 Die to create the focal point on this card:

Deck The Halls Card

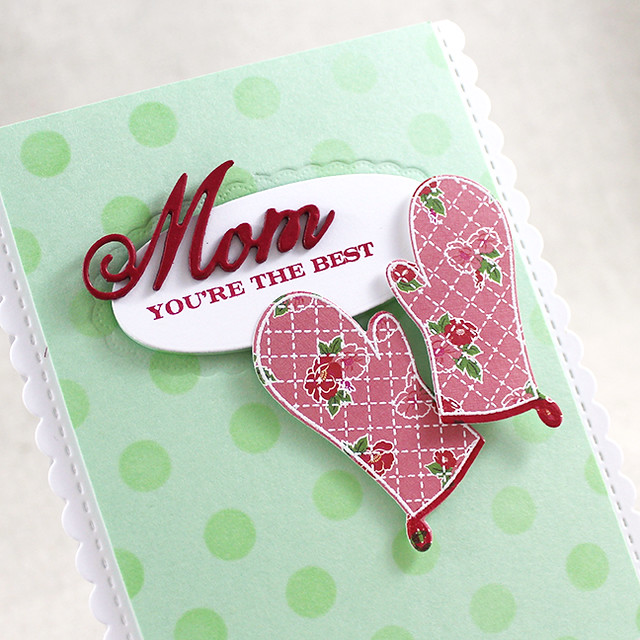
The oval on this card uses one of the windows from the Truffle Tote Box Die:

Mom You're The Best Card 2

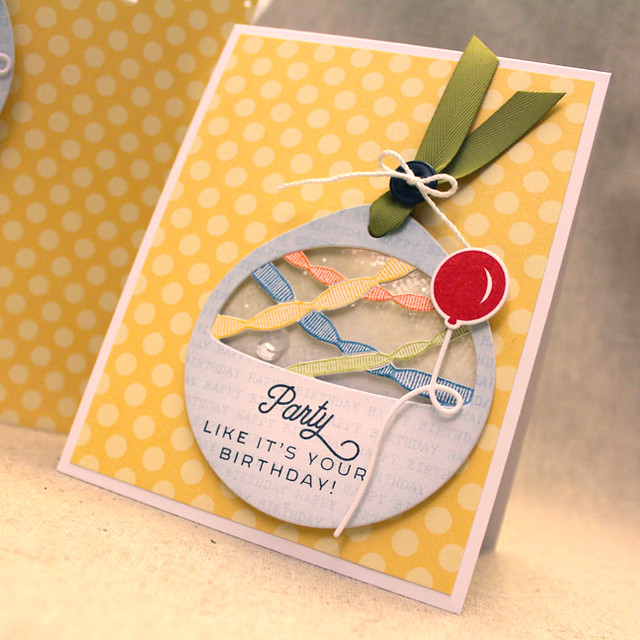
The shaker focal point on this card is the streamers tag from the For You Tag Die Collection:

Party Shaker Card

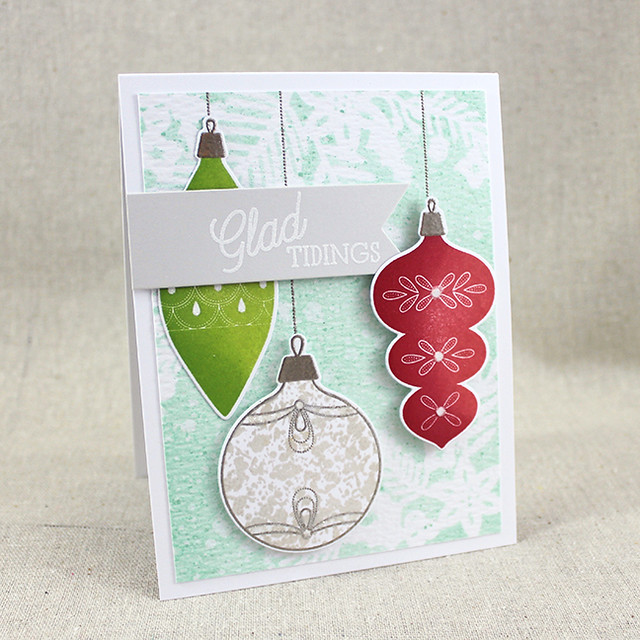
I used the Get A Handle On It Die Collection to create the sentiment banner on this card:

Glad Tidings Card

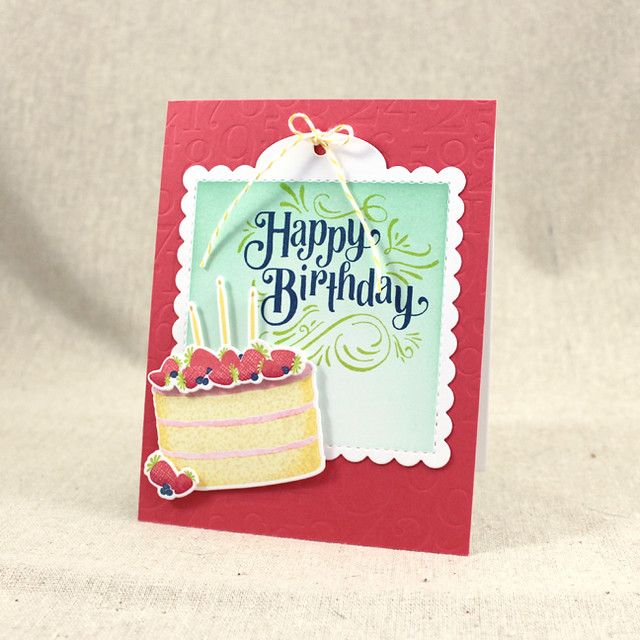
The Tag Sale: Quilted die cut made a great focal point on this card:

Strawberry Birthday Cake Card

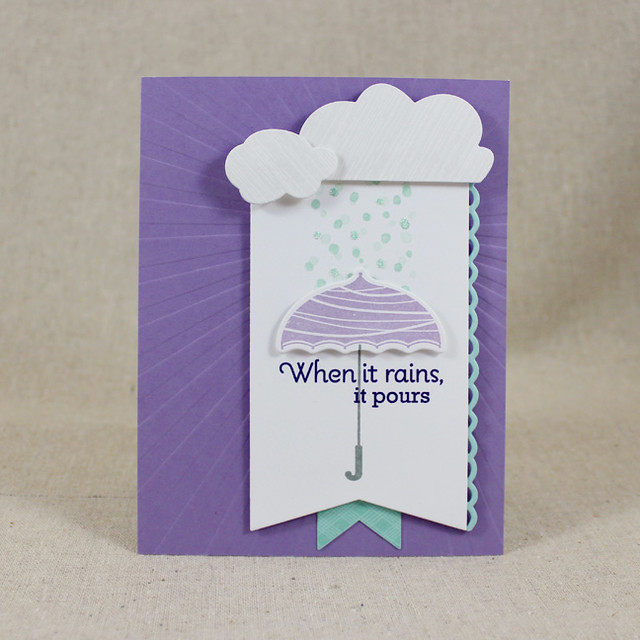
The Wine Bottle Tag die made a unique mat for the umbrella on this card:

When It Rains Card

And last but not least, the Tag Sale #10 looks super cute with Bowl of Sunshine on this card:


Make sure to head over to the Papertrey Ink Team Blog to see the full video and link up your project for your chance to win a gift card. Thank you so much for joining me for this week's challenge! Have a wonderful week!

Supplies:
So Very Merry Shaker Card

Sunday, September 30, 2018

Introducing the Make It Market Kit: Fairy Tale Christmas


Good morning, friends! The next Make It Market Kit, "Fairy Tale Christmas" will be released tomorrow, October 1st and I am thrilled to get to help introduce it to you today. Betsy's big holiday kit is one of the most highly anticipated releases for our customers each year. Each and every piece has been thoughtfully designed and selected to give you an endless amount of design options as you prepare for the holidays.

As in years past, we will be offering two separate kits, one full of the essential tools (main kit) and one with fun extras (trimmings kit).


The Fairy Tale Christmas Main Kit will be available for sale from October 1st at 10pm ET through December 1st 10pm ET or while supplies last at Papertrey Ink. It will not be available for sale after the December 1st deadline.


While we normally are able to ship orders within 48 hours, the shipping timeline could potentially be extended to as much as 2-3 weeks depending on how high the demand is and how much additional stock we will have to manufacture. We ask that everyone be patient and rest assured that their kit will arrive as quickly as possible.

The Fairy Tale Christmas Trimmings Kit will be available only as supplies last. It will not be restocked once initial supply is sold out.


Fairy Tale Christmas main kit contents
Fairy Tale Christmas Stamp Set retail value $24

Fairy Tale Christmas Die Collection retail value $60

Fairy Tale Christmas Patterned Paper Collection retail value $12
Bubbles - 6 large (2-1/2” x 1/4” deep) & 4 small (1-1/2” x1/4” deep) retail value $
Fairy Tale Christmas Main kit cost: $99


Fairy Tale Christmas Trimmings Kit contents
Magnets (25) retail value $3
6 Small Bubbles (1-1/2” x1/4” deep) retail value $1.50
4 Large Bubbles (2-1/2” x 1/4” deep) retail value $1.50
Fairy Lights (1 strand) retail value $3
Artificial Snow retail value $1
Miniature Mushrooms retail value $3
Sequin Mix retail value $4
1/8" Red Velvet Ribbon (1 yard) retail value $1
1/8" Green Velvet Ribbon (1 yard) retail value $1
1/8" Gold Sparkle Cord (3 yards) retail value $2
1/8" Mauve Sparkle Cord (1 yard) retail value $1
Reusable Storage Box retail value $5
Ring Fasteners retail value $6
Indian Gold Nuvo Embellishment Mousse retail value $8
Fairy Tale Christmas Trimmings kit cost: $37

Visit the Papertrey Ink blog HERE for more detailed product information and photos!

This kit is full of holiday whimsy from the sweet storybook characters to their woodland friends and all the shaker elements you can handle! There is also a beautiful set of stencils for sale separately that I know you're going to love. How about I show you this gorgeous kit in action?

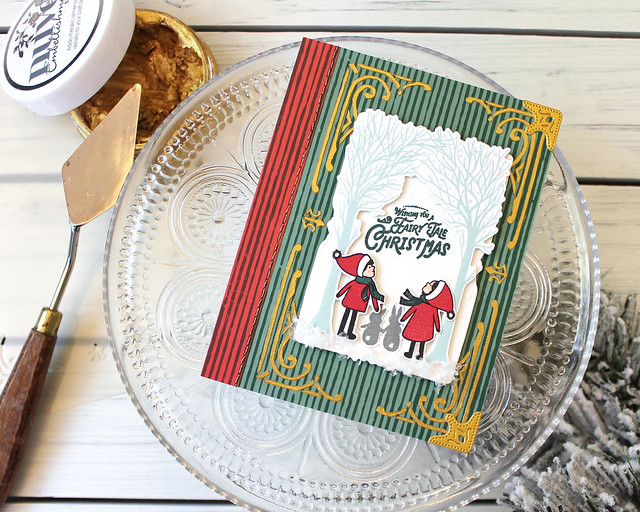
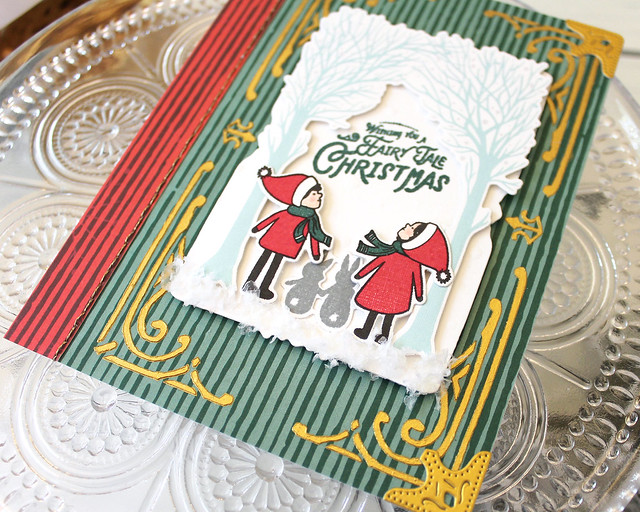
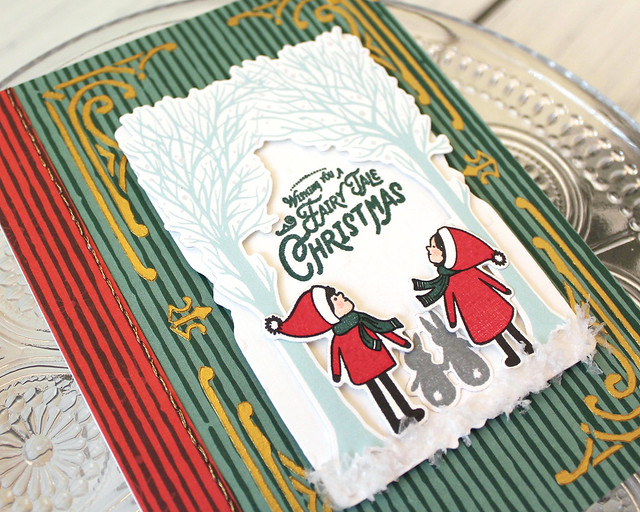
First up is a card I made with the kit.

LizzieJones_PapertreyInk_MakeItMarketKit_FairyTaleChristmasKit_FairyTaleChristmasCard

I began by stenciling the book cover details onto a piece of the patterned paper using the Fairy Tale Christmas stencils and the gold Nuvo mousse included in the trimmings kit. I knew I wanted to narrow the stenciled area, so I did half of the stenciling, waited until it dried, and then did the second half of the stenciling (omitting the ornament at the center).

LizzieJones_PapertreyInk_MakeItMarketKit_FairyTaleChristmasKit_FairyTaleChristmasCard2

Then, I stitched another strip of patterned paper to make the edge look like binding. I embellished two of the corners with Luxe Gold cardstock corners. I die cut the focal panel using the frame die and stamped the sentiment before impressing the cardstock with the snowy stencil from theFairy Tale Christmas stencil collection.

LizzieJones_PapertreyInk_MakeItMarketKit_FairyTaleChristmasKit_FairyTaleChristmasCard3

I die cut the pre-printed trees and adhered them to the sentiment panel. Then, I stamped and die cut the children and bunnies and added them too. I attached the focal panel to the front of the card using foam tape before embellishing it with the fake snow from the Trimmings kit. The storybook theme is so unique and charming for Christmas.

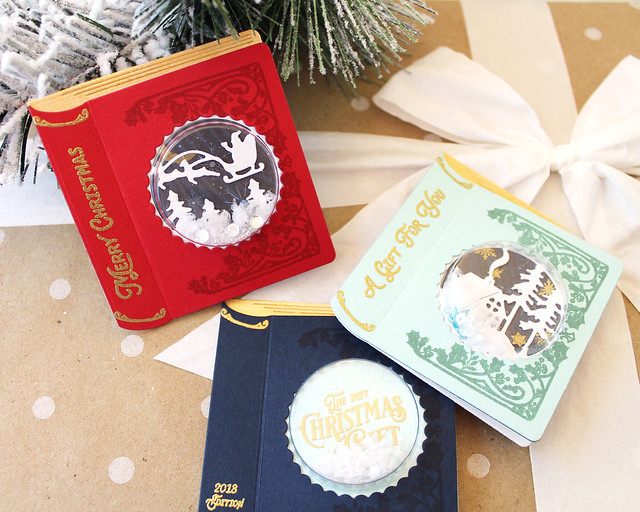
Next up, I have a set of shaker tags that I are so incredibly charming. That Betsy's a genius!

LizzieJones_PapertreyInk_MakeItMarketKit_FairyTaleChristmasKit_ShakerBookTags

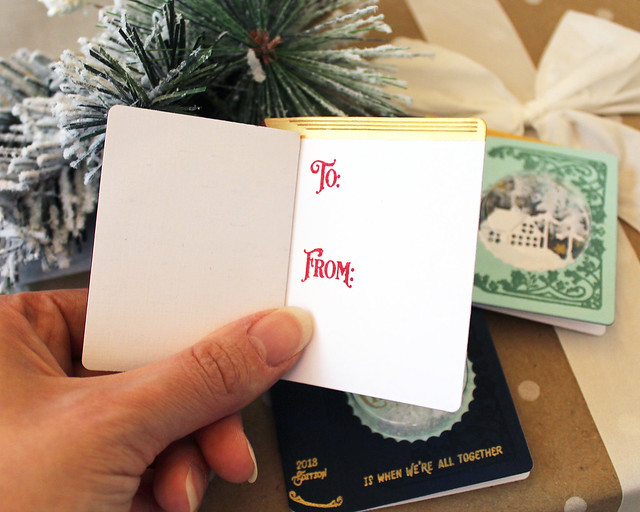
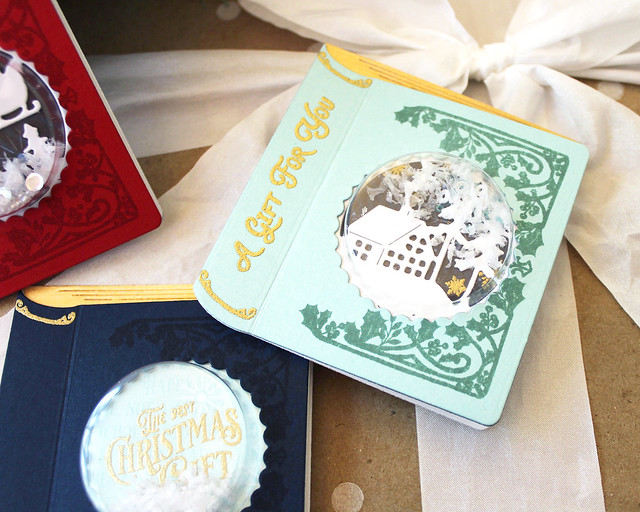
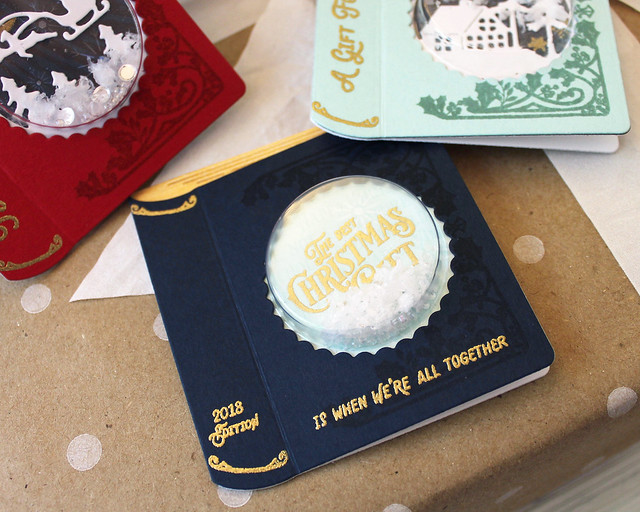
These are all constructed the same way, but I used different elements in the kits to make them come to life. I began by die cutting the "body" of the book from white cardstock. Then, I masked off the top edge (where the pages are) and painted the area with Nuvo mousse to make it look like the pages are gilded. I stamped the pages with "To:" and "From:" sentiments from the Fairy Tale Christmas stamp set and set them aside.

LizzieJones_PapertreyInk_MakeItMarketKit_FairyTaleChristmasKit_ShakerBookTags4

Next, I die cut the covers from cardstock and patterned paper (one of each for each tag). I stamped the covers with the holly design before die cutting the scalloped circle openings for the shaker bubbles. I heat embossed each cover with sentiments and design elements from the stamp set before adhering a bubble to the back side.

LizzieJones_PapertreyInk_MakeItMarketKit_FairyTaleChristmasKit_ShakerBookTags2

Then, I die cut scene dies for the Santa and Winter Night tags. Next, I heat embossed the scene details and sentiment on the patterned paper covers and filled the shaker bubbles. Betsy has included so many wonderful fillers in her trimmings kit! I mix and matched them to make each bubble just a little bit different. I adhered the scene die cuts into place and then adhered the cardstock covers and the patterned paper covers together. I adhered the covers to the book bodies to finish them off.

LizzieJones_PapertreyInk_MakeItMarketKit_FairyTaleChristmasKit_ShakerBookTags3

I decided not to add strings or ribbon to these tags. Rather, I'll just adhere them straight to my packages with double stick tape. Sean's whole family loves to read, so these will be absolutely fabulous for them (even beyond Christmas!).

My final project today is an ornament. Betsy has thought of everything to make special keepsakes like this one a snap!

LizzieJones_PapertreyInk_MakeItMarketKit_FairyTaleChristmasKit_WhiteChristmasBookOrnament

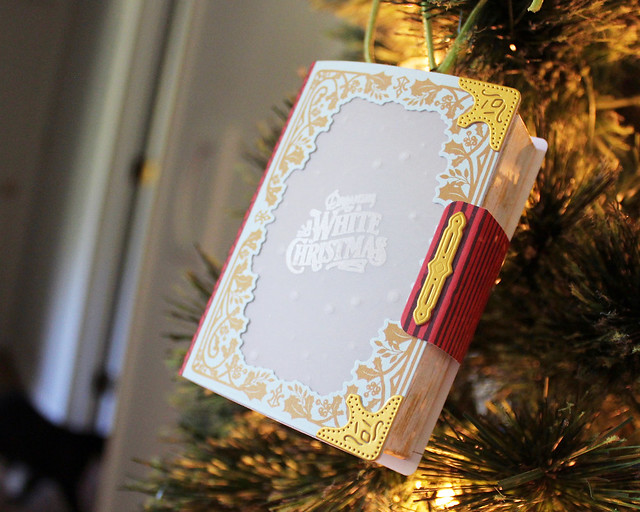
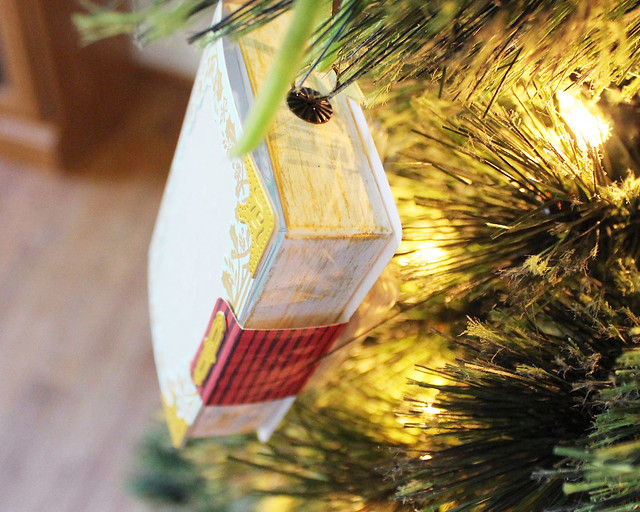
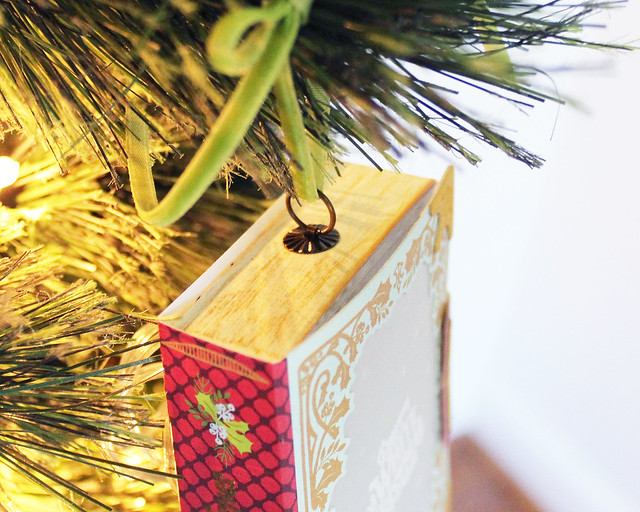
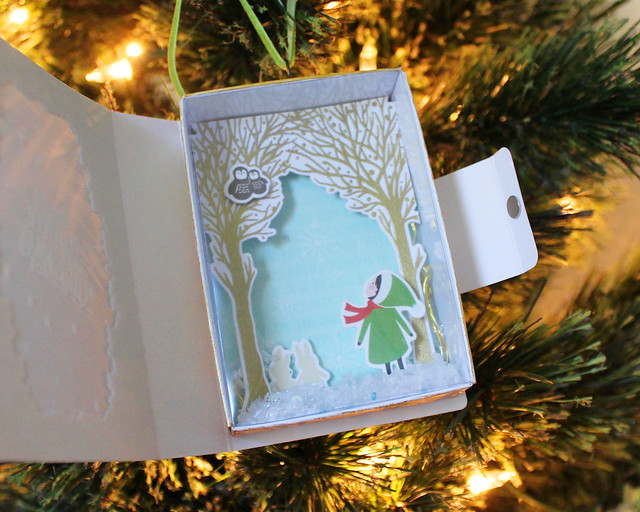
I wanted to make my ornament look and open like a book, but I also wanted it to be a shaker. So I got a little creative with my construction and made it work. I began by die cutting a matchbox from white cardstock. I dry brushed the edges with Nuvo mousse to give the impression of gilded pages.

LizzieJones_PapertreyInk_MakeItMarketKit_FairyTaleChristmasKit_WhiteChristmasBookOrnament4

Before I fully assembled the matchbox, I punched a hole and slipped one of the fasteners through, sealing it into the edge of the box. I used the green velvet ribbon from the Trimmings kit to create a hanger.

LizzieJones_PapertreyInk_MakeItMarketKit_FairyTaleChristmasKit_WhiteChristmasBookOrnament5

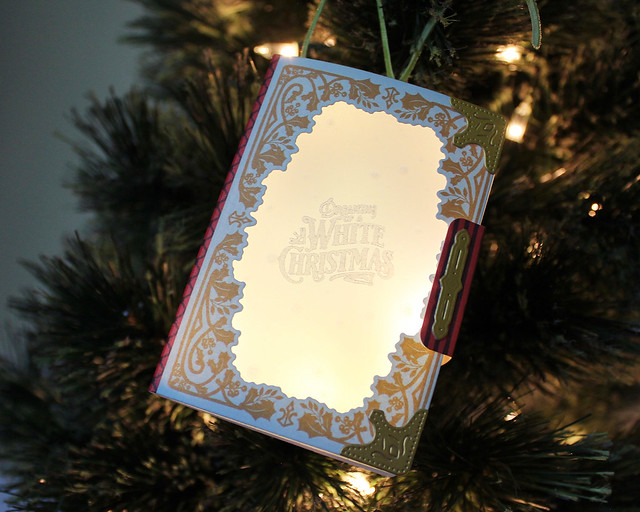
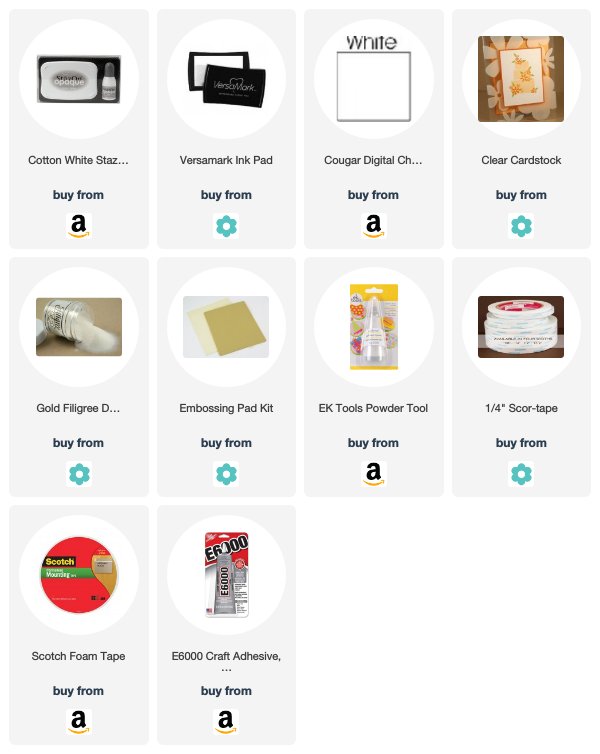
I die cut a pre-printed cover and used the inner frame to cut an opening. I stamped the sentiment on vellum using Cotton White Stazon and then textured it with the snowy stencil before adhering it to the back of the cover.

LizzieJones_PapertreyInk_MakeItMarketKit_FairyTaleChristmasKit_WhiteChristmasBookOrnament2

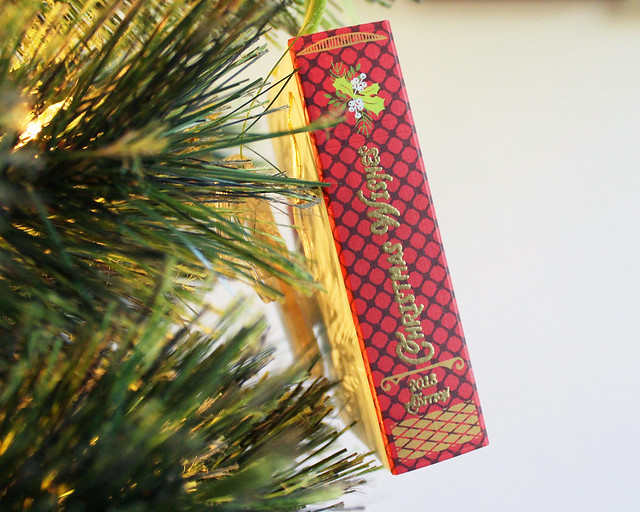
I heat embossed the sentiments from the Fairy Tale Christmas set onto the spine of the set and then adhered the cover to the matchbox.

LizzieJones_PapertreyInk_MakeItMarketKit_FairyTaleChristmasKit_WhiteChristmasBookOrnament3

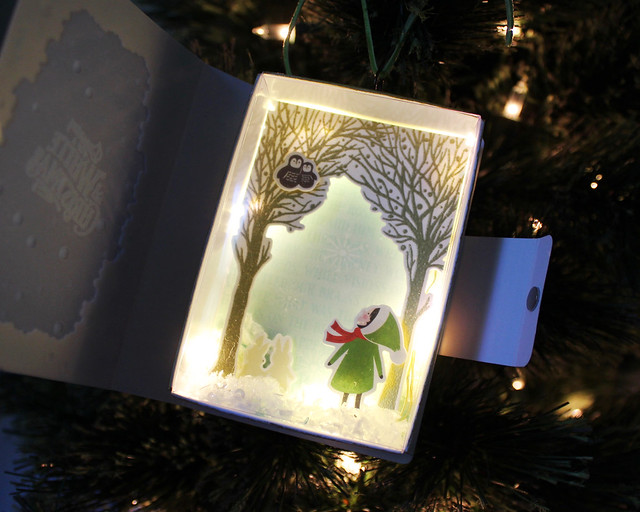
I cut a panel of patterned paper and adhered it inside the matchbox. Then, I used an anywhere hole punch to punch a hole for the string of fairy lights to fit through. I heat embossed the trees and used foam tape to adhere them to the back of the matchbox. That had the added benefit of securing and hiding the strand of fairy lights.

LizzieJones_PapertreyInk_MakeItMarketKit_FairyTaleChristmasKit_WhiteChristmasBookOrnament7

I die cut the little girl and the animals from the pre-printed papers and adhered them with foam tape to give layers of dimension. I filled the matchbox with faux snow and other fillers. Then, I die cut a second matchbox from clear cardstock to create a cover of sorts. I tucked it into the cardstock matchbox, sliding the edges behind the cardstock elements to secure it.

LizzieJones_PapertreyInk_MakeItMarketKit_FairyTaleChristmasKit_WhiteChristmasBookOrnament6

The book ornament still needed a latch, so I die cut the strap from patterned paper using the strap die. I cut the latch and corners from Luxe Gold cardstock and added those in place. Then, I used the magnets from the Trimmings kit to make the strap secure. I used E6000 to make sure that the magnets were fully fastened. I can't wait to decorate for Christmas so I can get this little lady hanging on a tree!

I hope you've enjoyed this first peek at the Make It Market Kit: Fairy Tale Christmas! I know you're absolutely going to love it! Make sure to check in with Betsy, Dawn, Kay, Kimberly, Laura, Laurie, Melissa, and Stephanie to see even more. You're definitely not going to be disappointed!

Supplies:
Fairy Tale Christmas Card


Shaker Book Tags


White Christmas Ornament