Saturday, March 11, 2017

Papertrey Ink Feature: Inflate & Celebrate and More Offbeat Birthday

Good morning, friends, and welcome back for Day 2 of the Papertrey Ink 10th Anniversary Countdown! Today I have the pleasure of introducing you to another of my sets debuting this month. This one is called Inflate & Celebrate and is a super fun mini set! The sentiments included in this set can be mixed and matched for Save-The-Date cards, invitations, birthday cards and so much more. The set even includes greetings that help you incorporate balloons in your designs. How cool is that?! It's one of those sets that's easier to understand when you see it in action, so let's get to a few projects.

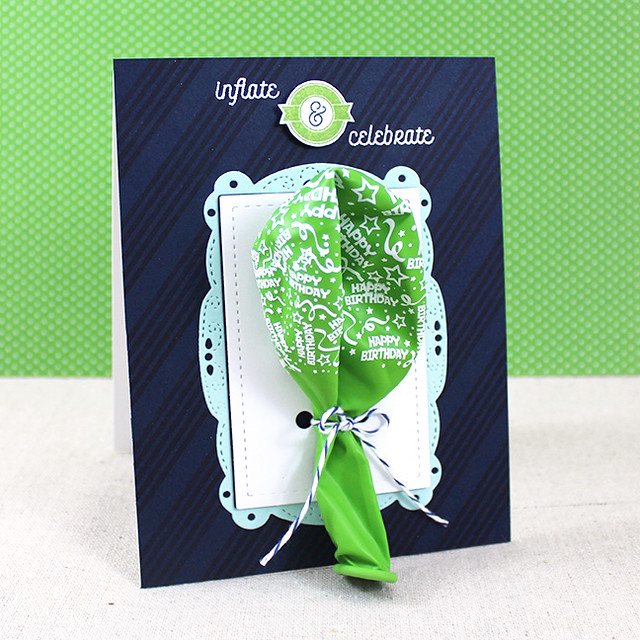
My first card today is a birthday card that pairs Inflate & Celebrate with the new Fun Frames Die.

Infalte & Celebrate Balloon Card

I began by stamping the striped background pattern onto Dark Indigo cardstock using the matching ink. I knew I wanted to heat emboss my sentiments onto the dark cardstock, so I completed this step first to give the stripes ample time to dry. Next, I die cut the large Fun Frames shape from both Aqua Mist and white cardstocks.

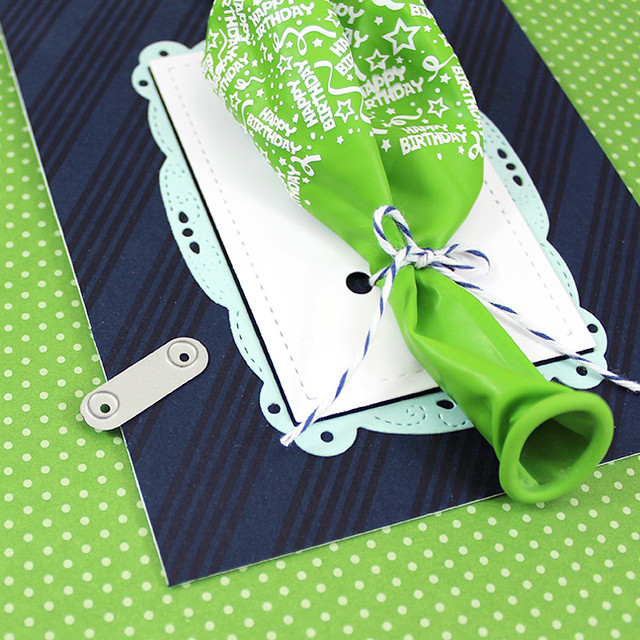
Inflate & Celebrate Balloon Holes Close Up

Then, I used the new All Tied Up die to add the double holes to the stitched center rectangle. This little die packs a big punch in a little package. It allows you to put two evenly-spaced holes anywhere on nearly any project. You can then tie all sorts of things to your cards and gift packages! It's incredibly handy and I can't wait to show you all of the possibilities!

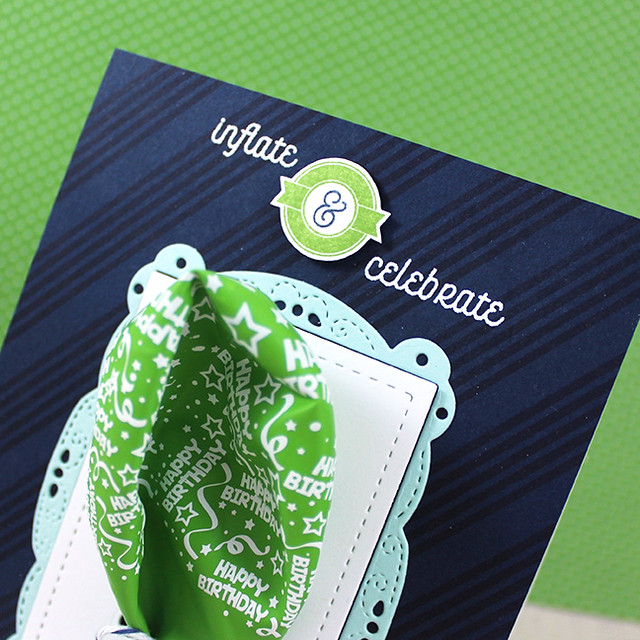
Inflate & Celebrate Close Up

Next, I stamped the small medallion and ampersand onto white cardstock and trimmed those out by hand. Then, I heat embossed the sentiments from Inflate & Celebrate onto the striped panel, placing the medallion between them. I used foam tape to give it a bit of dimension. Then, I adhered the  Aqua Mist frame to the striped card front. I added the rectangle next, making sure to thread the holes with baker's twine before I adhered it into place. I tied a pre-printed birthday balloon to the front of the card as my final step. Isn't it festive?!

Recipe:


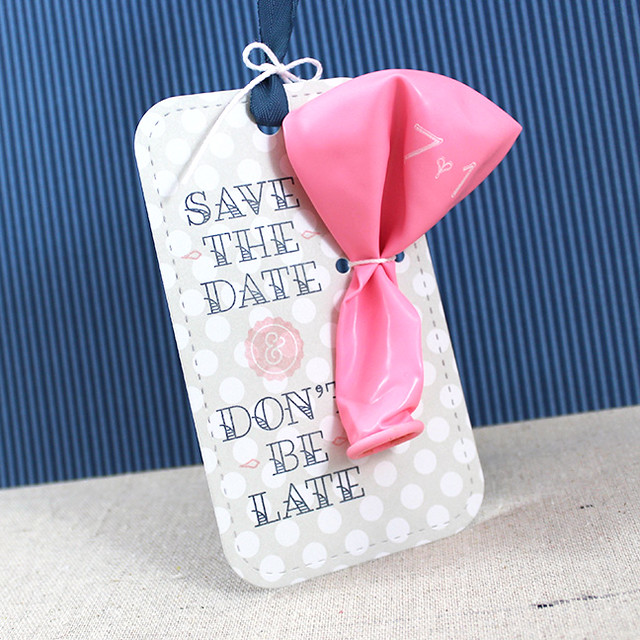
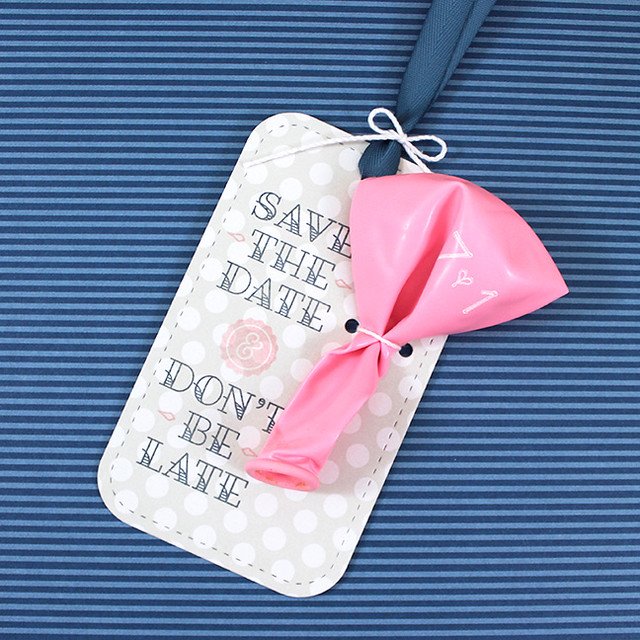
My second project today is a Save-The-Date tag made by using Inflate & Celebrate with the previously released Tasting Tag Die.

Save The Date Balloon Tag

I began by die cutting the tag from Soft Stone patterned paper. Then, I stamped the sentiments from the set using Dark Indigo ink. I added the ampersand and the small decorative images with Pale Peony.

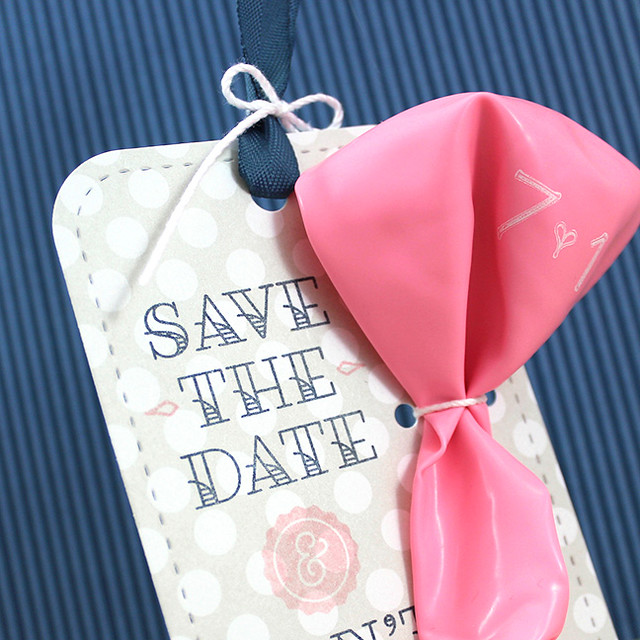
Save The Date Balloon Tag Close Up

Next, I used a length of Enchanted Evening twill ribbon and a bit of white crochet thread to embellish the top hole on the tag.

Stamped Balloon Close Up

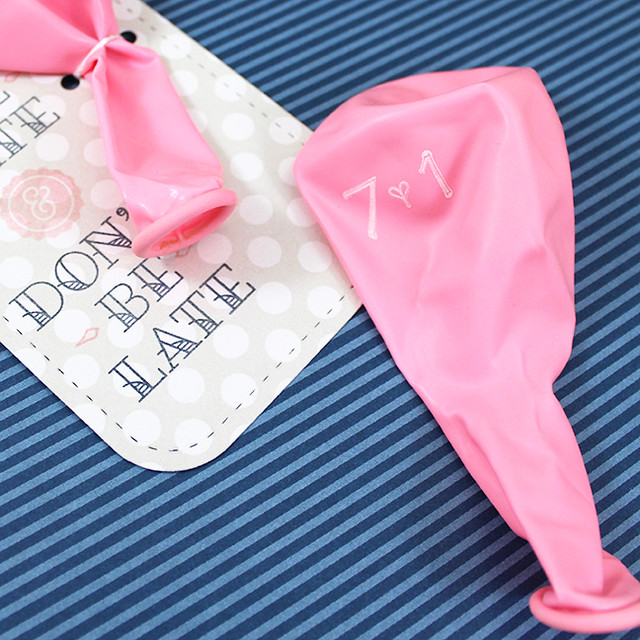
Of course, with a Save-The-Date you have to give people an actual date to save, so I stamped the date on a balloon using opaque white solvent ink. Keep in mind that when using white ink the sentiment will be more difficult to see on a lightly colored balloon. If you want to use a lighter balloon I would suggest using a darker ink color.

Save The Date Balloon Tag Flat

Once the balloon had dried (it only took a few moments) I tied it to the tag with more crochet thread. This would be such a fabulous way to announce an event! If you needed enough of them, you could even get the balloons custom printed. It's such a personalized touch.

Recipe:

My next project is an invitation to an anniversary dinner. I love making special events feel even more significant by marking them with personalized notes and invitations. This set makes those sorts of items even easier.

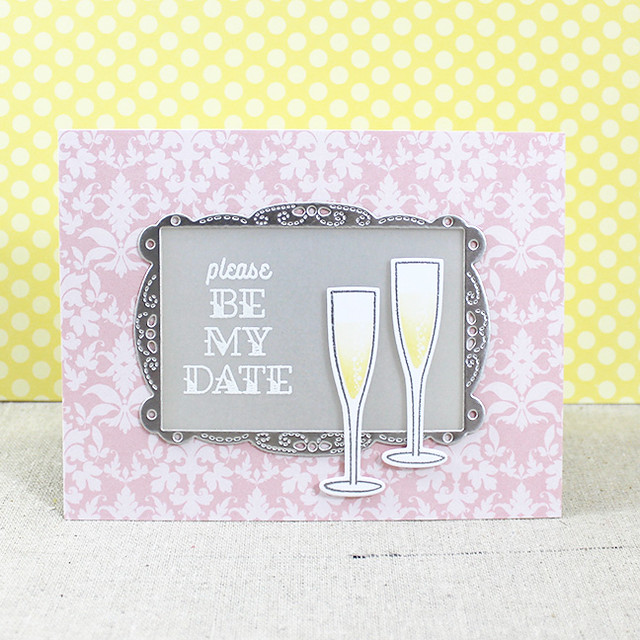
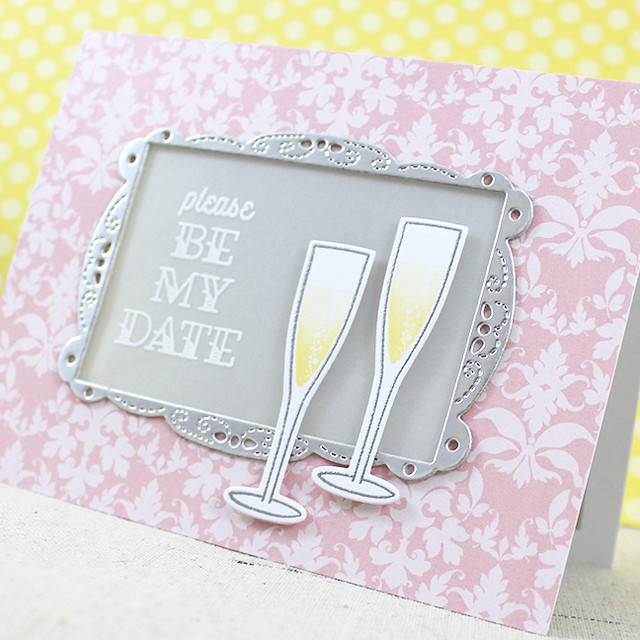
Framed Be My Date Card

I began by heat embossing the sentiment onto vellum using white powder. Then, I cut a window into a card base and a patterned card front. I adhered all three pieces together, sandwiching the vellum between the other two layers.

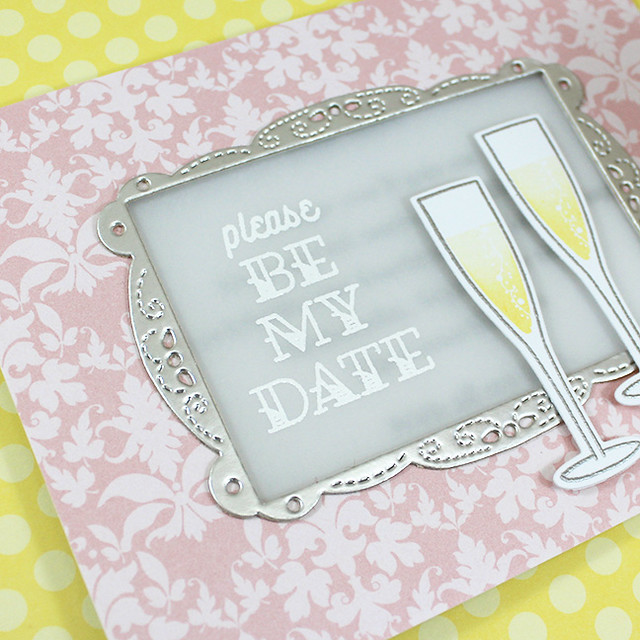
Be My Date Sentiment Close Up

Next, I adhered some of the Luxe Silver Adhesive Paper to one of the coasters and die cut it using the Fun Frames Die. I had to run the die cutting sandwich through the machine a few times to make sure everything cut properly, but after a couple of passes it cut nicely. The coaster gives the frame a nice depth and the silver paper makes it feel very elegant. I adhered the frame to the card front around the window I had previously cut.

Be My Date Glasses Close Up

I added two champagne flutes that I'd stamped using Propose A Toast. The glasses themselves were heat embossed with silver powder and the champagne was inked with Lemon Tart and Harvest Gold inks.

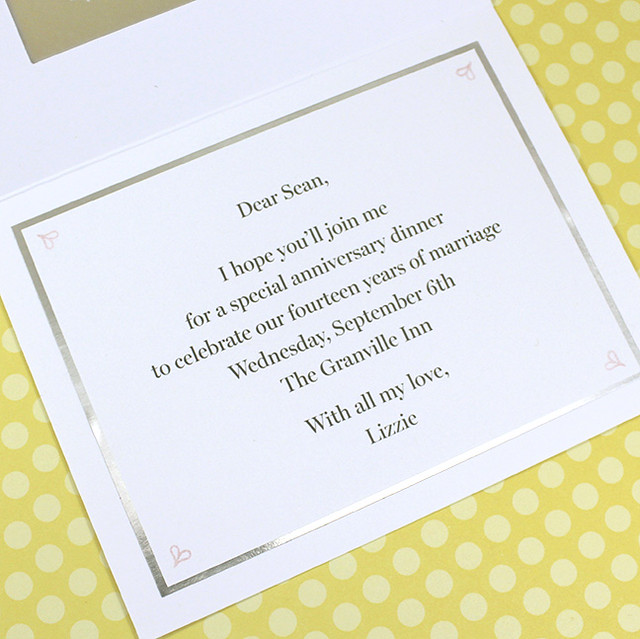
Be My Date Interior

On the inside of the card I layered my computer-generated invitation with more Luxe Silver Adhesive Paper and embellished the corners with stamped images from Inflate & Celebrate. These tiny images are perfect for adding just a hint of decoration and an additional pop of color.

Recipe:


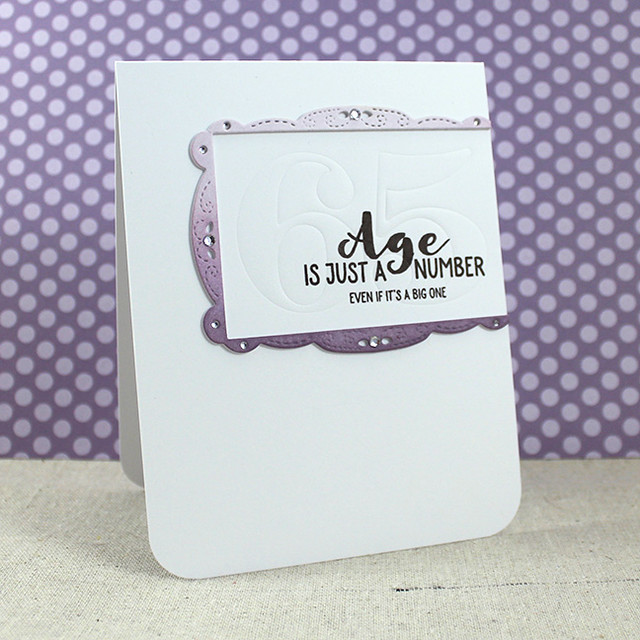
The next two cards feature Offbeat Birthday and use the same basic concept, but I made one in a more feminine style and one with a more masculine twist. Let's start with the more ladylike version.

Feminine Just A Number Card

I began by sponging a piece of white cardstock with Lilac Grace and Winter Wisteria inks. I die cut that panel with the large Fun Frames die and layered it with two additional die cuts for depth. I trimmed off one edge and set it aside. Then, I stamped one of the sassy sentiments from Offbeat Birthday onto a white card base using Smokey Shadow inks.

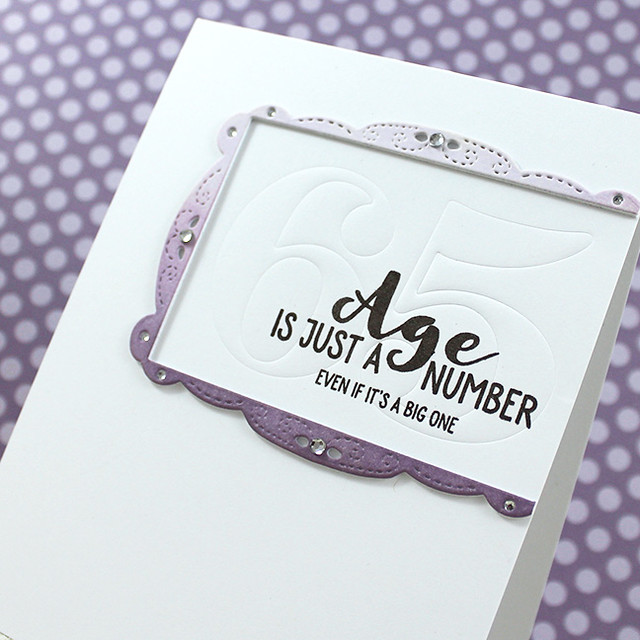
Feminine Just A Number Close Up

Next, I used the By The Numbers Die Collection to dry emboss the numbers into the card front. These numbers are intended to represent the birthday girl's age and can easily be customized. Note: I do not think 65 is old. I just needed an age to express the idea. If I were 65 I know I'd be razzing my friends about being old, so that's what I went with. Again...I do not think 65 is old. Please don't send me hate mail. I then adhered the frame to the card front and embellished with rhinestones. I love how it sparkles!

Recipe:


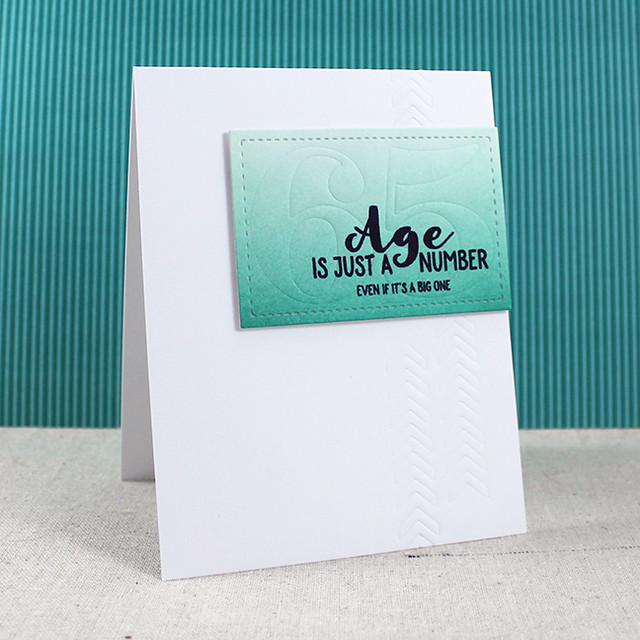
The masculine version is done in much the same way. I used the Multiply Die to add textured arrows to the card base and used the stitched panel from the Fun Frames Die for the age instead of the frame itself.

Masculine Just A Number Card

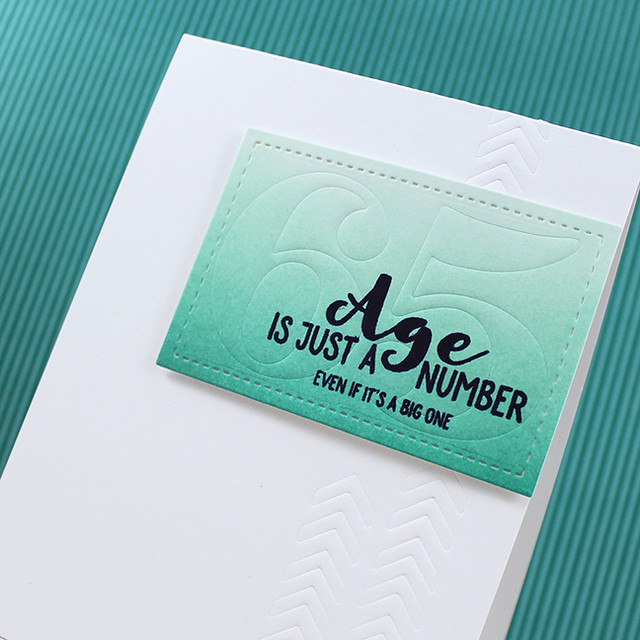
I blended Tropical Teal and Aqua Mist inks together on the panel and stamped the sentiment in True Black before impressing the numbers.

Masculine Just A Number Close Up

A tip: I didn't need both embossing mats to get the numbers to impress well. In fact, both mats made the sandwich too tight. I ended up just using the tan mat. Since every die cut machine is different you may want to experiment a bit to find the sandwich that works best in your machine.

Recipe:


And lastly today I have another Offbeat Birthday card. I have to admit, I was very proud of myself when I came up with this design. It makes me chuckle, like, a lot.

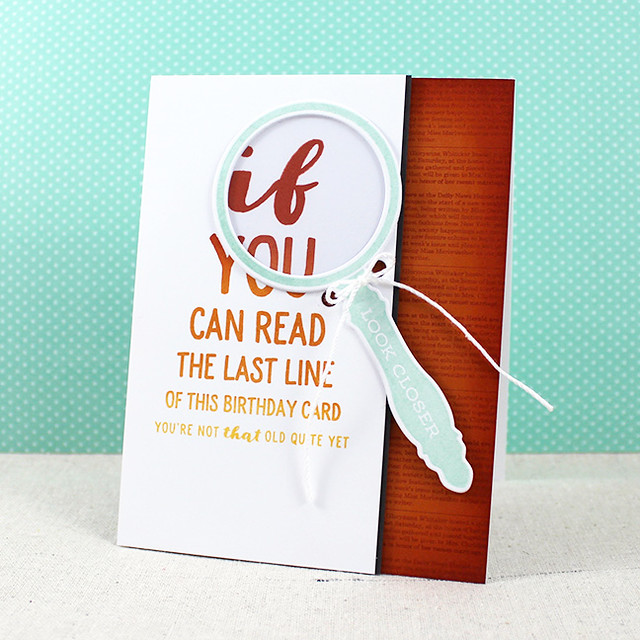
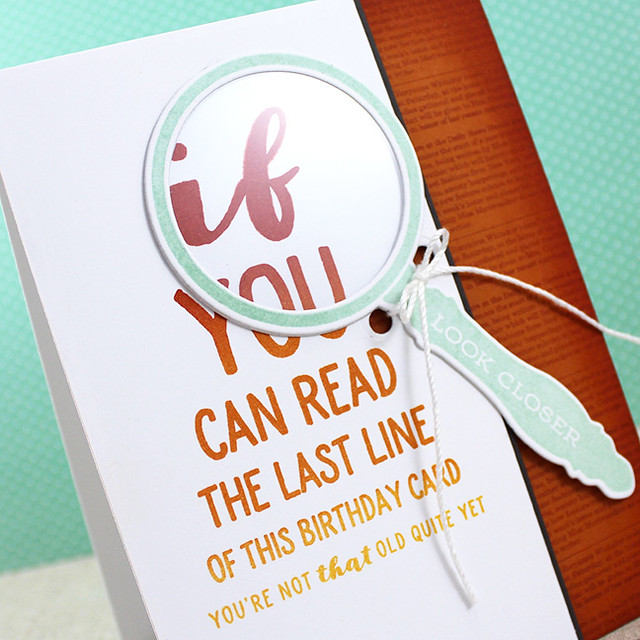
Magnified Birthday Card

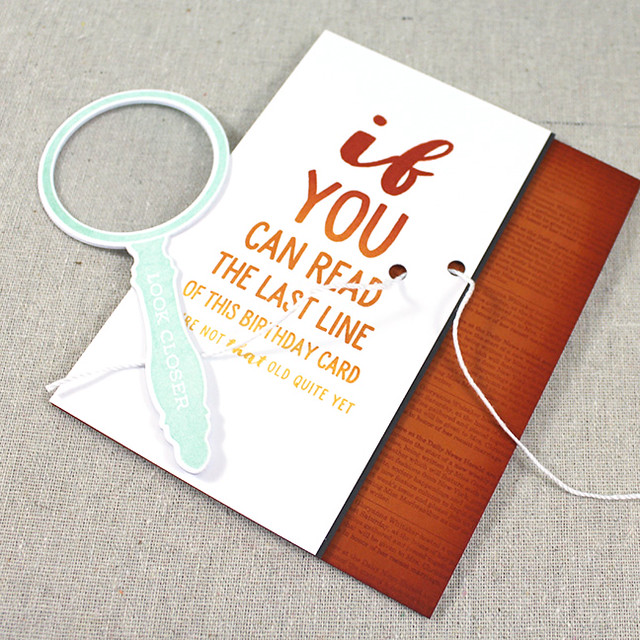
I began by stamping the large sentiment from Offbeat Birthday using Summer Sunrise, Canyon Clay, and Terra Cotta Tile inks. I blended them together on the stamp with sponges to get the ombré effect. Next, I used the All Tied Up die to add holes to that panel and set it aside.

Magnified Birthday Card Flat

Next, I stamped Background Basics: Newsprint on a Canyon Clay card front using Terra Cotta Tile ink. I also blended a bit of Terra Cotta Tile around the edges to give that panel some depth. I adhered that to a white card base. Then I attached a thin mat of Smokey Shadow to the edge of the sentiment panel. I threaded the holes with crochet thread and adhered that panel to the card front with foam tape.

Magnified Birthday Close Up

Then I created the magnifying glass. I die cut and stamped the magnifying glass from Secret Agent using Aqua Mist ink on white cardstock. I cut a lens from clear cardstock and sandwiched it between the stamped magnifying glass and an extra die cut. I tied that to the card front so that the lens would be positioned over the text. This is the sort of card I would give to my mom. A woman who, despite the fact that she can't read a hymnal if it's sitting on the pew in front of her, "doesn't need glasses." Uh-huh.

Recipe:


Thank you so much for joining me today, folks! I truly hope you've enjoyed the cards I've shared today. I'll see you back here again tomorrow with more of this month's release. In the meantime, make sure to check in with Nichole, Betsy, Heather, Kay, Keeway, and Lexi for more projects. See you soon!

Friday, March 10, 2017

Introducing Offbeat Birthday

Well, friends, it has finally arrived. After much anxious waiting (on our part as well, I assure you) the Papertrey Ink 10th Anniversary Countdown has begun! I'm kicking things off today by introducing you to one of the sets I'm excited to debut this month. This one is a birthday set packed with sentiments ranging from sweet to slightly snarky with a little twist of humor (imagine a smirk and you're in the right ballpark). I wanted to design a sentiment set that would work in those instances when a sentimental greeting just doesn't seem to fit. You know what I mean...coworkers, brothers, friends who have seen you at your least glamorous, teenagers, the list goes on. Offbeat Birthday is a set I know I've wanted for awhile and I hope it fills a need for you too. How about we take a peek, eh?

I wanted to start with something masculine since I know that can be a challenging category for so many of us. I paired Offbeat Birthday with Wishes Come True and the Frosted Borders Die for today's card.

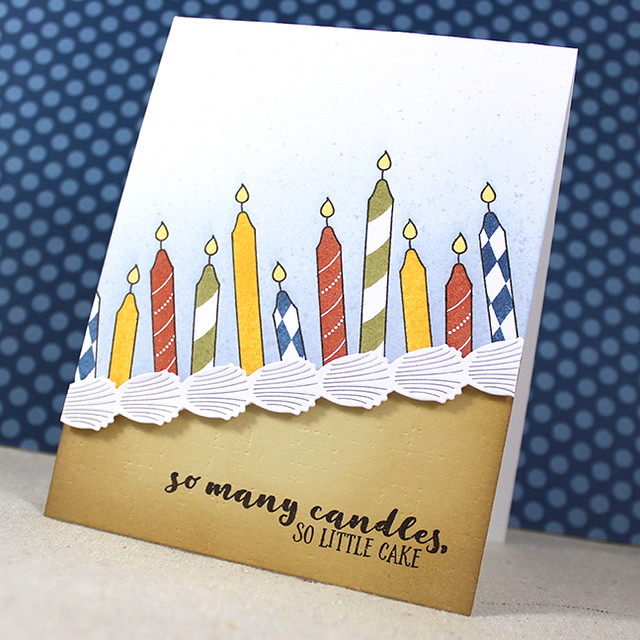
So Many Candles Card

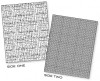
I began by sponging a piece of Fine Linen cardstock with Classic Kraft ink to make it look a bit like baked sponge cake. I stamped the sentiment from Offbeat Birthday using Smokey Shadow and then used the Linen & Canvas Impression Plate to add crumby texture. Then, I stamped the outlined candle from Wishes Come True along an angled line on a white card base. I used the patterned candles to fill in the outlines using Terra Cotta Tile, Summer Sunrise, Prairie Grass, and Enchanted Evening inks.

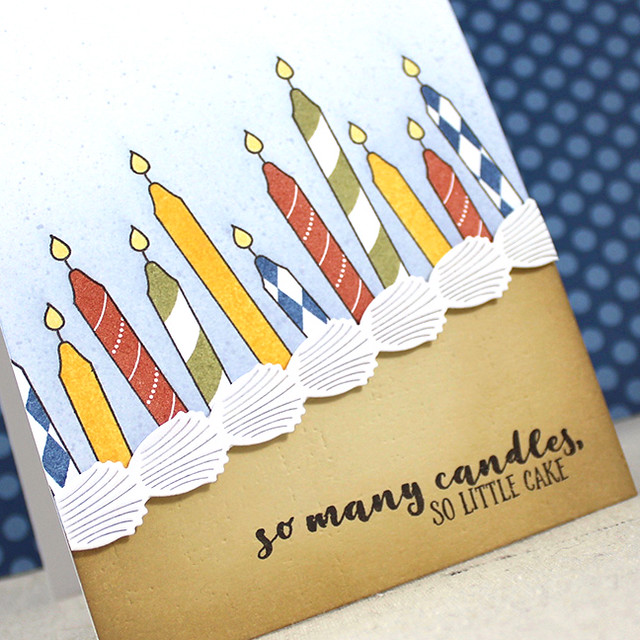
So Many Candles Close Up

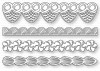
I used full-adhesive Post It notes to mask off the candles and flames so I could sponge Spring Rain ink onto the card base. It was a little tedious trimming out all of those candles, but I really like that I was able to keep the card a single layer. I also splattered some Spring Rain reinker onto the card base for a little texture. After removing the masks, I adhered the sentiment panel along the bottom edge of the card and added a Frosted Border with foam tape. I love that it looks like a close-up of someone's birthday cake. I also get quite a kick out of that cheeky sentiment!

Well, that's all for me today. I'll have plenty to share with you over the next several days though, so be sure to check back. And you'll definitely want to visit Nichole, Betsy, Dawn, Heather, Kay, and Stephanie for more of this month's release. See you tomorrow!

Recipe:
New products will be available in the Papertrey Ink store on 3/15 at 10 pm ET (may include affiliate links)

So Many Candles Card

Monday, March 6, 2017

Make It Monday

Good morning, all! I just wanted to pop in and mention that I have a Make It Monday over on Nichole's blog today.

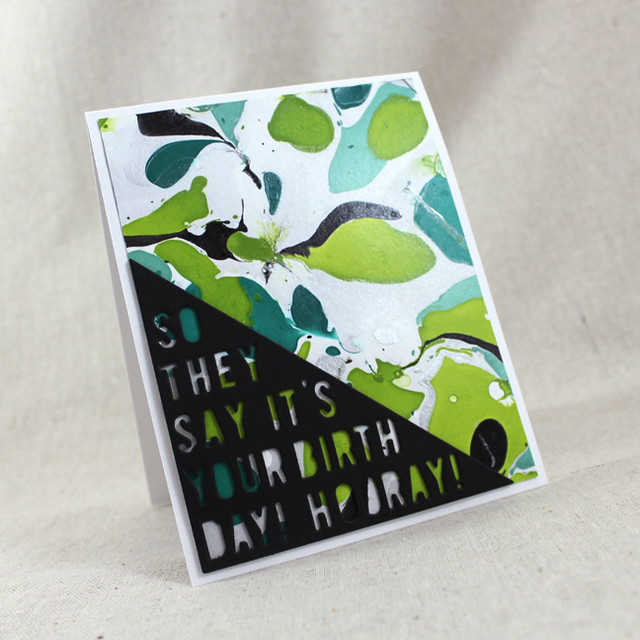
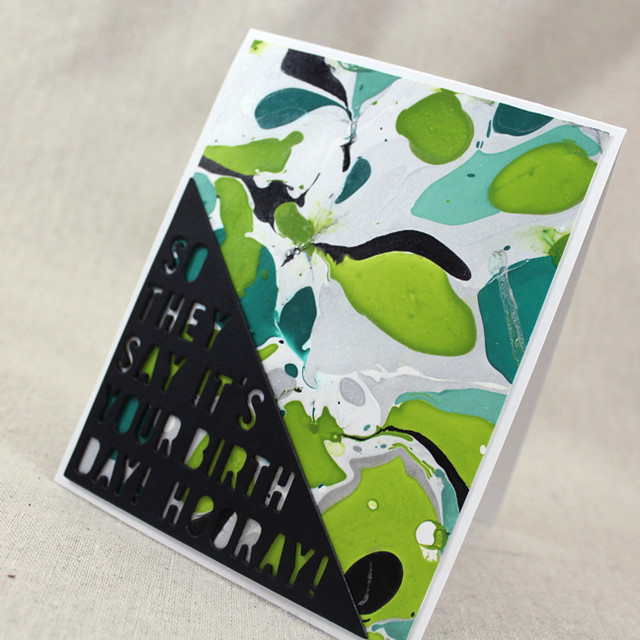
Marbled Birthday Card

It's a Nail Polish Marbling technique and it's so much fun! You get different results each time, so every panel is unique. I thought it might be helpful to share some tips that I shared in the video and some that I thought of after the fact, so I'm including those here.

Marbled Birthday 2

Nail Polish Marbling Tips:
1. You don't need anything fancy or special (though you can use what you happen to have on hand, you're really not using that much). I bought a variety of inexpensive polishes from my grocery store. You may be able to find something at a discount store or drug store that would work just as well.

2. I don't wear nail polish, so I wore latex gloves to do this technique. Not wearing nail polish means I don't have nail polish remover either, so this just seemed like the easiest way to stay clean.

3. Just use the skewer or toothpick for short, quick swirls. The nail polish sets up too quickly to do much more than that. You'll end up with a blobby mess on the end of the skewer. Ask me how I know.

4. I tried with both watercolor paper and regular cardstock. I had better luck with the regular cardstock because it was smoother. If you happen to have smooth watercolor paper on hand you could try it to see how well it works.

5. You want to put your paper into the water at a slight angle to avoid bubbles. If you get air bubbles between the polish and your paper it will dry in a skin and then flake off when you touch it.

6. You can clean out your water with a scrap of cardstock between panels. The scrap will attract most of what is left over in the water.

7. Make sure your water is free of all polish before discarding it. I tossed my water outside just to be sure I didn't end up with polish in my pipes or sink.

8. These panels need to dry a very long time. Dry the panels on wax paper to keep them from sticking to your drying surface. I let them dry for several hours before pressing them under a weight overnight to flatten them a bit.

9. I also pressed my panels between wax paper to make sure the nail polish didn't stick to anything. I don't know that it would have, but I wanted to be safe.

10. If there are parts of your panel that you don't love, simply die cut or trim around them. Or use embellishments to hide the unsightly bits.

11. Use nice, strong adhesive for your marbled panels. I suggest Scor-tape or something similar.

12. Make sure you're doing this technique in a well-ventilated area. Nail polish smells.

13. The tub that you use for this technique will get residue along the edges and in the bottom. Make sure you're using something that is either disposable or won't be reused for food.

I hope those tips help! I also hope you play along with this month's challenge. Just link up your project over on Nichole's blog for your chance to win a gift certificate to the Papertrey Ink store. Have a great week!

Supplies:
Black Créme Nail Polish - Wet N Wild; Be More Pacific Nail Polish (dark teal) - Wet N Wild; Mighty Mint Nail Polish - Sally Hansen; Pumping Iron Nail Polish - Sally Hansen; Limestone Nail Polish - Sally Hansen; Xyron

Sunday, March 5, 2017

Papertrey Ink Stitching Focus: March 2017

Lizzie Intro Photo

Good morning, everyone! Welcome to the new Stitching Focus feature! When Nichole asked me about taking on this new position, I was thrilled at the possibilities. I’ve always loved stitching projects. For me, building a unique accessory or piece of decor is like solving a puzzle. How can I make the item I want from what I happen to have available? It’s a challenge and one that I truly enjoy. My goal with these guest blogger posts is to introduce you to the hidden possibilities in our line of high-quality stitching dies. There is a whole world of promise at your fingertips and I want to help you find it.

Not only that, but I want to reintroduce you to older favorites that you may have forgotten or even missed entirely. We have so many wonderful products coming out each month that it’s easy to overlook all of the clever, thoughtful, and extraordinary details incorporated into every item. It’s also sometimes difficult to fit all of those special details in with everything else that we want to share. So I hope to be able to remind you of the brilliant tips and tricks the Design Team and many of you have shared using the fabulous stitching dies.
So to kick things off I thought I'd revisit the Stitched Coasters Die:

Stitched Coasters Die Graphic

Don't let the name deceive you - there is so much more to these dies than coasters! Just look at this die as a basic canvas. What could you do with a large square shape? I can think of about a dozen different ideas! I've created one such project, but first let's take a peek at some of the projects this die has been part of in the past.

Something Old Title

Stitched Coaster Round Up
  

1. Erin paired the Stitched Coasters Die with the Stitched Coaster Square Flair Die and Stitched Medallion 1 Die to add felt polka dots to her stitched frame. It's a great way to add color without much bulk!
2. On this coaster, Erin used the Stitched Coaster Square Flair Die to add an embroidered frame around her inlaid monogram. The Sew Stylish Alphabet 1 is a great size for personalizing all sorts of projects.
3. Laurie used the Stitched Coaster Square Flair Die to add a frame around her coaster, selectively choosing which holes to embroider. The result is clean and masculine.
4. Maile used the Stitched Coaster Die all by itself to create this nested square design. She kept things minimal and sleek for a coaster that's highly functional, but still full of style.
5. Erin created this set of rainbow coasters by pairing the Stitched Coaster Die with the Square Flair Die. The bright colors really pop against her choice of a Smokey Shadow backdrop.
6. The Cross Stitch Alphabet is another fantastic choice for personalization! Here Erin created a simple frame using the Stitched Coaster die and one of the inlaid squares. The tiny floral embellishments she added using the Sewing Staples: Floral Cluster Die are such a delicate, feminine touch!

Now that you've seen what the Stitched Coaster Die has done in the past, how about a brand new project?

Something New Title

I used the Stitched Coaster Die to create a travel Tic Tac Toe set! This will be wonderful for my niece and nephew on long trips in the car!

Lizzie Jones Tic Tac Toe Set

I created the grid by first drawing the lines onto Vintage Cream felt with a disappearing ink pen. Then I just finished each line with three long stitches. I simply used the intersections of the lines as a guide for where to stitch.

Lizzie Jones Game Board 1

I backed my game board with an Aqua Mist layer for a bit of contrast. And I sewed a piece of white chipboard between the layers of felt to give the board a little extra stability.

Lizzie Jones Tic Tac Toe Game Pieces
  
The Xs and Os are two layers of felt stitched together. I used the Sew Stylish Alphabet 1 to make assembling these a snap. The Xs are True Black and the Os are nice and bright in Pure Poppy.

Lizzie Jones Xs & Os Pouch
  
The game pieces can be safely tucked away in their Coin Purse Die pouch between rounds. I decorated the outside of the pouch with extra Sew Stylish Alphabet letters and Small Stitched Alphabet characters.

Lizzie Jones Game Board 2
  
I can see the kiddos getting a lot of joy out of this cute little set! And like I said before, the Stitched Coasters dies are such a wonderful basic shape that you are limited only by your imagination! What other ingenious ideas come to mind?

I hope you've enjoyed today's post and are looking forward to more Stitching Focus features coming your way! Thank you so much for joining me! Have a great week!

Travel Tic Tac Toe Set Supplies:
(thumbnail links below may include affiliate links)

Monday, February 20, 2017

Celebrating The Past, Present, and Future: 2016


Good morning! We've reached the last day of the Papertrey Ink 10th Anniversary stroll down memory lane. A group of us are revisiting our favorite sets from 2016 today and I've chosen to work with Just Desserts.


Just Desserts may be my very favorite of the sets I've designed so far. I mean, what's not to love about birthdays, cake, and sprinkles? This set is so much fun to use and it's versatile enough to make cards for just about anyone!

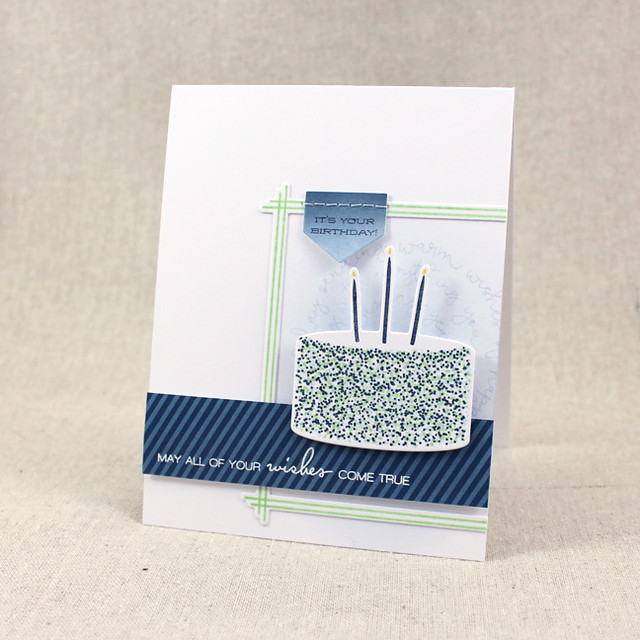
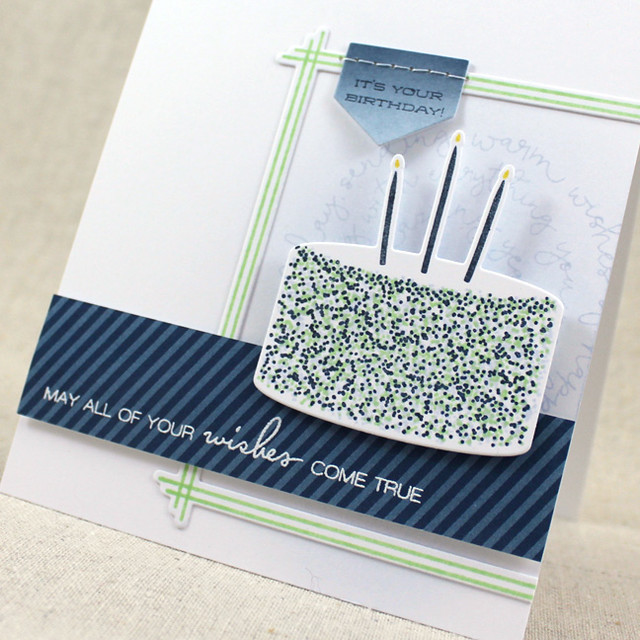
10th Anniversary - Birthday Cake Wishes Card

I knew I wanted to make a more masculine card today, so I began by die cutting the sprinkle cake shape and stamping the different sprinkle layers with Spring Rain, Vintage Jadeite, and Dark Indigo inks. I added the candles using Dark Indigo and Bright Buttercup inks. Next, I sponged a bit of Spring Rain ink onto a white card base before stamping the Script Swirls: Birthday sentiment in the same ink.

10th Anniversary - Birthday Cake Wishes Close Up

Then I die cut the frame from Fill In The Blank and stamped it with the coordinating lines in Vintage Jadeite ink. I adhered it to the card base and then stitched on a Monthly Moments: Tabbed shape that I'd sponged with Deep Indigo ink and stamped with a sentiment from the Clipsters set. I added an Enchanted Evening patterned paper strip that I'd heat embossed with a sentiment from the Just Desserts Sentiments mini set before mounting my cake with foam tape.

Here are a few past projects using Just Desserts:

Click here to see the original blog post

This trio of simple cards uses a handful of rhinestones to add interest. These came together quickly and would make a cute gift set.

Click here to see the original blog post


Click here to see the original blog post

This masculine card and tag set uses Hooray and the Picnic Plaid Impression Plate to add festive streamers and texture.

Now that I have showcased how this product from the past has remained a classic, it's your turn to share your ideas for the future! Stop by Nichole's blog to share a new project you make with this product, or just share a creation that is somehow inspired by what I made today. Get crafting and enter today so you can be eligible for a fantastic prize!

Thank you so much for joining me today! Make sure to check in with Betsy Veldman, Keeway Tsao, Melissa Phillips, and Michelle Leone to see which 2016 sets they're revisiting today! See you soon!
Recipe:
Stamps: Just Desserts, Fill In The Blank, Just Desserts Sentiments, Script Swirls: Birthday - Papertrey Ink
Cardstock: Enchanted Evening Patterned Paper - Papertrey Ink; white
Ink: Spring Rain, Vintage Jadeite, Dark Indigo, Bright Buttercup - Papertrey Ink; VersaMark - Tsukineko
Other: Noted: Just Desserts Die, Monthly Moments: Tabbed Die, Fill In The Blank Die - Papertrey Ink; White Embossing Powder - Filigree; Foam Tape - Scotch; White Thread