Saturday, May 14, 2016

NEW! Make It Market Mini Kit: Sunshine & Rainbows

Good morning, friends, and welcome back to today's Papertrey Ink countdown group post! Today we're showcasing Betsy Veldman's new Make It Market Mini Kit: Sunshine & Rainbows. Rainbows are one of the most cheerful parts of life. I don't know anyone who can frown while in the presence of a rainbow. It's simply unheard of!

Sunshine & Rainbows Cards

And just like real-life rainbows, this kit is sure to bring a great, big smile to your face. I paired the stamps and stencils with old and new products alike today to show you just how much you can do with this delightful new kit. Let's get to the projects!

My first card uses the kit with Erin Lincoln's new Colorful Words set.

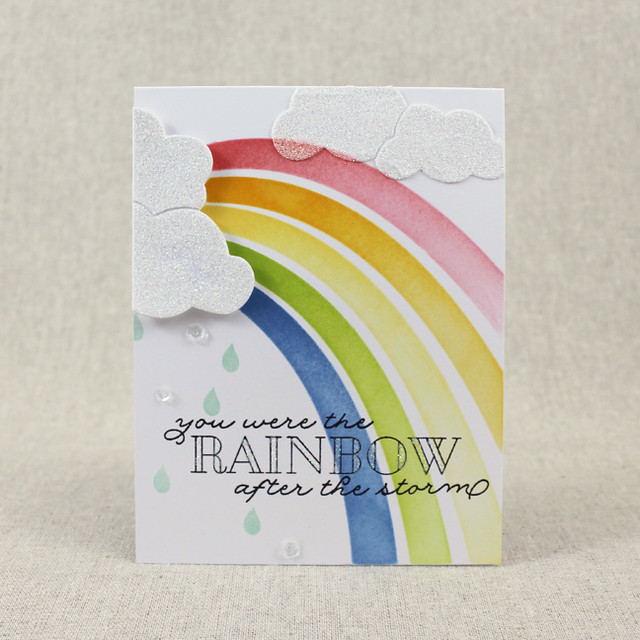
Rainbow After The Storm Card

I began by sponging the rainbow using Berry Sorbet, Summer Sunrise, Harvest Gold, Green Parakeet, and Blueberry Sky inks. The stencils Betsy has designed make this so easy! She's split the rainbow stripes into two parts which makes it a snap to add color only in the areas you want it. Next, I stamped the sentiment from Colorful Words. I filled the open areas of the sentiment with a glue pen and embellished with glitter.

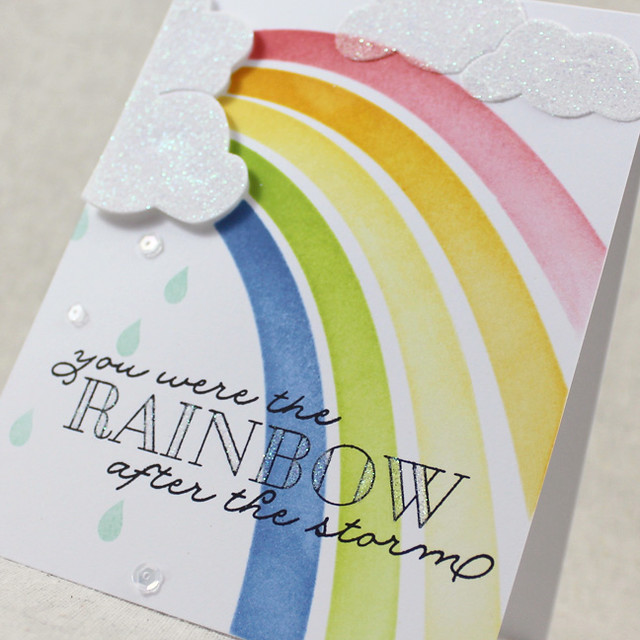
Rainbow After The Storm Close Up

Then, I used the stencils to apply embossing paste to the clouds. I love the texture it added! One set of clouds was added directly to the card front, the other set I applied to a piece of scrap paper, and both were sprinkled with glitter. Once the clouds on the scrap paper were dry, I trimmed them out and attached them to the card front with foam tape. I finished off the card by stamping a handful of raindrops and adding a few iridescent sequins, both from the mini kit.

Next up, I have a softer rainbow that I paired with a sentiment from an older favorite set.

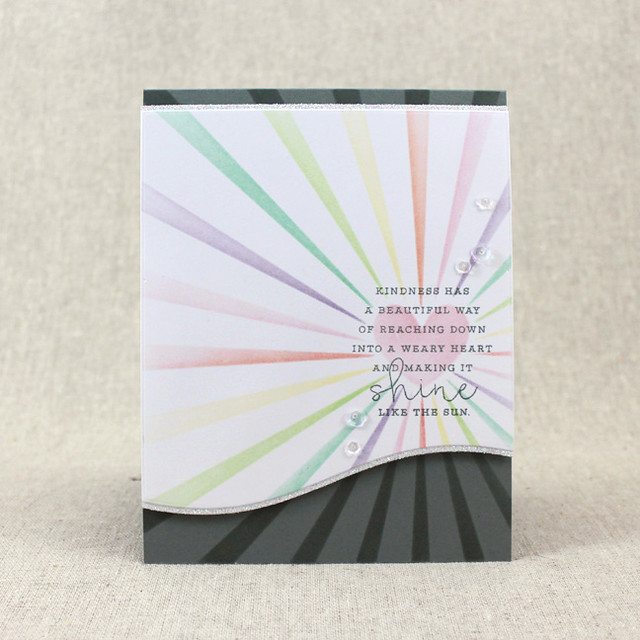
Shine Like The Sun Card

I began by creating the heart burst panel. I did a good bit of masking to be able to sponge all of the different colors, but I think the end result is worth it. You could always get a similar look with colored pencils though if you wanted to avoid the masking (markers bled a bit though, so I wouldn't necessarily recommend those). I die cut that panel with the Sentiment Splits: Curve Vertical Die and added the sentiment from Choose Joy. Isn't that just perfect?!

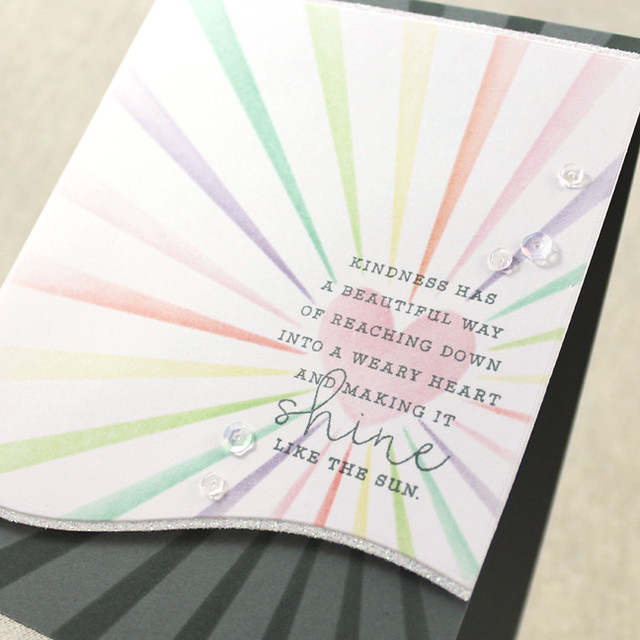
Shine Like The Sun Close Up

I added super thin mats of white adhesive paper behind the top and bottom edges of the heart panel and applied glitter to the sticky edges. It's a nice, subtle touch. Next, I sponged the same heart burst design on a Stormy Sea card base using the matching ink. I mounted the heart burst panel to the card base with foam tape and added a sprinkling of sequins from the kit.

Thank you so much for joining me today! Make sure to visit Nichole, Amy, Ashley, Betsy, Danielle, Dawn, Heather, Kay, Laurie, and Melissa for more of this wonderful new kit. Erin and Maile are also sharing more of their new designs, so make sure to visit them, too! I'll see you again tomorrow for the wrap up for this month's release.

Recipes:
Rainbow After The Storm Card
Stamps: Sunshine & Rainbows Mini, Colorful Words - Papertrey Ink
Cardstock: white
Ink: Berry Sorbet, Summer Sunrise, Harvest Gold, Green Parakeet, Blueberry Sky, Aqua Mist - Papertrey Ink; Onyx Black - VersaFine
Other: Sunshine & Rainbows Stencils, Sunshine & Rainbows Sequins - Papertrey Ink; Embossing Paste - Wendy Vecchi; Sugar Cube Glitter - Martha Stewart Crafts; Foam Tape - Scotch

Shine Like The Sun Card
Stamps: Choose Joy - Papertrey Ink
Cardstock: Stormy Sea, Adhesive Sheets - Papertrey Ink; white
Ink: Lemon Tart, Melon Berry, Sweet Blush, Mint Julep, Aqua Mist, Winter Wisteria, Stormy Sea - Papertrey Ink
Other: Sunshine & Rainbows Stencils, Sunshine & Rainbows Sequins, Sentiment Splits: Curve Vertical Die - Papertrey Ink; Sugar Cube Glitter - Martha Stewart Crafts; Foam Tape - Scotch

Friday, May 13, 2016

Summer Inspirations

Good morning, friends, and welcome back to the second group post in this month's Papertrey Ink countdown. Today we're celebrating summer!

Summer Inspirations Cards

The summer themed sets that we're introducing this morning are so much fun! And you'll be amazed at how versatile they can be. You can create for everything from bon voyage to birthday with these fantastic new stamps.

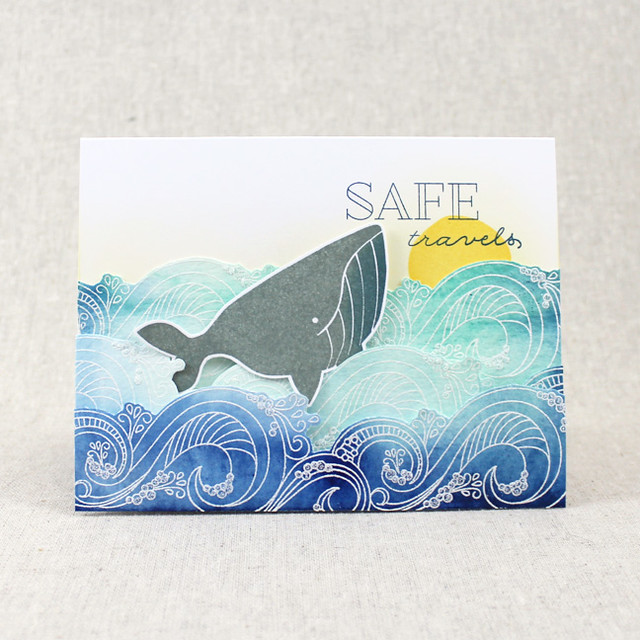
My first card today features Heather's new Keep Swimming set, Betsy's What The Doodle: Waves, and Erin's Colorful Words. There's also another set hiding in there, but it's very sneaky. Whales are supposed to be a symbol of safe passage over water, so I made this card for a friend heading out on a seafaring vacation soon.

Safe Travels Card

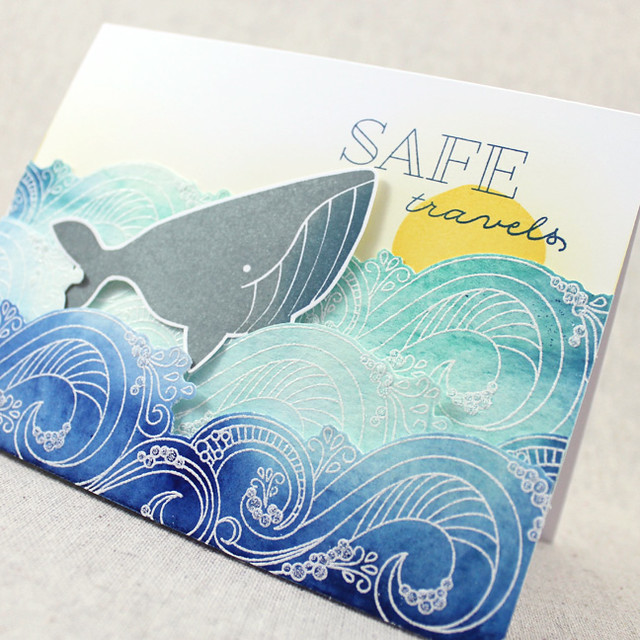
I began by watercoloring the blue/green background onto watercolor paper using my Gansai Tambi paints. While that was drying I sponged a white card base with a bit of Harvest Gold ink (I was working on this card one morning during a sunrise and got inspired). I added a sun with the urchin base image from Nichole's Simple Seashells set (see...sneaky) before adding the sentiment in Enchanted Evening. Next, I stamped the whale from Keep Swimming in Stormy Sea and Enchanted Evening inks and trimmed that out (again, there are dies but they haven't made it to me yet).

Safe Travels Close Up

Once the watercolored background was dry, I heat embossed the What The Doodle: Waves image in white powder and trimmed out three strips of waves. I adhered the strips to the card base with flat and foam adhesives, each adhesive layer a bit thicker than the last. I tucked my whale into place and embellished the sea spray with fine glitter. I'm really loving those waves!

My next project is a bit more somber. I had the "Footprints In The Sand" poem in mind while I was making this card. I thought it would work perfectly for a loved one in need of support.

Walk By Faith Card

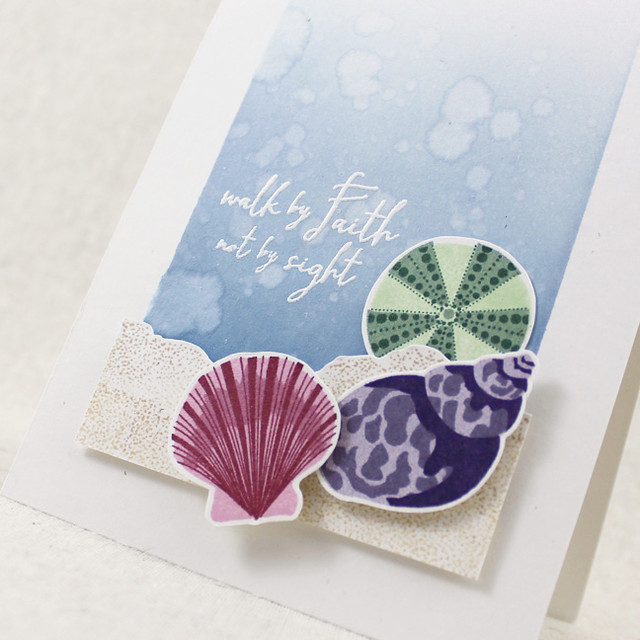
I began by masking off a rectangle on a Rustic White card base. I sponged Spring Rain and Enchanted Evening inks and then dripped on water droplets. When that had dried, I heat embossed the sentiment from Walk By Faith using white powder. Next, I created a sandy bank by stamping the Sand Swatch images in Fine Linen and Classic Kraft inks. I trimmed that out and adhered it to the card front with foam tape.

Walk By Faith Close Up

Then, I stamped three of the seashells from Simple Seashells onto Rustic White cardstock before trimming them out and adhering them to the card front. I stamped the urchin in Mint Julep, Ocean Tides, and Pinefeather inks. The tulip shell was stamped in Winter Wisteria, Plum Pudding, and Royal Velvet. The scallop was stamped in Lovely Lady, Autumn Rose, and Scarlet Jewel. This card could very easily be adapted to be more masculine with just a few simple ink substitutions.

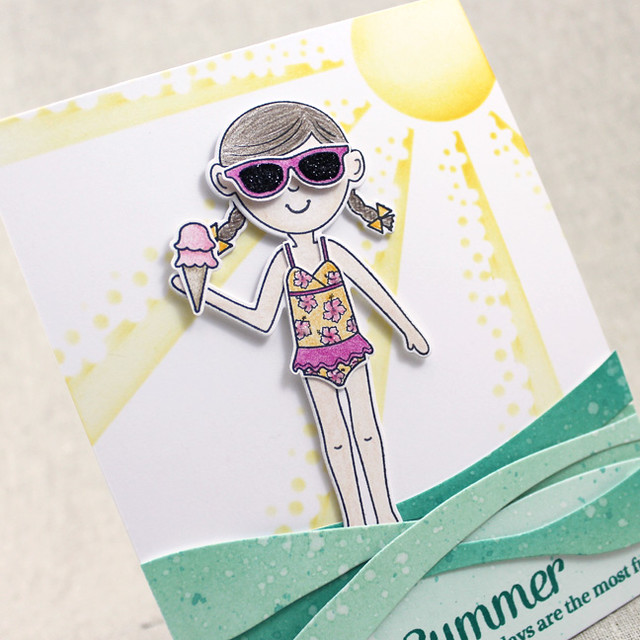
And last but not least today I have a card featuring Betsy's new Dress Up Dolls: Summer. We have several summer birthdays in our family and I thought this set would make a really cute birthday card.

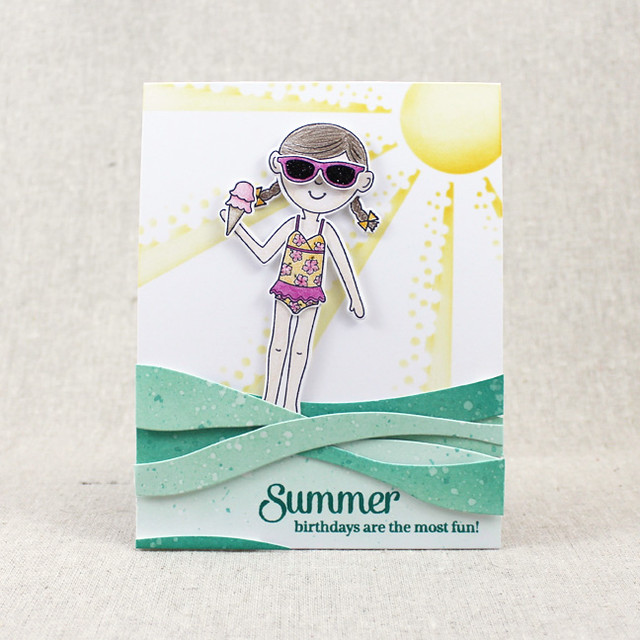
Summer Birthdays Card

I began by sponging the sun using Betsy's new Sun & Surf Stencil Collection. I used Harvest Gold with just a touch of Summer Sunrise to give dimension. Next, I set about making my waves. I sponged Aqua Mist and Tropical Teal inks onto white cardstock and splattered that with water and Tropical Teal reinker. Then, I die cut the panel with the Cover Plate: Waves die. I stamped the sentiment, from Birthday Classics: June, onto the largest piece using Tropical Teal ink. I adhered that to the card base using foam tape and then wove several of the other pieces together to create a textured pool. Some pieces are adhered with foam tape, some with flat adhesive, and some have both.

Summer Birthdays Close Up

Next, I die cut and colored the Dress Up Dolls: Basics girl. I stamped and colored the Dress Up Dolls: Summer accessories (sunnies, bathing suit, and ice cream cone) and trimmed them out. I adhered the accessories to the girl and embellished with glitter on her bathing suit and glasses. I tucked her into the pool where she looks mighty happy enjoying her birthday treat!

Aren't these new sets so much fun?! And I absolutely love that they're great for a broad variety of uses. Thanks so much for joining me today. Make sure to check in with Nichole, Amy, Ashley, Betsy, Danielle, Dawn, Heather, Kay, Laurie, and Melissa for more summertime inspiration. Erin and Maile are also sharing more of their new designs, so make sure to visit them, too! Have a great day, everyone!

Recipes:
Safe Travels Card
Stamps: Keep Swimming, Colorful Words, What The Doodle: Waves, Simple Seashells - Papertrey Ink
Cardstock: Watercolor Paper - Strathmore; white
Ink: Harvest Gold, Enchanted Evening, Stormy Sea - Papertrey Ink; VersaMark - Tsukineko
Other: White Embossing Powder - Filigree; Carerra Marble Glitter - Martha Stewart Crafts; Foam Tape - Scotch; Watercolor Paints - Gansai Tambi

Walk By Faith Card
Stamps: Simple Seashells, Sand Swatch, Walk By Faith - Papertrey Ink
Cardstock: Rustic White - Papertrey Ink
Ink: Spring Rain, Enchanted Evening, Mint Julep, Ocean Tides, Pinefeather, Winter Wisteria, Plum Pudding, Royal Velvet, Lovely Lady, Autumn Rose, Scarlet Jewel - Papertrey Ink; VersaMark - Tsukineko
Other: Foam Tape - Scotch; White Embossing Powder - Filigree

Summer Birthdays Card
Stamps: Dress Up Dolls: Basics, Dress Up Dolls: Summer, Birthday Classics: June - Papertrey Ink
Cardstock: white
Ink: Aqua Mist, Tropical Teal, Harvest Gold, Summer Sunrise - Papertrey Ink; Tuxedo Black - Memento
Other: Sun & Surf Stencil Collection, Dress Up Dolls: Basics Die, Cover Plate: Waves Die - Papertrey Ink; Crystal, Onyx Glitter - Martha Stewart Crafts; Foam Tape - Scotch; Colored Pencils - PrismaColor

Thursday, May 12, 2016

Introducing Floral Sketches & Classic Calligraphy

Good morning, friends! Welcome to the first group post for this month's Papertrey Ink new release countdown. Today we're showcasing the Floral Sketches and Calligraphy Classics stamp sets. Who doesn't love a wonderful floral? Especially when it pairs beautifully with a gorgeous script. These new sets from Dawn and Nichole are absolutely made for each other!

Floral Sketches Cards

I had a blast playing with a handful of techniques to see how many different styles I could achieve. How about we get to some projects, eh?

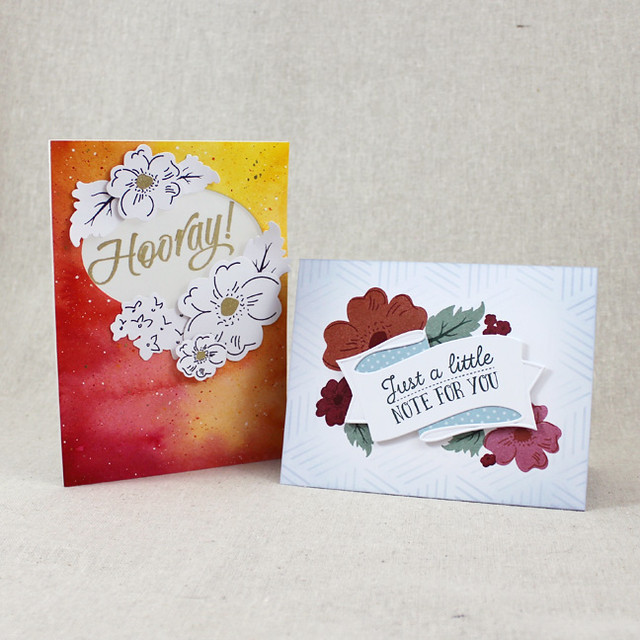
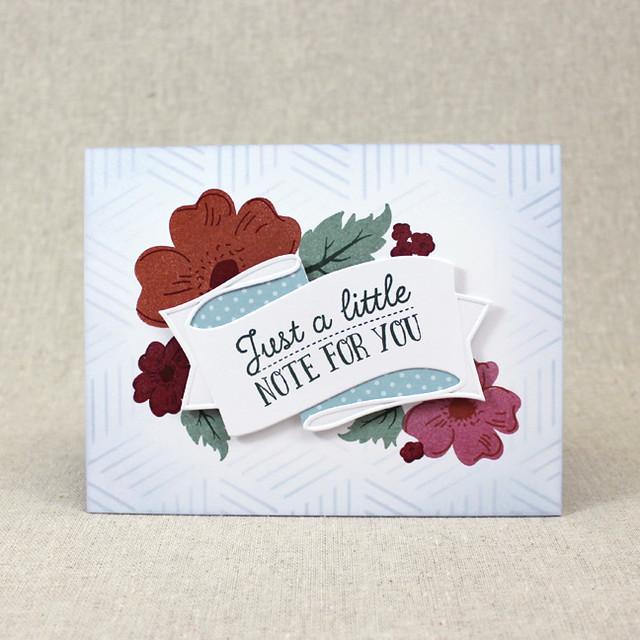
Just A Little Note Card

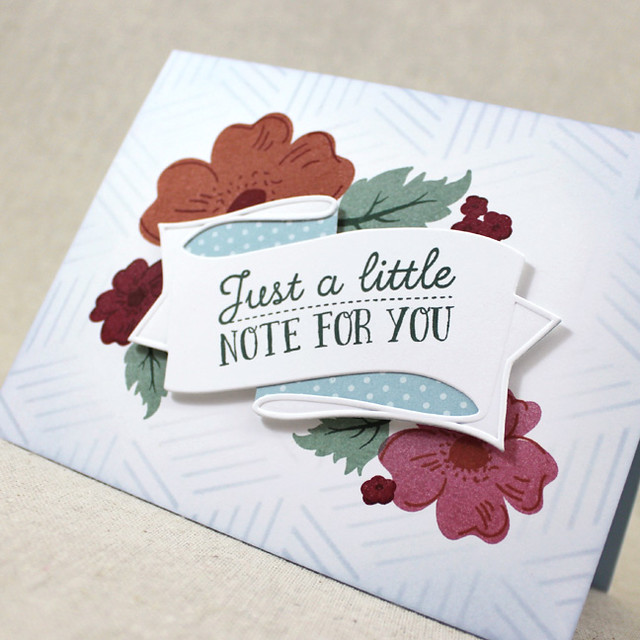
This first card has a bit of a vintage vibe about it. I began by stenciling the background using the Modern Basics stencil and Spring Rain ink. I also did a bit of extra blending around the edges to soften things a bit. Next, I stamped the Floral Sketches flowers in an Americana, Scarlet Jewel, and Autumn Rose color scheme. The details came next in Scarlet Jewel, Dark Chocolate, and Americana. Then, I added the leaves in Ocean Tides and Pinefeather. I mounted that panel to a Spring Rain card base and set it aside for a moment.

Just A Little Note Close Up

Next, I die cut a Layered Banner and stamped the top layer with one of the sentiments in the Floral Sketches set using Pinefeather ink. I curved the stamp slightly when sticking it to my block, resulting in a subtle arc that matches the curve of the banner. I attached a Spring Rain bitty dot layer to that before mounting the whole piece to the card front with foam tape.

The second card is also a departure for me colorwise, but in a totally different way. This time it's all about the brights! I also went with a larger format card with this one. It's an A6 instead of the standard A2 that we cardmakers usually use.

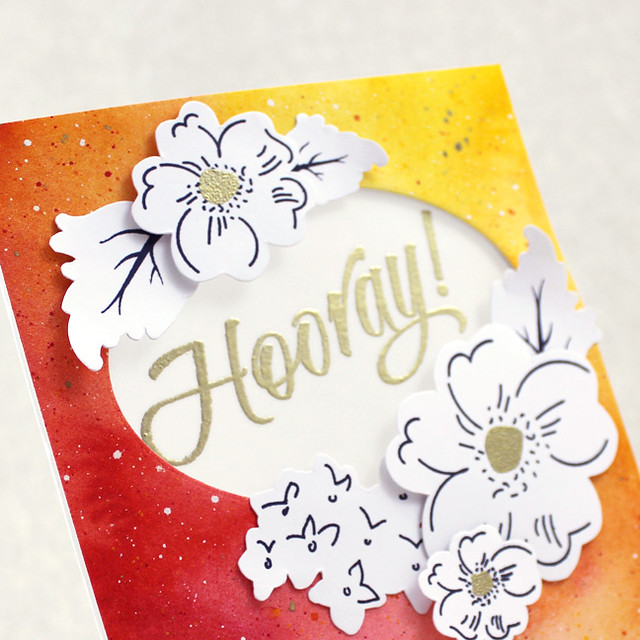
Floral Hooray Card

I began by watercoloring a background using bold, warm colors. Once it had dried I splattered more concentrated paint in tiny flecks, this time adding gold and white to the mix. I set it aside to dry again while I cut out my flowers (my dies fell into a gaping black hole on the way to Granville so I had to hand cut them, but there are dies that coordinate with this set). I stamped each shape with the its coordinating detail image in True Black ink and heat embossed the flowers centers with gold powder for a pretty metallic touch.

Version 2

Once the watercolored panel had dried, I die cut a window with the simple oval from Limitless Layers 3 1/2" Ovals Die Collection. Then, I mounted the panel to a vellum card base on which I had heat embossed the sentiment from Calligraphy Classics using gold powder. I lined the inside so the adhesive wouldn't show and then I attached the floral bits with a mix of flat and foam adhesives. I love the contrast of the black, white, and gold blooms against that bright background. This is a style I'm sure to try again!

Thank you so much for joining me today! Make sure to pop over and visit NicholeAmy, Ashley, Betsy, Danielle, Dawn, Heather, Kay, Laurie, and Melissa to see more of these beautiful new sets. Erin and Maile are also sharing more of their new designs too, so make sure to check them out, too. Have a wonderful day and I'll see you again very soon!

Recipes:
Just A Little Note Card
Stamps: Floral Sketches - Papertrey Ink
Cardstock: Spring Rain, Spring Rain Bitty Dot Patterned Paper - Papertrey Ink; white
Ink: Americana, Scarlet Jewel, Autumn Rose, Spring Rain, Ocean Tides, Pinefeather, Dark Chocolate - Papertrey Ink
Other: Layered Banner Die, Modern Basics Stencil Collection - Papertrey Ink; Foam Tape - Scotch

Floral Hooray Card (A6 size)
Stamps: Floral Sketches, Calligraphy Classics - Papertrey Ink
Cardstock: Vellum - Papertrey Ink; Acquarello Watercolor Paper - Fabriano Artistico; white
Ink: True Black - Papertrey Ink; VersaMark - Tsukineko
Other: Limitless Layers: 3 1/2" Oval Die Collection - Papertrey Ink; Watercolors - Gansai Tambi; Opaque White Pigment - Copic; Gold Embossing Powder - Filigree; Foam Tape - Scotch

Saturday, April 30, 2016

Floral Felt Wallet

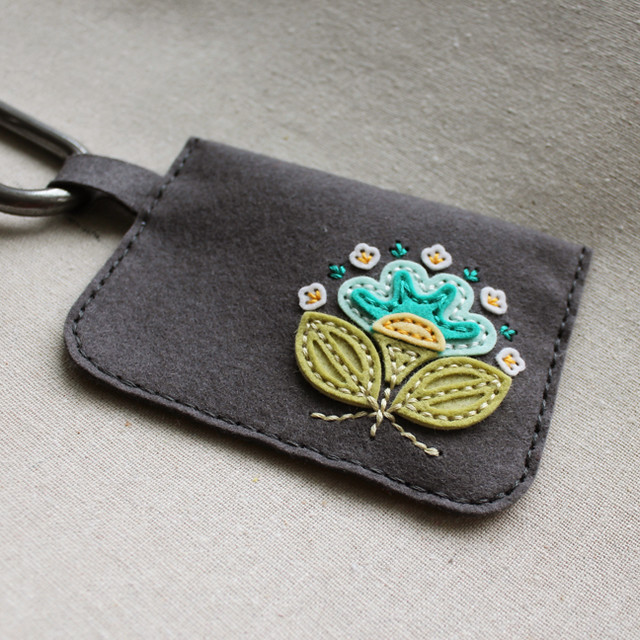
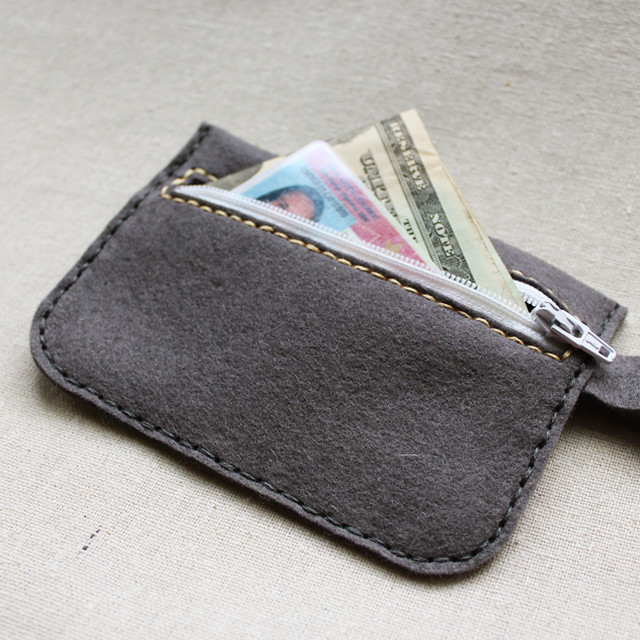
Hi there, folks! I just wanted to pop in today to share a little felt wallet I put together recently. I had some down time on a trip a few weeks back, so I planned ahead and took this little wallet along with me.

Felt Wallet

I've been wanting a small purse to take with me to the gym. Something just big enough to hold my license and a little cash or my debit card for those post-workout trips to the grocery. It's inconvenient to take my large handbag, but I thought the original Coin Purse Die would be the perfect size.

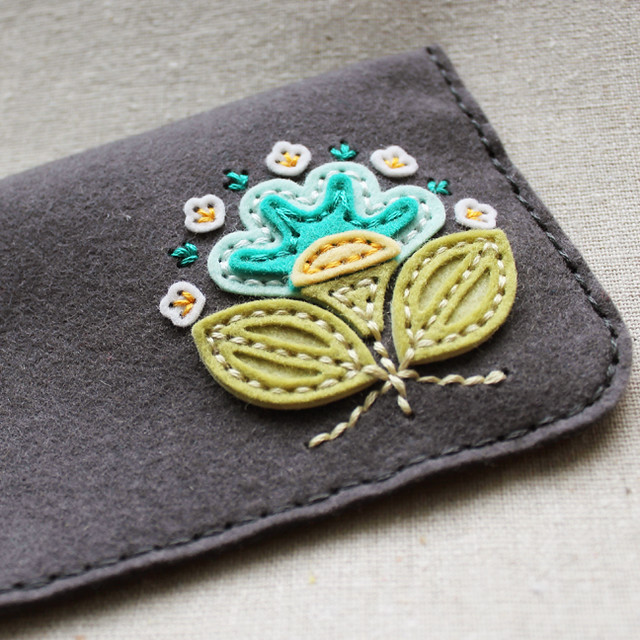
Felt Wallet Close Up

I cut the body of the purse from Smokey Shadow felt. I decided to decorate the purse with the Stitched Folk Flower die using Vintage Cream, Harvest Gold, Aqua Mist, and Tropical Teal felt. The leaves are Simply Chartreuse and Spring Moss.

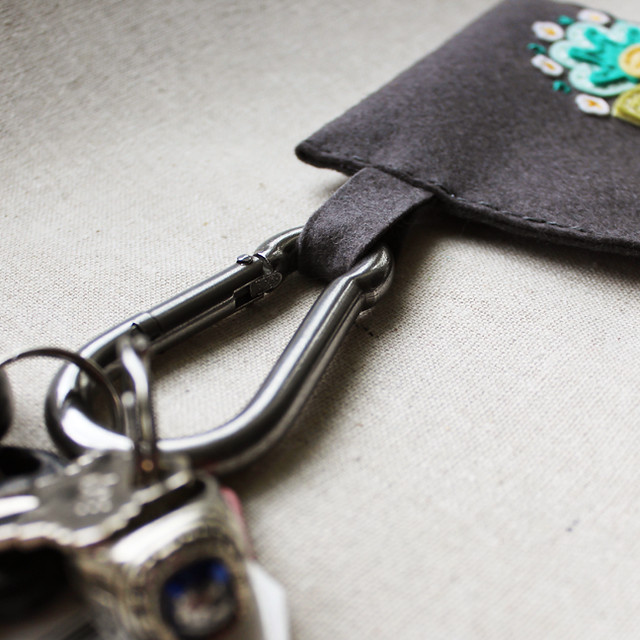
Felt Wallet Key Loop

I decided to add a felt loop that was big enough to accommodate my key ring, so I could hang them together on the same hook in the locker room. I simply stitched it between the layers of the purse body. Easy!

Felt Wallet Back

I chose to position the zipper on the back of the purse rather than along the top edge. I just like the way it lays. I used a contrasting stitch around the zipper for an extra little detail.  It's cute, sweet, and just the right size.

Thanks so much for joining me today. Enjoy the rest of your weekend!

Recipe:
Felt: Smokey Shadow, Vintage Cream, Harvest Gold, Aqua Mist, Tropical Teal, Simply Chartreuse, Spring Moss. - Papertrey Ink
Dies: Coin Purse Die, Stitched Folk Flower Die - Papertrey Ink
Other: Embroidery Floss - DMC; Zipper

Friday, April 15, 2016

Release In Review

Well, here we are friends. Today is the wrap up for Papertrey Ink's April countdown. The new products will all be available tonight at 10pm EDT, so it won't be long now. I have a handful of additional projects to share, so let's get to it!

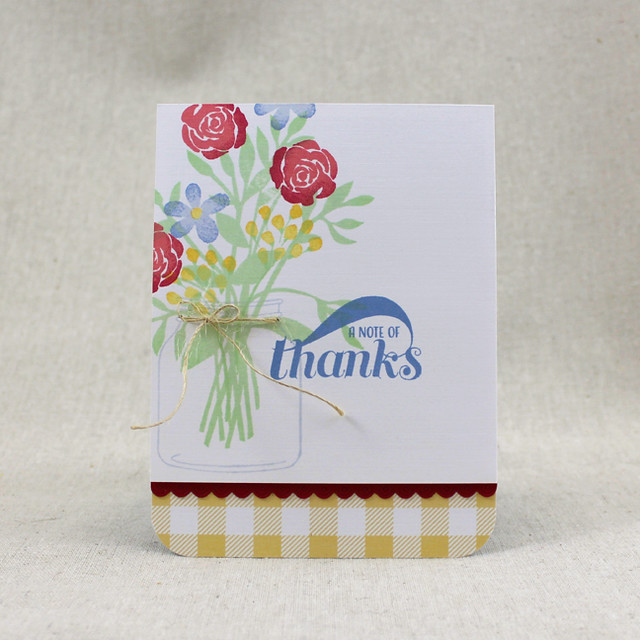
First up is Friendship Jar Flowers and Bold & Beautiful.

Note Of Thanks Bouquet Card

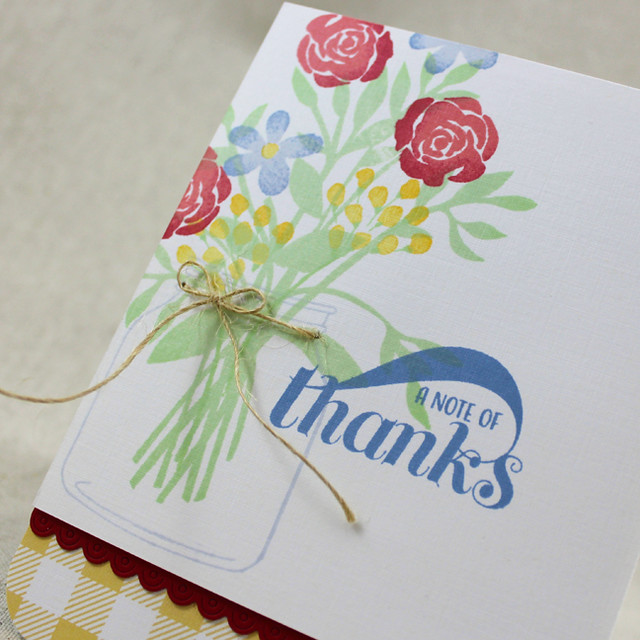
I used the rock 'n roll technique on most of the floral elements to add dimension. I added the pint jar in Spring Rain and the sentiment in Blueberry Sky before threading a twine bow through the panel.

Note Of Thanks Bouquet Close Up

I attached that, using foam tape, to a Spring Rain card base that I'd already embellished with Chicken Scratch Gingham paper. I used one of the small border bits from the Cover Plate: Delightful to add a petite row of scallops. As a final touch, I rounded the bottom corners to soften things up a bit.

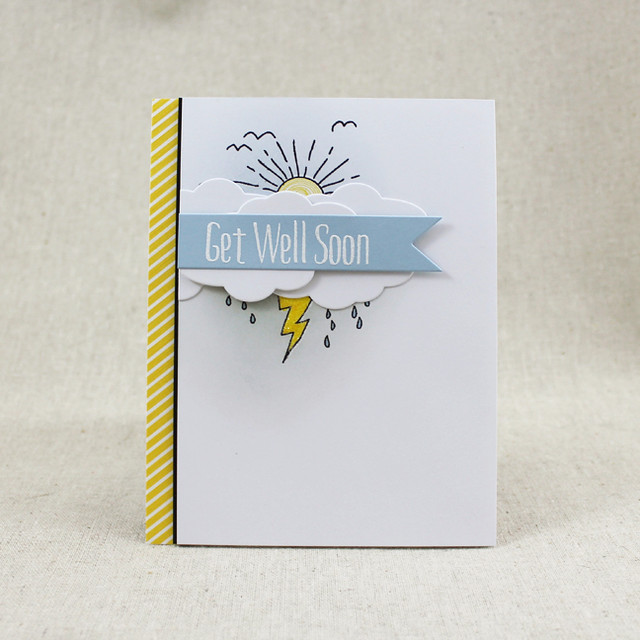
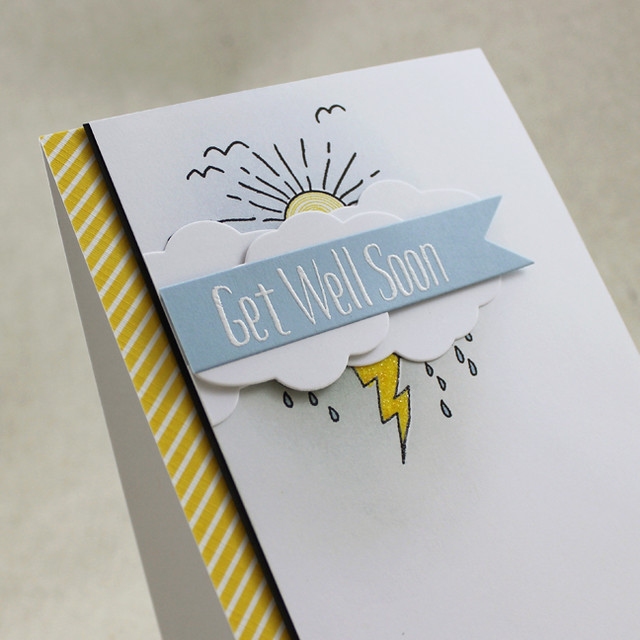
Next, we have Splits: Get Well Soon.

Get Well Soon Card

I began by stamping the halves of the splits image. I spaced them a little farther apart though because I knew I wanted to add in the die cut clouds. Next, I masked off the large elements on either side (the sun and the lightning bolt) and I sponged on Spring Rain (top) and Stormy Sea (bottom) inks.

Get Well Soon Close Up

I removed the masks and stamped the sun detail and colored the lightning bolt. I matted the edge with True Black and, with foam tape, mounted that whole piece to a white card base that I'd embellished with a strip of Bright Buttercup paper. I glittered the lightning bolt and layered on the aforementioned clouds before adding a Sketched Shapes sentiment banner.

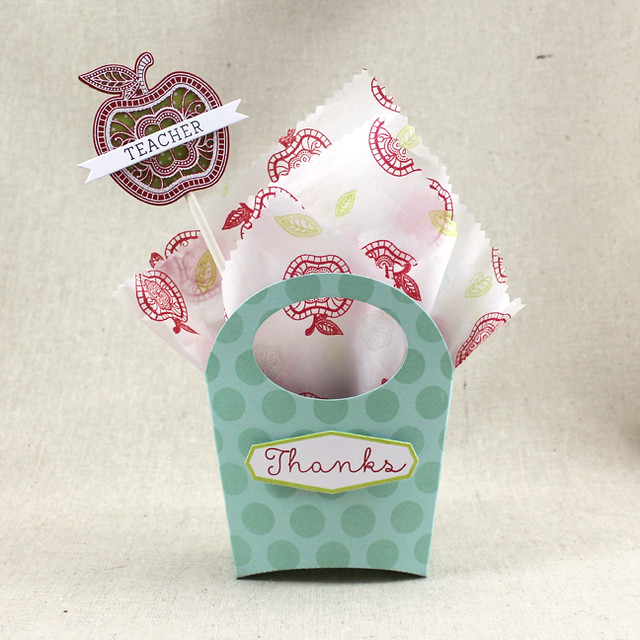
How about a little teacher gift featuring What The Doodle: Apple?

Teacher Thank You Tote

I began by creating a mini tote bag using the Fry Box Die. Do do this, just cut the two pieces as you normally would and then cut ovals (or some other "handle" shape) from each piece. I used a copy paper template to get them in the same spot. Then decorate and assemble as normal. I stamped the pieces with Polka Dot Basics III using the matching Aqua Mist ink.

Teacher Thank You Mini Tote

I added the label using the Treat Box Tags Die and Treat Box Tag Lines with a Sentiment from What The Doodle: Apple. Next, I stamped the custom tissue paper. I just randomly stamped the smaller images in the set with Pure Poppy, Aqua Mist, and Green Parakeet inks.

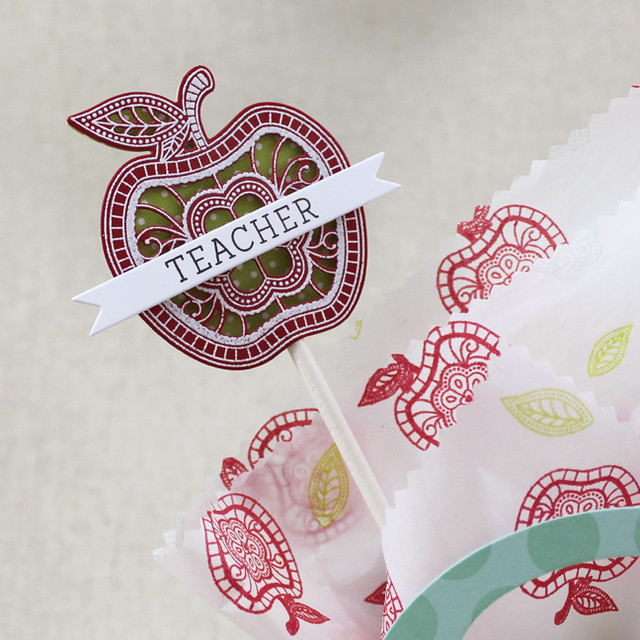
Teacher Thank You Tote Pick

I finished off the ensemble with a mini bag pick. I began by heat embossing the large apple on a Pure Poppy die cut. I attached that onto a Green Parakeet polka dot die cut using foam tape and then wedged a lollipop stick between the layers. I stamped the sentiment onto a small banner and then added that to the apple with foam tape too. It's the perfect size for a small gift, sweet treat, or gift card.

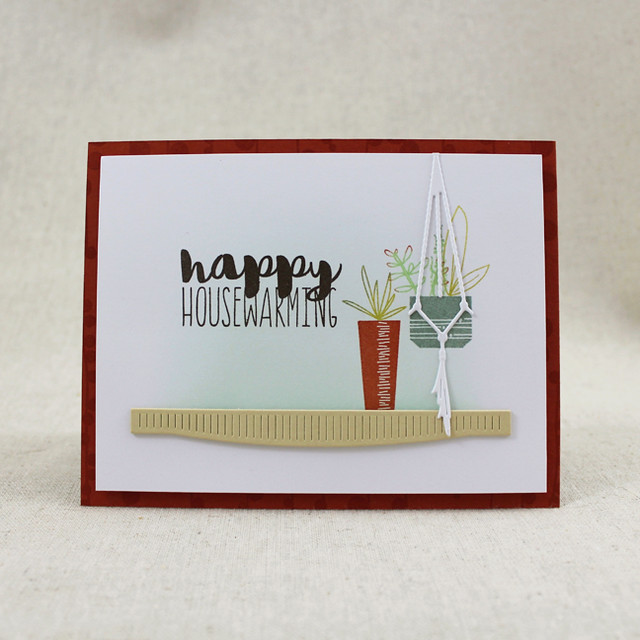
Next, let's take a peek at Super Succulents.

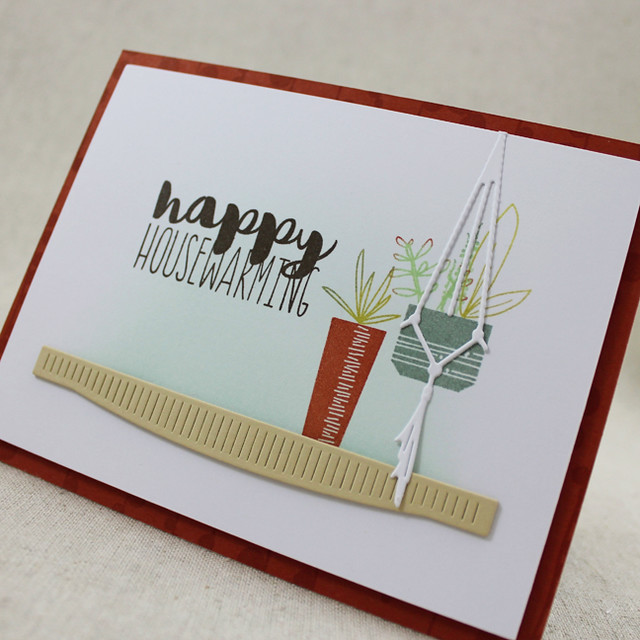
Happy Housewarming Card

I created a little indoor scene by creating a shelf from one of the border pieces from the Cover Plate: Delightful Die. I layered two Fine Linen pieces together to give a bit of weight without bulk. I sponged on a subtle background and stamped the planters and sentiment before attaching my shelf.

Happy Housewarming Close Up

I added a die cut plant hanger before mounting the panel to a Terra Cotta Tile card front that I'd stamped with the mother-of-pearl-styled images using the matching ink. I love these little plants and I can't wait to use them again in the future.

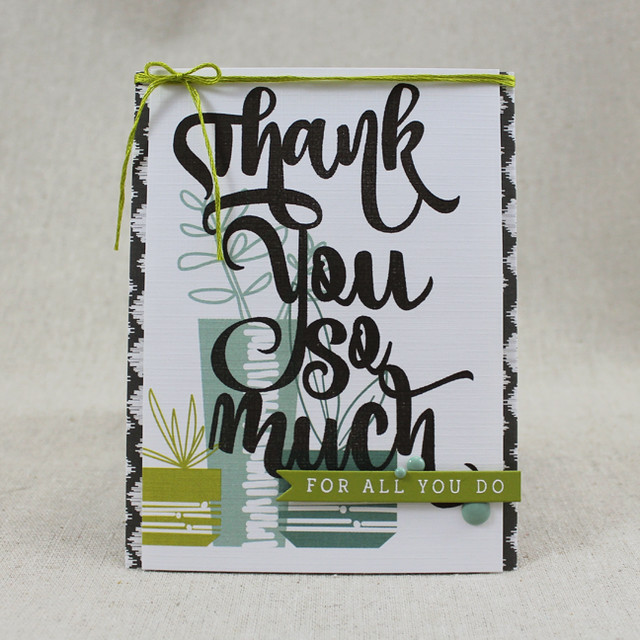
The patterned paper actually ended up being a perfect match for the Paper Clippings: Thank You set. This card would be ideal for thanking someone who checked on your plants while you were on vacation.

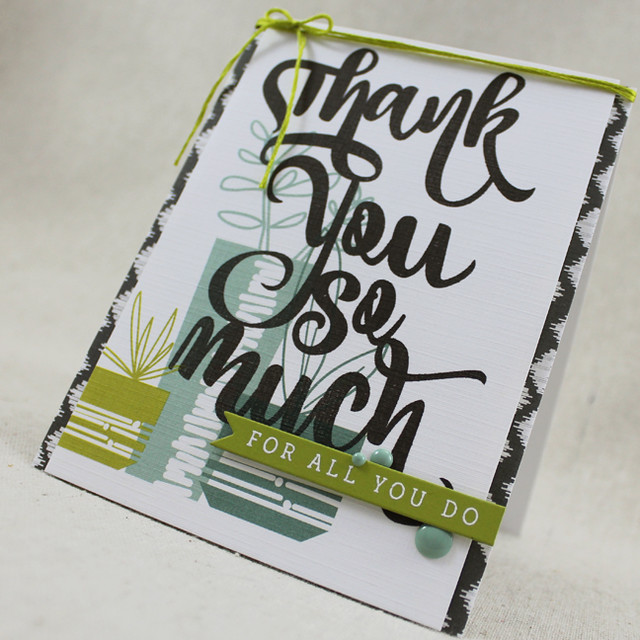
Potted Plant Thank You Card

The card came together super quickly. I stamped the large sentiment onto the patterned paper using Smokey Shadow ink. I trimmed it down a little before using foam tape to mount it to a white card base that I'd already covered with another of the Super Succulents papers.

Potted Plant Thank You Close Up

I heat embossed the small companion sentiment onto a tiny banner and used foam tape to attach it to the card front. I embellished with a few enamel dots and a matching embroidery floss bow.

Last but not least, I have a tag featuring the Dress Up Dolls: School Days set.

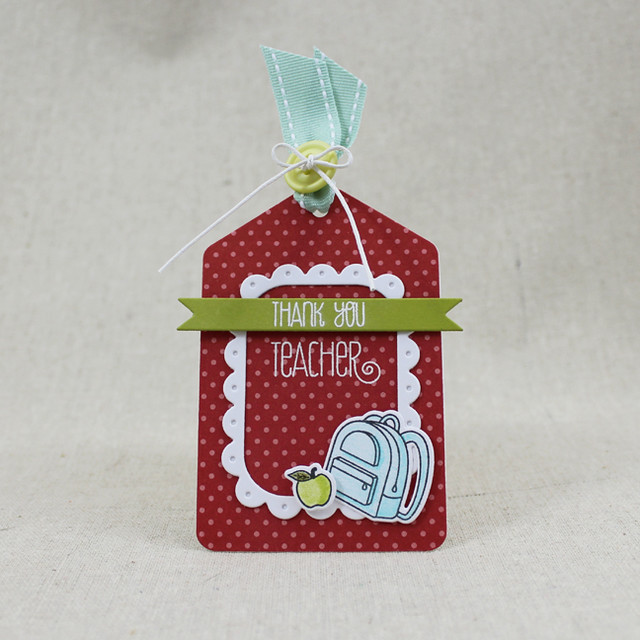
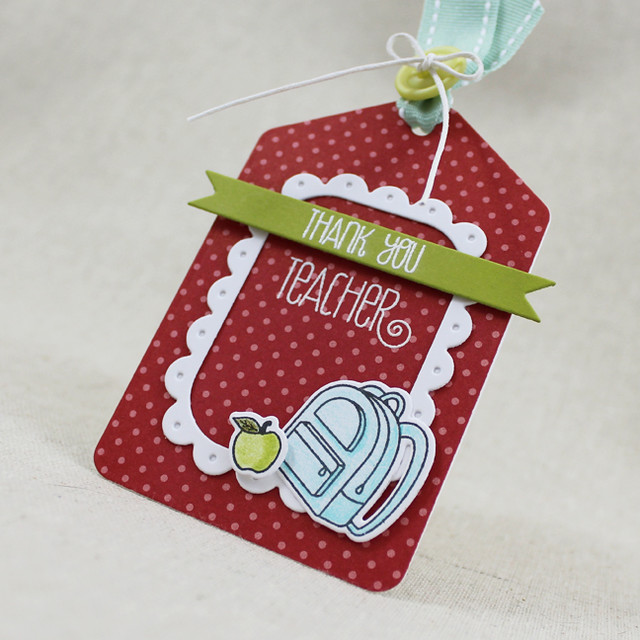
Thank You Teacher Tag

I wanted to keep this tag fairly simple, so I just used the accessory images and sentiments rather than one of the little people. I heat embossed part of my sentiment onto Pure Poppy patterned paper before adhering it to a white cardstock tag (just to give it stability). I added the frame before attaching the rest of the sentiment, heat embossed onto a banner.

Thank You Teacher Tag Close Up

I colored the die cut backpack and apple with colored pencils and added them with flat and foam adhesives. To finish, I threaded some Aqua Mist Saddle Stitch ribbon through the hole and tied on a Limeade Ice button with a bit of waxed white cord.

Thank you so much for joining me this week! Make sure to check in with NicholeAmy, Ashley, Betsy, Danielle, Dawn, Heather, Kay, Laurie, and Melissa to see more of this month's release. There were so many things I wanted to share with you this week that I simply couldn't get to, so don't be surprised if you see another post from me again before long. Happy shopping!

Recipes:

Note Of Thanks Bouquet Card
Stamps: Friendship Jar Flowers, Bold & Beautiful, Just The Jar: Pint - Papertrey Ink
Cardstock: Pure Poppy, Fresh Snow Linen, Chicken Scratch Gingham Patterned Paper - Papertrey Ink
Ink: Mint Julep, Vintage Jadeite, Berry Sorbet, Pure Poppy, Harvest Gold, Summer Sunrise, Spring Rain, Blueberry Sky - Papertrey Ink

Other: Cover Plate: Delightful Die, Rustic Jute Button Twine - Papertrey Ink; Foam Tape - Scotch


Get Well Soon Card
Stamps: Splits: Get Well Soon - Papertrey Ink
Cardstock: True Black, Bright Buttercup + White Patterned Paper, Spring Rain - Papertrey Ink; white
Ink: Spring Rain, Bright Buttercup, True Black, Stormy Sea - Papertrey Ink; VersaMark - Tsukineko

Other: Blue Skies Die, Sketched Shapes Die, Coaster - Papertrey Ink; Clean Color Marker - Zig; Foam Tape - Scotch; Crystal Fine Glitter - Martha Stewart Crafts; Copic; White Embossing Powder - Filigree

Thanks Teacher Tote Ensemble
Stamps: What The Doodle: Apple, Polka Dot Basics III, Treat Box Tag Lines - Papertrey Ink
Cardstock: Aqua Mist, Pure Poppy, Green Parakeet + White Patterned Paper - Papertrey Ink; white
Ink: Pure Poppy, Green Parakeet, Aqua Mist - Papertrey Ink; VersaMark - Tsukineko
Other: Fry Box Die, Treat Box Tag Die, What The Doodle: Apple Die, Limitless Layers: 2 1/4” Oval Die Collection, Tag Sale #10 - Papertrey Ink; Foam Tape - Scotch; White Embossing Powder - Filigree; White Tissue Paper; Lollipop Stick - Wilton

Happy Housewarming Card
Stamps: Super Succulents - Papertrey Ink
Cardstock: Fine Linen, Terra Cotta Tile - Papertrey Ink; white
Ink: Terra Cotta Tile, Ocean Tides, Aqua Mist, Smokey Shadow, Simply Chartreuse, Limeade Ice, Mint Julep, Vintage Jadeite - Papertrey Ink
Other: Super Succulents Die, Cover Plate: Delightful Die - Papertrey Ink; Foam Tape - Scotch

Potted Plant Thank You
Stamps: Paper Clippings: Thank You - Papertrey Ink
Cardstock: Super Succulents Patterned Paper, Simply Chartreuse - Papertrey Ink; white
Ink: Smokey Shadow - Papertrey Ink; VersaMark - Tsukinkeo
Other: Tag Sale #10 Die - Papertrey Ink; Embroidery Floss - DMC; White Embossing Powder - Filigree; Foam Tape - Scotch; Enamel Dots - Studio Calico

Thank You Teacher Tag
Stamps: Dress Up Dolls: School Days - Papertrey Ink
Cardstock: Simply Chartreuse, Pure Poppy Patterned Paper - Papertrey Ink; white
Ink: True Black - Papertrey Ink; VersaMark - Tsukineko
Other: Dress Up Dolls: School Days Die, Tag Sale #10 Die, Aqua Mist Saddle Stitch Ribbon, Limeade Ice Button - Papertrey Ink; Foam Tape - Scotch; Waxed Twine - May Arts