Tuesday, November 10, 2015

Introducing Confetti Toss

Good morning, friends! Welcome to Day 1 of the Papertrey Ink November new release countdown. I am so excited to share my new Confetti Toss collection with you today! This set has been a long time coming. It's been designed for just shy of two years, so I am particularly pumped about finally getting to share! How about we get on to some projects?

Let's start with a more masculine birthday card. After years of forcing rhinestones and bows on everyone I know, I tend to have no concept of gender propriety. So I asked Sean if confetti can be gender neutral. His response was simple and decisive. "Sure. They shoot off confetti at ticker tape parades and the end of major sporting events, don't they?" Such a wise man, that husband of mine. So if veterans and athletes can get down with confetti, so can regular dudes, right?

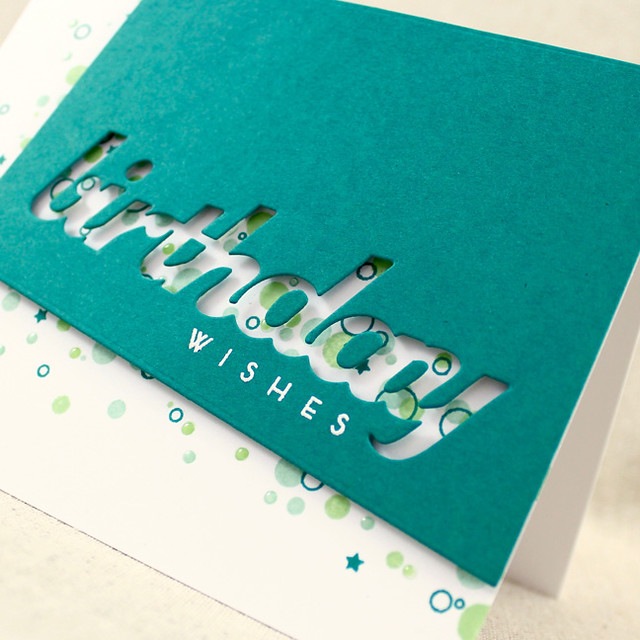
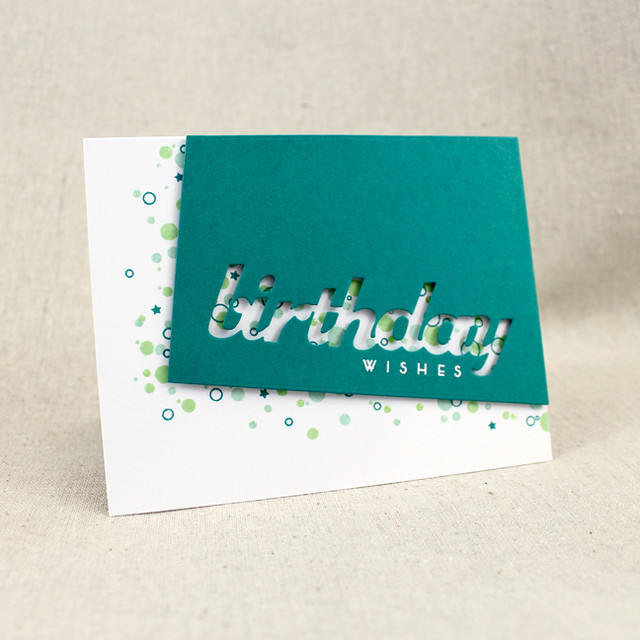
Birthday Wishes Card

Anyway, I began this card by die cutting a Tipped Tops panel from Tropical Teal cardstock. I cut the Birthday Trio shape from the panel and heat embossed the "wishes" sentiment from Wet Paint Holiday.

Birthday Wishes Close Up


Then, I used Vintage Jadeite, Aqua Mist, and Tropical Teal inks to create a confetti pattern on a white card base. I started with the lighter colors and added the open circles and stars with the darker ink. I added Glossy Accents to some of the mid-size dots for a little texture and then, once they had dried, attached the sentiment panel with foam tape. Easy peasy! The clusters made this design nice and quick.

Next up I have a more feminine design that I created with the new Confetti Toss Patterned Paper Collection. Not a fan of stamping your own confetti? These papers do the heavy lifting for you in four patterns and three color variations! A very special forum friend recently requested that we consider using purple in our future patterned papers. I may not be nearly as fond of purple as Pat, but I always aim to please. I chose to use today's pattern in her honor.

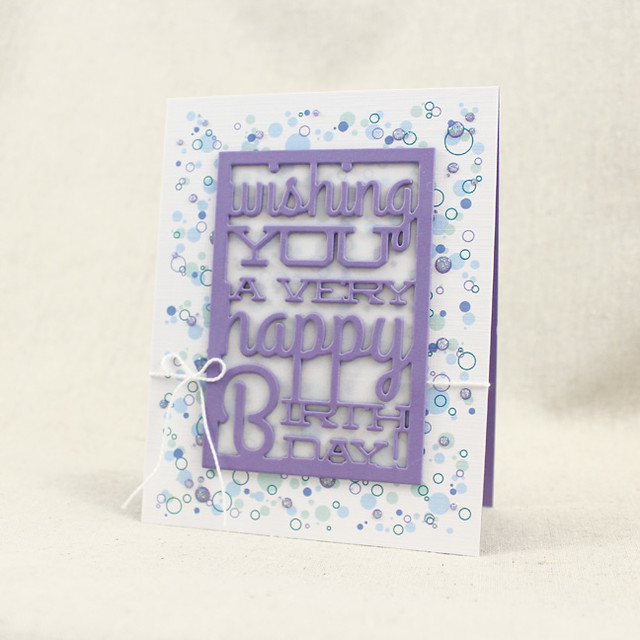
Confetti Text Block Birthday Card

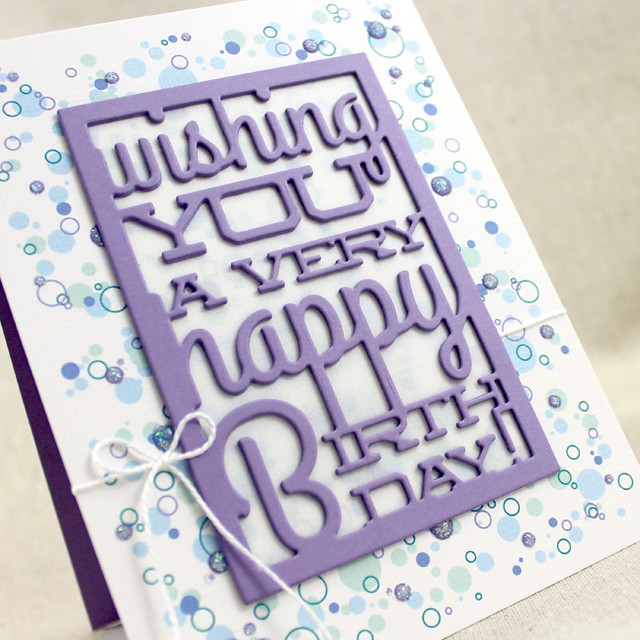
This card came together in a snap. I simply die cut three of the Text Block: Birthday shape from Winter Wisteria cardstock and layered them together for some depth. Then, I glittered the Winter Wisteria dots with Sugar Cube glitter and then covered the dots with Glossy Accents to seal in the glitter and give a bit of dimension.

Confetti Text Block Birthday Close Up

I adhered the patterned piece to a Winter Wisteria card base and tied a white crochet thread bow around the card front. I attached the Text Block to a piece of Linen Vellum and adhered it to the front of the card. See? A snap!

My third and final card of the day pairs the new Cover Plate: Sunflower with Confetti Toss for a fun alternative to coloring or paper piecing.

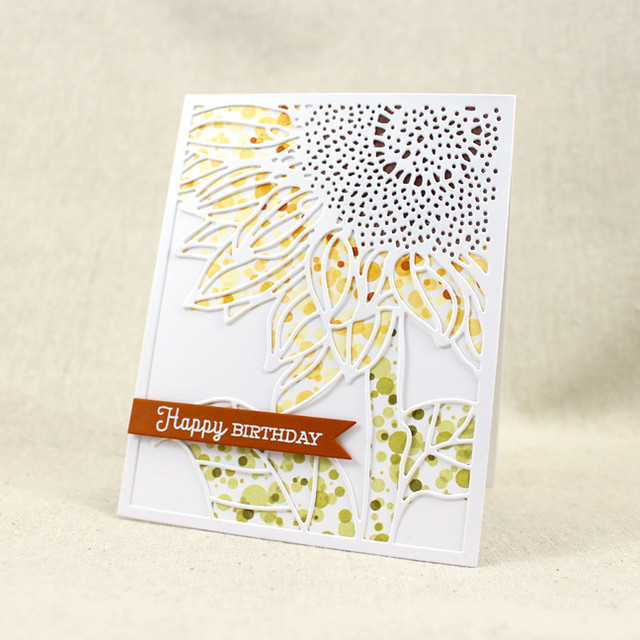
Sunflower Birthday Card

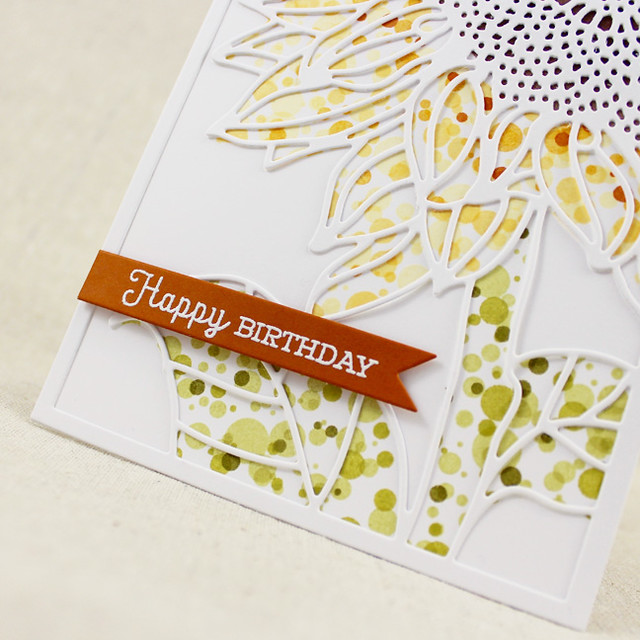
I began by lightly impressing the Cover Plate into my card base to serve as a guideline for my stamping. Then I masked off the different parts of the flower I wanted to "color" and stamped with a variety of ink colors to give the flower interest. I used sponging on the center of the flower (the Dark Chocolate area) to make sure the color would show though the small holes sufficiently, but everything else was stamped with the confetti dots.

Sunflower Birthday Close Up

Then, I die cut a Cover Plate: Sunflower shape from white cardstock (definitely going to want to bust out your metal shims for this one, folks) and adhered it to the card front with 1/8" ScorTape. Next, I die cut a Sketched Shapes banner from Canyon Clay cardstock and heat embossed the sentiment (also from Confetti Toss) with white detail powder. I adhered the banner in place with foam tape to give it a little height.

And there you have it! Thank you so much for joining me today. I can't wait to come back tomorrow to share more of Confetti Toss with you. In the meantime, make sure to pop in and check out all the inspiration that Nichole, Betsy, Dawn, Heather, and Erin have to share with you. See you soon!

Recipes:
Birthday Wishes Card
Stamps: Confetti Toss (available November 15th), Wet Paint Holiday - Papertrey Ink
Cardstock: Tropical Teal - Papertrey Ink; white
Ink: Vintage Jadeite, Aqua Mist, Tropical Teal - Papertrey Ink; VersaMark - Tsukineko
Other: Birthday Trio Die Collection - Papertrey Ink; Foam Tape - Scotch; Glossy Accents - Ranger; White Embossing Powder - Filigree

Confetti Text Block Birthday Card
Cardstock: Confetti Toss Patterned Paper Collection (available November 15th), Winter Wisteria, Linen Vellum - Papertrey Ink
Other: Text Block: Birthday - Papertrey Ink; Sugar Cube Glitter - Martha Stewart Crafts; Glossy Accents - Ranger; Xyron; Glue Pen; White Crochet Thread

Sunflower Birthday Card
Stamps: Confetti Toss (available November 15th) - Papertrey Ink
Cardstock: Canyon Clay - Papertrey Ink; white
Ink: Lemon Tart, Harvest Gold, Summer Sunrise, Canyon Clay, Spring Moss, Simply Chartreuse, Ripe Avocado, Dark Chocolate - Papertrey Ink; VersaMark - Papertrey Ink
Other: Cover Plate: Sunflower (available November 15th), Sketched Shapes Die - Papertrey Ink; White Embossing Powder - Filigree; Foam Tape - Scotch; ScorTape

Monday, November 9, 2015

Moments Inked: Basic Meal Planning


Good morning, planner people! It's my turn to share how I've been using my Papertrey Ink Moments Inked planner lately. This week I'm sharing my meal planning set up.

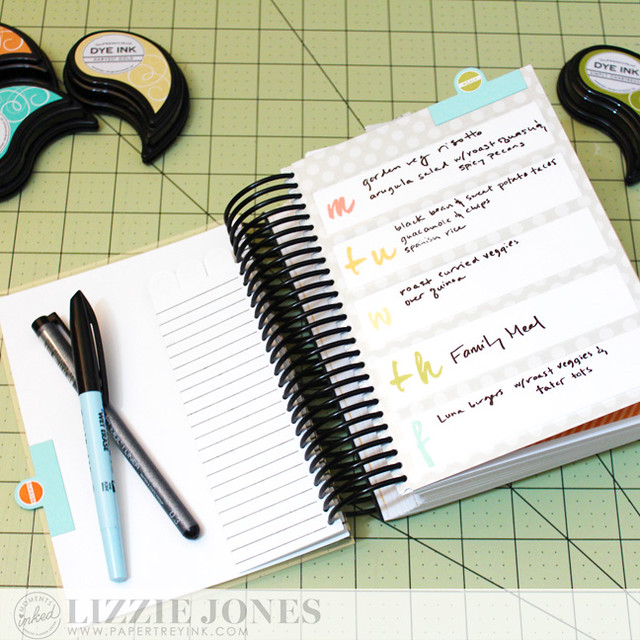
Meal Planning Spread

For some reason, meal planning has been notoriously difficult for me in the past. This system is really helping though. I put together a wet-erase page that I've tucked into my planner next to my coupons pocket. I love that it's reusable! All I have to do to start over is wipe it down with a damp towel.

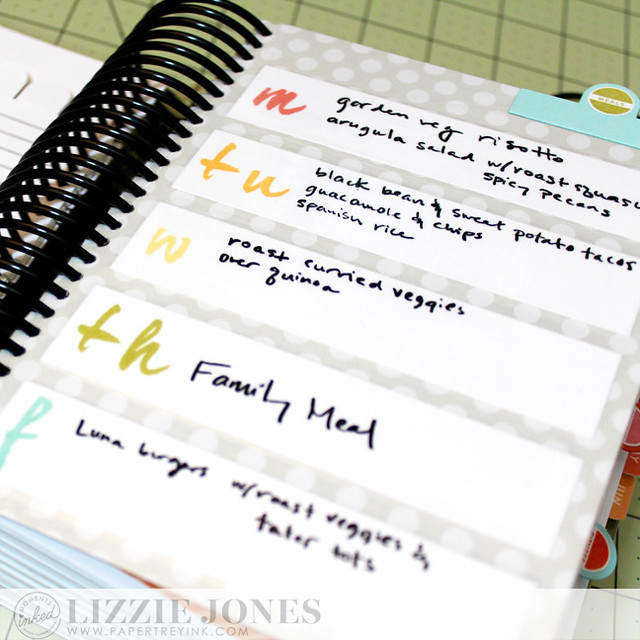
Week Of Meals Page

I created it by die cutting a full size basic page in the Divided Die collection from polka dotted Soft Stone paper and Soft Stone cardstock and adhering them together. Then, I used the largest Boxed Die to cut my daily boxes. I stamped them with rainbow colors using the Wet Paint alphabet. I adhered the boxes in place on both the front and the back. I also added a "Notes" section to the back along with the weekend days. I use that area to write down reminders and highlights about recipes I've tried through the week.

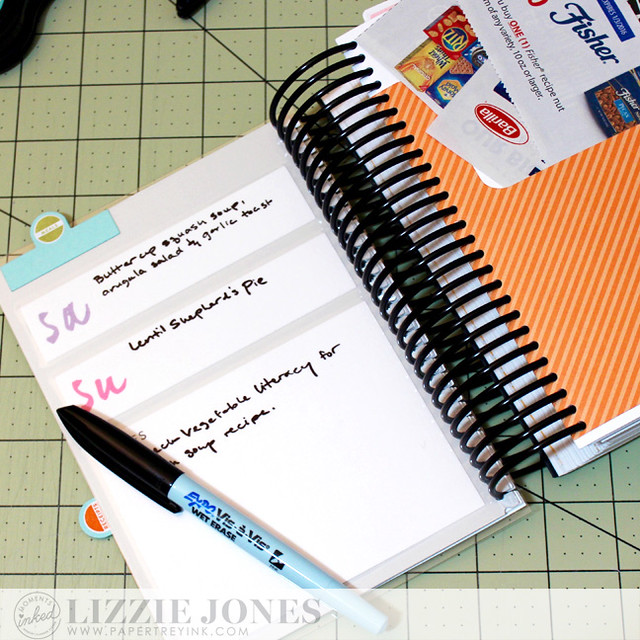
Meal Planning Page and Coupon Pocket

I laminated the whole piece to make it wet-erase. Fair warning, it was so thick that it took a few passes through the laminator to really get everything fully heated and adhered properly, but eventually it all worked out. I trimmed it out with scissors to finish it off.

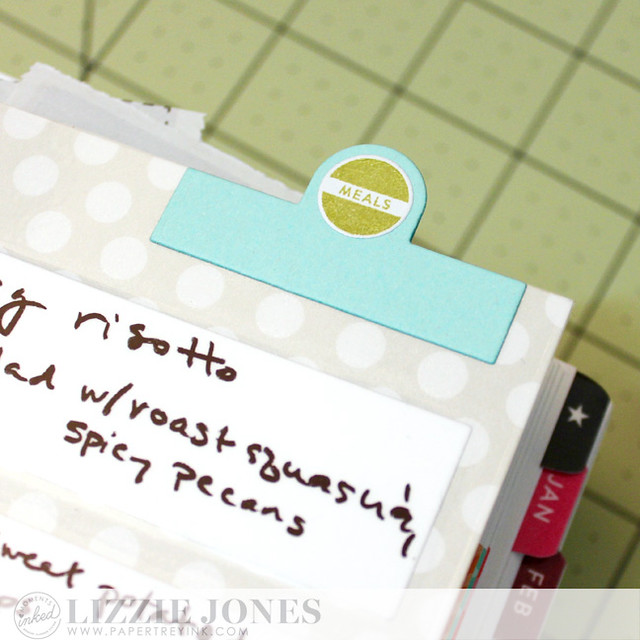
Meals Tab

I added a "Meals" tab to the top edge of my laminated page using the Divided Die and mini stamp set. That makes it easy to flip right to my page when my planner is closed.

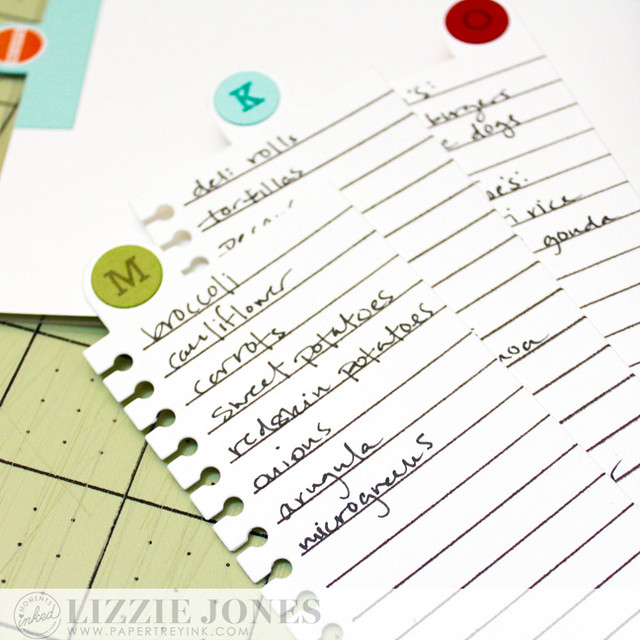
Grocery Tabs

I wanted to have an easy way to separate my shopping list into the places I regularly shop and the Divided Die turned out to be perfect! I die cut three of them and cut the tops into three tabs. I added brightly colored circles to the tabs that I stamped with relevant initials (M is for farmers Market [our indoor market goes through March], K is for Kroger, O is for Other [which is where I write down the things I buy in specialty stores]).

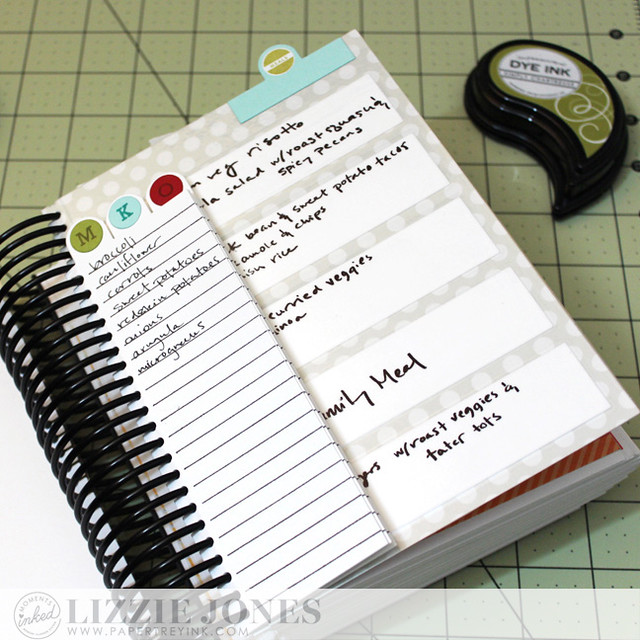
Grocery Tabs and Meal Planning Page

I like being able to see at a glance what items I need to pick up from which stores. It saves me time and makes my trips easy. Having everything written down also keeps me stay on track and only buy the things we actually need from the grocery store. And having the coupon pocket right there is a very handy thing, too!

Thank you so much for joining me today! Have a great week and I'll see you again soon!

Recipes:
Meal Planning Page
Stamps: Wet Paint Alphabet, Moments Inked: Divided, Moments Inked: Listed - Papertrey Ink
Cardstock: - Soft Stone, Soft Stone Polka Dot Paper, Aqua Mist, White Adhesive Sheet - Papertrey Ink
Ink: Simply Chartreuse, Melon Berry, Summer Sunrise, Harvest Gold, Aqua Mist, Winter Wisteria, Hibiscus Burst - Papertrey Ink
Other: Moments Inked: Boxed Die, Moments Inked: Divided Die - Papertrey Ink

Grocery Tabs
Stamps: Moments Inked: Listed, Pencilgrams - Papertrey Ink
Cardstock: Fresh Snow Linen, Aqua Mist, Pure Poppy, Simply Chartreuse - Papertrey Ink
Ink: Ripe Avocado, Smokey Shadow, Tropical Teal, Scarlet Jewel - Papertrey Ink
Other: Moments Inked Divided Die - Papertrey Ink

Sunday, November 1, 2015

November Color Play

Good morning, friends! Do you all feel totally well rested with your extra "fall back" hour under your belts? I sure hope so! At any rate, welcome to this month's Papertrey Ink Color Play feature. This month we're playing along with this photo:

Source

I really love the fresh feel of these colors together! That bold red really pops off of the cooler tones in the photo and how could I resist pulling out that glorious new Vintage Jadeite for another spin? I'm still solidly in holiday mode, so I thought I'd use this month's palette to create a festive card with modern appeal.

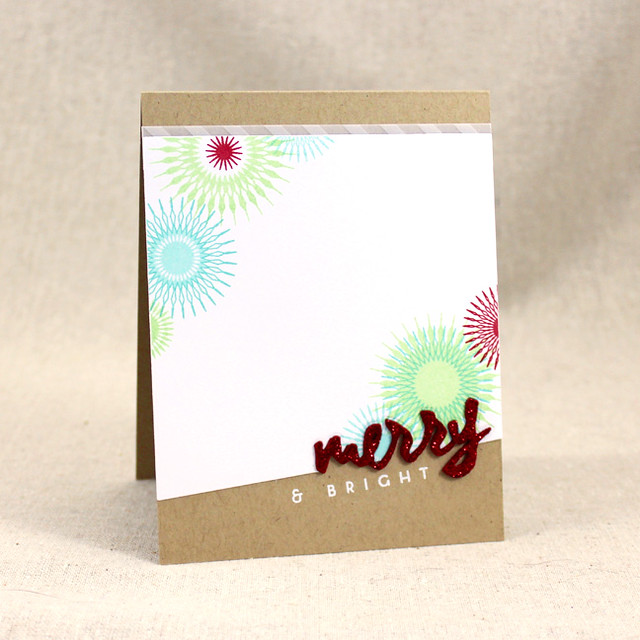
Merry & Bright Card


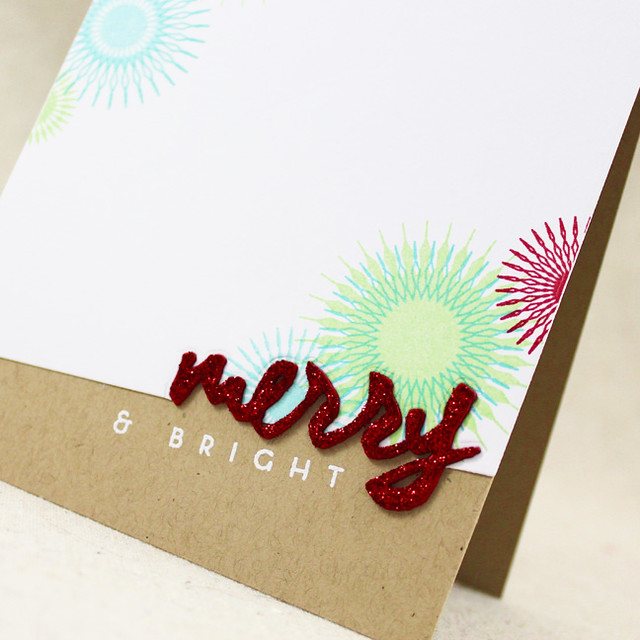
I began by die cutting a Sentiment Splits: Angle Vertical panel from white cardstock. I stamped that with a variety of the images from Snowflake Flurries using Vintage Jadeite, Hawaiian Shores, and Pure Poppy inks. In some cases I used generation stamping with the Hawaiian Shores snowflakes to add depth of color to my arrangement. Once that was complete, I used the word "merry" from the Wet Paint Holiday collection to cut a negative from the bottom edge of the panel. I also added a strip of striped vellum to the top edge to mimic the stripes of thicker and thinner whitewash in the inspiration photo.

Merry & Bright Close Up

Next, I heat embossed a Classic Kraft card base with the companion sentiment from Wet Paint Holiday and adhered my snowflake panel into place. Then, I die cut the "merry" from Pure Poppy cardstock three times and layered those pieces together to form a thicker die cut. I inlay the pure poppy die cut in to the negative in the snowflake panel and glittered the top layer to make it really stand out. All-in-all it's a simple card, but the little details (like the vellum edge and the glitter) give it plenty of personality.

Thank you so much for joining me today! Have a wonderful week and I'll see you again soon.

Recipe:
Stamps: Snowflake Flurries, Wet Paint Holiday - Papertrey Ink
Cardstock: Classic Kraft, Pure Poppy, Striped Vellum - Papertrey Ink; white
Ink: Vintage Jadeite, Pure Poppy, Hawaiian Shores - Papertrey Ink; VersaMark - Tsukineko
Other: Sentiment Splits: Vertical Angle Die, Wet Paint Holiday Die - Papertrey Ink; garnet glitter - Martha Stewart Crafts; White Embossing Powder - Filigree

Thursday, October 15, 2015

Release In Review

Good morning, everyone, and welcome back for my final wrap up for this month's Papertrey Ink countdown. It's been a busy one and I have a handful of projects left to share.

Let's start with Warmest Wishes, shall we?

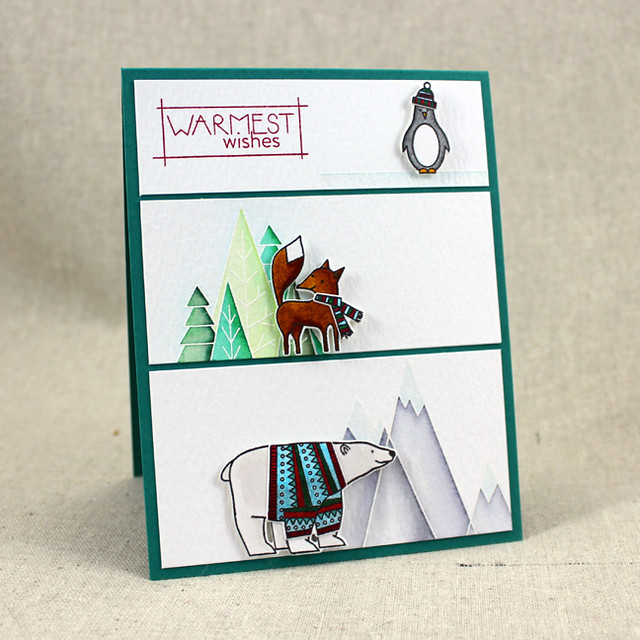
Warmest Wishes Card

I started this card by trimming three panels of watercolor paper and heat embossing them with the landscape images from the set.

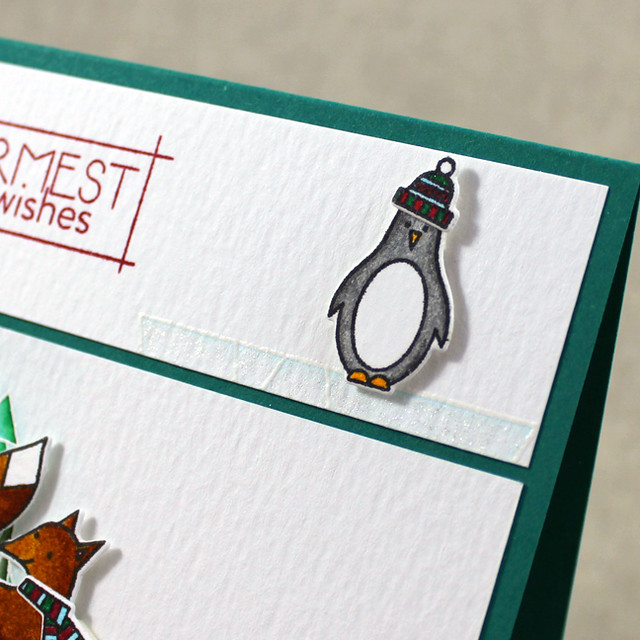
Penguin Close Up

I just stamped the mountains upside down to create the iceberg for the penguin. I colored the images with Zig markers and a water brush before adhering them to a Tropical Teal card base.

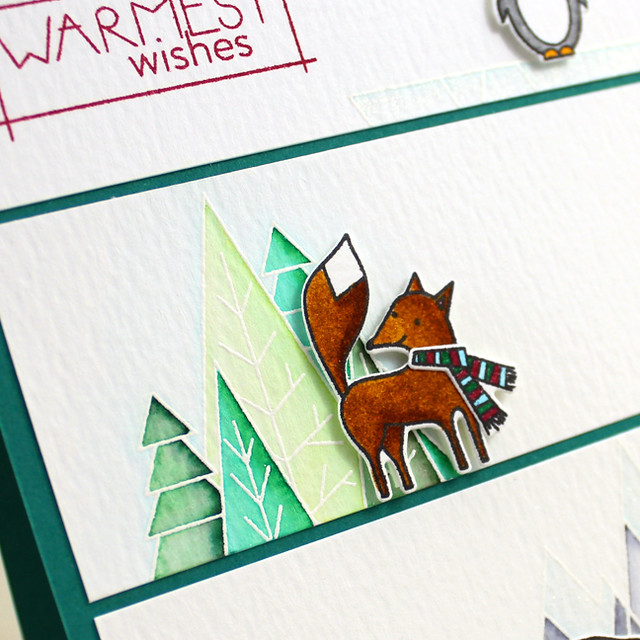
Fox Close Up

Next, I die cut and stamped the animals and their threads, also from watercolor paper. Again, I colored with the Zig markers.

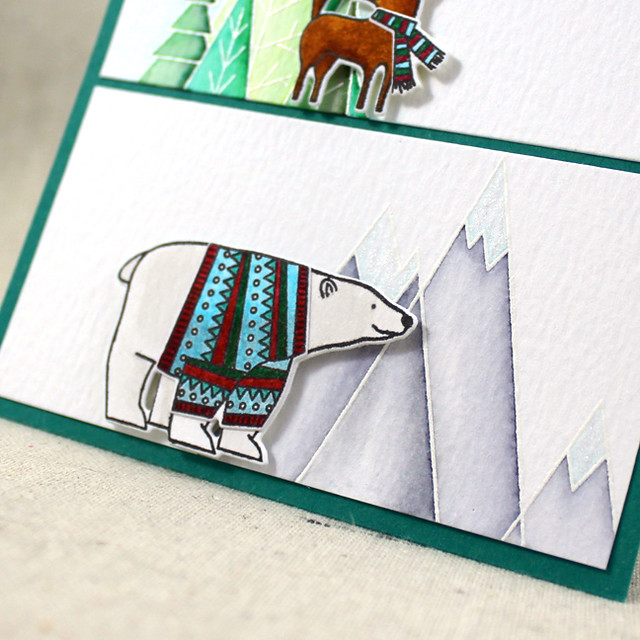
Polar Bear Close Up

Before adhering them to the card front with foam tape, I colored over the snowcaps and iceberg with a clear Wink of Stella pen for an extra touch of shimmer.

Next up, I have a tag made with Quilted: Winter and Tag Sale: Quilted die.

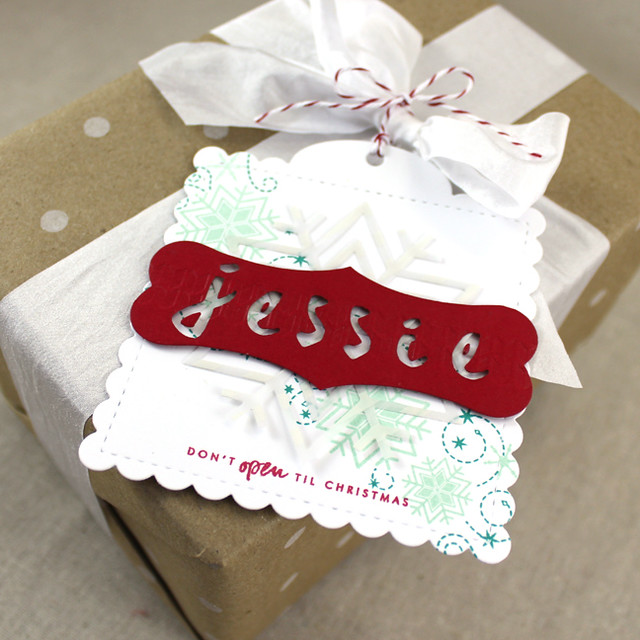
Jessie's Christmas Tag

I began by die cutting the tag from white cardstock and stamping it with the flurry image from Quilted: Winter in Tropical Teal and Aqua Mist inks. I added a sentiment from Wet Paint Holiday Tags in Pure Poppy ink and attached a vellum snowflake that I'd cut using the Quilted: Winter Die. I love having the ability to personalize my tags and the new Wet Paint Alphabet die gave me the perfect opportunity. I simply die cut the letters of my sister's name from a Pure Poppy Christmas Label shape and then gave it a little texture using the Striped Sweater Impression Plate. I adhered that to the tag with foam tape and tied on some red baker's twine as a finishing touch.

Speaking of gift giving, how about we take a look at a pillow box made by pairing Joyful Christmas and Snowflake Sparkle.

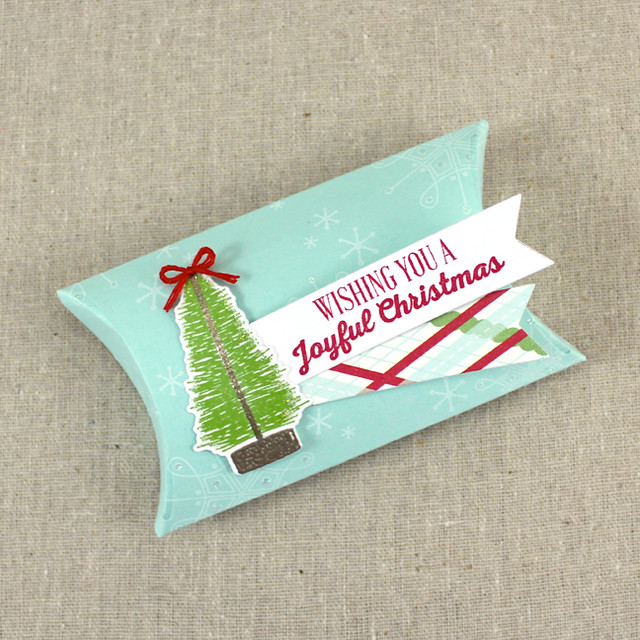
Joyful Christmas Pillow Box

I began by stamping a piece of Aqua Mist cardstock with the snowflakes from Snowflake Sparkle using Fresh Snow ink. Once that was complete, I die cut the box, assembled it, and added glitter to the snowflakes. Next, I die cut the tree from Joyful Christmas and stamped it with New Leaf ink. I added the trunk by heat embossing with Liquid Platinum powder and glitter to the edges of the tree.

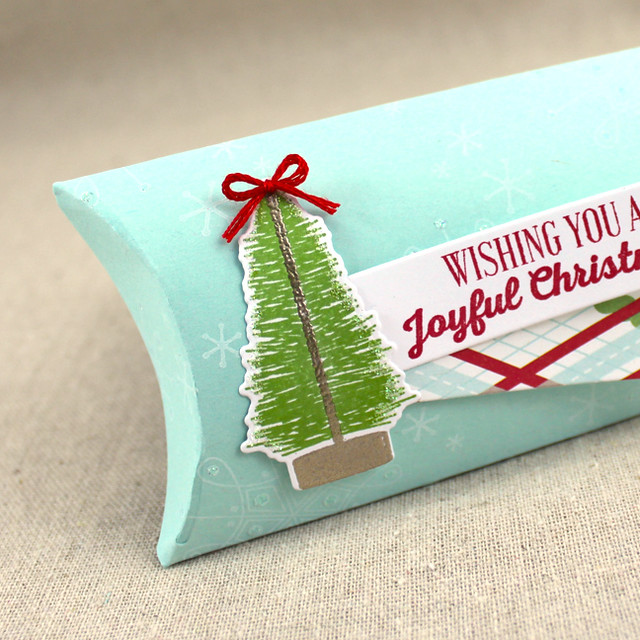
Joyful Christmas Pillow Box Close Up

Then, I die cut two banners using the First Place Die Collection, one from white cardstock and one from Holiday Plaid patterned paper. I stamped the white banner with a sentiment from Joyful Christmas and layered the two banners together before adhering them to the pillow box. I mounted the tree in place with foam tape and topped with a tiny embroidery floss bow.

And last, but not least, I have a card featuring Cup of Cheer by Dawn McVey. I love this set and can't wait to do more with it in the future. It may not seem like a big deal to most of you, in fact, you may not have even noticed, but there are mugs in this set that have their handles turned for lefties like me. Huge!

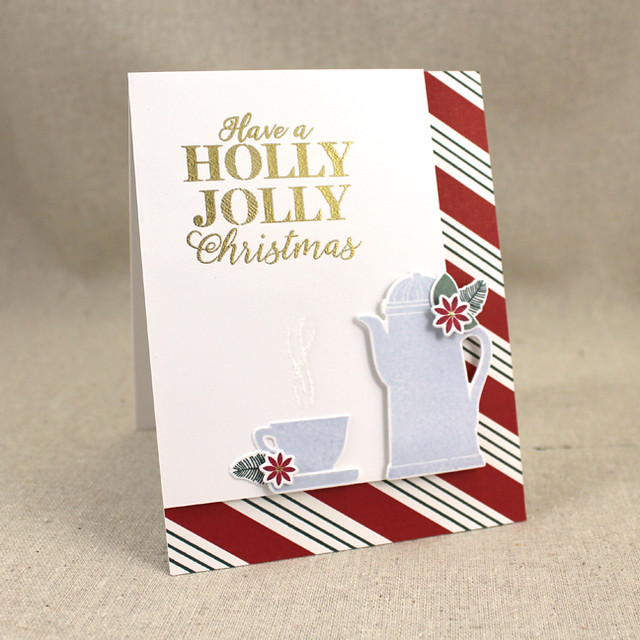
Holly Jolly Christmas Card

Anyway, I began this card by trimming out a piece of the new Pure Poppy + White Basics patterned paper and stamping Pinefeather lines between the Pure Poppy stripes. I adhered that to a white card base and set it aside. Next, I die cut the tea service pieces from white cardstock and stamped them with Spring Rain ink.

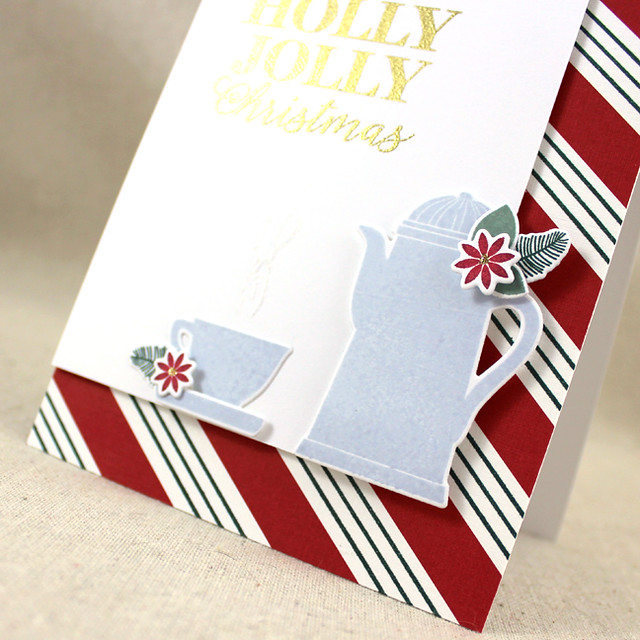
Holly Jolly Christmas Close Up

The leaves and flowers were also die cut and stamped with Pinefeather, Ocean Tides, Pure Poppy, and Scarlet Jewel inks. Then, I trimmed a white panel and heat embossed the Holly Jolly sentiment in the upper left hand corner with gold powder. I adhered that piece to the card front with foam tape and added my tea pot and mug. The tiny centers of the flowers were embellished with gold glitter and a steam swirl (from Candy Cane Christmas) was embellished with Crystal glitter as the perfect finishing touches.

Well, friends, that's it for me this time around. The whole team is sharing the rest of their projects today, so make sure to check in with Amy, Ashley, Betsy, Danielle, DawnHeather, Kay, Laurie, and Melissa for as much inspiration as you can handle. I'll see you all again soon!

Recipes:
Warmest Wishes Card
Stamps: Warmest Wishes - Papertrey Ink
Cardstock: Tropical Teal - Papertrey Ink; Watercolor Paper - Ranger
Ink: Pure Poppy - Papertrey Ink; Versafine Onyx Black, VersaMark - Tsukineko
Other: Warmest Wishes Die - Papertrey Ink; Clean Color Markers, Clear Wink Of Stella Pen - Zig; Foam Tape - Scotch; White Embossing Powder - Filigree

Jessie's Christmas Gift Tag
Stamps: Quilted: Winter, Wet Paint Holiday Tags - Papertrey Ink
Cardstock: Pure Poppy, Striped Sheer Basics Vellum - Papertrey Ink; white
Ink: Aqua Mist, Tropical Teal, Pure Poppy - Papertrey Ink
Other: Wet Paint Alphabet, Tag Sale: Quilted, Quilted: Winter Die, Christmas Label Die, Striped Sweater Impression Plate - Papertrey Ink; Cherry Baker's Twine - Divine Twine; Foam Tape - Scotch

Joyful Christmas Pillow Box
Stamps: Joyful Christmas, Snowflake Sparkle - Papertrey Ink
Cardstock: Aqua Mist, Holiday Plaid Patterned Paper - Papertrey Ink; white
Ink: Pure Poppy, New Leaf, Fresh Snow - Papertrey Ink; VersaMark - Tsukineko
Other; Joyful Christmas Die, Essential Pillow Box Die - Papertrey Ink; Sugar Cube Glitter - Martha Stewart Crafts; Liquid Platinum Embossing Powder - Ranger; Embroidery Floss - DMC; Foam Tape - Scotch; Glue Pen

Holly Jolly Christmas Card
Stamps: Cup Of Cheer, Background Basics: Plaid Builder - Papertrey Ink
Cardstock: Pure Poppy + White Basics - Papertrey Ink; white
Ink: Pinefeather, Spring Rain, Ocean Tides, Pure Poppy, Scarlet Jewel - Papertrey Ink; VersaMark - Tsukineko
Other: Cup Of Cheer Die - Papertrey Ink; Gold Detail Embossing Powder - Filigree; Florentine Gold, Crystal Glitter - Martha Stewart Crafts; Foam Tape - Scotch

Wednesday, October 14, 2015

Holiday Style

Good morning, everyone, and welcome to Day 5 of the October Papertrey Ink Countdown! Today we're showcasing Maile's new folded tag dies and the Wet Paint Holiday Tags and Star Scribbles stamp sets. It's no secret that I love gift packaging, so these fresh and modern tags and stamps are right up my alley! Plus, they're absolutely perfect for experimenting with a technique I've been wanting to try. Let's get to it, shall we?

How about we start with the tags. I wanted to try a technique I've been mulling over and I thought these tags would be a great opportunity to give it a spin. Essentially, it's an emboss resist and sponging technique, but with a twist.

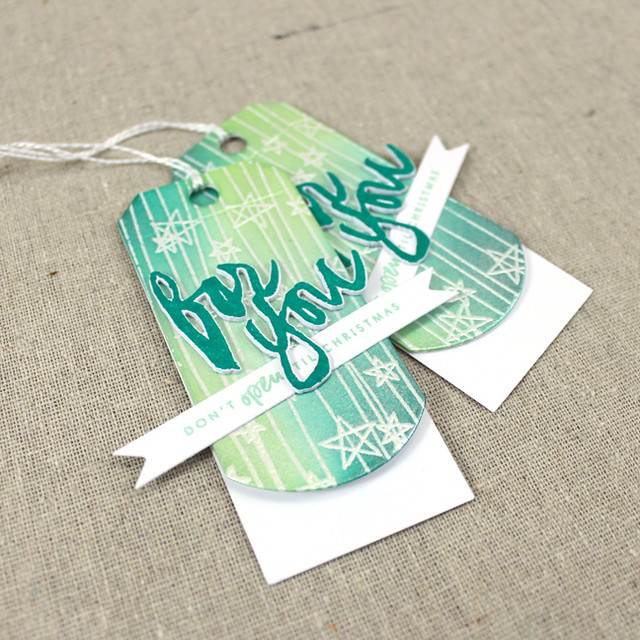
For You Tag Set

I began by die cutting the tags from white cardstock - super quick because there are two tags per die! I masked off the back portion of the tags with a post it note and then stamped and embossed the Star Scribbles images with clear powder. Then, I sponged Vintage Jadeite, Aqua Mist, and Tropical Teal inks over the embossing. Now comes the twist. After I was happy with my ink blending, I sponged Versamark over the front of the entire tag and sprinkled on Pearl colored Perfect Pearls. I dusted it around a bit and then brushed away the excess with a paintbrush. I buffed the surface with a soft cloth to remove any loose powder and allow the colors to show through a little better. The end result shimmers beautifully and almost looks like soft metal.

Folded Christmas Tag

Then I die cut the sentiment from Wet Paint Holiday Tags and stamped it with Tropical Teal. I also stamped a companion sentiment in Aqua Mist ink onto a white die cut banner. I layered the two and adhered them to the front of the tag.

I loved the technique so much that I decided to try it again, this time on a coordinating Christmas card.

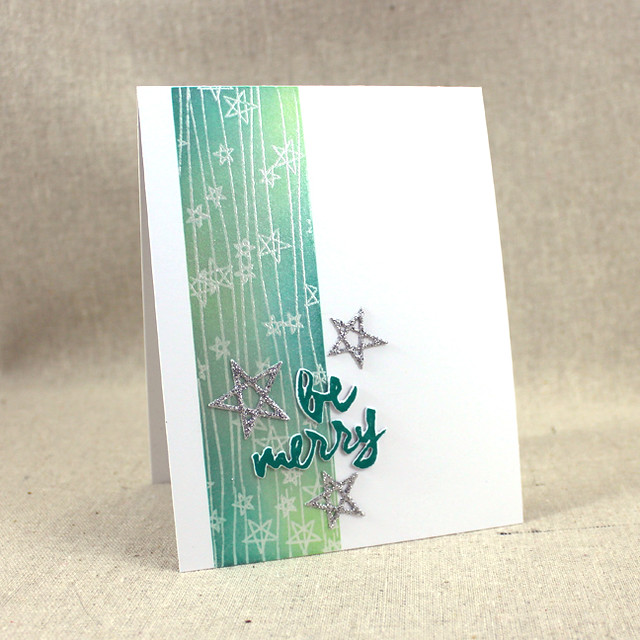
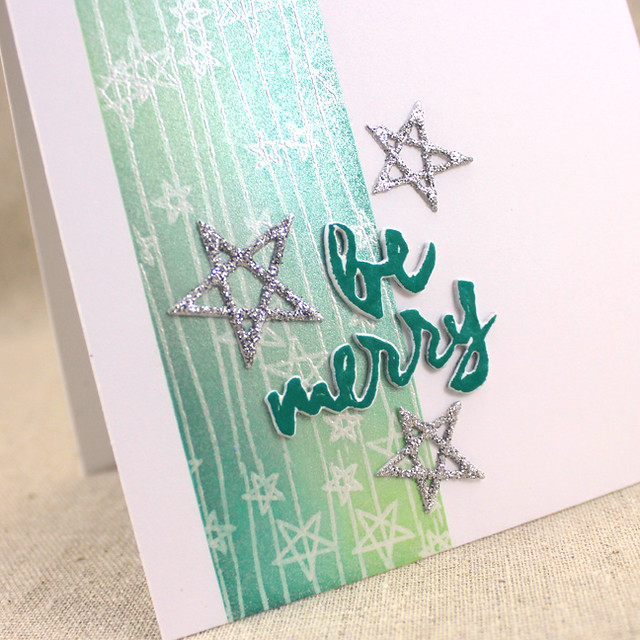
Be Merry Card

I followed the same steps for the blended stripe on the card as I had for the tag, just masking off a larger area. The Star Scribbles image is a tad short to go all the way from the top of the card to the bottom, so I just lined up the ends as carefully as possible to bridge that gap.

Be Merry Close Up

I embellished the sentiment with glittered stars that I cut with the Small Sketched Stars Die. I love how non-traditional and festive this card turned out!

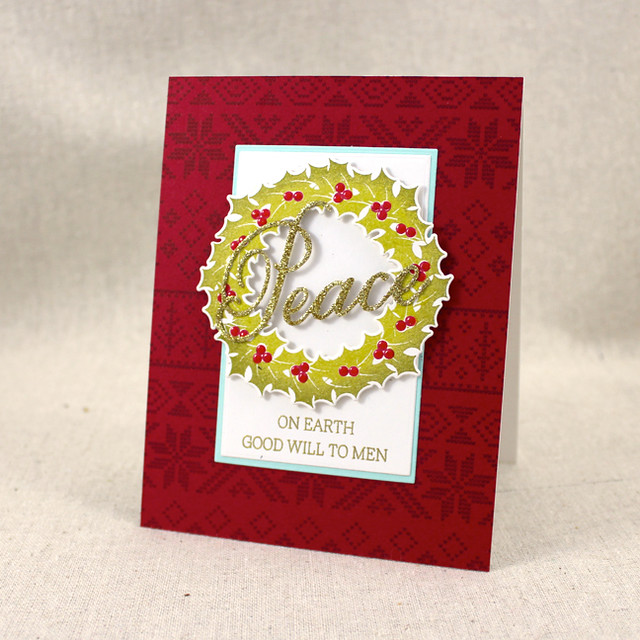
Finally today, I have one last card to share. This one pairs Fair Isle Borders with Dawn's Enclosed: Wreath set for a decidedly more traditional greeting.

Peace On Earth Card

I began by stamping my background. To make things super easy on myself I lined up several of the borders on one block and just stamped twice. Work smarter, not harder, folks. I inked the images with Scarlet Jewel and stamped onto Pure Poppy cardstock. Then, I die cut the smaller Botanical Blocks Basics rectangle and the wreath shape from Rustic White cardstock. I stamped the wreath with the coordinating image using Simply Chartreuse, Ripe Avocado, and Pure Poppy inks.

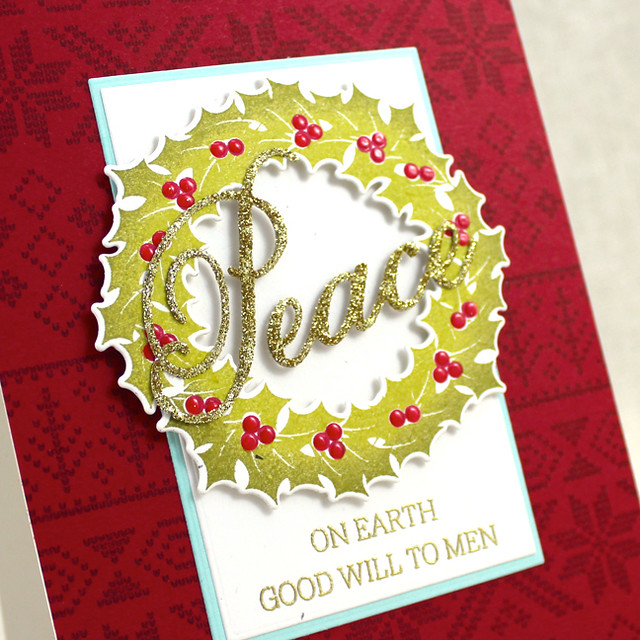
Peace On Earth Close Up

The rectangle was stamped with a sentiment from the set and matted with an Aqua Mist layer (also cut with the Botanical Blocks Basics die). I adhered the rectangle piece to the card front and added the wreath with foam tape. I then embellished the holly berries with Glossy Accents and set that piece aside to dry. Next, I die cut the "Peace" from xyroned Kraft cardstock and trimmed away the excess bits I didn't want to use. I removed the adhesive paper and added a sprinkle of gold glitter for a pop of glam. Once the holly berries were dry, I added the glittered sentiment and called it good.

Thank you all for joining me today. I'm sure you're aware that today is a group post day, so make sure to visit Nichole, Amy, Ashley, Betsy, Danielle, Dawn, Heather, Kay, LaurieMelissa, and Maile as they share more of this month's release. I'll see you back here tomorrow with a handful of additional projects. Have a great day!

Recipes:
For You Tag Set
Stamps: Wet Paint Holiday Tags, Star Scribbles - Papertrey Ink
Cardstock: white
Ink: Vintage Jadeite, Aqua Mist, Tropical Teal - Papertrey Ink; VersaMark - Tsukineko
Other: Folded Tags Die, Wet Paint Holiday Tags Die, Tag Sale #10 - Papertrey Ink; Pearl Perfect Pearls - Ranger; Clear Embossing Powder - Filigree; White Crochet Thread

Be Merry Card
Stamps: Wet Paint Holiday Tags, Star Scribbles - Papertrey Ink
Cardstock: white
Ink: Vintage Jadeite, Aqua Mist, Tropical Teal - Papertrey Ink; VersaMark - Tsukineko
Other:Wet Paint Holiday Tags Die, Small Sketched Stars Die - Papertrey Ink; Pearl Perfect Pearls - Ranger; Clear Embossing Powder - Filigree; Sterling Fine Glitter - Martha Stewart Crafts; Glue Pen

Peace On Earth Card
Stamps: Enclosed: Wreath, Fair Isle Borders - Papertrey Ink
Cardstock: Pure Poppy, Aqua Mist, Rustic White, Classic Kraft - Papertrey Ink
Ink: Scarlet Jewel, Simply Chartreuse, Ripe Avocado, Pure Poppy - Papertrey Ink; VersaMark - Tsukineko
Other: Botanical Blocks Basics Die, Enclosed: Wreath Die - Papertrey Ink; Foam Tape - Scotch; Gold Embossing Powder - Filigree; Glossy Accents - Ranger; Florentine Gold Fine Glitter - Martha Stewart Crafts; Xyron