Pages

Thursday, May 24, 2018

Wood Burned Utensils with Textile Impressions

Hi there, friends! I hope you're having a wonderful day and are looking forward to a relaxing holiday weekend. I just wanted to pop in today to share a project I made for a wedding gift a few weeks back. If you follow me on Instagram, you may have noticed this sneak peek I shared awhile ago.


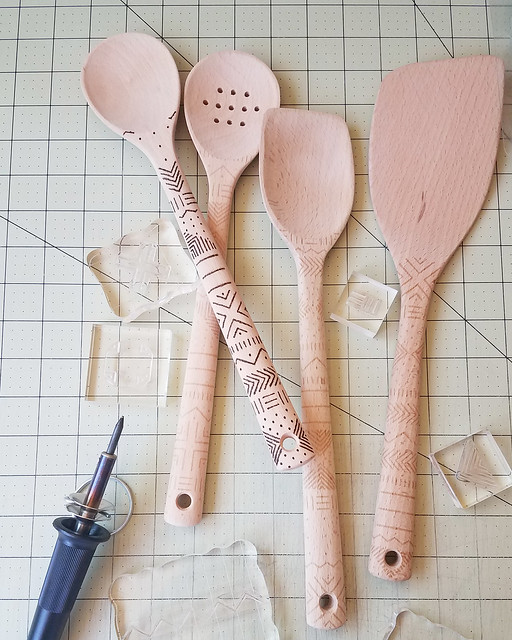
I was testing out my new wood burning tool (I have this one) because I wanted to make a set of decorated utensils for Sean's cousin and his lady as part of their wedding gift. I thought it might be fun to share how I used a stamp set that I designed, Textile Impressions, to add these patterns.

LizzieJones_TextileImpressions_WoodburnedUtensils1

I began by washing the wooden utensils. I bought an unvarnished variety (these ones are from Target), but they're still coated with a finish to make them nice and smooth for the store shelves. That coating can gunk up your tool, so a quick bath was necessary. Once they were dry I just stamped the patterns onto the utensils using Classic Kraft ink. I wasn't worried about whether or not the ink was food safe because 1) I didn't stamp on the food touchy parts much at all AND 2) I knew I was going to wash and reseal them with beeswax before all was said and done anyway.

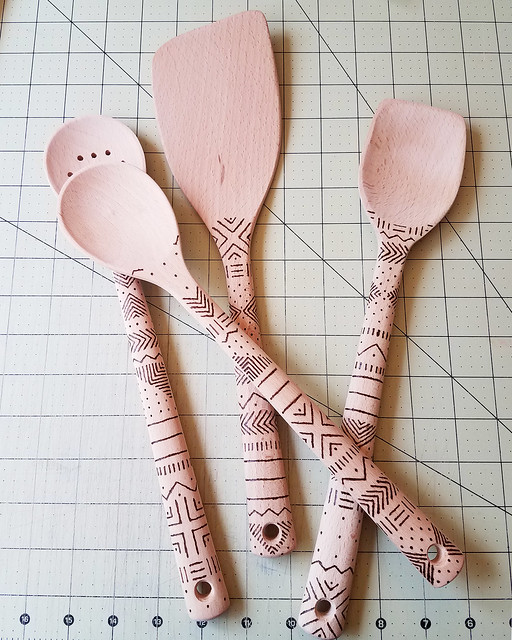
LizzieJones_TextileImpressions_WoodburnedUtensils2

Then I simply followed my stamped Textile Impressions lines with the wood burning tool. I switched up the patterns so none of the utensils is the same, but they all coordinate. The more (or more slowly) you go over a particular line, the darker it gets and the dotted designs were most definitely the easiest ones to transfer.

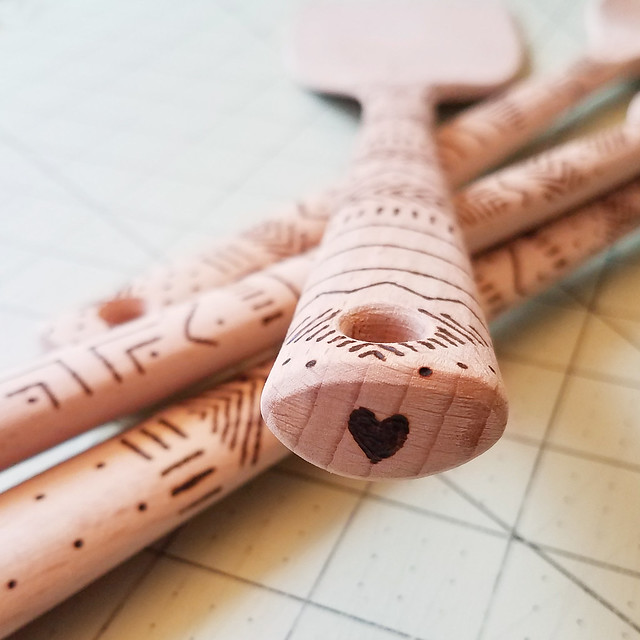
LizzieJones_TextileImpressions_WoodburnedUtensils3

I freehanded a little heart on the end of each utensil. I believe there are few things more full of love and care than spending the time and energy to prepare food, so a little heart felt appropriate. Once I was finished wood burning, I washed the utensils a second time and then sealed them with beeswax cutting board conditioner to give them a nice finish.

LizzieJones_TextileImpressions_WoodburnedUtensils4

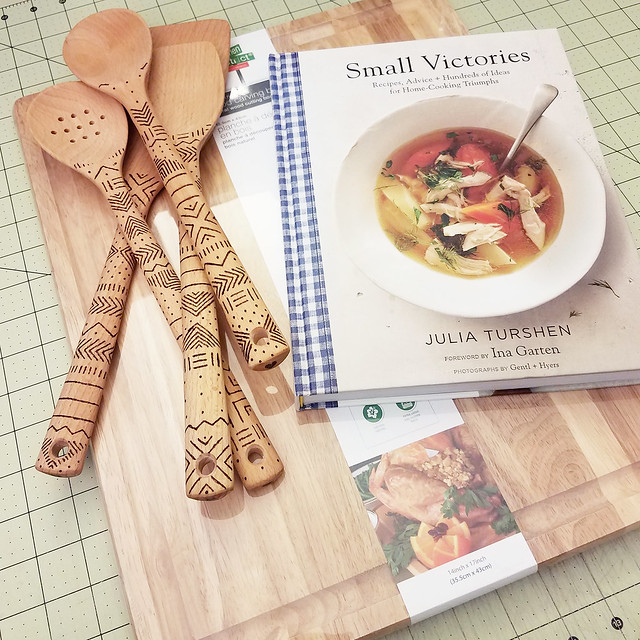
Here's the whole gift all put together. They actually asked for the cutting board (though it was varnished, so I didn't decorate it) and we threw in a cookbook from a chef I think is pretty rad.

So there you have it! Your stamps can do so much more than just paper projects. Do you use your stamps for other crafting? I'd love to hear about it!


In other news, don't forget that tomorrow at Noon ET I'm going to do an Ask Me Anything live on my Instagram stories. Come, hang out, and ask whatever sorts of questions you'd like. It can be crafting or otherwise. I'm game for almost anything!


And in case you didn't see it on the Papertrey Ink team blog, Papertrey is running their biggest sale ever over on their website through midnight Saturday. Now's the time to shop for all those things you have waiting on your wishlist, so pop over there and treat yourself!

If I don't see you tomorrow, have a great weekend everyone!

Tuesday, May 22, 2018

Ask Me Anything!


I'm doing an Ask Me Anything in my Instagram stories on Friday at noon ET and I hope you'll join me! I believe I can save it so that anyone who can't make it during the actual story can still watch it later, so if you can't be there in person there's no need to fret. You can ask your questions during the AMA or you can submit them here on this post or via email. Feel free to ask about crafting, cats, and beyond! I'll answer just about anything as long as it isn't uncomfortably personal (which, admittedly, is a fairly short list) or contractually obligated to remain a secret (a slightly longer list). I have no idea how this is going to go or if there's even much interest, so I'm not sure how long it will last. It'll be an adventure! I hope you'll come along for the ride!

Monday, May 21, 2018

Make It Monday: Above & Below

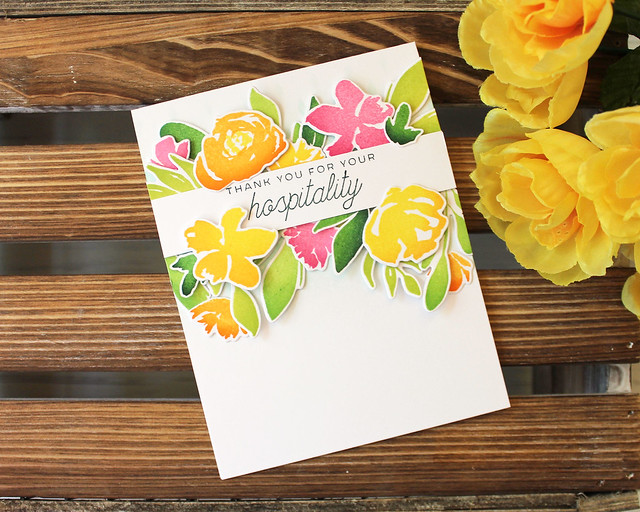
Good morning, friends! I'm just popping in quickly to share my Make It Monday project for this week. You can view the full video over on the Papertrey Ink blog, but here's a peek at my project.

LizzieJones_MakeItMonday_Above&Below_ThankYouForYourHospitalityCard

You may have noticed me using this technique a few times over the years. It's a personal favorite. The whole idea is fairly simple. You just stamp your sentiment on a die cut or cardstock strip and then decorate the area above and below...hence the name.

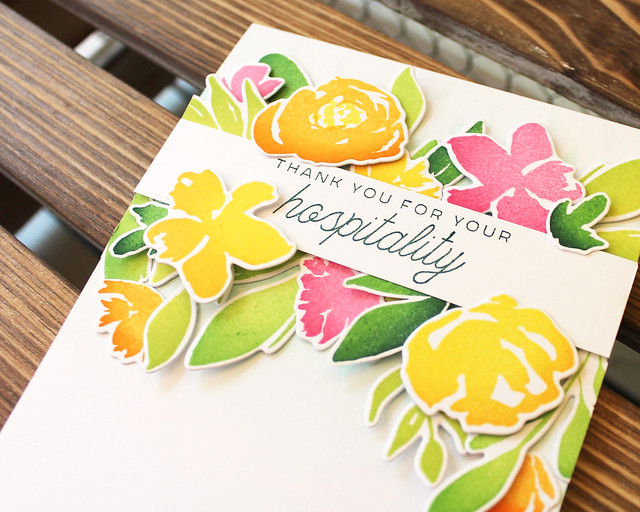
LizzieJones_MakeItMonday_Above&Below_ThankYouForYourHospitalityCard2

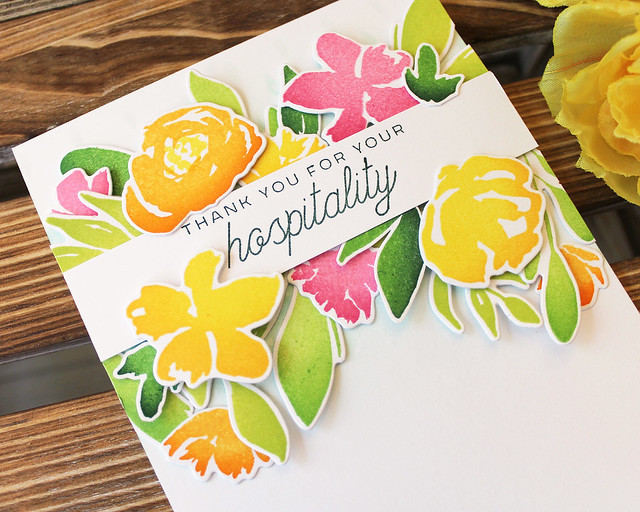
For this week's card I used a sentiment from my Christmas Cuts Sentiments stamp set and the flowers from Botanical Bounty. I love that set so, so much!

LizzieJones_MakeItMonday_Above&Below_ThankYouForYourHospitalityCard3

I hope you'll pop by the team blog to watch the video and link up your own project for your chance to win a $25 gift certificate to the Papertrey Ink store. Have a great week and I'll see you again soon!

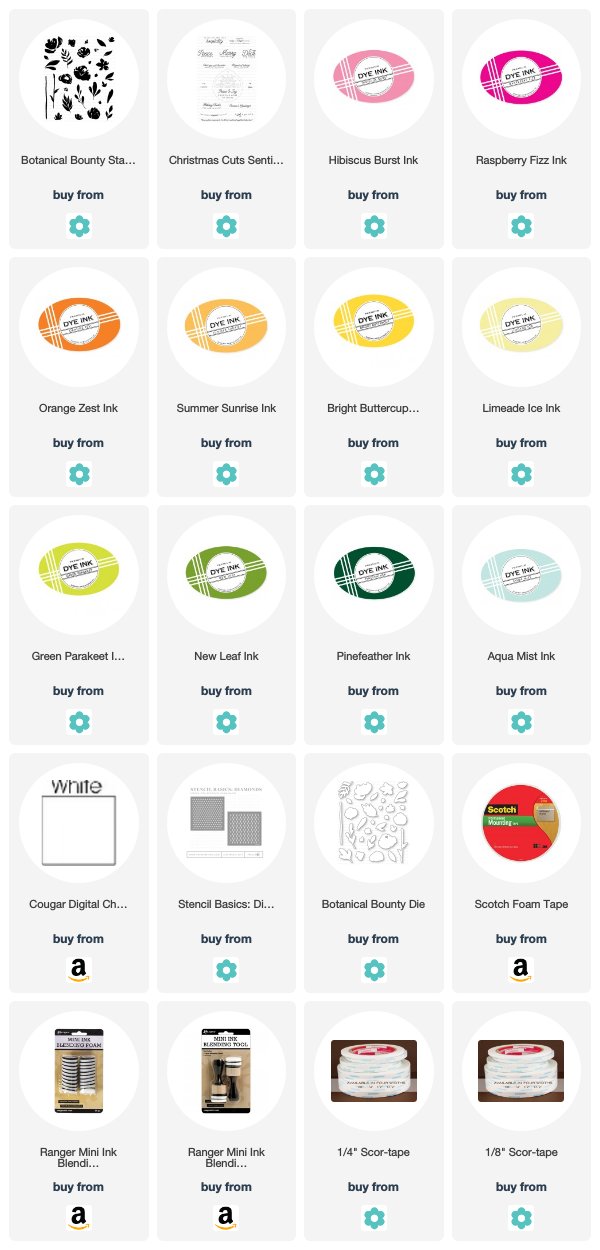
Supplies:
Thank You For Your Hospitality Card

Monday, May 14, 2018

Introducing Corner Adorner, Glorious Globes, Text & Texture: Roses, and Words To Live By

Good morning, friends! I hope kicking off your week with the Papertrey Ink May countdown means you're off to a great start. We're back today with Betsy's Text & Texture: Roses and Words To Live By: Courage sets as well as my Corner Adorner and Glorious Globes sets. It's a big day, so we have no time to waste! Let's get to it!

My first card pairs this month's Corner Adorner and Glorious Globes sets. It may sound like those two things wouldn't necessarily go together, but just you wait!

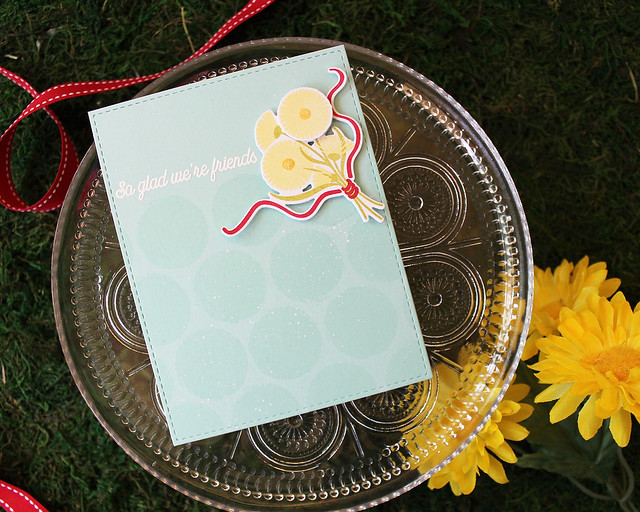
LizzieJones_May2018_CornerAdorner_GloriousGlobes_PapertreyInk_SoGladWe'reFriendsCard

I began by stamping the large solid globe repeatedly onto an Aqua Mist Simply Stitched cardstock panel using the matching ink. The globes this month have a brushstroke style, so the result looks like super-sized, painted polka dots!

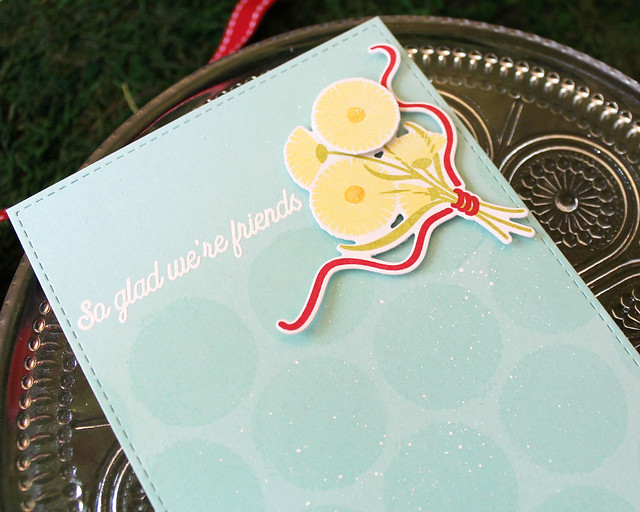
LizzieJones_May2018_CornerAdorner_GloriousGlobes_PapertreyInk_SoGladWe'reFriendsCard2

Next, I added white splatters and heat embossed the sentiment from Corner Adorner with white detail powder. Then, I die cut and stamped the Corner Adorner bouquet. If you're going to die cut your bouquet, it really helps with the placement to do your die cutting before your stamping.

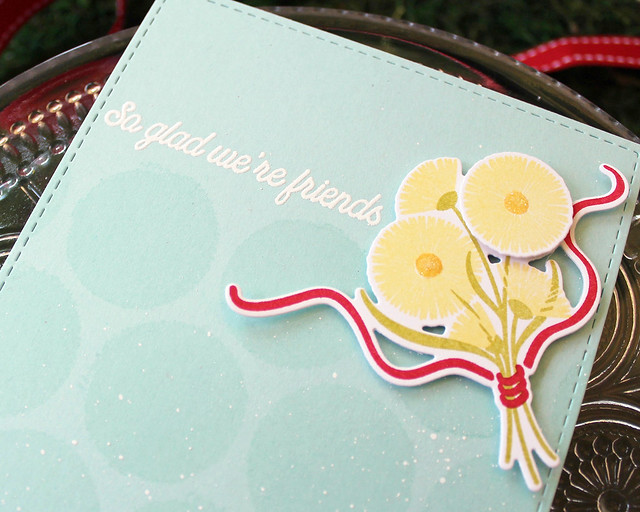
LizzieJones_May2018_CornerAdorner_GloriousGlobes_PapertreyInk_SoGladWe'reFriendsCard3

I also die cut and stamped one of the individual blooms. I added the bouquet to the card front with foam tape and embellished the flower centers with crystal glitter for a bit of sparkle. I'm loving those giant polka dots and I'm sure I'll be stamping them again. It makes me so happy when I can find ways to do make a stamp do double duty like this!

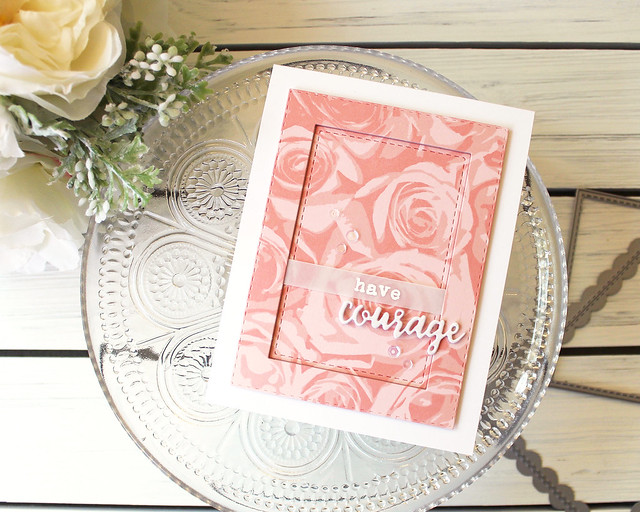
For my second card, I've used Betsy's Text & Texture: Roses background with her Words To Live By: Courage set. I was thinking of an encouragement card for someone fighting a cancer battle when I was making this card. It would be easy to change the color of the background to coordinate with the cancer ribbon color to personalize the card to your particular needs.

LizzieJones_May2018_Text&TextureRoses_WordsToLiveByCourage_PapertreyInk_HaveCourageCard

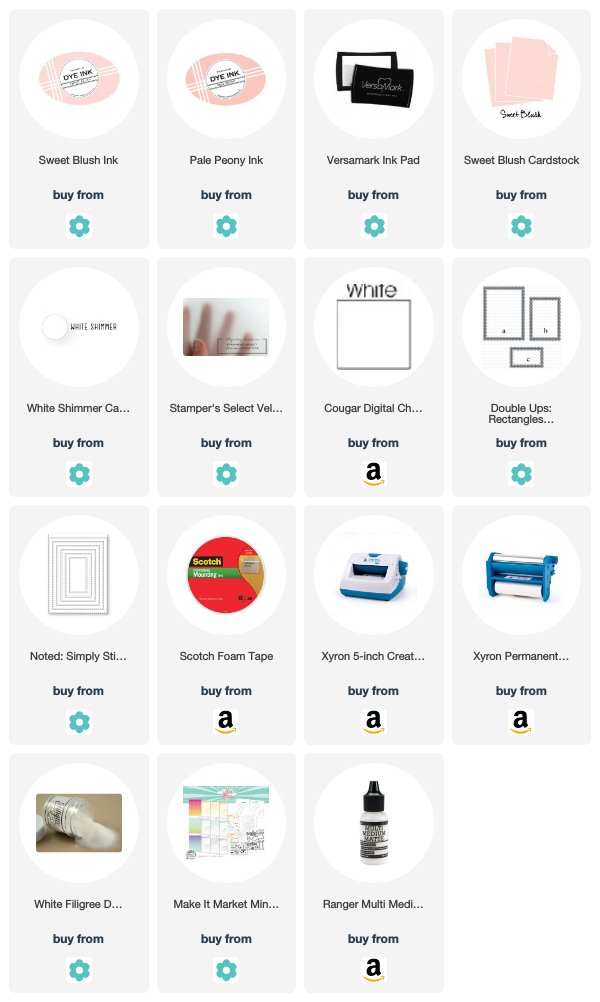
I began by stamping the roses onto Sweet Blush cardstock using Sweet Blush and Pale Peony inks. I used a stamp press to make sure that I got nice, even coverage. Once I was finished with my stamping, I die cut the background panel using the Double Ups: Rectangles and Noted: Simply Stitched layer to cut a frame.

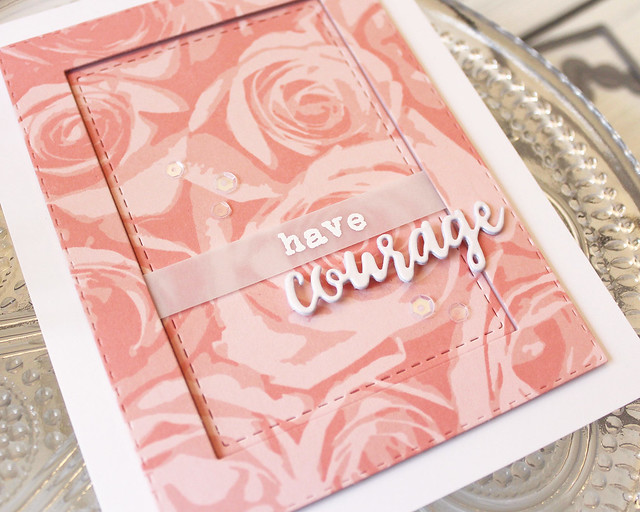
LizzieJones_May2018_Text&TextureRoses_WordsToLiveByCourage_PapertreyInk_HaveCourageCard2

I adhered the center panel to a white card front. Then, I heat embossed part of my sentiment onto vellum and adhered that strip to the back of the frame. I used foam tape to adhere the frame to the card, matching it up to the center panel.

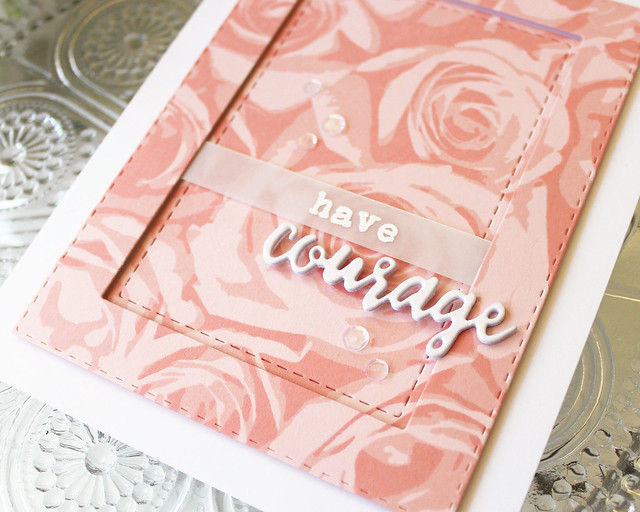
LizzieJones_May2018_Text&TextureRoses_WordsToLiveByCourage_PapertreyInk_HaveCourageCard3

Then, I die cut three "courage" die cuts from White Shimmer cardstock and stacked them for a bit of dimension and stability. I adhered that to the card front with foam adhesive and then embellished with a sprinkling of Sunshine & Rainbows sequins. The shimmer stock and sequins add the slightest bit of shine without being too over-the-top.

Thank you so much for joining me today! Make sure to check in with AmyBetsy, Dawn, Heather, KeewayLaurie, Melissa B, Melissa P, Michelle, and Stephanie for more sneak peeks or click HERE to see everything we're introducing today. Have a great week, everyone, and enjoy the release tomorrow night!

Supplies:
So Glad We're Friends Card


Have Courage Card

Sunday, May 13, 2018

Introducing Stars & Stripes and Celebrate With A Bang

First and foremost, Happy Mother's Day to all of you crafty mamas out there! I hope you all get to enjoy some relaxing, creative time today. And in other news, welcome back to today's Papertrey Ink May new release countdown! I have the great pleasure of getting to introduce two new sets from Lexi Daly today, Stars & Stripes and Celebrate With A Bang. You can use them together or separately for fabulous Fourth Of July projects or use one of the more universal sentiments in the Stars & Stripes set to make year-round creations. Let's take a closer look!

My first card today uses the sets together to create that classic Fourth Of July look.

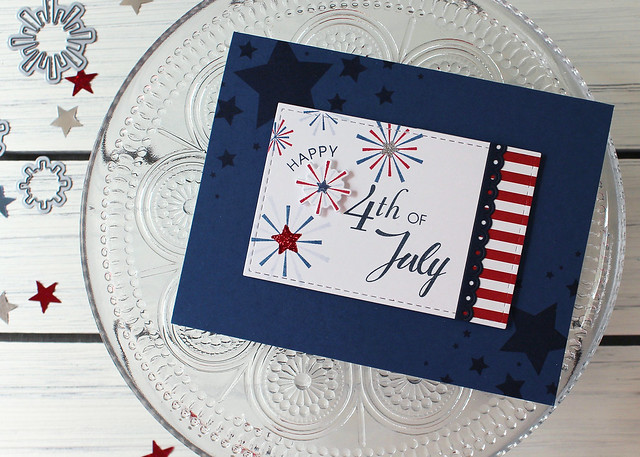
LizzieJones_May2018_CelebrateWithABang_PapertreyInk_4thOfJulyCard

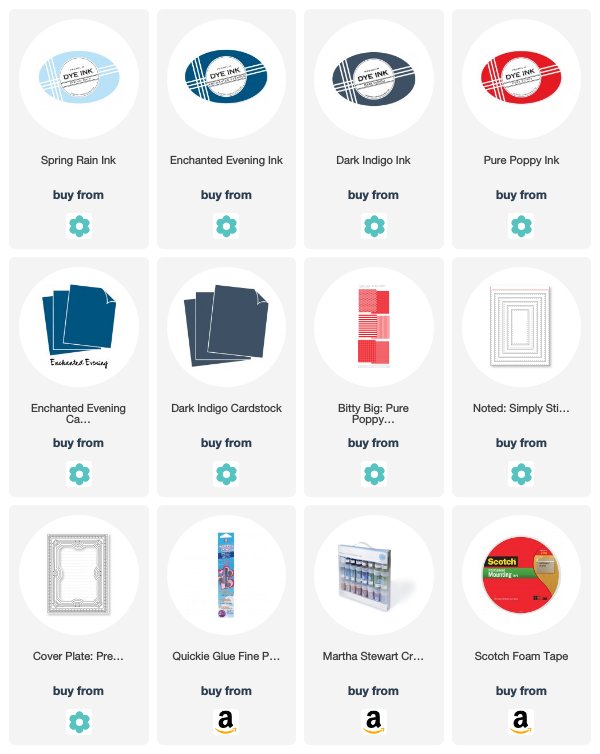
I began by stamping a cascade of stars using Dark Indigo ink on an Enchanted Evening card base. Then, I stamped the fireworks and stars from Celebrate With A Bang onto a Noted: Simply Stitched panel using Spring Rain, Enchanted Evening, and Pure Poppy inks.

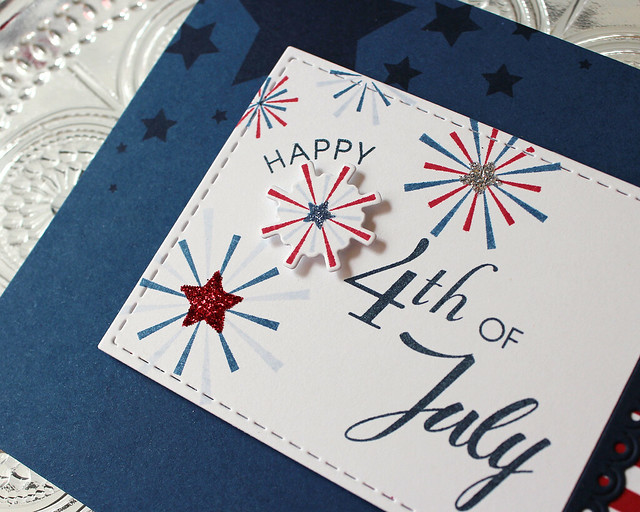
LizzieJones_May2018_CelebrateWithABang_PapertreyInk_4thOfJulyCard2

I followed up with the sentiment from Celebrate With A Bang in Dark Indigo before trimming off one end of the panel. I also stamped and die cut a the small firework and embellished each of the stars with glitter.

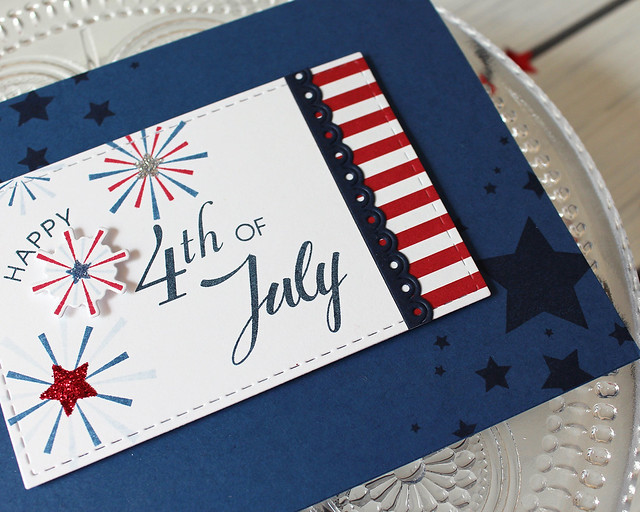
LizzieJones_May2018_CelebrateWithABang_PapertreyInk_4thOfJulyCard3

Next, I adhered a strip of Bitty Big: Pure Poppy patterned paper to the focal panel and embellished with a decorative border cut using the Cover Plate: Pretty Frame Die. I attached that panel to the card front and added the die cut firework, both using foam tape. This card is ready to celebrate!

My next two cards are more everyday sorts of cards using Stars & Stripes. We all love a great holiday set, but a holiday set that can be used for other occasions too...that's the best!

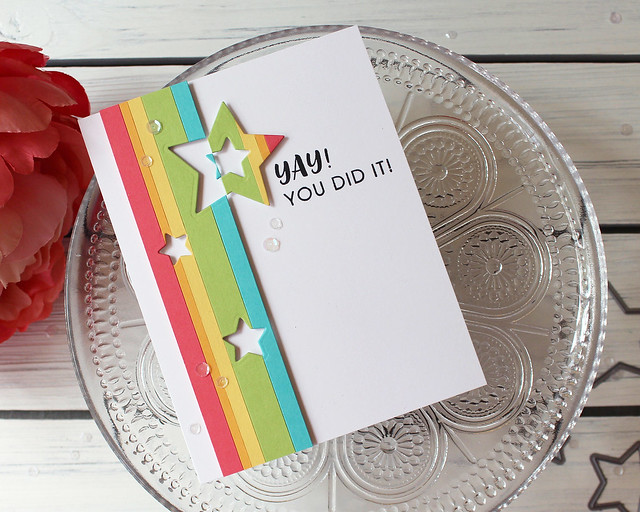
LizzieJones_May2018_Stars&Stripes_PapertreyInk_YouDidItCard

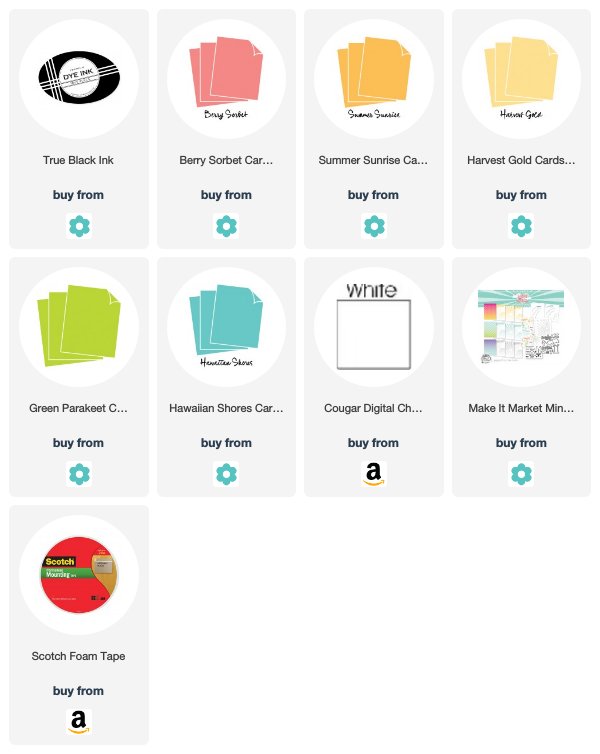
To begin this card, I cut strips of several colors of cardstock in varying widths (to keep things interesting). I adhered them together using the sticky side of label paper and then used the Stars & Stripes dies to cut a design into the strip.

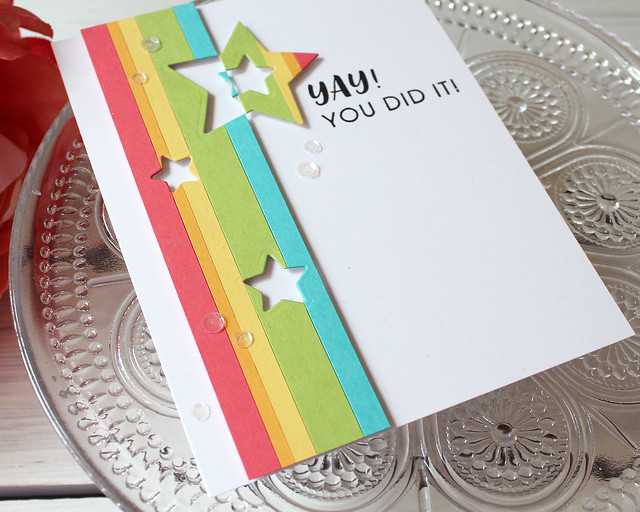
LizzieJones_May2018_Stars&Stripes_PapertreyInk_YouDidItCard2

I stamped the sentiment using True Black ink and then adhered the colorful strip and die cut elements to the card front using foam tape.

LizzieJones_May2018_Stars&Stripes_PapertreyInk_YouDidItCard2

Then I embellished with a handful of Sunshine & Rainbows sequins. I love how simple this card is, but the die cutting with the reverse negatives gives it a little something special. I did this card in rainbow colors, but you could try a monochromatic color scheme and it would be just as interesting.

My last card today pairs the new Stars & Stripes set with an older set, Shine, to give a supernova sort of effect.

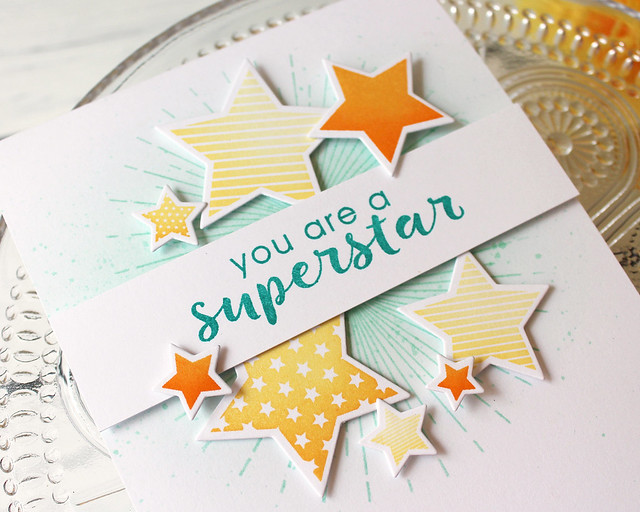
LizzieJones_May2018_Stars&Stripes_PapertreyInk_SuperstarCard

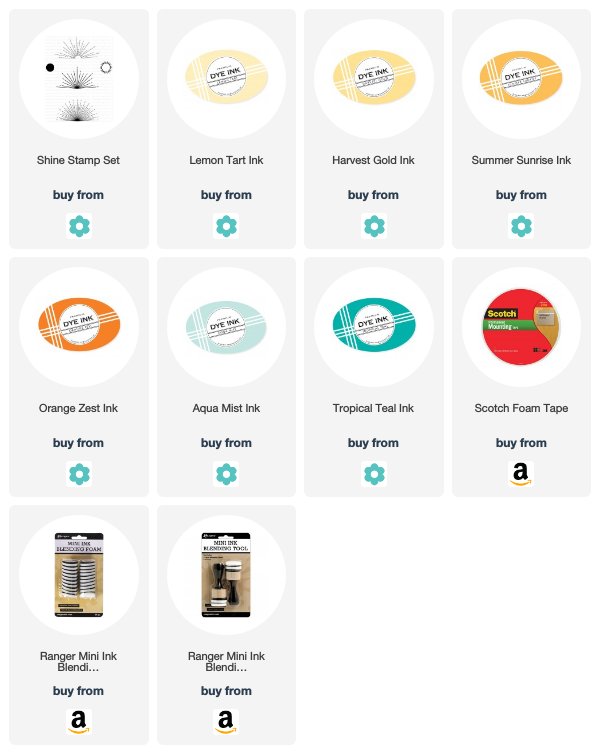
I began by sponging and speckling a bit of Aqua Mist ink onto a white card base. Then, I stamped the ray image from Shine using Aqua Mist ink both above and below a given point.

LizzieJones_May2018_Stars&Stripes_PapertreyInk_SuperstarCard2

I stamped the sentiment onto an additional strip of white cardstock using Tropical Teal ink and adhered it to the card front using foam tape.

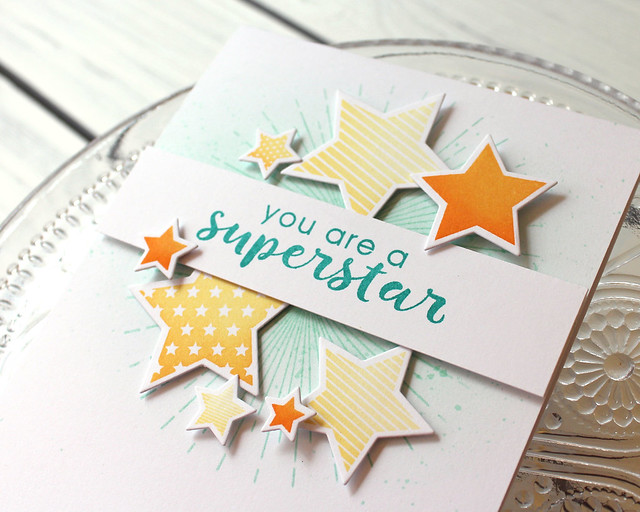
LizzieJones_May2018_Stars&Stripes_PapertreyInk_SuperstarCard3

Then, I stamped and die cut a whole mess of stars from Stars & Stripes using an array of yellow and orange inks. I adhered them around the sentiment using a mix of flat and foam adhesives to give my arrangement dimension. I love how it looks like the stars are bursting out from the sentiment!

Thank you so much for joining me today! I had such fun playing around with Lexi's new sets and I'm absolutely sure you will, too. I'll be back with more peeks at this month's release tomorrow, but in the meantime Betsy, Dawn, Heather, Laurie, Melissa B, Melissa P, Michelle, and Stephanie for more sneak peeks or click HERE to see everything we're introducing today. Enjoy your Mother's Day and I'll see you again in the morning!

Supplies:
Happy 4th Of July Card


You Did It Card


You Are A Superstar Card

Saturday, May 12, 2018

Introducing Forest Floor: Summer, Cover Up: Hexagons, and Seasonal Borders: Summer

Good morning and welcome back for Day 3 of the Papertrey Ink May countdown! The team is back today introducing Dawn's Cover Up: Hexagons, Betsy's Seasonal Borders: Summer, and my Forest Floor: Summer stamp sets. I have three projects to share with you, so let's get to it!

My first card today uses Cover Up: Hexagons with Forest Floor: Summer. I've also got a peek at Betsy's newest Noted: Pinked Edge A2 die collection in here as well.

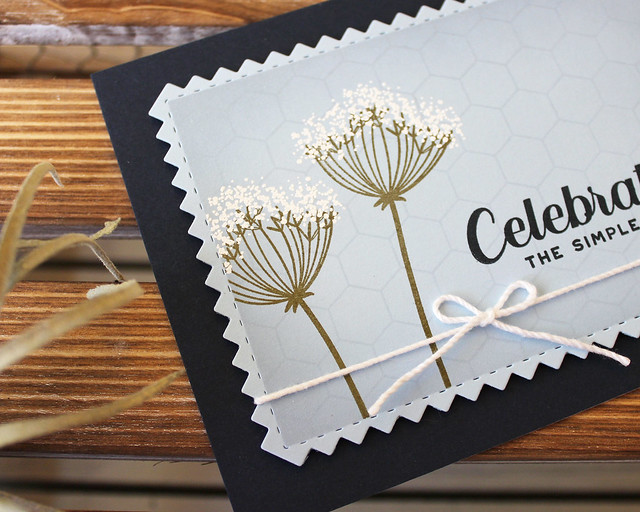
LizzieJones_May2018_ForestFloorSummer_PapertreyInk_CelebrateTheSimpleThingsCard

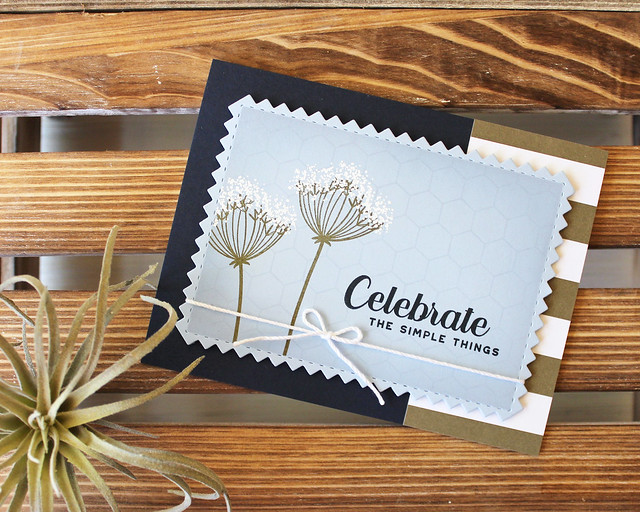
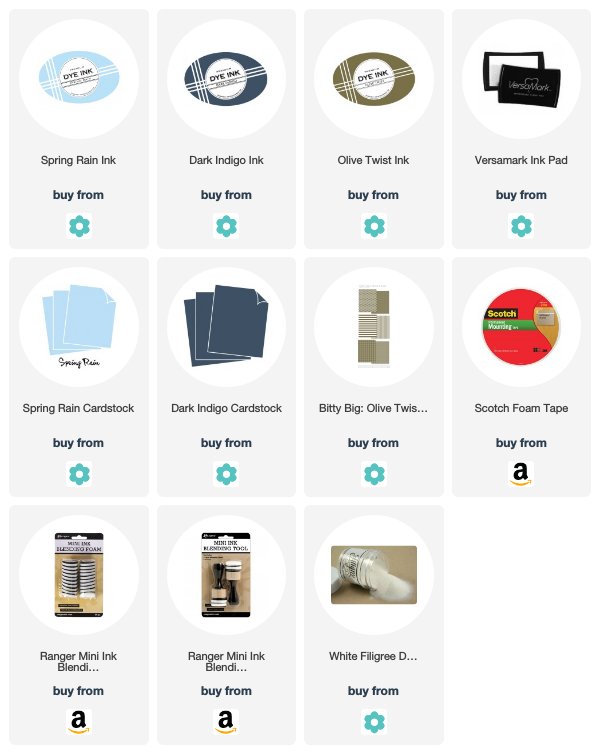
I began by die cutting a pinked edge layer from Spring Rain cardstock and masking the edges with post it tape. Then, I sponged some Spring Rain ink to define the edges a bit and stamped the Cover Up: Hexagons in the matching ink.

LizzieJones_May2018_ForestFloorSummer_PapertreyInk_CelebrateTheSimpleThingsCard3

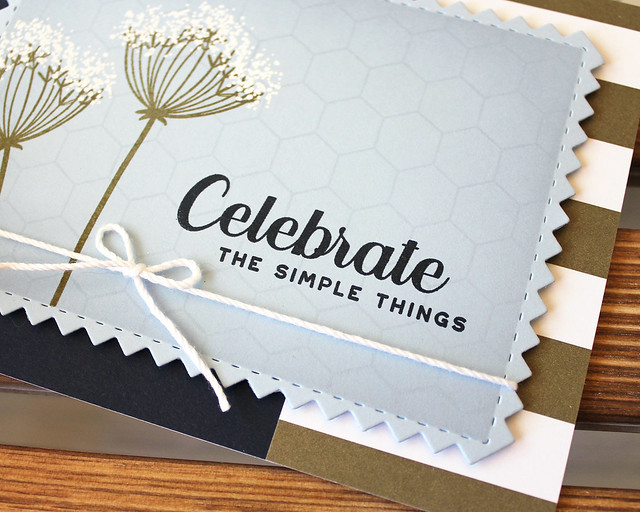
Next, I stamped the Queen Anne's Lace stems in Olive Twist and heat embossed the bloom bits with white detail embossing powder. I stamped the sentiment using Dark Indigo before removing the masks and tying a white crochet thread bow around the layer.

LizzieJones_May2018_ForestFloorSummer_PapertreyInk_CelebrateTheSimpleThingsCard2

I adhered a piece of striped Bitty Big: Olive Twist patterned paper to a Dark Indigo card base before adhering the focal panel with foam tape. I love how the bright white blooms pop against the pale blue background.

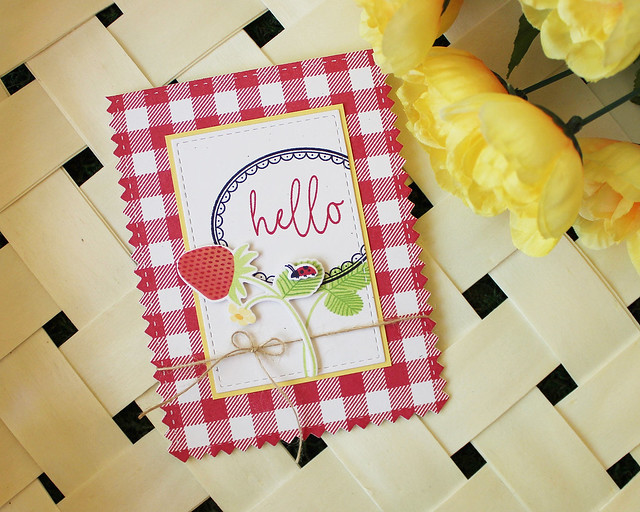
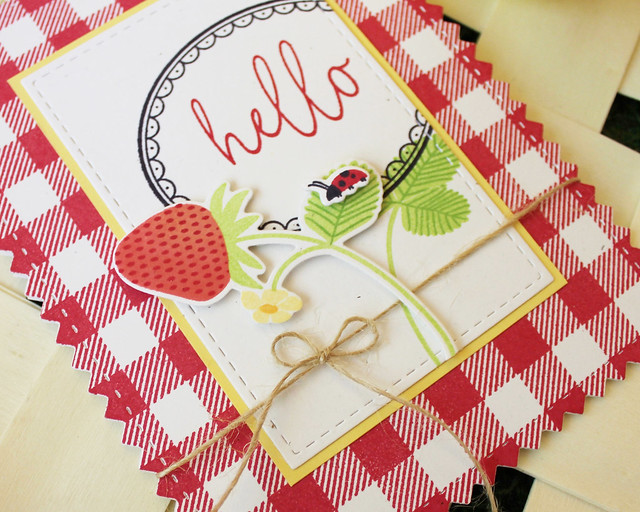
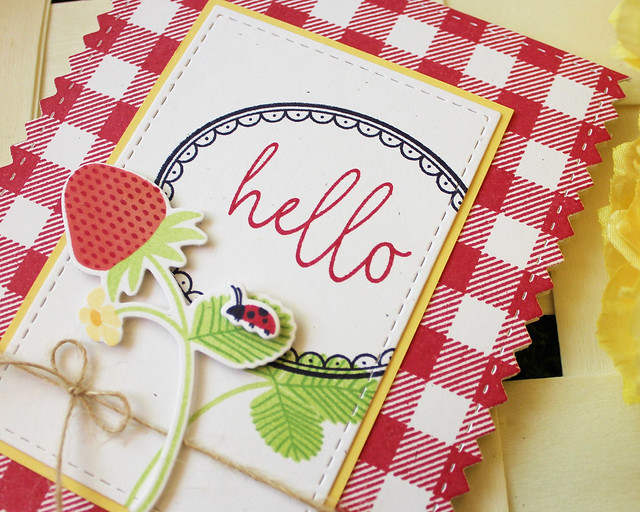
Next up, I have a card using the strawberries from Forest Floor: Summer. We have these tiny strawberries in our yard during the summer and they make me smile from the moment they start popping up all over the place. I couldn't help but turn them into a stamp!

LizzieJones_May2018_ForestFloorSummer_PapertreyInk_HelloCard

I began by stamping and die cutting the strawberry stem onto Rustic White cardstock. I used Melon Berry and Berry Sorbet to get the gradient of color on the berry and then used Pure Poppy to add the seeds. You could also heat emboss the seeds with a contrasting powder if you wanted them to be lighter.

LizzieJones_May2018_ForestFloorSummer_PapertreyInk_HelloCard3

I stamped the leafy stem onto a Rustic White panel that I had cut with a Noted: Simply Stitched rectangle. I followed up with the frame stamped in True Black and a sentiment from Pitter Patterns stamped in Pure Poppy. I matted that layer with a piece of Harvest Gold cardstock and set it aside for a moment.

LizzieJones_May2018_ForestFloorSummer_PapertreyInk_HelloCard2

Next, I stamped a Noted: Pinked Edge card base with the Background Basics: Super Gingham in Pure Poppy. I adhered the sentiment panel and tied a Rustic Jute Twine bow around the card base. Then, I attached the strawberry stem to the card front with foam tape. The card still needed a little something, so I stamped and die cut the little ladybug from Forest Floor: Summer and added her to the strawberry leaf with foam tape. I'm smitten!

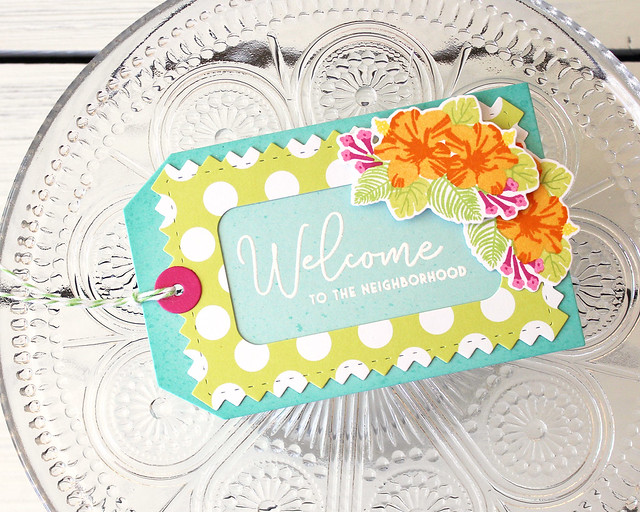
And last, but certainly not least, is Betsy's new Seasonal Borders: Summer stamp set. This one features a beautiful array of tropical leaves and flowers that you're going to love!

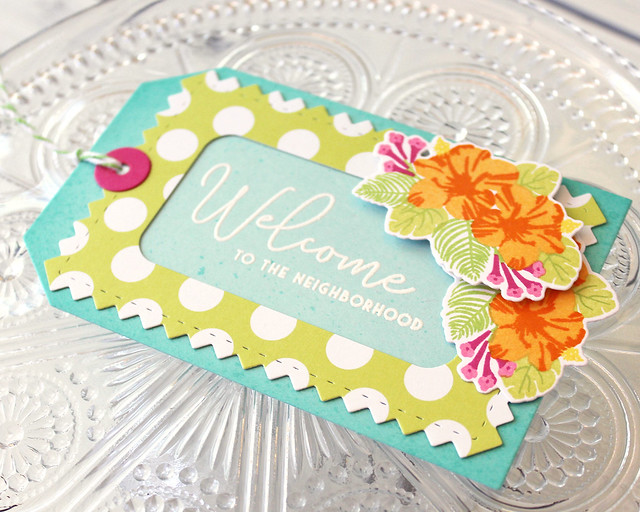
LizzieJones_May2018_SeasonalBordersSummer_PapertreyInk_WelcomeToTheNeighborhoodTag

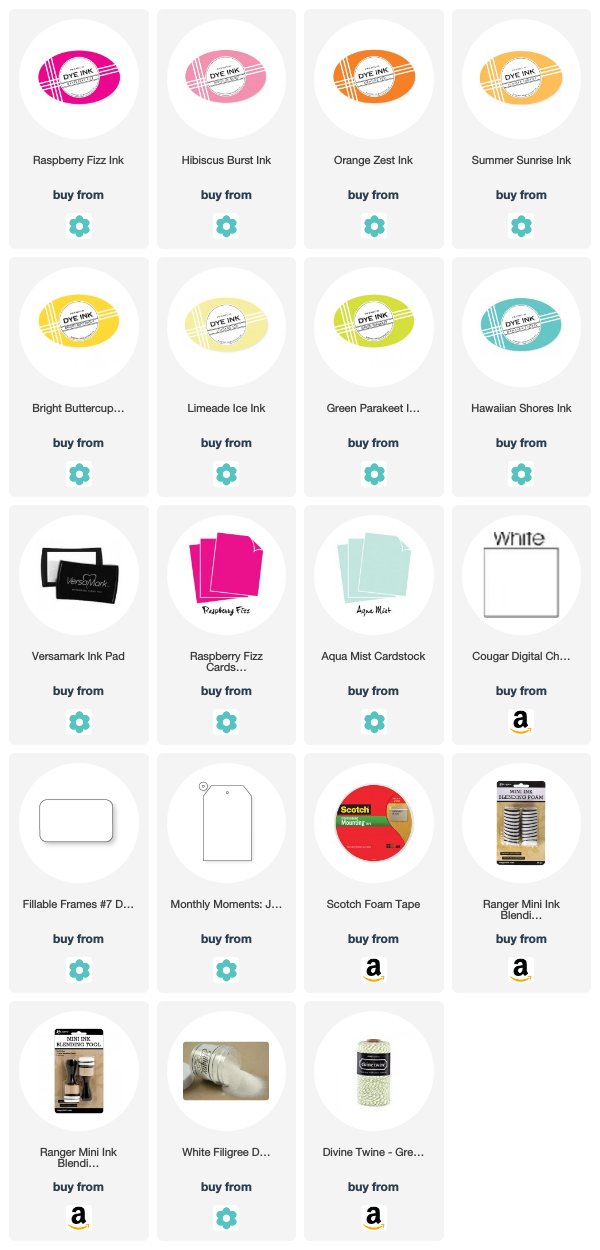
I began by sponging Hawaiian Shores ink onto an Aqua Mist Monthly Moments Journal Card 6 die cut. Once my sponging was done I added a few splatters for texture and heat embossed a sentiment from Sentiment Staples: Welcome with white powder.

LizzieJones_May2018_SeasonalBordersSummer_PapertreyInk_WelcomeToTheNeighborhoodTag2

Next, I created a frame from the new Bitty Big: Limeade Ice polka dot paper using a Pinked Edge rectangle and the Fillable Frames #7 die (I did have to double cut the Fillable Frames die to make it long enough, but it was a snap to do). I adhered the frame to the tag and added a Raspberry Fizz hole enforcer.

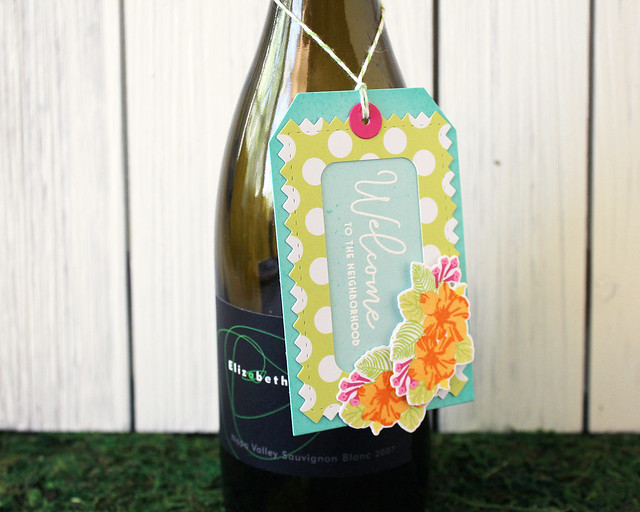
LizzieJones_May2018_SeasonalBordersSummer_PapertreyInk_WelcomeToTheNeighborhoodTag3

Then, I stamped and die cut the flower cluster from Seasonal Borders: Summer two times. I adhered them to the tag with a mix of flat and foam adhesives to give some dimension and then finished off the tag with some green baker's twine. Hanging this tag off of a nice bottle of wine or a basket of baked goodies would be such a nice way to welcome a new neighbor!

That's all I have for you today. I hope you've enjoyed today's post! I'll be back tomorrow with more of this month's release, but make sure to pop in on Betsy, Dawn, Heather, Laurie, Melissa B, Melissa P, Michelle, and Stephanie for more sneak peeks or click HERE to see everything we're introducing today. Enjoy your Saturday and I'll see you again in the morning!

Supplies:
Celebrate The Simple Things Card

Hello Card


Welcome To The Neighborhood Tag
Friday, May 11, 2018

Introducing Hashtag Everything & Shape Shifters: Circle 2

Good morning, friends, and welcome to today's Papertrey Ink May countdown post! I'm back today sharing a project I created with Betsy's new Shape Shifter: Circle 2 die as well as Lexi's Hashtag Everything stamp set. Let's get to it!

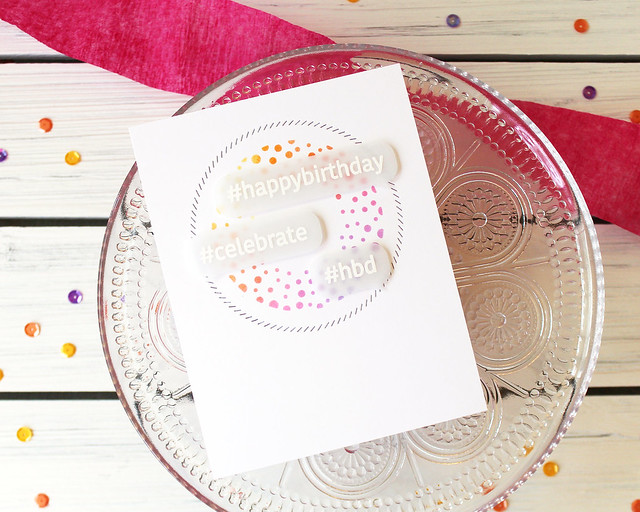
I wanted to create a card for a tween that felt techy, but not overly so. I wanted just a hint of tech, this is a handmade card after all. I was inspired by the color scheme of the Instagram logo and was off and running.

LizzieJones_May2018_HashtagEverything_PapertreyInk_HashtagBirthdayCard

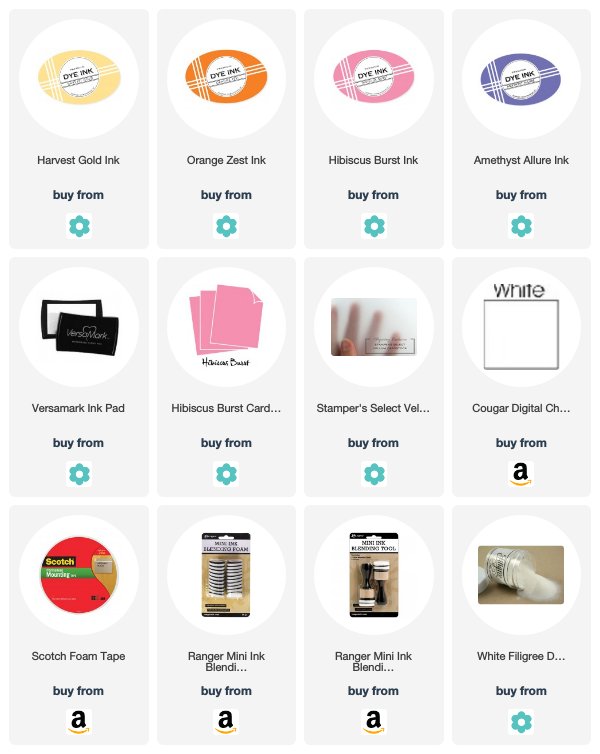
I started by using the center detail die from this month's Shape Shifters as a stencil. I simply cut it from copy paper and pounced my color through the negatives using blending sponges. I used Harvest Gold, Orange Zest, Hibiscus Burst, and Amethyst Allure inks to get my gradient.

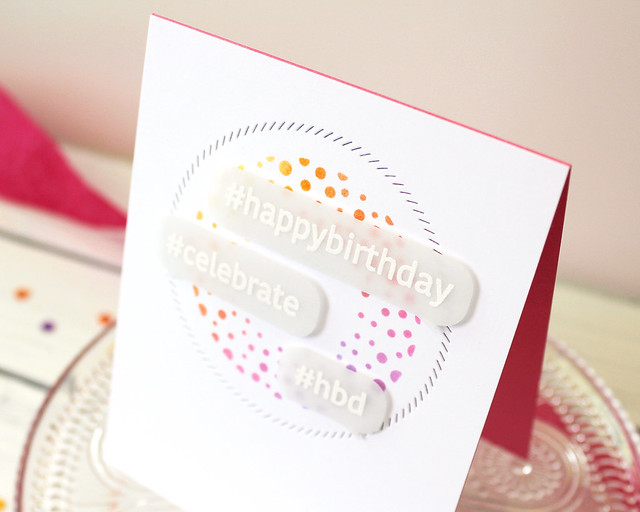
LizzieJones_May2018_HashtagEverything_PapertreyInk_HashtagBirthdayCard3

Then, I used the border die to add a die cut detail around the stenciled circle. I decided my front panel would really pop against a colorful card base, so I attached it to a Hibiscus Burst base, tying in the color wheel from the front.

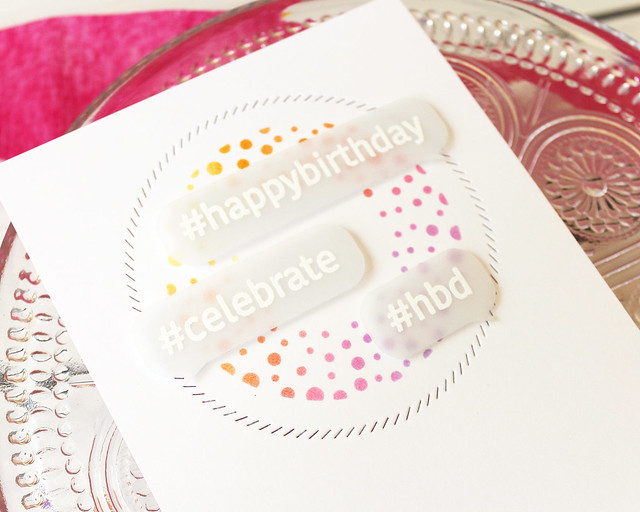
LizzieJones_May2018_HashtagEverything_PapertreyInk_HashtagBirthdayCard2

Next, I simply heat embossed the sentiments from Hashtag Everything onto vellum using white detail powder. I die cut the greetings, cutting a couple of them a second time to make them a little bit shorter. Then, I used slivers of foam tape underneath the embossing to adhere the text bubbles into place. Super clean and simple with a bright and colorful palette. Just right for the teens and tweens in your life.

I hope you've enjoyed today's post! Make sure to pop by tomorrow to see even more inspiration for this month's release. In the meantime, make sure to pop in on Betsy, Dawn, Heather, Laurie, Melissa B, Melissa P, Michelle, and Stephanie for more sneak peeks or click HERE to see everything we're introducing today. Have a great day and I'll see you again tomorrow!

Supplies:
#Birthday Card

Thursday, May 10, 2018

Introducing Baby Mine, Pitter Patterns, and Sentiment Staples: Welcome

Good morning, friends, and welcome to the May Papertrey Ink new release countdown. Today is all about babies! Heather and Rebecca have baby theme sets debuting this month and my newest edition of Sentiment Staples has several greetings perfect for celebrating new arrivals. Most of our friends are waiting to find out their babies' genders at birth, so I kept my projects on the gender-neutral side for today. A few simple color swaps would make it easy to give these a more gender-specific tone though. Enough yapping - let's get on to some projects, shall we?

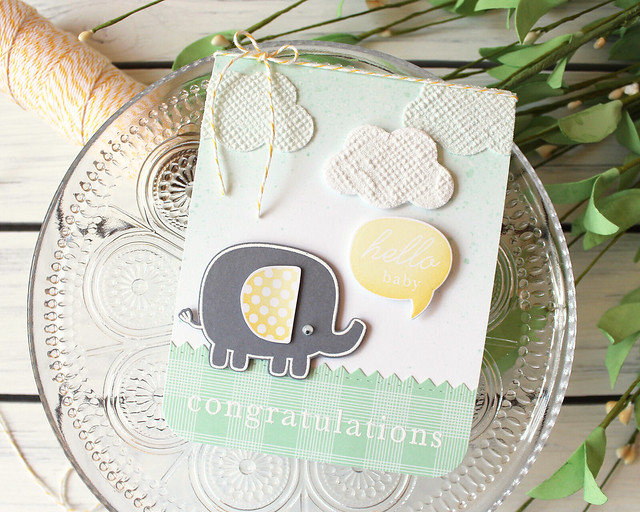
I'm beginning today with a project I made with Heather's Baby Mine stamp set and Clouds Stencil Collection. These puffy clouds are so cute with the elephant in Heather's set!

LizzieJones_May2018_BabyMine_PapertreyInk_HelloBabyCard

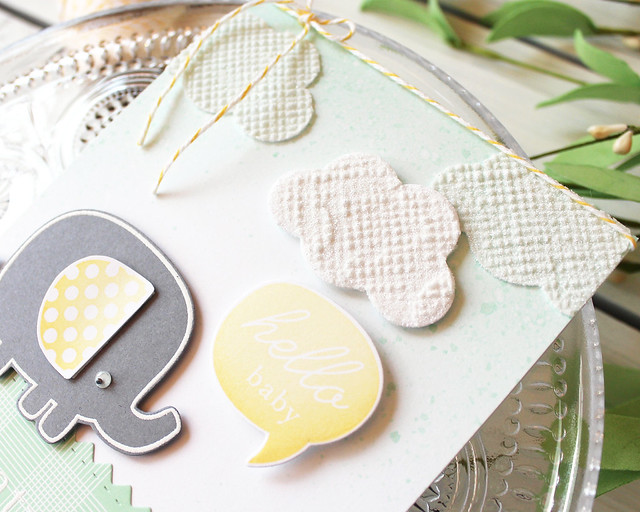
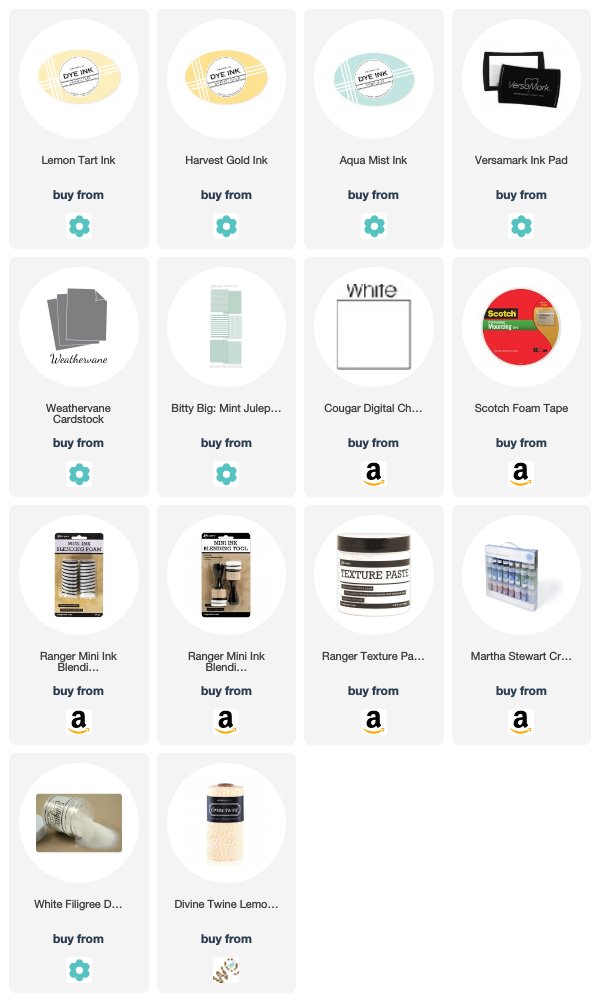
I began by blending an Aqua Mist background onto a white card base. I added some interest with a few speckles and then stenciled on the clouds using white embossing paste. I sprinkled glitter over the wet paste and then pressed the crosshatched cloud into the surface to transfer the texture. I may never get the glitter out of the nooks and crannies of my stamp, but it's worth it. I love the finished result! I used the same technique with one of the die cut clouds and popped it up using foam tape for a bit of dimension.

LizzieJones_May2018_BabyMine_PapertreyInk_HelloBabyCard3

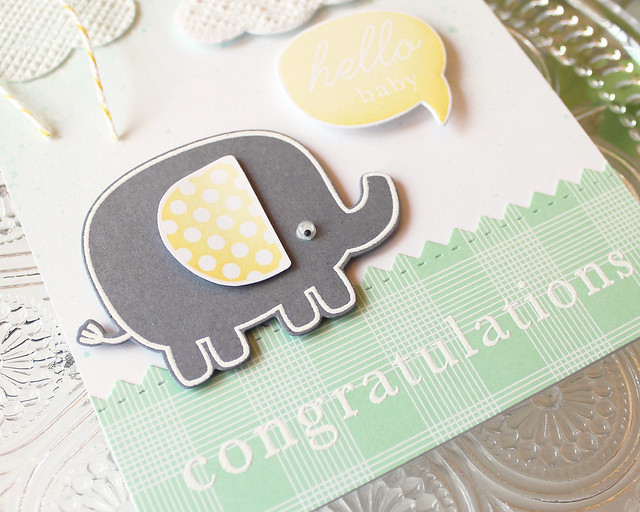
Next, I heat embossed the elephant onto a piece of Weathervane cardstock using white detail powder. I die cut him and added a patterned ear that I stamped and hand cut. I couldn't help but add a small googly eye to give him a little extra personality. I also stamped and die cut the speech bubble included in the set. I used Lemon Tart and Harvest Gold inks on both of them.

LizzieJones_May2018_BabyMine_PapertreyInk_HelloBabyCard2

Then, I heat embossed the sentiment from A Bit More: Baby Mine onto Bitty Big: Mint Julep patterned paper that I cut with a new die you'll be seeing more about soon. It created a sweet little "grassy" area for my elephant to stand. I rounded the corners and then adhered my elephant and speech bubble in place with foam adhesive. A little baker's twine finished it off nicely. I love the many textures and sparkle on this card!

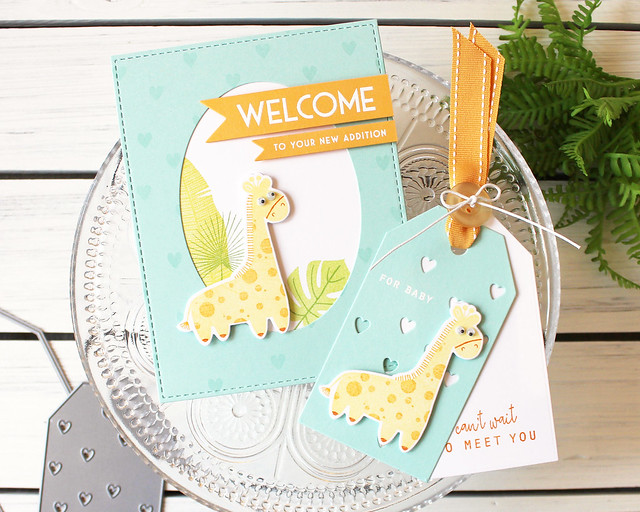
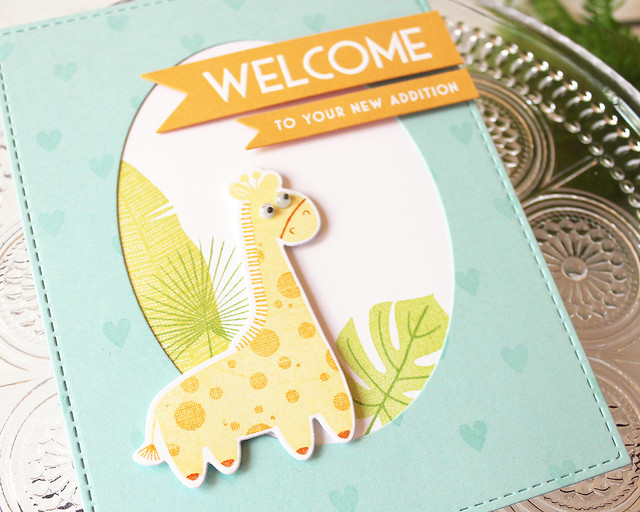
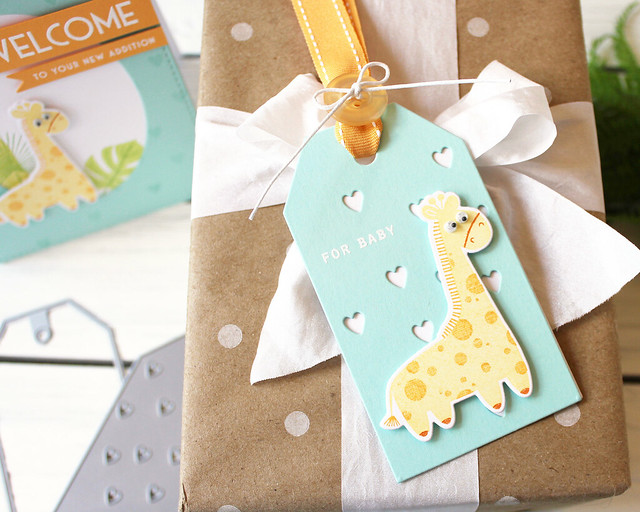
Next up, I have a card and gift tag ensemble. I paired Rebecca's Pitter Patterns with Sentiment Staples: Welcome and Jungle Buddies for a collection that's sure to steal any new parent's heart!

LizzieJones_May2018_PitterPatterns_PapertreyInk_WelcomeToYourNewAdditionEnsemble

I began with the card, so let's start there. I began by creating a die cut frame using the full size Noted: Simply Stitched A2 die with the large oval from the Noted: Scalloped A2 Die Collection. I stamped that frame with the heart background from Pitter Patterns. I really like that Rebecca designed the patterns to be a little bit irregular. It makes them very forgiving.

LizzieJones_May2018_PitterPatterns_PapertreyInk_WelcomeToYourNewAdditionCard3

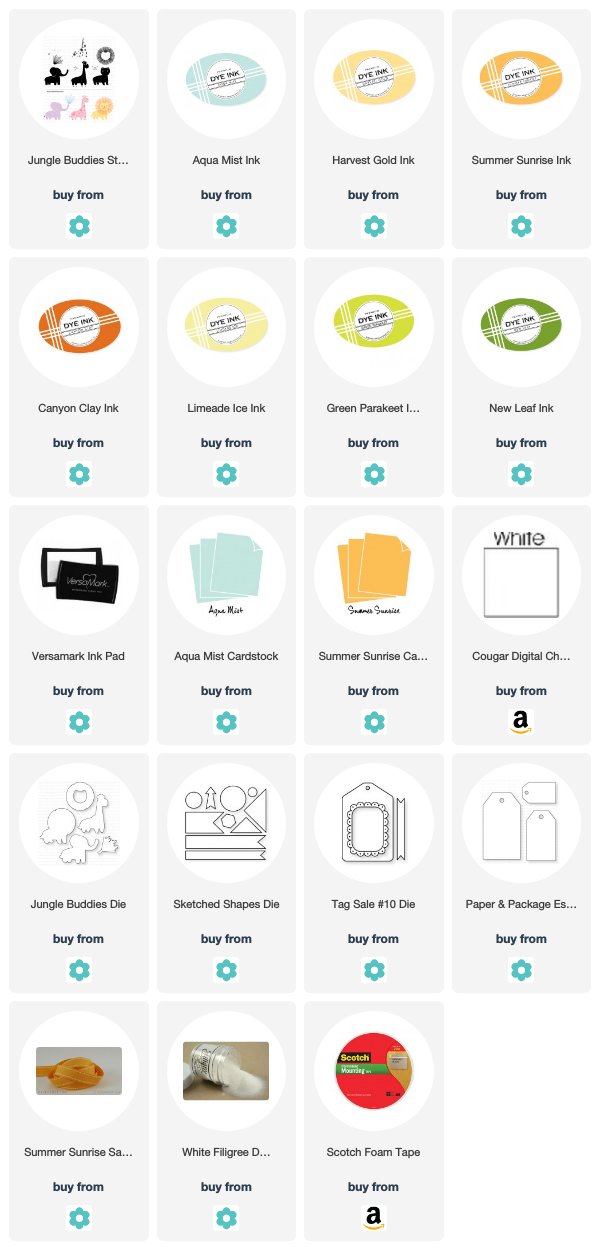
Next, I stamped and die cut the giraffe from Jungle Buddies. Then, I stamped a white card base with leaves from Palm Prints to create a little atmosphere. I adhered the frame to the card base and the giraffe in the midst of the leaves. He, of course, also got the googly eye treatment.

LizzieJones_May2018_PitterPatterns_PapertreyInk_WelcomeToYourNewAdditionCard2

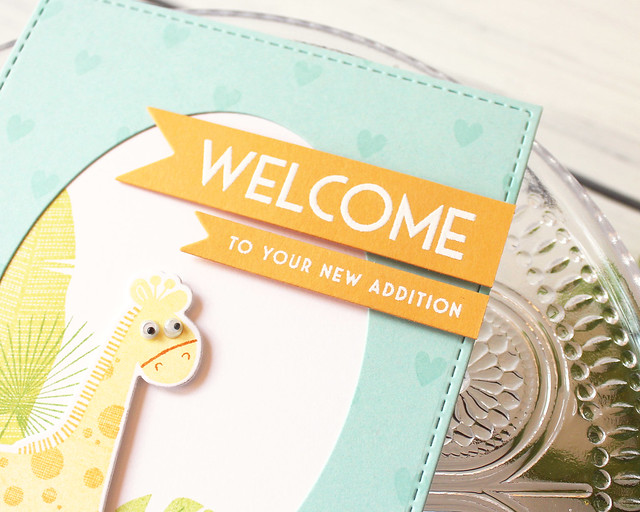
Then, I heat embossed the sentiments from Sentiment Staples: Welcome onto two Summer Sunrise banners. The large one is from the Sketched Shapes die collection and the small one is from the Tag Sale #10 Die. The bright white embossing keeps the whole feeling nice and light.
LizzieJones_May2018_PitterPatterns_PapertreyInk_WelcomeToYourNewAdditionTag
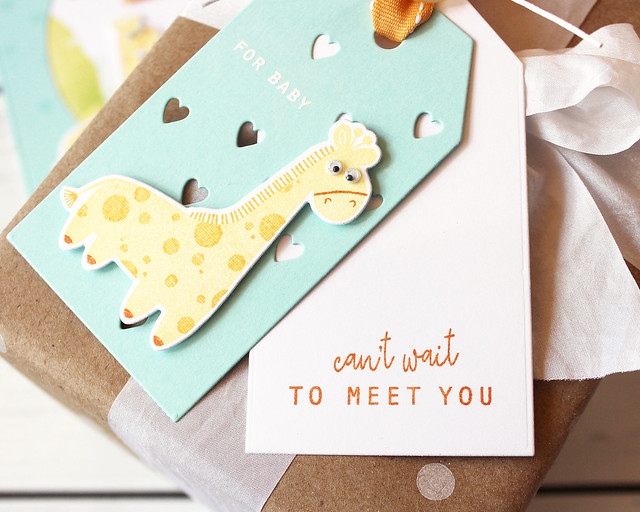
I wanted a tag to coordinate, so I worked on that next. I used one of Rebecca's Pitter Patterns Dies to create the top layer of my tag and her Paper & Package Essential Tag Die (the largest one) to create the solid backer. I heat embossed a message from Pitter Patterns onto the top tag using white embossing powder before adding a second giraffe with strategically placed foam tape (in that I avoided putting it anywhere it might show through the heart-shaped holes).
LizzieJones_May2018_PitterPatterns_PapertreyInk_WelcomeToYourNewAdditionTag2

I stamped the white tag with another of the sentiments from Pitter Patterns, this time in Canyon Clay ink. I used Summer Sunrise Saddle Stitched Ribbon to connect the two tags. I tied white cord through a Harvest Gold button to finish it off. I can't wait until I get to give this to someone!

Thank you so much for joining me today! Make sure to pop in on Betsy, Dawn, Heather, Laurie, Melissa B, Melissa P, Michelle, and Stephanie for more sneak peeks or click HERE to see everything we're introducing today. Have a great day and I'll see you again tomorrow!

Supplies:
Hello Baby Card

Your New Addition Ensemble