Good morning, friends, and welcome back for Day 5 of the
Papertrey Ink August countdown. I have a couple of additional projects to share with you featuring the new sets I have releasing this month. Just a reminder,
Wicked Elixir,
Too Hot To Handle, and the
Truffle Tote Box Die will be available for purchase on the Papertrey Ink website tomorrow at 10pm Eastern Time. Now let's get on to the projects!
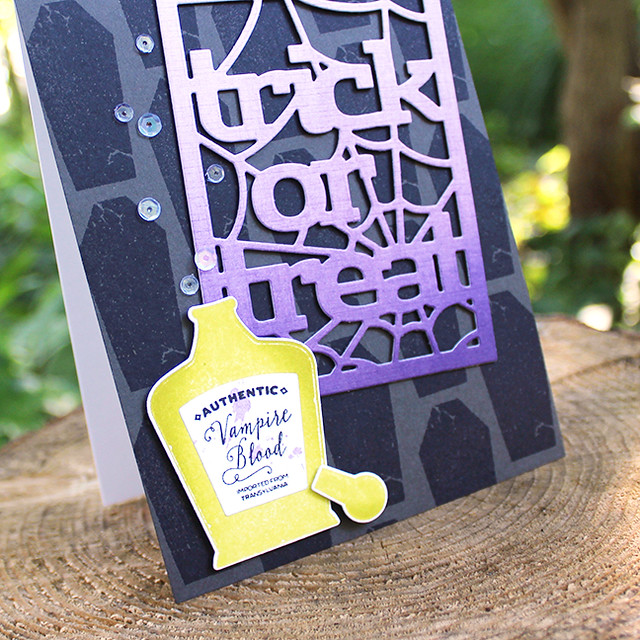
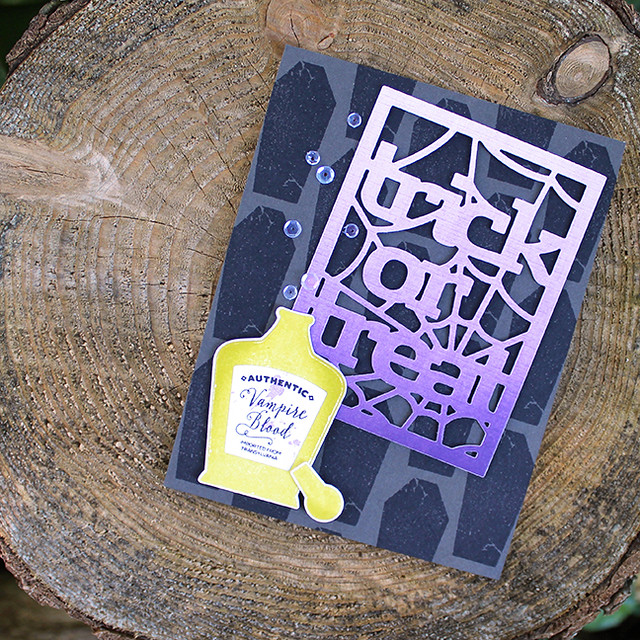
First up, I have a Halloween card pairing
Wicked Elixir with Haunted Headstones and the Text Block: Halloween Die.
I began by stamping a Smokey Shadow panel with the coffin-style headstone from Haunted Headstones in True Black ink. I adhered that to a white card base and set it aside for a moment.
Next, I sponged a Fresh Snow Linen cardstock panel with Winter Wisteria, Amethyst Allure, and Royal Velvet inks. I ran that through the Xyron to make the back sticky and then die cut it with the Text Block: Halloween die. I did the same with two pieces of Smokey Shadow cardstock before stacking the three pieces and adhering them to the card front.
Then, I die cut the Wicked Elixir bottle and stamped it with the coordinating image in Limeade Ice ink. I sponged a bit of Simply Chartreuse ink on the shoulders of the bottle for depth and added a Vampire Blood (ewww!) label cut from sticker paper. I adhered that to the card front with foam tape and then added several sequins above the bottle to look like escaping bubbles. It's the right kind of creepy that's perfect for Halloween!
Supplies:
My second project for today pairs my new
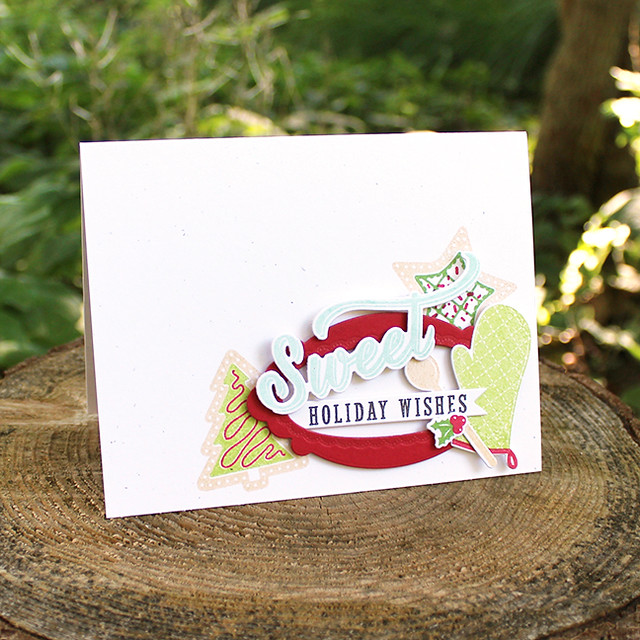
Too Hot To Handle set with Betsy's Sweet Holiday Wishes set. I love combining new sets with older favorites!
I began by die cutting a frame using a Mat Stack 6 die and the oval window from the Truffle Tote die. I placed that on a Rustic White card base to determine placement for the Sweet Holiday Wishes cookies before finally adhering it with foam tape.
Then I die cut an oven mitt and the spoon from Too Hot To Handle. I stamped those with the coordinating images and set them aside. I also die cut the "sweet" sentiment and a tiny banner from the Tag Sale #10 Die and stamped those with the greetings from Sweet Holiday Wishes. I did the same with the holly from Sweet Holiday Wishes.
I adhered the sentiment banner under the lip of the frame and added the "sweet" with foam tape over the top. Then, I tucked the oven mitt and spoon under the sentiment banner and adhered them into place. I adhered the holly with a bit more foam tape and called it good. The images might not be on quite the same scale, but I still like how they work together here.
Supplies:
Thank you so much for joining me today! I'll be back in a couple of days with more August release projects. In the meantime, make sure to visit
Nichole,
Betsy,
Dawn,
Heather,
Keeway, and
Melissa to see more of Day 5. Have a great day and I'll see you all again soon!










No comments:
Post a Comment