Pages

Monday, February 20, 2017

Celebrating The Past, Present, and Future: 2016


Good morning! We've reached the last day of the Papertrey Ink 10th Anniversary stroll down memory lane. A group of us are revisiting our favorite sets from 2016 today and I've chosen to work with Just Desserts.


Just Desserts may be my very favorite of the sets I've designed so far. I mean, what's not to love about birthdays, cake, and sprinkles? This set is so much fun to use and it's versatile enough to make cards for just about anyone!

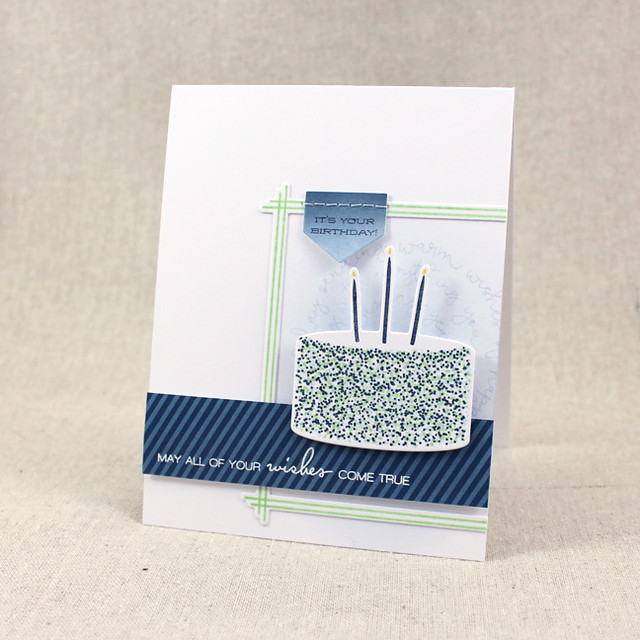
10th Anniversary - Birthday Cake Wishes Card

I knew I wanted to make a more masculine card today, so I began by die cutting the sprinkle cake shape and stamping the different sprinkle layers with Spring Rain, Vintage Jadeite, and Dark Indigo inks. I added the candles using Dark Indigo and Bright Buttercup inks. Next, I sponged a bit of Spring Rain ink onto a white card base before stamping the Script Swirls: Birthday sentiment in the same ink.

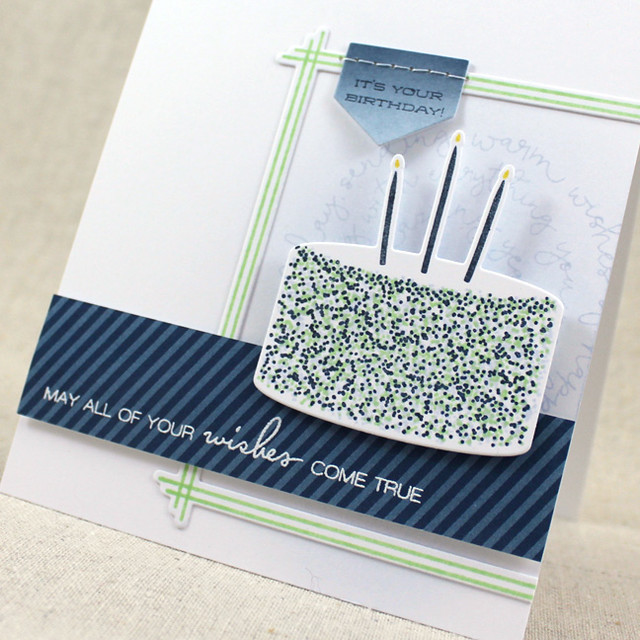
10th Anniversary - Birthday Cake Wishes Close Up

Then I die cut the frame from Fill In The Blank and stamped it with the coordinating lines in Vintage Jadeite ink. I adhered it to the card base and then stitched on a Monthly Moments: Tabbed shape that I'd sponged with Deep Indigo ink and stamped with a sentiment from the Clipsters set. I added an Enchanted Evening patterned paper strip that I'd heat embossed with a sentiment from the Just Desserts Sentiments mini set before mounting my cake with foam tape.

Here are a few past projects using Just Desserts:

Click here to see the original blog post

This trio of simple cards uses a handful of rhinestones to add interest. These came together quickly and would make a cute gift set.

Click here to see the original blog post


Click here to see the original blog post

This masculine card and tag set uses Hooray and the Picnic Plaid Impression Plate to add festive streamers and texture.

Now that I have showcased how this product from the past has remained a classic, it's your turn to share your ideas for the future! Stop by Nichole's blog to share a new project you make with this product, or just share a creation that is somehow inspired by what I made today. Get crafting and enter today so you can be eligible for a fantastic prize!

Thank you so much for joining me today! Make sure to check in with Betsy Veldman, Keeway Tsao, Melissa Phillips, and Michelle Leone to see which 2016 sets they're revisiting today! See you soon!

Recipe:
Stamps: Just Desserts, Fill In The Blank, Just Desserts Sentiments, Script Swirls: Birthday - Papertrey Ink
Cardstock: Enchanted Evening Patterned Paper - Papertrey Ink; white
Ink: Spring Rain, Vintage Jadeite, Dark Indigo, Bright Buttercup - Papertrey Ink; VersaMark - Tsukineko
Other: Noted: Just Desserts Die, Monthly Moments: Tabbed Die, Fill In The Blank Die - Papertrey Ink; White Embossing Powder - Filigree; Foam Tape - Scotch; White Thread

Saturday, February 18, 2017

Celebrating The Past, Present, and Future: 2014


Good morning and welcome back to Papertrey Ink's 10th Anniversary swing down memory lane. We've reached 2014 and this time I'm switching things up a little bit. Instead of revisiting an old stamp set, I'm revisiting my Text Block: Birthday Die.


The Text Block: Birthday was my first in the series, so it holds a special place in my heart. I loved how quickly I could create cards with a simple die cut! If you're anything like me, sometimes you unexpectedly need a card in a jiffy. These dies were a game changer for creating something fast, but still handmade and special.

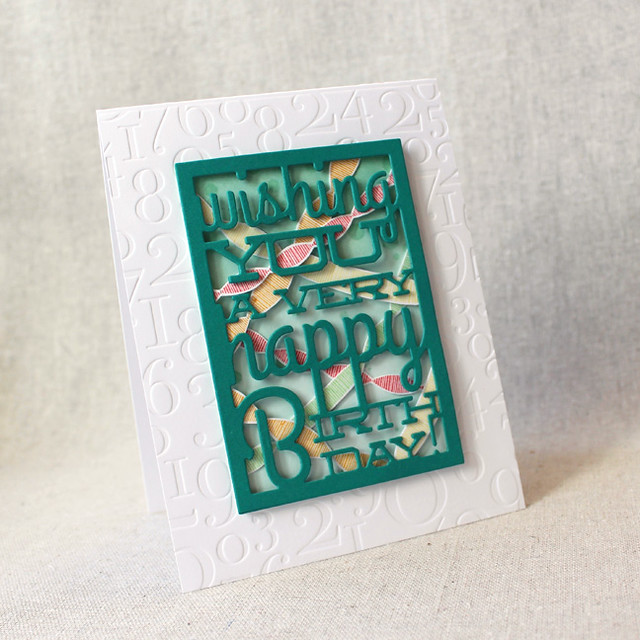
10th Anniversary - Text Block Birthday Card

To create today's card I began by sponging a panel of white cardstock with Aqua Mist ink. I stamped that layer with a few of the Confetti Toss dots using the same ink and then set it aside. Next, I stamped a variety of the streamers from Hooray using Harvest Gold, Summer Sunrise, Berry Sorbet, and Vintage Jadeite inks. I hand-cut the streamers and then layered them over the sponged panel, using flat and foam adhesives to add dimension.

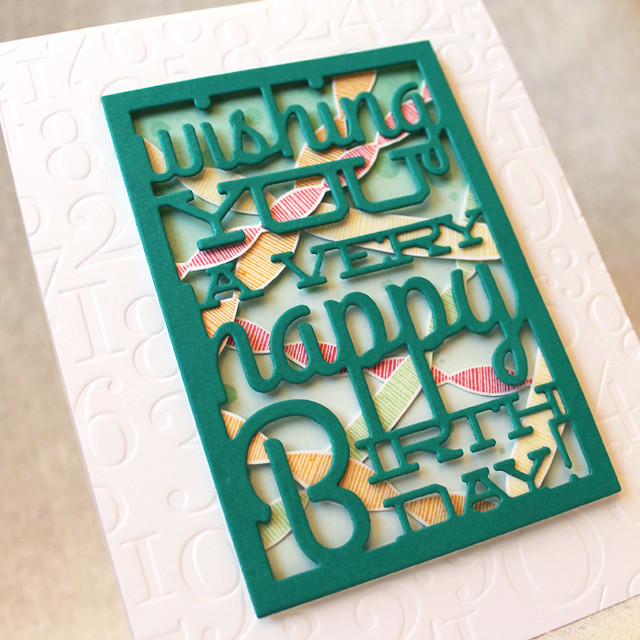
10th Anniversary - Text Block Birthday Close Up

I die cut the Text Block: Birthday shape from Tropical Teal cardstock and layered it over the streamers panel. I adhered that piece to a white card base that I'd textured with the By The Numbers Impression Plate. I love this plate for birthday cards and the bold numbers add nice, deep impressions.

Want to see more of the Text Block: Birthday Die? Here are a few projects I've made in the past.

Click here to see the original blog post

On this card I created a confetti-style border around the edge. This was before Confetti Toss came out, but that would be a much easier way to achieve the same look.

Click here to see the original blog post

I paired the Text Block: Birthday with Dawn's Leave It Be stamp set and Woodgrain Impression Plate. All those natural textures are great for masculine cards.

Click here to see the original blog post

I used an ombré glitter technique on these two. Just a little simple stamping with Polka Dot Basics and Background Basics: Chevron Stripes finished these off quickly.

And one last card:

Click here to see the original blog post

I used a camouflaged die cut technique with a Just Desserts sprinkle cake to create this one. That technique is so fun!

Now that I have showcased how this product from the past has remained a classic, it's your turn to share your ideas for the future! Stop by Nichole's blog to share a new project you make with this product, or just share a creation that is somehow inspired by what I made today. Get crafting and enter today so you can be eligible for a fantastic prize!

Thank you so much for joining me today! Make sure to check in with Betsy Veldman, Keeway Tsao, Melissa Phillips, and Michelle Leone to see which 2014 sets they're revisiting today! See you soon!

Recipe:
Stamps: Confetti Toss, Hooray - Papertrey Ink
Cardstock: Tropical Teal - Papertrey Ink; white
Ink: Aqua Mist, Harvest Gold, Summer Sunrise, Berry Sorbet, Vintage Jadeite - Papertrey Ink
Other: Text Block: Birthday Die, By The Numbers Impression Plate - Papertrey Ink; Foam Tape - Scotch; 

Thursday, February 16, 2017

Celebrating The Past, Present, and Future: 2012


Good morning, friends and welcome back to the Papertrey Ink 10th Anniversary throwback series. We've reached 2012 and I've chosen to work with With All My Heart.


One of my favorite things about Papertrey Ink stamps has always been how adaptable they are. For example, at first glance With All My Heart may seem like it's only suited to a specific holiday, but a few simple substitutions make it absolutely perfect for year-round creating. It's that versatility that makes me fall in love with these stamp sets over and over again. With that in mind, I thought today I would use this set to make an everyday, "thinking of you" sort of card.

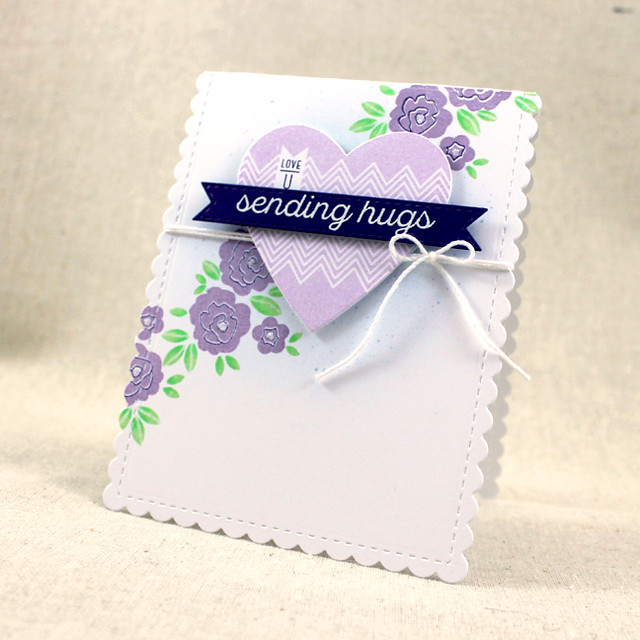
10th Anniversary - Sending Hugs Card

I began by sponging a white card base with a bit of Spring Rain ink. Then I used reinker and a stiff bristled paint brush to add speckles in the same color. I die cut the card base with the Noted: Scalloped A2 Vertical Die before stamping the flower cluster in the set in a diagonal pattern across the card front using Winter Wisteria and Royal Velvet inks. I added the leaves in Vintage Jadeite and then used a colored pencil to add a bit of shading.

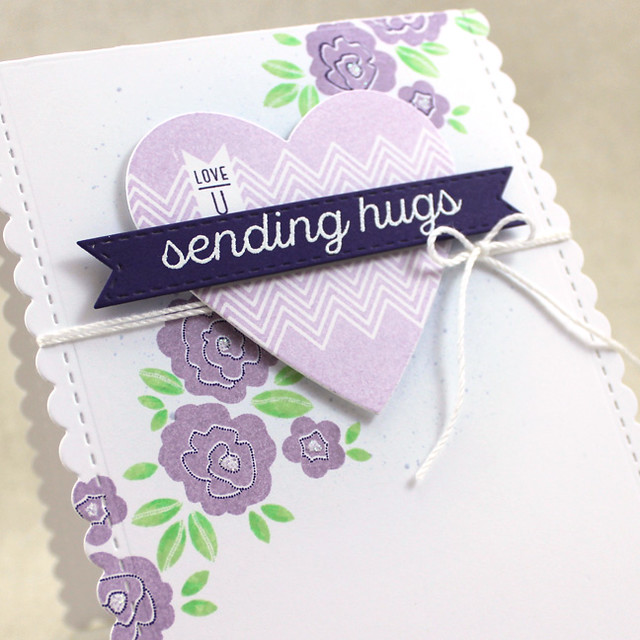
10th Anniversary - Sending Hugs Close Up

Next, I die cut a heart shape using the Limitless Layers: 2 1/4" Hearts Die Collection and stamped it with the chevron patterned heart using Lilac Grace ink. I added the mini sentiment to the heart using Royal Velvet ink. Then, I die cut a Royal Velvet Tag Sale: Quilted banner and heat embossed it with the Keep It Simple: Sending Hugs sentiment. I adhered that over the "Be Mine" sentiment using foam tape. I tied white crochet thread around the card base before attaching the heart with foam tape. I wanted to add a hint of sparkle, so I finished the card by embellishing the flower centers with Sugar Cube glitter.

Here's a card I made using With All My Heart back when it was released several years ago.

Click here to see the original blog post

I paired it with Background Basics: Retro and Classic Kraft cardstock at the time. I still love that card just as much as the day I made it.

Now that I have showcased how this product from the past has remained a classic, it's your turn to share your ideas for the future! Stop by Nichole's blog to share a new project you make with this product, or just share a creation that is somehow inspired by what I made today. Get crafting and enter today so you can be eligible for a fantastic prize!

Thank you so much for joining me today! Make sure to check in with Betsy Veldman, Keeway Tsao, Melissa Phillips, and Michelle Leone to see which 2012 sets they're revisiting today! See you soon!

Recipe:
Stamps: With All My Heart, Keep It Simple: Sending Hugs - Papertrey Ink
Cardstock: Royal Velvet - Papertrey Ink; white
Ink: Spring Rain, Winter Wisteria, Royal Velvet, Vintage Jadeite, Lilac Grace - Papertrey Ink; VersaMark - Tsukineko
Other: Noted: Scalloped A2 Vertical Die, Limitless Layers: 2 1/4" Heart Die Collection, Tag Sale: Quilted Die - Papertrey Ink; Sugar Cube Glitter - Martha Stewart Crafts; White Embossing Powder - Filigree; Foam Tape - Scotch; White Crochet Thread

Tuesday, February 14, 2017

Celebrating The Past, Present, and Future: 2010


Good morning and welcome back to Papertrey Ink's 10th Anniversary stroll down memory lane! This morning a handful of us are revisiting some of our favorite sets from 2010. I chose to create with Beautiful Blooms II today.


This set proves that some sequels absolutely can live up to the original - at least when it comes to stamps. I've always loved the unique shapes and variety of sizes in this set, perfect for building both backgrounds and focal points. And who can resist a polka dotted flower? Not me!

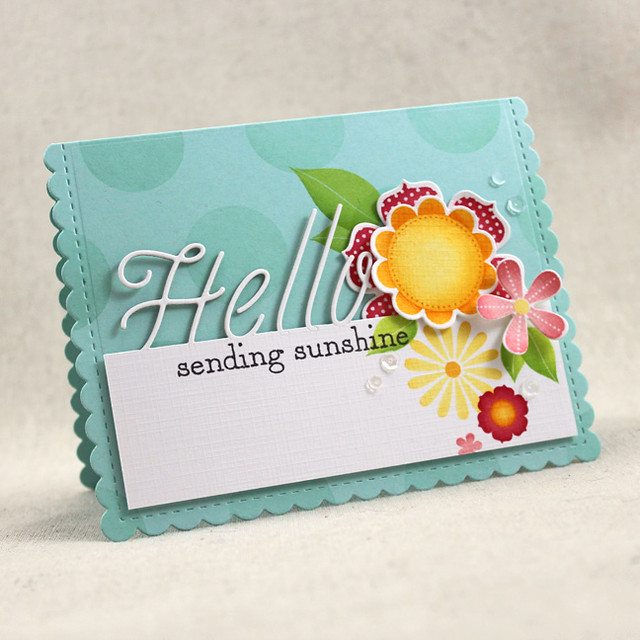
10th Anniversary - Sending Sunshine Card

I began my card today by using the largest flower center to create a giant polka dot pattern on a scalloped Aqua Mist card base (I used the Noted: Scalloped A2 Die Collection to cut the base). Then, I used a partial die cutting technique to cut a Fresh Snow Linen panel with the Thick & Thin: Hello die. I stamped the sentiment from Keep It Simple: Encouragement in Smokey Shadow ink on the panel below the die cut sentiment. Then I stamped a few of the flowers and leaves using sponging to add depth and dimension without bulk.

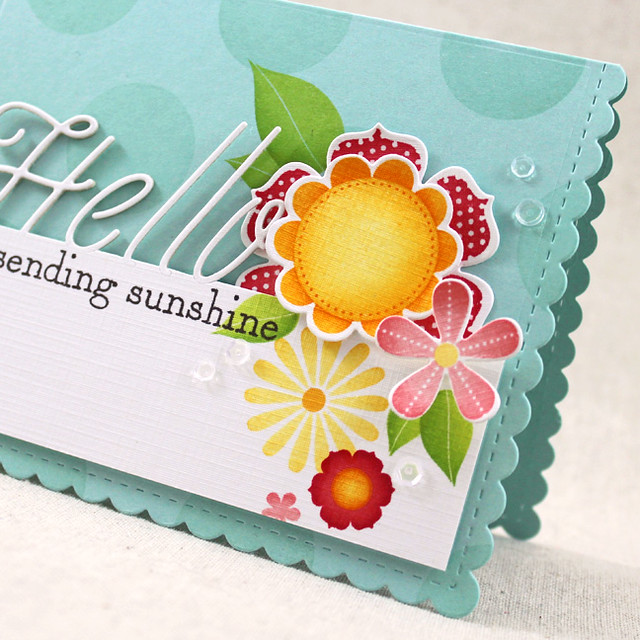
10th Anniversary - Sending Sunshine Close Up

I adhered the "hello" panel to the card base using coaster to give it a bit of dimension and tucked a large die cut flower behind the panel. I added the center scalloped flower and pink five-petal flower with foam tape and then embellished with a handful of clear sequins from the Sunshine & Rainbows Make It Market Mini Kit. I love those sequins so much! Isn't this card just so cheerful? I even know exactly who I'm sending it to.

I've always loved the dies for this set. The unique shape is perfect for felt projects! Here are a couple of my favorites:

Click here for the original blog post

Here's a coin purse I made awhile back that I absolutely love. I paired the flowers with the Doodlie Do Die Collection and the Buttoned Up #2 Die to round out the project.

Click here for the original blog post

And I made these barrettes for my niece a couple of years ago. She finally has enough hair to be able to pull them off! I packaged them in a gable box that I created from clear cardstock. Holy cute, Batman!

Now that I have showcased how this product from the past has remained a classic, it's your turn to share your ideas for the future! Stop by Nichole's blog to share a new project you make with this product, or just share a creation that is somehow inspired by what I made today. Get crafting and enter today so you can be eligible for a fantastic prize!

Thank you so much for joining me today! Make sure to check in with Betsy Veldman, Keeway Tsao, Melissa Phillips, and Michelle Leone to see which 2010 sets they're revisiting today! See you soon!

Recipe:
Stamps: Beautiful Blooms II, Keep It Simple: Encouragement - Papertrey Ink
Cardstock: Aqua Mist, Fresh Snow Linen - Papertrey Ink
Ink: Aqua Mist, Berry Sorbet, Pale Peony, Pure Poppy, Green Parakeet, New Leaf, Harvest Gold, Summer Sunrise, Orange Zest, Smokey Shadow - Papertrey Ink
Other: Noted: Scalloped A2 Die Collection, Thick & Thin: Hello Die, Beautiful Blooms II #1 Die Collection, Beautiful Blooms II #2 Die Collection, Beautiful Blooms II #3 Die Collection, Sunshine & Rainbows Sequins, Coaster - Papertrey Ink; Foam Tape - Scotch

Sunday, February 12, 2017

Celebrating The Past, Present, and Future: 2008


Good morning, Papertrey Ink fans! Today a group of us are looking back at our favorite sets from 2008 as part of the festivities. I'm taking a stroll down memory lane with Bitty Baby Blessings.


Every good stamp collection should include at least one great baby set. For me that set will always be Bitty Baby Blessings. You just can't go wrong with clean and simple images paired with a crisp font. This set is one that I turn to time and again when there's a little one to welcome into the world.

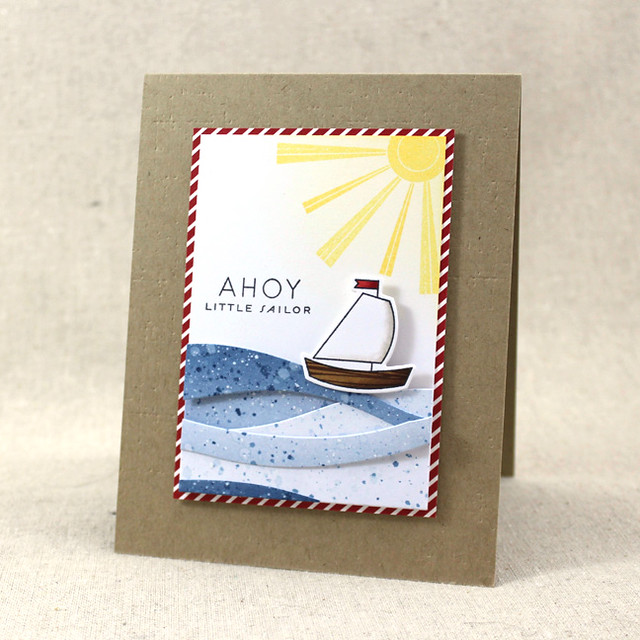
10th Anniversary - Ahoy Little Sailor Card

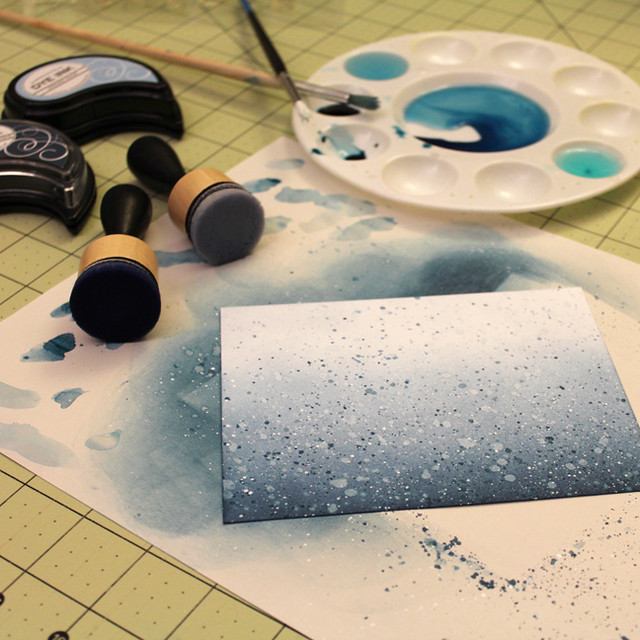
I had so much fun creating the card I made to share today (my fingers are still blue from the ink splattering)! I began by creating the sponged and splattered panel that would become the waves.

Blended Waves Progress Photo

I blended Spring Rain and Enchanted Evening inks onto a white card panel. Then I splattered with Enchanted Evening reinker, water, and Copic's opaque white pigment. It really didn't take much time at all, but it added so much depth.

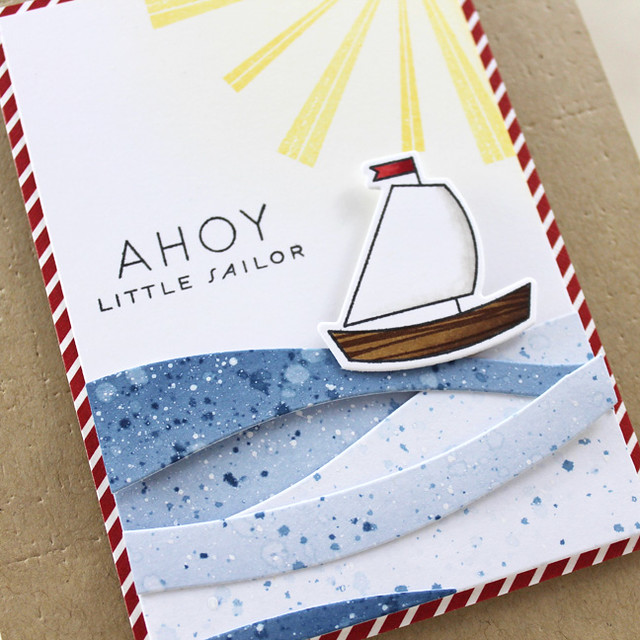
10th Anniversary - Ahoy Little Sailor Close Up 2

I die cut the panel with the Cover Plate: Waves die. This has seriously become one of my very favorite tools. With this cover plate I can create snow, waves, sand...so many possibilities! I sponged a small panel of white cardstock with a bit of Lemon Tart ink and stamped the sun from Up, Up & Away in Harvest Gold. Then I stamped the sentiment from Bitty Baby Blessings before arranging my waves. I used both flat and foam adhesives to add dimension and texture.

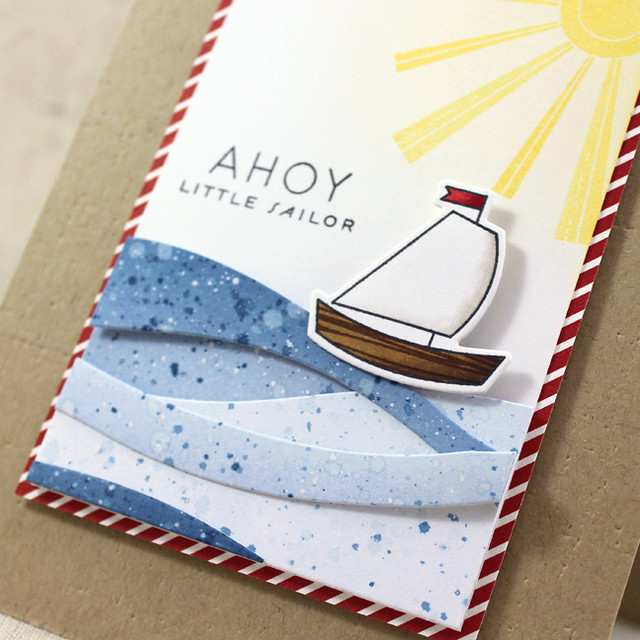
10th Anniversary - Ahoy Little Sailor Close Up

Next, I die cut, stamped, and colored the little boat from the set. I added the woodgrain pattern by reverse masking the body of the boat and stamping Background Basics: Woodgrain through the opening using Dark Chocolate ink. I absolutely love the result! I finished the card by matting the ocean panel with Pure Poppy + White Patterned Paper and adhering it to a Classic Kraft card base that I'd textured with the Linen & Canvas Impression Plate. The little boat was added to the waves with a bit of foam tape. I can't wait for someone to have a baby boy so I can give this card to them!

Here are a few more projects from the past I created with Bitty Baby Blessings:

Click here to see the original post
This baby mobile won me a Guest Star Stamper nod way back in 2008.

Click here to see the original post
Here's Bitty Baby Blessings paired with Global Greetings: Spanish from a few years ago.

Click here to see the original post
And here's the onesie paired with the Text Block: Baby die that I made into a shaker card.


Now that I have showcased how this product from the past has remained a classic, it's your turn to share your ideas for the future! Stop by Nichole's blog to share a new project you make with this product, or just share a creation that is somehow inspired by what I made today. Get crafting and enter today so you can be eligible for a fantastic prize!

And don't forget to check in with Betsy Veldman, Keeway Tsao, Melissa Phillips, and Michelle Leone to see which 2008 sets they're revisiting today! See you soon!

Recipe:
Stamps: Bitty Baby Blessings, Up, Up & Away, Background Basics: Woodgrain - Papertrey Ink
Cardstock: Classic Kraft, Pure Poppy + White Patterned Paper - Papertrey Ink; white
Ink: Spring Rain, Enchanted Evening, Lemon Tart, Harvest Gold, Dark Chocolate - Papertrey Ink; Tuxedo Black - Memento
Other: Cover Plate: Waves Die, Bitty Baby Blessings Die, Linen & Canvas Impression Plate - Papertrey Ink; Foam Tape - Scotch; Markers, Opaque White Pigment - Copic

Friday, February 10, 2017

Celebrating The Past, Present, and Future: Design Team Introductions

Good morning! We're doing something a little different this month in the lead-up to the Papertrey Ink 10th Anniversary festivities. Today, Nichole is introducing the Design Team for the upcoming year.

Lizzie Jones Headshot 2017

I'm thrilled to be returning both as a Design Team member and illustrator for this year. I truly appreciate Nichole, Julie, and Jane for giving me the opportunity to keep working with their fantastic company. They have built something very special and I am so grateful to be included.

My colleagues are funny, incredible, creative people that keep me on my artistic toes (in the best way). And I don't have to tell you all how inspiring they are. Month after month, these ladies find a way to knock our socks off with their imaginations.

The folks at the warehouse deserve our profound thanks, too. They work hard to make sure that our stamps, dies, and cardstock get to us quickly and safely. I'm sure I'm not the only one who is thankful for their valuable contributions.

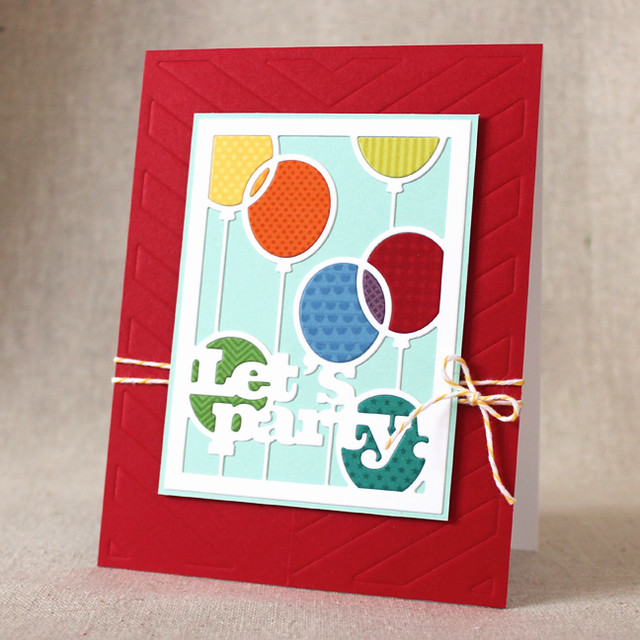
So to celebrate the kick off of the 10th Anniversary the Design Team, old and new, are sharing a favorite card they've made with Papertrey products. I chose this one:

Lizzie Jones Favorite 2017

Here's the original post so you can read all about it. I love the bright colors, the theme, and the texture. I'm a sucker for texture either visual or tactile. Also, who doesn't love a bit of baker's twine?

I also thought it might be fun to share a few silly, random facts about me for those of you who may not know me well. Here are ten fun facts in honor of Papertrey's ten amazing years.

1. I'm a lefty, but I can't use left-handed scissors.

2. I got married at 19 and have been happily wed ever since. My husband, Sean, is adorable. We met at a punk rock show the last day of Junior year (high school) and have been together ever since.

3. I have huge feet - size 11. I have to shop in the men's department sometimes. My hiking and cycling shoes are both men's sizes.

4. My husband and I have traveled to three countries outside of the United States. We've been to Canada, Scotland, and Italy. I can't wait to plan our next international trip!

5. I'm a strict vegetarian and I love to cook.

6. My husband and I collect fine art. Our prized piece is from an artist named Aminah Robinson. Her work is awe-inspiring and we feel so lucky to be stewards of her legacy.

7. I really enjoy mystery novels though I don't have as much time to read as I'd like. Even better if there are animal sleuths involved. I'm a sucker for a cat detective. I'm also a dork.

8. I have a 100-year-old Chandler & Price printing press in my basement. It still works!

9. I've worked on both a commercial organic farm and in a commercial kitchen.

10. I built our dining room table. It's seven feet long and four feet wide and seats eight comfortably. We host a "round robin" style dinner group with friends once a week, so it gets plenty of use.

There you have it! A few fun facts about little ol' me. If you'd like to learn more, feel free to check out my Instagram. It's mostly pictures of the cat (my dear, sweet Gus), but there are other snippets of life in there, too. I hope you have fun celebrating Papertrey's past, present, and future with us over the next several days. I'll see you again soon!