Good morning, everyone, and welcome back to Day 4 of the
Papertrey Ink January countdown! Today's group post is all about
Petite Places: Home & Garden. Betsy has saved the best Petite Places for last! This series may be coming to a close, but the Home & Garden edition is so versatile, you definitely won't be disappointed. Let's get on to some projects, shall we?
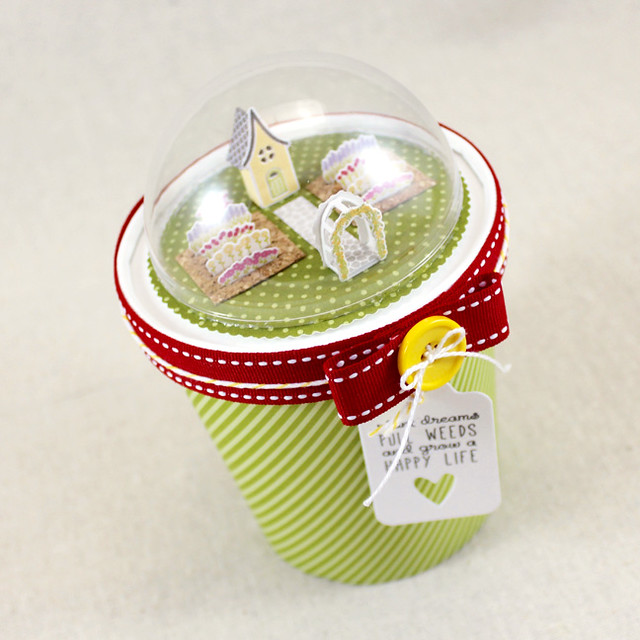
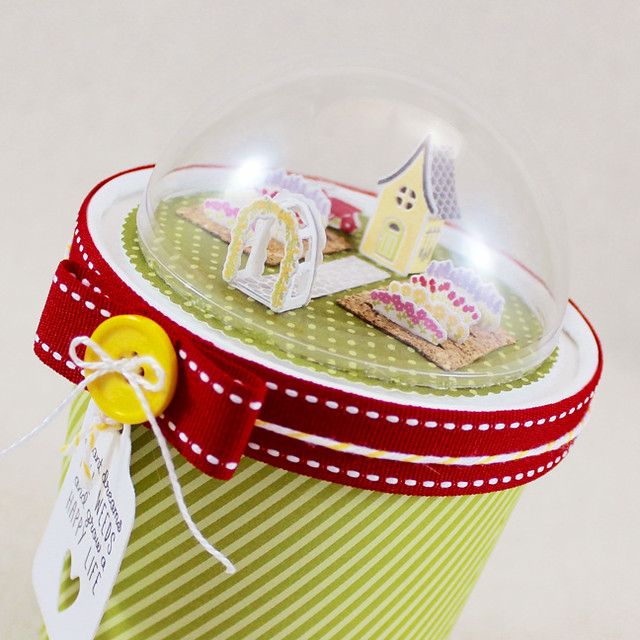
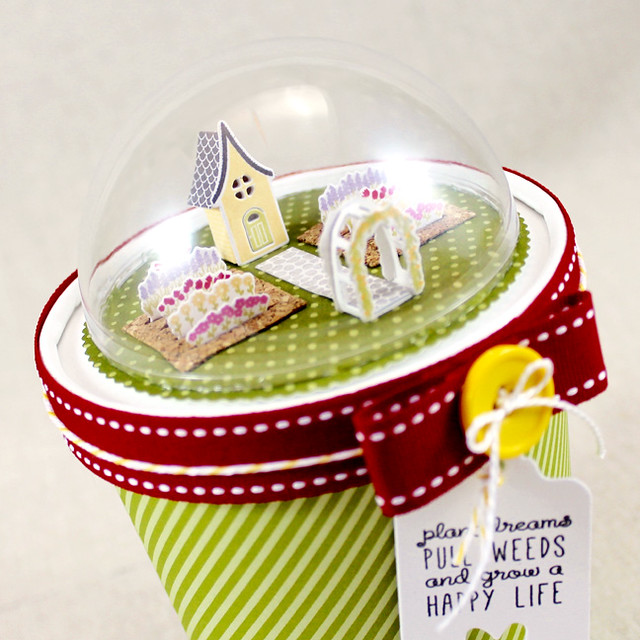
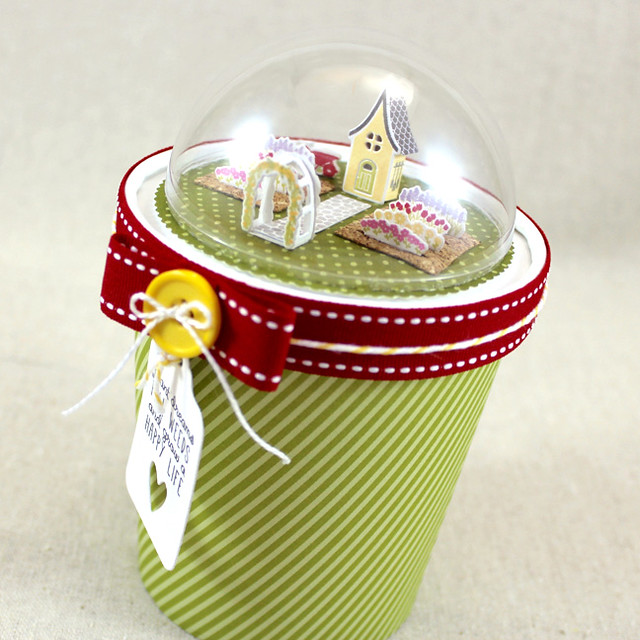
My first project today is a decorated pint container. These are the perfect size for a few seed packets and some peat seed starters or a handful of spring bulbs (Narcissus would be perfect!).
I began by die cutting the shed components, wheelbarrow, flowers, and trellis parts from Rustic White cardstock. I stamped those with their coordinating images (there are even tools to hang on the side of the shed!) and assembled the shed and trellis.
Next, I die cut the garden plots from cork sheeting and tucked the flowers into place. I wanted a pathway, so I pulled out Petite Places: Walk In The Park for the center aisle. I stamped third generation Smokey Shadow onto Soft Stone to get the right color balance.
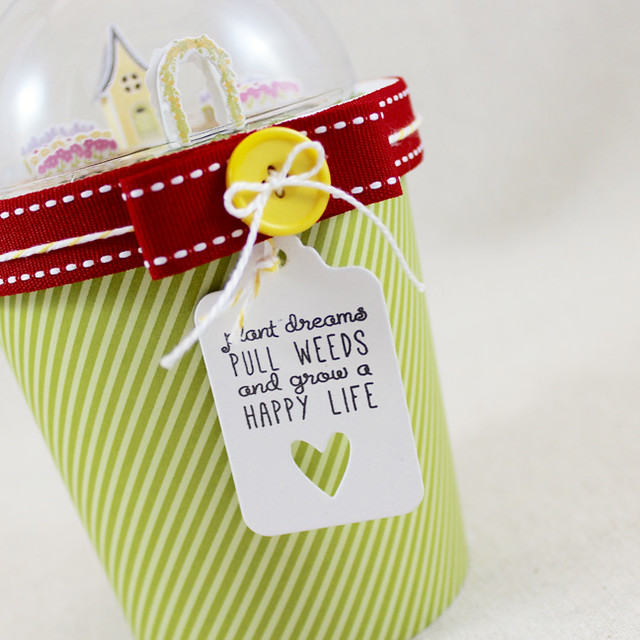
Then, I decorated a pint container using Simply Chartreuse patterned paper and Pure Poppy ribbon. I tied a little sentiment tag to the container with Baker's Twine before I adding a little button-embellished bow to hide the ribbon seam.
Then, I die cut a Scene It: Basic Backer shape from Ripe Avocado patterned paper and added it to the top of the container with foam tape.
I adhered my garden scene into place and then topped the whole thing with a clear dome. Isn't it the cutest?!
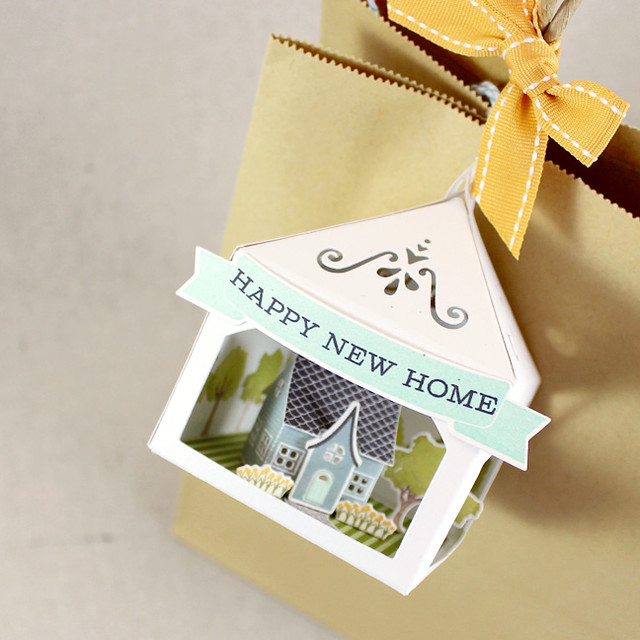
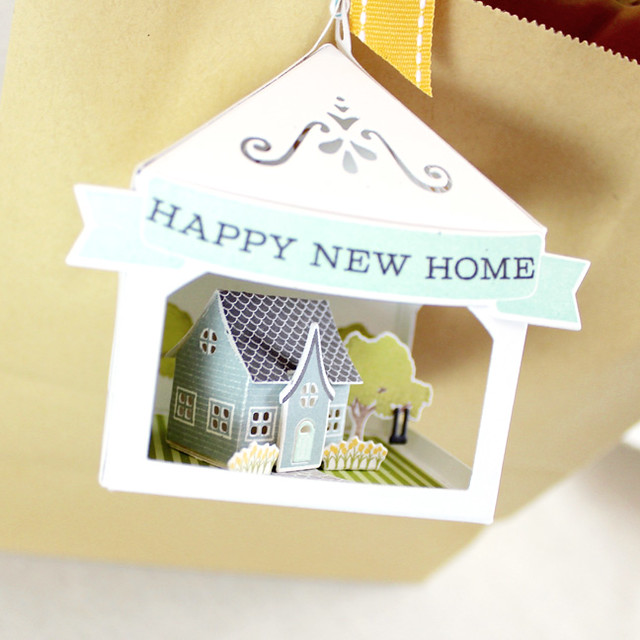
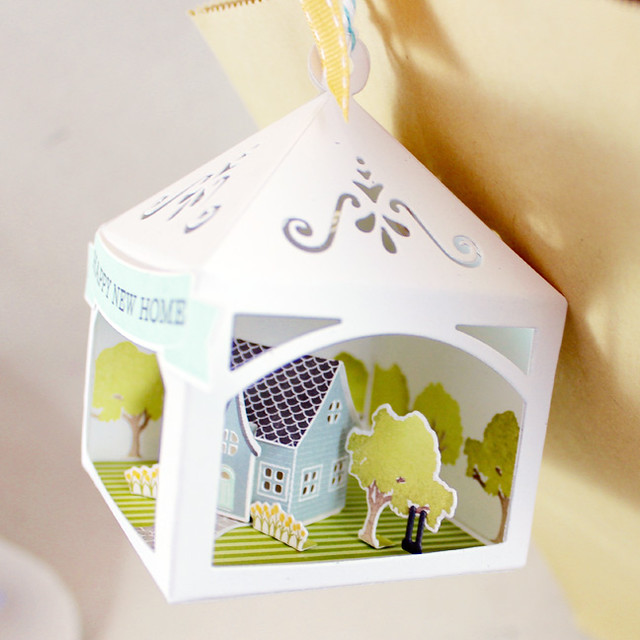
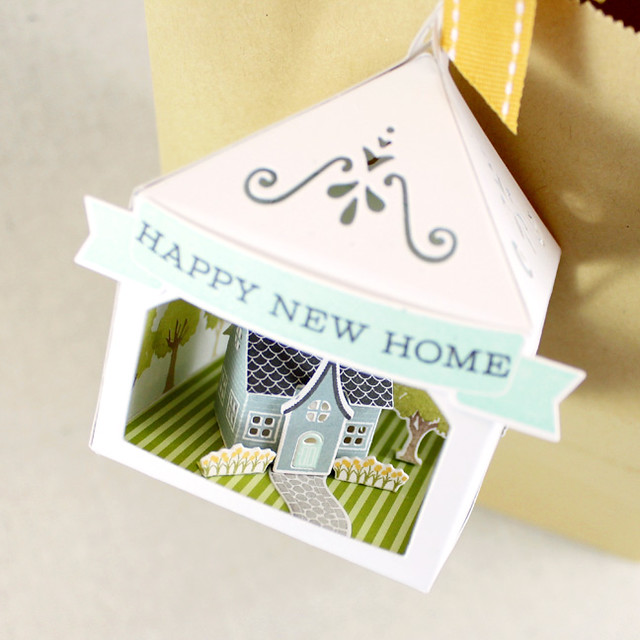
Next, I have a 3D tag that I created for a new neighbor or friend moving into their first house.
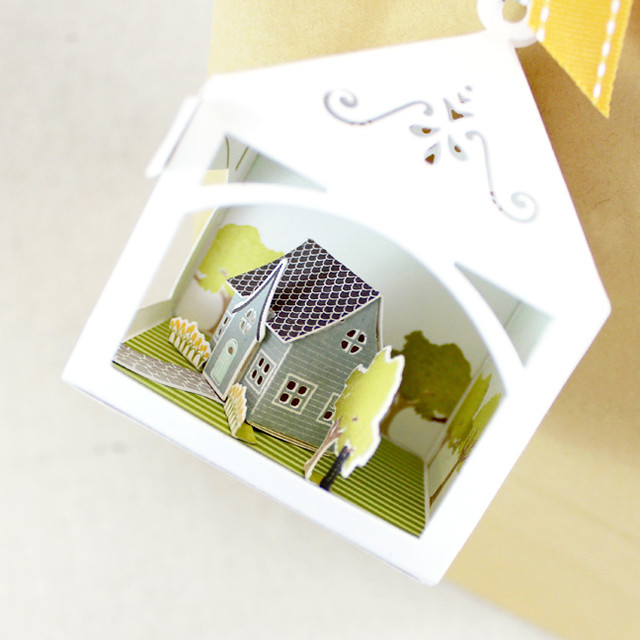
I began by die cutting and assembling a Petite Ornament: Square shape from Rustic White cardstock. I added stamped scene panels to two of the windows using the trees in Petite Places: Home & Garden and Petite Places: Walk In The Park.
I also added a bit of sponging with Aqua Mist to suggest a clear, blue sky. The backs of those panels were stamped with the plaid image from Half & Half so the outside would still have a bit of interest, too. Next, I added the "grass" patch using a square of Simply Chartreuse patterned paper.
Once the ornament itself was ready to go, I went to work on the components for the inside. I die cut the house, tree, and flower beds from Rustic White cardstock and stamped all of them with their coordinating images. I added a die cut swing to the tree with Smokey Shadow cardstock and created a sidewalk by stamping the pathway from Petite Places: Walk In The Park onto Soft Stone cardstock.
Then I went about creating my little scene inside the ornament. I adhered everything at an angle, so I wouldn't have a "bad" side.
Next, I die cut a Bountiful Banners shape from Rustic White and stamped it with the coordinating image in Aqua Mist ink. I added the sentiment, from Keep It Simple: Home, in Smokey Shadow ink before adhering it to the ornament. I used a bit of Baker's Twine to tie my tag to a bag handle and then added a small Summer Sunrise bow for a pop of color. I'm so smitten with this set. Everything turns out so cute!
And lastly today, I have one more
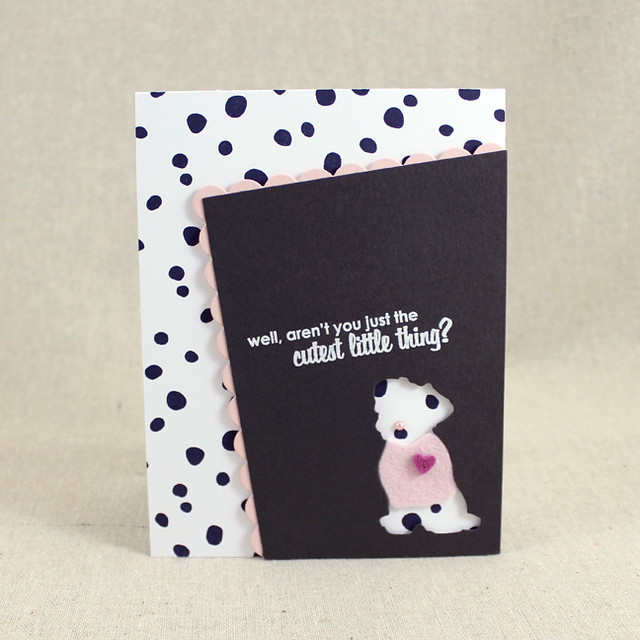
Background Basics: Splats card to share with you. All week, I've been working with these images and thinking "dalmatian." So I thought I'd go ahead and make a card for someone who may have gotten a new puppy (the spots would also work in other colors for different breeds, too).
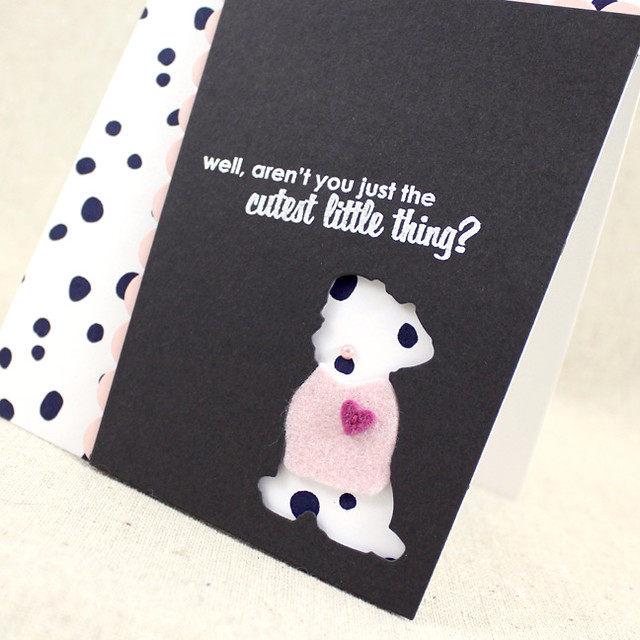
I began by repeatedly stamping the large dot strip onto a white card base using True Black ink. Next, I die cut the medium Tipped Tops shape from Smokey Shadow cardstock. I die cut the dog image, leaving a negative, and heat embossed the sentiment using white powder. I added a scalloped border to that piece using the Embroidered Frames: Dots die and Sweet Blush cardstock.
I adhered that panel into place with foam tape and then added a Sweet Blush puppy sweater that I'd embellished with a tiny heart. A pink puppy nose created with a colored-to-match pearl was the perfect finishing touch.
That's all for me today, friends. I hope you've enjoyed today's post. Make sure to check in with
Nichole,
Amy,
Ashley,
Betsy,
Danielle,
Dawn,
Heather,
Kay,
Laurie, and
Melissa for more Petite Places inspiration. I'll see you back here tomorrow. Have a great day!
Recipes:
Garden Shed Pint Container
Stamps: Petite Places: Home & Garden, Petite Places: Walk In The Park - Papertrey Ink
Cardstock: Rustic White, Soft Stone, Simply Chartreuse Patterned Paper, Ripe Avocado Patterned Paper - Papertrey Ink
Ink: Harvest Gold, Pure Poppy, Simply Chartreuse, Smokey Shadow, Summer Sunrise, Winter Wisteria, Hibiscus Burst - Papertrey Ink; VersaMark - Tsukineko
Other: Petite Places: Home & Garden Die, Tremendous Tags Die, Scene It: Basic Backer Die, Pure Poppy Saddle Stitch Ribbon, Harvest Gold Button, Cork Sheets, Clear Dome, Pint Container, Pint Size Wrap Die - Papertrey Ink; Foam Tape - Scotch; Silver Embossing Powder - Filigree, Baker's Twine - Divine Twine
New Home 3D Tag
Stamps: Petite Places: Home & Garden, Petite Places: Walk In The Park, Bountiful Banners, Keep It Simple: Home, Half & Half - Papertrey Ink
Cardstock: Rustic White, Soft Stone, Simply Chartreuse Patterned Paper, Smokey Shadow - Papertrey Ink
Ink: Simply Chartreuse, Ripe Avocado, Limeade Ice, Classic Kraft, Dark Chocolate, Stormy Sea, Aqua Mist, Smokey Shadow, Summer Sunrise - Papertrey Ink
Other: Petite Places Home & Garden Die, Petite Ornament: Square Die, Petite Places: Walk In The Park Die, Bountiful Banners Die - Papertrey Ink; Scor Tape; Foam Tape - Scotch; Baker's Twine - Divine Twine
New Puppy Card
Stamps: Background Basics: Splats, Sweet Cheeks - Papertrey Ink
Cardstock: Smokey Shadow, Sweet Blush - Papertrey Ink; white
Ink: True Black - Papertrey Ink; VersaMark - Tsukineko
Other: Oh Come All Ye Faithful Die, Tipped Tops Die, Embroidered Frames: Dots Die, Sweet Blush Felt, Autumn Rose Felt - Papertrey Ink; White Embossing Powder - Filigree; Foam Tape - Scotch; Self-Adhesive Pearl - Mark Richards; Embroidery Floss - DMC

Adorable projects!! Now I'm wanting that 3-D ornament die just because I love your little gift attachment so much. What a cute, cute idea! And your little spotted dog card is so adorable too! I always leave here inspired!
ReplyDeleteSuch a cute puppy card! Love the negative cut out, great idea! And your 3D ornament is the perfect touch to welcome a new neighbor!!
ReplyDeleteThe home & garden theme is such a hit. I always need a thank you or am giving seeds and starter plants to friends...this is perfect.
ReplyDeleteI thought everything was so cute. Love your ornament and the dog card was precious. Thanks so much.
ReplyDeleteTwo brilliant gift ideas - I wouldn't want to open them, I'd be too in awe of the packaging!
ReplyDeleteGreat cards and scenes, but love the "ornament" New House. I don't have that die either so I guess I'll have to order it too.
ReplyDeleteSuper cute! I love that second house- WOW! Love the colors, and everything is just perfect!
ReplyDeleteYour 3D tag is brilliant! So cute and adorable.
ReplyDeleteWhat an adorable 3D tag, and love the wrapped in design paper container for your pretty petite home on top. Great job.
ReplyDeleteGorgeous!
ReplyDeleteGreat idea to use that ornament die for your cute scene.
ReplyDeleteLove love your projects! What a good idea to use the ornament box for your PP scene - gonna be stealing, um...copying that idea!! You always have the best ideas & thanx for sharing!!
ReplyDeleteYou let your imagination run wild, Lizzie, and it paid off. Each project is adorable and so very detailed. Super duper work!
ReplyDeleteThe new home tag is so cute. Nice use of the ornament set too.
ReplyDeleteHi Lizzie,
ReplyDeleteLovely Work!!!
Cariños,
María Alba
Wonderful colors that are bright and cheery! I just love your beautiful work! Anyone would be delighted to receive any of your projects!
ReplyDeleteWhat a lovely idea for a new home. So clever. It all just works
ReplyDeleteDo you sell these? How much for 30-50 of the "Happy New Home" gift tags?
ReplyDeletePlease tell me how I can get petite places stamps and dies!!! Please. Even used ones I'd be happy!
ReplyDelete