Pages

Saturday, October 15, 2016

Release In Review

Good morning! Welcome back to the Release In Review Day for this month's Papertrey Ink October countdown. I have a couple more projects to share with you and then I'll have another post for you later in the month with even more inspiration. All that said, let's get on to the projects!

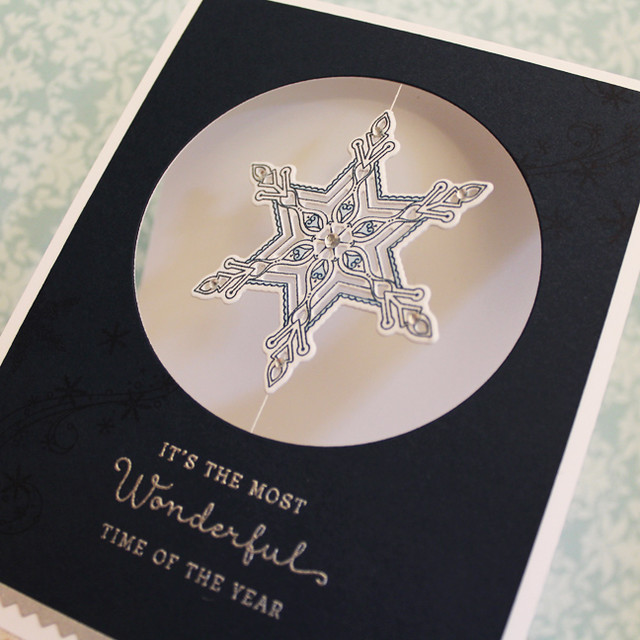
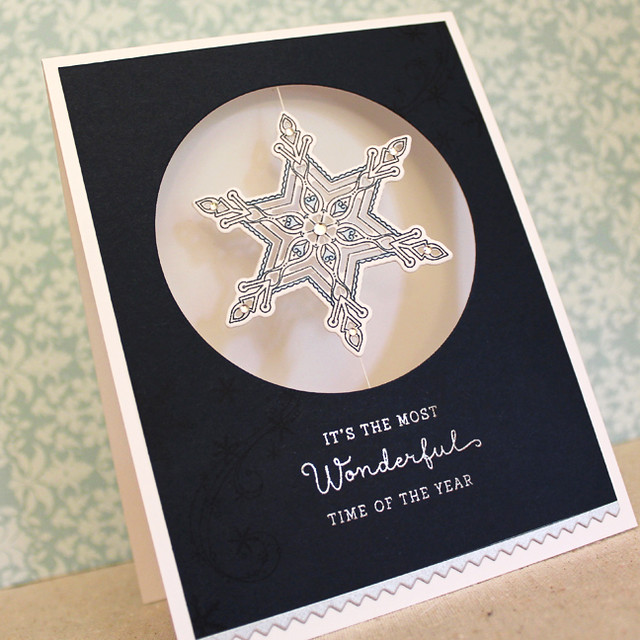
First up, I have a card made with Betsy's What The Doodle: Snowflakes set. I couldn't wait to use this set to make a spinner card!

Most Wonderful Time Card

I began by stamping and die cutting two of the large snowflakes. I used a pale blue Copic to color in a few choice areas and I adhered the snowflakes together back-to-back with a strand of thread between them. Next I die cut a circle from a white card base and a panel of Dark Indigo cardstock. I stamped the Dark Indigo piece with the flurry image and a few of the smaller snowflakes before heat embossing the sentiment with silver powder.

Most Wonderful Time Close Up

I adhered the Dark Indigo layer to the card base making sure to secure the ends of the thread with extra-strong adhesive. I used a small, pinked strip of metallic silver cardstock along the bottom edge to add interest and embellished the spinning snowflake with silver rhinestones for an extra touch of sparkle. I love that this set is so elegant and playful at the same time!

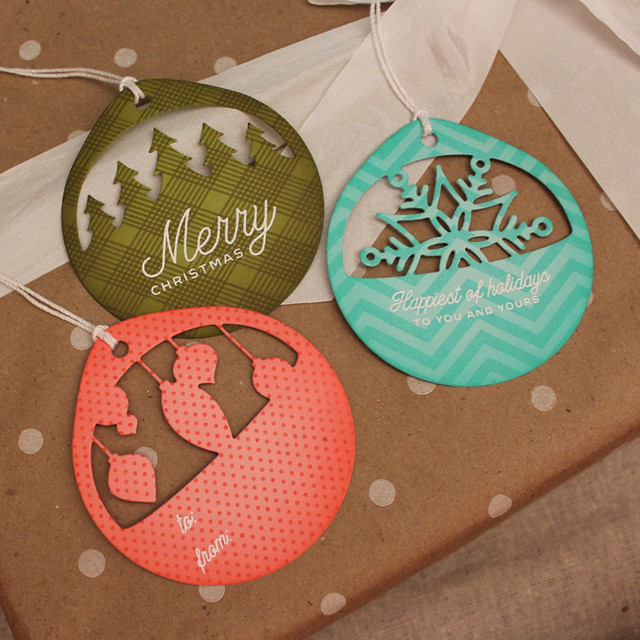
Lastly for today, I have another set of Christmas Cuts Tags to share with you.

Patterned Christmas Cuts Tags

I began by sponging three pieces of cardstock with a coordinating ink color to deepen the edges (I used Pale Peony/Berry Sorbet, Simply Chartreuse/Ripe Avocado, and Aqua Mist/Hawaiian Shores).

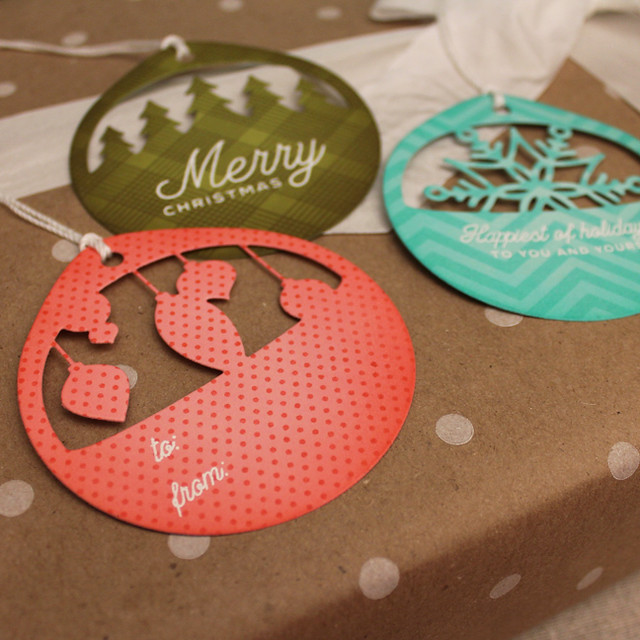
Patterned Christmas Cuts Tags Close Up 1

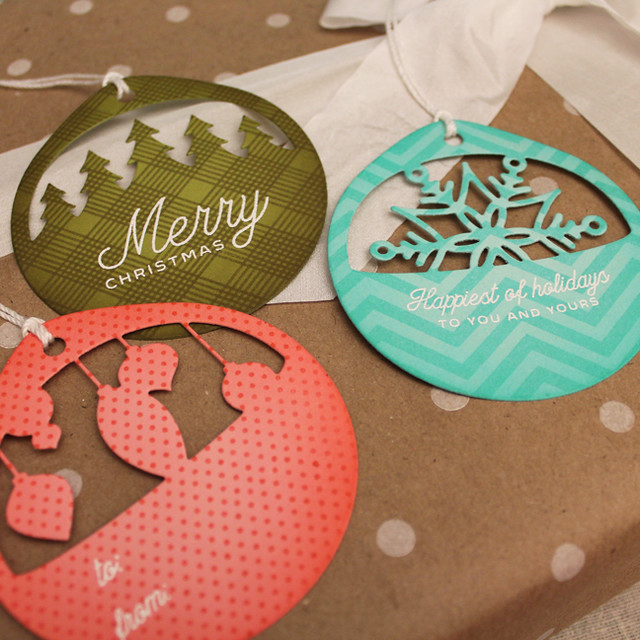
After die cutting, I stamped each one with a different background pattern. Then I heat embossed the sentiments onto the tags with white detail powder and tied on a bit of white crochet thread.

Patterned Christmas Cuts Tags Close Up 2

These were so quick and easy and I love how the white embossing pops!

Thank you so much for joining me today! Make sure to pop in with Nichole, Amy, Ashley, Betsy, Danielle, HeatherKay, Laurie, and Melissa to see more of this month's release. See you again soon!

Recipes:
Most Wonderful Time Card
Stamps: What The Doodle: Snowflake - Papertrey Ink
Cardstock: Dark Indigo, Silver Metallic - Papertrey Ink; white
Ink: Dark Indigo - Papertrey Ink; VersaMark - Tsukineko
Other: What The Doodle: Snowflake Die, Pinking Shears Die - Papertrey Ink; Circle Die - Quickutz; Silver Embossing Powder - Filigree; Tiny Rhinestones - Mark Richards; Medium Rhinestones - Darice; Marker - Copic; White Thread; Xyron

Patterned Christmas Cuts Tags
Stamps: Christmas Cuts, Background Basics: Super Stripes, Polka Dot Basics II, Noted - Papertrey Ink
Cardstock: Pale Peony, Simply Chartreuse, Aqua Mist - Papertrey Ink
Ink: Berry Sorbet, Ripe Avocado, Hawaiian Shores - Papertrey Ink; VersaMark - Tsukineko

Other: Christmas Cuts Tags Die Collection - Papertrey Ink; White Embossing Powder - Filigree; White Crochet Thread

Friday, October 14, 2016

Introducing NEW! Mini Kit: Holiday Hugs

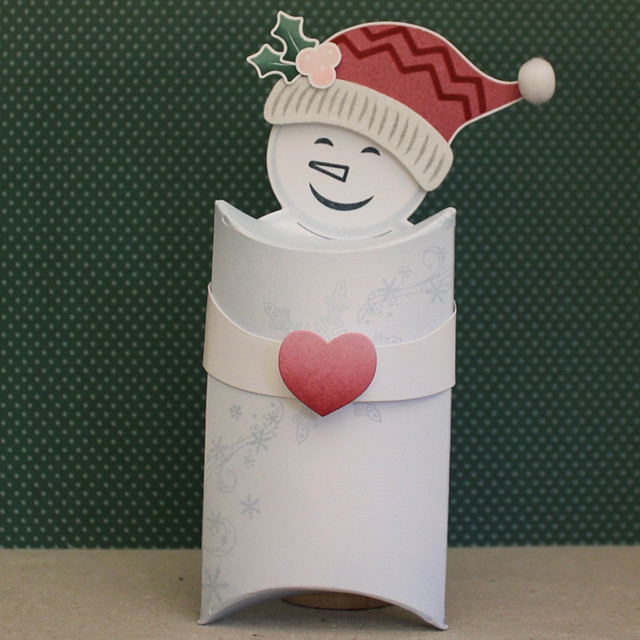
Good morning and welcome back to Day 5 of the Papertrey Ink October countdown! I'm always looking for fabulous new ways to dress up treat packages and gift cards. Betsy's new Make It Market Mini Kit: Holiday Hugs is a super charming option for doing just that! I can see Santa Claus and Frosty bringing festive cheer to my family and friends all through the holiday season, can't you?

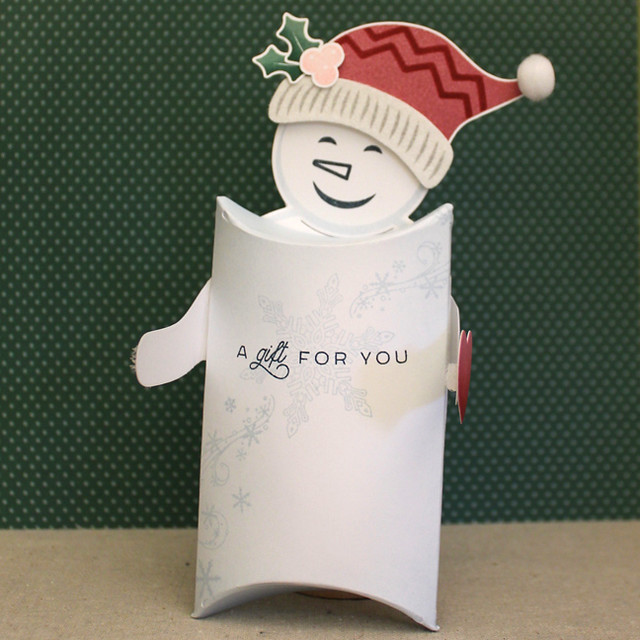
Frosty Pillow Box

I began by die cutting a pillow box from white cardstock and sponging around the edges lightly with Spring Rain ink. I stamped the What The Doodle: Snowflakes onto the box with more Spring Rain before adding the Christmas Cuts sentiment in Dark Indigo. I set the pillow box aside while I worked on the other details.

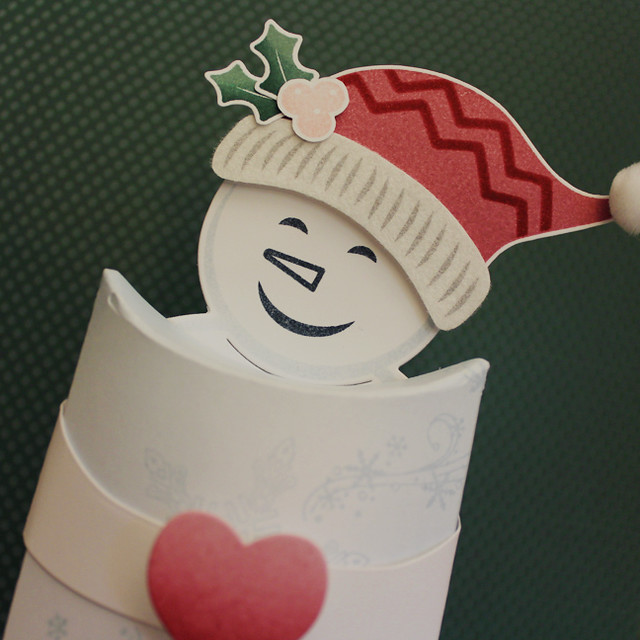
Frosty Pillow Box Close Up

I die cut the snowman body and arms from white cardstock and stamped them with the coordinating images in Deep Indigo and Spring Rain inks.

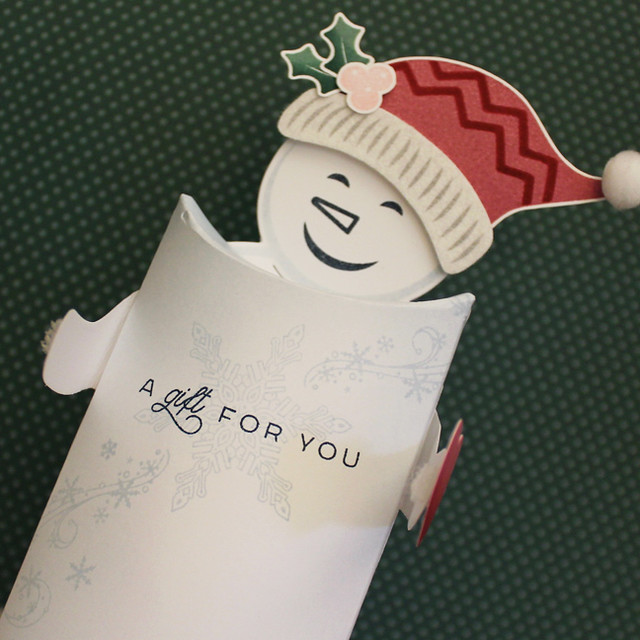
Frosty Pillow Box Open Arms Close Up

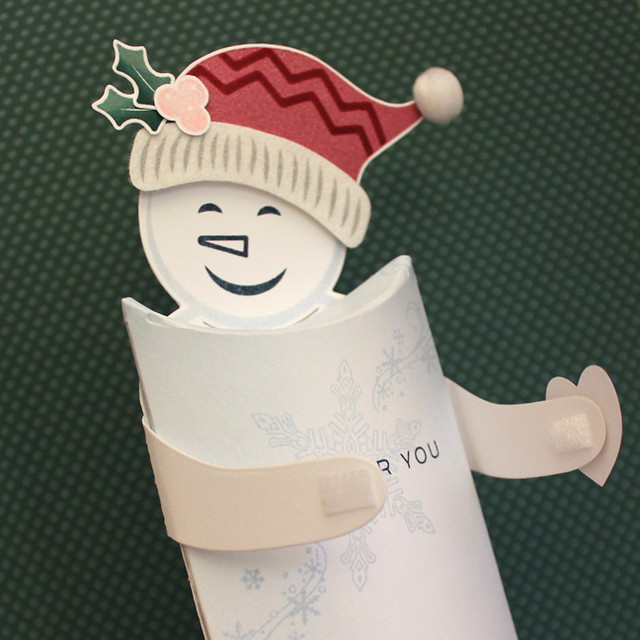
I assembled those pieces with super strong adhesive (Scor-tape is my preference) and adhered them to the back of the pillow box, wrapping the arms around the sentiment. I used a small piece of velcro to keep the arms closed and embellished the top hand with a heart die cut that I'd sponged with Autumn Rose and Scarlet Jewel inks.

Frosty Pillow Box Arms Detail

The hat was the last piece of the puzzle. I stamped the stocking cap in Autumn Rose ink and added the zig-zag pattern with Scarlet Jewel and the stencil included in the kit. I trimmed out one of the pre-printed hat cuffs from the patterned paper before sending it through the xyron and covering it with white flocking. I attached the cuff to the cap with foam tape and added a white pom-pom to the top.

Frosty Pillow Box Open Arms

I stamped the holly berries in Pale Peony and the leaves with Ocean Tides and Pinefeather. I trimmed those out and used them to embellish the cap, attaching them with flat and foam adhesives. Isn't he just the cutest?

Next up I have a little treat box I created with one of the Christmas Cuts sentiments and Betsy's Sweet Holiday Wishes set.

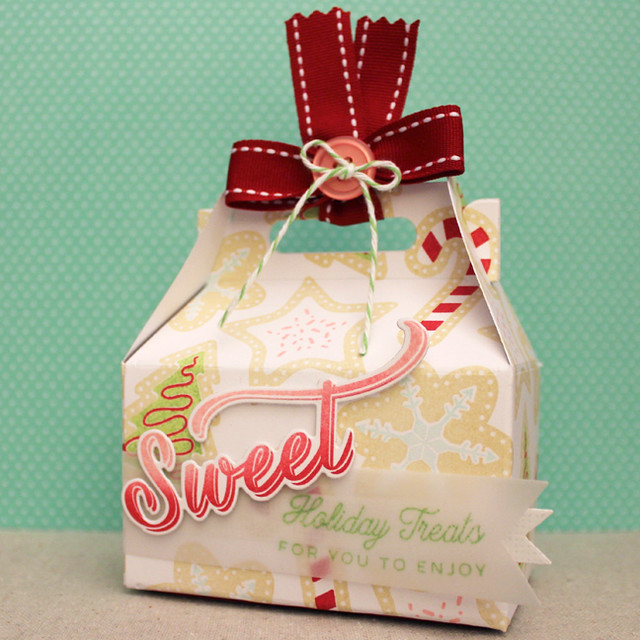
Sweet Holiday Treats Box

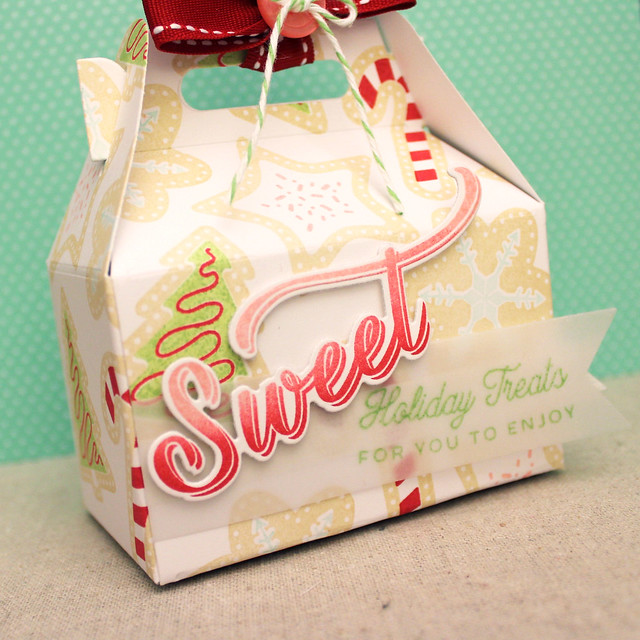
I began by stamping patterned paper using the sugar cookies in Betsy's set. I used Fine Linen, Pure Poppy, Aqua Mist, Pale Peony, and Green Parakeet inks. I die cut the paper with the Gable Box die and assembled as normal. Next, I stamped and die cut the "Sweet" sentiment from Sweet Holiday Wishes using Pale Peony and Pure Poppy inks.

Sweet Holiday Treats Box Close Up

I stamped the sentiment from Christmas cuts onto a vellum banner and heat embossed with clear powder. I layered that banner with a second banner cut from Linen Vellum and attached them to the front of the box. The "Sweet" was then added with foam tape. I embellished the handle with Pure Poppy Saddle Stitch ribbon, a Berry Sorbet button, and a bit of green baker's twine. This box couldn't be sweeter!

Well that's all for me today, folks. Nichole, AmyAshley, Betsy, Danielle, Heather, Kay, Laurie, and Melissa are all sharing more of the Holiday Hugs kit and Erin has a thing or two up her sleeve to share, too. Make sure to visit all of them and I'll see you back here again tomorrow for this month's Release In Review. Have a great day!

Recipes:
Frosty Pillow Box
Stamps: Make It Market Mini Kit: Holiday Hugs, Christmas Cuts, What The Doodle: Snowflake - Papertrey Ink
Cardstock: white
Ink: Spring Rain, Dark Indigo, Autumn Rose, Scarlet Jewel, Ocean Tides, Pinefeather - Papertrey Ink
Other: Huggable Die, Essential Pillow Box Die, Heart-2-Heart #3 Die - Papertrey Ink; Pom pom - Darice; Foam Tape - Scotch; White Flocking - Stampendous; Velcro

Sweet Holiday Treats Treat Box
Stamps: Sweet Holiday Wishes, Christmas Cuts - Papertrey Ink
Cardstock: Vellum, Linen Vellum - Papertrey Ink; white
Ink: Fine Linen, Pure Poppy, Aqua Mist, Pale Peony, Green Parakeet, New Leaf - Papertrey Ink
Other: Sweet Holiday Wishes Die, Get A Handle On It Die Collection, Sketched Shapes Die, Gable Box Die, Pure Poppy Saddle Stitch Ribbon, Berry Sorbet Button - Papertrey Ink; Green Apple Baker's Twine - Divine Twine; Clear Embossing Powder - Filigree; Foam Tape - Scotch

Thursday, October 13, 2016

Sweet Holiday Inspirations

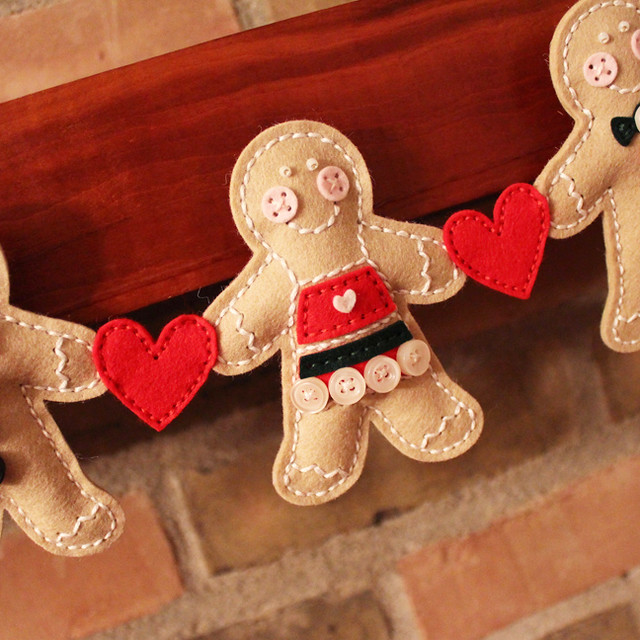
Good morning and welcome back for Day 4 of the Papertrey Ink October countdown! Today is all about our favorite sweets during the holiday season. Being a proud cookie aficionado, I'm working with Erin's new Gingerbread Miss & Mister dies today. One of my favorite parts of seasonal crafting is making special home items that I know will get years of love. Erin's new stitching dies make creating festive projects an absolute joy! Let's get on to my project, shall we?

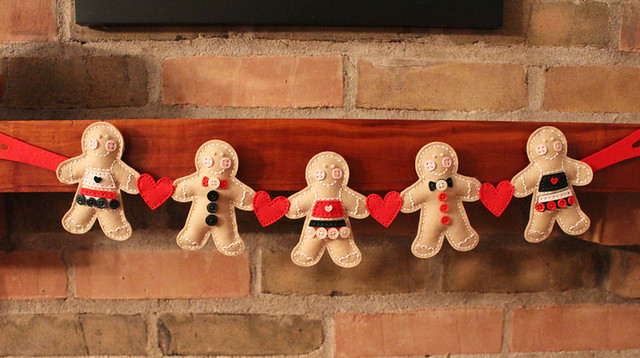
Gingerbread Cookie Garland

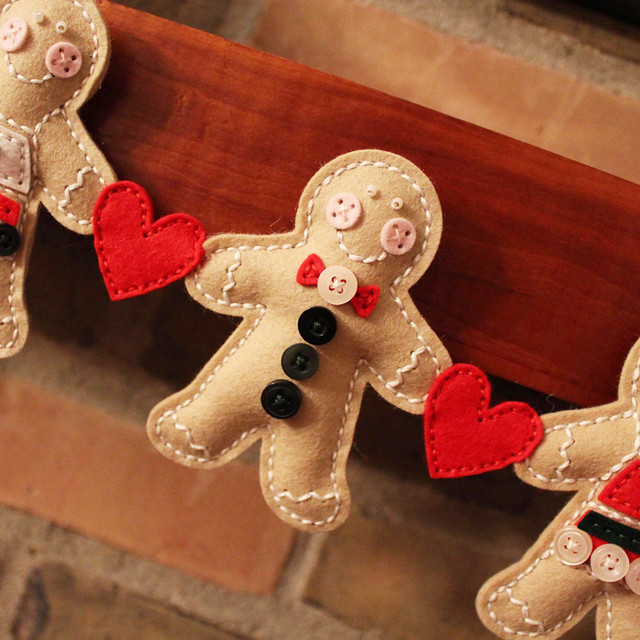
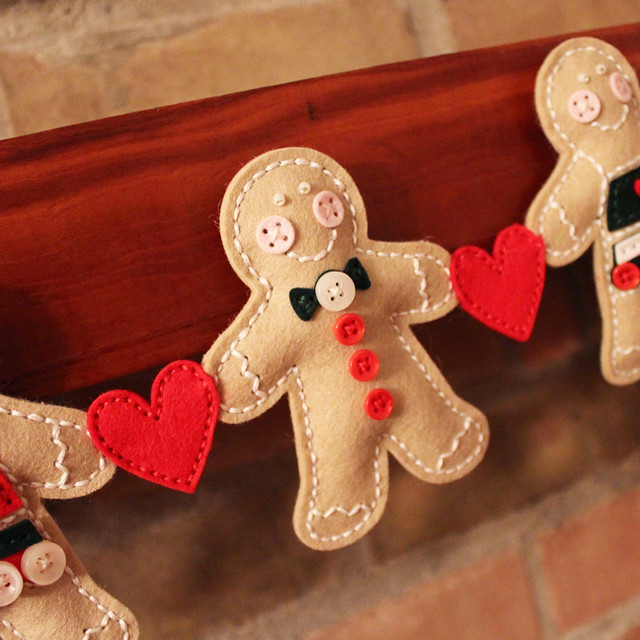
I'm totally smitten with how this garland turned out. The gingerbread people look so cute all lined up in a row!

Gingerbread Miss 2

I used Classic Kraft, Pure Poppy, Sweet Blush, Vintage Cream, and Pinefeather felt to put this garland together. I paired the new dies with the heart from the Coffee Cozy Details Die collection and the Garland Die Collection from the Quick Stitch: Beaded Holiday Kit.

Gingerbread Man 2

I used the Gingerbread Basic Die to cut a back for each figure so I could stuff them slightly with polyfil for a little dimension. There are button shaped dies in the die collections (which I used for their cheeks), but I also included real buttons for some extra depth.

Gingerbread Miss 1
I used the white beads from the Quick Stitch: Sewing Staples kit for their eyes. I would imagine any 3mm bead would work well.

Gingerbread Man 1

Usually I just use two or three strands of floss on my stitching projects, but I used the full six for the white stitches on these figures. I wanted to make it look as much liked piped icing as possible and using the full six strands of floss helped create that impression.

Gingerbread Miss 3

I just love these gingerbread people so much! I can't wait to see how you'll all use them!

Thank you so much for joining me today! Make sure to pop in on Nichole, Amy, Ashley, BetsyDanielle, Heather, KayLaurie, Melissa, and Erin to see more sweet holiday inspiration. Have a great day and I'll see you tomorrow!

Recipe:
Gingerbread Cookie Garland
Dies: Gingerbread Miss Die, Gingerbread Mister Die, Gingerbread Basic Die, Coffee Cozy Details Die Collection, Garland Die Collection (Quick Stitch: Beaded Holiday Kit) - Papertrey Ink
Felt: Classic Kraft, Pure Poppy, Sweet Blush, Vintage Cream, Pinefeather - Papertrey Ink
Other: White Beads (Quick Stitch: Sewing Staples Kit), Pinefeather Buttons, Pure Poppy Buttons, Vintage Cream Buttons - Papertrey Ink; Embroidery Floss - DMC; Polyfil

Wednesday, October 12, 2016

Quick Crafts For The Holidays

Good morning and welcome back to Day 3 of Papertrey Ink's September countdown! Today is all about quick crafts. It never fails...I always have grand plans for my cards, packaging, and tags for Christmas and as the holidays draw near I run out of time to get to everything. The products we're sharing this morning will help me easily pull together those last-minute projects without skimping on style.

First up today I'm sharing an ensemble I created using Heather's new Jingle All The Way stamp set.

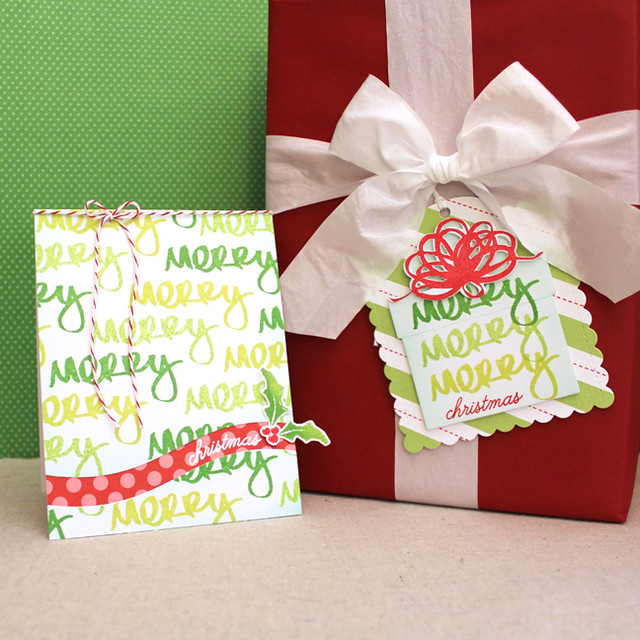
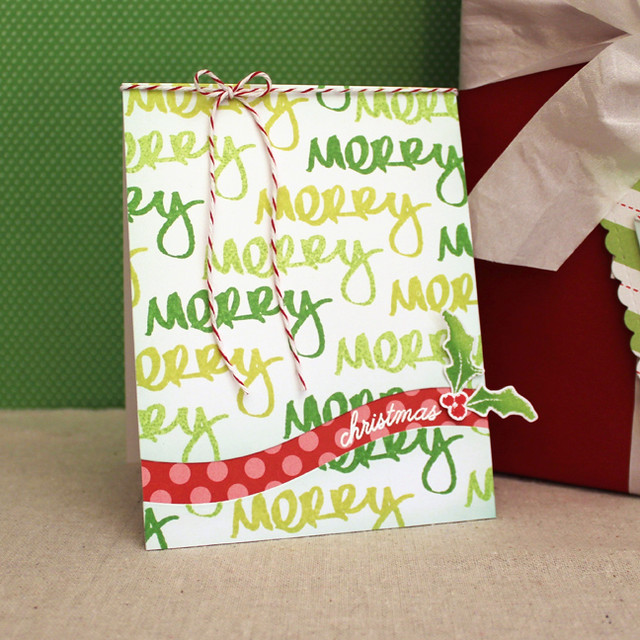
Merry Merry Merry Christmas Ensemble

These projects came together in a snap and who doesn't love that?! Let's start with the card.

Merry Merry Merry Christmas Card

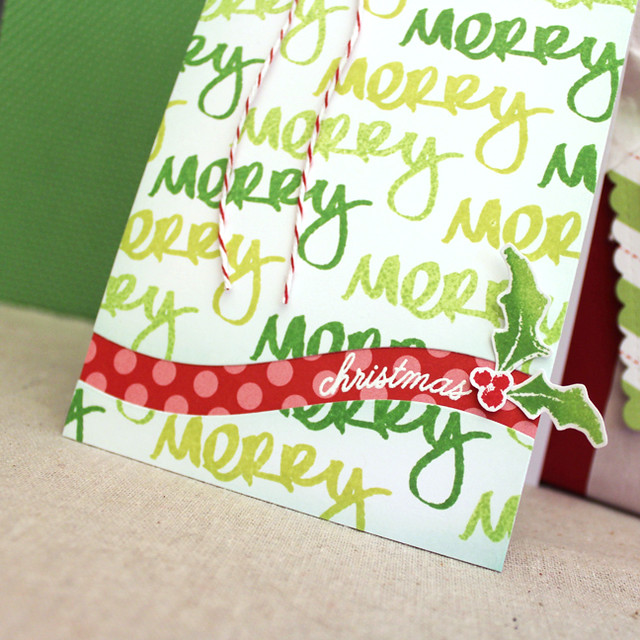
I began by sponging a bit of Aqua Mist ink onto a piece of white cardstock before die cutting it with the Sentiment Splits: Curve Vertical die. Doing the sponging first keeps the effect very soft. Then I stamped the "merry" sentiment repeatedly to create a background pattern.

Merry Merry Merry Christmas Close Up

I heat embossed my sentiment onto Pure Poppy polka dot paper and adhered my panels into place. I embellished the sentiment with the holly from Script Swirls: Christmas and added a bit of red baker's twine to pull that pop of bright color in one more time. Cute and easy!

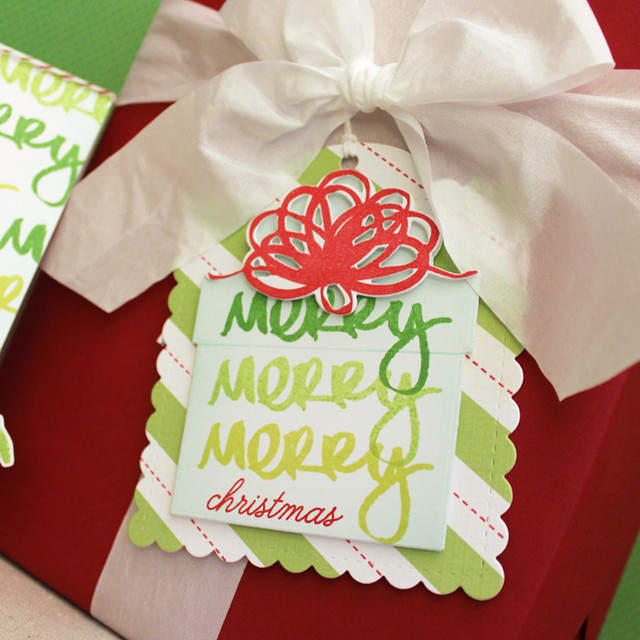
The tag was just as simple.

Merry Merry Merry Christmas Tag

I sponged another piece of white cardstock with Aqua Mist ink before die cutting the Enclosed: Present shape. I stamped the "merry" three times in a stack and snuck "christmas" below in Pure Poppy. Then, I die cut and stamped the Enclosed: Present bow and added it to the top of the gift with foam tape. I die cut a Tag Sale: Quilted shape from Green Parakeet paper and added Pure Poppy stripes to dress it up a bit. I then attached my present with foam tape. I love how this ensemble came together!

I have a Christmas Cuts tag trio to share with you today too. This stamp and die collection could seriously not make holiday tags any easier!

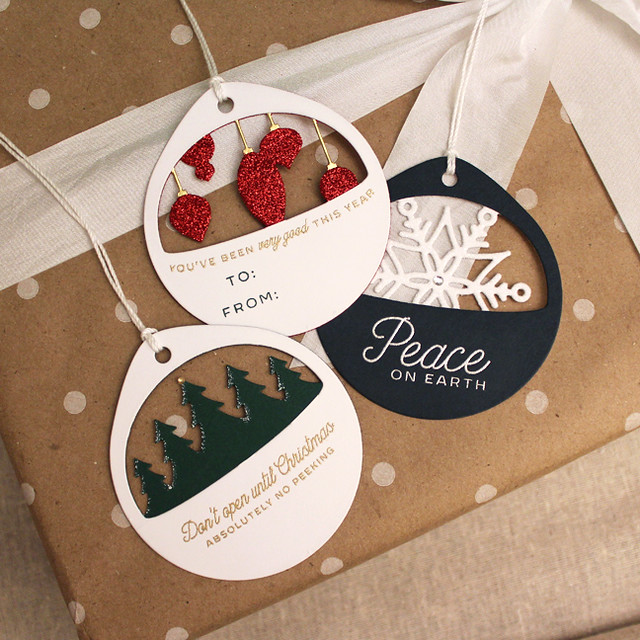
Layered Christmas Cuts Tag Trio

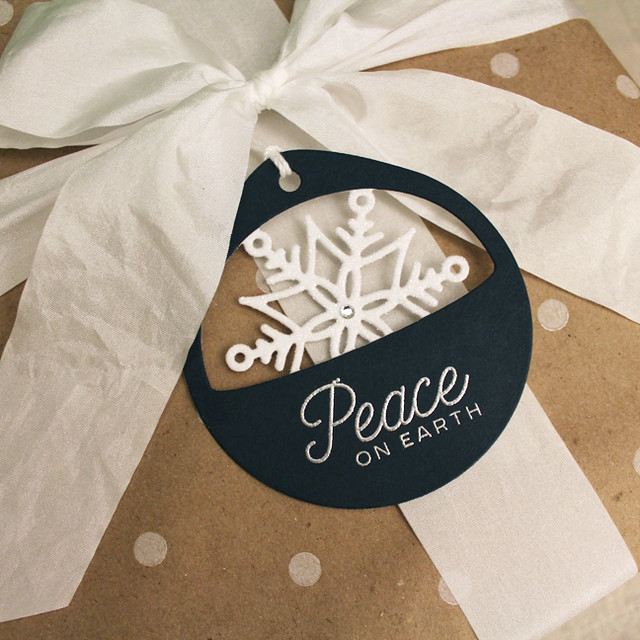
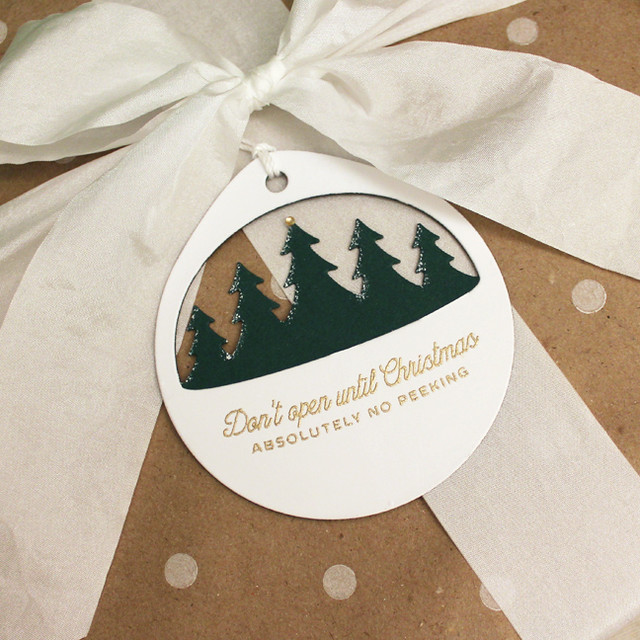
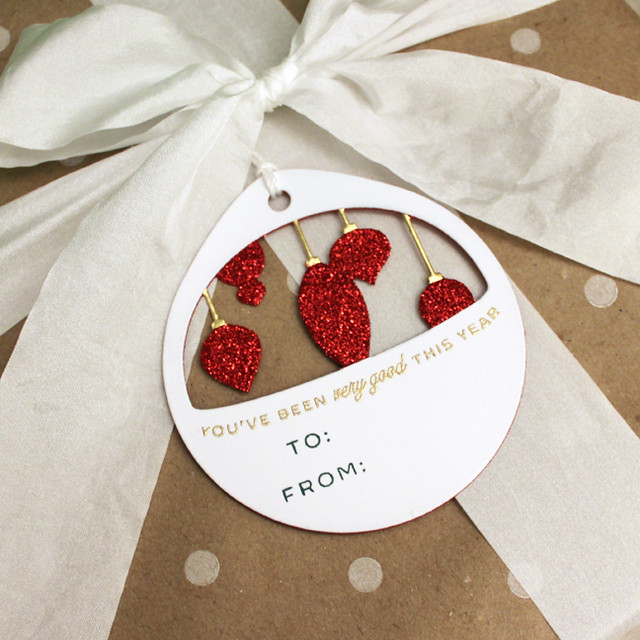
These tags are all layered with the back layer being embellished in some way and the top layer being heat embossed with a sentiment from the coordinating stamp set. You could make them even quicker by not fussing with the embossing if you were really in a time crunch.

Peace On Earth Tag

On this snowflake tag I used xyroned white cardstock for the white layer. After the two pieces were adhered together, I used fine Crystal glitter and a silver rhinestone to give the snowflake sparkle. The top layer is Dark Indigo and the sentiment is set in silver powder.

No Peeking Tag

The trees tag uses more stippled snow and a tiny gold rhinestone to add interest to the Pinefeather layer. The white top layer is finished with a gold embossed sentiment.

Very Good Tag

I used xyroned Pure Poppy cardstock on the ornaments tag along with Luxe Gold Adhesive sheets and fine Garnet Glitter. The white top layer includes a gold embossed sentiment as well as a "To:/From:" stamped with Pinefeather. I'm definitely making more of these tags. They look like they took me forever, but they actually came together in a few minutes.

That's all for me today. Make sure to pop in on Nichole, Amy, Ashley, Betsy, Danielle, Heather, Kay,Laurie, Melissa, and Erin for more of these quick holiday projects! See you tomorrow!

Recipes:
Merry Merry Merry Christmas Card
Stamps: Jingle All The Way, Script Swirls: Christmas - Papertrey Ink
Cardstock: Pure Poppy Polka Dot Paper - Papertrey Ink; white
Ink: Limeade Ice, Green Parakeet, New Leaf, Pure Poppy, Aqua Mist - Papertrey Ink; VersaMark - Tsukineko
Other: Sentiment Splits: Curve Vertical Die - Papertrey Ink; Foam Tape - Scotch; White Embossing Powder - Filigree; Cherry Baker's Twine - Divine Twine

Merry Merry Merry Christmas Tag
Stamps: Jingle All The Way, Enclosed: Present, Plaid Builder - Papertrey Ink
Cardstock: Green Parakeet + White Paper - Papertrey Ink; white
Ink: Limeade Ice, Green Parakeet, New Leaf, Pure Poppy, Aqua Mist - Papertrey Ink
Other: Enclosed: Present Die; Tag Sale: Quilted Die - Papertrey Ink; Foam Tape - Scotch; White Crochet Thread

Layered Christmas Cuts Tag Trio
Stamps: Christmas Cuts Sentiments - Papertrey Ink
Cardstock: Pure Poppy, Dark Indigo, Pinefeather, Luxe Gold Adhesive Sheets - Papertrey Ink; white
Ink: Pinefeather - Papertrey Ink; VersaMark - Tsukineko
Other: Christmas Cuts Tag Dies - Papertrey Ink; Fine Garnet, Crystal Glitter - Martha Stewart Crafts; Gold, Silver Embossing Powder - Filigree; Tiny Rhinestone - Mark Richards; Medium Rhinestone - Darice; Opaque White Pigment - Copic; White Crochet Thread

Tuesday, October 11, 2016

Introducing Paper Clippings: Joy To The World

Good morning! Welcome back to Papertrey Ink's September countdown. Today I have the pleasure of  helping introducing Betsy Veldman's newest Paper Clippings set. I know many of you have been waiting to see what Betsy has up her sleeve for her Christmas edition and I promise that Paper Clippings: Joy To The World is sure to make you folks very happy. Let's get on to some projects, shall we?

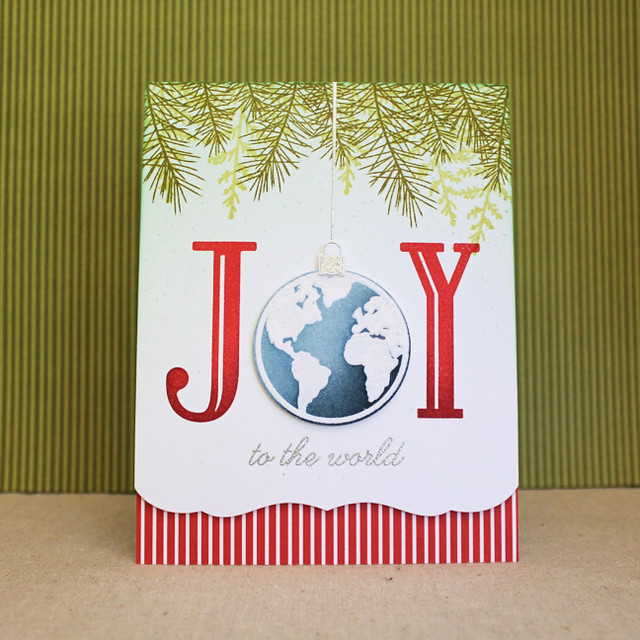
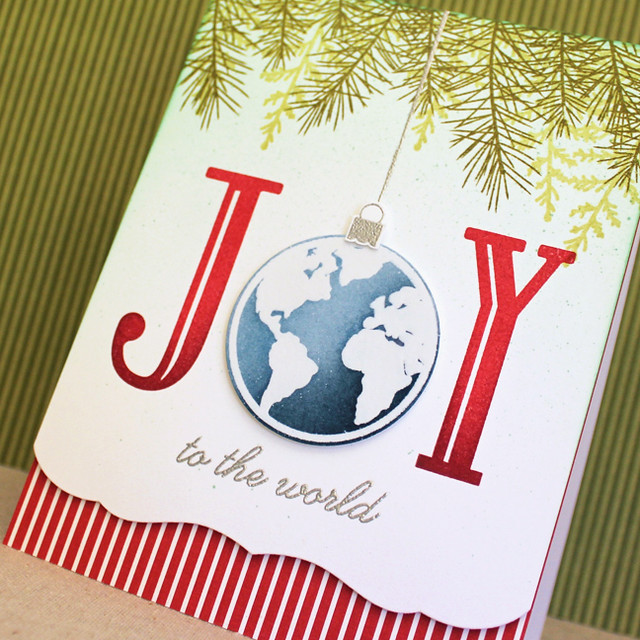
My first card today is a whimsical take, using the earth image as an ornament in place of the "O" in "JOY."

Joy To The World Ornament Card

I sponged a bit of Aqua Mist ink onto a white panel and then splattered speckles of Aqua Mist reinker to give it a little interest. Then, I stamped the Holiday Greens Borders in Spring Moss and Ripe Avocado inks. Next came the "J" and "Y" in Pure Poppy shaded with a bit of Scarlet Jewel. I added the sentiment from Jingle All The Way (more on this set soon) and the ornament string from Vintage Ornaments II before die cutting the bottom edge of the panel with the Edgers #1 die.

Joy To The World Ornament Close Up

Next, I heat embossed the earth image onto white cardstock using clear embossing powder. I sponged the finished area with Enchanted Evening and Dark Indigo inks before die cutting. I also heat embossed the ornament hanger with silver powder and trimmed that out by hand. I used foam tape to mount the white panel to a card front that I'd already covered with striped Pure Poppy paper. Then I added the earth and ornament hanger in place, also with foam tape. Cute!

Second today I have a fairly traditional card to share.

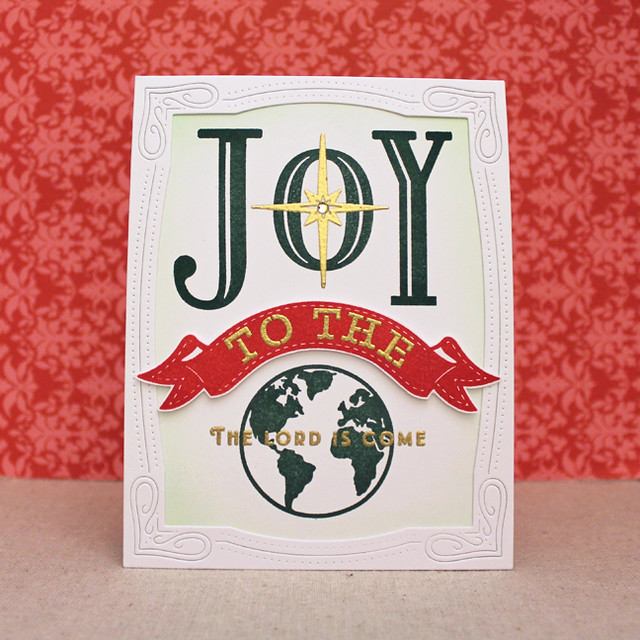
Framed Joy To The World Card

I began by sponging a bit of Mint Julep ink onto a white card base. Next, I stamped the "Joy" and the earth in Pinefeather inks. Once those were fully dry, I heat embossed the star and the sentiment using gold powder.

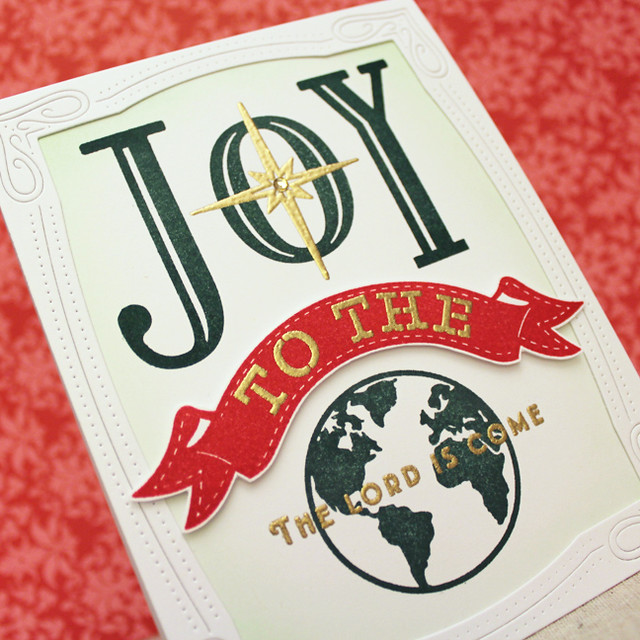
Framed Joy To The World Close Up

Next, I stamped the banner onto an extra piece of white cardstock using Pure Poppy ink. That was followed by the sentiment in gold embossing and trimmed out by hand. I layered a Cover Plate: Delightful frame onto the stamped card base and then added the banner with foam tape. I added a rhinestone (colored to match) to the center of the star for a little extra sparkle.

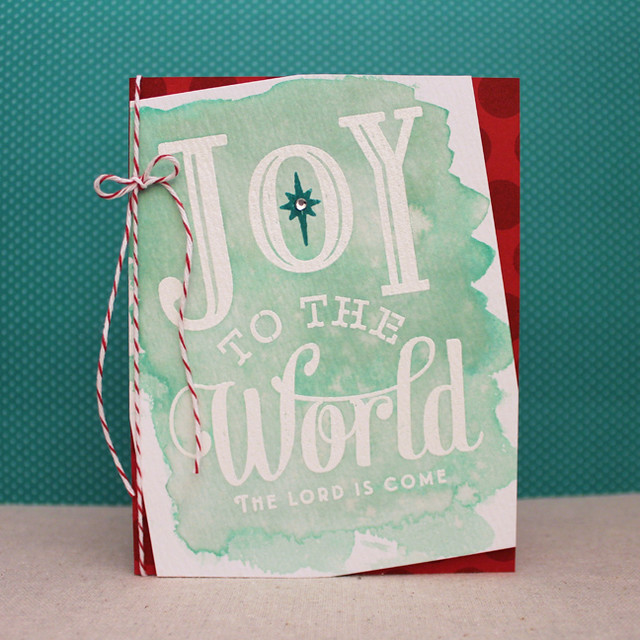
Finally today, I have a more contemporary, watercolored card.

Watercolor Joy To The World Card

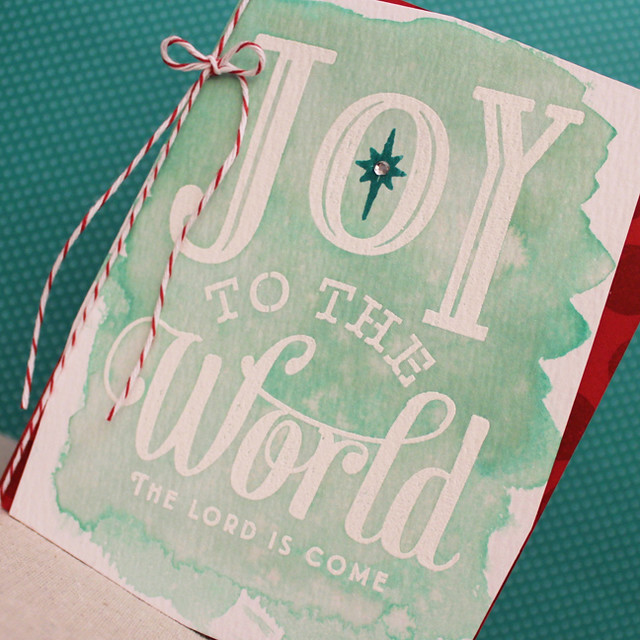
I began by heat embossing the sentiment onto watercolor paper using white powder. I color washed over the embossing with Aqua Mist reinker and sprayed the surface with shimmer spray before setting the panel aside to dry. In the meantime I stamped a Pure Poppy card base with polka dots using Americana ink.

Watercolor Joy To The World Close Up

Once the watercolor panel was dry I stamped the star using Tropical Teal ink and trimmed the edges at an angle. I attached that panel to the card front with foam tape and embellished with a baker's twine bow and rhinestone. I like the more casual, modern style and the subtle shimmer from the spray.

Thank you so much for joining me today! Make sure to check out Nichole, Betsy, Danielle, and Melissa for more projects featuring this month's release. Enjoy and I'll see you again tomorrow!

Recipes:
Joy To The World Ornament Card
Stamps: Paper Clippings: Joy To The World, Jingle All The Way, Holiday Greens Borders, Vintage Ornaments II - Papertrey Ink
Cardstock: Pure Poppy + White Stripe - Papertrey Ink; white
Ink: Pure Poppy, Scarlet Jewel, Enchanted Evening, Dark Indigo, Ripe Avocado, Spring Moss, Aqua Mist - Papertrey Ink; VersaMark - Tsukineko
Other: Edgers #1 Die Collection - Papertrey Ink; Nesting Circles Die - Quickutz; Clear Embossing Powder, Silver Embossing Powder - Filigree; Foam Tape - Scotch

Framed Joy To The World Card
Stamps: Paper Clippings: Joy To The World - Papertrey Ink
Cardstock: white
Ink: Pinefeather, Mint Julep, Pure Poppy - Papertrey Ink; VersaMark - Tsukinkeo
Other: Cover Plate: Delightful - Papertrey Ink; Gold Embossing Powder - Filigree; Foam Tape - Scotch; Rhinestone - Darice; Marker - Copic

Watercolor Joy To The World Card
Stamps: Paper Clippings: Joy To The World, Polka Dot Basics III - Papertrey Ink
Cardstock: Pure Poppy - Papertrey Ink; Watercolor Paper - Ranger
Ink: Aqua Mist, Tropical Teal, Americana - Papertrey Ink; VersaMark - Tsukineko

Other: Cherry Baker’s Twine - Divine Twine; White Embossing Powder - Filigree; Foam Tape - Scotch; Rhinestone - Darice; Pearl Shimmer Spray - Tattered Angels

Monday, October 10, 2016

Introducing Christmas Cuts

Good morning and welcome to the October Papertrey Ink countdown! Today I have the pleasure of introducing you to my new Christmas Cuts collection (just a reminder: all of the new products I share this week will be available for purchase at 10pm on October 15th).


These stamps and dies coordinate to make your holiday tags fun, easy, and stylish! I'll be sharing more of the complete collection (including the dies) in the coming days, but today I'm going to share a card that I made by pairing one of my new sentiments with Heather's Sprig Wreath set.

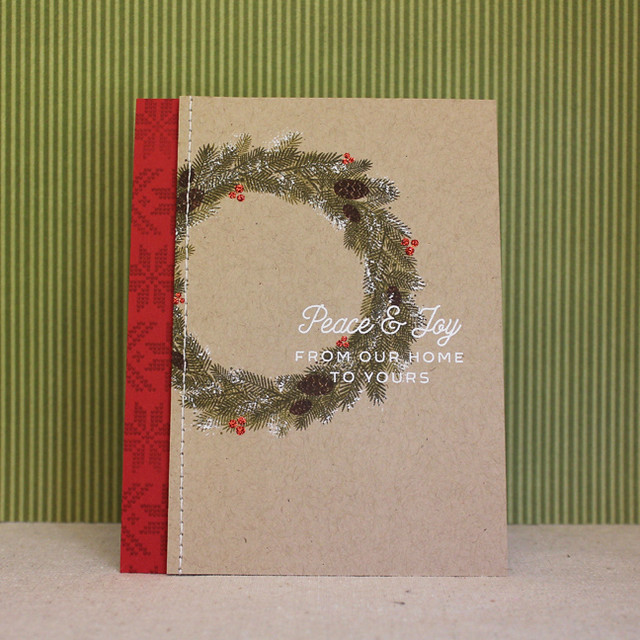
Peace & Joy Card

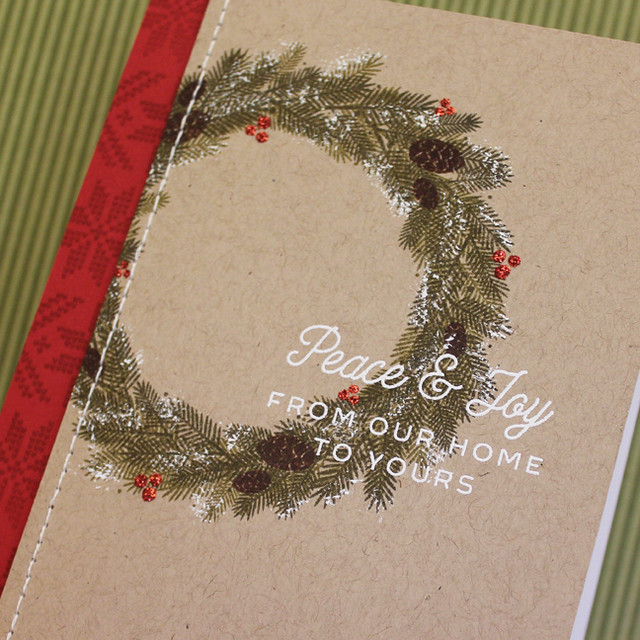
I began by stamping the wreath onto a panel of Classic Kraft cardstock using Ripe Avocado and Olive Twist inks. I then added the pinecones with Dark Chocolate and the berry clusters with Pure Poppy. I heat embossed my sentiment with white powder and then stitched up the side with white thread. Next, I used Copic's opaque white pigment (the stuff in the jar) and a stipple brush to add snow to the wreath.

Peace & Joy Close Up

While that was drying I stamped a strip of Pure Poppy cardstock with the Fair Isle background using Americana ink. I adhered that to a white card base and then mounted the wreath panel to the card front with foam tape. As a final touch, I added glitter to the berries to make them sparkle. I love that I was able to add plenty of detail while keeping this card is nice and flat. That will make it so easy to mail!

Thanks for popping in with me today. Make sure to visit Nichole, Betsy, Heather, and Maile as they share more of this month's release. Have a great day, everyone!

Recipe:
Stamps: Christmas Cuts Sentiments, Sprig Wreath, Fair Isle Borders - Papertrey Ink
Cardstock: Classic Kraft, Pure Poppy - Papertrey Ink; white
Ink: Ripe Avocado, Pure Poppy, Dark Chocolate, Olive Twist, Americana - Papertrey Ink; VersaMark - Tsukineko
Other: White Embossing Powder - Filigree; Carnelian Glitter - Martha Stewart Crafts; Foam Tape - Scotch; Opaque White Pigment - Copic; Sewing Machine